TJ’s Bulldog

What does a professional, world-class pistolsmith use for his personal weapon of choice?

I asked good buddy TJ (of TJ’s Custom Gunworks) that question, and the answer was surprising.  This is a man who knows handguns inside and out, and a guy who is one of the top men in the world for custom-crafted combat handguns.  SIGs, 1911s, Colt and Smith revolvers and autos, and more.  A guy who could have just about anything he wanted.  His guns are carried by law enforcement officers, special agents, and others the world over.  So what is TJ’s personal sidearm?

It’s a highly-customized Charter Arms Bulldog, chambered in the mighty .44 Special cartridge.  It’s the one you see here and in the photo above:

As you might imagine, TJ did not leave the gun stock.  These are the custom features TJ’s personal .44 carries:

      • Satin brushed hard chrome finish
      • 1.5-inch barrel (cutdown from stock barrel)
      • Radiused and polished trigger
      • “Melted” (rounded – sharp edges removed) contours throughout
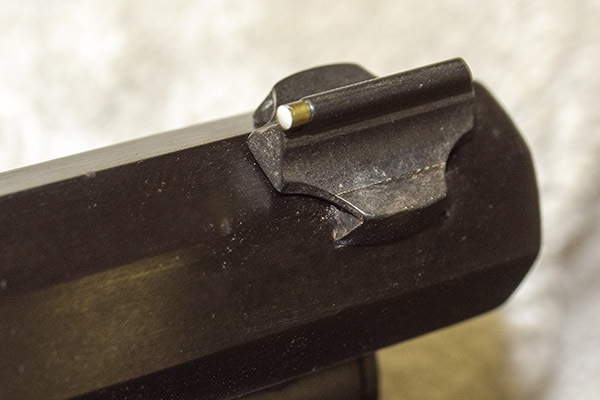
      • Night sights with orange DayGlo highlighting
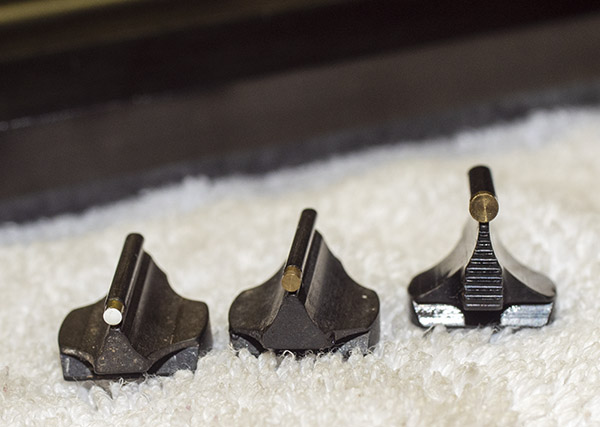
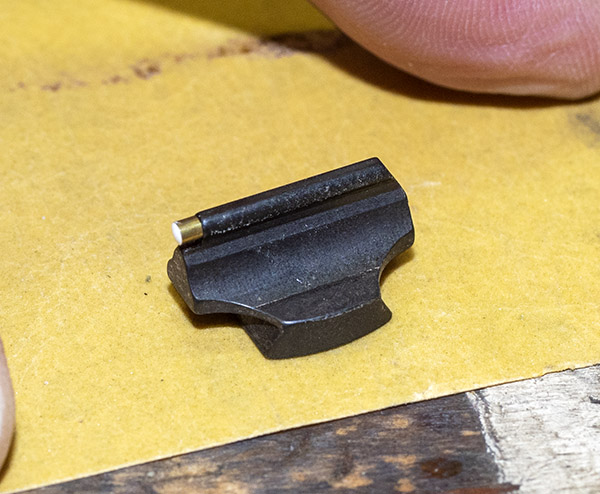
      • Custom-contoured front sight
      • Level 1 action work
      • Action modified to double action only
      • MagNaPorted barrel
      • Bobbed hammer
      • TJ custom prototype laser grips (modified from Crimson Trace S&W grips)

TJ explained that double action is the only way he uses revolvers.  You know, there’s a school of thought that a good man with a double action revolver can fire faster than can one with a semi-auto handgun.  You can read more about that in Ed McGivern’s Fast and Fancy Revolver Shooting, a good read for anyone interested in improving their handgun shooting with a double action revolver.

TJ’s Charter Arms custom Bulldog is a very impressive weapon.  You can see more photos of it, and a few of TJ’s other custom guns, on the TJ’s Custom Gunworks website.


Help us bring more content to you:  Please click on the popup ads!


More Tales of the Gun!


Never miss an ExNotes blog:  Sign up here for free!
New Shoes for the Model 60

I visited with good buddy Paul up north last week, and while I was there he showed me a set of Altamont grips he had for his Smith and Wesson snubnose handgun.  When I saw the grips it was love at first sight, and I had to have them for my TJ-customized Model 60.  Paul was happy to oblige (thanks, Paul!), I came home with a new set of Altamont‘s finest, and they promptly went on the Model 60.  The Model 60 now looks like a scaled-down version of the big .45 ACP Smith & Wesson Performance Center Model 625, and I had to grab the shot you see above.   The 625 wears custom grips, too, but that’s a story for another blog.

There’s no question I’ve gone overboard in getting grips for the Model 60.  It came with the stock checkered walnut grips (the original equipment on this handgun), as well as a set of Pachmayr rubber grips.  The Pachmayrs would have been better for shooting, but I wanted a set of smooth rosewood grips and I found them on Ebay.  They looked great, but they were painful to shoot.

The Model 60’s OEM checkered walnut grips. Photo by TJ of TJ’s Custom Gunworks.
Smith and Wesson J-frame uncheckered rosewood grips. These are the same size as the walnut grips shown above.
The problem with both the OEM walnut grips and the replacement rosewood grips is that they are too small. My pinkie wraps around beneath the frame and takes a pounding with each shot.

The problem with the stock walnut grips and the Ebay rosewood grips is that my little finger gets under the grip.  The recoil from the little Model 60 is significant (as we engineers like to say, f = ma), and it would pound my pinkie every time I fired it.  Think about putting your pinkie sideways on a table and having someone whack it with a hammer, and you’ll have a pretty good idea what shooting this little snubbie was like.

All that’s changed with the Altamont grips Paul provided.  Take a look.  They’re beautiful.

Custom Altamont grips for the Model 60. Note the stippling (a crocodile pattern!) and the laser-engraved S&W logo.
The Altamont grips installed on the Model 60.

The new Altamont grips are extended just a bit below the frame and they have finger grooves.  It keeps my pinkie from getting underneath the frame, and with the new grips the Model 60 just feels right in my hand.

The Altamont grips provide a much better ergonomic hold. I like them a lot.

These new Altamont grips have a much better feel to them.  The wood-to-metal fit is way better than with the stock grips (the grips exactly contour to the Model 60’s frame, unlike the OEM grips).   The next obvious question, and the one that really matters is this:  How did the Model 60 shoot with the new grips?

In a word, it was amazing.  The new Altamont grips completely changed the character of the Model 60.  First, a couple of shots of the Model 60 on the range:

The Model 60 became an entirely different animal with the Altamont grips. It’s much easier to shoot now.
Good buddy TJ reworked my Model 60 extensively. It has an action job, selective polishing (ejector rod, cylinder, trigger, hammer, and cylinder release), and a red ramp front sight. TJ’s Custom Gunworks is the place to go if you want a bespoke handgun.

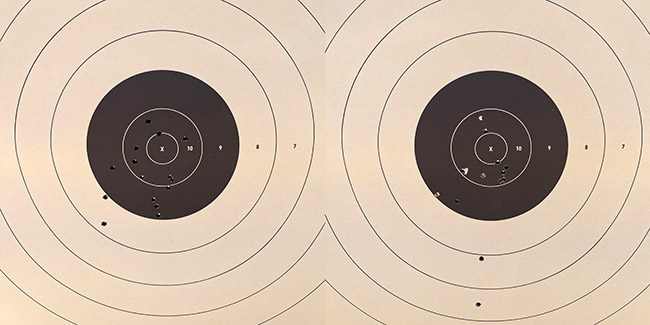
And here are two targets I shot at 15 yards (45 feet).  One has 10 shots on it; the other has 12 (each had two cylinders of 5 cartridges, and I had a couple left over to finish the box).

Two targets on the 15-yard line. That little Model 60 has near-target grade accuracy with the Altamont grips. If you have a snubbie, you need these grips!

Several things are amazing about the above targets.  The first is that it was windy as hell out on the range this morning, and even though I was shooting with both hands from a bench, I could see the sights swimming around as the wind gusted.  The second is that the groups are dramatically tighter than they had ever been before with this handgun.  And the third is that the revolver shot almost exactly to point of aim.  I was holding at 6:00 on the 50-foot slow-fire NRA targets you see above.  My load was the tried and true .38 Special target load:  2.7 grains of Bullseye propellant with the 148-grain Hornady hollow base wadcutter.  Before, with the OEM and rosewood grips shown above, this same load shot a good 12 inches to the right of the point of aim, and the groups were huge.  Evidently, as the revolver discharged, it was rotating to the right in my hands with those much smaller grips (and beating the hell out of me in the process).  The Altamont grips brought the point of impact essentially in line with the point of aim and just a bit high, which is what I want in a handgun.

You may recall from a recent blog that I have a load development test planned for the Model 60, and I’ll be firing the cartridges I loaded for it within the week.  I was up north on a secret mission last week and I didn’t get to shoot during that time.  I recently read that if you go 72 hours without firing a handgun your skills deteriorate.  I believe that, and I wanted to get in a little shooting before I shoot for group size.  Hopefully, the Santa Ana winds through the Cajon Pass will die down, conditions will be right, and I’ll get to do some real accuracy testing in the next few days.  You’ll get the full report right here.  Stay tuned, my friends.


More Tales of the Gun are right here!


Never miss an ExNotes blog:  Subscribe here for free:

A Model 60 Load Development Plan

This blog outlines the development plan I’m using for my new-to-me Model 60 Smith and Wesson revolver.  You might recall that I bought this revolver not too long ago and I had my good buddy and master pistolsmith TJ (of TJ’s Custom Gunworks) go through the gun, get everything perfect, do the trigger, and add a bit of tasteful polishing.

My custom Smith and Wesson Model 60. Note the polished ejector rod, cylinder, trigger, cylinder release, and hammer, and the smooth rosewood grips.

TJ did a hell of a job, I recently qualified with the Model 60 for my concealed carry permit, and now I want to find the most accurate load for this handgun.  To me this means two things:  The smallest group size and where the revolver hits with respect to the point of aim.  I’m not concerned with velocity.  All the velocity in the world doesn’t mean a thing if you can’t hit your target.

When I develop a load, I generally do a bit of research on the Internet to see what others have found to be an accurate load, I see what components I have on hand (bullets and powders), and I consult my reloading manuals.  I never take loads off Internet forums as gospel unless I confirm their safety in my load manuals or they come directly from the manufacturer’s websites (there is just so much inaccurate information on the Internet), and I never load at the manual’s max without working up to that level.  My approach is to load a few rounds at the minimum level and a few a bit below the max level with each bullet and powder combination to get a quick feel for further load development.  Or, I might find a combination in the initial tests that is so good I don’t need to do any further testing.

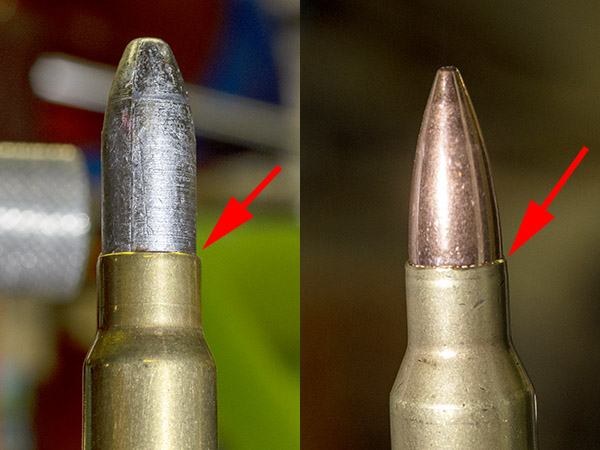
From left to right: 158-grain cast flatpoint, Hornady 158-grain jacketed hollow point, Hornady 110-grain jacketed hollow point, and Hornady 148-grain swaged wadcutter.

These days, I’m governed by what I have on hand, as the component suppliers are out of nearly everything.  For me and this test series, that means four bullets:

      • A 158-grain cast flatpoint bullet from a local caster
      • Hornady’s 158-grain jacketed hollowpoint
      • Hornady’s 110-grain jacketed hollowpoint
      • Hornady’s 148-grain swaged wadcutter

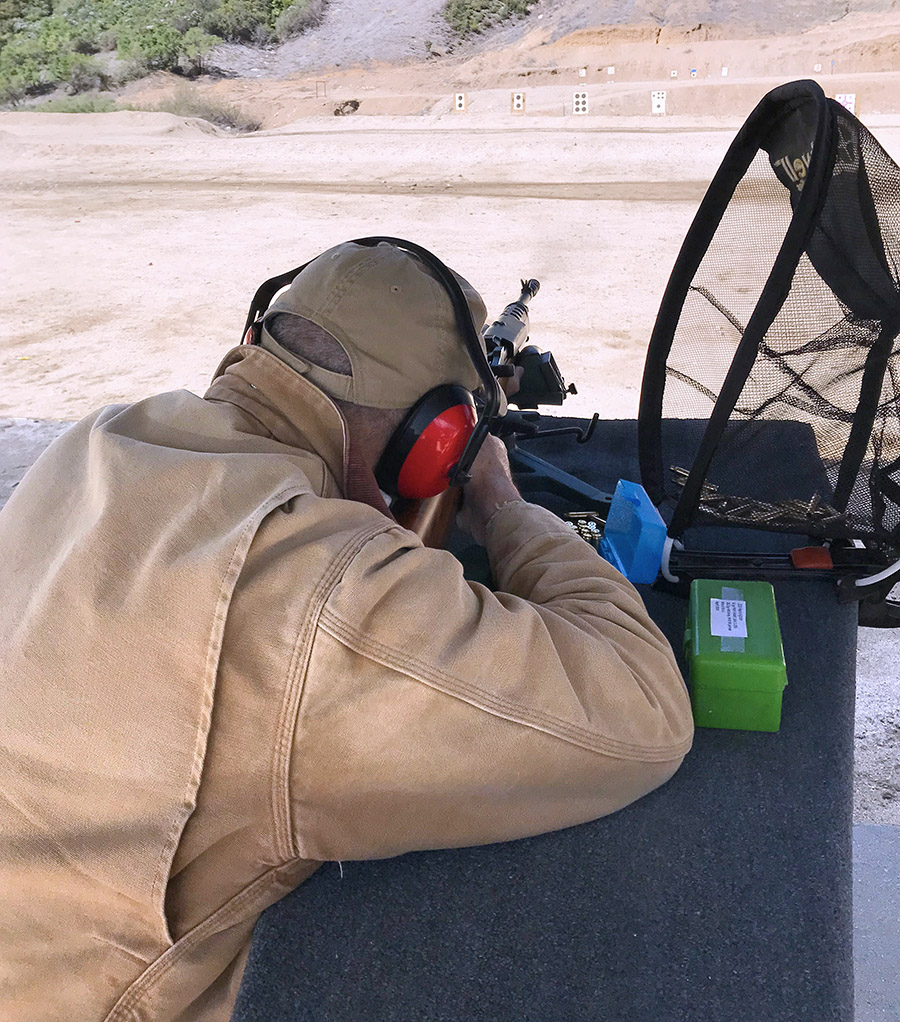
All are shown in the photo above.  My powders include Winchester 231, Unique, Bullseye, and Power Pistol (as seen in the featured photo at the top of this blog).

Here’s what the test plan looks like:

I’m going to test at 50 feet and fire two groups of three shots each for each combination.  That will keep the total number of rounds fired to a manageable 150 rounds.  It’s a quick look at what works and what doesn’t.

You might notice that I’m only going to test one load with the 148-grain wadcutter bullet.  That’s because it’s been the known accuracy load for years, and it’s also because it’s what I have my Star progressive reloading press set up to make. Stated differently, I’m not going to change this load because it’s my standard wadcutter load, and the Model 60 will either do okay with it or it won’t.  I already know this load shoots significantly to the right of my point of aim in the Model 60, but I’m including it here because I have the ammo and it’s easy to include in this test series.

That’s the plan.  I’m reloading the ammo as you read this, and I’ll have it tested most likely next week.  Watch the ExNotes blog for results in the near future.


More Tales of the Gun!


Never miss an ExNotes blog!  Sign up here:

The Model 52 Smith and Wesson

I’m a lucky guy.  One of the Holy Grail pieces in my collection is a Model 52 Smith and Wesson.   These guns were discontinued nearly 30 years ago and a lot of folks (myself included) consider them to be the finest handguns ever manufactured.  I had always wanted one, and finally, after pestering a good friend relentlessly, he agreed to sell me his.

An impressive target handgun: The Smith and Wesson Model 52-2. It has one of the best triggers I’ve ever experienced.

The Model 52 was built as a no-compromise bullseye target handgun chambered for mid-range .38 Special wadcutter ammunition.  What that means is that it’s not a duty weapon or a concealed carry weapon.  It’s a full-sized, 5-inch-barreled, adjustable sights, tightly-clearanced handgun with but one objective in mind:  Shooting tiny groups with wadcutter ammo.

The .38 Special cartridge has been around forever, and the target variant uses a wadcutter bullet.  One of my friends saw these and commented that it was odd-looking ammo, and I guess if you’re not a gun nut it probably is.  The bullets fit flush with the case mouth, and because of the sharp shoulder at the front of the bullet, they cut a clean hole in the target (hence the “wadcutter” designation).

.38 Special wadcutter ammo, reloaded on a Star reloading machine. The secret sauce (not so secret, actually) is a 148 grain wadcutter bullet seated flush and 2.7 grains of Bullseye propellant.

I love reloading .38 Special wadcutter ammo, especially now that I am doing so on my resurrected Star reloader.  You can read about that here.

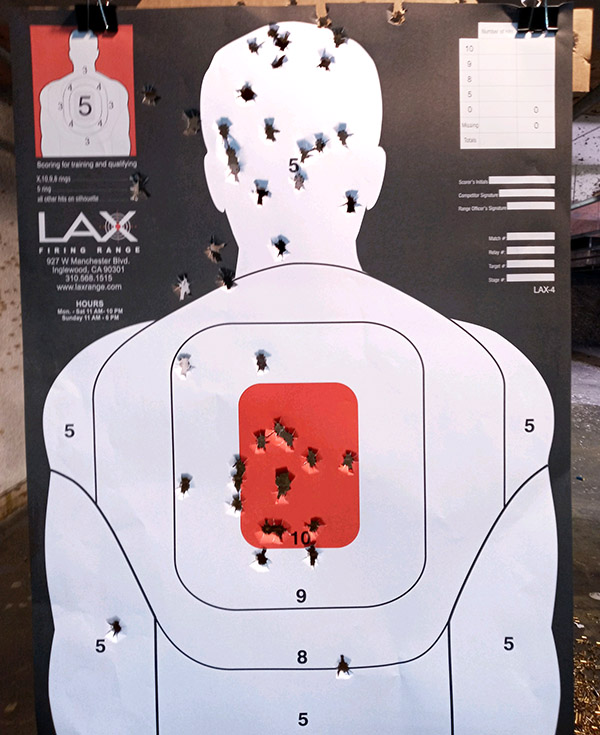
You can see the clean holes cut by the wadcutter bullets in the target below, and that’s a typical target for me when I’m on the range with the Model 52.  What you see below is a target with 25 shots at 25 yards shot from the standing position.

25 rounds at 25 yards from the Model 52, all in the bullseye. I’m a ham-and-eggs pistolero; guys who are good can shoot much tighter groups.

Yeah, I know, 2 of the 25 shots were a bit low in the orange bullseye.  A gnat landed on my front sight twice during the string of 25.  (That’s my story and I’m sticking to it.)

That’s a Hornady hollow-base wadcutter on the left, and the Missouri Bullets cast double-ended wadcutter on the right. The HBWC is orientation sensitive; the DEWC is not.
Reloaded HBWC and DEWC cartridges, with two of the double-ended wadcutter bullets that show the wadcutter end (which faces forward in the cartridge) and the hollow base end. These HBWC projectiles are Hornady bullets.

Next question:  Which is more accurate in the Model 52, the hollow-base wadcutters or the double-ended wadcutters?   The two I tried are the Missouri cast double-ended wadcutter, and the Hornady swaged hollow-base wadcutter.   Here’s what they look liked (with me behind the gun) on a set of 50-ft targets:

50-ft targets used for comparing DEWC bullets versus HBWC bullets. These targets are about one-fourth the size of the silhouette target shown above.

And here’s the group size data from the 16 five-shot groups I fired a couple of days ago (all dimensions are in inches).  It was all focused on answering the question:  Which is more accurate?  Hollow-base wadcutters, or double-ended wadcutters?

The load was 2.7 grains of Bullseye, a CCI 500 primer, and mixed brass for all of the above groups.  They were all shot at 50 feet.  So, to answer the accuracy question, to me the difference is trivial (it’s less than a 1% difference when comparing hollow-base to double-ended wadcutter average groups).   The standard deviation (a measure of the variability in the group size) was a little bigger for the hollow-base wadcutters, but the difference was probably a statistcal anomaly and it was more due to me, I think, than anything else.

Folks often wonder how the Smith and Wesson wizards managed to get a semi-auto to feed wadcutter ammo.  It’s partly in the magazine design and partly in the ramping (but mostly in the magazine).  The Model 52 magazine is designed to only hold 5 rounds, and if the bullet protrudes beyond the case mouth, it won’t fit into the magazine.  The magazine holds the the top cartridge nearly perfectly in alignment with the chamber, and when the slide pushes the round forward, it glides right in.    It will even do so with an empty case, as the video below shows.

The Model 52 was first introduced by Smith and Wesson in 1961.  It was based on Smith’s 9mm Model 39, but it had a steel frame (instead of an aluminum frame, although Smith also made a small number of Model 39s with steel frames), a 5-inch barrel (instead of the 39’s 4-inch barrel), and target-grade sights adjustable for windage and elevation (instead of the 39’s windage-adjustable-only sights).  The original Model 52 had the Model 39’s double action first shot capability, although I’ve never seen a no-dash Model 52.   In 1963 Smith incorporated a better single-action-only trigger and the 52 became the 52-1, and then in 1970 it became the 52-2 when Smith incorporated a better extractor.  Mine is the 52-2.

I was lucky…when my friend sold the Model 52 to me, he had the complete package:  The original blue Smith and Wesson box, the paperwork that came with the new gun, and all of the tools and accessories (including the barrel bushing wrench).

You might be wondering:  Which is more accurate?  The Model 52 Smith and Wesson, or the new Colt Python?  They are both fine and accurate handguns, but in my hands and after coming back from good buddy TJ and TJ’s Custom Gunworks with a crisp single-action trigger, the Python gets top billing in the accuracy department.  You can read about the Python’s accuracy with wadcutter .38 Special ammo here.


Never miss any of our ExNotes blogs on guns, bicycles, motorcycles, construction equipment, product reviews, and all the rest.  Subscribe for free here!


More Tales of the Gun?  You bet!


Click on those popup ads!

The Rimfire Series: A .22 Colt Trooper Mk III

Take a look at this:  A Colt Trooper Mk III chambered in .22 Long Rifle, an interesting and extremely accurate revolver.  I picked it up maybe 30 years ago in a local gun store.  The revolver was in their display case on the lower shelf and I almost didn’t see it.  I wasn’t in the market, but when I saw the Trooper it grabbed my attention.  It was marked $225, I offered $200, the guy on the other side of the counter said okay, and the Trooper was mine.

Deep bluing, crisp lockwork, and color case hardening on the hammer. It makes for a good-looking revolver. This one wears custom handgrips.

I didn’t realize it at the time, but the little Trooper is a phenomenally accurate handgun, maybe one of the most accurate I’ve ever shot.   It groups as well as a Model 41 Smith and Wesson, a target handgun with maybe twice the sight radius.

The Trooper is based on a Colt that was originally a .38 Special, then it was chambered for the .357 Magnum, then it was redesigned as the Trooper Mk III, and then it was offered in .22.  That was a thing back in the ’60s and ’70s, you know, offering full-sized revolvers but in .22, and it was a good thing.   These are awesome target guns, relatively inexpensive to shoot, and just plain fun.  And heavy.  The Trooper kept the same external envelope (i.e., the exterior dimensions) as the far-more-powerful .357 Magnum Trooper, and that means there’s a lot more steel in the barrel and the cylinder.

I bought my Trooper used, but it is in as new condition.  It came with the original lighter colored (and checkered) walnut grips, but I saw the grips you see the revolver wearing in these photos about 15 years ago and I had to have them.  The smooth grips look good and the medallions imply the gun went throught the Colt Custom Shop (it did not), but truth be told, the original grips offer a better hold and they fit the revolver better.

The grips say Colt Custom, but my Trooper was a regular production gun. The build standards were way higher back in the day.

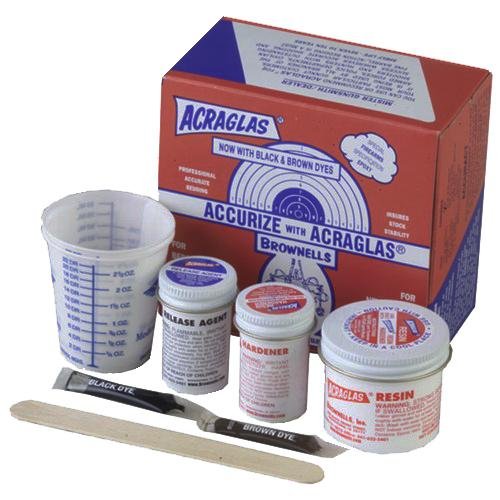
One of these days I’ll get around to hogging out the interior of the custom grips and fitting them to the Trooper with AcraGlas, but that’s a project for the future.  Or, I may put the original grips back on the gun (they’re around here somewhere).

The Troopers were available with a 4-inch barrel (like mine), a 6-inch barrel, or an 8-inch barrel, and they could be had with a high polish blue (like mine), a high-polish nickel, or a brushed nickel finish.  If I knew then what I know now I would have purchased a matching blue steel Trooper Mk III in .357 Magnum.  They were around $200 back in the day, and like my .22, the .357 would have been a sound investment.  These guns go for five to eight times that amount today.  You could argue that they make for a good investment, but that implies flipping the gun to realize the profit, and that’s not going to happen.  I’ll keep this one forever.

You know, it’s hard to find new guns built to these same standards as regular service guns were 30 or more years ago.  When I look at the deep bluing on my Trooper, that’s pretty obvious.  The new Colt Python is one that rivals the Trooper for build quality, but it’s the exception.


Join our Milsurp Target Shooting group!


Click on the popup ads and help us keep the lights on!

Never miss an ExNotes blog!


Need targets?  Order them the way we do and have them delivered to your door!


Check out our Tales of the Gun page!

A TJ Trigger for My New Python

As I mentioned in a recent blog, good buddy TJ (of TJ’s Custom Gunworks) reworked the trigger on my Colt Python.  The original single action trigger had a lot of creep, it was heavy, and what surprised me most of all was that it actually cocked the hammer another few degrees before it released.   I was getting a little double action when firing single action.

That bothered me enough to call my contact at Colt Manufacturing, and I think he was surprised when heard about it, too.   He checked with his engineering department, and the word came back:  They had to do that to meet the California and Massachusetts drop test requirements.  I checked the California regulation and it requires dropping a loaded, cocked revolver from a height of 1 meter six times on a concrete surface without the gun firing inadvertently.   Think about that.  Dropping a loaded and cocked revolver, a .357 Magnum, onto a concrete floor.  Six times.

Me?  I’m going with an alternative approach.  I’m not going to drop my loaded, cocked, .357 Magnum revolver on a concrete surface even once.  It’s kind of a common sense approach, one that the politicians in California and Massachusetts apparently think we can’t be trusted to take.

A loaded revolver.   Cocked.  Dropped.  Six times.  Onto a concrete floor.  What were they thinking?

I’m not one to to argue Darwinism versus Divine Creation (we don’t do politics or religion here on ExNotes), but here’s a thought.  Maybe someone who drops a cocked, loaded, .357 Magnum revolver on a concrete surface six times, well, maybe Darwin was on to something.  Maybe that person needs to be culled from the gene pool.  Before you get your shorts in a knot, though, remember my preface:  It’s just a thought.

Anyway, back to the main attraction, and that’s the trigger job TJ did on the new Python.  TJ took photos of the Python’s internals (the complete parts interface is shown above in the large photo).  The photo below shows what was causing the trigger creep and the hammer movement during a single action trigger pull:

That’s the hammer on the left, and the trigger on the right.  You’ll notice that the hammer’s sear area (denoted by the red arrows) is kind of rough and it contains a hooked ledge of sorts.  That’s what was rotating the hammer back a few more degrees when the trigger was actuated in the single action mode.

TJ modified the sear to eliminate the hooked ledge and create the angles and surface finish the Python trigger-to-hammer interface deserves.  That’s what you see below.

Before he improved the sear interface, the Python’s double action trigger pull was 9 1/2 lbs; it is now 9 lbs.  The single action trigger pull was a very creepy 5 1/2 lbs; now there is no perceptible trigger or hammer movement before the hammer is released and the trigger breaks at a very clean 2 1/4 lbs.   The upgrade completely changes the character of the new Python.  I can’t imaging anyone buying a Python and not wanting to have the trigger cleaned up in this manner.  TJ is the guy to do it.

The next big question is:  Did the new trigger a make a difference in how the Python performed?  Hey, you tell me.  Here are two 5-shot groups shot at 50 feet with the improved trigger:

Those two groups were shot with my go-to .38 Special target load (a 148-grain wadcutter and 2.7 grains of Bullseye prepared on my Star reloader).  The group on the left measures 0.680 inches; the one on the right measures 0.830 inches.  Some of the .357 Magnum loads performed just as well.   I’ll share all my Python load testing results in a near-term future blog.  I didn’t adjust the sights during my load testing because I’d be moving them with each new load; I’ll zero the gun when I’ve selected the load I want for the Python.  I am a happy camper; these are phenomenally good results.

You might be wondering about now why you’d need a trigger job on a $1500 handgun.  Folks, this isn’t Colt’s fault.  They’re doing what they have to in order to meet a requirement imposed by people who don’t understand what they are doing.  Don’t get upset with Colt.  Do the right thing and vote.

If you have a Python and you’re not happy with the trigger, take a look at TJ’s Custom Gunworks and drop TJ a note.  Trust me on this:  You’ll be glad you did.


More Tales of the Gun!


Never miss an ExNotes blog!


More gun porn?  Check this out!

An Urban Camo SIG 239 (and a quick Python update)

When I recently visited good buddy and custom gunsmith TJ of TJ’s Custom Gunworks to discuss a trigger job on my new Colt Python, I noticed a custom SIG P220 in .45 ACP in his shop.   The SIG had a very unusual finish.  The trigger work was incredible, with as crisp a single action trigger pull as any I have ever felt.  I’m hoping the Python’s will be as good after  TJ works his magic on it (jumping ahead, it is, and that will be in a future blog). I asked TJ about the SIG, and in particular, if I could share it with our blog readers.   Here’s what TJ told me:

I haven’t taken photos of my urban camo P220 yet; I’ll do that over the weekend.  Here are some photos of his little brother, the P239, in .40 S&W.

The camo finish is a 6-layer process. I did a full LEVEL 1 package on it, and since it was already DAO (Joe’s note:  That’s double action only) I did a full bob on the hammer, slightly lifted the slide catch, melted the edges and corners, satin polished the barrel and extractor, applied orange DayGlo on the front sight, installed camo Duracoat on the Hogue rubber grips, and I fitted my TJ hex head grip screws. I can email you more details of what I did if you need it over the weekend.

These are the photos TJ sent.   The first one is the 239 SIG as TJ acquired it, the next one is one of the steps in the camo application process, and the last two or three are the finished gun.

This TJ-customized SIG 239 sure is impressive.  It’s in a powerful chambering, it’s compact, all of TJ’s customs are super reliable, and the gun just has a cool look.  Whoever ends up owning it is going to have one hell of a handgun.   TJ tells me he’s going to be listing the gun you see here on Gunbroker in the near future (at a price that seemed to me to be way too low).

If you’ve ever thought about having a custom handgun built to your specifications, TJ is the guy you want to talk to.  One of the gun magazines described TJ’s work as “duty jewelry you can wear.”  That sounds accurate.  You don’t have to be here to use his services; most of TJ’s work is for folks in other states.  Take a few minutes and check out the photos of prior TJ custom handguns  on the TJ’s Custom Gunworks website.


Never miss an ExNotes blog!


A quick note:  The Python is back from TJ now and the trigger is superb.  The double action went from 9 1/2 to 9 lbs and it is much smoother.  The single action trigger went from 5 1/2 lbs (with a lot of creep) to a what I would call a breaking glass, creep-free 2 1/4 lbs.  It feels better and I am seeing an immediate improvement on target.  If you own a Colt Python, trust me on this:  You need a TJ trigger job on yours.  It completely changes the character of the revolver.  Watch for an upcoming blog on the new Python with its improved trigger.


Help us keep the lights on:   Please visit our popup ads and our sponsors!


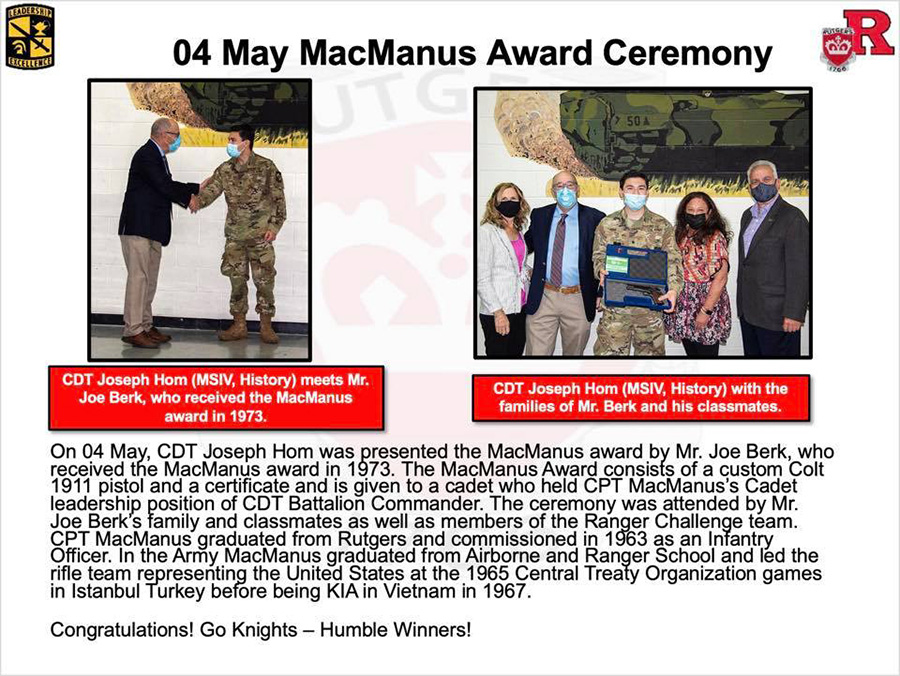
The 2021 MacManus Award

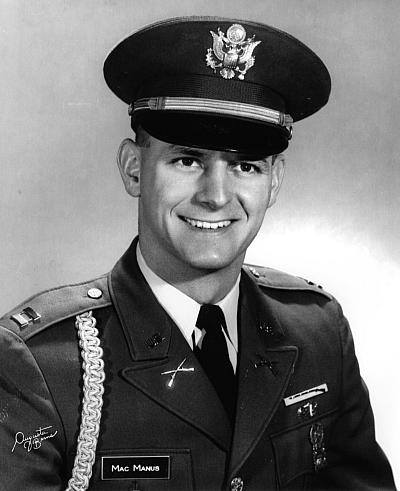
Last year I wrote about the MacManus Award, a program I helped revive with the Rutgers University Reserve Officer Training Corps.  Captain Colin D. MacManus was a US Army Infantry officer and an Airborne Ranger who graduated from Rutgers in 1963.  Captain MacManus was killed in action in Vietnam in February 1967 and posthumously awarded the Silver Star for gallantry in action.

US Army Captain Colin D. MacManus, Rutgers University ’63.

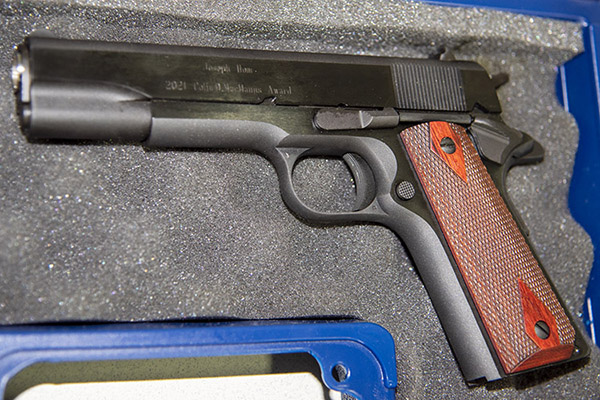
To commemorate Captain MacManus’ life, each year the MacManus family awarded a .45 Auto to the graduating senior who held his Rutgers Corps of Cadets assignment, and in 1973, that was me.  The award was a very big deal to me in 1973, and it’s still a big deal to me today.  I still shoot my MacManus .45 regularly.

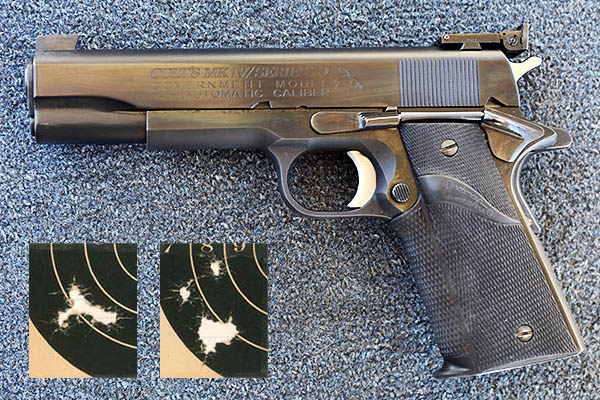
My first handgun: The Colin D. MacManus 1911 and a couple of 5-shot, 25-yard hand held groups I fired with it. I had it accurized in the 1970s, and it is still a tack driver.

The MacManus award fell away a few years after I graduated, but we were successful in restarting it in 2020.  The young man who won the MacManus award last year communicates with me regularly.  He’s now a US Army Infantry lieutenant going through the Ranger School at Fort Benning Georgia.  Good people, these are.

My good buddy at Rutgers, Colonel Javier Cortez, selected the top cadet at Rutgers for the 2021 graduating class, and I’m happy to report that this year’s honoree will receive his 1911 from the  Colt company (last year’s award was a Springfield Armory 1911, another fine handgun).  This year’s Colt is the Classic Government Model just like you see in the photo at the top of this blog, and Colt is putting some special touches on it through their Custom Shop.  That’s the same Colt model I was awarded in 1973, I’ve put a few tons of lead through it since then (230 grains at a time), and my Colt is still going strong.

Because of the pandemic, there was no award ceremony last year.  We’re doing the award ceremony via Zoom this year, and I’m looking forward to it. If you would like to read more about MacManus award and its revival last year, you can get to it via this link:

The Colin D. MacManus Award

This is good stuff, folks, and I am delighted to be associated with the effort.  These are fine young men we are honoring.  I’m proud of them, and I know you are, too.


Keep up with all the good ExhaustNotes stories!


IMR 4166: A quick look

Necessity is the mother of invention, or something like that.  When I heard that IMR 4320 was discontinued (on top of the ammo and components shortage), I was not a happy camper.  IMR 4320 was my go to powder for several cartridges, and now what I have left is all there is (and it’s almost gone).  But it really doesn’t matter, because we can’t hardly find propellants of any flavor. That notwithstanding, I made the trek to my local components supplier a couple of weeks ago, and he had only three propellants left:  IMR 4166, 8208, and BLC2.  I’ve never used any of these, although I had heard of Ballsy 2.  The 4166 seemed interesting…it matched my motorcycle jacket, but none of my reloading manuals had any data for it (it’s that new).  I bought all three.

I went online and found data published by the manufacturer, so I worked with that for my 30 06.  IMR 4166 is an extruded stick powder.  It will flow through a dispenser, but the dispenser throw variability was about 0.2 grain, and that’s enough when loading for rifle accuracy that I’ll weigh every charge with my scale and trickle it in with my RCBS powder trickler.N Would 0.2 grains make an accuracy difference?  I don’t know (and someday I’ll test to find out).  I suspect not, but weighing every charge only takes a few seconds more, and it seems like the right thing to do.

IMR 4166 is a stick powder that looks like any other stick powder. It’s in a powder trickler in this photo. Yeah, I weigh the powder for every cartridge.

On the IMR website, it said that Enduron IMR 4166 is one of a new class of propellant that offers four adventages:

Copper fouling reduction.  These powders contain an additive that drastically reduces copper fouling in the gun barrel. Copper fouling should be minimal, allowing shooters to spend more time shooting and less time cleaning a rifle to retain accuracy.   Hmm, that might be interesting.  We’ll see how it does, I thought to myself as I read this.

Temperature change stability.  The Enduron line is insensitive to temperature changes. Whether a rifle is sighted in during the heat of summer, hunted in a November snowstorm or hunting multiple locations with drastic temperature swings, point of impact with ammunition loaded with Enduron technology will be very consistent.  In the old days, I might have dismissed this as a solution looking for a problem, but I’ve experienced what can happen in a temperature sensitive powder.  I had a max load for my 7mm Weatherby that was fairly accurate that I took out to the range one day when it was 107 degreees.  I fired one shot and had great difficulty getting the bolt open.  It’s a real issue if you develop a load at one temperature and then shoot it at an elevated temperature.  If IMR 4166 is free from that characteristic, that’s a good thing.

Optimal load density.  Enduron powders provide optimal load density, assisting in maintaining low standard deviations in velocity and pressure, a key feature for top accuracy.   Eh, we’ll see how it does on paper.  I have some loads that are low density (i.e., they occupy well under 100% of the case volume) and they shoot superbly well.   I’m interested in how the load groups.  The target doesn’t give extra credit if an inaccurate load has a low standard deviation.

Environmentally friendly.  Enduron technology is environmentally friendly, crafted using raw materials that are not harmful to the environment.  Okay, Al Gore.  Gotcha.  Now go back to inventing the Internet.

My test bed for the new powder would be a Model 700 Euro in 30 06, a 27-year-old rifle I bought new about 10 years ago.  I had just refinished it with TruOil and glass bedded the action (a story a future blog, to be sure), and I hung a cheapie straight 4X Bushnell scope just to get a feel for how everything might perform.

The Model 700 Euro had a tung oil finish. The rifle was only offered in 1993 and 1994. The tung finish didn’t do it for me, so I did my usual TruOil finish. That’s an old Bushnell 4X economy scope up top.

My load was to be a 180-grain Remington Core-Lokt jacketed soft point bullet and 47 grains of the IMR 4166, all lit off by a CCI 200 primer.  If you’re interested, I was using Remington brass, too.  The cartridges were not crimped.

Loaded 30 06 ammo with the Remington 180-grain jacketed soft point bullet.

Wow, those 180-grain bullets pack a punch.  Recoil was fierce, and I probably felt it more because the Model 700 doesn’t have a recoil pad.

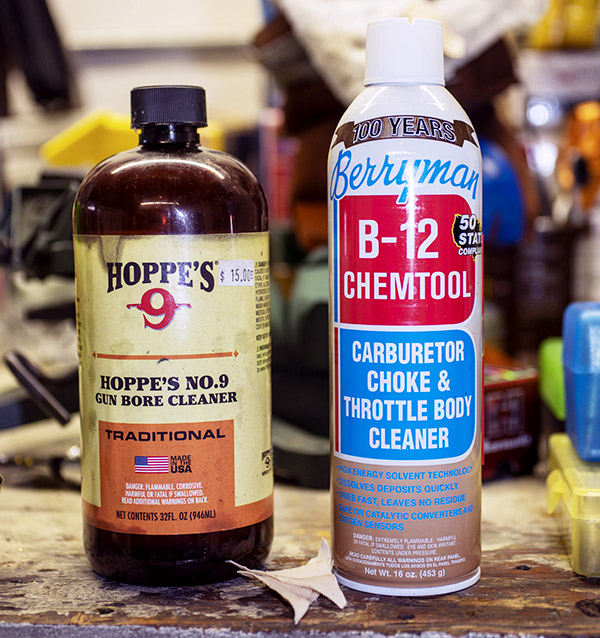
Okay, that’s enough about my heroics.  Let’s take a quick look at how the propellant performed.   With regard to the reduction in copper fouling claim, I’d have to say that’s an accurate claim.  After 20 rounds (the very first through this rifle), I ran a single patch with Hoppes No. 9 though the bore, followed by a clean patch, just to remove the powder fouling.  There was a very modest amount of copper fouling, way less than I would have seen with any other propellant.  Ordinarily, at this point in the cleaning process (i.e., removing the soot) I would normally see a bright copper accent on top of each land.  With 4166, there was only a minimal amount of copper present (as you can see below).   After a second patch with Hoppes No. 9, the copper was gone.  I guess this copper fouling eliminator business is the real deal.

This is a brand new rifle even though it’s nearly 30 years old. Check out the machinings inside the bore. Remington, for shame!

With regard to accuracy, 4166 has potential.  I shot five targets that afternoon, and this was the best.  It’s a 0.590-inch group at 100 yards, and that ain’t too shabby.

Sometimes you just get lucky. Other times you rely on careful load development, glass bedding, and a steady trigger squeeze.

The bottom line for me is that IMR 4166 is a viable powder.  Now, like everyone else, I need to find more.  That’s going to be a challenge.  But at least I know that my IMR 4320 has a decent replacement.

Two .44 caliber 1858 Remington New Model Army Revolvers

This is a guest blog by good buddy Jose, and it compares two modern Italian reproductions of the famed .44 caliber 1858 Remington New Model Army revolver.  One is manufactured by A. Uberti S.p.A. (it’s the one on top in the big photo above); the other is by F.LLI Pietta (the revolver on the bottom). Here’s another shot of the two:

The Uberti in on top right, the Pietta is on lower left.

The 1858 Remington New Model Army was a competitor to Colt’s blackpowder percussion sidearm.  The Army went with both versions but primarily bought the Colt (it was 50 cents cheaper than the Remington).  Then the Colt factory had a fire in 1864.  At that point, the Army starting buying Remingtons in quantity.  The Remington was considered to be the stronger revolver because it has a top strap over the cylinder (the Colt does not), and some folks feel the Remington is easier to aim because the rear sight is cut into the frame (instead of the hammer, as on the Colt).  And there are other advantages to the Remington, which Jose covers.  With that as a background, here’s Jose’s article on the modern Uberti and Pietta reproductions.  All photos in this blog are by Jose.


Help us publish:  Please click on the popup ads!


If you’ve never fired a percussion revolver you’re really missing out on huge part of firearms history. But maybe you didn’t know that even here in California you can order one of these fine blackpowder revolvers online or over the phone with a credit card and have it shipped to your doorstep without background check or going through an FFL. Your state rules may vary.

Cap and ball packpowder sidearms were a huge part of arms on both sides during the American Civil War. The Union Army had a contract for the Colt 1860 Army, but when Colt could not keep up with demand Remington Model 1858’s were ordered. Many troops preferred the Remington over the Colt for a number of reasons. The Remington has a top strap making it stronger, and the Colt was prone to having loose percussion caps jam the cylinder.

Uberti 1858 Remington Revolver

I’ve had the Uberti for about 10 years. It’s an awesome piece of fine craftsmanship. There is nothing cheap about this revolver, the fit and finish are supurb. The cylinder and barrel are a deep blue, the steel frame is color case hardened, and the trigger guard is polished brass, ans walnut stocks, giving it a very classy look. The gun is a six shot .44 cal, rifled 8-inch barrel with 1:18 LH twist, and weighs in at 2.7 pounds.

454 cal pure lead balls, Remington #10 percussion caps, waxed felt wads, and the Uberti 1858 New Army.
Powder measure, balls, waxed felt wads, and caps.

I use .454-inch diameter balls cast from pure soft lead (stick on wheel weights or plumbers lead, BRN 7) weighing in at 143 grains. It fires best when loaded with 35 grains of FFF blackpowder (I don’t like substitute synthetics), a felt pad soaked in bore butter over the powder, and the ball over the top. The felt over the powder charge prevents a chain fire from jumping between cylinders, and also adds some lube to the barrel between rounds helping prevent a buildup of powder. Either Remington or CCI #10 percussion caps provide the spark.

The color case hardened steel frame on this model Uberti is off set nicely by its polished brass trigger guard.
The loading lever on the Remington 1858 is used to ram the ball into each cylinder, after loading powder and waxed wad. The percussion caps are placed on the cylinder nipples only after all cylinders have been loaded.
The cylinder doesn’t require removal between loadings, only for cleaning.

The Uberti is very well balanced and feels good in the hand. The cylinder locks up very tightly. There are noches between the cylinder nipples to rest the hammer on making it safe to carry with all six cylinders loaded. The rear sight is a V-notch on the top strap, unlike the Colt 1860 which has the notch on the hammer because the 1860 lacks a top strap. It’s no exaggeration that out to 40 yards my the Uberti 1858 holds about as tight a group as my Ruger Super Blackhawk .44 mag!

The Remington 1858 has a top strap over the cylinder making it stronger than the Colt 1860 and older firearms. It also allows for placement of a stable V-notch rear sight as opposed to the Colt’s rear site which is a simple notch filed on the back of the hammer.
Nice sight picture. This Uberti has a 1:18 barrel groove twist and holds groups as tight as my Ruger Super Blackhawk out to about 40 yards.

Properly cleaning and blackpowder revolver after a day in the field is a good exercise in gunsmithing. The revolver should be entirely disassembled, down to the Springs, removing hammer from the frame, cylinder pin, loading lever, trigger, mainspring, nipples from the cylinder – everything except for removing the barrel from the frame and front sight.

The notchs between the nipples are for the hammer to rest, allowing the six-gun to be safely carried with all cylinders loaded.

A good set of gunsmithing drivers and properly fittjng nipple wrench are mandatory to keep from damaging the screws. Owning a blackpowder revolver will help anyone gain confidence to start Barking simple dunsmithing repairs and parts replacements on other types of firearms. If you don’t already have a blackpowder gun order one today! They are a blast.

Pietta 1858 Remington Revolver

This one was recently purchased because the price was right. It looks like it has never been fired, and I’ve not fired it yet, either. The specs are essentially the same as the Uberti; however, the claimed weight of the Pietta is only 2.4 pounds compared to Uberti’s 2.7 pounds. For whatever reason the Uberti feels much lighter and more well balanced. The Pietta is noticeably front heavy. The Pietta has a little play at cylinder lockup. The hammer pull and trigger feel smooth and crisp, similar to the Uberti.

The Pietta, another quality Italian replica in a slightly lower price range.

The really nice thing about the Pietta is that it came with an optional .45 Colt conversion cylinder. I’ve always wanted to get a conversion cylinder for my Uberti but they are very expensive, about 2/3 what I paid for the gun, and they always seem to be out of stock.

This Pietta came with a .45 Colt conversion cylinder.
The conversion cylinder has an upper plate that holds a separate firing pin for each cylinder.

The conversion cylinder for the Pietta fits very nice, locks up tightly, and came with a box and a half of .45 Colt ammo which I have no intentions of using. Remington first started converting Model 1858 revolvers to .46 cal rimfire metallc cartridges in 1868. These were still blackpowder cartridges as smokless powder hadn’t yet been developed. So I will hand load .45 cartridges for the Pietta using blackpowder to stay traditional.

I’m looking forward to shooting these two together on a side-by-side comparison soon. For now, I hope you enjoy the photos.


That’s an awesome article, Jose.  Thanks very much for sharing it with us here on the ExNotes blog.

I asked Jose to tell us a bit about himself, and he did.   Jose is a geologist, an offroad racer, a fly fisherman, an upland game hunter, a handloader, and he likes to teach outdoor sports to young people. He lives on the banks of the Henry’s Fork River in Idaho in the spring and summer months and he spends the winter months in Big Bear Lake, California. Most of Jose’s offroad racing adventures are in Baja.  Jose’s other hobbies include taekwando, and cumbia and bachata dancing.  An interesting man, to be sure!


Never miss an ExNotes blog.  Subscribe here for free!

A place to start for all your black powder accessories is right here!

Hit those popup ads!