The Jagrolet

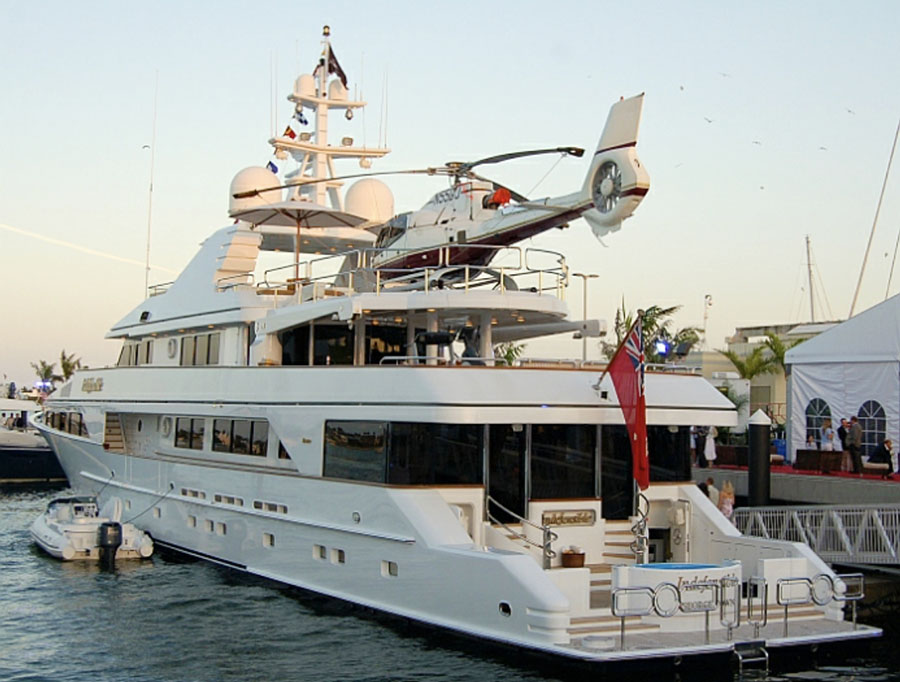
Last century I worked on a boat called the Attessa. The Attessa has worn many names since and was a steel Kong & Halvorsen dry docked at a National City, California shipyard for a fairly thorough refit. I think it was over 150 feet long by the time we added a stern section. For some reason we didn’t move the rudders aft at the same time, which was kind of weird. I always wonder if it steered well or crab-walked when you turned the helm? We also re-flared the bow to give the front of the boat a less navy, more-yachty look. A complete remodel of the interior was also done. That’s where I came in. I was one of three electricians on the job.

The other two electricians were from Montana and were sent from the yacht owner’s personal supply. The Montana boys were house electricians and had never done boat wiring so I was there to help them with the oddities of marine construction. All three of us got along well. One day I accidentally caught our lead electrician snorting coke down below in the new aft section. “I guess you shouldn’t have seen this,” he said. I didn’t care, there was so much work to do we needed everyone we could get. Besides, the painters were all speeded up.  Why not Sparkies?

You may remember the Attessa as the boat featured in Goldie Hawn’s movie Overboard. The owner of the boat was an ultrarich Montana guy named Washington. The project was pretty massive. The boat even had two captains at one time. Something about overlapping contracts. I spent months just doing interior lighting. For some reason one captain of the boat hated me and would go around sabotaging my work. He bitched constantly even though I was getting more done than the other two guys put together. The other captain was fine and we worked well together.

One day Bad Captain cut out a low-voltage lighting transformer because he didn’t like where it was. I just followed the plans, man. The wires were cut at the worst location making them unusable, meaning I had to run new wires or splice them. Splicing is never good on a boat. I was pissed off. “What the F is wrong with you?” I asked the captain. “You just destroyed 8 hours of work! It was done! It was tested! Now I have to run new wires and re-do the transformer. Like we don’t have enough shit going on!”

I went to the main contractor on the project, Neil, and told him about Bad Captain’s constant needling and tampering. It caused a real hubbub. Neil was already under the gun for cost overruns and hearing about the sabotage made him mad as hell. We had a team meeting where Bad Captain was told to leave me the F alone and that if he had any problems with my work to go see Neil. We maintained a frosty relationship after that but Bad Captain let me work undisturbed.

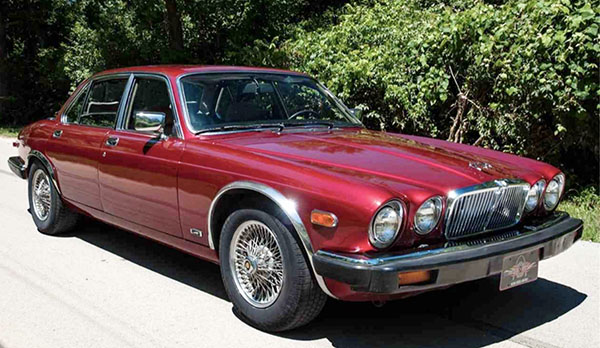
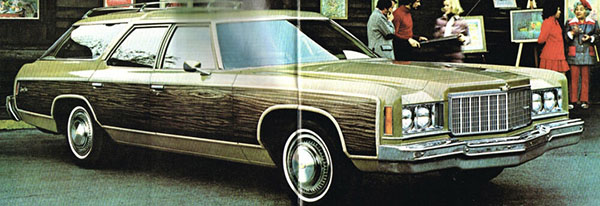
The engineer aboard the Attessa also hated Bad Captain so naturally we hit it off in grand fashion. He was the cool kid aboard the boat. He was a lovable cad and everyone liked him, which should have tipped me off. He had a Jaguar sedan with the straight 6 and wanted to repower the car with a small block Chevy. I had a sweet, 400 cubic-inch small block Chevy trapped inside a giant green station wagon.

It was a pain in the ass to work in National City. You had to park far away and check in or out. It was like working at a factory. The shipyard had a huge floating dry-dock and did a lot of contract work for the Navy. The metal grinding was constant, every day you’d have to blow the iron dust off the decks or the next morning you’d have rust stains bleeding all over. When the new bow and stern were finished we launched the Attessa and took her to Shelter Island for completion. I was much happier on Shelter Island.

I sold the 400-inch Chevy Wagon to Attessa’s engineer for 400 dollars. He didn’t have the money right then but we were good friends, you know? He pulled the engine and transmission from the Chevy and installed it into the Jag. I guess there is a kit that makes this swap particularly easy. The Attessa re-fit job was starting to go sour. The budget was blown to hell and the owner was getting tired of shelling out so much money. In the afternoon Neil would come aboard and ask each of us what we did that day. I’d show him what I was working on and he’d tell me to speed it up as he was getting heat from the owner. Our lead electrician was fired for drug use. People were quitting. Good Captain was gone. The engineer left.

I started getting parking tickets for the Chevy Wagon. The car was abandoned without plates in downtown San Diego racking up charges. They cops traced the car to me by the VIN number. I guess the engineer never changed the title to his name and just shoved the scavenged car into the nearest parking spot. At the same time Neil was bugging me to get the old 6-cylinder Jaguar engine out of his shop. My engineer buddy had given it to me as partial payment for the small block. I had no use for the Jag engine but that didn’t deter his generosity.

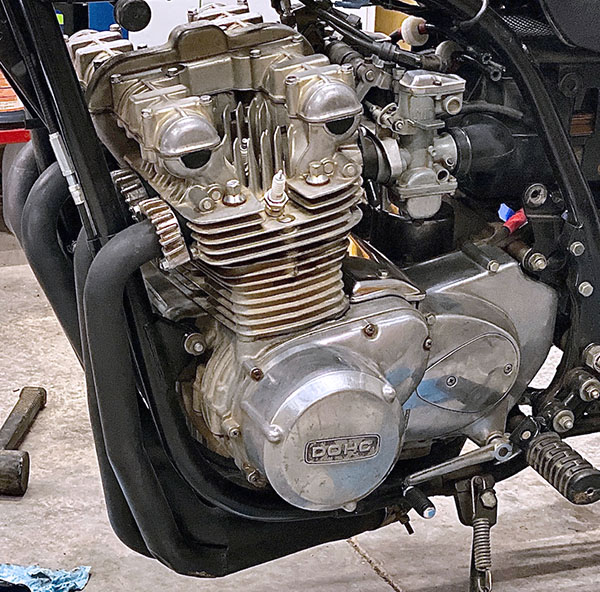
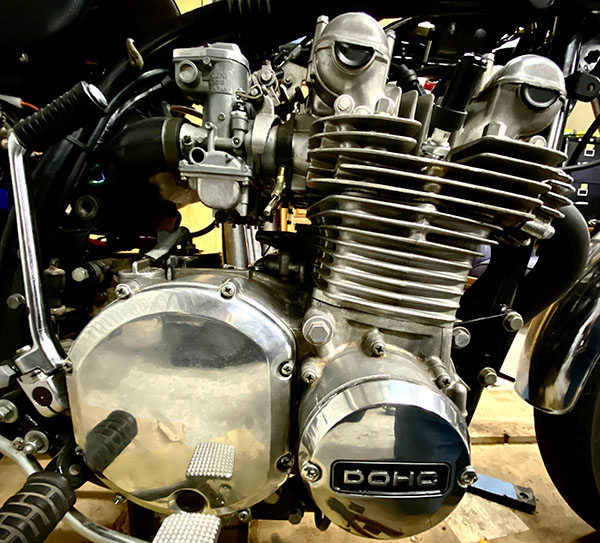
The Chevy was towed followed by more bills and notices. I had a hell of a time convincing the department of motor vehicles that I didn’t own the Chevy. The tow company kept the car. Nobody knew where my engineer buddy had gone. I had nowhere to store the Jag engine and no one wanted to buy it. This was pre-internet days and advertising the engine for sale would cost more than it was worth. I called around but even Jaguar repair shops wouldn’t give me 25 dollars for the engine. I told Neil to toss the double overhead cam, inline 6 engine in his dumpster.

Everybody on the Attessa was starting to get on each other’s nerves. It wasn’t a happy workplace since the crew stopped using drugs. There was constant bitching about how long the job was taking. On lunch break one of the welders told me, “I don’t know why they’re bitching at you, you’re the only one doing anything on this boat.” Morale was falling apart. After 5 months of hustle and push the Attessa needed a fresh team. We were burned out. I got a better offer from another boat builder (twice as much per hour!) so I told Neil I was quitting.

Neil took it well, we are still friends today, and had me use my full two-week notice to get the remaining Montana electrician up to speed as best I could. We kicked ass and when I left the lower decks were all done and we were working in the pilothouse so the electrical part was nearly finished. Starting the next boat project felt like I was in a prison early release program. The new boat build was full of happy workers. Some of the welders and painters from the Attessa got there ahead of me. It was like a family reunion except you were being paid to attend. I never got a penny for the Chevy small-block and I never heard from the engineer again. Which is just as well or I probably would have given the lovable cad another damn car.


More Joe Gresh is right here!

Road Test: 1975 Kawasaki Z1 900

The Kawasaki 900 is a legend amongst savvy motorcyclists around the world. Back in the day the limited-to-paper Moto Press lavished high praise on Kawasaki’s top of the line motorcycle. They even called it the King of Motorcycles. And the praise was well deserved. On any greatest-list the Z1 pops up as one of the best motorcycles ever built. But what’s it like to ride today? How does it compare to modern bikes with their liquid cooling, fuel injection and zillions of horsepower?

As it turns out, not too bad. The first thing you’ll notice is the power. Or lack of power compared to a modern Ricky-Racer type of motorcycle. The Z-1 is fast but in a leisurely way. The revolutions build slowly through the gears allowing a rider time to enjoy the acceleration process. There are only 5 cogs in the smooth shifting transmission but you get to enjoy each one of them for a few seconds before going on to the next. With less than half the horsepower of a modern 1000cc motorcycle the Kawasaki Z1 has a human-scaled power delivery. You don’t need the vision or reflexes of Valentino Rossi to wring the neck of this willing old battlewagon.

There are plenty of options available to increase the Z1’s horsepower to near-modern levels but I don’t feel like the bike needs more power. The Z1 is plenty fast enough to keep up with today’s traffic situations and unless you plan on improving the brake system you really don’t want this old Kawasaki going any faster.

The brakes are where you feel the weight of all those years that have scrolled past since 1975. The brakes are not good. The single disc, single piston front brake is the culprit. It takes a healthy squeeze to lock the front wheel and the brake lacks the precise feel of a modern multi-piston caliper. The rear drum brake is better at its job than the front brake but that’s only because rear brakes have much less influence on stopping. Antilock brake systems for motorcycles were unheard of when the Kawasaki 900 was made and you won’t miss it. I say all this for informational purposes only. It’s not like you can’t enjoy the 900 on a ride or you’re fearing stop signs. In regular use the brakes are borderline but acceptable.

A big surprise is how well the Z1 handles. When the Kawasaki first came out most moto-magazine reviewers praised the handling or at worst didn’t complain about it. Since then the un-illuminati have managed to change the narrative. Today the general consensus is that the Z1 is a widow maker, a bike with a hinge in the middle. Unsafe at any speed. I call BS.

The Z1 has a wonderful, lightweight feel through corners. The wide handlebars help with the easy steering. Large diameter wheels may also contribute to the stable, enjoyable ride. Leaned over the Z feels planted and neutral as long as you don’t hit any mid-corner bumps. On straightaways at speed the bike does not wobble. My Z1 has 45-year-old shock absorbers and so an upgrade might help but I’m not going that fast anyway.

This whole, canyon carving, race bike for the street thing has gotten annoying and probably explains the popularity of adventure motorcycles. Riders who blitz around on public roads feel like they’re really hauling ass but that’s because they are the only ones racing. Everyone else is just out for a ride. I get it: it’s hard to keep a 170-horsepower motorcycle under the speed limit or anywhere near it.

Marc Cook, an editor I worked for, once told me the 200 horsepower 1000cc BMW sport bike would be unrideable without all the electronic nannies. Modern bikes have gotten much better than modern riders. That’s where the human-scale power of the Z1 shines. You can whack it open without activating any rider aids because there are none because the bike doesn’t need them. Traction control for the Z is in the right twistgrip.

The Z1 is a mostly comfortable bike to spend the day on. Those high, wide bars that make steering so easy work against you at high speeds. If it didn’t mean replacing the cables and hoses I’d lower the bars a couple of inches but leave them wide. The big, long, cushy seat on the Z1 is a marvel of comfort. I slide way back for fast highway touring and scooch up tight to the gas tank in the twisty stuff. The mid-bike foot peg location is a good compromise and suits the Z1’s multipurpose nature.

Since the Z1 engine is a non-counterbalanced, inline 4-cylinder bolted solidly to the frame some vibration is transmitted to the rider. Personally, I love the way it moves but everyone has their own level of vibration tolerance and the quality of the vibrations changes with different engine layouts. The Z1 is smooth up to 4000 rpm. Above 4000 the vibration takes on different shapes and affects different areas of the motorcycle. None of this is very strong or detracts from the ride. There’s a sweet spot around 4700 to 6000 RPM where the Z1 feels as smooth as it needs to be. I wouldn’t call the Kawasaki a buzzer but if you were to jump onto the Z1 from your modern bike you may think the old Kawasaki is kind of raw. I think of that rawness as being alive with possibilities.

Fuel economy on the Z1 is so-so. I average between 38 and 40 miles per gallon but live at high-ish altitude and it’s been very hot. Heat and altitude kill mileage. I will check again in cooler weather when I expect a slight improvement. Fueling, the way the bike responds to throttle input, is slushier than an injected motorcycle. There are no abrupt engine responses. Things happen slightly slower right off idle but that may be my carburation setup. At a steady cruising speed the slushiness means you don’t need to keep strict control over the throttle. This bike is not nervous or skittery.

You’d think parts would be hard to come by for such an old motorcycle, but no. There’s a thriving Kawasaki Z1 restoration movement afoot. It’s mostly driven by demand, as the Z1 is commanding a premium price in the vintage motorcycle market. The Z1 is right at home in the middle-aged, empty-nester-loaded-with-cash, nostalgia-boomer’s wheelhouse. That demographic has and generates the most dollars. It’s actually easier to get parts for a 1975 Z1 than many more recent models and the prices aren’t unreasonable. With an abundant supply of repair parts easily obtainable the Z1 scores high for livability.

Compared to a modern 1000cc motorcycle the Kawasaki Z1 is slower, takes longer to stop and is worse in tangible ways. On a racetrack, that is. In ways intangible the Kawasaki Z1 is the better street motorcycle for simply enjoying a motorcycle ride. It’s easy to fix, reliable as any new bike (maybe more reliable) and a joy to possess.

I never feel like the Z1 is tolerating my incompetence. Instead we work together, both of us not in our prime, and we get places, you know? Riding Kawasaki’s Z1 feels like springtime and affirmation and young, anxious wonder. The bike is a time machine that radiates happiness. And when we get to the place we were going milky-eyed old men walk up and tell me how wonderful my motorcycle is and how much they loved the one they owned back when they were strong. That kind of reverence and emotion is not going to happen with just any motorcycle. The Kawasaki Z1 900 is much more than a collection of parts assembled in a factory. It’s industrial art that inspired an entire generation of motorcyclists. Long live the King!


Check out Gresh’s Kawasaki Z1 resurrection here!

Product Review: Chase Harper 650 Tank Bag

I’ve dropped a lot of usable content on Facebook without thinking about it. Good stories that would have made excellent topics for an ExhaustNotes.us blog post and I’ve screwed around and published them on Facebook’s Anti-Social Network. To what end? All it does is supply the buoyant pontoons that support a miserable, never-ending political tussle on my Facebook feed. My Chase Harper magnetic tank bag is a perfect example. Why haven’t I written a product review on this thing?

Until John Burns over at Motorcycle.com brought up tank bags I had completely forgotten I had one. I bought the Chase Harper 650 the day Berk and I left for our 650/500 Royal Enfield Baja trip. Neither Royal Enfield was set up with luggage so we strapped our gear on the bikes as best we could. I started out on the 500cc Bullet and I had so much junk to carry I used a backpack to hold some of it.

I’m a proponent of letting the motorcycle carry as much weight as possible. Slinging 20 pounds of junk onto your back and then pounding on city streets is not smart or sexy. My back was already hurting. We were working our way south to pick up a freeway when I called out to Berk, “Is there a motorcycle shop around here? I need to get a tank bag.”

“Yeah, follow me.” I followed Berk through the nondescript Californian sprawl and we arrived at a motorcycle accessory shop that was not named CycleGear. The shop guys came out and ogled the (at the time a new model not yet sold) Royal Enfield 650. We shot the breeze for a bit and then went inside to look at tank bags. Which didn’t take long because they only had one in stock: the Chase Harper 650.

The Model 650 is as plain as you can make a tank bag. It has a few zipper compartments and four strong magnets to hold the thing to your tank. Nothing expands or is special. Chase Harper is proud of their motorcycle products and prices them accordingly. The thing was like 90 dollars! As it was the display model, kind of dusty and missing the box and paperwork I asked the guys for a discount. No deal.

Berk started telling them how we were famous motojournalists. The clerks shook their heads, neither having heard of or read our stuff. I showed them a few tired old Motorcyclist Magazine stories on my cell phone and they seemed really interested but would not budge on the price. “We’ve already reduced the price on that bag, we can’t go any lower.” I bet Peter Egan could have gotten the price down. The fastest way to end this ego shattering indignity was to fork over the money and haul ass as fast as we could.

The bag was a great relief for my back. It held my camera, wallet, phone and enough stuff that I could survive a day or two on the hoof. Whenever Berk and I went into a store or restaurant I took the bag with me. The magnets make that so easy. I didn’t like that the bag had no rain cover. Those soulless misers at the motorcycle shop not called CycleGear said it was rain resistant. Whenever a motorcycle gear manufacturer says a product is resistant to rain you can take that to mean the damn thing is a sponge. I mean, anything that doesn’t dissolve like sugar when it gets wet could be described as resistant to rain.

As it turns out we didn’t hit any rain on our ride through Baja and the tank bag worked out perfectly fine. I got the 650 Royal Enfield up to an indicated 115 miles per hour and it stayed put like it was made to do 115.

In all the time I have owned the C-H bag I never really looked it over too closely. I didn’t see any straps for using the bag like a backpack. This is a common feature on tank bags. It wasn’t until Burns’ brought up tank bags on Facebook that Steve, another C-H 650 user told me that the straps were hidden in a zipper compartment under the grab handle.

And they were! Well hidden, I wonder if I the shop not named CycleGear had given me the original paperwork for the 650 would I have found the straps sooner? Probably not: I would have tossed the paperwork anyway. I’m a rebel, man.

The interior of the C-H 650 is plush, deep red. I feel like I have a bordello between my legs whenever I open the lid. Well padded, my camera gear survived Baja’s bumpy roads unscathed.

The lid of the 650 has quite a few features. There’s a bungee cord crisscrossing the top to hold odd shaped bits. Behind the mesh map holder there is yet another zipper for papers and what not.

Finally, there is a front-opening pouch with a red plastic liner that might keep something dry depending on how much the zipper leaks. I haven’t used any of these little hidey-holes so I can’t say if they are worthwhile. I toss everything into the main compartment.

The backside of the C-H 650 is not covered in super soft material. It’s more like vinyl. I had no tank scratches using the 650. There is one clip on the front and two clips on the back that I imagine could be used for strapping the bag to non-metallic gas tanks. I did not get the parts that would affix the bag to a non-metallic tank. They might be an extra cost item or you-know-who lost them at that shop not named CycleGear.

Overall I’m happy if not ecstatic with the Chase Harper tank bag. Just remember to bring plastic bags to protect your stuff in the rain. It did the job I needed it to do for much more money than I thought it should. For only having one, dusty tank bag the shop not named CycleGear did ok. My last tank bag lasted 10 years. This one looks sturdy enough to go the same distance.

Product Review: Xtreme Power 14-inch Electric, Wet/Dry Concrete Saw

Recently we added a paver patio to Tinfiny Ranch’s ever-growing suite of stone and concrete structure. The pavers we used weren’t exactly made for paving. They were that pressure molded, popcorn cement stuff, like a two-cell block but these were all solid. I have a great assortment of 4x8x16 blocks and less, but still plenty of 8x8x16 blocks. I got them at a surplus materials auction for only 20 dollars. No one else bid on them because they are kind of an odd block.

The only catch was you had to move them. The blocks are not that heavy individually but the repetition of loading several hundred of them into The Bomber, a 1990 4X4 GMC Suburban (last year of the solid front axle!) had me questioning the wisdom of bidding so high.

When I bought the blocks I had no immediate plans for them, it was just too good of a deal to pass up. It took three trips to load and move the blocks from the auction yard back home. I made a neat, orderly pile up in the higher reaches of Tinfiny Ranch. The blocks sat there a couple years, not bothering anyone.

During that time I built a retaining wall and leveled the back yard, then I poured a decorative concrete slab around the side and back of the little shack we call home. When I got to the section where the septic tank was buried I had to stop pouring concrete. At this stage of the construction process those $20, auction concrete blocks started to look like a canny deal. Unlike real pavers these blocks were 4 to 8 inches thick. That means I needed a way to cut the blocks to fit the odd shapes mandated by my out-of-square building techniques. I purposely make my home projects cockeyed. It makes them easy to identify if they are ever stolen, like the VIN number on your motorcycle.

Which is, even I have to admit, a really long introduction to this concrete saw review.

I didn’t plan to buy Xtreme Power’s 14-inch electric, concrete wet-saw because I already had a 12-inch Hitachi concrete saw. It’s kind of funny in a sad, losing-my-mind sort of way but it had been so long since I used the Hitachi I forgot what size it was and bought a new 14-inch, wet-cutting, diamond blade for it. Naturally the 14-inch blade wouldn’t fit into the 12-inch saw. Side by side the 14-inch saw is much larger than the 12-inch. It just goes to show you how a couple inches can make a big difference.

My wife CT, constantly bucking for wife of the century, suggested I check the prices on a new 14-inch saw to fit the blade I had instead of buying yet another 12-inch blade to fit the saw I had. There were other, mitigating circumstances that I didn’t let CT know about. One of them was the fact that the Hitachi was never made to be used wet. It was a dry saw. My Pop welded in a threaded bung for a garden hose and for years we used it plugged into 120 volts while standing in water. We did this because we were construction workers and simply not very bright.

It was only a hundred bucks more to buy a whole new saw rather than eat the sunk costs of the 14-inch diamond blade and buy another 12-inch diamond blade. A big plus is that the Xtreme Power saw is built from the factory to be used wet. All gripping surfaces are electrically isolated and the power cord has one of those super-sensitive GFI-type circuit breakers to prevent idiots like me from electrocuting themselves.

Spinning a 14-inch blade through concrete is not an easy thing to do. It takes lots of power and with a 15-amp rating the Extreme Power saw uses just about all the current your standard household receptacle will supply. You won’t be running this saw on a 100-foot extension cord.

Concrete saws rotate the opposite direction from wood cutting circular saws. Meaning if the saw binds it jumps forward instead of kicking back. Even if it doesn’t bind you have to restrain the saw rather than push it forwards. It’s a handful to keep the thing going in the direction you want.

Xtreme Power’s 14-inch saw was not without its faults. The saw came with a strange water connection than won’t fit any US-spec water hose. I had to replace the stock fitting but the step-down in size from garden hose to saw fitting was huge. I made a spooky looking plastic adaptor to accommodate the size issue.

Once connected to water I opened the hose bib and the small hoses promptly blew off and squirted water into the inner reaches my nice new 14-inch Xtreme Power saw. This didn’t bother me, as the manufacturer must have anticipated a wet saw getting wet. Xtreme Power uses water supply hoses that are a soft silicone type of material; so soft they won’t stay on the hose barbs. A few wraps of bailing wire around the hoses secured them and left a nice, sharp barb to cut my hand on should I ever relax my vigilance in the future.

My water supply problems were not over yet. In use those super soft hoses manage to kink easily, stopping the water flow to the blade. It’s easy to tell when the water stops because clouds of cement dust billow from the blade housing. There you are, trying to steer a heavy, bucking saw while holding the water supply hose in a position that won’t cause it to kink. I’m amazed I didn’t sever both my feet with the damn thing. New, stiffer hoses will be installed before I use the 14-incher again.

Ignoring the water hose problem for the moment this saw cuts concrete like butter. I can make a foot-long, 4-inch deep concrete cut in about a minute. There’s no dust but a slurry of concrete mud slinging out the back of the machine means you won’t be carving the Thanksgiving turkey with this thing.

Being a wet cutting saw the blade housing has to cover a large percentage of the blade to prevent the user from being splattered with mud. This housing makes seeing where the blade is cutting nearly impossible. You have to kind of wing it. There’s a notch on the shoe to use as a guide. I had good luck eyeballing the line using the edge of the shoe and the edge of the material as a guide.

Which brings us to another problem with using a 14-inch blade to cut 4-inches of concrete: You may luck out and make a straight cut from the side the saw is on but that big blade has other ideas and will wander outboard leaving behind a tapered cut as the blade flexes. A multitude of passes with shallower cuts would be a better idea but I needed to move on so I chopped the pavers in one pass. Precision is not my bag when it comes to stone work.

Out of the box, the Xtreme Power saw is not ready to work. You’ll need to redo the water hose system before attempting any cuts. I was cutting really thick blocks so for regular pavers the blade wandering issue probably won’t be a problem. This saw is big and heavy but it has to be because of the size blade it swings. Xtreme thoughtfully included a set of wheels that would come in handy if you were cutting many feet of expansion joints or grooving an area for non-skid. I’d like to rig a handlebar system so the saw could be used as a walk-behind unit.

I can’t comment on longevity. I’ve used the saw two days in total. Amazon has them for $200 with free shipping. That’s a little more expensive than renting a saw for two days but probably less than renting a saw for a week. The blade is not included. You’ll have to buy that separately, which is how I got into this mess in the first place.


You’ll find more Product Reviews here, and if you like Gresh’s writing (and who doesn’t?), here’s a link to more Joe!

Squeeze Me: KLR250 Refresh, Reflash and Rehash Part 3

The KLR250 refurbishment has been going slowly but in addition to that I’m not getting much done otherwise. It’s the heat. Temperatures at Tinfiny Ranch have been hovering around 100 degrees or more and under these conditions it’s all I can do to press paper firebricks.

I did manage to order a brake caliper kit from England. The Widow Maker’s front brake gave me lots of problems at Daytona this year. The caliper was mightily stuck and the master cylinder was odd feeling. I managed to get the brake working well enough for Bike Week and replaced the master cylinder in a previous R, R & R episode but I didn’t trust my half-assed Florida Man repairs on the caliper.

The Brakemasters rebuild kit was very complete and was inexpensive to boot. The Widowmaker’s original rubber parts lasted through 20 years of neglect so the new stuff has a steep hill to climb. The only part I didn’t care for was the new bleeder nipple. The replacement nipple did not want to thread in easily. I could have forced it and remolded the aluminum caliper threads but instead used the old nipple, which threaded in by hand.

As expected, the caliper job went well. Old motorcycles with single-piston calipers are a breeze to repair. The hardest part was fitting the dust seal into the caliper body and then fitting the piston. I didn’t remember how I did the trick last March and was getting frustrated. Thank goodness for YouTube; I pulled up a quick search on caliper dust boot installation and there was a guy showing me how to do the deal.

I think in March I used a beer can to make an expander sleeve for the piston and then slid the piston into the (already installed in the caliper) boot. It just wasn’t working this time. Maybe fresh rubber is stronger than 20-year-old rubber. YouTube man fitted the boot to the piston first (the opposite of what I was doing) and let a short length of rubber hang off the back. That hanging bit was then pushed and prodded into its groove on the caliper. Once the dust boot is in the groove the piston can be slid into the caliper all the way until the piston groove catches the other end of the boot. With all the talk of grooves this sounds confusing but that’s why YouTube videos are so nice. YouTube Man’s method worked great and the caliper is now ready for reinstallation.

If it cools off a little I’ll tackle the fork seals and re-grease the steering head bearings next. And keep making firebricks, of course.


More on the KLR250 and other moto-resurrection stuff is on the ExNotes Resurrections page!

The Not-So-Free Press

Long time readers know that we try to avoid political topics here at ExhaustNotes.us. There’s no percentage in it as the best you can hope for is losing half your audience. Oh sure, we could tear off the bandages and let fly with the anti-pros and pro-cons as good as the next guys. But with Berk leaning right and me not-leaning-right the result would be a complete loss of all of our readers. No, the free press I’m referring to in this click-bait title is my four-brick, paper brick maker that I got for Christmas last year.

This brick thing happened because I’m a subscriber to the Sunday edition of The New York Times. The Sunday Times is a left-biased but mostly true news source that is so big you can read the thing all week long. The NYT puzzle page is legendary and it takes me forever to do the crossword…in ink. And what happens after you read the huge quantity of great writing contained within? Boom! Into the trash goes all that fine newsprint. I felt guilty throwing those efforts into the landfill. It doesn’t have to be this way. I’ve started recycling The New York Times into home heating blocks for the coming winter. If this works out well I may start a commune. We’ll wear flowers in our hair and stink. I’ll call it The Gresh Utopian Society, or Gus, for short.

After shredding all that mostly true but left-biased information I toss the confetti into an empty cat litter bucket. Any bucket will work but the cat litter bucket seems appropriate for America’s political mood. Next I pour water over the top of the paper and add a bit of bleach to keep the odor and mold to a tolerable level. You’ll need to let the paper soak for a week or more for it to break it down into an oatmeal-consistency mush. I give the mush a stir every few days just to let it know I’m thinking of it.

The paper brick mold is a simple machine with four perforated compartments for mush and a close-fitting plunger to squeeze the water from the mush and compress the block. My example was a little too close fitting as it was nearly impossible to get the plunger into the mold. A quick session with a grinder and pliers made the plunger more plungerable, if I can use that word.

Once you’ve filled the mold with your paper mush a heavy weight on the plunger will supply steady pressure and solidify your firebricks. Drying time is about a week out here in arid New Mexico. If you tried this in Florida or the Pacific Northwest the bricks may never dry. Yes, this is a time-consuming process but look on the bright side. If you find one let me know.

The finished paper brick is surprisingly lightweight. It takes two NYT Sunday editions to make about six bricks (depending on what President Trump has said or done the week the paper came out). I have just started building my winter stockpile so I can’t really say if this is a good idea or a total waste of time. As they say, the truth is in the burning and if the bricks ever dry out completely I’ll write a follow up report on how long the paper bricks stay aflame on the next slow news day.

Skip Duke

Skip Duke lived in New Mexico and died before I got the chance to meet him. I don’t know the exact date he shuffled off. Judging from the condition of Tinfiny Ranch when we first bought it from his daughter I’m guessing five or more years had elapsed between our purchase of Skip’s run-down mountain property and his death.

I never met Skip Duke but I get a strong sense of the man from the junk he left behind. I found boxes of mixed fasteners and some really nice ¼-inch by 8-inch screws with flat-topped heads. The heads are 5/8-inch wide and made so that the fastener countersinks itself like a giant deck screw. These screws are so nice I want to build something just to use them. Skip left behind two really nice red-painted, bottle jacks; one of them must be a 50-ton model. It’s a bruiser, like a foot tall and weighs 40 pounds. Skip was into radios: he was a Ham operator I’m guessing. Tinfiny had several antenna wires strung over the trees and arroyos. In his broken down shop I found a signal generator, watt meter and some other radio test gear that I couldn’t identify. That’s some old school radio stuff, man.

I never met Skip Duke but I think I would have liked him. Skip Duke had multiple uncompleted projects running in parallel when he died and that’s the same way I work. I get bored with one project and switch over to another, never finishing any of them. The 1975 Kawasaki 900 I call Zed was one of Skip’s unfinished projects. In the scattered debris of Skip’s life I found motorcycle magazines from the 1970’s featuring the new Z1900. The bike got universally rave reviews in the magazines, and rightfully so: the 900cc Z1 Kawasaki was a landmark motorcycle.

From reading old correspondence I found that Skip was having trouble with a Dyna III electronic ignition system he bought for the old Kawasaki. A melted wiring harness on Zed and no sign of the electronic ignition leads me to believe Skip sent the rotor and pick up coils back for a refund or tossed them in the bushes. One day I’m going to look for it with a metal detector. I found the original points plate in a box of MG car parts and after I cleaned them up the bike ran fine. I remember when electronic ignitions were novel, high tech stuff. I didn’t like them back then either.

Abandoned for years, Skip Duke’s house was overrun by rats when we looked at it with Ronnie, our real estate agent. A converted garage, the house had one bedroom, a living room, a kitchen and a bathroom. Maybe 500 square feet under roof. On the right side of the house was a small garage where Skip kept his tools and his motorcycles. I found a working 4-inch Makita belt sander in there. The bottom garage door panel was broken and the door hung off its track. You could walk inside. Ronnie looked around and said, “There used to be more motorcycles in here.” Next to the garage Zed was sitting outside in the weather, leading me to believe thieves had made off with Skip’s better motorcycles. As if there ever was a motorcycle better than a Z1.

We gutted Skip’s house. Every night after work I would put down 5 of those green rat poison blocks. Every morning they would be gone. Eventually the pace slowed until one day I found the poison untouched. The rats ate a total of 3 gallon-size buckets of poison but I won the war. I spent a pleasant two weeks hauling out dead rats and disinfecting the entire place with a solution of 50/50 bleach and water. My lungs burned and my vision blurred but at last the place was clean and rodent free inside.

We replaced the siding, drywall and insulation, and rewired most of the the electrical system. Skip’s little garage area is now my wife CT’s walk in closet. The concrete ramp leading to the garage has been leveled off and is a 5’ X 14’ office and storage room. We re-plumbed the bathroom and redid the kitchen eliminating any appliance that hinted at being a stove. We named the little house in the arroyo “The Carriage House” hoping to boost the little shack’s confidence. New paint and tile made The Carriage House look fresh inside. Skip’s old fiberglass shower stall was hard to remove and we were running out of time so it still serves, the last remnant of a bygone owner.

Skip Duke was not satisfied with the little Carriage House and had bigger plans in the works. Further up the property there was a graded area where Skip was going to build a structure. Two large, wooden sawhorses held 8-foot x 20-foot sheets of a composite material consisting of 6” white Styrofoam sandwiched between two layers of glued-on, exterior grade, 1/2’’ oriented strand board. There was enough paneling to build a 20 X 40 insulated building. Unfortunately, death has a way of messing up the best of plans. The 20’ X 40’ structure never got built. White plastic sheeting covered the composite panels but the relentless New Mexico sun crystallized the plastic. The sheet lay in tatters and it would crumble when you tried to pick it up. Without protection the panels fell victim to the elements.

Oriented strand board is fairly weather resistant but you can’t let it remain wet for long. Stacked horizontally on the sawhorses, the panels couldn’t shed water and the pooled moisture between the panels rotted the OSB. I’m sure if Skip Duke knew he was going to die he would have stacked them vertically allowing water to run out from between the panels. I managed to salvage enough panel material to build the walls for another of Skip’s unfinished projects: the pump house.

The original pump house was a 55-gallon metal drum over the wellhead. Inside the living room was a 40-gallon pressure tank to smooth out the cycling of the well pump. I can’t figure why anyone would want a gigantic pressure tank in their living room but Skip was not a man who trifled with cosmetics. The amount of paneling I could salvage determined the size of the well house so I poured a 6’ X 10” slab with a central drain and built a small shed over the well. I moved the 40-gallon pressure tank to the new well house and installed a water softener next to the pressure tank. With 6” thick Styrofoam walls the pump house is so well insulated a 150-watt chicken coop heater keeps the pipes nice and toasty in winter. Too bad so much composite paneling was ruined; it would have made for a super energy efficient house.

When Skip Duke died he left behind a 24-foot motorhome without an engine, an 18-foot Hobie Cat sailboat on a trailer, a 1974 MGB-GT hardtop 4-seater, a 4-person Jacuzzi with seized air and water pump motors, two large dog houses and a backyard chicken coop with camouflage netting over the top. Skip was a man who was into everything cool. I got rid of the junk except for the MG. Those hardtops with their Italian, Pininfarina-designed hatchbacks are rare. I might get it running one day.

Life is funny. I have an Internet buddy also named Skip Duke. He is very much alive and a Kawasaki Z1 guru. The living Skip Duke’s Kawasaki advice has saved me untold woe in the long restoration process of dead Skip Duke’s motorcycle. I bet the two Skips would get along famously (either that or they’d kill each other).

I never knew Skip Duke. We’ve remodeled and reused his vast pile of junk in ways he could not have foreseen. I wish he had left details of his future plans, like notes stuck to each project describing what he saw as success. I hope he’s looking down (or up as the case may be; Skip might have been a real jerk) and smiling as he sees his old Kawasaki motorcycle (now my old Kawasaki motorcycle) roaring down the highway full of life and power. I hope whatever becomes of that soulful part of a man after death is aware of the happy life CT and I have built atop the 5-acre spread he must have loved dearly. And I hope he finds joy in all that we have done.


Follow the complete Z1 resurrection here!

For more on Tinfiny Ranch and the Tinfiny Summit, check out the YouTube videos here!

4 Things You Need To Survive Motorcycle Touring With Covid-19

With the advent of a killer virus sweeping the nation, traveling long distance by motorcycle has become more complicated. We used to hop on our motorcycles, ride all day and then in the evening get a room at the cheapest motel we could find. Those days are over. Don’t get me wrong; motels are still an option, much like Russian roulette is a fun parlor game. Go ahead, pull back those sheets and crawl inside. Did the maid really disinfect the room? Was the last traveler teeming with the virus, coughing and spitting his way to sleep? What can you touch and what can’t you touch?

Nowadays to go anywhere far on a motorcycle you’ll need to be able to camp, and not at commercial campgrounds either. Campground bathhouses were never a sterile environment in the first place, now they seem like a damp Club Med for viruses. I’ll take my chances with the bears, you know? I’m talking rough camping: riding into a National Forest, finding an out of the way spot with nice soft grass and bedding down for the night.

The first thing you’ll need is a tent. In my younger days I spent many uncomfortable nights sleeping out in the open. I’d pull over, toss a plastic tarp on the ground and just lay down. That was the full extent of my camping preparation. I’ve since learned that biting bugs, rain and animals make having a tent the way to go. I bought this small, old school style pup tent because I’m done setting up the flex-pole igloo type tents. Small pup tents are smaller and lighter than igloos and there are too many stressed elements in an igloo. Every Igloo tent I’ve owned ended up tearing.

I’m going to assume you already own a sleeping bag (everyone should). In addition to the sleeping bag an air mattress will drastically improve your chances of falling asleep inside that claustrophobic pup tent. If you’re 20 years old you could probably forgo the air mattress. I’m using one with a built in pump instead of the self-inflating type for two reasons. Number one is an inflatable packs down much smaller than a self-inflating type. Number two is the self-inflating pads compress and after a few minutes you’re on the ground anyway. The need to keep the size and weight of your camping gear to a minimum will become apparent when you start loading your motorcycle.

Hard-core riders can get away without a camp stove but I’m not a hard-core rider. I need my coffee in the morning or a can of warm soup in the evening. Unfortunately, while the burner itself is tiny, carrying one of these small, gas-powered stoves requires a bunch of other gear. I have one pot to boil water or soup, extra water to clean up the mess and then there’s the gas bottle, which is like three times the size of the camp stove. Not to mention the stuff you are going to cook. It’s a space and weight commitment you may not want to make. Plain old water and candy bars will work fine if it’s only a one-night road trip.

Now we are getting into purely luxury items. When you rough camp in the forest there are never picnic tables, benches, fire rings or screaming children. This type of folding camp chair can really make a campsite feel like home. There are two basic styles of small camp chairs, the tripod type and the X type. I prefer the X-type because they are less prone to sink into soft ground…like the ground you find in a forest. The tripod type is much easier to fold up so you’ll have to make your choice based on terrain and patience level.

All the gear in this story can be purchased for less than one night’s stay at a motel so there’s the cost savings to be considered. I can pack everything in one medium-sized stuff bag and bungee the mess to my motorcycle. It’s not an easy way to travel for sure but with many national and state parks closed now it’s about the only way to travel. I’ve recently purchased all the camping gear you see above attempting to make my pack smaller and lighter. And I’ve succeeded: It’s easily half the size and weight of my old camping gear. I’ve yet to use it in anger but that will change soon. My riding buddy Mike and I are going on a several day ride and since we are old, lung impaired and clinging to life by a thread we both feel like rough camping is the safest option Covid-wise.


Catch up on our most recent blogs here!

Hasty Conclusions:  First Look at Viking Cycle’s Warlock Jacket

 Viking Cycle sent Joe Berk a new jacket to test and since I’m the loyal, half-witted sidekick, Berk made sure I got one, too. Viking Cycle was just in time with their products because the heat in New Mexico was getting a bit much for me. I was tempted to go bare on my motorcycle. The folks at Viking Cycle let me pick whichever jacket I wanted and I chose the Warlock, a mesh jacket that should flow plenty of air. I went with the high viz color because car drivers, along with Americans in general, are getting more careless in their comportment. And I look cool besides.

Viking Cycle’s prices are incredibly low. The Warlock mesh in several colors retails for just $54.99 and if you give Viking your email (or invent a new one) they will knock 15% off the already ridiculously low price. All the Viking gear is very economical (check out their website). If you’ve been paying attention to ExhaustNotes you know I’m a cheap bastard. The Warlock appeals to me in that place where my miser instinct festers.

The Warlock comes with a zip-in, vest-style liner, which I promptly removed and tossed into the growing pile of other inner liners. I don’t use them and on a mesh jacket it would defeat the purpose of the mesh. Instead I’ll toss a rain jacket over the Warlock if it gets too cool. Colder still and I’ll put a shirt on underneath the mesh. It’s all about the layers, man.

Kind of a neat feature that I’ve never seen before is the front-pocket lanyard. I guess you can clip your house keys or 9mm semi-automatic pistol to the lanyard and it will prevent them from falling onto the ground when you’re retrieving other items from the pocket. There are four front pockets and one inner pocket. The pockets are plastic so they should delay rainwater from getting inside but if it’s raining you will probably have the whole jacket covered anyway. The Warlock has back armor, elbow armor, and chest armor. The elbow armor slips into a hook-and-loop pouch and sometimes when I slide my arm into the sleeves my finger will catch on the pouch. Not a big deal but since I have not tested the jacket yet I have to come up with something.

The Warlock is made in Pakistan which should appeal to my anti-China friends (I’m talking to you, Keith). To tell you the truth I’m not sure if we are at war with Pakistan or not but it can’t hurt to outsource some of our manufacturing to a wide variety of countries just to keep the world’s economy humming.

I like the fit of my XL Warlock. The arms are slim so they shouldn’t flap around yet the middle is suitably sized for a well-fed Westerner like me. As far as quality goes, the Warlock looks like any other mesh motorcycle jacket. I mean, I’m not a seamstress, I don’t see any glaring problems. I will need to put a few thousand miles on the Warlock mesh jacket to see if anything goes pear-shaped. Unfortunately it’s been raining like mad here in New Mexico and I don’t want to get my motorcycle dirty. Keep watching this space for a full road test of the Warlock.


See more ExhaustNotes product reviews here!

South By South Bend: Part 2

 The South Bend lathe project has been waylaid by several factors, none of them your fault. I did manage to wire the 4-pole, two-position, center-off toggle switch into the Harbor Freight ½ horsepower motor. So now I have forward and reverse. I’ll probably never use reverse but it’s good to have it in case you want to cut from the backside.

I could have made the motor reverse with a three-pole switch but since the motor is wired high voltage (240vac) you want all hot legs disconnected when the switch is in the off position. And I had the switch. The switch connections started out simple enough but soon I had wire coming out my ears. I ended up having to double up the metal junction box to allow enough space for the spaghetti.

I normally don’t like complicated things but I couldn’t come up with a better way and it was like 115 degrees in the shed. Not a good temperature for thinking. I’ve included a shot of the Harbor Freight motor’s faceplate in case anyone can come up with a simpler way of reversing the motor.

After the motor was running I had to file the 3/4-inch to 5/8-inch shaft-sleeve as it was too tight from the factory. I also cut down the tall key that was included in the sleeve package. The new belt is narrower than the original, or maybe not. The old one was pretty rotten. As it is situated, the inner face of the belt contacts the center of the motor pulley. The V-sides are supposed to do the contacting around here. I forget if A is wider than B in belt-speak but I’ll have to do a little work on the belt and pulleys. The thing works like it is so that’s good enough for now.

I’ve been relearning the various levers and knobs on the South Bend, levers and knobs that I knew blindfolded 40 years ago. My first cuts were ragged, a combination of no end support on the work piece and a cutting tool that has been in the lathe for eternity. I’ve since quelled the shaking by using a live center. That one change improved the appearance of the machined surface by 42%. The tool is still not what I want as it is tearing material more than cutting. I might try some of these newfangled carbide tools, the ones with a three-sided cutting edge that you can swap as it gets dull.

I’ve machined my test piece to roughly 5/8” so my next trick will be to dig around the junk box and see if I can find a thread cutting tool. You need a V with the correct angle. Watch this space for the threaded rod or mangled mess. I’ll also go over the remaining tooling I have for the South Bend. I’ve lost a lot of stuff over the years but there are still toys like steady rests, faceplates, and lathe dogs to clean up and experiment with.


You can read the first part of South Bend story here.