ExNotes Review: Viking Momentum Tail Bag

Two or three years ago Joe Gresh and I provided product reviews on our Viking motorcycle jackets.   We like them a lot and you may have noticed that Viking advertises on our website.  Both jackets have given us good service and I’ll provide links to those reviews at the end of this blog.

The topic today is the Viking Momentum small street and sportbike tail bag.  I’ve found bags like this to be ideal for my travels through Baja and elsewhere.  I used similar equipment on my KLR 650 and I found that I could carry more than I needed in Baja and elsewhere.  Gresh suggested the Viking bag and I ordered one.  It arrived quickly and it was well packaged.

The Viking Momentum bag arrived in a robust cardboard box.

After taking the Viking bag out of the box, I put it on my Royal Enfield.  The size was about perfect.  What I especially like is that I can swing my left over it when getting on and off the motorcycle.  With larger tail bags, getting on and off the motorcycle becomes a problem, but not with the Viking bag.

The Viking Momentum tail bag.

The Viking bag has a hinged lid and lots of mounting points.  I’ve not used the slotted deal on top of the lid yet.  It looks cool.  The bag also has a carrying handle.   It’s a well-designed and well-built motorcycle accessory.  I examined the bag closely and I am impressed with the build quality.  I could not find any defects and no indications of sloppy workmanship.

The Momentum has a carrying handle and two zipper handles for opening an expanding the bag.

Before I installed the bag on my Royal Enfield, I opened it to see the interior.  The Momentum comes with a rain liner, a set of straps, and spare nylon web bungee cord attach points.  You can rivet these to the bag (in addition to the four already present) or you can use them as replacements if the ones on the bag detach.

Inside the Momentum I found a rain liner and extra straps. You can use the extra straps for additional tie down points. I think I could use the straps to turn the Momentum bag into a backpack.
Extra straps and spare D-ring attachments.

The Viking Momentum bag has four Velcro straps on the bottom.  These pass under the seat, stick to each other, and secure the bag to the seat.

The Momentum upside down. The Velcro straps pass under the motorcycle seat and attach to each other.

To mount the bag, I took the seat off the Enfield.  The Enfield and Viking designs makes this easy.  On the Enfield, the ignition key unlocks the right side panel, it comes off, and that reveals a cable pull button that unlocks the seat.  Easy peasy.

Unlocking the Enfield side panel to gain access to the seat release.
The Enfield’s seat release.
The Enfield seat removed from the motorcycle.

Once the seat was off the bike, it was a simple matter to mate the Viking Momentum’s mounting straps underneath.

The Momentum tail bag strapped to the Enfield seat.

I first mounted the seat so its carrying handle faced forward, as shown below.  Then I reversed it.  I’ll say more about that in a bit.

The Momentum installed on the Enfield.

The Viking bag has two zippers around the exterior.  The upper one is for the lid; it provides access to the bag’s interior.  There’s another zipper around the bag’s base; unzipping it allows the bag to expand and approximately doubles its volume.

With the bottom seat unzipped, allowing the Momentum to expand.

I thought it would be cool if the expanded bag would hold a full-face helmet, but it did not.  That’s okay.  If I put my helmet inside, there wouldn’t be room for anything else.

There are a couple of zippers inside the Viking bag.  One is on the bag’s inner walls.  The other is on the underside of the lid.  You can store things in the lid compartment like your phone, a map, a Baja tourist visa, your BajaBound insurance paperwork, and other stuff.

The Momentum interior.
The underside of the Momentum lid. You can unzip the zipper and store small items inside the lid’s pocket.
Like most motorcycle apparel and many luggage items, the Momentum is manufactured in Pakistan.

The Viking Momentum includes a rain liner.  It packs up compactly.  You can keep your stuff dry in the rain liner inside the Momentum bag.  It’s a nice touch.

The Momentum rain liner.

With the Momentum bag’s handle facing forward, I didn’t like how the bag was positioned on the seat.  It provided adequate room, but no extra room.  The Enfield has a hard seat.  I’m getting older and my butt is aging along with the rest of me.  I need extra room to move around on a motorcycle seat, and with the bag mounted with the carrying handle forward I didn’t have any extra room.  I also noticed that the base zipper (the one you unzip to expand the bag) pull was digging into the Enfield’s Naugahyde surface.  I didn’t want to disrespect the Nauga that gave up its hyde for my seat, so I turned the bag around and moved it more toward the rear.

With the Momentum mounted with the handle facing forward, the expansion zipper toggle is against the seat surface. I turned the bag around to eliminate this issue.

When I did that, the Velcro straps are still captured by the seat’s base mounting points (the bag won’t slide off), and I eliminated the zipper-to-Naugahyde interference.

The Velcro straps secured on the motorcycle seat after reversing the bag.

Cosmetically, the seat looks great in either orientation.

The Momentum mounted in the reverse position.  The expansion zipper handle is off the seat.

I once led a bunch of guys on a short Baja weekend ride about 15 years ago.  One had a Harley, he was new to motorcycling, and he had never done an overnight ride.  We met at a Denny’s before heading for Mexico, and when he rolled up on his Electra-Fried, he and that Harley looked like they escaped from the opening scene on the old Beverly Hillbillies show.  The only thing missing was Granny in her rocking chair.  He told me his saddlebags and his Tour Pak were stuffed, and he also had two or three gym bags bungied to the bike.   This was a weekend trip to San Felipe, about 130 south of the border, and we were only staying two nights.  My KLR had a medium tank bag and nothing else (and that tank bag also held a camera).  “I’m ready for a week down there,” my friend announced from his adventure Glide.

“Well,” I said, “I’ve got my Nikon and a spare set of underwear, so I guess I’m good for a week, too.”

My boat anchor Nikon D810 and a Nikkor 24-120 lens in the Momentum. I really like this.  The camera and the lens cost almost as much as the Enfield.

I guess I shouldn’t make fun of that guy.  I get it; he was at the front end of the learning curve, and we’ve all been there. I once took an overpacked Harley into Baja, too.  We were going to Cabo, taking the ferry to mainland Mexico, heading down to Guadalajara, and coming back through Sinaloa cartel country (you can read about that trip here).  I did not yet know about the virtues of traveling light and good ballistic nylon gear like the Viking Momentum bag.

How not to pack a motorcycle. The Momentum tail bag is a much better approach.

The point is this:  You don’t need to carry a lot on a motorcycle trip (even if you write a blog), and you can get a lot of stuff in the Viking Momentum.  I like it.  The Momentum tail bag is a good deal; on the Viking website it retails for $99.99.

So there you go:  My take on the Viking Momentum tail bag.  It’s a good thing to have for your motorcycle but don’t take my word for it.  Listen to what Bernadette has to say.

I mentioned above I would provide links to the Viking motorcycle jacket reviews.  Here’s mine, and here’s Joe Gresh’s.


More ExNotes product reviews are here.


Never miss an ExNotes blog:


Have you clicked on the popup ads today?

Fallingwater, Pennsylvania

By Joe Berk

Fallingwater, a famous Frank Lloyd Wright structure in southwestern Pennsylvania, is a place we have long wanted to visit.   We finally checked that box late last year and it was well worth the trip.  It’s one of Frank Lloyd Wright’s most famous architectural accomplishments, designed in 1935 and completed in 1939 for the wealthy Kaufman family.   The Kaufmans owned a large department store empire in nearby Pittsburgh, and Fallingwater was their vacation home.   The Kaufman family turned the estate over to the Western Pennsylvania Conservancy and it now operates as an area open to the public.

A Commonwealth Treasure indeed!

The Kaufman family’s request to Wright was straightforward:  They wanted something unique, something that merged the mountains’ natural beauty with the architecture, and they wanted the local stream to run through the home.  The resulting home became one of Wright’s best known accomplishments.    Frank Lloyd Wright had a distinguished career and he is arguably one of the most famous architects who ever lived.  Fallingwater is the only Wright home open to the public.

A river runs through it…the view from one of the balconies at Fallingwater.  Check out the leaves turning color.
Note the layered sandstone construction.

The Kaufmans asked Wright to use natural materials from the area and he did.  Much of the home is constructed of local sandstone.  They also asked Wright to design the interior furnishings and decor.  It all works well together.

A local artist taking it all in.
Wright also designed the interior and its furnishings.
The family room.
Wright chotchkas.
Furniture crafted from local trees.
More interior pieces.
This looks southwestern, but it works with the sandstone walls.

In 2019, Fallingwater was added to the UNESCO World Heritage List.  It is also a National Historic Landmark, it is a Commonwealth of Pennsylvania Treasure, the American Institute of Architects named it the best all time work of American Architecture.  All that’s great, but take it from us, the ride and the place are awesome.  As a destination, Fallingwater is tough to beat.

A photo from the exterior, showing the balconies and the surrounding woodlands.

Fallingwater is in the Laurel Highlands area about 70 miles outside of Pittsburgh.  It’s a mountainous area, and because of that, the roads are perfect for great riding.  The scenery, the roads, and the riding in this area are pretty much what good motorcycle riding is all about in all but the winter months.  Fall is one of the best times to take it in as the leave turning colors add a further visual treat to what is already a delight to the senses.  The trick is to do it late enough in the year that the leaves are turning, but not so late that the temps are too low or the roads are too icy.  We were lucky; our timing was perfect.

You can’t just show up at Fallingwater.  You have to make a reservation and pay for your tickets online.  Trust me on this:  The tour is money well spent.


Never miss an ExNotes blog:

If You’re Gonna Be Stupid You’ve Got To Be Tough

By Joe Gresh

I recently hurt my back feeding a 5-pound log into our wood stove. It’s been cold here in New Mexico, like in the 20’s at night. In the morning CT likes to get a roaring fire going to take the chill off the Carriage House’s unheated living room. The place is only 600 square feet so burning two or three logs makes it nice and toasty for her as she gets ready to go to work. When I finally roll out of bed I enjoy the heat also.

It’s strange to me that I can lift thousands of pounds of concrete without any pain to speak of yet the slightest movement can cause such a heavy thud to my lower back. I was just doing my part to make CT’s life even more comfortable when I opened the stove door, reached in with the log and cried out with pain. It was pretty bad. I couldn’t walk or stand up. I doped myself up on Wal-Mart’s finest stomach-bleeding, generic painkillers and settled in for a day of agony.

One thing I’ve learned about my back in the 65 years I’ve owned it is that rest is no way to improve a sore back. To sit down or lie in bed may feel better at the moment but in the end it just makes it worse. You have to keep moving. Obviously concrete work was out of the question so after the pain killers kicked in I walked (slowly) up to the shed to tinker around with the Husqvarna.

The Carrizozo Mudchuckers, who I ride with on occasion, are transitioning to harder core off road motorcycles. One guy has a Honda XR350. Mudchucker Mike bought a Husaberg 400, which is basically a dirt bike with the bare minimum of lighting necessary to be street-legal. I figured if I was going to keep up with these full-on offroad bikes I needed to make the Husqvarna 510 less of a Supermotard and more like Husqvarna’s TE-type dirt bikes.

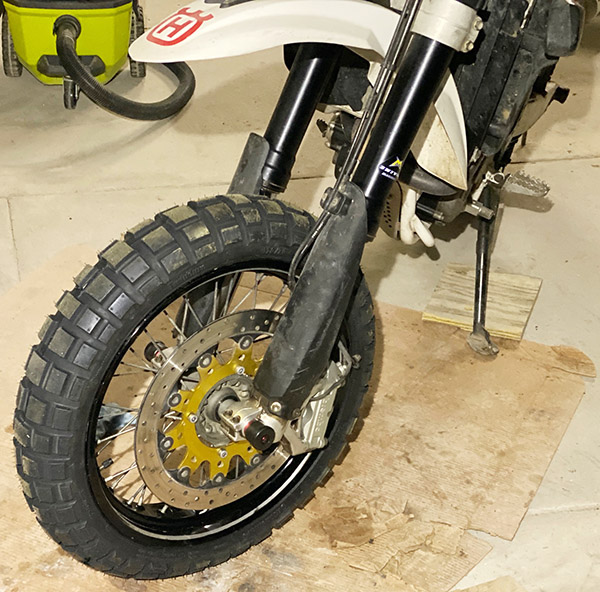
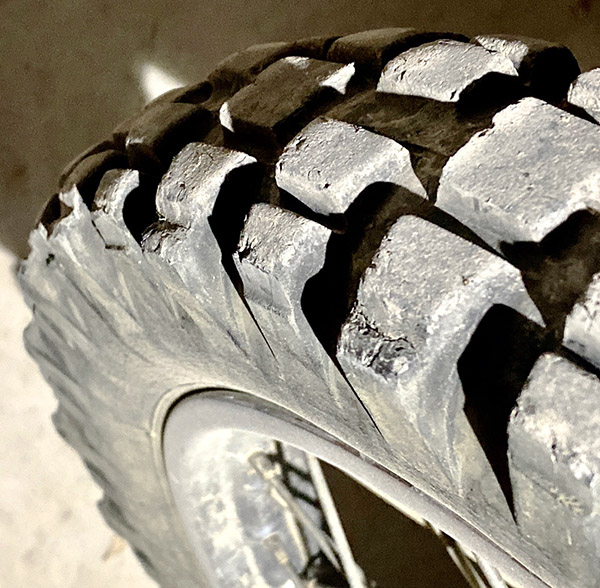
Even though it looks like a dirt bike the 510 Husky is rigged to be a street bike. It has slightly shorter suspension, wide, 17’ radial tires with a giant front disc brake that I am madly in love with. The bike can stop on a dime and return a dollar three eighty-five. You actually earn money every time you squeeze the front brake lever. Unfortunately that tiny doughnut front wheel is not so good in the dirt. Tire choices for serious off work are limited and I’ve found nothing that works even ok off road. In mud the tire loads up after just a few revolutions turning into a greasy slick. In sand it steers poorly and doesn’t dig in around corners well. About the only place it’s good is on ½ mile flat tracks.

I was pretty sure a 21-inch front wheel would work much better. There’s a reason almost every dirt bike comes with a 21-inch front wheel. First, you’ve got hundreds of tire choices. Every conceivable condition has a tire specifically designed for it. To me, a skinny 21-inch cuts through mud better and loads up less allowing more steering control. The same can be said for sandy conditions. The larger diameter wheel rolls over obstacles easier due to the less abrupt approach angle. Plus, a 21-inch front wheel just looks better on a dirt bike.

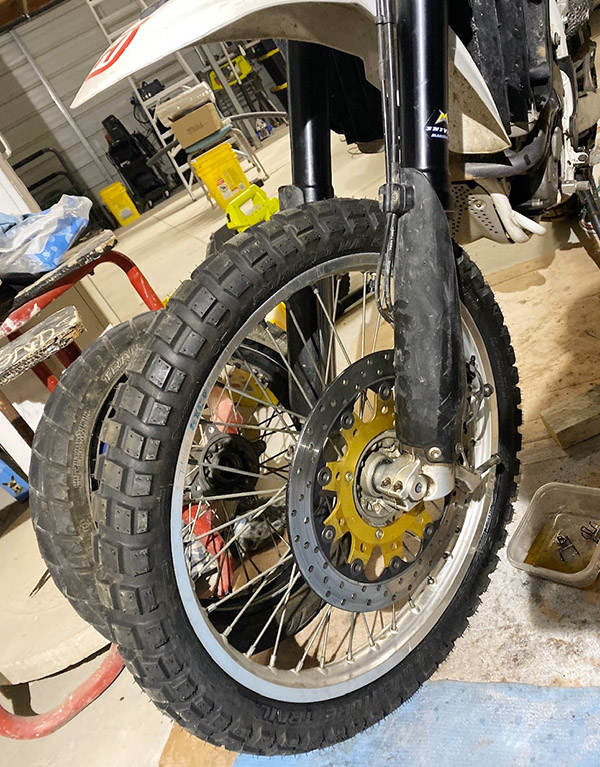
I bought a slightly bent, $100 21-inch TE Husqvarna front wheel complete from eBay a few years ago. It was one of those modifications I planned on doing and since my back was shot I figured, what better time? It’s good light duty work. The rim was pretty wobbly so I removed a bunch of spoke nipples and pounded on the thing with a sledgehammer. Those aluminum rims are stronger that you think. I managed to get the wheel a little straighter but it really needs a new rim.

The eBay TE hub looked exactly like the original hub on the 510 except the SMR axle was larger than the TE axle, probably due to the higher stresses asphalt puts on the long forks. The larger axle meant I had to swap the 17-inch wheel bearings into the 21-inch wheel hub. Along with the larger axle the SMR has a larger disc rotor so that part had to be swapped over to the 21-inch wheel also.

The disc rotor is secured to the hub by allen-head bolts and they were tight. I tried heat, I tried penetrating oil, and I tried an impact tool. Through all this monkey motion I managed to round out the hex in the rotor bolts and several allen sockets. Too easily, I fell back on my old reliable cold chisel to remove the rotor bolts. Needless to say the bolt are now unusable.

The old (smaller) rotor came off easily on the 21-inch wheel and it was then that I realized the TE rotor bolts were smaller. In fact, the TE rotor mounting-bosses were smaller than the SMR mounting bosses. The rotor bolt-hole centers were the same and the SMR rotor mated up to the TE hub. I used the smaller TE bolts as they were a countersunk type and self centered in the larger SMR rotor holes. I made a mental note to add spacers or drill and tap the TE hub for the larger SMR bolts at some undefined later date. Shoddy as it was, the 21-inch front wheel bolted into the SMR forks and seemed to fit perfectly. I spun the wheel: it was bent but not that bent.

The original 17-inch rim is so small and the disc rotor is so large that you have to remove the caliper to remove the wheel from the forks. And this is when things started to go pear-shaped. I bolted the caliper on and gave the 21-incher a spin. It didn’t spin well at all.

The spokes on the Husky SMR510 were always close to the caliper even with the stock setup. What I didn’t foresee was that the smaller wheel located the caliper very near the rim where the spokes were centered and farthest away from the spokes. With the 21-incher’s less-steep spoke angle and the caliper having moved closer to the hub in relation to the rim edge the spokes hit the caliper. They weren’t hitting hard, mind you, the wheel still spun. But they were hitting.

Not one to take a hint that something was critically wrong with the idea, I used a 4-inch grinder with a 60-grit flap wheel to knock the backside of the caliper down a bit. It was working. The spokes hit the caliper less each time I sanded the Brembo caliper. I was almost there. The spokes were barely brushing against the caliper and the wheel was spinning nicely. It needed just a bit more grinding. And then the brake fluid started leaking. I had sanded completely through the caliper into the piston chamber.

At that very moment the entire situation became clear to me. To make the 21-incher work I would need to use the small rotor that came with the used wheel. To use the small rotor I would need the lower fork leg from a TE because the radial caliper mounting bolts would be too far from center and the brake pads would miss the rotor. To use the lower fork leg I would need both sides because the TE has longer travel suspension. Finally, I would need the TE type caliper to clear the spokes. In a matter of seconds I realized that everything was wrong and that I was well and truly screwed.

I found a new Brembo caliper on eBay for 200 dollars and I bought a new set of wheel bearings just because pounding on them to remove them is not good once much less twice. I guess the Husqvarna is going to stay a Supermotard. I’m about 400 dollars and a couple days labor into this daisy chain of stupid decisions and I just want to make it stop. When the parts show up I’ll be putting the 17-incher back on the Husky and try to find a more aggressive tire.

Unless I find a complete set of TE forks, brakes and wheel on eBay…


Never miss an ExNotes blog:


How many popup ads did you click on today?

The Casio Marlin

By Joe Berk

I’ve mentioned my Casio Marlin (also known as the Duro) a few times in previous blogs.  I love this watch for any number of reasons:  It’s accurate, it’s rugged, it’s waterproof, it’s comfortable, and it’s inexpensive.  It’s a diver’s watch, but I’m not a diver.  I just like the look of thing.  I’ve worn it on a few big moto trips including the ride around the Andes Mountains in Colombia.  It poured cats and dogs on that trip.  The Marlin was unfazed.

At about $50, this watch has to be the deal of the century.  Just for grins I grabbed a picture of the Rolex Sea Dweller and put it along side the Casio.  If you own a Rolex don’t get your shorts in a knot ((I own one, too).   But the comparison has to make you wonder:  Let’s see, $50 for the Casio and $16,500 (or whatever it is these days) for the Sea Dweller (if you can find one and in today’s market that’s not easy).  As Aristotle would say….hmmmmm.

Yeah, you can go a little deeper with the Rolex (they say down to 3,900 meters).  My Casio says it’s good for 200 meters.  That’s over 600 feet down.  It’s not likely I’ll ever visit those regions and if I ever do I can guarantee you the time of day is not what will be on my mind.

I’ve owned my Marlin for about 10 years now.  I think I’ve had to replace the battery twice.  My guy charges me $3.25 to install a new battery (parts and labor).  The strap got stiff and cracked, so I’ve replaced that once (I think it was $10).  I checked and the cost of a replacement resin Rolex band is close to $300.  On the other hand, the Rolex is self-winding, so it never needs a battery.   Again….hmmmm.


You know what to do…click on the popup ads!


On that comfort thing…the Casio Marlin is about the right size for a man’s watch and the resin band is very comfortable.  I always forget I have it on and on more than a few occasions I’ve gone into the water wearing it (swimming, showering, and most recently, almost being swept away in my Subaru going to the gun club).  It doesn’t matter to the Casio.  I’d say it’s indestructable, but some Internet weenie would want to get into a urinating contest about that.

Boarding the ferry in Magangué on the Magdelena River.  Even there, the Casio’s good looks and functionality appealed to an onlooker.

When I rode Colombia with Juan and Carlos, one time we had to wait a couple of hours on a hot and humid afternoon for the ferry to come in and carry us down the Magdalena River to Mompos.  While we were waiting in what little shade we could find in Magangué, a young Colombian boy came over and touched the Casio, nodding his approval.  If I had another watch with me I would have given it to him.  I still think about that on occasion and wish I had given it to that kid.  I think when I bought my Marlin, they were $39.  That young fellow most likely would have cherished the Casio the rest of his life (as I will).  Maybe I need another ride in Colombia.  If I go again I’ll throw an extra Marlin in one of the panniers.  You know, just to be prepared.


More watches and more product reviews?  You bet!


Never miss an ExNotes blog:

Dream Bikes: Honda Super Hawk

By Joe Berk

That’s me, age 15, in the photo above.  I’m on my Dad’s Honda Super Hawk, and no, I wasn’t getting ready to do my best impression of Rollie Free or Walt Fulton (even though I was apparently wearing the same swim trunks as ol’ Rollie).  I wasn’t getting ready for a high speed run at all…it was summer, and we spent a lot of time in the water in those days.  And when Dad said it was okay (and sometimes when he didn’t), I rode the Super Hawk in the fields behind our house.

We didn’t know as much about photography back in the mid-’60s. But you get the idea. That Super Hawk was a lot of fun.  That’s me in the summer of 1966.
Rollie Free at Bonneville in 1948, on his way to a romping 150.313 mph land speed record. Check out the swim trunks.
Walt Fulton breaking 100 mph in 1952 at El Mirage, California, on a Mustang motorcycle.

The Honda fascination started with me as a 13-year-old kid.  We weren’t motorcycle people.  Yet.  I was mesmerized by a ’64 Triumph 500cc Tiger a guy at school owned.  That started a slew of snail mail requests to the motorcycle companies (snail mail was all we had back then, but we never felt communications deprived), and pretty soon I had a collection of moto sales literature.  Dad started looking at it.  Then we saw a Honda Dream at a McDonald’s (I wrote about that a few blogs back).  A short while later, Dad’s trapshooting buddy Cliff Leutholt (one of those nicest people who rode a Honda) visited us on his Super Hawk.  Jet black, chrome, silver paint, twin carbs, electric start, it was stunning.  Cliff said it was good for 100 mph.  Dad rode it (a first for my father) and he was hooked.   The 1960s were good times.

Me, with Dad’s CB 160, in February 1966. No snow, but it was cold that time of year in New Jersey.

The bug bit hard.  Dad started looking at the classifieds (remember those?), and in 1965, he bought the Baby Super Hawk, a scaled down, 160cc version of the 305.  Dad owned that bike for only a few months, and then he traded it in on a Super Hawk.  Sherm Cooper (of Cooper’s Cycle Ranch) offered Dad $450 for the 160 against the Super Hawk’s $730 (it was $50 more than Dad had paid for the 160), and just like that, we had a Super Hawk.  Boy, that was a blast.


Hey, help us out…do a friend a favor…please click on the popup ads!


The Honda Super Hawk emerged from a vibrant and dazzlingly successful Honda Motor Company.  Honda first brought its motorcycles to the US in 1959, and, well, you know the rest.  1961 saw the creation of the 250cc Honda Hawk, which quickly evolved into the Super Hawk.  The Super Hawk bumped displacement to 305cc, and its 180-degree parallel twin was good for 28 horsepower at 9200 rpm (unheard of engine speeds back in the early 1960s).  The Hondas had 12-volt electrics, twin 26 mm Keihin carbs, a single overhead cam, a 4-speed transmission, and a wet sump lubrication system.

Like the Honda Dream in our recent blog, the Super Hawk had an electric starter, along with a kickstarter that oddly rotated forward (it was hard to look like Marlon Brando kick starting a Super Hawk, but I did my best).  The instrumentation was a cool touch.  Instead of the more conventional (i.e., British) separate cans for the tach and the speedo, both were contained in a single panel atop the headlight.  The Super Hawk had a tubular steel frame and front forks, but no front frame downtube (the engine was a stressed member).  The electric starter occupied the space where front downtube would be.  It was a clever engineering solution and that electric starter made life easier, but the Super Hawk didn’t look as cool as the 305cc CL 77 Scrambler (more on the Scrambler in a future blog).

The Super Hawk was a runner.  A road test in Cycle World magazine had the top speed at 104.6 mph and the bike ran a respectable 16.8-second quarter mile at 83 mph.  Super Hawks had twin leading shoe front brakes (something special in the pre-disk-brake era).  The motorcycle weighed 335 pounds.  The Super Hawk could be had in the same blue, black, white, or red color choices as the Honda Dreams, but unlike the Dream, all the Super Hawks had silver frames, side covers, and fenders.  I remember that nearly all Super Hawks were black; it was very unusual to see one in any other color unless you were an Elvis fan.

Click on the image to watch the video.

The Super Hawk had good starring roles, too, before product placement became the mega-industry it is today.  There were pop songs about Hondas.   Elvis Presley rode a red Honda Super Hawk in the 1964 movie Roustabout.  And a fellow named Robert Pirsig rode across the US on one with his son and wrote a book about it (Zen and the Art of Motorcycle Maintenance); that book has become something of a bible in the travelogue and motorcycle deep think genres.  Pirsig’s Super Hawk currently resides in the Smithsonian.

So, back to my early days and my turning Dad into a rider:  As awesome as the Super Hawk was, it didn’t last long.  The progression back in those days was a small Honda, a bigger Honda, and then (before the advent of the Honda CB 750 Four), a jump to a Triumph or BSA.  Dad had been bitten by the bug big time, and in 1966, he bought a new Triumph Bonneville.  But that’s a story for another blog.


Never miss an ExNotes blog:


More Dream Bikes!


Our previous blog on the Honda Dream is here.   And here’s our blog on riding a Honda Scrambler in New Jersey’s Pine Barrens:  Jerry and the Jersey Devil.

The Wayback Machine: Welcome to the Show

By Joe Gresh

I’ve been so busy with home-nesting projects my motorcycles have succumbed to time’s crumbling embrace. I parked the ZRX1100 Kawasaki after the carburetors clogged up and it began running on three cylinders. Since it has been sitting a few years naturally the brake pistons seized. Followed by fluid leaking out of the calipers. Followed by me robbing the battery to start the generator that powers the nest. In any event, it needed tires, a chain and sprockets and the throttle cable repaired. So the big green Eddie Lawson lookalike has suffered the indignity of being dragged across the countryside on a two-hundred-dollar Harbor Freight trailer.

Even worse, the mini bike my pops built for me when I was a wee lad is on the injured reserve list. Forty-eight years idle, Mini has untold issues although the Briggs and Stratton engine still turns over. I’ve lost a few critical, hand-made parts and since the Old Man has shuffled off I’ll have to re-make the stuff myself. It’s not easy handling such a precious thing. The mini is lousy with my father’s engineering and artistic skills. The welds and frame geometry are a direct, tangible link to happy times working together in the garage.

The 1965 Honda 50cc went under water in one of Florida’s many hurricanes so I took it apart and threw everything into boxes and plastic tubs. It’s been apart so long the tubs have crystalized into the finest, most fragile parts bins in existence. The slightest touch turns them to dust. Dry, chalky plastic oxide mingles with 4mm JIC screws and yellowed wings. The sheet-metal swing arm rusted completely in half so I’ll have to rig something in aluminum to secure the rear wheel to the frame and lower shock eyes. I do have a good engine for the Honda: a fire breathing 140cc Lifan clone that clears the front fender by a quarter-inch.

The newest dead-bike I own is a Husqvarna. On the last, long-ish motorcycle ride I took to Big Bend Park way down in south Texas the Husqvarna SMR510 lost its clutch release. Bit by bit, little by little the clutch action faded away until finally pulling the clutch lever had no effect on events. The headlight also broke off but on a dirt bike that’s hardly worth mentioning. We were doing some trail riding down there and the Husky did ok shifting motocross style. Starting out was the main problem as you had to push the thing, jump on, and pop it into first. The bike would either stall or roar off on a wheelie. On the ride home I would circle the backfield waiting for traffic lights to change. Sorry, everyone in El Paso.

At least the Z1 Kawasaki never ran for me. I bought it from the owner of the property we now live on. I had to get it out of there because things were disappearing and I felt someone was going to pilfer the Z before I could. The Z needs all sorts of stuff but I get the feeling this bike will be a keeper. The lines are so clean and simple compared to modern bikes. It sits damn near perfect, doesn’t feel heavy and I know from following David Howell through the Everglades, Z’s do well in the dirt.

Which leaves us with the only motorcycle I own that works: a 360cc, 1971 Yamaha RT1B. Fondly known as Godzilla to dirt riders far and wide, the old Yamaha just keeps popping along. Analog everything, smoky, noisy, sweating petroleum from every pore, this is the bike that will not die. Even with me maintaining it.

Everything around us is constantly falling apart. Even the Great Pyramid in Egypt will be a sand dune one day. I just hope that when it finally falls to the ground replacement parts will still be available on Ebay.


Help us keep the lights on…please click on the popup ads!

Never miss an ExNotes blog:

Bobbie’s Solo Baja Ride: Part 3

By Bobbie Surber

Do you ever have those moments when you wake up unsure of where you are? I awoke to the sound of birds, more specifically, parrots, and the smell of fresh tortillas and knew instantly that this was not home; I was in Baja in Mulege and wholly smitten with my room with her stone walls, comfy bed, and protective mosquito netting. I didn’t want to get out of bed until I remembered that I had made plans to go horseback riding to the bay.


Keep us going…please click on the popup ads!


Throwing on my clothes and double-timing it to the restaurant, I had just enough time for a cup of coffee and water before my guide arrived to take me to the ranch, which was less of a ranch and more of a lean-to along the highway with both our horses tied and already saddled. I met my girl for the day, Lupita. She had enough spunk to whinny at our arrival and appreciate the carrots I brought to help form this new friendship. Our saddlebag were loaded with swimwear and lunch, and we set off for a leisurely ride to the bay.

Horseback riding in the Sea of Cortez.

Muscle memory took over from riding horses in my youth, and I gave in to the morning’s joy and the view of Conception Bay. Riding down the beach at a slow gallop letting our horses have their lead and finding a bit of shade, we stopped for an early lunch of fresh fruit, good tequila, and some freshly made empanadas. After lunch, I asked if I could take off the saddle and ride bareback, something I had not done since childhood. It seemed a perfect idea for this glorious morning. Surprisingly my guide said yes and permitted me to ride Lupita bareback into the bay to enjoy a good swim. I had forgotten the thrill of entering a body of water on horseback; Lupita seemed to enjoy the experience as she left the security of the ocean bottom and took us further out into the bay. The morning flew by and soon it was time to return to the beach and make our way back to the corral.

Sunrise on the Rio Mulege.
A river runs through it…the Rio Mulege in Mulege.

Returning to Historica Casita in the heat of the early afternoon, I did what any sensible local would do. I retreated to the coolness of my room for a proper afternoon siesta. After a cold shower and fresh clothes, I headed out to explore. With the help of a newfound local friend and a Google search, I learned that the Mulege indigenous population has a long and rich history that dates back centuries. It is believed that the region’s first inhabitants were hunter-gatherers who lived in small bands, but the arrival of the Mission changed their lives forever. Spanish missionaries established the mission in 1730, teaching the local population how to farm and build adobe structures and simple homes. I was also happy to learn there has been an effort to preserve their history by preserving ancient artifacts and teaching younger generations about their heritage.

The Mission in Mulege.

While the Mission was closed, I could still walk the grounds and view the river from the vantage point of the Mission, as it is built on one of the highest points in Mulege. Wandering back down the hill, I walked the river’s edge, exploring the town and the small community of locals and ex-pats. As I made my way back to the hotel, I realized how hungry I was and looked forward to an evening in the hotel courtyard, a good dinner, and a freshly squeezed margarita. The evening did not disappoint as I sat visiting with locals and a young family visiting from the mainland. Soon I was off to bed with the promise of an early rise and the chance to explore the many beaches along Conception Bay.

Sunrise on the Sea of Cortez.
A fine Mulege breakfast.

The following day I was back on my bike and headed towards my next stop, Playa Santispac, a short 25 kilometers south on Highway 1. I knew I only had a few hours before the oppressive heat and humidity would force me back to the room, and I was determined to make the most of the day. Cresting the ridge, I was overlooking the bay with her teal-colored water inviting a closer look. Santispac beach has a restaurant and several palapas stationed along the beach; as I rode my bike down the beach, I decided a swim was in order, followed by a hearty breakfast at the modest beachside restaurant.

An overlanding rig.
My BMW on a beach in Mexico.

Swim and breakfast completed, I headed further south, stopping at each beach I passed and settling on what has become one of my favorite beaches, Playa el Requeson. The white sand and sand spit at low tide, taking you to a small island, was more than I could resist. Setting up my camp chair, I soon made friends with an overlander couple from England. Borrowing their snorkeling gear I enjoyed a quick swim out to the island, enjoying the starfish and rockfish along the shore. I reluctantly returned for one last night in Mulege with a new plan for the following day, to ride to Loreto for lunch and then return to Playa el Requeson to camp for two nights.

Loreto’s Malecon.
Loreto has a rich history.

Loreto has a rich history that dates back to the 16th century when Spanish missionaries established the first mission in the area. Indigenous people then populated the area, and over time, it became an important fishing port for the region. Today Loreto is a popular tourist destination complete with a Malecon along her waterfront. Loreto has an historic town square with a well-preserved mission and museum. With a population of around 25,000, finding lodging at every price point is easy, as are the town’s many services.

The Loreto Mission.

After a lovely day sightseeing, I headed about an hour and a half back north to Playa el Requeson to find a bit of shade and a good place for my tent. The afternoon was blazing hot as I headed inland along Hwy 1, as I once again cursed myself for selecting June to make this ride. Complaining aside, I arrived and indulged in a long swim to take the sting out of the day’s heat. I found my new friends in the overlanding vehicle who gave me the gift of a cold drink with ice and offered the shade of their massive vehicle to pitch my tent. The day gave way to a glorious sunset, and soon, we had a modest fire complete with fresh fish for dinner. With a million stars out for our pleasure, full bellies, and the delight of margaritas on the beach, the night was spent with storytelling of our past adventures. Both Stephen and Shelly’s stories surpassed mine as they shared their adventures traveling through three continents over the past several years.

The two days camping on the beach flew by, and it was sadly time to make my way back north. I planned to head to San Felipe, but the reality of the heat made heading back to the Pacific side an easy choice. Retracing my ride through Baja allowed me to revisit a few of my favorite places and discover a few new ones to ensure this would not be my last ride there!


Part 1 of my Baja adventure is herePart 2 is here.


Never miss an ExNotes blog:


Venturing into Baja?  Insure with the best:  BajaBound.  It’s what we use.


Want more Baja info? It’s right here!


Want to read more stories about riding in Baja? Pick up a copy of Moto Baja!

Why think small?

By Joe Berk

Half a lifetime ago I was a yuppie, and the symbols of being a successful yuppie included an MBA and a Rolex.  The Rolex was easy (the only requirement was having more money than brains).  The MBA was more difficult.  It required going back to school, which I did.  Getting the MBA definitely gave me a boost.  My career at the munitions company was on fast forward; at one point I was the youngest vice president in the Aerojet corporation (then I got fired, but that’s a story for another time).  I loved being in the bomb business (business was booming, so to speak), and being a former Army guy, I was in my element.

That could have been me in the ’80s and ’90s. I wore a jacket and tie to work every day.  I had the big glasses, too.

Anyway, while I was going to night school for the MBA, one of my classes was titled Human Behavior or something like that.   The guy who taught it was a Ph.D in one of the soft sciences, and I knew pretty quickly that he leaned way left.  That’s okay; in my book you can lean however you want as long as you don’t expect me to agree with you on every issue.

The first night of class the prof had everyone tell the rest of their class their name and what they did.   We were all yuppies, we were all young, and we all had good jobs. It made for good entertainment, but I had a feel for how things were going from the first several yuppies who told us what they did and the prof’s reactions and questions.  Yep, the guy was a definite leftie.  I started to wonder what his reaction would be to me…a guy firmly entrenched in the military industrial complex working for a munitions company.

“So what do you do, Joe?” Dr. WhatsHisName asked.

“Uh, I’m an engineer,” I said, hoping he would leave it at that, but knowing he wouldn’t.

“What kind of an engineer are you, and who do you work for?”

“Uh, I’m a mechanical engineer,” I said.   No sense in oversharing, I figured.  Maybe he wouldn’t notice I didn’t name my company.

“Who do you work for?”

“I work for an aerospace company.”

“What company, and what do you engineer?”  This guy wasn’t going to give up.  I liked my job and I liked what I did, but I wasn’t about to tell Jerry Rubin here I supported the Vietnam War.

“I work for Aerojet, and we make a variety of products.”  It had become a contest, and I was losing.

“What are your products?”  He had me.   Time to ‘fess up.

“I do cluster bombs.”   There.  It was out.  I knew the guy was going to call whoever it is you call when you find someone violating the Geneva Convention.  The good doctor stared at me for several seconds.  The other 30 or so yuppies in the class were dead silent.  It was a pregnant pause if ever there was one and we were pretty close to the 9-month mark.  Somebody’s water was about to break.

“Does your family know what you do?” he softly asked, speaking almost in a whisper.

“My wife does,” I said, mirroring his subdued tone.

“And how does she feel about how you earn a living?”

At this point, I knew I had to come clean.  “Truth be told, Professor, she’s disappointed in me.”  I had hoped that would end the discussion, but the guy would not let up.  He was a dog and I was the bone.  Then I sensed a way out, anticipating what his next question would be.

“What does she say to you?” he asked.

“Well, Doc, like I said, she’s disappointed, and she’s made that known on several occasions.”  The good Professor was nodding knowingly.  He was hearing my confession.   I don’t recall specifically, but I’m pretty sure he was smiling.  I was on a roll and I continued. “You see, Professor, my wife works for TRW’s Ballistic Missiles Division.  They do nuclear intercontinental missiles and she’s always asking me why I’m wasting my time screwing around with conventional weapons.  If you’re going to go, she always says, go big.  Go nuclear.”

My yuppie classmates started laughing.  Me, I was scared.  I was running a perfect 4.00 grade point average in the MBA program up to that point, and I thought I had just blown any chance of aceing this course.  The professor nodded without expression, made a note on his pad, and went on to the next yuppie.  My being a wiseass had earned a good laugh, but that note he made couldn’t have been a good thing and I was afraid it would cost me.

So how did it turn out?  I busted my chops in that course and I got my A.  But I was sweating bullets for the rest of the term.  Little, non-nuclear bullets, but bullets nonetheless.   More importantly, the cluster bombs I helped engineer won the Gulf War a few years later in 1991.   Most of Saddam Hussein’s Republican Guard tanks were taken out with CBU-87/B cluster bombs and GAU-8/A 30mm ammo (and my company, Aerojet Ordnance, also made the ammo for those A-10 Gatlings).  Sometimes when studying human behavior, the guys who know (I mean, really know) reach the only conclusion and solution possible:  An adequate quantity of high explosives delivered on target.  I’m not at all embarrassed about having had a hand in that.  Fact is, I’m proud of it.


Never miss an ExNotes blog:

Bobbie’s Solo Baja Ride: Part 2

By Bobbie Surber

In Part 1 I shared with you my adventure from Sedona, AZ, crossing the border for the first time on a bike, and heading down Mexico’s Transpeninsular Highway to Guerrero Negro.   This blog continues the adventure.


After an early morning departure leaving behind the comforts of the Hotel Mision Cataviña, I continued on Highway 1, enjoying a quiet morning and the rare good luck of an empty road. Settling into the ride with a deep breath that allowed me to loosen my tight muscles after two long days of riding, I felt the joy start to creep in as I took in the vastness and emptiness of the Sonoran Desert. The fierceness of the summer sun had already begun turning the winter greenness to a light wheat color. This did not diminish the stark beauty of her desert, with the surrounding hills in the distance with their deep purple shadows demanding a second look. My bike was doing great; her little single-cylinder engine was a gem off-road and could manage up to 80 miles an hour, more than enough in Baja. She was a perfect bike for the moment, made for Baja.

The desert south of Cataviña.

Rolling down into Villa Jesus Maria I was more than ready for a break, something cold to drink and some much-needed gasoline. I did well with the drink and break, but as can happen in Baja, the Pemex had no gas. It was another 40 kilometers to Guerrero Negro; as I emptied my MSR liter of gas into my tank, I said a little prayer to both Jesus and Maria to extend my range to Guerrero Negro.

In the Guerrero Negro salt flats.
At Scammon’s Lagoon in Guerrero Negro.

Prayers answered, by perhaps both Jesus and Maria, I arrived with a smidgin of gas fumes left in my tank. Reaching Hotel Don Gus, which several riders had recommended as both affordable and bike safe, I pulled into the dirt parking lot to check in. This is a typical motel-style lodging with comfortable rooms and a simple restaurant serving hearty portions. My room settled, I headed for a taco truck that every rider raves about, Tony’s Fish Tacos. Let me tell you, I often dream of Tony’s fish and shrimp tacos with the perfect batter and lime crema!


Keep us going…please click on the popup ads!


Fully satisfied and with still enough daylight left, I went to explore the salt flats famous in this area. A short ride from town, the salt flats looked like a mirage at times, fooling the eye into believing it was a vast lake. This soon gave way to the commercial operation with magnificent mounds of salt with trucks and bulldozers on the top of the salt hill so high that the trucks looked like toys. Soon I was passing the small boat dock and positioned my bike for a good pic. The sun was warm but blissfully not hot with the Pacific breeze. I set up my small camp chair, pulled out a flask filled with an excellent local Vino Tinto, and gave a silent toast to a perfect Baja day.

A Don Gus Hotel selfie.

I woke the following day with growing excitement, and unable to wait for daybreak I loaded my bike impatiently, waiting for the restaurant to open for a much-needed cup of joe. You will often find that opening and closing times in Baja are more of a suggestion than a hard rule. A half-hour later, I was in my room, firing up my rocket pocket stove and making do with a Starbucks instant coffee and some leftover tortillas. Bike ready and stomach full, I headed to the gas station to fill up Red, only to find I had caused a stir and was noticed by a few locals who wanted to meet the female American solo rider. A few of the younger ones asked what seemed like endless questions, wanting to know where I had been and where I was going. This completed, I was on the road heading to the part of Baja I had been waiting for, Mulege and the famous Bahia Conception.

The road out of town was uneventful, an endlessly flat straight that challenged me to stay awake and focused. About an hour later, I passed the midsize town of Villa Alberto with plenty of gas, shopping, and lodging. I stopped long enough for gas and was back on the road. My interest in the highway picked up as I neared San Ignacio. A few kilometers before San Ignacio there was another military stop, which was uneventful other than the guard looking at me, my bike, and a long look down the road with was becoming the norm question and answer: Solo? Si Solo! With an astonished look, he waved me on, wishing me a safe ride. My next stop was a visit to the Baja 1000 popular pit stop, Rice and Beans, a restaurant and hotel just off the highway with good food and cold beer. I left satisfied and headed to the main square of San Ignacio.

Inside the Rice and Beans Restaurant in San Ignacio.

The town of San Ignacio is a true desert oasis with more palm trees than you could count and a river running through the town. San Ignacio seems caught in a time warp as elderly men sit in the shade of the massive trees that frame the small-town square, reading and playing cards as they eye me parking my bike. Curious about this gem, I found just enough cell coverage to look up her history. San Ignacio was founded in 1706 by the Cochimi tribe. In 1728, missionary Juan Bautista de Luyando discovered San Ignacio and committed to building Misión San Ignacio Kadakaamán. The building is made of volcanic rock from the nearby mountains. Her mission sits quietly, waiting for the next visitor, and I was lucky to find her open and welcoming.

The San Ignacio Mission.
San Ignacio’s town square.
A restaurant in San Ignacio.

I reluctantly got back on my bike, heading back to the highway with a promise that I would return to San Ignacio for further exploration and to enjoy her peaceful river and nearby lagoon. With one more top off of gas, I headed down the road finding the excitement of endless twisties and, on the horizon to my left, the peaks of Tres Virgenes. One last climb took me to another peak, with soon a sweeping view of the Sea of Cortez. Massive winds kept me alert. The heat was near overwhelming, and the wind only accelerated my dehydration. I was physically spent with still another hour to my destination. Pulling into Santa Rosalia, I sadly passed her mission for another time. I stopped just long enough to douse myself with water at the gas station, drink as much water as possible, and get back on the road.

Soon I was riding through the arches that welcome you to the proper start of the town of Mulege. My destination was Historico Las Casitas. After several attempts to find the hotel cursing my Google Maps, I finally arrived. I walked in, took off my riding gear, and as if they were waiting for me to arrive, a young man said not a single word; instead, he handed me a glass of lemonade, a drink from heaven made with fresh limes, lemon, and cane sugar. I emptied my glass in two long swings. Gratefully finding an ounce of composure, I asked about a room for the night. I soon settled into my volcano rock room with mosquito netting; it took me no time to pass out with cold air soothing my heat-exhausted body.

The Hotel Las Casitas courtyard.
My room in the Las Casitas.

Waking in the late afternoon, I discovered the L-shaped courtyard covered in vines and trees, allowing for continual shade against the heat of the June sun. My bike was safely parked in the courtyard; I made my way to the bar to the young man who had saved me with his magical lemon concoction and ordered another (with tequila this time). Sufficiently recovered, I headed out to discover the town and look for another perfect taco. Mulege, another mission town founded in the early 1700s and known for the beauty of the river that runs her length ending at the Sea of Cortez, her proud mission sets up on a hill overlooking the palm trees and river. Sadly not open, I wandered around the grounds taking in the softness of the sunset overlooking the river. I headed back to the town square, and with a food stand next to the market, I had a satisfying plate of carne asada tacos with the best beans I’ve had in Baja. Heading back to the hotel, I found the courtyard packed with locals and visitors enjoying the evening coolness. I was lucky to be greeted by the owner, I learned more about the hotel’s history, and I met a friend of his who could take me horseback riding the following morning. With plans set for the next day I gratefully slipped between the crisp white sheets, pulled my mosquito netting around me, and drifted off to sleep dreaming of the adventures ahead.


Part 1 of my Baja adventure is here.


Never miss an ExNotes blog:


Venturing into Baja?  Insure with the best:  BajaBound.  It’s what we use.


Want more Baja info? It’s right here!


Want to read more stories about riding in Baja? Pick up a copy of Moto Baja!

Three Steps to Ease into Moto Camping

By Mike Huber

I know many people on this page camp and ride, but some have yet to dive into mixing these two great passions.  My objective in this article is to help you bridge riding and camping, alleviate any concerns on this topic, and build a foundation of knowledge for those new to motorcycle camping. In doing so you will discover a deeper level of motorcycling that many riders experience.


Help us bring more to you…please click on the popup ads!


Start with Less

With all the social media posts of riders from around the world sharing their epic adventures and providing reviews of the gear they use can cause anxiety.  Intimidation from the expense and amount of equipment people use for moto camping can become overwhelming when starting this hobby.  I’m not saying any of these riders are wrong in the gear (or the amount) they use, but my philosophy while motorcycle camping is less gear is much more efficient and cheaper. My first time moto camping I had nothing other than a one-person Kelty tent (which I still use), a sleeping bag, and a small personal hygiene kit.  I planned to give moto camping a shot and figured I could survive one night out on Washington’s Olympic peninsula even if I was a bit uncomfortable.

I wasn’t uncomfortable at all.  In fact, other than adding a 6-pack of beer and a crushed Subway sandwich my gear didn’t grow or change for the next 8 more years (even after “maturing” from a Ducati Monster M1100 to a BMW GS1200).  Would I have been more comfortable with a sleeping pad, cooking set up, and maybe even a chair?  Yes, but that came years later after learning from others (I am a bit set in my ways even if they force me to be uncomfortable). Starting from such a minimalist perspective and adding gear slowly allowed me to tailor my equipment perfectly.  You will find everyone has a “better” way of doing things; you might want to learn what works best for you and expand slowly.

Start in a Familiar Location

Roaring through the dense rainforest of the Olympic Peninsula on my Ducati Monster I was excited to be camping with my motorcycle for the first time.  In hindsight this choice was probably a further and more isolated location than I should have started with, but it worked for the most part. I had ridden the road several times, I was comfortable with the distance, and I was aware of the ever-changing weather conditions.  Being new to this I didn’t pack rain gear and of course it rained heavily that night (I was forced into my tent by the weather by 7:00 p.m.).  You must pack raingear if you want to ensure it never rains on your moto camping trip.   But even with the weather not cooperating it was a fun first night and it was enough to get me hooked on the lifestyle.

Looking back, a more comfortable way to experience my first moto camping adventure would have been a more controlled environment.  Even for those well-seasoned campers, testing new gear in your home or backyard to learn how to set up, adjust, and break down the equipment makes for a less stressful time in a real-world environment. Purchasing lots of expensive gear, not testing it, and going on a multi-state tour can be a painful way to learn the gear isn’t right for you or the climate.  Another way to learn your equipment and build experience is at a state park close to your home or a KOA.  Even if you have to retreat to the KOA store or end up back inside your house, don’t be discouraged.   That’s what this step is for.  Take notes on what worked and what didn’t, and build off that until you are comfortable with the next step, which can be dispersed camping or a longer distance ride.  It is better to learn in this semi-controlled environment than to have a horrific night with improper gear in poor weather and become completely deterred from ever moto camping again.

Learn From Experience

Having completed a successful test runs with your gear it is now time to begin learning how to increase your confidence in harsher and more remote environments. This point in your experience level is also the perfect time to make gear adjustments based on your notes.  With a few nights camping under your belt you can seek advice and learn from others, including their set up tricks and in what type of climate they moto camp.  In doing so you will fine tune your camping outfit so that it is perfect for you, your motorcycle, and the climate.

During this phase it is important to remain open minded.  Everyone has a method that works best for them.  For some it is a half shelter at a roadside pullout, for others it can be as elaborate as a 6-man tent with copious gear that requires 2 hours to pack.  Normally when I travel and moto camp it isn’t for just one night.   I’m on the road for two to three months at a time with Airbnbs or hotels as resting points or for working.  Even though I am comfortable with my moto camping equipment it’s always fun to chat up other motorcyclists. In most cases, even if their set up is completely different there is usually one or two takeaways I learn from conversing with them.

Conclusions

Moto camping is an easy and inexpensive way to escape the rat race with less effort than many would think.  These experiences and the people I meet along the journey are some of the most best I have had.  Being so removed from everything as you sit relaxing in the glow of a warm campfire reflecting off your moto is a fulfilling feeling that few venture to achieve.


Never miss an ExNotes blog: