ExNotes Review: Shinko Raven R009RR Tires

By Joe Gresh

There are many fast motorcycle riders/writers that would be better suited to the task of reviewing motorcycle tires. Unfortunately, none of them are available at the moment so you’ll have to go with my impression of these Shinko Raven tires.

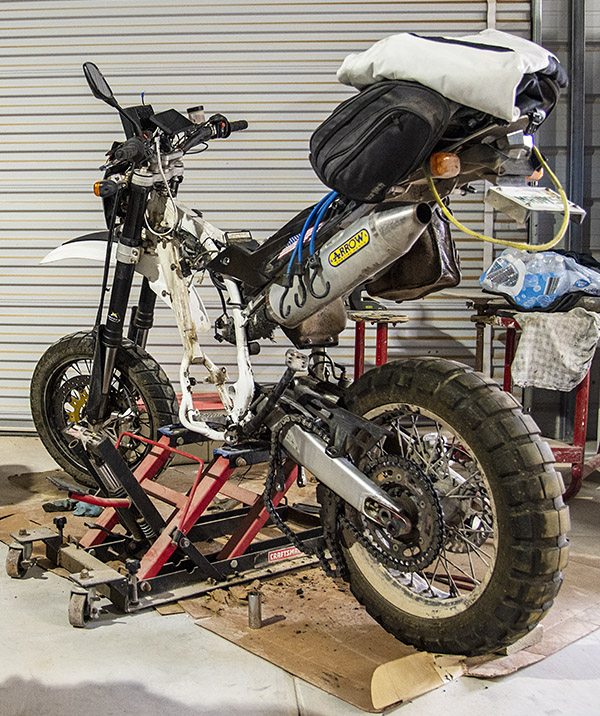
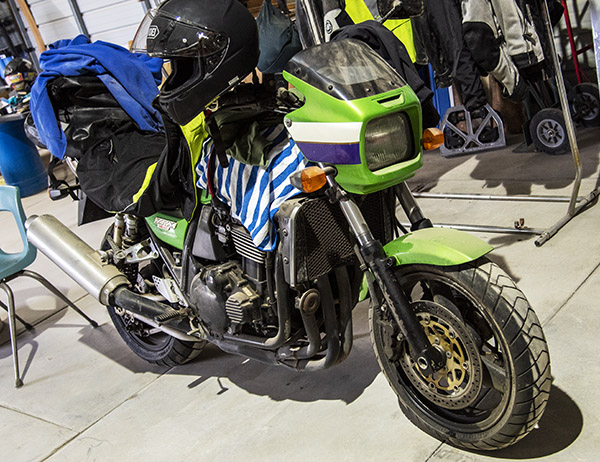
I previously ran Continental Conti-Motion tires on the ZRX1100 mostly because they were cheap. I got a good deal on a set of front/rear tires with shipping included. The Conti-Motion set came with a 180/55-17 rear tire that was a little bigger than the original 170/60-17 called for on the ZRX. The wider, lower profile tire seemed ok at the time because I hadn’t ridden the motorcycle for 9 years. After I fitted the Shinko Ravens I could tell a difference.

The Harbor Freight tire machine along with the tubeless rims on the ZRX made swapping the tires a breeze. The new tires took only a few ounces of weight to balance so I assume the rubber is pretty evenly distributed around the tire.

I have around 4000 miles on the Shinko tires and it looks like the rear might go another 3000 miles or so. The front tire is wearing much slower and looks like it will go 10,000 miles. Like I said: there are faster riders that could eat these tires up in one day.

The Shinko Ravens are supposedly aramid belted radials with a speed rating of Z, or 149 mph plus. The ZRX1100 won’t do 149 falling out of an airplane so I should be good. Shinko claims the Raven is their longest wearing sport tire. Until they start making car tires, that is.

In a straight line the Contis and the Shinkos are about the same. However the Shinko tires feel much different than the Contis in corners. With the wide 180 series Continental rear tire it felt like the ass end of the bike raised as you laid the bike into a corner. Or maybe the front end dropped. Hitting a bump mid-corner made the rear of the bike want to twist outwards instead of absorb the bump. You had to counteract that wagging sensation with a firm grip on the bars.

No such problem with the Shinko Raven 170 series tire. The ZRX leans into a curve with the ride height feeling evenly matched front to back. No effort on the handle bars is required. Mid-corner bumps don’t have the twisting feel and the rear suspension articulates without drama.

These sensations are all relative and feelings are hard to quantify, maybe it’s just me, and on a race track there might not be any difference in lap times. But then what are you doing racing a heavy street bike on cheap street tires? Stop that.

I much prefer the handling characteristics of the Ravens even though I can’t find the word “Raven” anywhere on the tire. They are stable, go around corners nicely and are round and black.

I haven’t had many opportunities to try the Shinko tires in the wet. In the dry season it rains infrequently (hence “dry season”) and when it’s monsoon I tend to stay home. Still, it’s possible to get caught in the rain here in New Mexico. What little time I have in the wet with the Shinkos didn’t feel all that grippy. I took it easy as the oils accumulated during the dry season rose to the top of the asphalt. Cracking the throttle on the torquey 1100cc 4-cylinder can induce wheel spin on a wet road so don’t do that. In a wet corner you can get the big ZRX drifting easily. Don’t do that either.

In the dry I have yet to lean the bike over far enough to use all the available tread, also known as crashing. The mountain roads where I live are swept only by wind and rain. It’s not surprising to round a corner and find a steaming cow turd in the road. Or sand. Or a downed tree. Anyway, that’s my excuse.

The Shinko tires are a great match for the ZRX1100, I wouldn’t think a small thing such as tire size would have such an outsized effect on the overall feel of a motorcycle but there it is. I would buy another Raven if they go on sale but then I’m the worst guy to take tire advice from, as there are other, faster shills.


Join our Facebook ExNotes page!


Never miss an ExNotes blog:


Help us keep the lights on:


Don’t forget: Visit our advertisers!


ExNotes Review: Doremi Kawasaki Z1 Body Set

By Joe Gresh

Zed has been dormant for a few years. The bike has a running issue that has eluded my best efforts to remedy. But this story isn’t about my mechanical incompetence. This story is about Zed’s gas tank.

Back in the Zed’s Not Dead series I cleaned the tank fairly well using the apple cider vinegar method. The cider/baking soda trick works well but Zed’s tank was looking a little crusty after sitting two years with alcohol laced fuel inside.

I decided to give the tank a second cider session. All went well and the tank was spotless inside. I installed the tank and filled it with fresh gas. Checking the tank for leaks revealed none so I closed up the shed and retired to dream big dreams of fun motorcycle rides to come.

The next morning when I opened the shed a strong odor of gasoline hit my nose. Fuel was everywhere under Zed. The right side tank bottom was soaking wet. Apparently only the paint was covering pinhole rust-through spots. After draining the remaining fuel I ran a wire brush over the bottom of the tank, which revealed a ton of tiny holes.

My initial plan, because I can’t let it go, was to cut out the bottom of the tank, fabricate a new sheet metal piece to fit and then braze the new bottom into the tank. It’s a good plan and it might have worked.

Instead, I went with Plan B: a new set of painted bodywork from Doremi (a Zed parts supplier out of Japan). Doremi is resold by several different companies in the US. I chose Cycles R Us, an eBay seller because they had the correct year and color in stock and their shipping was only $39. Prices for the body set are mostly the same (around $1500 with some outliers at $1700).

I know what you’re thinking: that’s a lot of money for a cheap bastard like me. It killed me to spend the money but used tanks are going for $500 and new, unpainted reproduction tanks are $400. Not to mention a professional paint job on my repaired stuff would probably exceed $1200.

One of the good things about the soaring value of Z1 Kawasaki’s is that you can spend money restoring them with a good chance of getting your investment back (minus your labor)

Enough of the rationalizations: let’s get into the product. Opening the well packaged box from Doremi was breathtaking. The paint is stunning. I cannot find a flaw anywhere and I don’t think the factory Kawasaki paint looked this good back when the bike was new on the showroom floor.

For 1975 Kawasaki’s Z1 had two color choices, a metallic aqua-blue that was pretty and my bike’s color, a dark burgundy that looks almost brown in low light. The color pops deep red metallic when a single photon from the sun strikes the paint surface. The stripes are perfectly applied and I cannot fault the quality of Doremi’s product.

My kit came with new tank badges and a new gas cap, some resellers break these parts out of the kit and sell them separately.

The tank badges are flat when you get them and require gentle bending by hand to fit the curvature of the gas tank. This is kind of a trial and error thing. I got the badges pretty close but they still need a little tweaking near the front. I stopped bending them mostly because I was worried about messing them up.

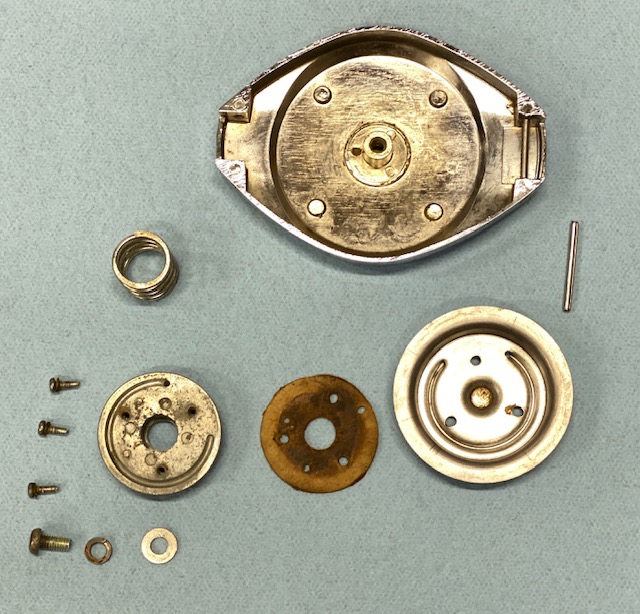
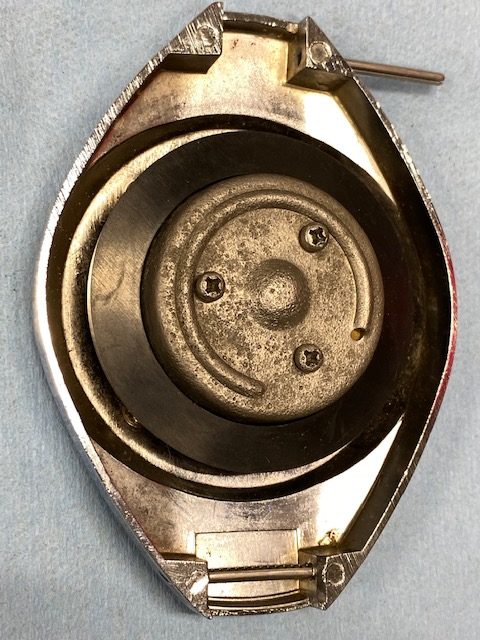
The gas cap comes loose in another bag. Putting the cap on was pretty easy once the roll pin was test fit into the tank.

The gas cap latch was a little harder to install. The instructions were oddly worded and there are some notches you are supposed to file into the underside of the latch. The photos aren’t super clear and I could find no reason to file notches so I ignored the instructions and did it the way I wanted.

The main issue with the gas cap latch is getting the little torsion spring inside the latch then holding it concentric while the pivot shaft is slid into place. The instructions recommended using a small, flat blade screwdriver, I tried that but it was fumbly and the spring never ended up in the correct location.

The method I settled on was to compress the torsion spring and capture the two ends with a small tube (the interior metal barrel of a wire crimp connector) once you have both ends of the spring under control it’s easy to insert the spring and line it up with the pivot shaft.

The latch’s pivot shaft is sort of a rivet. After it’s in place you have to peen over the end. This is a two-man job as you’ll need to hold a weight against the pivot head on one side while rolling the other end. I’ll get CT to help me with this step.

The new side covers arrived without badges so I used the original badges. The old badges were in fair condition but I suspect the reseller removed the new badges from the Doremi kit.

The new tail section was a bit fiddley in that the bolt holes didn’t quite line up perfectly like the original tail. You reuse the original Kawasaki grommets and spacers with the new tail. Maybe new grommets would be softer and have more give. It took a little aggressive tugging to get all four bolts lined up and in place. I imagine the plastic will take a set in its new position and future fitting will be easier.

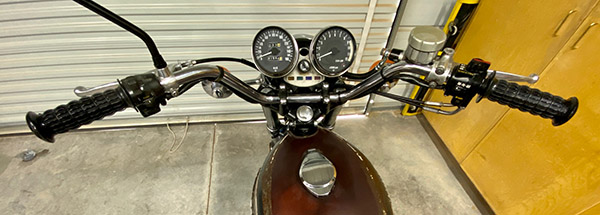
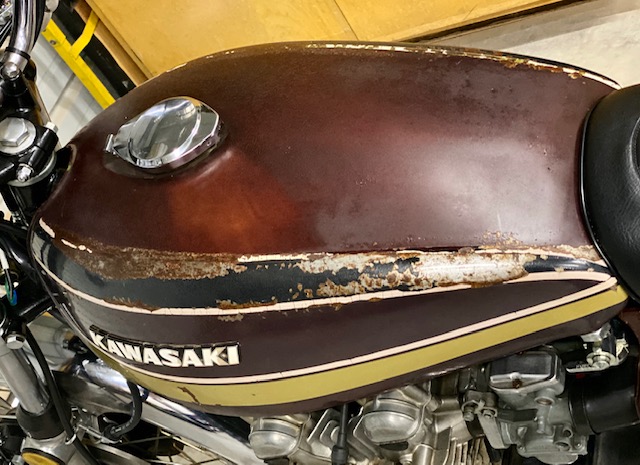
Zed’s original paint was in horrible condition, the bike had sat outside for an indeterminate length of time. Talk about patina. I cleaned up the old paint as much as I could but it was tatty and dead. The Doremi body kit transformed the bike: it looks like a new, 1975 Kawasaki Z1-B. The bike is beautiful in the sunlight with the perfectly smooth surfaces changing color as you move about. Damn, this bike looks good.

Is the Doremi body set worth $1500? If your old stuff is rusted, yes. Even if your old stuff is in good shape you’d be hard pressed to find a painter who could lay down a beautiful job like Doremi for $1500. It’s like you’re paying for a paint job and the bodywork is free!

I recommend the Doremi highly. If we had a rating system at exhaustnotes it would get top marks. If you want your Z1 to look like a new bike get the Doremi.


Never miss an ExNotes blog:


Don’t forget: Visit our advertisers!


The Wayback Machine: Zed’s Not Dead

Our latest Resurrection story about Joe Gresh’s ZRX is not our first big Kawi resurrection story.  Going back a few years, we previously ran a 20-blog series on a Z1 Kawasaki.  This Wayback Machine piece was the culmination of that story, with a link at the end that will take you to the entire series.  Those big Kawis are cool, and the Z1 is unquestionably the coolest of them all.


By Joe Gresh

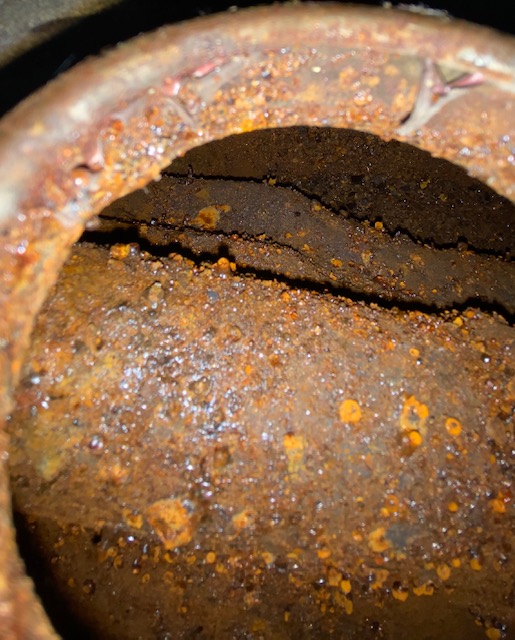
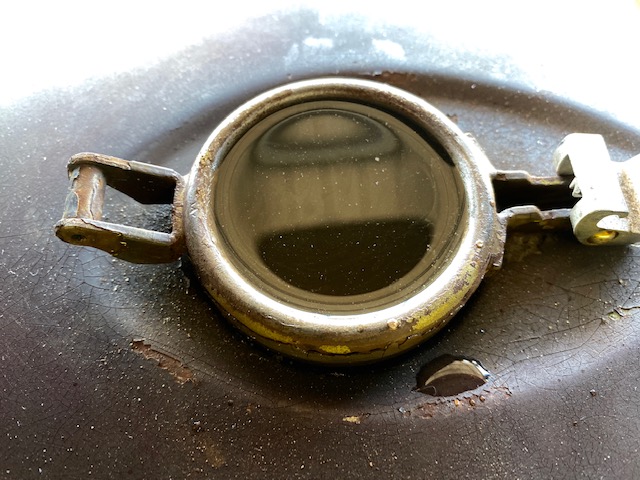
You may recall from Zed 19 I had to re-soak Zed’s gas tank as 10 days were not enough to dissolve the rust. I drained, dried and reloaded the tank with apple cider vinegar and let it sit for 4 more days. This is what it looked like originally:

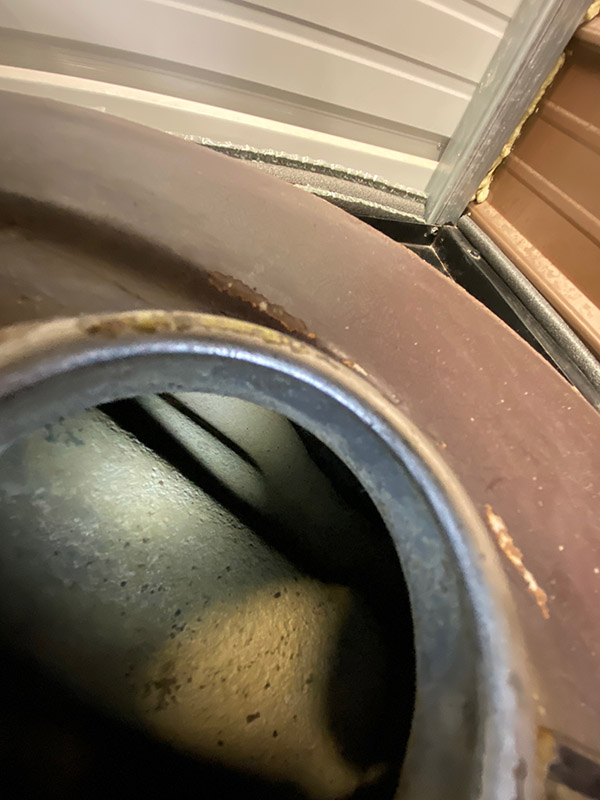
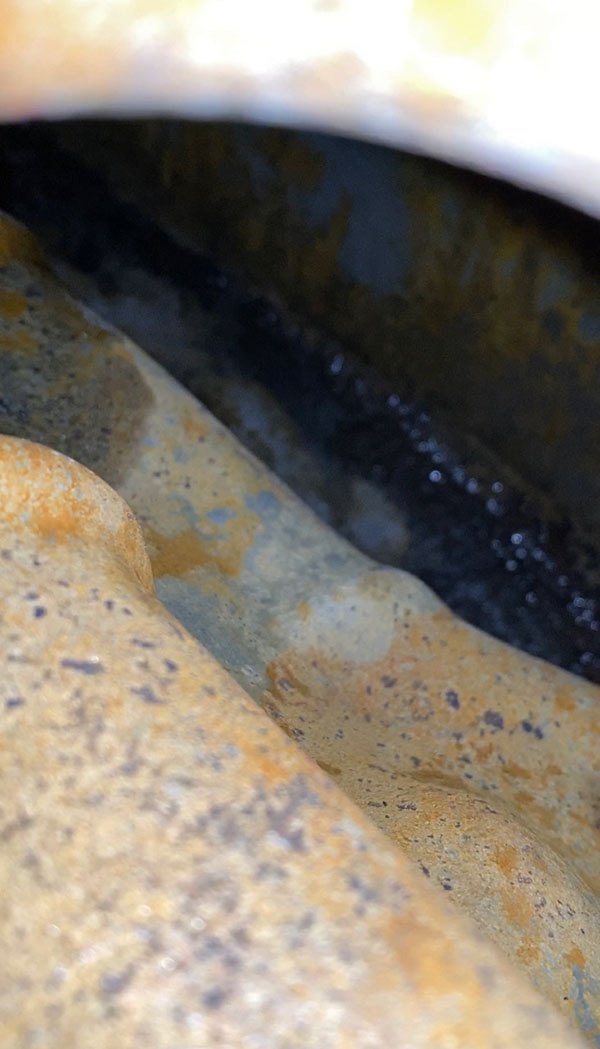
The second session really knocked most of the rust out. After rinsing I dumped a large box of baking soda into the tank and added clean rainwater sloshing it as I filled to mix thoroughly. I don’t know the chemical reaction that takes place but the baking soda neutralizes the acid, turning the metal a dull grey, almost white color. This treated metal does not flash rust and I’ve been going 3-4 years on another tank I cleaned like this without rust reappearing. It’s like the metal turns passive and stops reacting to oxygen.

If I wasn’t so hell-bent on riding this bike I think I would flush and cider the tank one more time but it looks good enough and I’ve got to ride! I connected a small hose to my shop vac and played it all over inside the tank. I can hear nothing when I shake the tank so at least there are no big chunks loose inside.

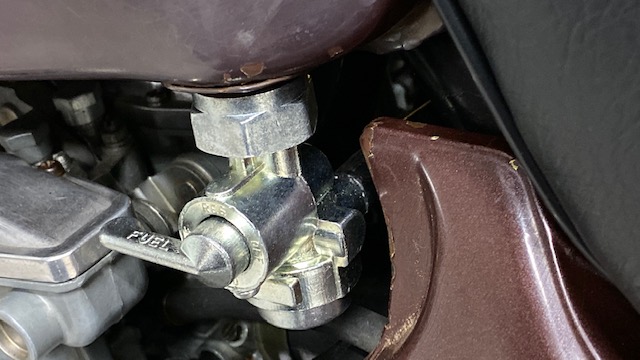
Proving that even the simplest life forms can learn I bought an entire new petcock for $23 rather than the rebuild kit for $8. This is real growth on my part. Usually I buy the kit, mess with it for hours then put it on only to have it leak. Only then will I buy the new one. Kawasaki uses a turnbuckle-type left-hand/right-hand thread on the Z1 petcock. It took about 145 tries to get it to tighten up facing the correct direction.

The new petcock has screens inside the tank and a bowl filter but with 40% of Zed’s tank out of my view-field I can only assume the entire tank is as clean as the places I can see. Inline fuel filters, one for each set of two carbs will hopefully catch any debris still in Zed’s tank.

An update on the Z1 Enterprises regulator/rectifier: It works. The battery charges @ 14.8 volts which is still a tad high but much better than the 17 volts Kawasaki’s setup was doing.

From the top Zed looks pretty well sorted. I took it for a ride and it ran really well for off the bench carb settings. It might be a little rich at idle or it might just be our 6000-foot elevation. I’m not going to tinker with it for now. I’d rather get some miles on the bike.

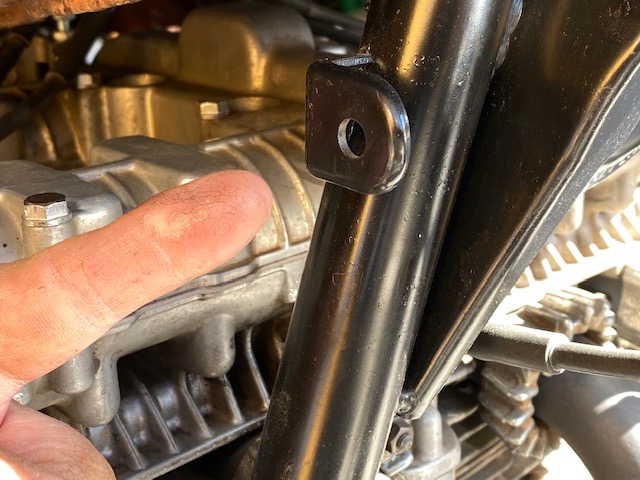
I don’t know what this bracket is for. Located on the right side down tube near the tach drive, it’d too light for a steering damper mount. Anyway, there’s enough stuff on the bike as is so I’m not going to worry about it.

I took Zed to my secret proving grounds and she ran through all 5 gears smoothly. The bike hit 90 MPH without even trying. I’ll need a better front tire to do any high-speed work. The brakes work ok. When you ride a SMR 510 Husqvarna all other motorcycle brakes seem like crap. After 33 miles there are small oil leaks at the tach drive and countershaft area. Maybe the clutch pushrod seal or sprocket seal is the culprit. That stuff is easy to fix.

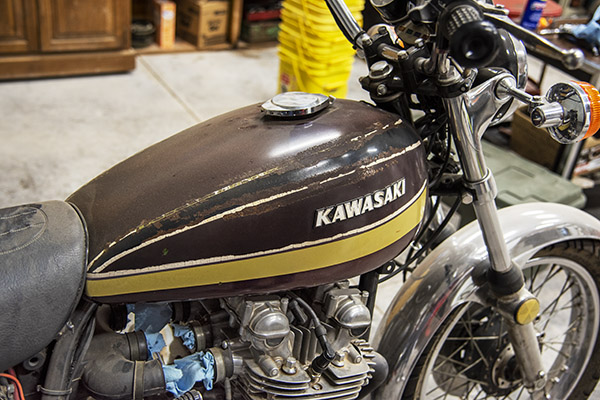
The patina on Zed is excessive, bordering on shabby. The bike sat outside for years and paint wise there’s nothing left to polish or wax. The finish is just not there. The pin striping is cracked and missing sections. I’m not sure what to do about that. On the one hand a ratty bike may be less attractive to thieves and old Z1’s are getting fairly expensive. On the other hand it does look pretty bad. I’ve seen my Enduro buddy Mr. French do some amazing work with rattle cans. Maybe I’ll give it a go. The paint can’t look any worse.


That’s it: from Dead to Zed in 20 easy sessions. Don’t worry, this won’t be the last you’ll hear of Zed. I’ll be doing some long trips on this bike, maybe Mexico, maybe ride to a few flat track races. I’ll update the blog if I do any more major work on the bike. The story of Zed’s resurrection may be ending but the story of Zed is just beginning.


And there you have it.  If you’d like to run through the gears (i.e., the previous 19 installments of Zed’s Not Dead), you can do so here!


Help us continue the content:  Please click on the popup ads!

Joe Gresh’s Tinfiny Toys

A recent road trip took us to New Mexico, and that meant a stop at Joe Gresh’s Tinfiny Ranch.   The word “ranch” has a nice ring to it, but Joe’s ranch is more of a cool toys repository than a place where cattle range freely (the toys more than make up for the missing cattle…the stories they hold are better than any Bonanza episode).

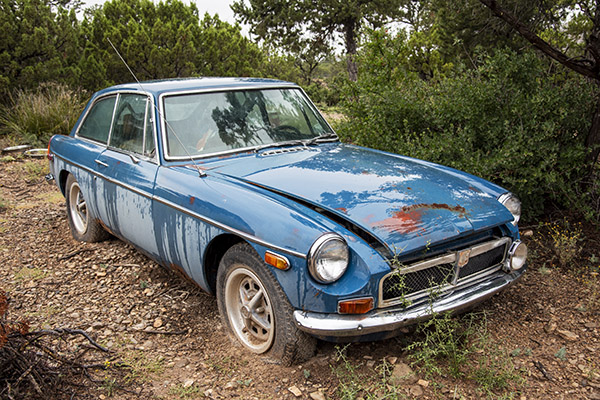
When walking up the hill from Joe’s home to his shop, you can’t miss his powder blue MGB GT.  The MG came with the property.  At one point Joe was going to get it running again and he started a resurrection blog series on it.  He’s now thinking he may sell it.  I’d like to see him finish this one for a lot of reasons, mostly centered around my belief that any British motor vehicle is inherently cool and there would be interesting blog content accompanying the effort.  Time will tell.   And so will we.

As you can see from the above photo, it was raining a bit when we visited.  The rain gave the MGB a nice look, a hint of what it would be if it was running again with the original paint buffed out.  The MG would be a cool resurrection project.  If you agree, leave a comment here on the blog.  I’m trying to start a “Keep the MG” movement.

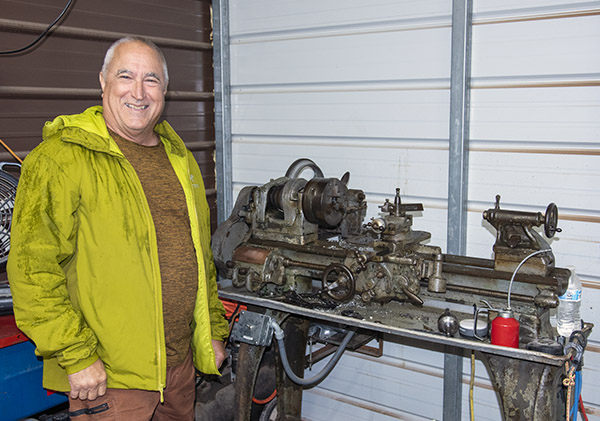
Joe has a  bunch of equipment in his Tinfiny Ranch shop, including a sandblast cabinet, a drill press, all manner of hand and power tools, and a lathe.  “You can make anything with a lathe…you can even make another lathe,” Joe once said.   You can read more about that here.

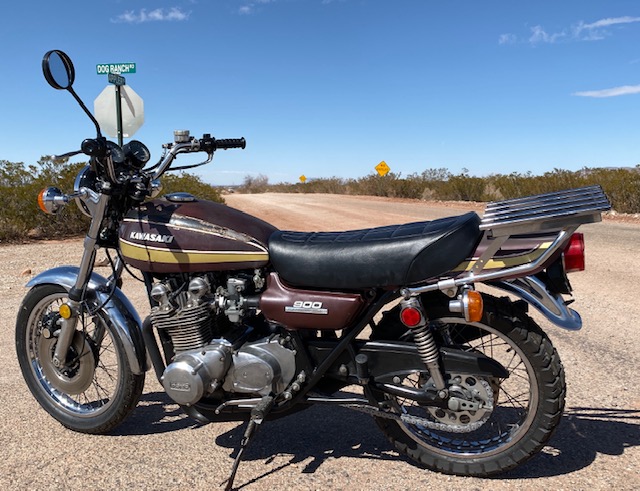
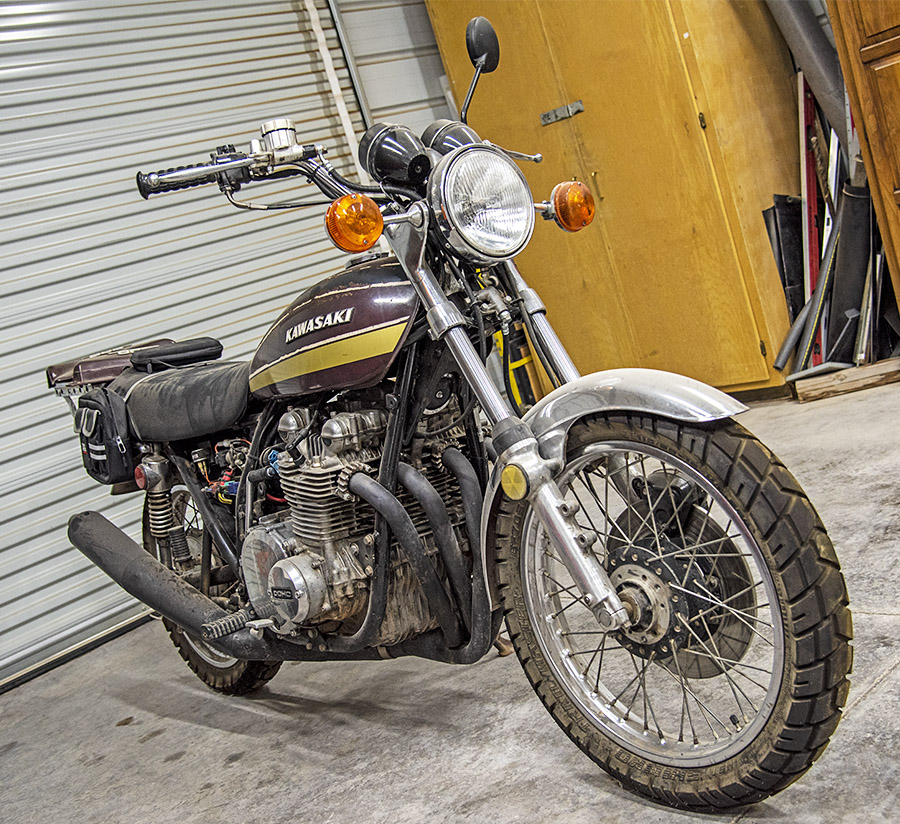
The photo at the top of this blog is Zed, Joe’s original 900cc Kawasaki, and it is the first resurrection story Joe wrote for ExNotes.  In my opinion, this is the coolest bike on the planet.  I especially like the original paint.  The patina is priceless.

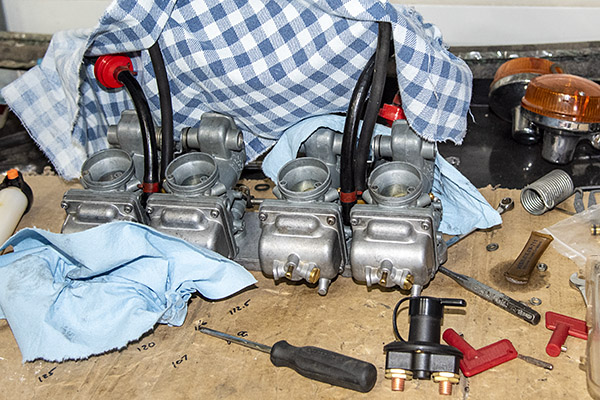
Joe had Zed’s carbs off the bike when we visited.  Zed needs Joe, and I think Joe needs Zed.  He’s talked about selling it; I hope he doesn’t.  If you agree, leave a comment here on the blog.  You know the drill.

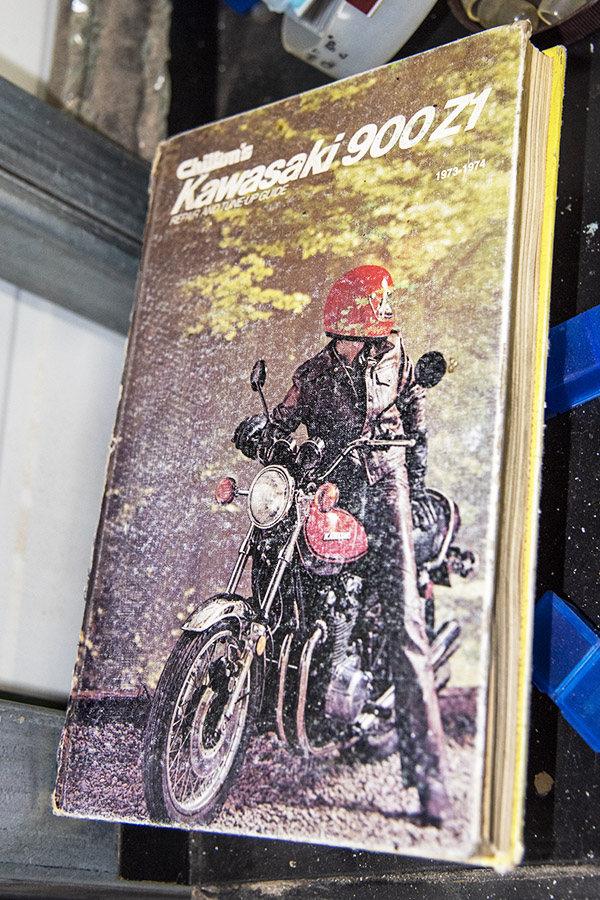
Joe’s well worn Zed shop manual.

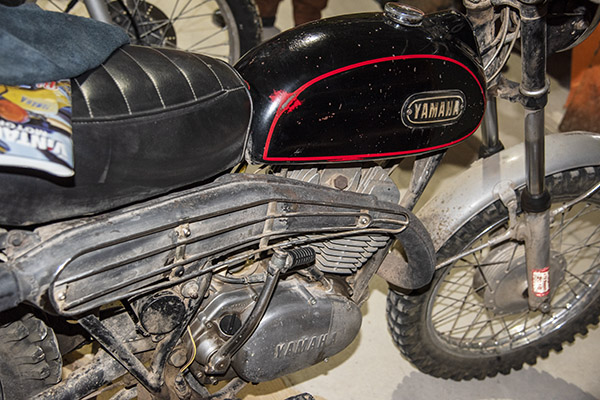
One of Joe’s more famous vintage bikes is Godzilla, a Yamaha 360 he rode on the Trans America Trail.   It’s a delightfully original machine with a lot of stories, a few of which have appeared here on ExNotes.

I wish Yamaha still made these bikes. I always wanted one, but I’ve never ridden one. Someday.

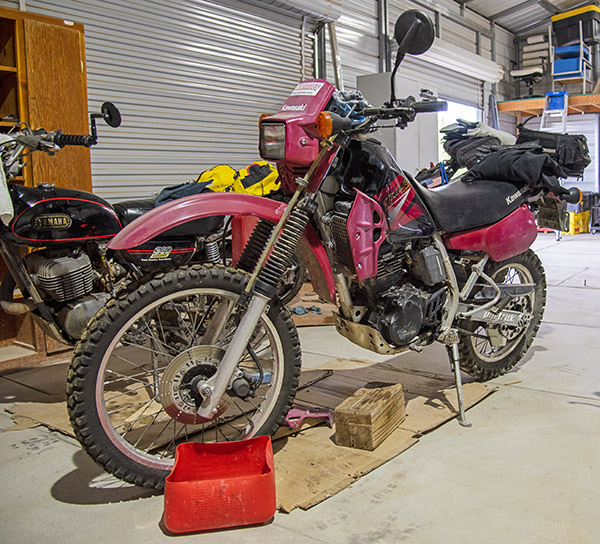
Joe is one of two guys I know with a Kawasaki KLR 250 (the other guy is also named Joe, but it’s not me).   Joe has a few stories about the KLR 250 here on ExNotes.

When I first met Joe on our CSC Motorcycles 5000-mile ride through the American Southwest (with our friends from China and Colombia), Joe told me he would really love to install the 250cc RX3 engine in his KLR 250.   Joe is thinking about selling his KLR.  I get it; I sold my KLR a few years ago.  But I regretted it.   KLRs are great bikes.

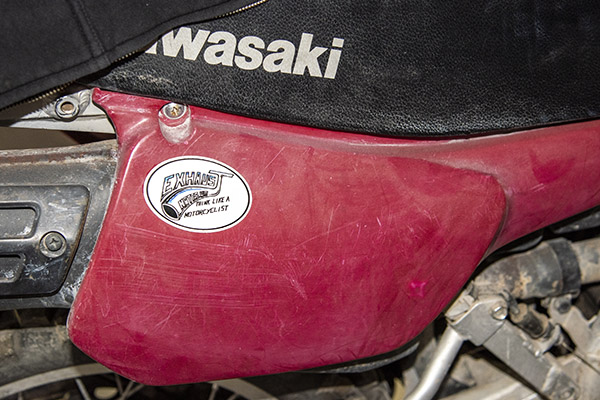
I have one of these decals on my motorcycle, too.

Incidentally, if you want to know more about the RX3 and our ride with the Chinese on it through the American Southwest, you might consider picking up a copy of 5000 Miles At 8000 RPM.

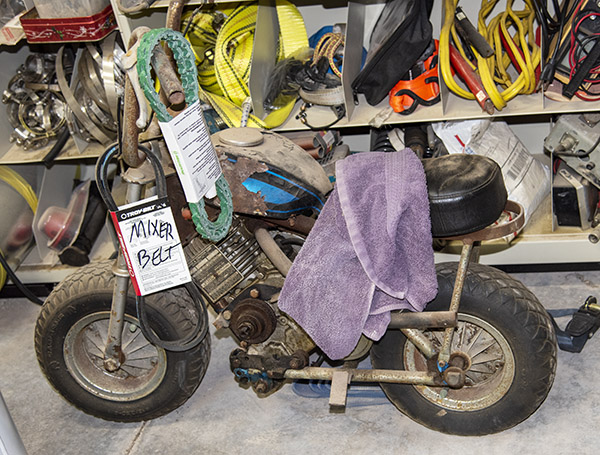
Here’s Joe’s mini-bike.   He’s owned this one a long time.

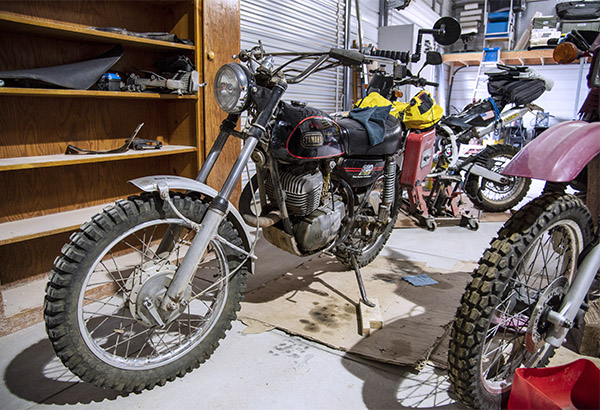
Joe’s famous Husky…with the engine out.  Joe is rebuilding the transmission on this motorcycle.  He’s blogged about it; watch ExNotes for future updates.  I know Joe will have it on the road again.

Joe’s Kawi 1100 hasn’t been started in a decade or two.  He’s thinking about getting it on the road again.  That will make for a bunch of great blogs.

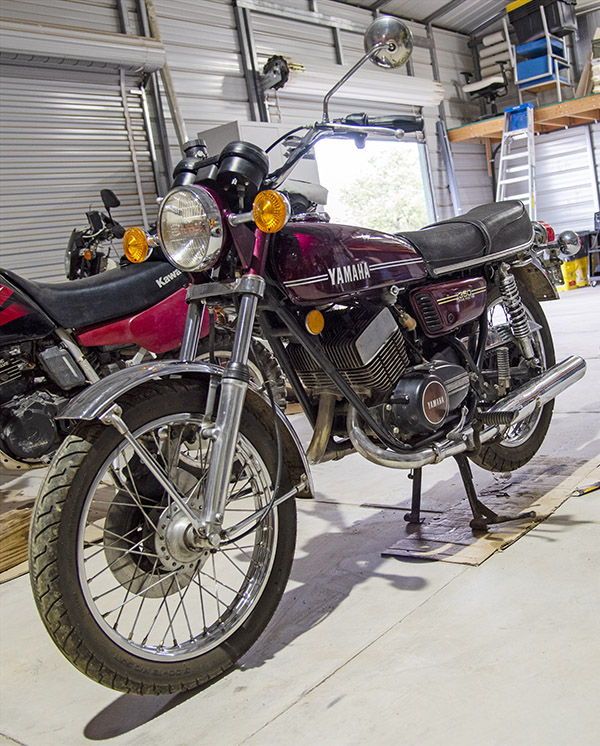
Joe’s most recent acquisition is this stellar Yamaha RD 350.  Joe’s written about it here on ExNotes.

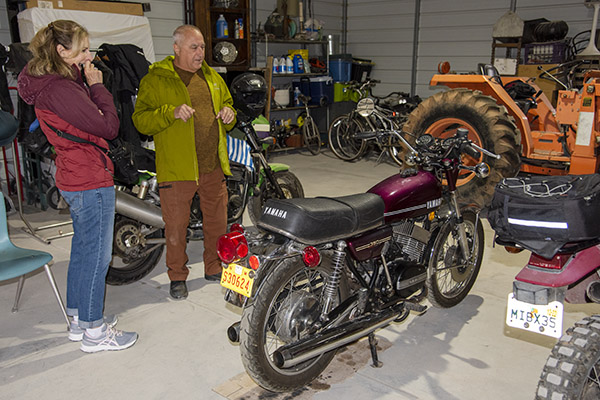
Joe explaining the RD’s merits to Susie.

Joe started the RD 350 for us.  It sounded great.

It was a good visit.  There’s a lot going on at Tinfiny Ranch (living off the grid stuff, concrete stories, tractors, implements, the water wars, vintage motorcycles, and more), and you can read about it here on ExNotes.  Stay tuned, my friends.


Keep us going!  Here’s why you should click on those popup ads!


Become a paid ExNotes writer!


Never miss an ExNotes blog:

Zed Plays Dead: 1975 Kawasaki Z1 Woes

To really understand the cloud of confusion surrounding my brain you’ll have to go back to the very beginning. Back when Zed was left for dead. We don’t have time for that now so I’ll cut to the chase: Zed ran fine for 3000 miles and then the carbs started puking gas from the overflow tubes. The bike was running rich and fluffy as hell. Idle was hit and miss.

My natural assumption was that the old float needles had worn a groove into the sealing surface preventing the cone-shaped needle tip from seating. I purchased a cheap but shoddy set of needles/seats on eBay and with my deft touch soon had them fitted into Zed’s 4 carburetors.

And one of the carbs still puked fuel. If you’ve followed this saga online you’ll know that the brass seat was punched with some tiny, elfin numbers. This punching deformed the seat so that the fuel kept leaking into the float bowl and then overflowed onto the ground. I replaced the new seat with the best looking seat out of the old batch.

This cured the fuel leaking issue. I could leave the petcock in the “on” position and the bike stayed nice and dry.

Yet Zed was still running poorly, cylinders would cut out randomly and the idle was inconsistent. Further investigation revealed that the rubber, year-old vacuum port plugs had dry rotted allowing air to seep past and upsetting the tenuous air/fuel ratio. I ordered new vacuum plugs and was sure the running problems would go away.

They didn’t. In fact, fixing the air leak seemed to make things worse. The bike would run on 3 cylinders and then 4 as your road speed increased. It seemed the longer it ran the worse it ran. I checked the ignition points. They were the original points that came with Zed and had served me well but now they were pitted badly. I filed the points back to good smooth contacts and now the filed points were so thin I couldn’t rotate the mounting plate enough to set the timing correctly.

And so it continued. I ordered new points and reset everything. I had fat, blue spark. The Kawasaki ran terrible. I checked battery voltage, changed fuel filters and nothing worked. In my befuddled state I hit on the float level as a potential cause of the problem and ordered the cool little bowl drain fitting and clear tube tool used to set the float levels.

The float levels were all high. I reset the float levels to spec and now I was truly sure I had the bike problems licked. It ran worse each test ride. I could go about 10 miles before the bike would start missing. It seemed like cylinder 1 was the most likely culprit as removing the plug wire on #1 had no effect on the engine. Pulling the #1 sparkplug revealed a flooded cylinder. Cylinder #4 was also sort of weak, not exactly shouldering the load if you know what I mean and I think you do.

I checked coil resistance and coil 1&4 were exactly the same as coil 2&3. Must be the condensers, I told myself. Condensers are typically replaced along with points: they come as a set. I didn’t buy them that way because in my entire life I’ve only found one bad condenser. Anyway, the way reproduction parts are made you want to keep the original stuff if it still works.

My frustration was growing. Instead of nickel and diming my way through the ignition system I bought new coils and an entire ignition backing plate with new points, condensers and fresh screws the heads of which were not stripped out. It was a whole new ignition system. I was sure something was heating up and fouling the plugs.

My $114 dollar ignition system bought me nothing but clarity. But it was a glorious clarity. The bike ran worse than ever. I didn’t get out of the shed before the #1 cylinder fouled. I was smiling; the odds were narrowing rapidly and in my favor. What are the chances of two completely different ignition systems having the exact same fault? Nearly zero, my brothers. You’ll not hear me complaining about blowing $114 on an ignition system I didn’t need because I was sure then that the problem was carburation. I re-checked the float level in the #1 carburetor. It was fine but I knew now that the only thing I had changed in that carburetor was that damn needle and seat.

I picked through the old needles and seats and selected the best looking set. I removed the eBay needle and seat and reinstalled the old ones. That was it. Zed ran on all four cylinders. I took the bike out for a test ride keeping my fingers crossed at the dreaded 10-mile mark but the bike kept running. I lugged the motor in high gear. The motor pulled cleanly without missing.

I know better than to assume anything was fixed without putting a few miles on the bike so I did a loop to Capitan, out to Roswell and then through Ruidoso to home, a trip right at 300 miles. At my first gas stop in Capitan I was astounded at the fuel mileage. Previously Zed was a steady 40 miles per gallon bike. That first fill-up netted 50 miles per gallon.

From Capitan to Roswell was a nice, winding, 4000 rpm tootle enjoying the breeze and the smooth running Kawasaki. I filled up again and the old Z1 returned 59 miles per gallon. Almost a 50% increase in fuel mileage.

In Roswell’s hot, stop-and-go road construction traffic Zed started to stumble. Crap, I was 100 miles from home and the problem had returned. One cylinder started dropping out and then another. The bike was dying in the middle of the road. Out of instinct I reached down and found the fuel petcock in the off position. Zed ran all the way home on 4 cylinders.

I can’t explain why it took so long to figure out the problem. There were so many distractions on the way to that moment of clarity. I’ll be looking for some OEM Mikuni needles and seats. They say the cheap man pays the most but I’ve found that value is very subjective. For example, what would I be writing about if I bought the correct parts the first time around?


Hey, you need to read the complete Kawasaki Z1 resurrection story!


Need more Joe Gresh?


Never miss an ExNotes blog:   Sign up here!

Giblets 1

With only two full-time writers here at ExhaustNotes.us, it’s a real challenge to churn out the quantity of content a website demands. Luckily we have Joe Berk on staff. One Berk equals like seven normal writers. Coming up with topics is easy but some of the ideas don’t rise to the level of an actual ExhaustNotes.us story. I’ve swept the floor at the luxurious ExhaustNotes.us office plaza and tossed all the bits into this blog post.

Reaching in through the bottom of the chicken we find that the 1975 Kawasaki Zed has been having a few problems as of late. The far right-side carburetor was spewing gasoline sporadically so I purchased 4, generic carb repair kits online. I really only needed the float needle and seat but at $14 a kit it was cheaper to buy the whole shebang rather than just the seats.

The carburetors sit relatively high off the crankcase on a Kawasaki Z1 so most carb circuits can be accessed from the bottom or top without removing the whole bank of 4 carbs. You can get to the idle jet, the main jet, the needle and seat and even the slide needle and emulsion tube if you’re willing to struggle a bit. When I say access theses parts I don’t mean to imply that it’s easy to do. I have the cuts on my hands to show for it.

After 3000 miles of running I was surprised by the lack of debris in the Kawasaki’s float bowls. If you followed Zed’s resurrection you’ll know how rusty Zed’s tank was. I expected the main-jet sump to be full of fine red dust. Installing the new needles and seats was a fiddly job but I managed to get them in and replaced the pilot jets just because I had them. I left the original main jets in place.

Before turning on the fuel I checked the fuel filter on the petcock and found it clean. I bought new inline filters but seeing how clean everything was I left the old inline filters alone. Don’t fix it if it isn’t broken is a good motto to live by with aging motorcycles.

As soon as I turned the petcock on fuel started pouring out of Carb Number 3 (from the ignition side). Of course this is the hardest one to work on. I pulled the float bowl back off and removed the float and the needle. Everything looked ok. Figuring a piece of dirt must be in there I blew carb cleaner into the seat and reassembled the carb. Back together with the petcock on, the fuel leaked as bad as it ever did.

I took the float bowl back off and removed the float. Holding the needle in place with my finger I turned on the petcock and gas poured down my hand, onto my wrist and up the sleeve of my shirt. This led me to believe there was a problem with Number 3’s new needle/seat.

Upon further examination I found some unexplainable marking on the inside of the seat where the needle valve would normally seal. I’m not sure what is going on. Are the stampings some kind of size identifier? Did the punch that marks the seat miss and stamp the inside of the seat?

It became obvious to me that this particular needle/seat combination was never going to seal so I picked the best looking needle/seat from the old parts and installed them into Carb Number 3. No more leaking.

For the real mechanics: I know I should reset the floats but the bowl drain screws are very tight; removing them may break something I don’t want broken. My rationale is that the replacement needles/seats are the same overall length so the float levels wouldn’t have changed much, if at all. One day I’ll get the drain screws out and set the float levels using the clear tube system.

The upshot is that Zed is running much better. I took a quick, 140-mile, 60-degree-January-day jaunt and stopped several times leaving the fuel petcock on: no leaks. Spinning 5000-5500 RPM in top gear the Zed returned 41 miles per gallon not including the amount of fuel that I spilled while working on the carbs. In addition, I had to turn the airscrews in almost one whole turn after installing the new needles/seats and pilot jets.

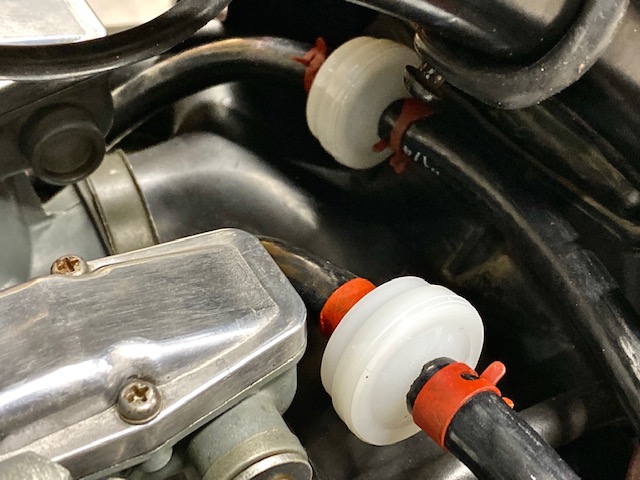
Moving on from the carburetor woes, there are a few disappointing rubber-issues with some parts on Zed. The rubber fork wipers have split in just a little over a year. I really expected them to last a bit longer than that. The rubber vacuum plugs that cover the ports used for balancing the carbs have also rotted and split. These were new about the same time as the fork wipers. Not only are the vacuum plugs rotted, but one of the brass nozzles cast into the new rubber intake manifolds came adrift when I tried to push the vacuum plug into position. Luckily it didn’t go all the way into the intake port and I managed to pull it out and get the plug onto the thing.

When I was resurrecting Zed I sourced parts from all over. I’m going to try and dig around to see if I have any receipts that will tell me where I got the various rubber bits. If they are EBay sellers I won’t bother but I’m sure the more reputable companies will work on making it right. One factor that may have caused the rubber failure is the fact that Tinfiny’s shed gets very hot in the summertime. With the doors closed it’s not unusual to hit 130 degrees inside. 130 degrees isn’t that hot for an air-cooled motorcycle engine but New Mexico’s dry air combined with long term exposure might affect the rubber. None of my other bikes stored in the same conditions have had rubber failures.

Well, what do you know, I had more ground to cover but this carb story ended up running on for so long it’ll make a standalone ExhaustNotes.us blog! I’ll post up Giblets 2 soon.


Read all about Zed’s resurrection here!


Whoa!  You’ve won a free subscription to ExhaustNotes!

Road Test: 1975 Kawasaki Z1 900

The Kawasaki 900 is a legend amongst savvy motorcyclists around the world. Back in the day the limited-to-paper Moto Press lavished high praise on Kawasaki’s top of the line motorcycle. They even called it the King of Motorcycles. And the praise was well deserved. On any greatest-list the Z1 pops up as one of the best motorcycles ever built. But what’s it like to ride today? How does it compare to modern bikes with their liquid cooling, fuel injection and zillions of horsepower?

As it turns out, not too bad. The first thing you’ll notice is the power. Or lack of power compared to a modern Ricky-Racer type of motorcycle. The Z-1 is fast but in a leisurely way. The revolutions build slowly through the gears allowing a rider time to enjoy the acceleration process. There are only 5 cogs in the smooth shifting transmission but you get to enjoy each one of them for a few seconds before going on to the next. With less than half the horsepower of a modern 1000cc motorcycle the Kawasaki Z1 has a human-scaled power delivery. You don’t need the vision or reflexes of Valentino Rossi to wring the neck of this willing old battlewagon.

There are plenty of options available to increase the Z1’s horsepower to near-modern levels but I don’t feel like the bike needs more power. The Z1 is plenty fast enough to keep up with today’s traffic situations and unless you plan on improving the brake system you really don’t want this old Kawasaki going any faster.

The brakes are where you feel the weight of all those years that have scrolled past since 1975. The brakes are not good. The single disc, single piston front brake is the culprit. It takes a healthy squeeze to lock the front wheel and the brake lacks the precise feel of a modern multi-piston caliper. The rear drum brake is better at its job than the front brake but that’s only because rear brakes have much less influence on stopping. Antilock brake systems for motorcycles were unheard of when the Kawasaki 900 was made and you won’t miss it. I say all this for informational purposes only. It’s not like you can’t enjoy the 900 on a ride or you’re fearing stop signs. In regular use the brakes are borderline but acceptable.

A big surprise is how well the Z1 handles. When the Kawasaki first came out most moto-magazine reviewers praised the handling or at worst didn’t complain about it. Since then the un-illuminati have managed to change the narrative. Today the general consensus is that the Z1 is a widow maker, a bike with a hinge in the middle. Unsafe at any speed. I call BS.

The Z1 has a wonderful, lightweight feel through corners. The wide handlebars help with the easy steering. Large diameter wheels may also contribute to the stable, enjoyable ride. Leaned over the Z feels planted and neutral as long as you don’t hit any mid-corner bumps. On straightaways at speed the bike does not wobble. My Z1 has 45-year-old shock absorbers and so an upgrade might help but I’m not going that fast anyway.

This whole, canyon carving, race bike for the street thing has gotten annoying and probably explains the popularity of adventure motorcycles. Riders who blitz around on public roads feel like they’re really hauling ass but that’s because they are the only ones racing. Everyone else is just out for a ride. I get it: it’s hard to keep a 170-horsepower motorcycle under the speed limit or anywhere near it.

Marc Cook, an editor I worked for, once told me the 200 horsepower 1000cc BMW sport bike would be unrideable without all the electronic nannies. Modern bikes have gotten much better than modern riders. That’s where the human-scale power of the Z1 shines. You can whack it open without activating any rider aids because there are none because the bike doesn’t need them. Traction control for the Z is in the right twistgrip.

The Z1 is a mostly comfortable bike to spend the day on. Those high, wide bars that make steering so easy work against you at high speeds. If it didn’t mean replacing the cables and hoses I’d lower the bars a couple of inches but leave them wide. The big, long, cushy seat on the Z1 is a marvel of comfort. I slide way back for fast highway touring and scooch up tight to the gas tank in the twisty stuff. The mid-bike foot peg location is a good compromise and suits the Z1’s multipurpose nature.

Since the Z1 engine is a non-counterbalanced, inline 4-cylinder bolted solidly to the frame some vibration is transmitted to the rider. Personally, I love the way it moves but everyone has their own level of vibration tolerance and the quality of the vibrations changes with different engine layouts. The Z1 is smooth up to 4000 rpm. Above 4000 the vibration takes on different shapes and affects different areas of the motorcycle. None of this is very strong or detracts from the ride. There’s a sweet spot around 4700 to 6000 RPM where the Z1 feels as smooth as it needs to be. I wouldn’t call the Kawasaki a buzzer but if you were to jump onto the Z1 from your modern bike you may think the old Kawasaki is kind of raw. I think of that rawness as being alive with possibilities.

Fuel economy on the Z1 is so-so. I average between 38 and 40 miles per gallon but live at high-ish altitude and it’s been very hot. Heat and altitude kill mileage. I will check again in cooler weather when I expect a slight improvement. Fueling, the way the bike responds to throttle input, is slushier than an injected motorcycle. There are no abrupt engine responses. Things happen slightly slower right off idle but that may be my carburation setup. At a steady cruising speed the slushiness means you don’t need to keep strict control over the throttle. This bike is not nervous or skittery.

You’d think parts would be hard to come by for such an old motorcycle, but no. There’s a thriving Kawasaki Z1 restoration movement afoot. It’s mostly driven by demand, as the Z1 is commanding a premium price in the vintage motorcycle market. The Z1 is right at home in the middle-aged, empty-nester-loaded-with-cash, nostalgia-boomer’s wheelhouse. That demographic has and generates the most dollars. It’s actually easier to get parts for a 1975 Z1 than many more recent models and the prices aren’t unreasonable. With an abundant supply of repair parts easily obtainable the Z1 scores high for livability.

Compared to a modern 1000cc motorcycle the Kawasaki Z1 is slower, takes longer to stop and is worse in tangible ways. On a racetrack, that is. In ways intangible the Kawasaki Z1 is the better street motorcycle for simply enjoying a motorcycle ride. It’s easy to fix, reliable as any new bike (maybe more reliable) and a joy to possess.

I never feel like the Z1 is tolerating my incompetence. Instead we work together, both of us not in our prime, and we get places, you know? Riding Kawasaki’s Z1 feels like springtime and affirmation and young, anxious wonder. The bike is a time machine that radiates happiness. And when we get to the place we were going milky-eyed old men walk up and tell me how wonderful my motorcycle is and how much they loved the one they owned back when they were strong. That kind of reverence and emotion is not going to happen with just any motorcycle. The Kawasaki Z1 900 is much more than a collection of parts assembled in a factory. It’s industrial art that inspired an entire generation of motorcyclists. Long live the King!


Check out Gresh’s Kawasaki Z1 resurrection here!

Zed: Better Living Through Silicone

Every time I tinker with Zed it leaks a little less. This session I tackled the alternator wire oil leak. Zed’s alternator runs wet, a popular thing to do way back when motorcycles were made of steel and riders were flesh and blood. Where the wire harness exits the stator housing a rubber grommet is supposed to keep oil from seeping out. Someone had stuffed electrical tape down in there and Zed’s grommet wasn’t doing its job because the harness dripped oil.

The problem with replacing the grommet is that the stator harness plug needs to be dismantled to get the wire ends through the grommet. Dismantling the 45 year old stator plug is an iffy proposition. You’ll break the brittle plastic for sure. I guess you could eliminate the plug, cut the wire ends off and butt splice the mess back together. It would probably be better from an electrical standpoint.

The job also requires removing the stator housing to gain access to the grommet. That means a new cover gasket and more work. Instead, I took ExhaustNotes.us reader, Honda 919’s advice: After removing the tape and gunk in the grommet area I flushed the void with carb cleaner and mopped it out with a rag. Once I got the void nice and clean I packed in black, RTV silicone until it was flush with the stator housing. Then I let it dry over night. No more stator leak…at least for now.

The black rubber, half-circle cam end plugs were the next problem. Oil seeped out of these with the engine running and at high speeds the oil would blow back onto the plug wire and whatever pants you happened to be wearing that day. The plugs are more than just rubber though, they have an aluminum core to help hold their shape. Zed’s were dry and hard from years of service so I bought new ones.

The old cam plugs were glued in with silicone. I’m not sure it’s a factory process but I used a tiny bit of RTV black on the head semi-circle to help seal the plugs. All went well until I started tightening the valve cover and the rubber plugs started to squirt out the side of the head. Maybe the silicone was making the plugs slippery. I used a rubber mallet to tap the rubber plugs back into the head but when I did that the valve cover gasket pulled in towards the head.

I decided to let the silicone set up and walked away. The next day I loosened the valve cover, set the valve cover gasket back into position and buttoned the thing up. Hopefully for good.

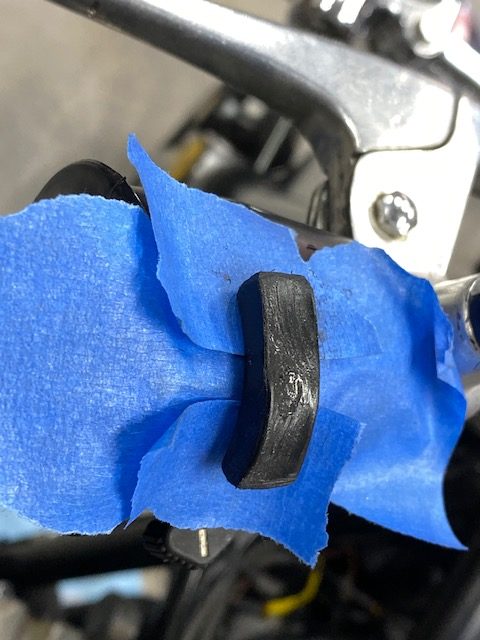
Somewhere in all these road tests the high/low beam knob fell off leaving a broken bit of plastic stalk to control the lights. The parts to fix the high/low switch cost nearly as much as an entire new switch cluster! Having had about enough parts ordering I heated and curved a bit of black plastic, drilled a hole in the thing and RTV silicone glued it onto the protruding bit of the switch stalk. It looks horrible but at least it’s ugly.

I set an ambitious goal for Zed’s 4th test run: 200 miles across the Sacramento Mountains to eastern New Mexico and back. I was only 15 miles into the test run when I smelled oil. The damn valve cover was leaking. Still! The two forward cam ends had a light sheen of oil so I aborted the big ride and took a shorter route. After 36 miles of riding the oil leak seemed to be gone. After 60 miles of riding the cams were nice and dry and there was no oil smell. After 90 miles of riding, not a drop of oil anywhere: the engine was dry. Maybe the earlier oil leak was pre-existing oil blowing around the front of the engine? Back home I checked Zed and could not find any leaks.

I believe the test runs are over for Zed. It runs great and it doesn’t leak. There will be more repairs in Zed’s future but I feel pretty confident in the old motorcycle getting me where I need to go. That is, if the gas tank doesn’t leak.


More Zed’s Not Dead here!

Zed’s Not Dead: Part 20

You may recall from Zed 19 I had to re-soak Zed’s gas tank as 10 days were not enough to dissolve the rust. I drained, dried and reloaded the tank with apple cider vinegar and let it sit for 4 more days. This is what it looked like originally:

The second session really knocked most of the rust out. After rinsing I dumped a large box of baking soda into the tank and added clean rainwater sloshing it as I filled to mix thoroughly. I don’t know the chemical reaction that takes place but the baking soda neutralizes the acid, turning the metal a dull grey, almost white color. This treated metal does not flash rust and I’ve been going 3-4 years on another tank I cleaned like this without rust reappearing. It’s like the metal turns passive and stops reacting to oxygen.

If I wasn’t so hell-bent on riding this bike I think I would flush and cider the tank one more time but it looks good enough and I’ve got to ride! I connected a small hose to my shop vac and played it all over inside the tank. I can hear nothing when I shake the tank so at least there are no big chunks loose inside.

Proving that even the simplest life forms can learn I bought an entire new petcock for $23 rather than the rebuild kit for $8. This is real growth on my part. Usually I buy the kit, mess with it for hours then put it on only to have it leak. Only then will I buy the new one. Kawasaki uses a turnbuckle-type left-hand/right-hand thread on the Z1 petcock. It took about 145 tries to get it to tighten up facing the correct direction.

The new petcock has screens inside the tank and a bowl filter but with 40% of Zed’s tank out of my view-field I can only assume the entire tank is as clean as the places I can see. Inline fuel filters, one for each set of two carbs will hopefully catch any debris still in Zed’s tank.

An update on the Z1 Enterprises regulator/rectifier: It works. The battery charges @ 14.8 volts which is still a tad high but much better than the 17 volts Kawasaki’s setup was doing.

From the top Zed looks pretty well sorted. I took it for a ride and it ran really well for off the bench carb settings. It might be a little rich at idle or it might just be our 6000-foot elevation. I’m not going to tinker with it for now. I’d rather get some miles on the bike.

I don’t know what this bracket is for. Located on the right side down tube near the tach drive, it’d too light for a steering damper mount. Anyway, there’s enough stuff on the bike as is so I’m not going to worry about it.

I took Zed to my secret proving grounds and she ran through all 5 gears smoothly. The bike hit 90 MPH without even trying. I’ll need a better front tire to do any high-speed work. The brakes work ok. When you ride a SMR 510 Husqvarna all other motorcycle brakes seem like crap. After 33 miles there are small oil leaks at the tach drive and countershaft area. Maybe the clutch pushrod seal or sprocket seal is the culprit. That stuff is easy to fix.

The patina on Zed is excessive, bordering on shabby. The bike sat outside for years and paint wise there’s nothing left to polish or wax. The finish is just not there. The pin striping is cracked and missing sections. I’m not sure what to do about that. On the one hand a ratty bike may be less attractive to thieves and old Z1’s are getting fairly expensive. On the other hand it does look pretty bad. I’ve seen my Enduro buddy Mr. French do some amazing work with rattle cans. Maybe I’ll give it a go. The paint can’t look any worse.


That’s it: from Dead to Zed in 20 easy sessions. Don’t worry, this won’t be the last you’ll hear of Zed. I’ll be doing some long trips on this bike, maybe Mexico, maybe ride to a few flat track races. I’ll update the blog if I do any more major work on the bike. The story of Zed’s resurrection may be ending but the story of Zed is just beginning.


And there you have it.  If you’d like to run through the gears (i.e., the previous 19 installments of Zed’s Not Dead), you can do so here!

Zed’s Not Dead: Part 19

It’s time to clean out Zed’s rusty gas tank. Before I bought it Zed sat outdoors for a long, long time and heavy rust inside the tank had gotten out of control. Clean gasoline is critical when there are 4 carburetors to clog up. You know how I feel about tank liners and new Z1 tanks aren’t very expensive so I won’t be doing any heroics to save this one. If it doesn’t come clean I’ll go to plan B. I’m just looking for any excuse to buy one of Z1E’s beautiful painted body sets.

A few years back I read a story on using apple cider vinegar to dissolve rust. I used the stuff to clean Godzilla’s rusty tank and it worked great. Of course, Godzilla’s tank wasn’t nearly this bad. The cider vinegar is a very mild acid and works slowly so you don’t have to worry about eating a hole in your gas tank.

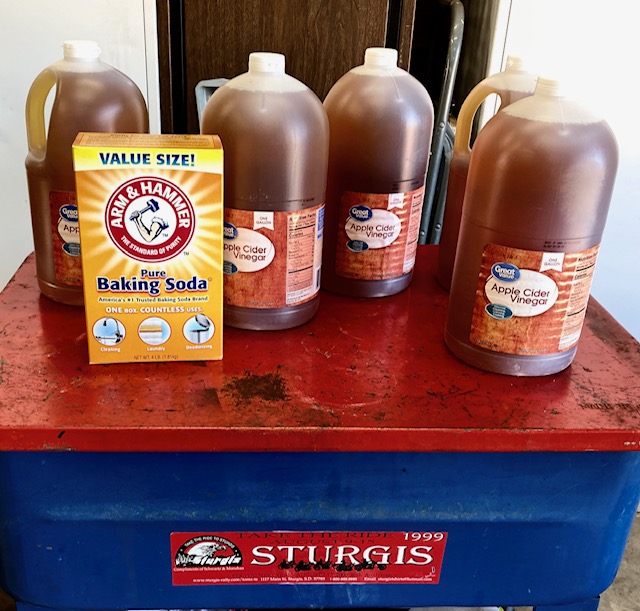
Available at Wal-Mart, cider and baking soda are the two ingredients used. I also pressure washed the inside of the tank to knock loose any flakey rust. After pressure washing I dried the tank with a heat gun and dumped in 4.25 gallons of apple cider vinegar.

With the tank jugged all you can do is wait. Zed’s tank was really bad so I left the cider in for 10 days. I dumped the rusty cider into a bucket and flushed the tank with water. The results were encouraging but the tank was still not shiny clean.

Normally this would be the time to pour in the box of baking soda and fill the tank with water to neutralize the acidic vinegar but Zed’s tank needs another dose of cider. Using the heat gun I dried the tank again then refilled it with a gallon of fresh vinegar and the rest with the murky cider I had dumped out of the tank. Vinegar is not cheap, you know.

While the tank was soaking I dismantled and de-rusted the gas cap. I wasn’t sure which way the new rubber gasket went on the flange. One side is 1/32” wider than the other and manufacturers do stuff like that for a reason. The old gasket was no help. It had crumbled. Figuring I had a 50-50 chance of getting it right I installed the gasket wide-side towards the gas tank.

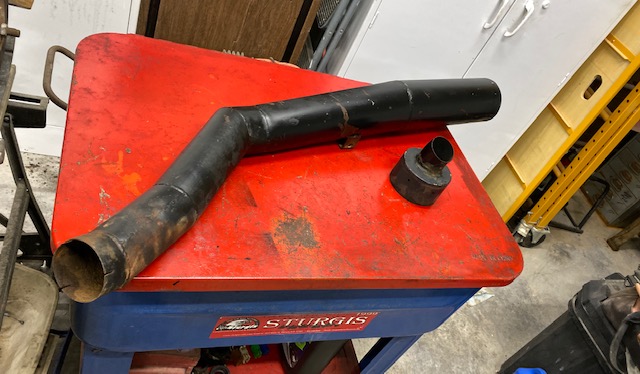
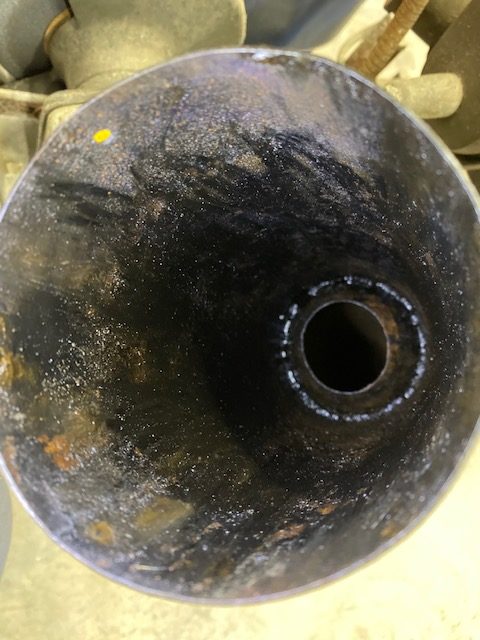
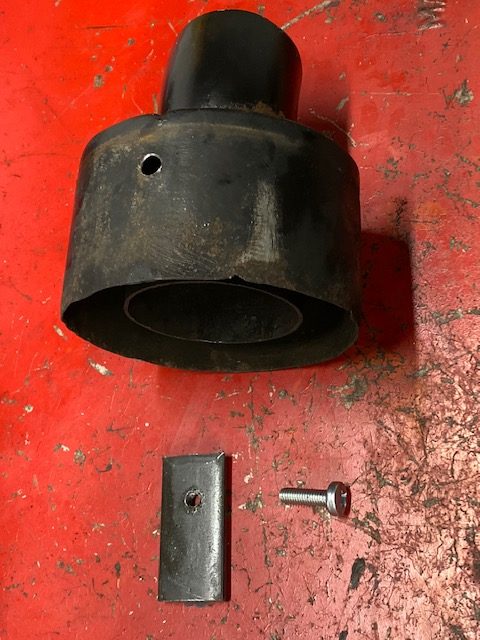
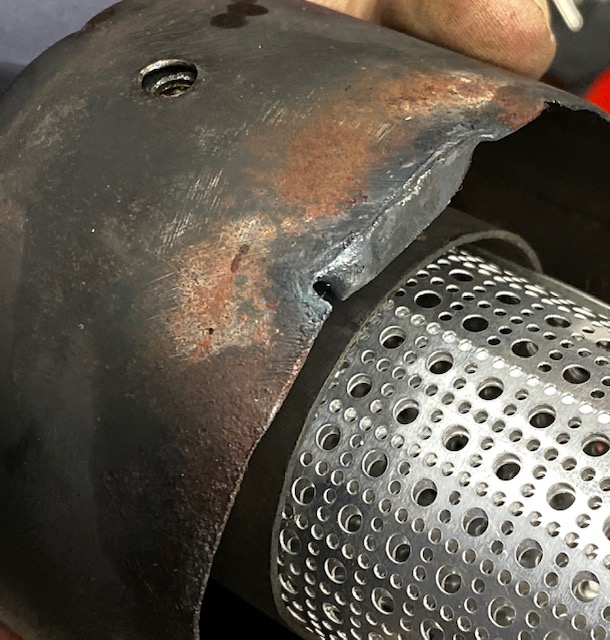
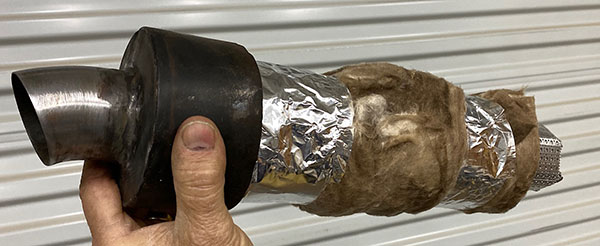
Zed’s exhaust was held on by coat hanger wire when I got the bike. The headers seem well made but the muffler section looks a bit crude. Not terrible but nothing like from a factory. It has an internal reverse cone 12” from the end of the muffler body. There was no baffle anywhere.

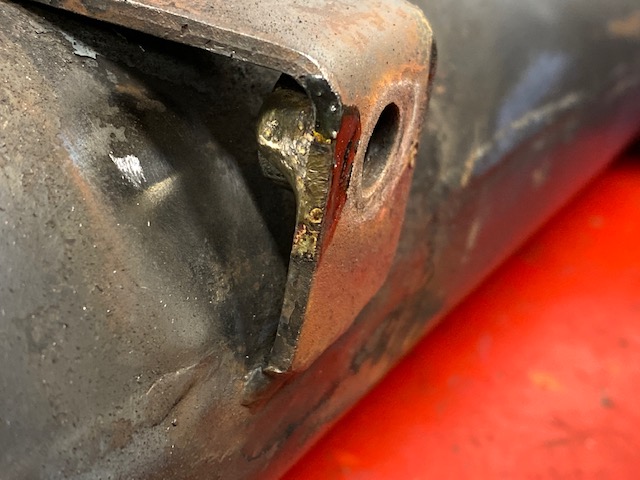
The muffler end cap was secured by a stripped sheet metal screw. I drilled and tapped a piece of flat stock for a 6mm screw. This backing piece gives the screw more meat to bite into. Then I set the backing piece into place and welded it to the end cap. I can’t weld and trying to stick a thick piece to thin sheet metal is hardest of all.

Where the muffler was held on by a coat hanger I brazed a 3/8-16 nut to act as a blind nut. This wasn’t critical but it will make muffler installation much easier as there is not much space for a wrench. It also eliminates one more variable when you are fumbling around trying to line things up.

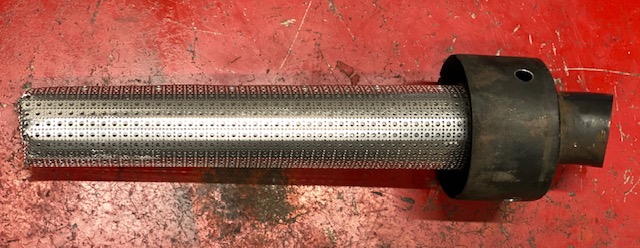
I made a baffle from perforated aluminum, rolling it over a 1-1/2” PVC pipe to form the tube. The baffle is long enough to protrude past the inner reverse cone for support and is wrapped in standard fiberglass insulation. The end of the baffle is folded in on itself and riveted. There are a lot of tiny holes in the baffle so I don’t think it will be too restrictive. I’m sure the Mansfield house insulation won’t last long but at least I tried.

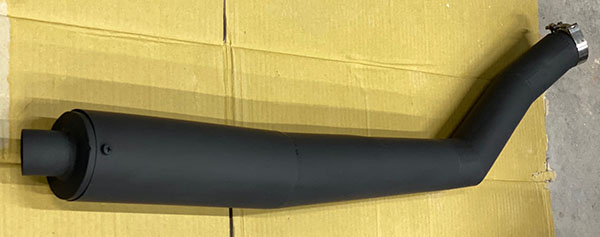
After all that pipe work I splashed some BBQ black on the muffler and it doesn’t look bad. As long as you don’t get within 25 feet.

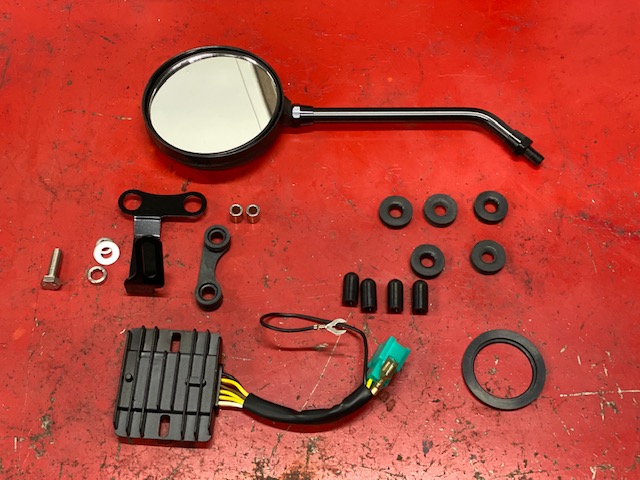
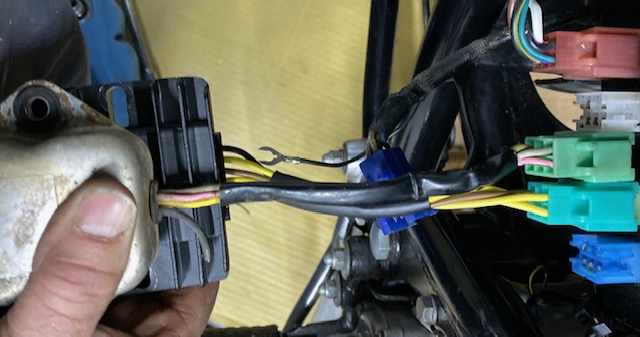
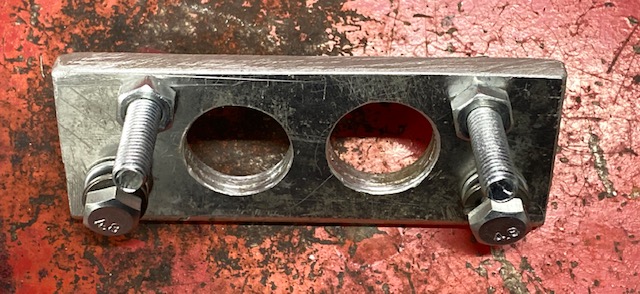
Zed was overcharging the battery to the tune of 17-volts so I bought a non-stock replacement unit from Z1E. The new unit eliminates the factory rectifier, having that function combined into the body of the regulator. Electrically, the unit is plug-n-play and the bolt holes from the old/new regulators line up but the wiring harness from the new unit was too short by about ¾”. There was no way to plug the regulator in and still have enough slack to reach the mounting holes under the battery box. I tried all sorts of finagling and considered rotating the regulator and using only one mounting bolt or drilling new holes closer to the harness socket. In the end I made a bracket to move the regulator. While I was at it I narrowed the bolt spacing between the slotted regulator mounting holes to make it easier to install.

All is mounted securely now and the unit plugs in just fine. It remains to be seen if it regulates. We will find that out in Zed 20.


Want more Zed?  Just click here!