Charlie Don’t Paddleboard: A Baja New Year’s Story

By Mike Huber

There was no better way to ring in 2023 than camping off our motorcycles on a beautiful beach in Bahia Conception in Baja, Mexico.  The only thing that made the moment more special was sharing cigars, Tecates, and Tequila with our new friends in the palapas to our left and right while sitting around a fire.  Somehow, I managed to make it until 10 p.m., which is equal to a Boston New Year, and I surpassed my previous Baja New Year by 1 hour.  I was pretty proud of myself.

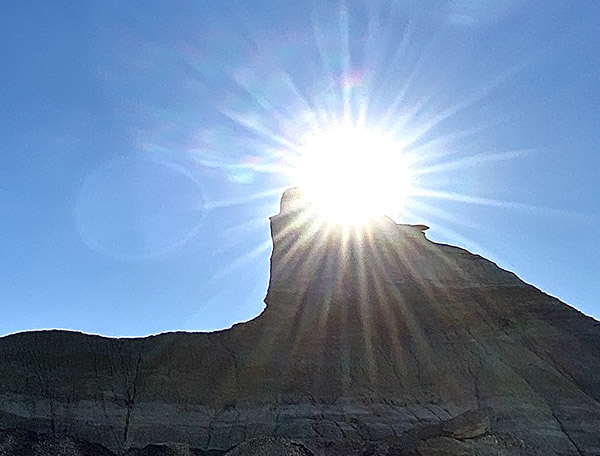
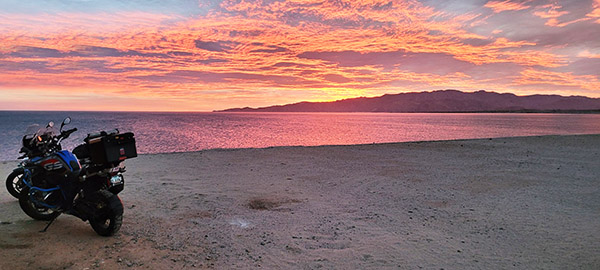
Groggily awaking the next morning to the sunrise peering over the mountains across the bay was a serene way to start the new year.  Once we had a coffee (or three) in us we decided to pack up and make our way back north. The plan was originally to hotel in Guerrero Negro for the night, but we had made such incredible time riding that we arrived in town by 11:30, and it seemed too early to stop for the day.  The biggest problem with this is once you leave Guerrero Negro there isn’t much (really anything) until you arrive in Gonzaga Bay, which is another 4+ hours of riding and the possibility of bad winds.  We rolled the dice and decided to attempt the ride to Gonzaga confident we would arrive just before sunset, which I had confirmed was at 16:49 PST.

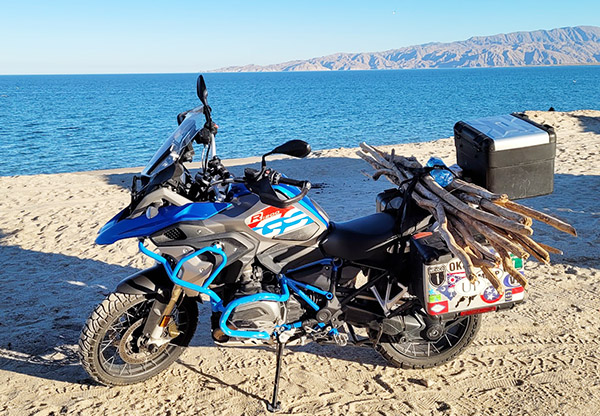
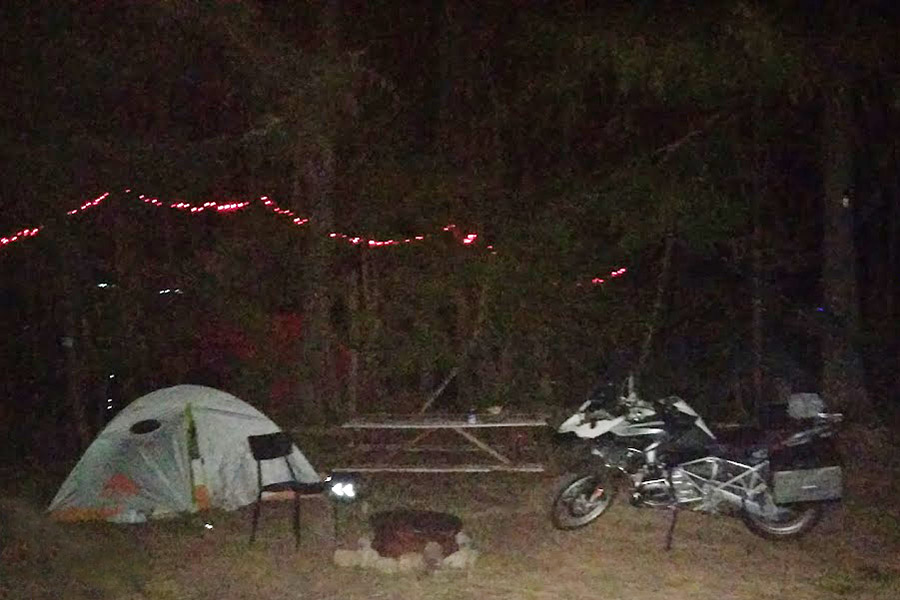
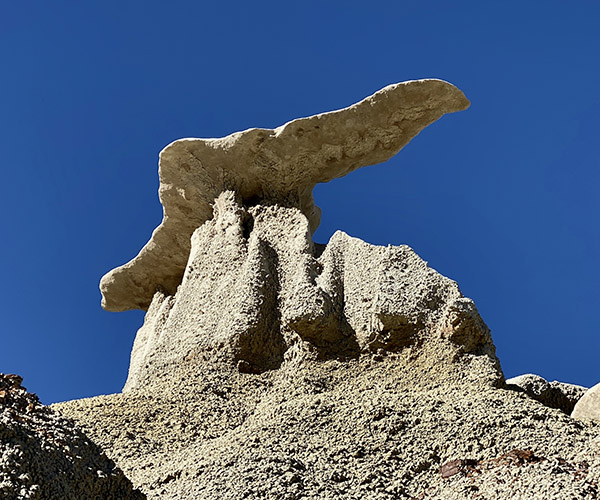
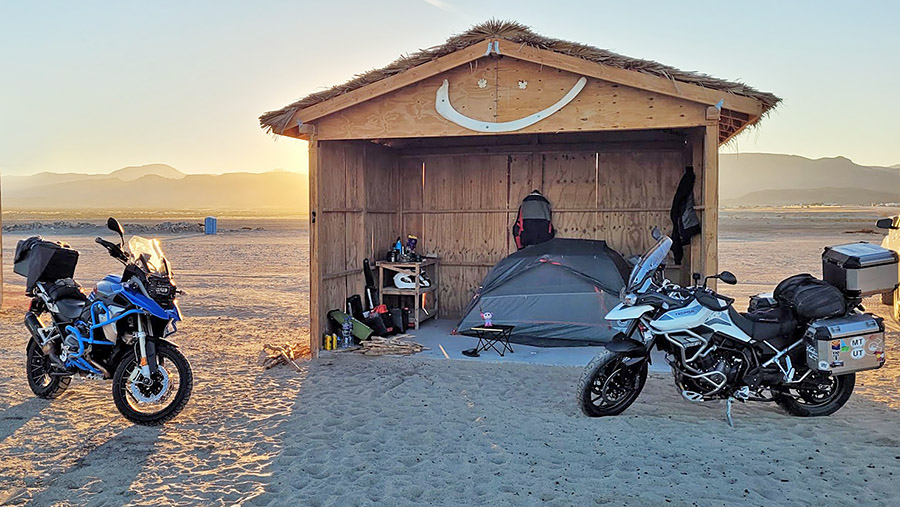
The ride up was rather uneventful and even the winds seemed to be cooperating with us on the last leg of this ride.  In pulling up to the Rancho Grande Tienda to reserve our campsite, refuel the bikes, and load up on firewood we were starting to feel the 320 miles we had just completed.  One of the cool things about camping in this location is the rather long bundle of firewood they provide.  Every time I load the wood on the moto it looks like some type of biplane.  What completes the biplane feeling is riding to the palapas on the bay you are parallel with an airstrip, so you actually feel like you are about to take off. Just as we hit the 1-kilometer dirt road the winds began to increase heavily.  This was the norm for this part of Baja and wasn’t too alarming for us.

Thankfully the palapa provided us with some protection from the swirling gusts, but not from the roaring freight train sounds that would keep us awake through the night as a demoralizing reminder that we’ll have to ride in them the following day.

After setting up our home for the evening it was time for a cold Tecate beer to unwind and enjoy the gorgeous views of the bay and the mountains that surround it.  As I sat in my chair, I noticed a lone paddleboarder in the bay and became a bit alarmed with his lack of movement while he struggled to fight the wind to return to shore. He was quite a ways out and it was obvious the wind was physically and mentally wearing him down from this difficult battle.  I could see him stand up to paddle ferociously for a few moments and then he would lay on the board, clearly to rest.  This went on for about one more Tecate when I noticed it was 15:45.  People were beginning to gather on the shore to watch his valiant yet seemingly unsuccessful attempt to return to his camp, but he wasn’t getting any closer.  It was time for me to walk the beach and see who this person was with, gain insight on his experience level, how long he was out for, and determine next steps (if any were needed).


Keep us publishing….please click on the popup ads!


After a few minutes I found his wife who didn’t seem to be concerned until I mentioned that sunset would be in an hour.  At that moment the full weight of the situation set in, and she became frantic.  Being one to always travel with a SpotGen 3 GPS emergency beacon I powered it on, gave her a brief tutorial on how to activate the SOS button, handed it to her and said, “If I am not back in 15 minutes you push the SOS button.”   I then directed her to drive the bay in search of a fisherman or boater that could possibly assist.  While she was working the problem from that angle, I fired up the BMW GS1200 and returned to the tienda to see if I could find a local that could assist in what clearly was becoming a rescue operation.

The locals in the tienda didn’t seem to know anyone that could help.  This was not what I expected, and my brain was scrambling for any other ideas to save this person.  As I exited the store the man’s wife came flying into the parking lot creating a mini dust storm from her sprinter van.  She was even more panicked then earlier. Just as I was about to take the GPS beacon, return to the location of the paddleboarder and press SOS we saw a 1960s VW van with some surfers with their boards on the roof.  After explaining the situation, they fully agreed to help, and we all raced back to the beach.  We had 40 minutes of sun left before it disappeared over the desert mountains behind us.  Once our rescue caravan arrived one of the surfers quickly dawned his wetsuit, grabbed his board, and was off into the cold, windy waters.  Fortunately, it didn’t take him very long to reach the distressed paddler, secure his paddleboard to his surfboard and tow him back in.  Everyone was safe and back on shore with 10 minutes of sunlight remaining.

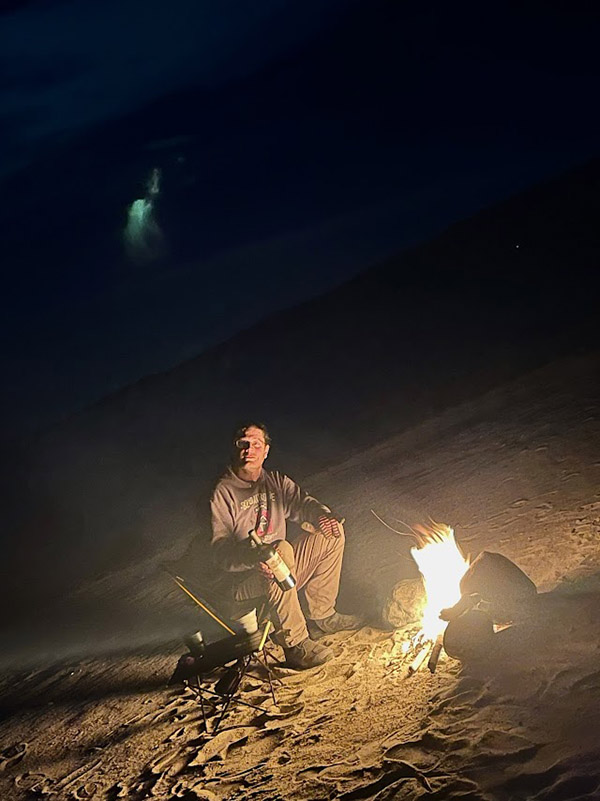
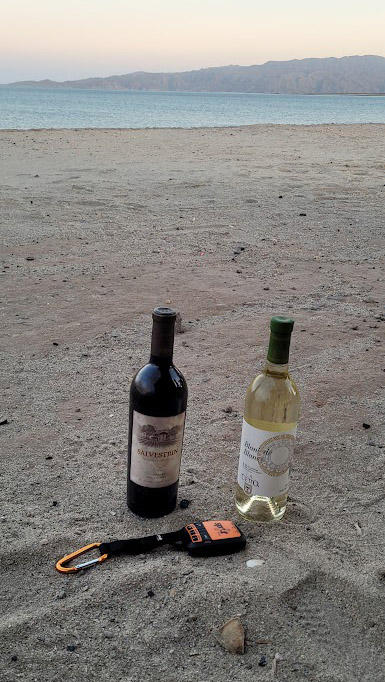
The rescue operation was a success.  The hero surfers made a hasty exit just as the last rays of light from the sun began to fade into the lonely desert.  An hour later the family came over to our palapa to gift us with a couple bottles of wine as a thank you for assisting in the rescue mission.  Of course, we invited them to share our campfire.  Chatting with the paddleboarder, we learned this was his first paddleboarding experience. Together we relived the moments of the day from each of our perspectives while drinking the wine and enjoying the glow of the fire.  What could have been a much worse ending was nothing more then a valuable lesson for him.  The true heroes were the surfers, and I never even got their names before they rolled back down the dusty road and into the Baja desert.


More good Baja articles and stories!


Headed into Baja?  Insure with the best:  BajaBound!


Never miss an ExNotes blog:

Setting Up Lee’s Classic Turret Press

By Joe Berk

This blog outlines the first steps in setting up the Lee Classic Turret Press Kit. Although it’s easy, there are a lot of steps and it’s more than you or I want to cover in a single blog.  I’ll present additional blogs covering this topic in the coming days.

The Lee Classic Turret Press includes good instructions. The kit includes the turrent press, the handle, a spent primer catch tube, primer arms, and hardware.

After the turret press has been secured to your reloading bench (you can view the Lee bench plate installation blog here), attach the primer catch tube to the barb fitting beneath the ram.

This barbed fitting on the ram underside captures ejected primers.
The primer catch tube attaches to the barb.
The primer catch tube installed. It’s nice not having primers falling out. This is a well-thought-through design.

Lee provides a clear plastic bag containing the hardware items you see below.

The handle bolt and fittings, the lock ring wrench, and two primer arms (one for small primers, the other for large primers).
The handle attaching hardware.

You can install the press handle to operate the press from either the left side or the right side.  I installed mine on the right side.  To do this, install the bolt from the left side and the two fittings (one goes inside the other) on the right side of the ram linkage.

Intallation of the handle’s half-inch bolt and the fittings in the ram attach point.

Insert the press handle on through the fitting, and then tighten the bolt.

The handle installed on the Lee turret press.

After installing the press handle, you can operate the press to cycle the ram. Each time you do so by raising and the lowering the ram, the turret head will advance a quarter turn (or 90 degrees) counterclockwise.  At this point, it’s a good idea to oil the ram, the ram linkage, and the turret.  I used gun oil on my press.  Lee states in their instructions that any gun oil will do.

The lower arrow points to the ram. The upper arrow points to the twisted 1/4-inch-square bar that cams the turret 90 degrees counterclockwise with each ram cycle. It’s a very clever design.

I’m going to initially reload 9mm ammo on my Lee turret press, so the next step involved installing the Lee Deluxe 4-die set in the turret.    We’ve previously written about Lee’s Deluxe 4-die sets for other cartridges here on the ExhaustNotes blog (we’ll include a set of links below).   In my opinion, they are the best dies available from any reloading equipment supplier.

Lee’s Deluxe 4-Die Set in 9mm.
Lee’s Deluxe 4-Die Set includes a powder dipper, a shellholder, a resizing/decapping die, a powder through-hole expanding die, a bullet seating die, and the factory crimp die. Lee dies are the best dies I’ve ever used.  They are also the least expensive.

I started by installing the 9mm shell holder in the ram. After installing the shell holder in the ram, I raised the ram all the way up.

The 9mm shellholder in the turret press ram.

I next installed the the decapper and resizing die in the turret head.  With the ram fully raised, I screwed the sizing die into the ram until it contacted the shell holder, and then locked it in place with the locking ring.

The resizing die in the turret, locked in place by the locking ring.
I raised the ram fully, and screwed the sizing die all the way down so that the bottom of the die contacted the shellholder. Then I locked it in place with the locking ring.

After doing the above, I lowered the ram and inserted a 9mm case in the shell holder.   I then partially raised and lowered the ram halfway four times.  That rotated the turret to position the sizing die directly above the ram again.  You can also turn the ram manually.  With the sizing die directly over the ram, I raised the ram fully.   The sizing die resized the 9mm case, the old primer was pushed out of the case, and the primer was captured by the tube hanging beneath the ram.

A 9mm case in the turret press.
Raising the ram to resize the case and push the spend primer out (the decapping operation).
When the ram is lowered, the turret is cammed a quarter turn counterclockwise.

The next die, installed one position to the left of the sizing die, was the expander die.   After raising the ram, I screwed it all the way into the turret such that it touched the shell holder, and I locked it in position with its locking ring.  I then repeated what I had done earlier.  I raised and lowered the ram halfway four times to bring the expander die back over the ram.  I put the 9mm case into the shellholder and ran the ram up fully.  It flared the case mouth perfectly, just enough to allow starting a 9mm bullet.

The expander die locked in place with its locking collar. This die is installed in the threaded turret hole one position to the left of the resizing die.
A 9mm, 124-grain plated copper bullet being fit checked in the flared case mouth. I’m not going to seat the bullet yet (we’ll discuss that in a subsequent blog); here, it’s only being fit checked after the case mouth flaring operation.

I then installed were the last two dies.  I installed the bullet seating die by partially screwing it into the turret’s third threaded hole, and then I installed the factory crimp die by partially installing it into the turret’s fourth threaded hole.  I didn’t attempt to adjust the bullet seating die or the factory crimp die yet; that will come later and we’ll discuss this in subsequent blogs.

The bullet seating die is the third die installed in the Lee turret.
The factory crimp die is the fourth die installed in the Lee turret.

Lee includes two priming arms and a lock ring wrench in the clear plastic bag containing the turret press hardware.  You may have noticed that the four dies are right next to each in the turret.  The lock ring is a clever tool that makes it a bit easier to tighten the four dies’ lock rings.

The Lee lock ring wrench (top view).
The Lee lock ring wrench (bottom view).

Two days from now, I’ll cover installing and adjusting Lee’s auto-drum powder measure, and then after that I’ll have a blog on installing Lee’s safety primer feed.  Stay tuned, there’s more coming on this awesome reloader.


Never miss an ExNotes blog:


More reloading and more gun stories?  You bet!


Here are links to our earlier blogs on Lee reloading equipment:

Lee Bench Plate
Lee’s Modern Reloading Manual
Lee Safety Powder Scale
Lee Classic Turret Kit Unpacking
Lee .44 Magnum Dies 1
Lee .44 Magnum Dies 2
Lee .44 Magnum Dies 3
Lee .357 Magnum Dies

Toad Rock Campground, British Columbia

By Mike Huber

When traveling I keep a loose schedule.  I talk to people along my journey and gain insight on what is best to see, and just as importantly, what is best to avoid. In 2017 while sitting outside Starbucks somewhere in Washington state a couple asked where I was headed (I ride a GS1200; frequenting Starbucks is an ownership obligation).  I didn’t have much of a destination in mind and the couple asked if I had my passport, which I did.  They recommended visiting Toad Rock Campground in British Columbia. Just like that, Toad Rock Campground became my weekend destination.

I entered Canada through Idaho.  It always seems once crossing the border everything just becomes more magnificent. Trees are larger, there is more wildlife, the mountains are higher, the water is bluer, you get the point.  I crossed the Canadian border at Rykerts, B.C.  This was a bit out of the way but it was what the couple had recommended.  The main reason (besides 3A being a phenomenal road) was that I would take the World’s Longest Free Ferry across Kootenay Lake to Balfour.  Once I disembarked the ferry in Balfour it was just a short hop to Toad Rock.  It turns out taking the longer route was absolutely the right call.

Arriving at Toad Rock, I dismounted from the GS and went to check in.  The lady running the camp stated it was full, but I could find a patch of grass in the back and set up camp. I signed in and paid (I want to say $10 CDN but don’t fully remember).  She then looked at me, pointed and said, “If you’re an asshole I will throw your ass OUT!”  To which I swiftly replied “Yes, Ma’am.” Later I found out she even makes motorcycle clubs remove their vests and colors to avoid any friction within the camp.  This was all fine with me.

I rode to the back forty to find my piece of lawn, which was located well outside the wooded main area.  The camp looked really cool with lights hung all through it to include a central gazebo with a stage, bar, and a very large refrigerator which was firmly held closed by a bungy cord.  I asked someone what the deal was with this cord.  They replied that there was a large pig that wandered the campground to scare the bears away and if you don’t bungy the refrigerator, the pig will open the door and drink all your beer.  Interesting indeed.

My camp was set up by 13:00 and I discovered a local loop for an afternoon blast around southern B.C. The loop entailed riding Route.31 around to Route 6.  From Route 6 I dropped down into Nelson, B.C. Nelson would make a great stopping point for a late lunch and has a quaint downtown area to walk around and stretch. The roads were in great shape and outside the mountain views being minimized from several wildfires it was a perfect June day to enjoy this part of the province.  What made the day even better was stopping twice to jump into an ice-cold mountain stream that hugged the road to cool off.  The streams were cold and refreshing, especially after riding in full gear during the peak of the day.

Upon leaving the streams my entire body would be tingling (like I just ate a piece of peppermint gum) from the extreme change in temperature it had just experienced.  Having been fully refreshed from my swims it was time to eat. My stomach was growling for a burger just as I entered the town of Nelson.  While eating a giant bacon burger and enjoying a cold Kokanee beer I suddenly heard a loud chopping through the air.  I recognized that sound from years before.  It was a Chinook helicopter coming to refill its water bucket in the lake to continue fighting the wildfires.  Once that show was over and my burger was finished it was time to head back to Toad Rock and see what was going on at camp for entertainment.  I would not be disappointed.

As I arrived at camp around 17:00 the pavilion in the middle was just getting warmed up and people were piling in serving drinks from the BYOB bar, retrieving beers from the refrigerator (and remembering to secure the beers from the thirsty pig), and talking with others. It wasn’t long before riders were randomly grabbing instruments to play music.  Everyone was welcoming as they took turns sharing their motorcycle adventure stories.

At this point I realized we all were in the middle of a great motorcycle story just living in the present here. The festivities continued late into the night.  As the night wore on and people slowly began to drift off to their campsites, I decided it was time to return to my tent as well.  The only problem was I couldn’t find my campsite. I knew it was in the lawn section but that seemed impossible to find as I went by the same tents a few times as I wearily followed the colored lights strung throughout the trees.  I began to worry that I’d have to locate the owner to ground guide me back to my campsite. Does meandering the campground hopelessly lost constitute being an asshole?  It was at this moment I saw a familiar landmark that marked my tent location and I haphazardly slid into my home for the evening. This was a day that fully encompassed what being a motorcyclist is all about: Living in the present, embracing each moment, and bonding with fellow riders.


Want to be thinner, ride faster, and look better?  Please click on the popup ads!

More riding in Canada?  You bet:  Check out the Three Flags Classic!


Never miss an ExNotes blog:

ExhaustNotes Travel:  The Bisti Badlands Of New Mexico

By Joe Gresh

In the northwest quadrant of New Mexico there’s a lonely, two lane highway numbered 371 that runs north from the small town of Thoreau on Interstate 40 to Farmington. About 30 miles south of Farmington, on the east side of Highway 371 is a place called the Bisti Badlands in the De-Na-Zin Wilderness. The Badlands are where you can find the ever-patient hoo-doo’s standing watch over mankind as we scurry around like red ants on our disturbed mound. Not ageless, the rock formations and strangely eroded pedestals found in the Bisti slowly change over time. Unless a stone topples to the ground you might spend a lifetime observing and never notice the backs of the old ones ceding to gravity’s incessant pull.

CT and I left Farmington around 9:00 a.m. and drove to the Bisti where we met Gilbert, who works as a guide for Navajo Tours USA, a Native American company that operates in Chaco Canyon and Shiprock as well as the Bisti Badlands. These guys are good and it’s not just me.  National Geographic thinks so too.


Help us keep publishing:  Please click on the popup ads!


Gilbert is Navajo and has like 16 different jobs, guiding tourists through the Bisti being one of them. Along with Gilbert, me, and CT was Sasha. Sasha spoke with a heavy accent; she sounded like she was from an eastern European country or maybe Texas. Her husband and young son dropped her off at the Bisti parking area and as soon as they were satisfied we weren’t ax murderers they fled the scene. Sasha said they were tired of hiking around New Mexico and were going back to Farmington to rest.

Bisti Badlands is one of those places that doesn’t look like much from the parking area. There was only a sun-faded, Bisti Badlands map under scratched Plexiglas in an information kiosk to identify that we had arrived at the correct spot. The map looked as old and bleak as the landscape it described. I looked across a wide, shallow expanse of hard packed, barren dirt and wondered where the heck we were going to hike. I mean, there’s nothing out there.   Do we just walk out into the center of the desolate valley? Gilbert laid out a northeasterly route that would hit some of the high points of the Badlands. We opened a red pipe gate, stepped high over a large diameter cross bar between the gateposts, and started hiking.

Gilbert and Sasha were way younger and fitter. At first they appeared to have an ambling pace yet I would have to break into a canter every few hundred yards to catch up with them. I tried matching Gilbert’s stride one for one but he still pulled steadily away. I decided he was using some secret Navajo walking method taught only to tribe members. Sasha I figured to be a hiking ringer, one of those chicks that walks 75 miles before breakfast and drinks raw egg smoothies.

After a couple miles of hiking we started to get into an area that resembled the promotional materials for the Bisti Badlands. Large stones sat atop thin spires of Tuff, relatively soft volcanic ash and debris that had solidified. But Tuff isn’t all that solid hence the ground underneath the stones eroded before the harder top rock. We walked past huge piles of what appeared to be broken terra cotta clay. Gilbert explained that the section we were in has a low-grade coal seam running just beneath the surface. In the shallow valley by the parking lot you could see the darker stripe of coal. When the coal catches fire it bakes the clay above changing its color to red. This joint is one big, open-air kiln.

At the Bisti Pyramid Gilbert stopped for a rest. CT and I sat down on a stone. Gilbert lulled us into a stupor with his gentle voice telling tales of the Badlands. Sasha ran around the crazy rocks snapping photos. She reminded me of a Jack Russell Terrier. Too soon we were on our way again.

Our surroundings became more surreal, like we were walking through a Salvador Dali painting. I realized that I had no idea where we were and was so turned around I couldn’t tell which way was back. Gilbert pulled us in for another rest break and told Sasha we were going to stay here until she got back and to not wander out of sight. Sasha went climbing around with her giant Canon DSLR getting shots of rocks from every conceivable angle. Sasha oozed vigor and health. I started to wish I had gone back to town with her husband and son. They were probably drinking in a smoky bar somewhere.

Gilbert told us stories about getting lost in the Badlands at night. I was thinking about the cold, clear New Mexico night and looked around.  The only wood to burn was petrified. I sure didn’t want to start that coal seam on fire and end up like those baked clay fragments. Gilbert pointed me to a cell phone tower off in the distance. See that? he said. That tower is on Highway 371. If you get lost head for the tower; at night it has a flashing light on top.

We went further into the rough terrain; the flat lands were far behind. Stone shapes became more dramatic and impossible. We were in the Bisti Badlands proper and no mistaking it.

My feet were killing me. I asked Gilbert how much further before we start heading back to the cars. He said that we are almost at the turn around point. It had been ten miles at least, maybe more.

In the afternoon we started to head back. We were kind of quiet, just stumbling along in a near-death state of mind. I judged our distance traveled to be 25 miles. At last the parking area came into view. We were still 30 miles away but at least I could see our car and the restrooms.

At a turn in the path approximately 40 miles from the car parking area Gilbert said that Sasha wanted to explore the southern parts of the Bisti Badlands. We said to go on without us and that we would be fine as we could see the cars only 50 miles away. Gilbert said he would walk back to the cars with us to make sure and Sasha would wait for him to return where they could continue exploring the Bisti area. We made it on sore feet but we made it to the car. Gilbert showed us again on the map the route we had taken. I asked him how far we had traveled all total. Gilbert said 5 1/2 miles. And that’s how it is in the Bisti Badlands. Distances can be deceiving. If you are in the Bisti area look up Navajo Tours. You’ll have a fun hike and won’t get lost and die like the dumb tourist you are. I recommend them highly but don’t try to keep pace with Sasha.


Never miss an ExNotes blog:

Racing the Sun

By Mike Huber 

Finding myself in Arizona in the winter months has become my norm.  Arizona provides one of the better climates for riding and camping, and I can camp there without waking up next to a frozen Gatorade bottle in my tent (which happens way too often to me).

Over the past three years wintering here I had missed one of the more moving Veterans Day memorials, the Anthem Veterans Memorial in Anthem, Arizona.  This fascinating tribute to our country’s Soldiers, Airmen, Marines, Sailors, and Coast Guard (no Space Force yet) is located just two minutes off Interstate 17.

I visited the Veterans Memorial on several occasions while stopping at the Starbucks in Anthem (insert BMW GS joke here) before riding to work in Phoenix or Tucson.  What makes the Anthem Veterans Memorial so special is that on November 11th at 11:11, the sun aligns with the Memorial and shines directly through its five pillars (each pillar represents a branch of the military).  That lights the Great Seal of the United States of America.  The pillar heights correspond with the number of people in each branch (Army, Navy, Air Force, Marines, and Coast Guard).

This year when I rode my GS to Phoenix for routine maintenance, I saw the sign on I-17 for the Memorial. I looked down and it was 11:08.  I had a chance to make it!  Pulling in my clutch and clicking down two gears brought me to this new destination. It was exhilarating. I was literally racing the sun to be where I needed to be at 11:11.

I didn’t make it in time. Only five minutes or so had passed, but the eclipse of the Great Seal was not in totality anymore.  That is how accurate this modern-day sun dial is. The radiant glow from it was still vibrant and even though it wasn’t in full on totality it was still very impressive.

Many people surrounded the Memorial this day; more than a few rode motorcycles here as a Veterans Day Pilgrimage. It is always a great day whenever I chat with Veterans, especially at such an impressive monument on Veterans Day.

Having been so close to seeing this Memorial at its peak has placed it on my 2023 list.  I will join other Veterans riding to the Memorial and the festivities on this special day, and Starbucks will be part of the experience to meet my BMW GS ownership obligations.


Help us keep the hits coming.   Please click on the popup ads!


Never miss an ExNotes blog:

Lee’s Bench Plate

By Joe Berk

Our story on the Lee Classic Turret Press Kit continues.  There’s a lot in the kit, and we’re presenting articles on each item (links for our earlier Classic Turret Press Kit, its contents, and other Lee-related blogs are included at the end of this blog).   Today’s blog focuses on the Lee bench plate.  The bench plate allows quick installation and removal of any Lee press, and its price is $39.  The bench plate idea is a good one.  I own a couple of Lee progressive reloaders and I don’t have extensive real estate on my loading bench.  The Lee bench plate is the answer.

Here’s what you get in the Lee bench plate kit.

The Lee bench plate includes the lower plate, two Z-bars, four Phillips head screws, three panhead bolts with washers and nuts, and the upper plate.

The smaller upper plate bolts to the press base (the red casting that forms the base of any Lee reloading press).  The larger lower plate bolts to your reloading bench.  The two zinc plated pieces are Z-bars that screw into the lower plate and capture the upper plate bolted to the press.   The upper plate has several holes that allow it to be attched to any Lee press.  You can buy extra upper plates if you have other presses. It makes it easier to change presses on your bench.

The Lee bench plate includes everything you’ll need except the bolts required to attach the lower plate to your reloading bench (that makes sense because Lee doesn’t know the thickness of your reloading bench).  You have to drill four holes through your bench to attach the lower plate.  Here’s what the lower plate looks like installed on my reloading bench.

The lower plate attached bo my reloading bench.

After attaching the lower plate to your reloading bench, the next step is to attach the upper plate to the reloading press.  I installed the upper plate on my Lee Classic Turret Press using the three panhead bolts, nuts, and washers Lee includes.  Note that the press is inverted in the photo immediately below.

The upper plate attached to the press. The red arrow indicates the nub that prevents the press and upper plate from backing out. The press is upside down in this photo.

It’s not immediately apparent in the Lee instructions how to orient the upper plate (i.e., which side faces up).  It should be installed such that the flat base of the plate is at the bottom, and the two lips on either side extend up.  This will be more clear in the photos below.

Once the upper plate is attached to the press, the press and plate are set on the lower plate and the Z-bars can be secured to the lower plate with the four Phllips head screws Lee provides.  The Z-bars capture the upper plate, securing the press to the lower plate and the reloading bench.

There are nubs at the end of the upper plate lips that catch the end of the Z-clamps (denoted by the red arrow), so then the Z-clamps are tightened, the little nub prevents the whole affair (upper plate and reloading press) from backing out.
A macro shot showing the upper plate nub captured by the Z-bar.

Here’s the press mounted on the bench with the Lee bench plate.  It’s a clever approach.

Lee turret press attached to the reloading bench with the Lee bench plate kit (right side).
Lee turret press attached to the reloading bench with the Lee bench plate kit (left side).

If you have other Lee presses or reloading gear, you can purchase additional upper plates (Lee calls this part the steel base block) directly from Lee.  Lee includes the mounting hardware (the panhead bolts, nuts, and washers) with each additional upper plate.  Lee lists the other equipment items compatible with the bench plate in their instructions:

    • Classic Turret Press
    • Load-Master
    • Breech Lock Reloader Press
    • Breech Lock Challenger
    • Classic Cast
    • Breech Lock Classic Cast
    • Pro 6000 Six Pack Progressive
    • Red Base Pro 1000
    • Red Base 4 Hole Value Turret Press
    • Year 2018+ Pro 1000 Press
    • Year 2018+ 4 Hole Value Turret Press
    • Auto Breech Lock Pro Press
    • Automatic Processing Press & Automatic Case Primer
    • Auto Bench Prime

If you don’t want to purchase additional upper plates, you can make your own upper plate from 3/4-inch plywood.   Lee includes a drawing in their instructions showing the dimensions of a plywood upper plate.  That’s a nice touch.  Lee also offers information on plywood bases for, as they describe it, “other color” presses.  That’s a nice touch, too.

The key question in all of this is:  Do you need the Lee bench plate?  If you use one press only, the answer may be no. You could just mount your press directly to the bench and not use the plate at all.  But if you own other Lee reloading gear (or another “other color” press), you might want to consider the Lee bench plate.  Or, if you want to get your press out of the way to use your bench for other purposes (such as cleaning a gun), it makes sense.  The bench plate greatly eases removing the Lee press for installing other equipment or to clear the bench.   It’s a good idea and good value for the money.  It makes sense for me.


Help us out, folks:  Hit those popup ads!


Never miss an ExNotes blog:


Check out our other Lee reloading equipment blog posts:

Lee Modern Reloading Manual
Lee Safety Powder Scale
Lee Classic Turret Kit Unpacking
Lee .44 Magnum Dies 1
Lee .44 Magnum Dies 2
Lee .44 Magnum Dies 3
Lee .357 Magnum Dies

We’ve come a long way, baby…

By Joe Berk

Susie and I recently visited the Franklin Automobile Museum in Tucson, Arizona, and while we were there I photographed their 1913 Thor Model U motorcycle.  It’s a fascinating machine from many perspectives, one of which is what those guys had to do back in the day to start their motorcycles.  Today, we have electric starters and fuel injection…hit the ignition, touch the starter button, and go.  Turn back the clock 15 years or so and it was open the fuel petcock, close the choke, turn on the ignition, and hit the starter button.  Turn back the clock 50 or 70 years and you have to add kickstarting to the mix.  Go back a century or more (for this 1913 Thor, it would be a cool 110 years), and wow, you practically had to go to Thor University to learn the drill.

The 1913 Thor as viewed from the left side. The large lever extending up from the crank is the clutch. The drive chain on the left is one of two chains on this motorcycle. The left handgrip operates the throttle and the clutch. Think about that:  Your left hand operated the throttle and the clutch.
The 1913 Thor Model U on its centerstand. Note the rear wheel ground clearance, the bicycle pedals, and the chain on the right side. There’s no front brake; the bicycle pedals operate a rear wheel coaster brake, like you might have had on your Schwinn in the ’50s or ’60s.

Starting a Thor would keep a rider busy.  The bike had to be on its rear wheel centerstand to get the rear wheel off the ground (why will become clear in a bit).  Then you had to put the engine in gear by pushing the clutch lever forward.  You might think that’s counter-intuitive.  Read on, blog acficionados.

The clutch lever is on the left side of the motorcycle, and the “T” at the top operated the optional two speed transmission (as shown, the transmission is in first; turn the lever 90 degrees and it’s in second).

If your Thor had the the optional two speed rear hub transmission (a $40 option on top of the motorcycle’s $290 price in 1913), you would want to make sure it was in the high gear position.  You do that by turning the T-handle on top of the clutch lever parallel to the motorcycle.  Having the bike in second gear would make the engine easier to turn over; it would be like putting your bike in second for a run-and-bump start  (and I realize as I type this how few readers will know what a run-and-bump start is).   But we’re not going to run-and-bump this priceless 1913 Thor.  Stay with me; this is going to get interesting.

Fuel petcocks under the left forward side of the fuel tank. The rear petcock allows fuel to flow to the carburetor. The forward petcock allows fuel to be removed for priming the cylinders or, as the owner’s manual states, “for any purpose.” It included a small cup for this purpose.
The right side of the mighty Thor 1000cc twin. Those little protuberances on the outboard side of the valve covers (bear with me; I’ve been looking for an excuse to use the word “protuberance” all day) are where you dump raw fuel to prime the engine. No kidding.
Another view of the priming port.  The spring you see in this photo is the intake rocker return spring.

Next up:  Prime the engine by taking a bit of fuel from the Thor’s fuel tank priming petcock and manually inject gasolina into the intake cups (the Thor has openings in its intake domes for this purpose…those Thor engineers thought of everything).  Or, you could use the optional device on top of the fuel filler cap to extract a bit of fuel.  Like I said, they thought of everything.

The right twist grip operates the ignition advance; the left twistgrip operates the throttle. The lever on the right handlebar is a compression release.  It could be locked in the compression released position to hold the exhaust valves open.

You then retard the ignition timing via the right twistgrip (you read that right; the left twistgrip works the throttle) by twisting it clockwise.  Having the ignition fire after top dead center, you see, makes it easier for the engine to catch a spark and continue running.   So where’s the throttle?  That’s on left handlebar.  Open the left twistgrip a bit by turning it clockwise.  It will stay where you leave it; there’s no return spring.

That funny little chrome lever on the right handlebar?  It’s not a clutch (remember, that was ginormous lever to the left of the fuel tank).  The little right-handlebar-mounted lever is a compression release.  Pull it in, and it opens the exhaust valves to, well, release the compression.  It makes it easier to pedal, and we’ll get to that momentarily.  Maybe you didn’t believe me when I told you this was a complicated undertaking.   Read on.  It gets even more interesting.

Thor Plumbing 101: The “forward filling nipple” (Thor’s terminology; we’d call it a fuel filler cap) is where the gas goes.  Thor recommended any “standard grade gasoline,” but advised straining it through a chamois first (things were different in 1913).  The gizmo on top of the fuel filler cap extracts a bit of gas that can be transferred to the priming ports.  The center cap is for oil; Thor also recommended straining the oil before pouring it into the oil tank.  The third (and rearmost) device is a needle valve that should be left open to allow oil to flow into the reservoir immediately below the tank (and from there, to the engine).
The Thor oil reservoir, complete with sight glass.  That little petcock halfway down the oil line?  Make sure it’s open before you start the motorcycle!

The Thor has a total loss lubrication system.  That term, total loss, doesn’t describe how your 401K account is doing these days; it refers to how the engine uses oil.  It uses and consumes it (it’s not returned or recirculated).  Think of it as Autolube for four strokes.  Ah, shoot, I’ll bet a lot of you are too young to know what Autolube is, too. Gresh can explain it later.  Back to the main attraction, that total loss lubrication system…there’s an oil petcock halfway down the oil line on the left side of the motorcycle, between the sight glass and the crankcase.  It needs to be open (you may void your warranty if operate the motorcycle with it closed).  The Thor would consume a quart of oil every 50 to 300 miles depending on conditions and your riding style, but the tank carried a gallon, and with a top speed somewhere between 50 and 65 mph (again, depending on conditions, the rider, and whether or not you had the optional two speed transmission), it’s not likely you would run out of oil.  “They smoke a lot,” one Thor expert told me, “so as long as you see blue smoke behind you, you’re good.”

The last bit of preparation involved closing the choke on that big tomato can Thor carb nestled in the V between the cylinders, and that involved two actions:  Closing a thumbscew on the carb’s rear and screwing down a tapered knob on top.

All right…now we’re ready to get to the good part.  You may have noticed that the Thor has two chains (one on each side of the motorcycle) and a set of pedals (like a bicycle).  Once you have completed all the actions described above, you can get on the Thor and start pedaling like Lance Armstrong charging up the Col du Tourmalet (I say that figuratively; the good guys at the Franklin Automobile Museum are not going to let you climb onto their 1913 Thor).   Your pedaling is going to drive the rear wheel via the chain on the right side of the motorcycle from the pedals’ chainring to the rear wheel sprocket.  That’s going to spin the rear wheel and tire (which is why we wanted the bike on its centerstand), transmit the rotational inertia you generated through the rear-hub-mounted transmission, turn the drive chain on the left side of motorcycle, transmit your torque through the clutch (which we engaged earlier) and spin the Thor’s 61-cubic-inch V-twin.  As you ponder all of that, be thankful that you’re not trying to crank the 1914 Thor’s larger 74-cubic-inch engine, and be thankful that I clued you into actuating the compression release.  And finally, be thankful that you’re adding the rear wheel and tire’s flywheel effect to what you (the motive force in this cacaphony of early American motorcycle starting activities) have set in motion.

Once you’ve attained sufficient rotational inertia, release the right handlebar compression release.   If Thor and the other ancient Norse gods are smiling, the engine will catch, and you’ll hear the opening chords of that delightful “potato-potato-potato” V-twin symphony we Americans love.  As soon as you are sure the music will continue, pull that large left clutch lever rearward to disengage the clutch and reverse direction on the pedals (like you would have on the Schwinn you rode as a kid).  As mentioned earlier, there’s a coaster brake back there; in fact, it’s the only brake on this motorcycle.  While the engine is warming up, advance the ignition (with the right twistgrip), open the carb choke (it involves two actions, as mentioned above), and then, as the owner’s manual explains with early American Aurora  engineering precision, apply “a trifle” of throttle (with the left twistgrip).   The owner’s manual authors’ descendants, I’m sure, went on to become writers for Saturday Night Live in the early days when that show was still funny.  One more thing…if it’s a cold day, Thor recommended placing a rag soaked in warm water around the carburetor’s float chamber.

Once everything is percolating to your satisfaction, roll the motorcycle forward off the stand (Pro Tip:  Remember to disengage the clutch first), and while adjusting the throttle, feather the clutch lever forward to start moving.  As you read this, think about simultaneously feathering that clutch lever and working the throttle with both of your left hands.  Whew!

After writing and then reading the above, I think I’m going to step out into my garage and start my Enfield 650.  By pressing a button.  Just because.


Help us keep the good stuff coming…please click on the popup ads!


Never miss an ExNotes blog: