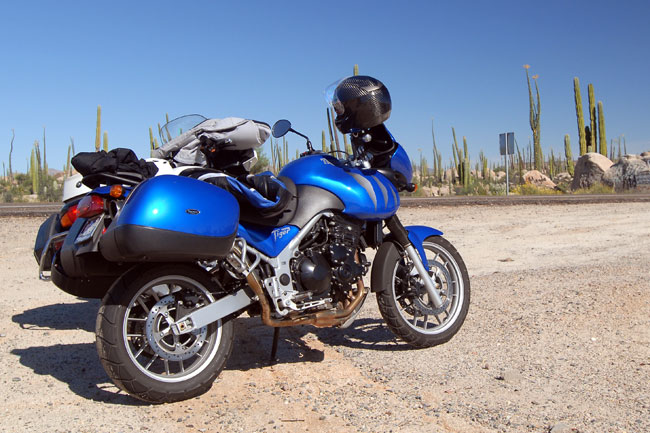
I’ve always loved Triumphs and I always thought they were not only the coolest bikes around but also the best bang for the buck. I rode Triumphs in the ’60s and ’70s when they were air-cooled and I rode them when they were made by Hinckley. I always thought the ’65 Bonneville was the best looking motorcycle there could ever be until the Speed Triple came along and took that title. But the one that stole my heart was my ’06 Triumph Tiger in Caspian blue. I loved everything about that motorcycle. Seeing Bobbie Surber’s Tiger has me thinking about my Tiger again.
My Tiger in Baja. We both spent a lot of time patrolling the peninsula.
I wasn’t planning to buy a new motorcycle when I walked into Doug Douglas Motorcycles in 2006 and saw the one that would become mine. But none other than old Doug Douglas himself noticed how I reacted to it. Doug knew his business, and he told me he’d sell it to me for whatever the number was, which seemed like a reasonable deal. Reasonable, however, was not the adjective that was governing my thought process when I saw that motorcycle, and Doug recognized that. I gave Doug the only response I could think of at the time, which was: I’ll take it.
Keep us going…click on the popup ads!
Sue hit the roof when I came home and told her she needed to give me a ride back to Doug’s to pick up a new motorcycle. She stayed upset longer than usual when I told her how much it cost and that I would be taking the money out of the checking account. “What happened to the money you got from selling your Suzuki?” she demanded. It was more of an accusation then a question.
I had to think for a minute, and then I remembered. “That mother-of-pearl and onyx bracelet I bought for you…I used the money I got for the TL to buy it” I said, and Susie mellowed. Visibly. It was like de-arming an IED. “Oh,” was all she said, and then she was her usual cheery self.
When we arrived at Douglas Motorcycles, the tempest was over. I introduced Susie to Doug and she said, “You must be the world’s greatest motorcycle salesman…my husband told me he took your first offer, and he never does that…”
Doug smiled. “Oh, I’ve sold a few motorcycles,” he said, “but that’s not my real strength. My real strength is furniture. I am the world’s greatest furniture salesman.”
Stopping to let the fog blow over along Baja’s Transpeninsular Highway enroute to Bahia de Los Angeles.
Sue was perplexed, as was I. Had I missed something? Did Doug Douglas Motorcycles have another wing that sold furniture?
“Yeah,” Doug continued, “there are a lot of couples who bought new bedroom furniture and new dining room sets when the husband came home and told the wife he bought a new motorcycle from me…”
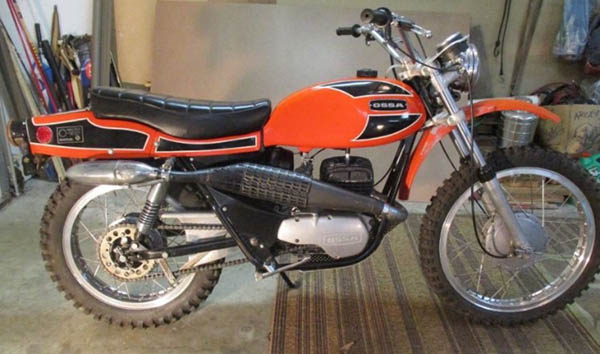
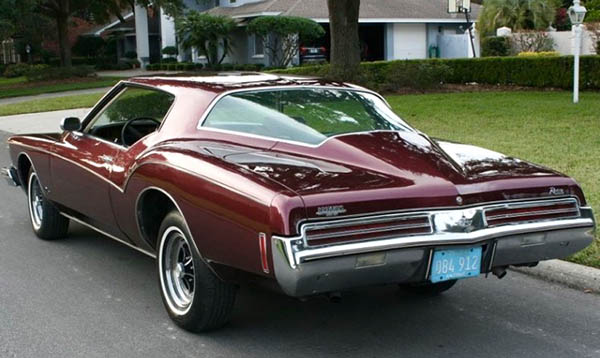
I must have been around 15 years old the first time I saw an Ossa Pioneer. It was at Haines City motocross track. Mike Mills’ mom was divorced and her boyfriend gave us a ride way out to Chrome Avenue in his boat tail Buick Riviera . What a car! The Riviera smelled great inside not only because it was new, but because the boyfriend wore cologne. This was the first time I had been around a grown man that used cologne. All the other adult men I had known up to that point smelled like dirty socks. I smell like dirty socks right now.
You know what to do: Click on the popup ads!
“Burn the tires, c’mon!” we pleaded. It was a strange experience sitting in the plush, perfumed Riviera as the big V-8 engine effortlessly spun the tires into clouds of cotton candy. “Want to stop at the hobby store to pick up some sniffing glue, boys?” Damn we laughed and had fun with that guy. He treated us like equals, like he cared what we had to say. I wish I could remember his name. It was like going to the motocross races with Hugh Heffner.
He drove 90 miles per hour every chance he got and it wasn’t long before he was dropping us at the motocross track. He spun the Buick around and said, “I’ll be back at five.” And then lit the tires up again on Chrome Avenue. He was exactly what we wanted to be when we grew up.
Mostly Bultacos and Maicos were racing in Haines City back then but one guy had an Ossa Pioneer with the lights removed. The rider was good. He would get crossed up over the jumps and finished in the top 5 against real race bikes. I loved how the rear fender blended into the bike. That fiberglass rear section had a small storage area inside. One of the bike magazines of the era tossed a loose spark plug in the storage and went scrambling. The plug beat a hole in the rear fender and they had the nerve to bitch about it. Hell, I knew at 10 that you have to wrap stuff in rags on a motorcycle.
It rains most everyday in Florida and it started pouring. The races kept going for a while but finally had to be called because it was a deluge. You could hardly see to walk. There was no cover so we huddled in the leeward side of the ticket stand out by the entrance. It rained harder, the wind was howling. Wearing only shorts and T-shirts we were getting colder and colder. My lips were turning blue, man.
It was like Niagara Falls, a solid sheet of water that the Riviera emerged from. Man, I was so glad to see that car. “How were the races, boys?” Soaking wet and shivering we piled into the Riviera’s soft leather seats. I thought he’d get mad but boyfriend just laughed. You got the feeling he could go buy another Riviera if he wanted to.
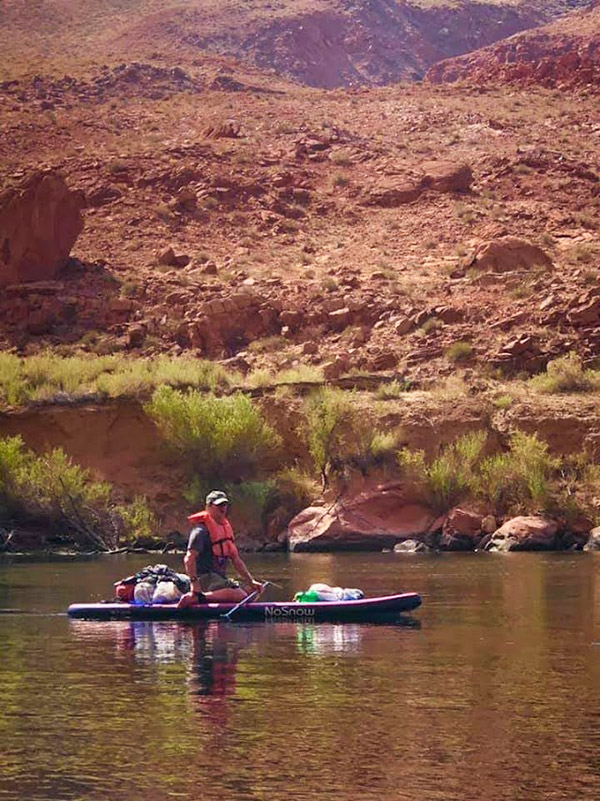
Since my last story was on paddleboarding I thought sticking with the topic would be a great opportunity to share a unique and exciting experience. Camping off a paddleboard at the base of Horseshoe Bend in Page, Arizona. This was to be a 2-day, 15-mile trip down the Colorado River from Glenn Canyon Dam to Lee’s Ferry and would include one night of camping off our paddleboards. As an avid motorcycle camper, I thought camping off a paddleboard would be right up my alley as the amount of gear from a moto to a paddleboard was relatively the same. This adventure would bring us to one of the most hostile environments in the United States, all while living it from a new perspective, being on top of the frigid waters of the Colorado River.
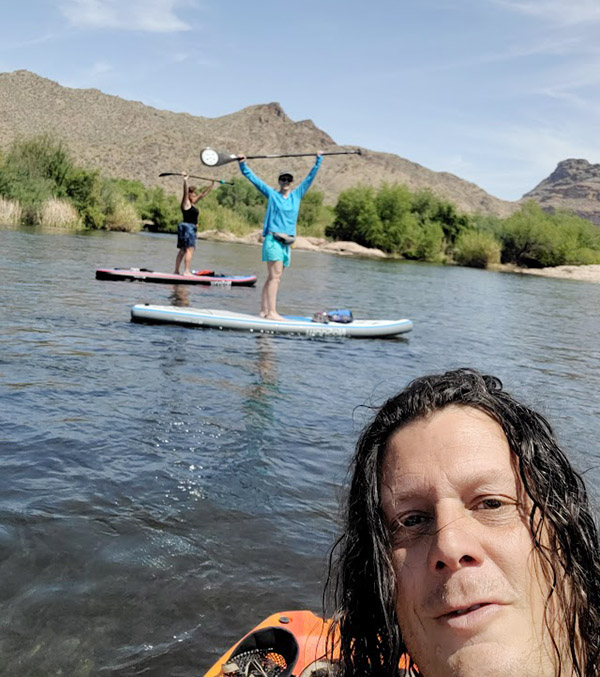
The adventure began with camping near Page, Arizona, and a day of light paddleboarding on Lake Powell to gain more familiarity and confidence on the board. This was more for myself, as the two friends I was traveling with were both very experienced paddlers. My paddling to this date was limited to a couple of 8-mile runs on the Salt River near Phoenix and a horrible windy day off the Colorado River where we launched from Hoover Dam. The Salt River had portions of minor rapids, but the environment was much tamer than we would experience along the Colorado River.
The Colorado River water is extremely cold even during the spring. Contrasting the freezing water was the ambient air temperatures, which reached the high 90s (with no place to find shade or relief from the sun above the golden canyon walls that surrounded us). Adding to the natural environmental threats there can be winds that blow up the river so strongly that you cannot paddle against them, even when going down river. A year prior we were supposed to do a camping trip and ended up having to do an 18-mile paddle in heavy winds; on that trip, we were not able to camp as the winds were forecast to be worse the next day. I didn’t want to put myself through that again. That night we made our way to Horseshoe Bend in our car to watch the sunset and look down over the edge to see where we would camp the next evening.
Please click on the popups…it’s how we keep the lights on!
The day we were set to launch the winds were calm. At 8:00 a.m. we loaded our watercraft onto a powerboat at Lee’s Ferry that would deliver us to the base of Glen Dam. It was a cold ride in the boat to our drop off location as the sun was still hidden behind the massive walls that went straight up nearly a thousand feet. Every bend we went around I was in constant awe. It was as if every element that you can face in nature was in full view for us to admire, respect, and fear. Once dropped off we unloaded the paddleboards, our gear, and took a few minutes to gain our composure before starting our 15-mile journey down river.
Pushing our boards off the shoreline, it was still cold and between the 40-degree water and 50-degree air none of us wanted to stand up on the boards. Making a small error that could cause us to capsize during this delicate time would result in hypothermia with little hope of warming up until the sun crested above the canyon walls more than two hours later. The winds were absent and with an occasional dam release we just coasted down the river effortlessly. Having no headwinds was so much more pleasant than our previous time on this fully exposed river when we spent the day battling a constant headwind.
When the sun finally glimpsed above the canyon walls they instantly lit up. Just a beautiful golden prison we were trapped in with neon aqua waters so clear you can see fish swimming 20 feet below your board. We had dispersed the weight of our gear between the three boards and then balanced them out as best we could. We even had a bundle of firewood secured with Rok Straps for what we hoped would be a magical night under the stars. Along the way we stopped occasionally for a snack, a beer, or a short hike. There are some hidden petroglyphs along the river where you can disembark from your board and hike in to view them. This made for a perfect slow-paced and enjoyable day that we all fully embraced.
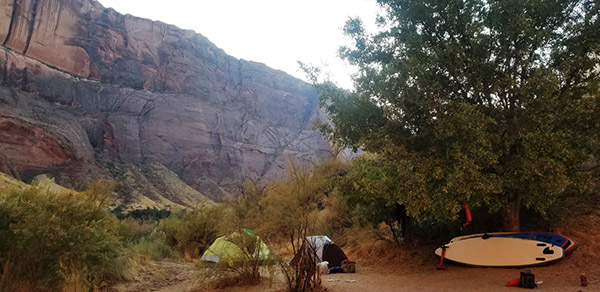
It was still early, yet due to the lack of headwinds and numerous dam releases we were already arriving at our camp at Mile 9. Mile 9 camp is at the turn of Horseshoe Bend. What made this really cool wasn’t the view (it all looked really the same with giant canyon walls on both sides of you). What made this special was that when you looked up the thousand-foot walls you could see hundreds of tourists looking down at you and waving. I felt like we were in a zoo exhibit. We set up camp and spent a relaxing afternoon swimming, chatting with other boaters (mostly kayakers and fellow paddlers), and just enjoying the fact we weren’t battling winds. This was quite a rewarding day.
After a perfect day of mild paddling, relaxing and gazing off into this beautiful yet intimidating environment, the day slowly turned into evening. It wasn’t long before we started a campfire. Sitting around a campfire with new friends, cold beers from our Ice Mule Cooler, and exchanging stories is always the high point in my day. I wandered off to use the bathroom when I noticed flashing from above. At first, I thought it was the stars beginning to peer from above the cliffs, but it wasn’t. The flashes I saw were the tourists above using their phones and flashlights to signal “hello” down to us. As I zipped my pants up, I already had the “It was the cold water that caused shrinkage” or the “You’re 1,000 feet away…of course it looks smaller” thoughts. For some reason my new friends around the campfire didn’t understand my humor and the stories continued until the flashes from the tourists above faded about the same time we did.
Having slept great that night at the base of one of the most iconic photo spots in the United States it was now time to pack up. Winds always seemed to gain intensity as the day wears on, so we wanted an early start to avoid this threat, but there were no winds on this day, either. It was almost as if the river was rewarding us for having passed its initiation from that previous windy trip that didn’t allow camping. The river was so calm we were able to even lay down on our paddleboards and allow the current and dam releases to carry us the remaining 6 miles downriver without any effort. This is how paddleboarding should be, but I knew this was an anomaly on the Colorado River. In my experience tailwinds are like unicorns. They really don’t exist, yet somehow this trip we were surrounded by a herd of unicorns.
It wasn’t long before we could see Lee’s Ferry ahead of us on the right. We made it to shore and began the process of packing our gear up to return to Lake Powell for one more night of camping before returning to southern Arizona. Since paddleboarding Horseshoe Bend, anytime I see pictures of this location I zoom in and can often see paddleboards, kayaks, and tents at the beach when everyone else just is looking at the full view of the photo. I absolutely prefer my new perspective of this part of Glenn Canyon National Recreation Area, that being through the eyes of a paddleboarder.
We’re just about there setting up and using the Lee Classic Turret Press Kit. We explained in prior blogs how to set up everything except for the safety prime, and that’s what we’re going to focus on here. The safety prime can be purchased separately; when you purchase the Classic Turret Press Kit it is in included. You literally get everything you need to start reloading with the Classic Turret Press Kit except the dies and the brass, bullets, primers, and powder. I chose a set of 9mm dies because it was my intent to load 9mm only on my classic turret press, but I like the press so much I’m going to buy additional turrets so facilitate changing from one cartridge to another. I really like the Classic Turret Press Kit
Help us bring more stories to you: Please click on the popup ads!
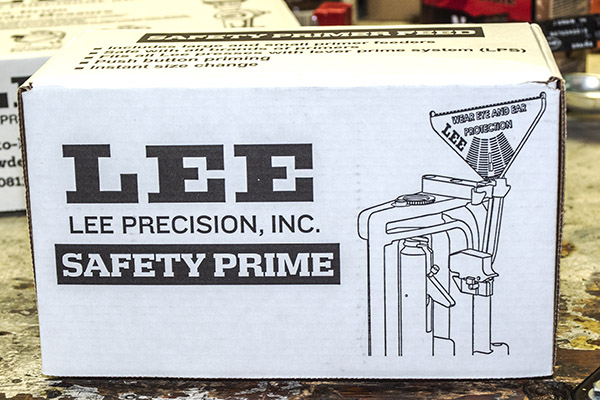
But I digress; back to today’s focus, and that’s on the Lee safety prime. It arrives packaged nicely, as has been the case with everything from Lee.
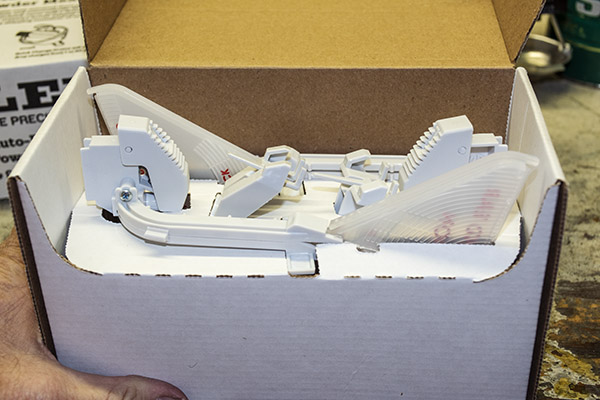
The Lee Safety Prime packaging. This carton arrives inside the Lee Classic Turret Press Kit box.Inside the Lee Safety Prime box.
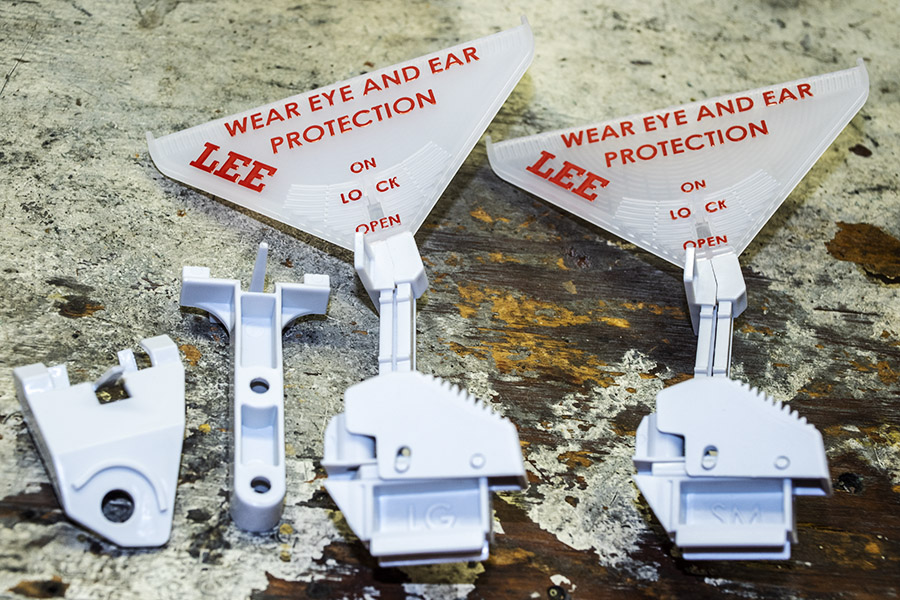
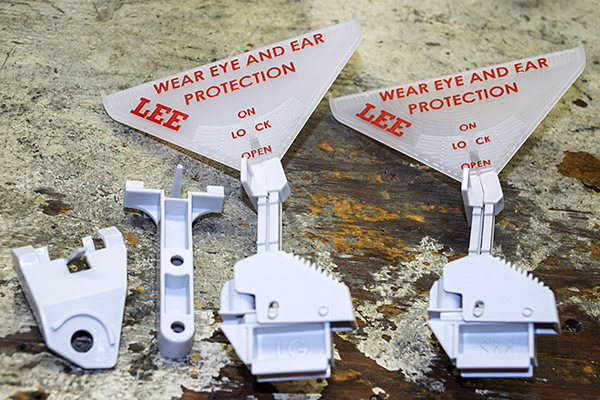
The Lee safety prime kit includes a primer two primer feed mounts, two primer trays, two primer feed chutes, and two primer triggers. The primer tray, feed chute, and trigger are provided as assembled units. One is for large primers, the other for small primers. They are marked accordingly. The two primer feed mounts you see in the photo below are included because the safety prime can be used on different types of presses. We’re installing this on a classic turret press, so we will only need one of the two brackets (the one on the left side of the photo below).
Mounts for the single stage Lee press and the turret press, and primer trays, feed chutes, and triggers for small and large primers.
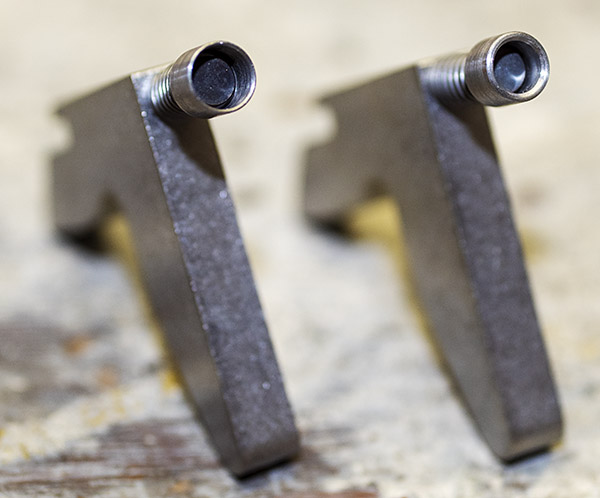
When we prepared the blog on installing the classic turret press, I showed but did not explain the two primer arms that Lee provides with the turret press. There’s one for large primers (either rifle or handgun) and one for small primers (either rifle or handgun. These mount easily; you simply drop them into the slot on the ram, they fall into place, and they pivot on an axle in the ram.
Primer arms for large and small primers. These are included in the turret press hardware.
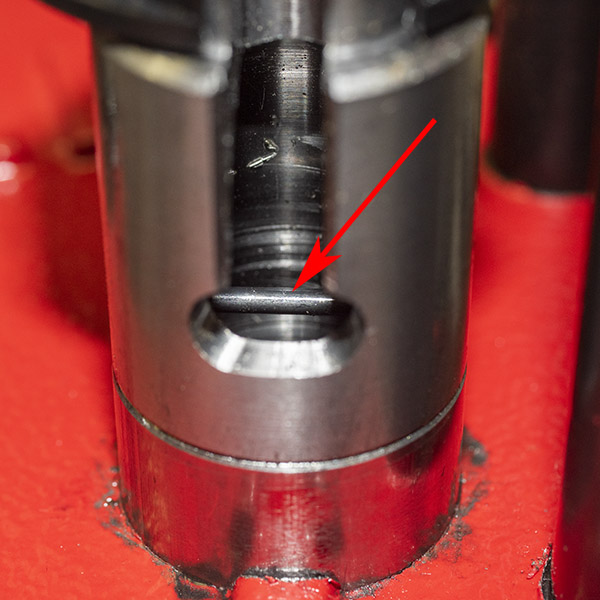
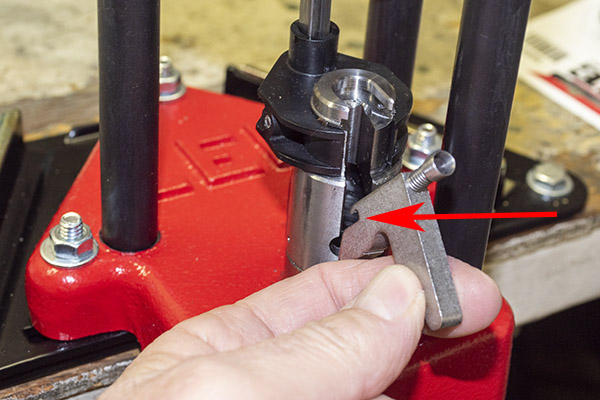
There’s an axle inside the press ram, as shown in the photo below. It’s the attach point for the primer arm. The primer arm drops into the ram when there’s no shellholder in the ram (if the shellholder is in place, you cannot insert the primer arm, so you need to remove the shellholder to install the primer arm).
The axle for mounting the primer arm.Inserting the primer arm into the ram. The slot shown by the red arrow mounts over the axle shown in the photo above.
Once the primer arm is installed, reinstall the shellholder.
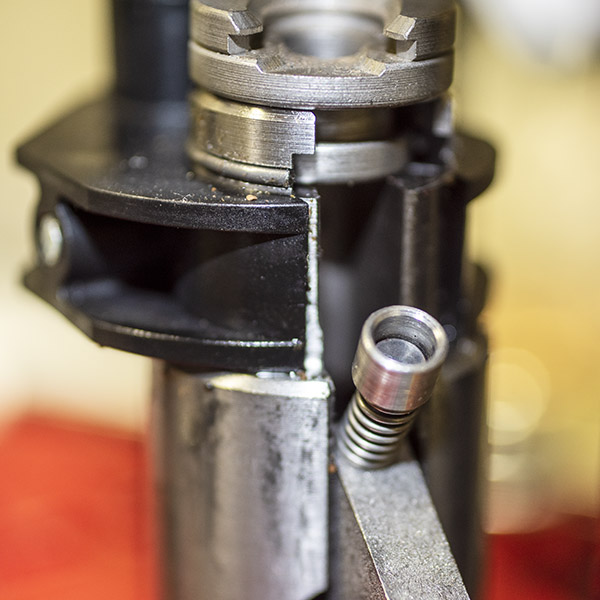
The primer arm mounted on the ram.
As the ram is lowered, in the last inch or so of its travel the primer arm contacts the press base and the arm rotates to place the primer directly below the cartridge case. When the press is lowered completely, the press arm seats the primer into the cartridge case in the shellholder. We’ll show and discuss this further below.
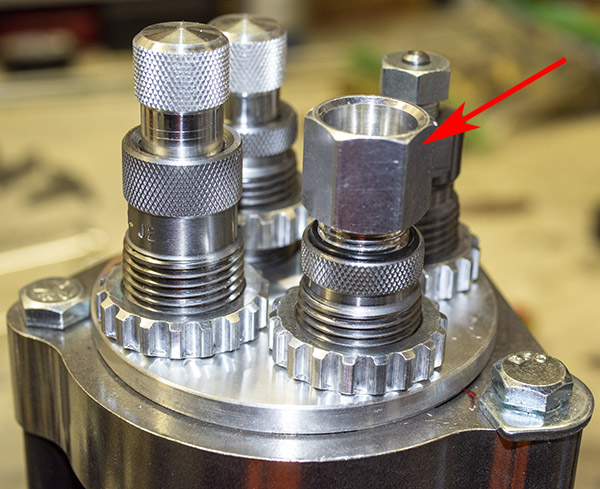
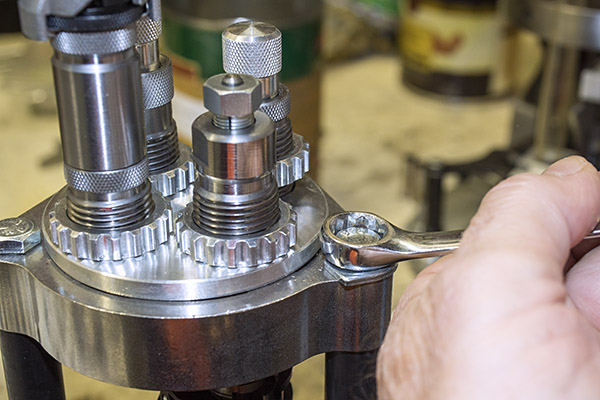
The next step is to mount the safety prime components on the classic turret press. There’s a 1/2-inch bolt and washer securing the top of press; it needs to be removed to install the safety prime mounting bracket.
The 1/2-inch turret head mounting bolt has to removed to install the safety prime mount.The turret head mounting bolt and its washer.
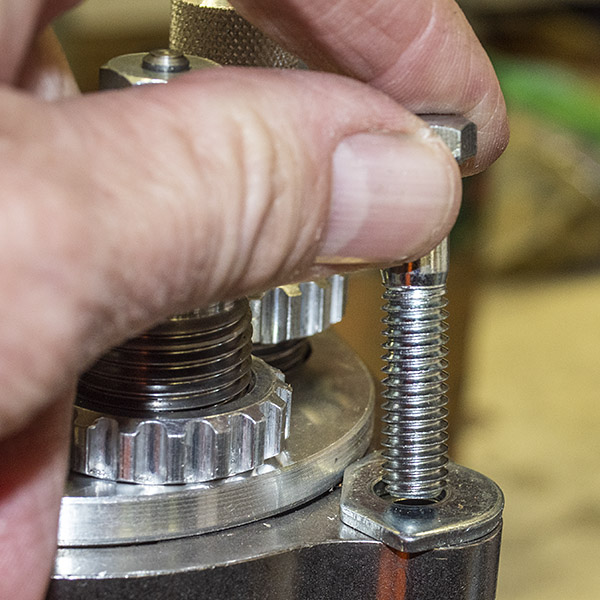
The 1/2-inch bolt and its washer are then installed in the safety prime mounting bracket, and the mounting bracket is installed on the press.
The bolt and washer on the safety prime mount.
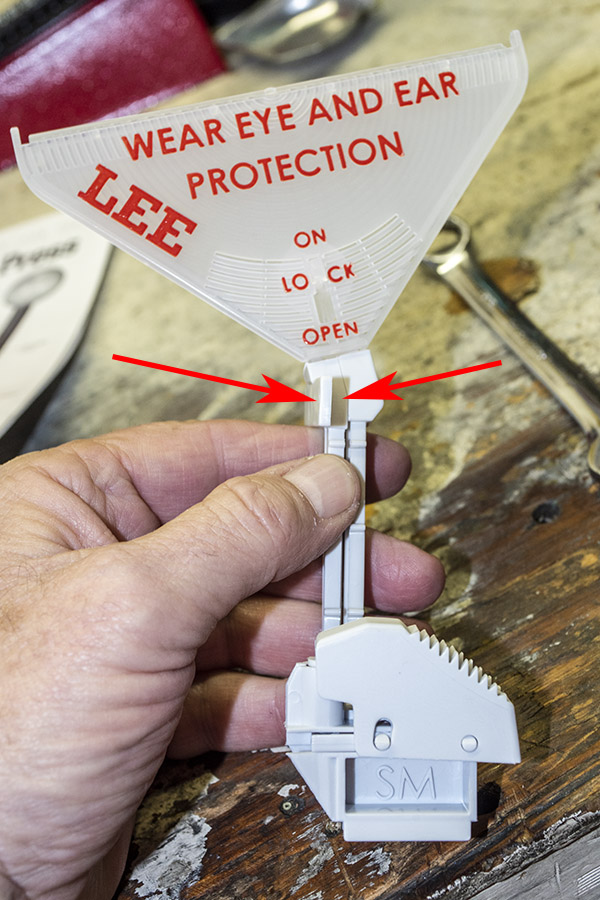
Next, we’ll show the safety prime tray, feed chute, and trigger. As mentioned above, as delivered from Lee the primer tray (the big triangular affair with the Lee name and appropriate warnings), the feed chute, and the trigger are already assembled. The primer tray is a press fit into the feed chute; you can leave them assembled as shown below. Note that the feed chute has slot near where it meets the primer tray; this area interfaces with the safety prime we mounted on the press.
The small primer tray, feed chute, and trigger. The tab the arrows point to slips into the safety prime mount.
The feed chute fits into a loose joint on the safety prime mount. There’s a lot of relative motion between these two items, and that’s okay. Lee cleverly designed this loose joint so that it has six degrees of freedom. This very clever design allows the safety prime trigger to move up, down, left, and right, and it can rotate. We’ll see why that’s important in a bit.
The feed chute coupled to the safety prime mount.
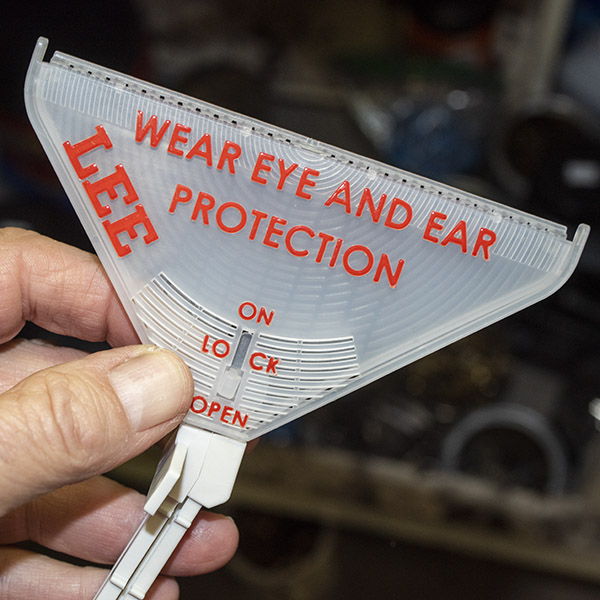
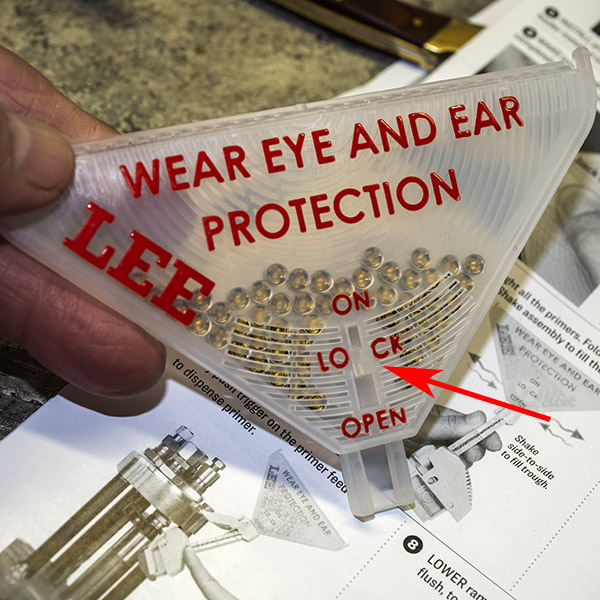
The Lee safety prime primer tray is a clamshell arrangement with a lock and an on-off switch. In the open position, it allows the primer tray to open so you can load primers into the tray. In the lock position, the tray is locked closed and it blocks primer entry into the tray. In the on position, it allows primers to feed into the feed chute.
The primer tray has a switch that locks, opens, and allows the primers to flow from the tray to the feed chute.
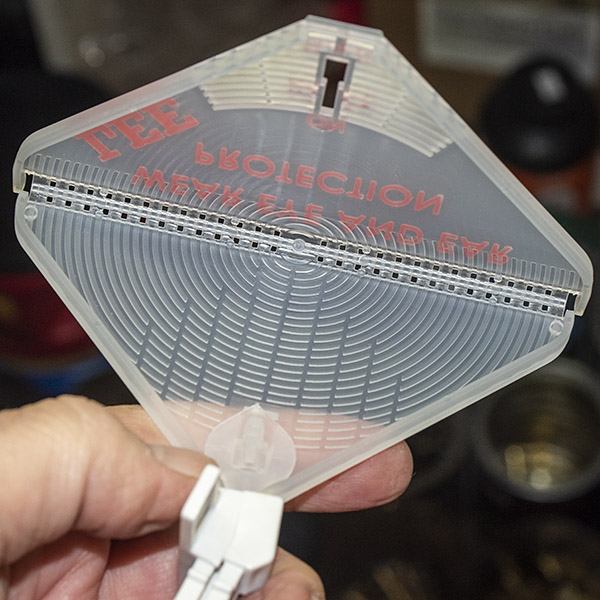
When you want to load primers in the primer tray, you can do either remove the primer tray from the feed chute, or you can remove the entire primer tray, feed chute, and primer trigger from the press. To open the primer tray, place the lock in the open position, and open the tray’s clamshell.
The safety prime primer tray in the open condition.
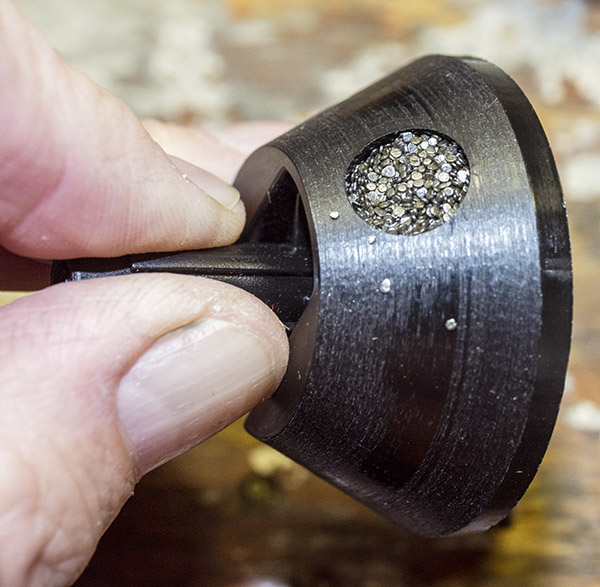
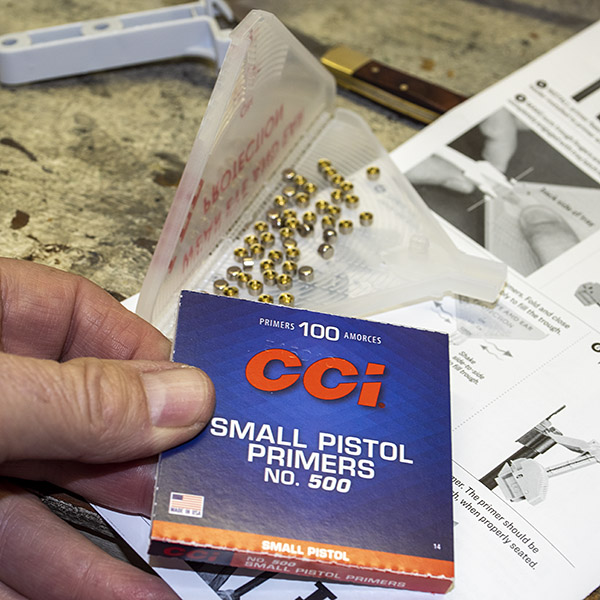
Put the primers into the tray. You’ll notice that some face up, and some face down.
Primers loaded into the safety prime primer tray.
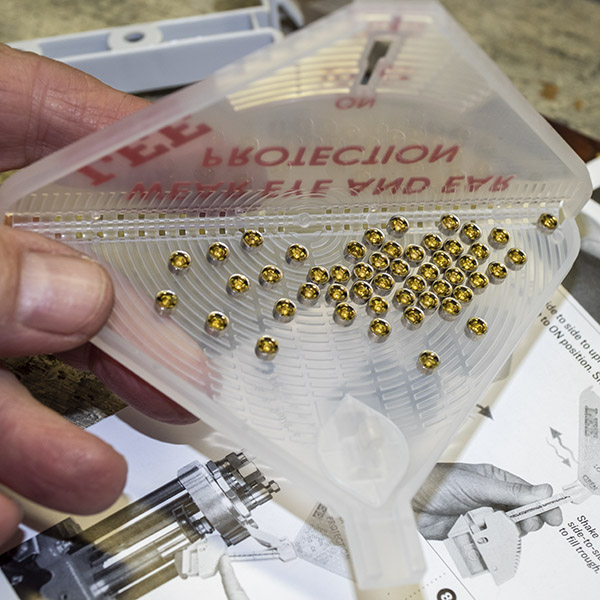
Once the primers are in the tray, and with the tray open, gently jiggle the primer tray back and forth. Don’t get too aggressive here or you’ll jiggle primers out of the tray. Just go easy, and after a few seconds, all the primers will face up. The jiggling allows the ridges in the tray to turn all the primers face up.
After gently jiggling the primer tray left to right the primers will all face up.
Once the primers are all face up, close the tray clamshell and put the lock in the lock position. This will prevent primers from leaving the tray until you want them to.
The safety prime primer tray closed and locked. The primer tray is shown removed from the feed chute, but it doesn’t need to be to load primers into the tray.
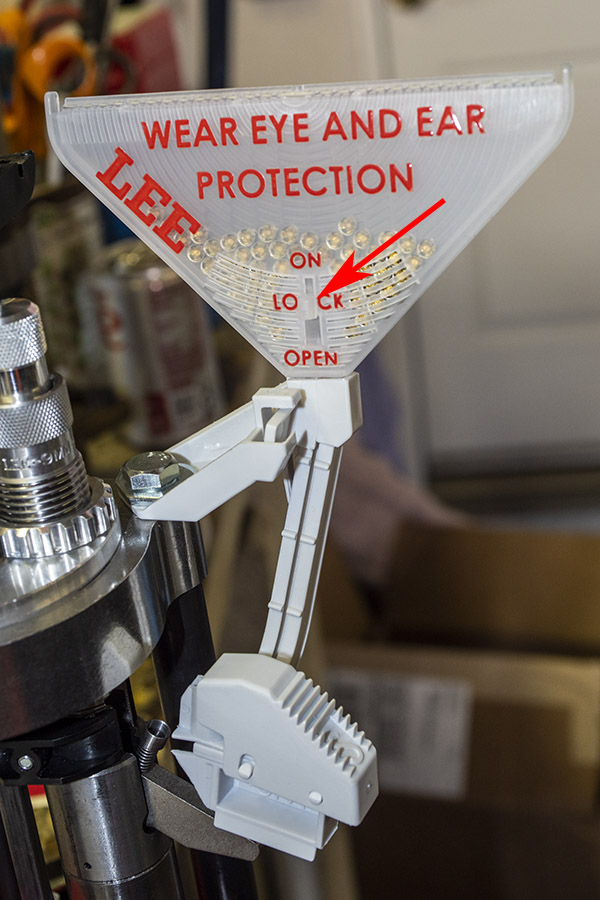
With the tray mounted on the feed chute, insert the primer tray, feed chute, and trigger assembly into the safety prime mount on the turret press.
A loaded primer tray, feed chute, and trigger mounted on the safety prime mount.
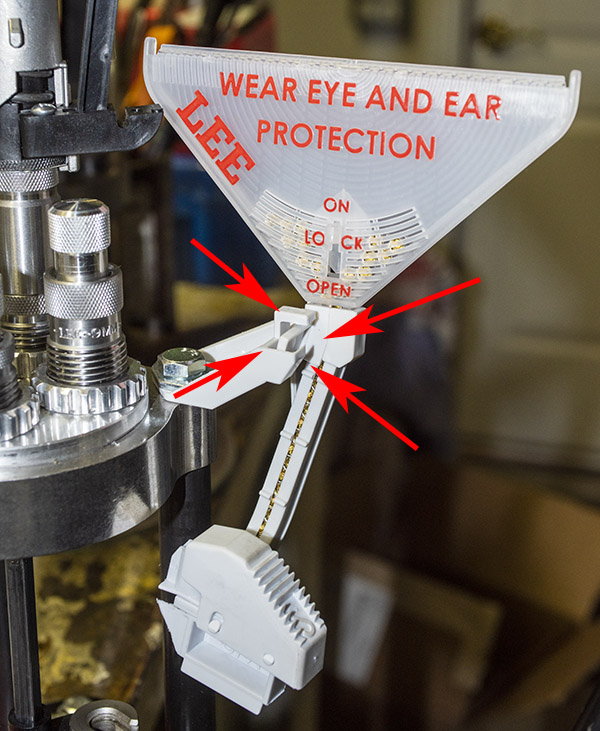
At this point, move the primer tray lock to the open position, and the primers will fill the feed chute. The entire affair can be moved around (within a limited range) to allow the safety prime trigger to find where it wants to be.
The interface between the safety prime mount and the primer tray, feed chute, and trigger allows for left to right, up and down, and rotational movement.
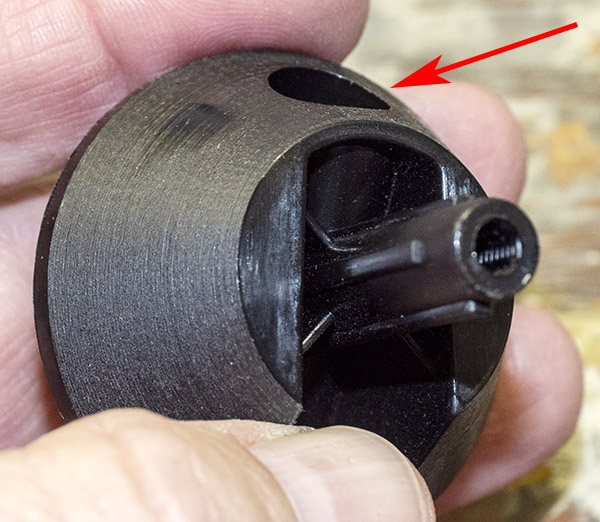
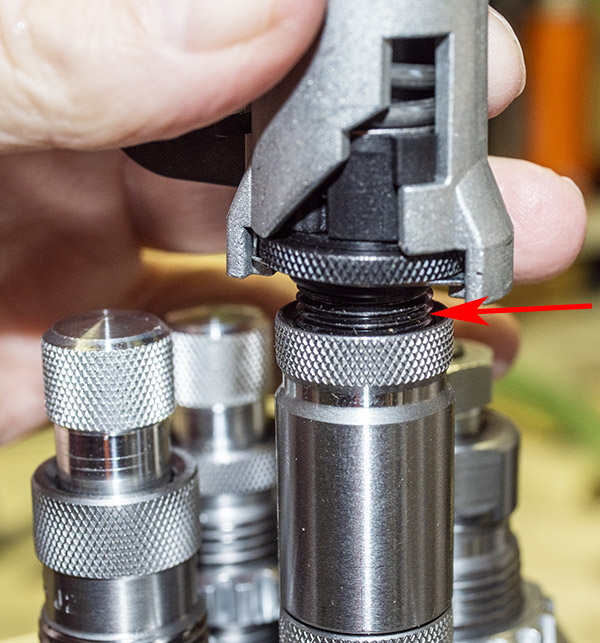
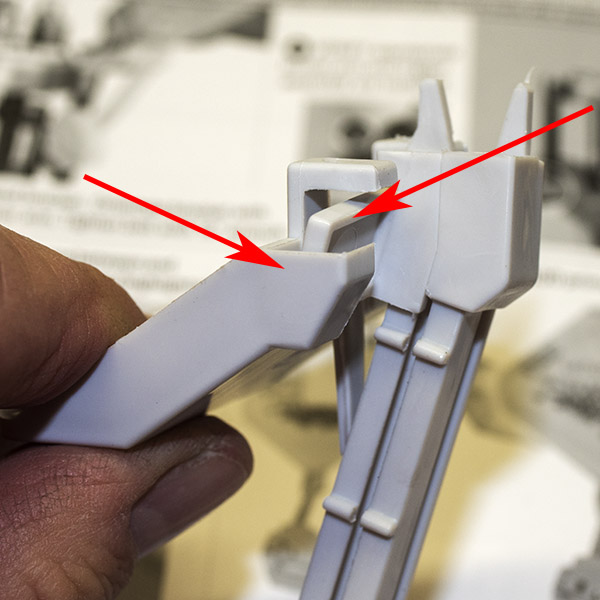
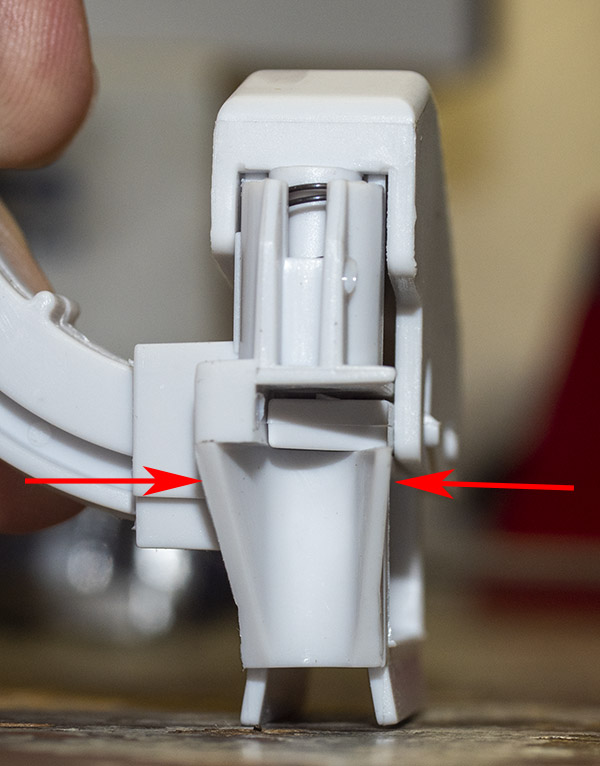
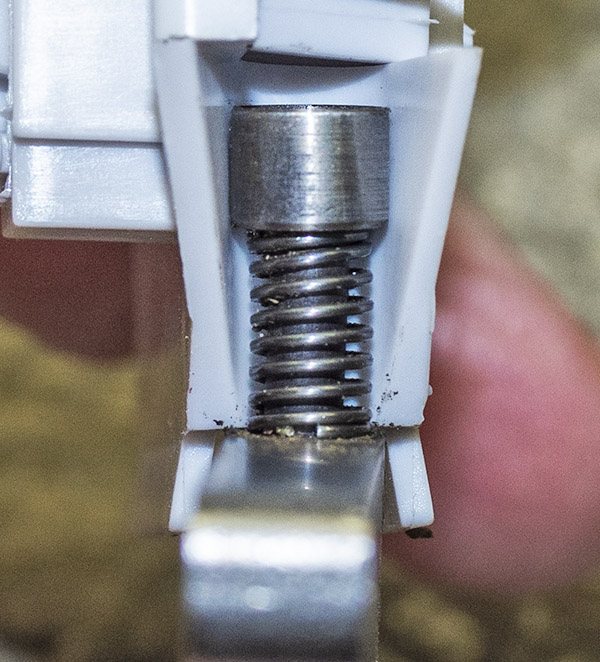
Here’s a macro shot of the forward end of the trigger. It includes guides (one on each side) that allow moving the trigger to make contact with the primer arm and correctly position itself.
The trigger base includes two ramps that guide the trigger over the primer arm.A macro shot of the trigger over the primer arm. The trigger’s ramps guide the primer arm into position.
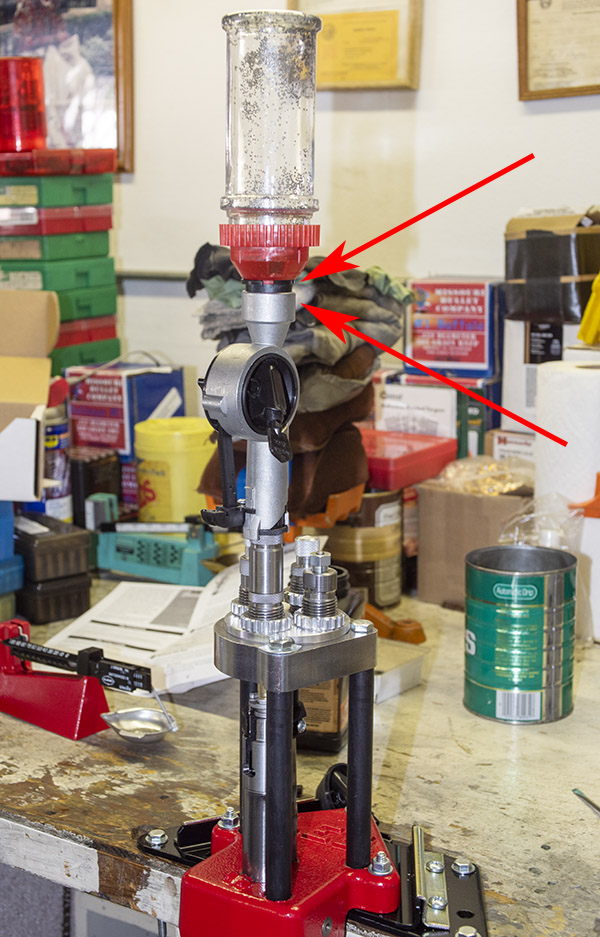
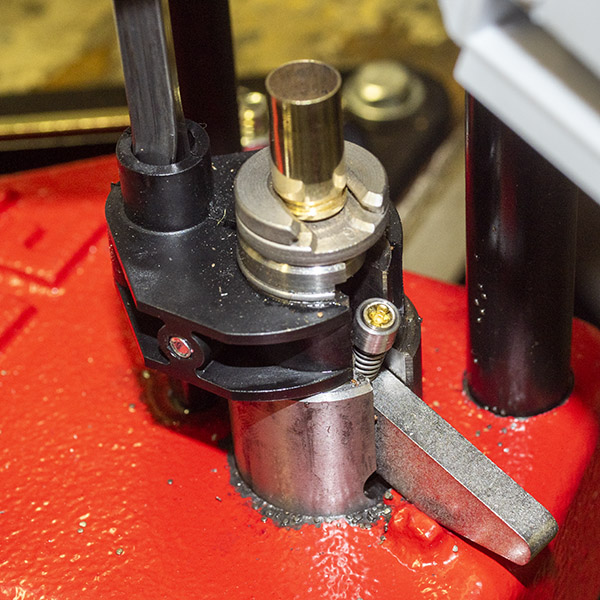
Here’s how this works. I positioned the sizing die directly above the ram, with the ram in the lowered position. I raised the ram a small amount and placed a 9mm cartridge case (one that I’ve already fired) in the shellholder. I then fully raised the ram, driving the fired case into the sizing die and decapper. I heard a satisfying “tink” as the primer fell into the primer catch tube.
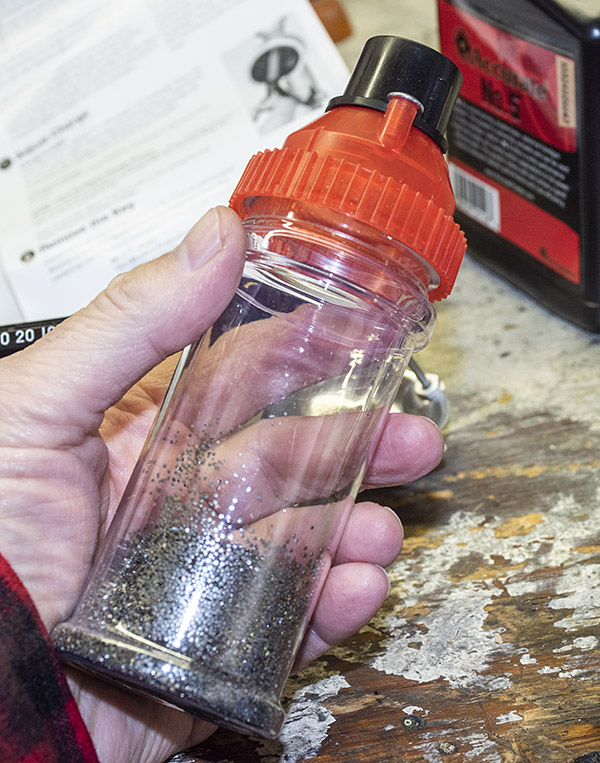
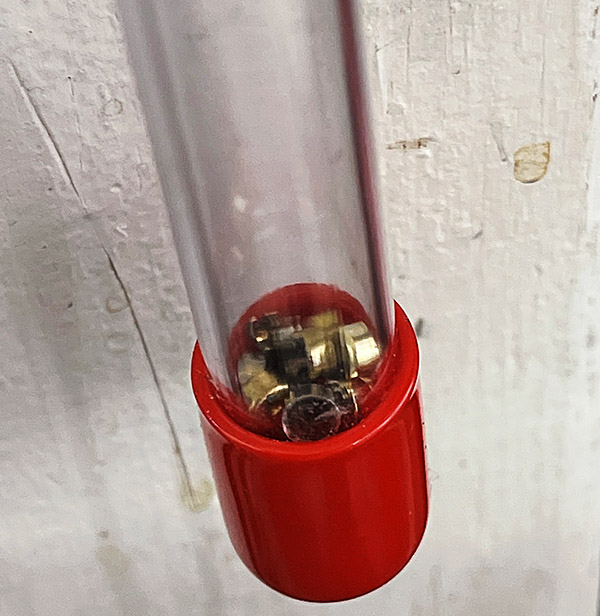
The spent primer tube hangs beneath the turret press ram. You can remove the red cap at the bottom to dump the spent primers. This is the cleanest spent primer collection approach I’ve ever used.
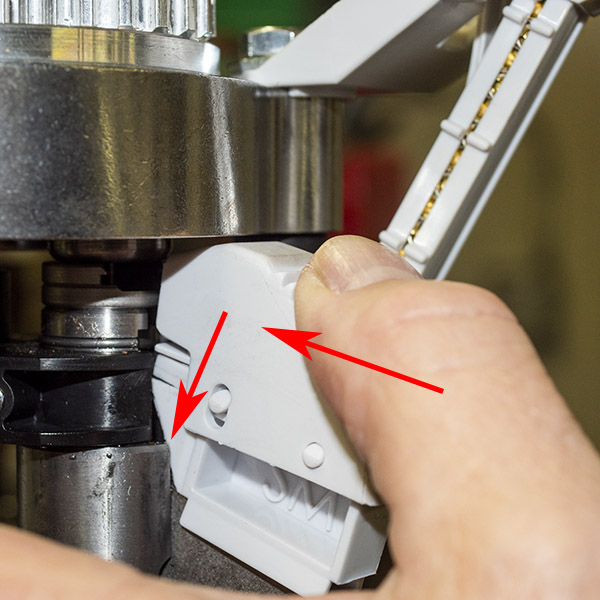
With the press in the fully-raised position, I pushed the primer trigger forward into the primer arm. That allowed the trigger to align with the primer arm. I then pushed down on the trigger. That’s the required motion on the trigger: Forward and then rotate downward, which places a fresh primer from the feed chute in the primer arm. I then allowed the trigger to swing away from the primer arm.
Pushing the trigger forward to mate with the primer arm and then down deposits a single primer into the primer arm. It’s a very clever approach.
Voila! When the trigger was allowed to move away from the primer arm, there was a CCI 500 small pistol primer waiting to be seated. The safety prime moving away from this primer is a very important safety feature. If the primer in the primer arm fires when it is seated, the prior rotation of the safety prime trigger (and the rest of the safety prime assembly) keeps the other primers away from the one being seated, and prevents the other primers from sypathetically igniting.
And there you go!
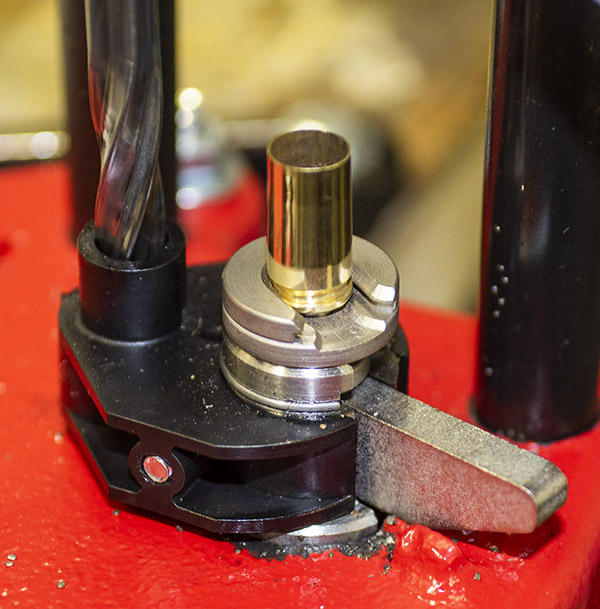
I then lowered the ram with a freshly sized case. As the ram moved down, the primer arm contacted the press base and began to rotate into the ram.
Lowering the ram rotates the primer arm into position.
When the ram approached the last part of its travel, the primer arm positioned the primer directly beneath the deprimed and resized case. As I moved the lever up for to complete the stroke, I could feel the primer being seated.
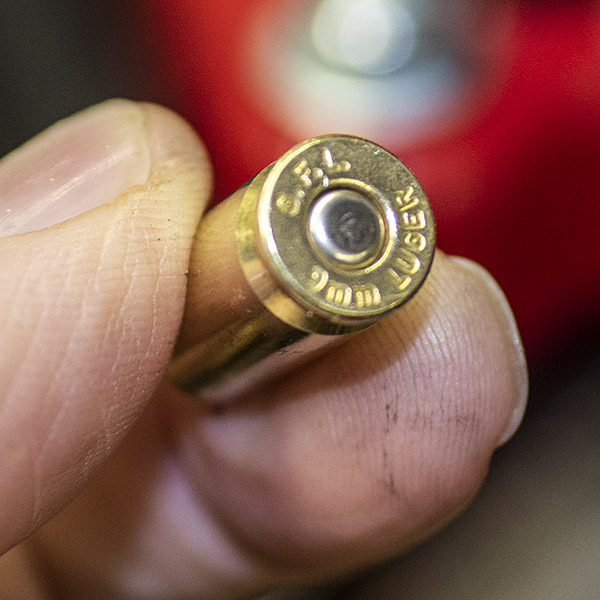
Fully lowering the ram seats the primer into the case that was deprimed on the upstroke.A freshly primed case.
Wow, this was cool stuff. I had already adjusted the Lee auto-drum powder measure to throw the correct charge of Accurate No. 5 powder (see our earlier blog). Now all I needed to do was to adjust the bullet seating die and the factory crimp die.
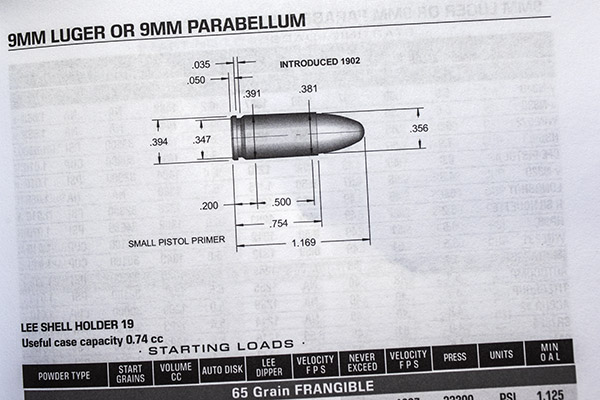
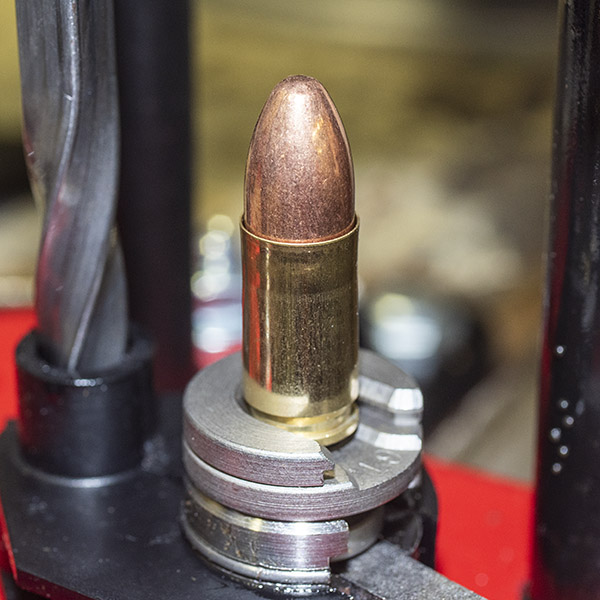
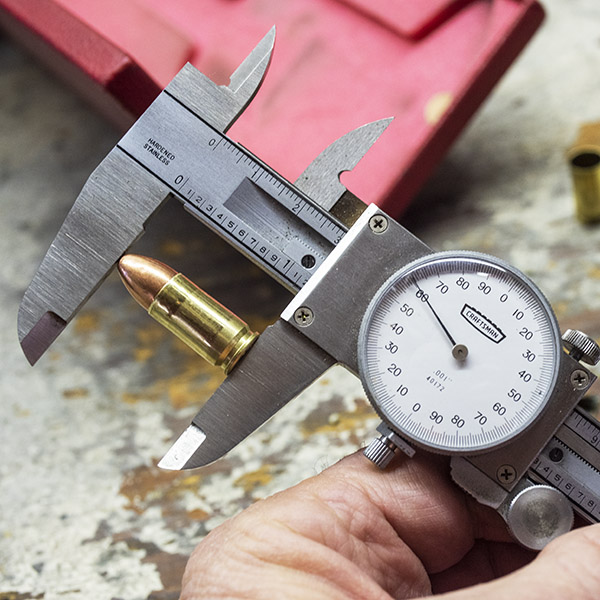
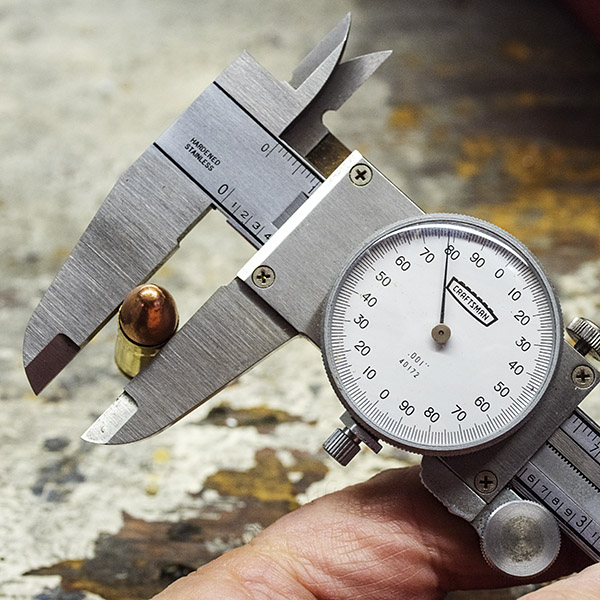
Adjusting the bullet seating die involved positioning the turret so the case was directly beneath the die. I wanted to seat the bullet to the desired cartridge overall length, but I didn’t want to crimp the bullet with the bullet seating die. That involved running the die all the way into the turret so that it contacted the shellholder, and then backing it out enough so the crimping feature in the die did not contact the cartridge case mouth. Then, the next step was to adjust the bullet seater (the knob on top of the bullet seating die) so that it achieved the desired cartridge overall length (in this case, I was shooting for 1.160 inches). The Lee Modern Reloading manual recommend 1.169 inches, but I didn’t want the cartridge to be that long. I made the adjustment by putting a bullet in the case mouth and repeatingly running the ram up, screwing in the bullet seater a little bit at a time between each stroke until it seated the bullet to a cartridge overall length of 1.160 inches. All this is explained in more detail in our earlier blog on using Lee’s Deluxe 4-die set.
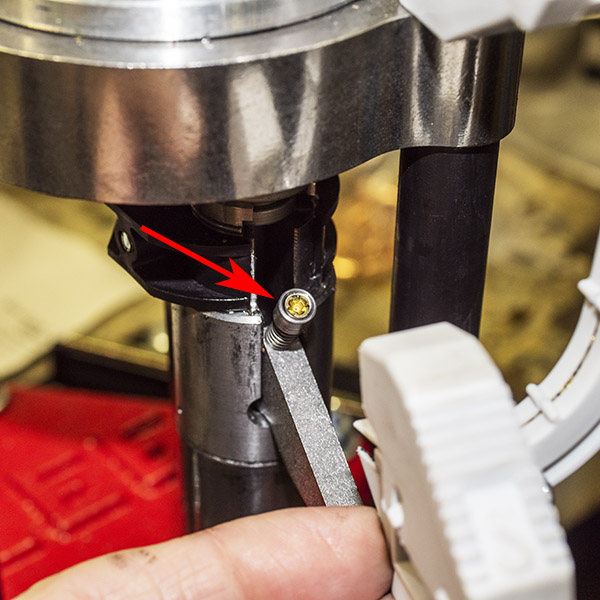
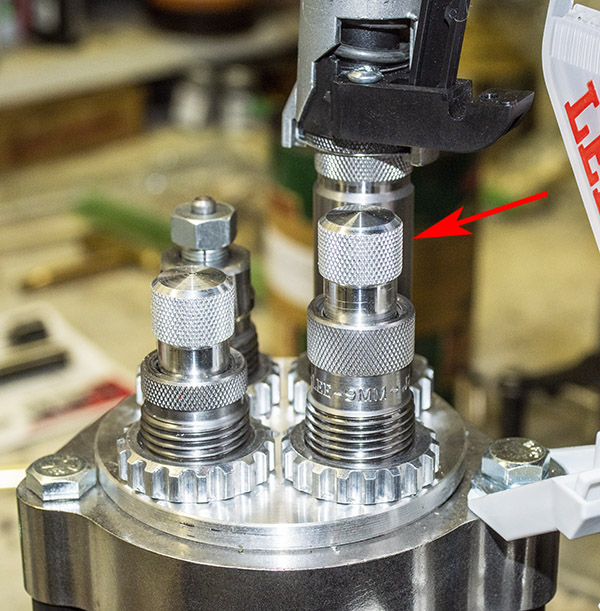
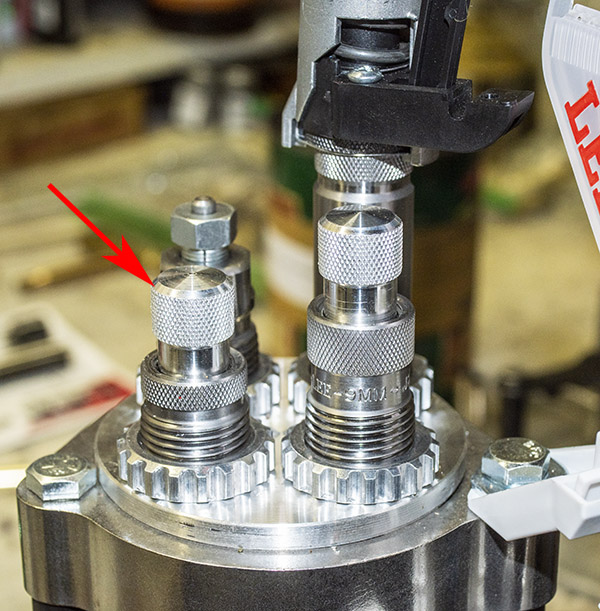
The 9mm Luger cartridge dimensions as shown in the Lee Modern Reloading manual.A 124-grain plated roundnose bullet started in a 9mm case.The bullet seating die. The red arrow points to the bullet seater. Screw it in to seat the bullet deeper, screw it out to not seat the bullet as deep.Right on the money, at the desired cartridge overall length of 1.160 inches.
Now that I had the bullet seating die adjusted, the last step was to adjust the crimping die. That’s also explained in detail in our earlier blog on using Lee’s Deluxe 4-die set. What his entailed was raising the ram fully and then screwing the factory crimp die into the turret until it contacted the shell holder. I then adjusted the crimp by screwing in the crimping feature in the crimping die. Lee recommends a case mouth dimension of 0.381 inches; I wanted a case mouth outside diameter of 0.378 inches. I wanted a stronger crimp.
The Lee factory crimp die. The red arrow points to the crimp adjustment. Screw it in for a stronger crimp, screw it out for a less aggressive criimp.A cartridge mouth outside diameter of 0.378 inches.
At this point, I was ready to start loading. I found it easy to do with the Lee Classic Turret Press Kit. After loading powder into the auto-drum powder measure and primers into the safety prime primer tray, and positioning the sizing die directly over the ram, I got into a rhythm. The sequence goes like this:
Place a fired 9mm cartridge case in the shellholder.
Raise the ram to resize and decap the case.
Push the safety prime trigger down and into the priming arm.
Lower the ram (this advances the turret to place the expander die over the ram) and seat the primer.
Raise the ram to charge and flare the case.
Lower the ram (this advances the turret to place the seating die over the ram) and place a bullet in the case mouth.
Raise the ram to seat the bullet.
Lower the ram (this advances the turret to place the crimping die over the ram).
Raise the ram to crimp the bullet.
Lower the ram (this starts the sequence again by advancing the turret to place the sizing die over the ram).
Remove the reloaded cartridge and place it in the ammo box.
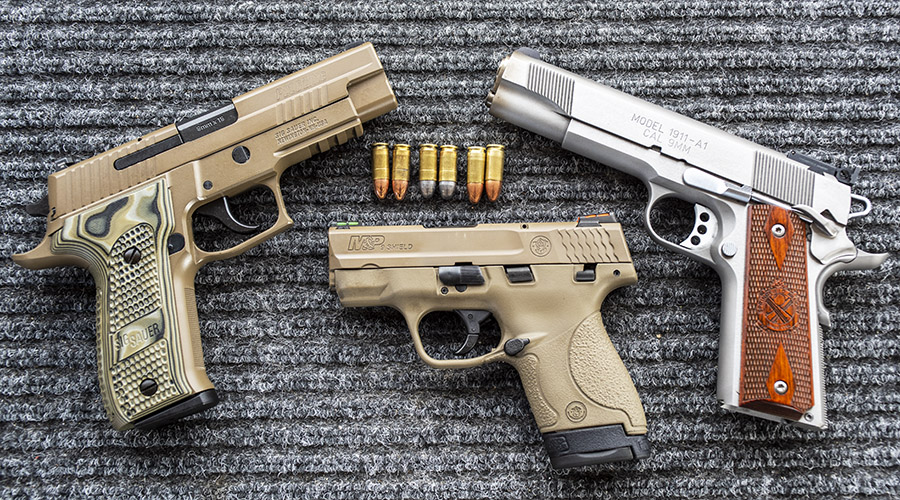
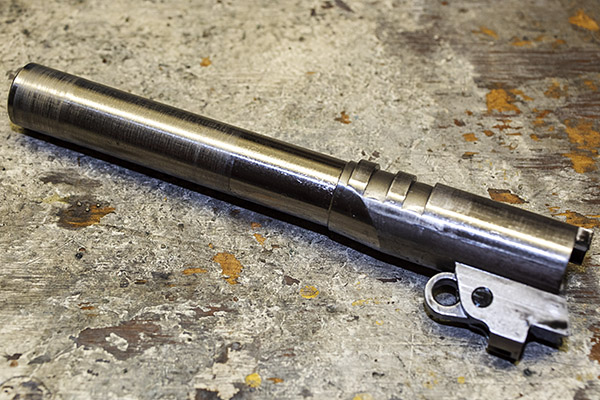
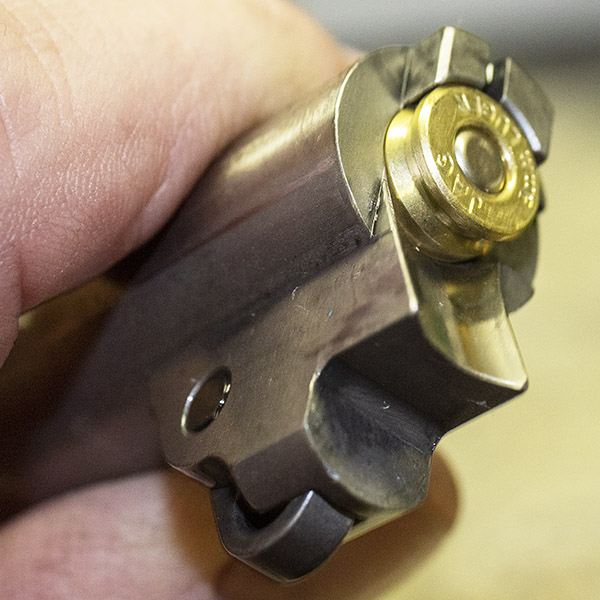
After the first few rounds, it was time for a fit check, also known as the plunk test. I shoot a lot of 9mm; it is one of my favorite cartridges. I have three 9mm handguns: A SIG P226, a Springfield Armory 1911, and a Smith and Wesson M&P Shield. Of these, the Springfield has the tightest chamber, so I use its barrel (after taking it out of the gun) for the the plunk test. If my reloaded 9mm rounds pass the plunk test in my Springfield barrel, they will feed and chamber in anything.
Three glorious 9mm pistols: A SIG P226, a Smith and Wesson Shield, and a Springfield Armory 1911.The Springfield Armory 1911 barrel.I left the barrel dirty for a more stringent plunk test.
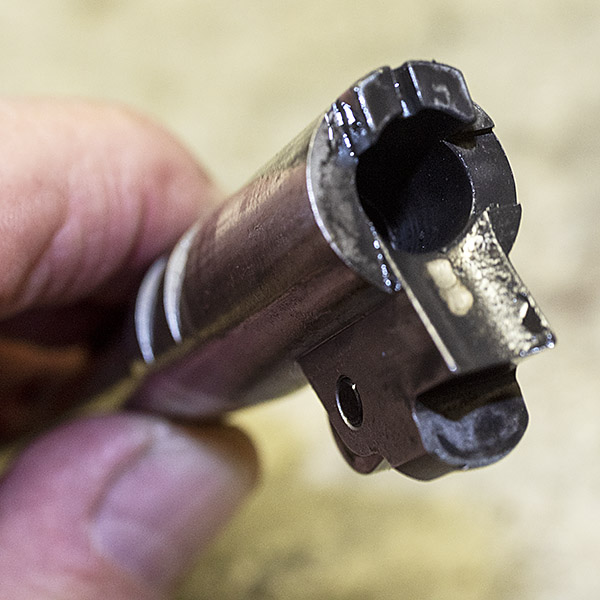
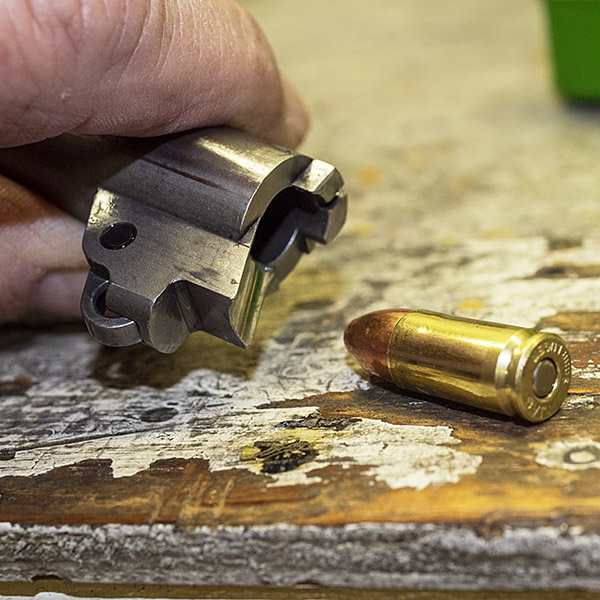
The plunk test is straightforward and highly technical. I drop a 9mm round into the chamber, and if it drops in easily with a nice plunk, it passes the first part of the plunk test.
Plunk! Easy chambering in a dirty barrel with gravity feed. So far, so good.
The second part of the plunk test involves turning the barrel down, and if the round falls from the chamber with a nice plunk, it passes the second part of the test.
Plunk! Yep, a slight downward tilt and the reloaded 9mm round dropped right out. The Lee factory crimp die works wonderfully well.
If the first few rounds pass the plunk test, I’ll then proceed to reload the rest of the ammo. That’s what I did here, and while I had the barrel out of the Springfield, I randomly selected a few more rounds and similarly plunk tested them. They were good to go.
You know, I still do the plunk test on all of my 9mm ammo because old habits die hard. Before I started using Lee’s Deluxe 4-Die set, I would occasionally experience plunk test failures, and what that meant is the rounds would most likely jam when I was on the range. With Lee’s factory crimp die, that just doesn’t happen. With Lee’s dies and this turret press, I suspect plunk test failures and jams will be a thing of the past. You probably realize by now I really like my Lee dies. And I absolutely love my Lee Classic Turret Press Kit.
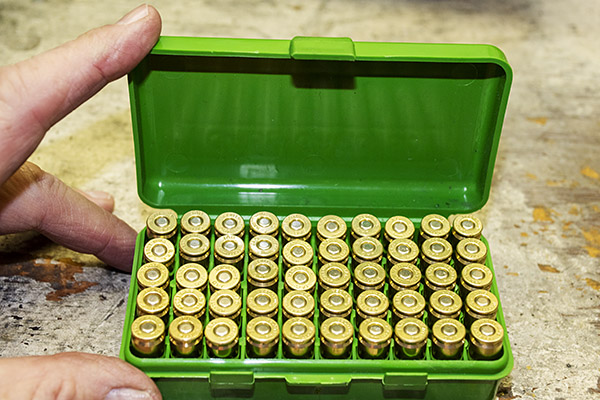
After finishing the plunk test, we were off to the races. I loaded one box of 9mm ammo, which took less than 20 minutes. You can load high quality ammo quickly with the Lee Classic Turret Press Kit.
The first 50 rounds reloaded on my Lee Classic Turret Press. Life is good.
Next up…range firing the ammo you see above in a new S&W Shield, a SIG P226, and a Springfield Armory 1911. That blog will post in a few more days.
Stay tuned!
One of the best places to buy Lee reloading gear is on Amazon.
Never miss an ExNotes blog:
Here are links to our earlier blogs on Lee reloading equipment:
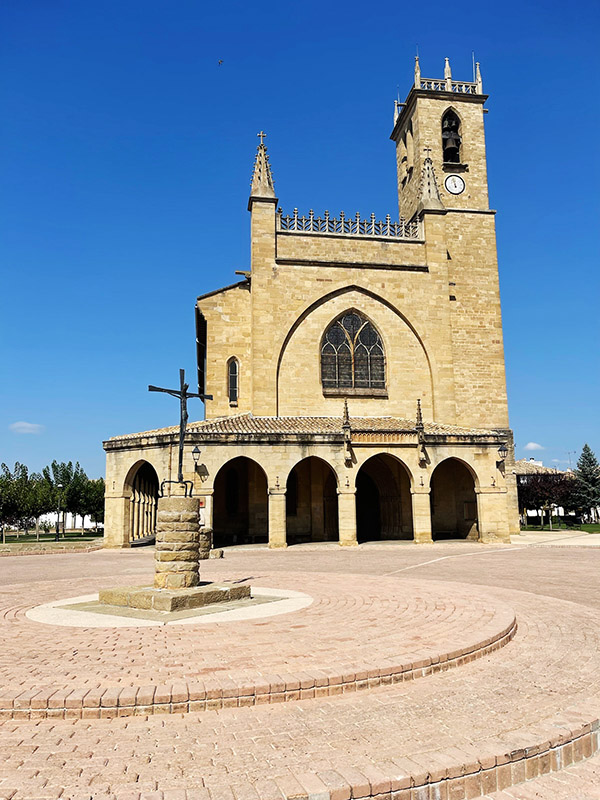
The Camino de Santiago, also known as the Way of St. James, is a network of pilgrimage routes that lead to the shrine of the apostle Saint James the Great in the cathedral of Santiago de Compostela in Galicia, Spain. The Camino has been a popular destination for Christian pilgrims for more than a thousand years, and it is now visited by people of all faiths and backgrounds from around the world.
There are several routes of the Camino de Santiago, including the Camino Frances (French Way), which is the most popular, and the Camino Portugués (Portuguese Way), which starts in Lisbon or begins in Porto for a two-week shorter Camino. The Camino de Santiago is a long-distance walk or hike that typically takes 30-40 days to complete, depending on the route and the pace of the individual pilgrim.
Along the way, pilgrims stay in Albergues (pilgrim hostels) or other types of accommodation and follow the yellow arrows and shells which mark the way. The Camino de Santiago offers a unique opportunity to experience the beauty of the Spanish landscape and culture and to challenge oneself physically and spiritually.
Please click on the popup ads!
I walked seven different Camino Routes with my first Camino in 2012 and the last in September 2021. My last walk found me starting in Pamplona, Spain, a vibrant city never lacking a reason for a fiesta, a city known worldwide for the Running of the Bulls every July. I ended my journey in Leon, Spain. With my added side trips, I walked over 300 miles, experiencing high desert plateaus, the Rioja wine region, the blissful Logrono’s tapas, the magnificent Burgos Cathedral, the Meseta’s emptiness, and the joy of Leon.
I was on a multi-month motorcycle/camping trip through Arizona, Utah, Colorado, Wyoming, and Montana. When riding, there are times when every part of your brain is laser-focused on the road ahead of you and who might try to run you over from the back or side, but every now and then, the ride is so peaceful that you have time to turn a portion of your brain to the gift of “I wonder.” This led me to reminisce over my six prior walks along different Camino routes in Spain, Portugal, and France. Once released, an avalanche of memories and images flowed to the point that I knew I would be booking my flight to Europe as soon as I stopped my ride for the day.
A quick Google Flights search gave me what I needed, and I soon had a ticket. This was another solo walk, my favorite way for most hikes. My arrival in Pamplona was early enough that I decided to start my Camino right from the Pamplona Airport, bypassing one of my favorite cities in Spain.
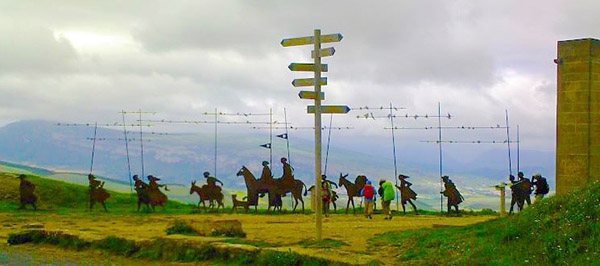
The morning had the hope of the fall weather yet to come as I headed slowly up the first of several foothills with the goal of a 10-mile walk for my first day. The gravel crunched satisfactorily underfoot as I quickly adjusted my backstraps to climb up to an iconic ridge that all pilgrims look forward to, the Alto del Perdón, a mountain pass in the province of Navarra in northern Spain, about 12 miles outside of Pamplona. I had returned to the Camino Frances trail after nine-year of absence, taking in beautiful views of the surrounding landscape and a chance to rest and recharge. The mountain pass is named after a sculpture of the Virgin Mary and the phrases “Señora del Camino” (Lady of the Way) and “Perdón” (Forgiveness), which are inscribed on the base of the sculpture. The windswept ridge and the massive wind turbines in the background contrast the sculptures that represent a pilgrimage from the Middle Ages. I took my first full breath after 18 hours of travel and an excellent 8-mile walk to this point. I thought about my intentions for this walk, what I hoped to gain and whom I would miss in the coming weeks of a long walk across most of Spain.
Reluctantly leaving the ridge late afternoon, I knew it would be challenging to reach my Albergue for the night. The steep loose gravel trail reminds me that my knees are not what they used to be, and motorcycle riding for the prior months did little to prepare me for the rigors of this walk. Soon the village of Uterga appeared with another climb up to her main street. My arrival timed perfectly to watch the evening stroll of the locals begin, kids running in the square, little old ladies with perfectly quaffed hair and well-put-together outfits ambling in deep conversations. Adults were sitting in outdoor cafes having a drink, visiting each other, and enjoying the last dregs of daylight. I wanted to plop my disheveled self within their mist and order my first long-awaited glass of Vino Tinto, but I pulled myself together and made the last of my walk to my Albergue in short order.
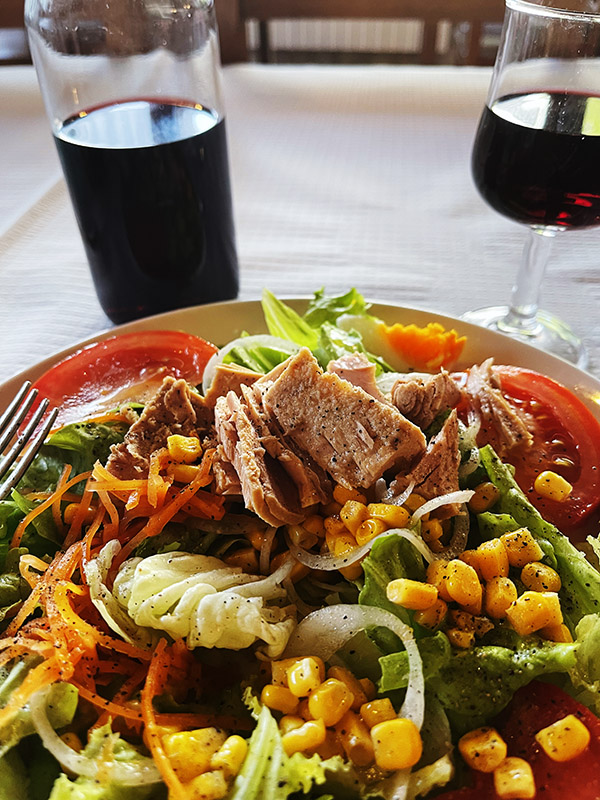
This first night’s stay found me in a dorm room in a private Albergue with its small restaurant and bar. After showing my pilgrims pass (issued to show you are walking the Camino) and paying 12 Euros for my place in the dorm room, I quickly dumped my backpack on my bed, looked in the mirror, confirmed I looked like a wreck, dashed for the bar, and ordered my first of many good Rioja wines. Settling in, I met my first group of fellow pilgrims. A portly German fellow in his mid-fifties that I would painfully learn would serenade us throughout the night with his epic snoring. Also, a group of Italian bicycle riders. They were loud, and all were talking at once with what would become the usual question: Why is an American woman walking the Camino alone? Well, that’s a question for another day! I order my second glass of wine and move into the restaurant for the start of the evening’s Pilgrim meal, an inexpensive three-course meal with portions that could feed a small family, and your choice of bottled water or a bottle of wine, Good God, man, why would you order the water? I certainly did not.
I had equal feelings of contentment and joy seeping in as German, Italian, and Spanish conversations swirled around me—fellow pilgrims sharing their day’s success and physical hardships. Many of the pilgrims had started 60 miles back on the French side of the Pyrenees, had survived the celebrations of Pamplona, and were still in high spirits so early in their walk. I listened to their stories and their countless toasts made in several languages. I left the room while the wave of conversation and laughter reminded me of how lucky I was to be on this walk for a 7th time. This surely was the beginning of an epic adventure and the hope of what Spain had in store for me.
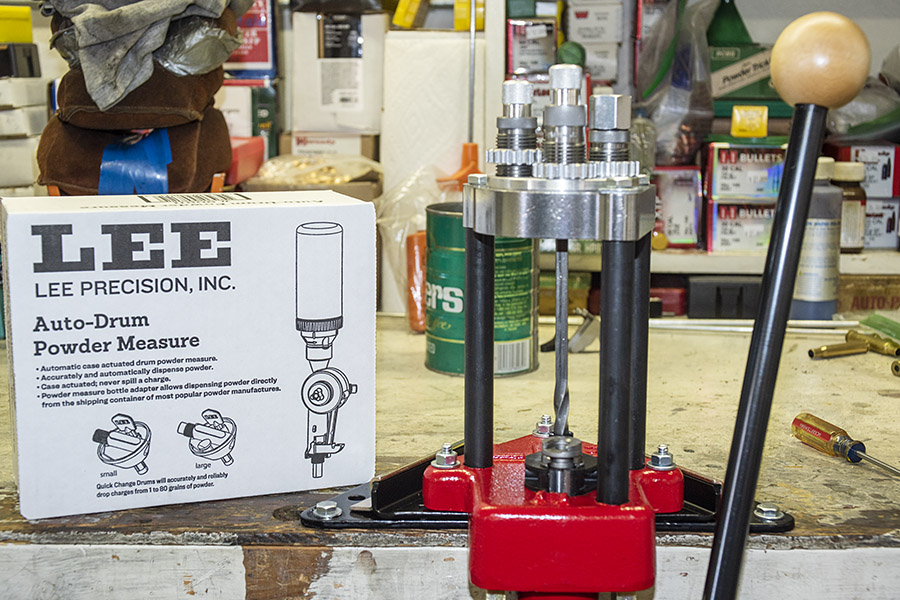
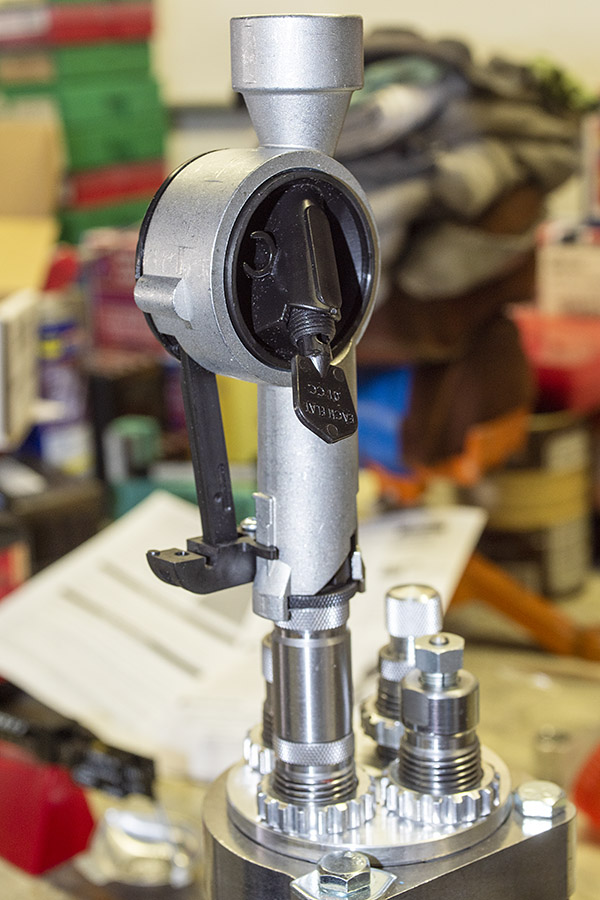
After mounting the Lee Classic Turret Press, the next step is to install the auto-drum powder measure on the expander die. This blog focuses on doing so. The auto-drum powder measure is a well-engineered device. As I installed and adjusted the Lee auto-drum, I was impressed with its design and build quality.
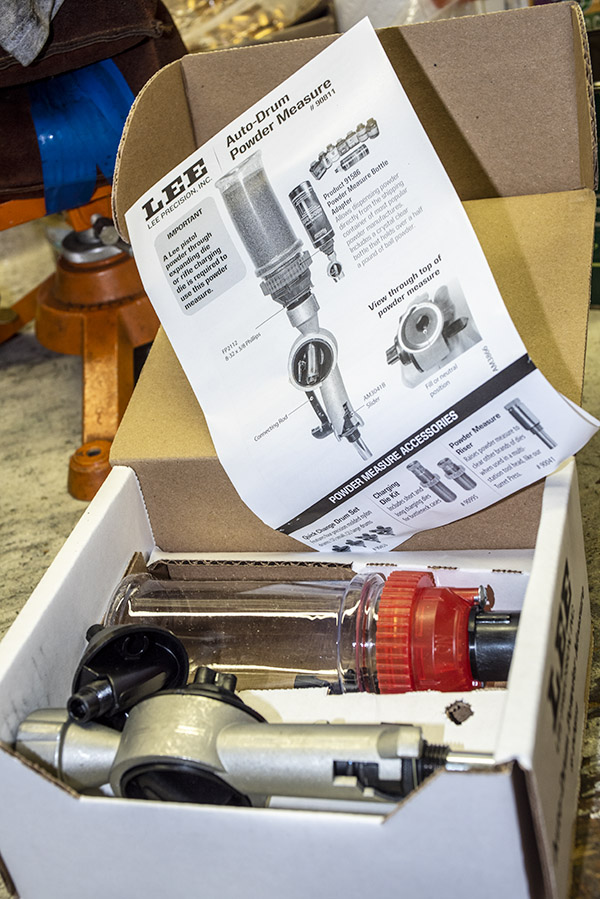
The Lee auto-drum powder measure in its carton. As always, the packaging and the included instructions are excellent.
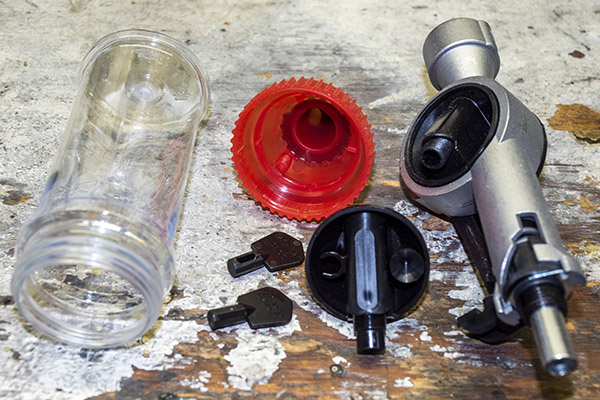
The auto-drum powder measure includes the bottle, the bottle top, two adjustment keys, two quick change drums, the auto-drum tightening screw, and the body.
Lee auto-drum powder measure components.
Keep us afloat…please click on the popup ads!
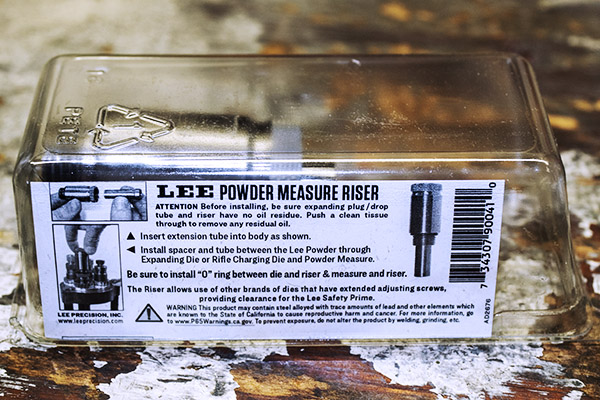
In addition to the above, Lee’s Classic Turret Press Kit includes a powder measure riser. It’s used to raise the auto-drum powder measure so it clears the safety primer feed when the turret rotates. We’ll cover installation of the Lee safety primer feed in the next blog.
Lee’s Powder Measure Riser as packaged from the factory.Lee’s powder measure riser includes the body, the tube, and an o-ring.
The photo below shows the auto-drum body. It’s a die-cast part what includes the auto-drum (the black cylindrical subassembly inside the silver die casting). As the Lee turret press ram is raised, the cartridge case pushes a cylinder in the riser up. The upward movement of that cylinder actuates a lever (the black piece on the auto-drum, which rotates the drum). There’s a cavity in the drum that fills with powder when it is aligned with the bottle. When the drum rotates, the cavity holding powder rotates to align with the expander die, and a fixed amount of powder drops through the expander die into the brass cartridge case below. It’s a clever approach.
Lee’s auto-drum powder measure body.
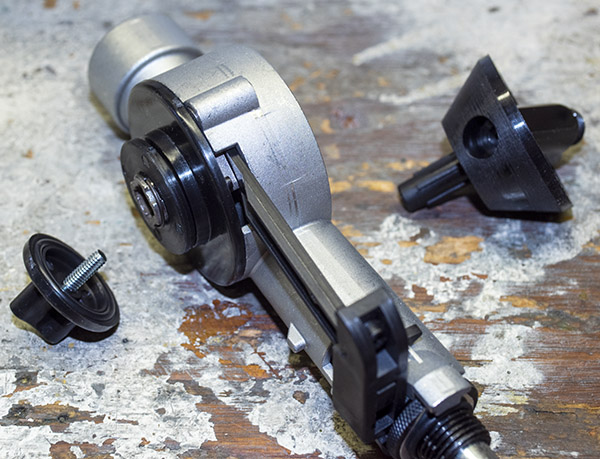
The central part of the auto-drum consists of three molded black plastic subassemblies. These are the screw subassembly, the cover, and the drum. You unscrew the screw (shown on the left in the photo below) and the drum can be removed from the auto-drum body.
Lee’s auto-drum body disassembled, showing from left to right the screw subassembly, the body, and the drum.
The drum is where the powder amount is defined. There’s a cavity shown by the red arrow in the photo below. The amount of powder the drum drops can be adjusted by making changes in the volume of this cavity.
A macro shot of the drum. The cavity indicated by the arrow is what determines the powder volume.
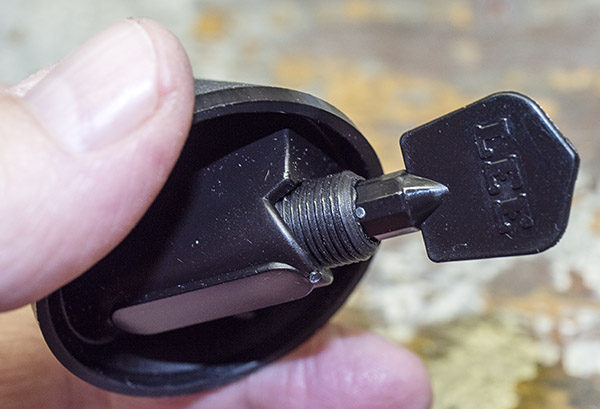
There’s a threaded adjustor in the drum that is 0pposite the cavity. The top of this threaded adjustor is the bottom of the drum’s cavity. Screwing it in reduces the powder volume; screwing it out increases the powder volume.
The screw indicated by the red arrow moves in or out to adjust powder volume.
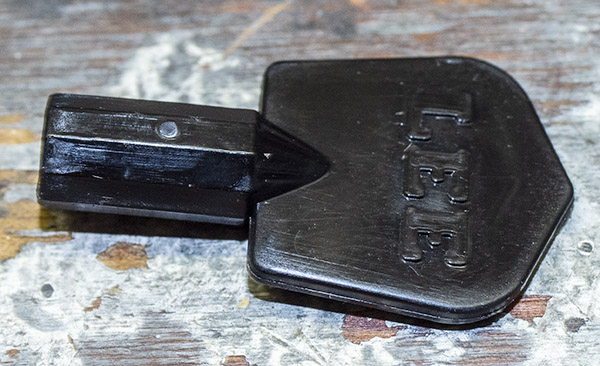
Lee provides two hex keys for making the powder volume adjustments.
The auto-drum hex key used for adjusting powder volume.The hex key inserted in the powder drum adjustment screw.
There’s a place in the drum body to store the key, or you can simply leave it in the threaded adjustor (which is what I do).
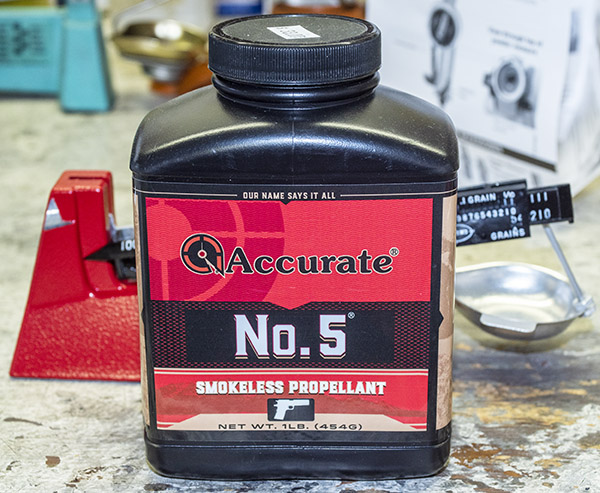
As mentioned in an earlier blog, I decided to use Accurate No. 5 propellant for my 9mm reloads. It’s one of several propellants listed in Lee’s Modern Reloading manual for use with the 124-grain plated bullet, and it’s a powder on I had on hand.
You go to war with the army you have. I had Accurate No. 5. I usually prefer Unique for 9mm, but I use that powder for other cartridges and I didn’t want to use it up. Accurate No. 5 seems to be in stock everywhere these days and I had some on hand, so it was my choice. As you’ll see in a later blog, that was a good move.Lee’s Modern Reloading book (see our earlier review) had 9mm loads for a plated 124-grain bullet using Accurate No. 5.
I loaded two loads for my initial 9mm evaluations. One was with 5.2 grains of Accurate No. 5; the other was with 5.6 grains of Accurate No. 5.
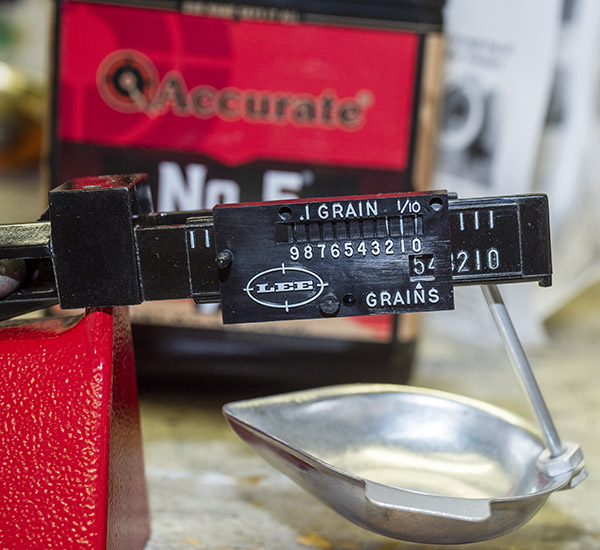
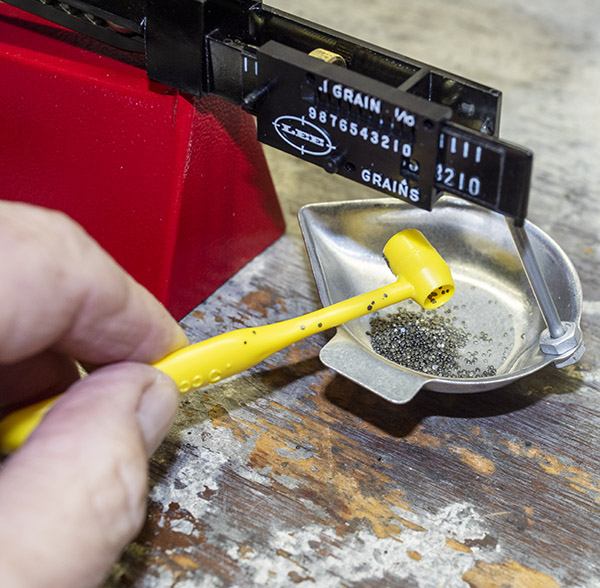
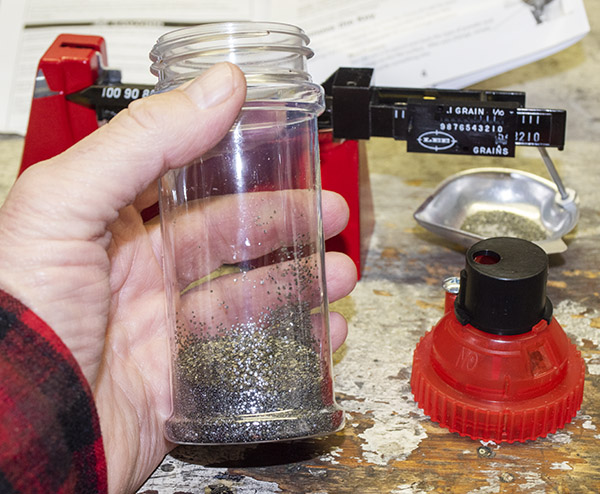
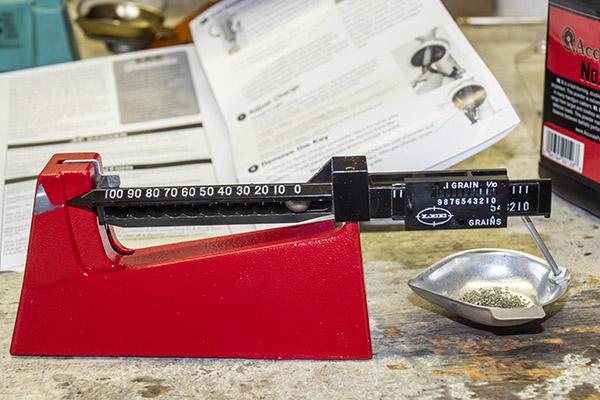
After zeroing my Lee safety powder scale, I set it at 5.2 grains. I used the Lee dipper to add powder to the scale until the beam balanced. The Lee powder dipper (provided with the Lee 9mm dies) makes a good powder trickler.
Using the Lee dipper to add exactly 5.2 grains of Accurate No. 5 to the scale.
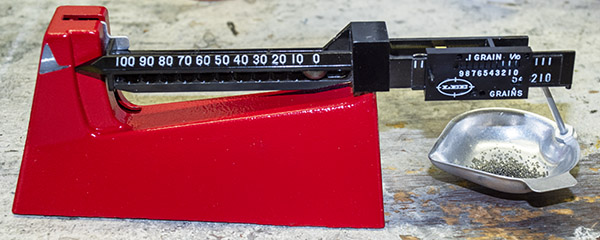
Once I had 5.2 grains of Accurate No. 5 in the Lee safety scale (indicated by the balance beam), I transferred that amount to the Lee drum.
Right on the money.
Initially, the powder was well below the surface of the drum. The idea here is to use the auto-drum key to screw in the adjuster until the surface of the powder in the drum cavity is approximately flush with the surface of the drum. This is to get the drum adjustment close to the desired powder amount (in this case, 5.2 grains). This is a coarse adjustment. We’ll dial in the adjustment once the auto-drum is reassembled.
After pouring 5.2 grains of Accurate No. 5 in the auto drum powder cavity, I used the adjustment screw to bring the powder charger level with the drum surface.
After accomplishing the above, I poured the powder into the powder bottle and I reassembled the auto-drum into the auto-drum powder measure.
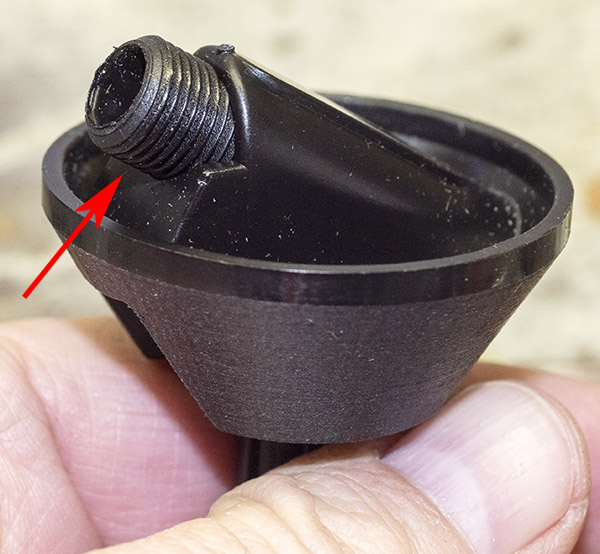
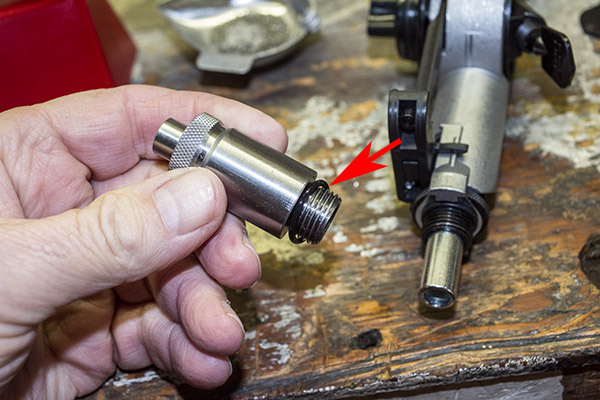
Next, I removed the fitting and its o-ring from the expander die.
The Lee powder through expander die. I removed the fitting indicated by the red arrow so I could install the auto-drum powder measure.I kept the o-ring with the expander die fitting. The riser, which installs in the expander die, includes its own o-ring.
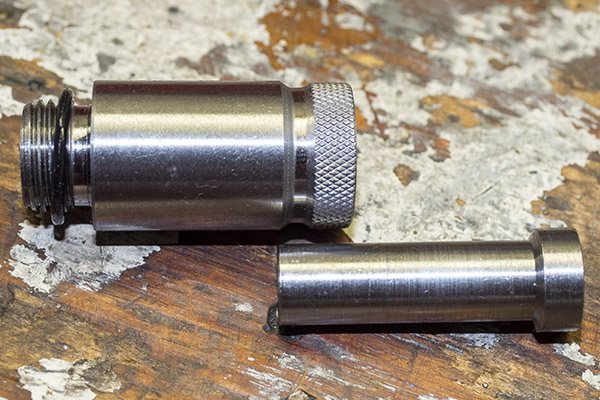
After removing the expander die fitting, I replaced it with the Lee auto-drum riser.
The riser is included in the Lee classic turret press kit.The riser includes three pieces: The riser body, an o-ring, and the cylinder.The riser installed in the expander die.
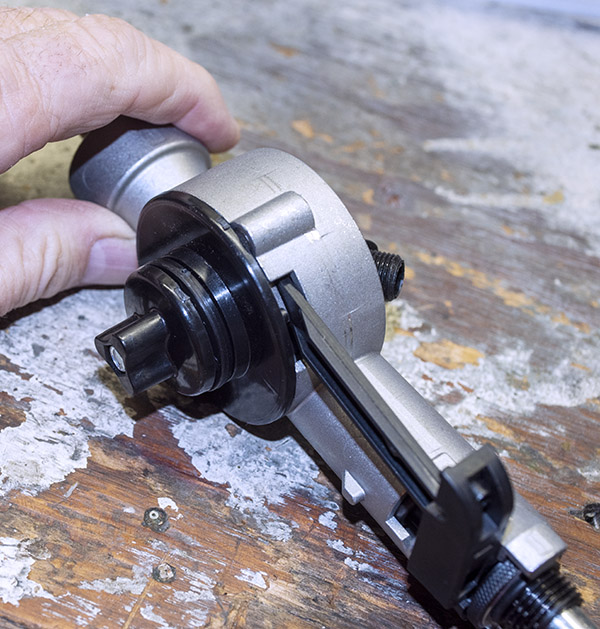
After installing the riser, I then threaded the auto-drum powder measure into the expander die as shown below.
The auto-drum powder measure screws into the riser above the expander die. The black thumbwheel tightens the auto-drum powder measure in the riser.The auto-drum powder measure installed on the riser and the expander die. With each upward press stroke, the cartridge case pushed the riser cylinder up, which pushes the auto-drum’s lever, which rotates the drum and drops the powder through the die into the cartridge case. Clever, indeed.
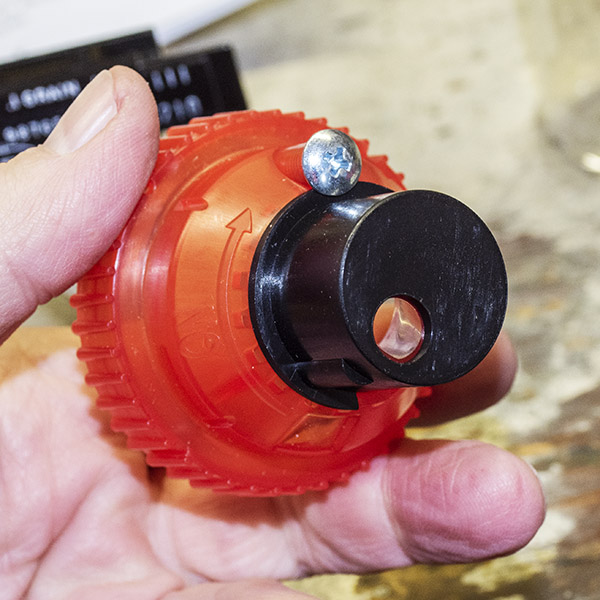
The Lee auto-drum powder bottle and its cap are what hold the powder. The cap is a red molded plastic piece with an on-off valve at its base. The cap’s valve is closed after adding powder to the bottle or removing the bottle from the auto-drum powder measure. It is opened after the bottle is installed in the auto-drum powder measure. When closed, it prevents powder from spilling out of the bottle when the bottle is removed from the powder measure.
The auto-drum powder measure bottle cap and its open-close valve (the black drum at the cap’s base). The valve rotates to open or close.
After adding powder to the bottle, threading the bottle top onto the bottle, and closing the cap’s valve, we can invert the bottle and place it on top of the auto-drum powder measure. There’s a raised rib on the bottle cap valve and a groove in the auto-drum die casting to align the bottle with the auto-drum powder measure.
Accurate No. 5 powder in the auto-drum powder measure bottle.The auto-drum powder measure bottle with its cap installed.The auto-drum powder measure bottle cap valve has a raised rib that fits into the auto-drum body. This axially aligns the bottle with the body.The body notch that accepts the bottle cap valve rib.The auto-drum powder measure installed on the expander die. The arrows show where the bottle fits into the auto-drum body.
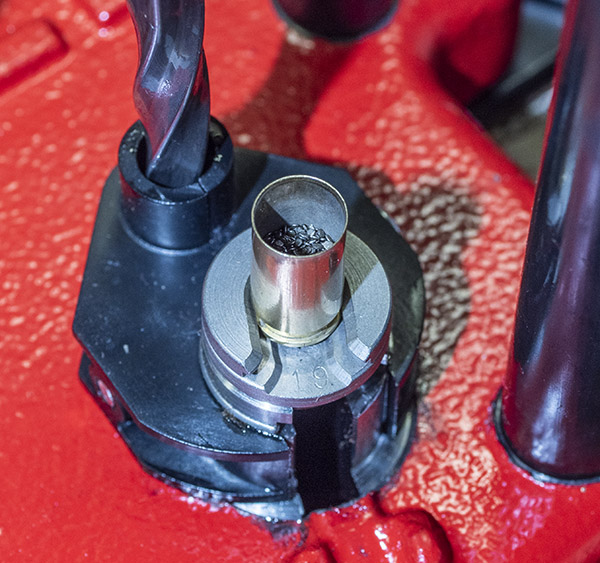
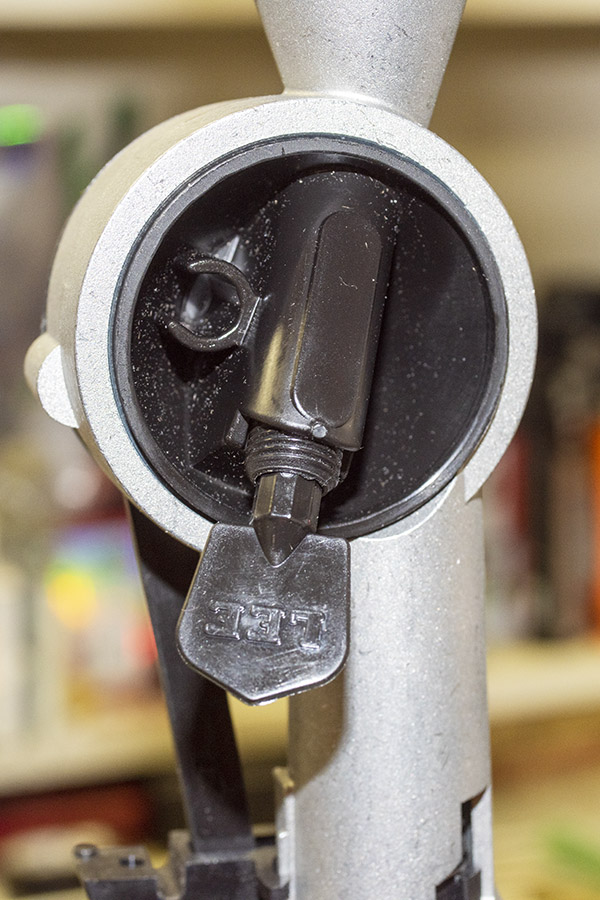
At this point, I placed an empty cartridge case (with a spent primer) in the shellholder and fully raised the ram to run the cartridge case into the expander die. This expanded the case mouth and actuated the auto-disk powder measure to dispense approximately 5.2 grains of Accurate No. 5 powder into the case. When I lowered the ram, I could see the case with powder in it. Note that I used a cartridge case with a spent primer only because I was setting up the auto-drum powder measure on the press. Ordinarily, in the normal operation of this press, the cartridge case would have a new primer in it.
A cartridge case that has been expanded and charged with powder.
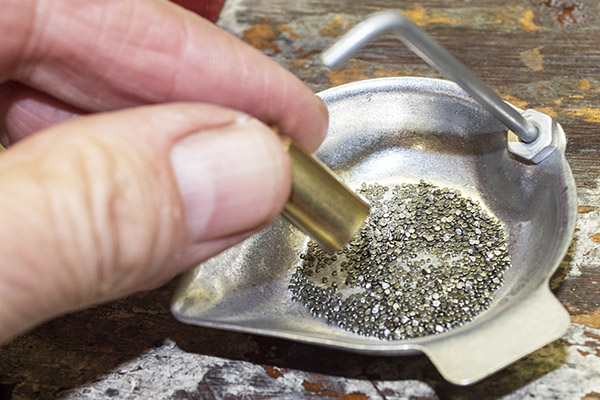
Remember that my initial adjustment was a crude one, accomplished by screwing in the auto-drum adjustor to bring the powder level approximately level with the auto-drum’s surface. The next step is to dial in the auto-drum cavity adjustment such that the auto-drum dispenses exactly 5.2 grains of Accurate No. 5. To do this, I took the powder in the case (shown above), poured it into the Lee safety scale pan, and checked the weight on the safety scale.
Pouring the cartridge case contents into the Lee safety scale pan.
I found that I was a little bit under 5.2 grains of powder. I expected this, as I couldn’t get the auto-drum cavity completely full of powder for the coarse adjustment described above. I made an adjustment to increase the amount of powder dispensed by turning out (i.e., unscrewing) the auto-drum cavity adjustor by a quarter of a turn.
The initial charge was a bit light, as will typically be the case when dialing in the auto-drum powder measure. I increased the volume by turning the volume adjustment out with the hex key.
After an attempt or two at adjusting the auto-drum, I had the dispensed powder amount exactly where I wanted it: 5.2 grains.
Bingo! 5.2 grains of Accurate No. 5.
I am impressed with the Lee auto-drum powder measure. I like the fact that it automatically dispenses powder with each stroke of the press handle if there is a cartridge case going into the expander die, and I like that it can be infinitely adjusted. Older designs used fixed (i.e., non-adjustable) cavities that dispensed fixed power amounts. The infinite adjustment feature of this powder dispensing device is a better approach. I also like that the cartridge case remains directly in front of you after the press is lowered (unlike a progressive reloader, in which the cartridge case may be on the other side of the press when it is charged). With the Lee classic turret press kit and its included auto-drum powder measure, you can see that each case has been charged with powder and that you have not inadvertently double-charged the case. And, if anything is not as it should be, you can easily remove the cartridge from the shellholder, correct the problem, and continue. On a progressive press, this is much more difficult to do.
This brings us to where I want to be in today’s blog. So far, our blogs described mounting the bench plate, installing the press, intalling and adjusting the first two dies (the resizing die and the expander die), and adjusting the Lee auto-drum powder measure to dispense precisely the amount of powder required. Tomorrow, we’re going to cover installing the Lee primer feed and making final adjustments to the bullet seating and factory crimp dies. Stay tuned.
One of the best places to buy Lee equipment is on Amazon.
Never miss an ExNotes blog:
Here are links to our earlier blogs on Lee reloading equipment:
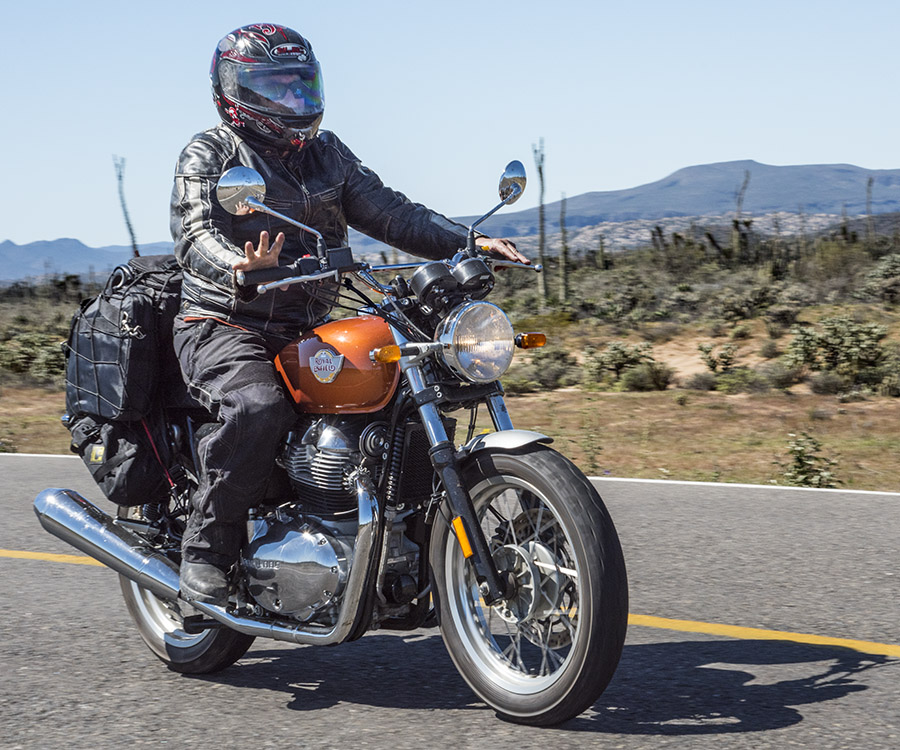
When I saw the first photographs of Royal Enfield’s new 650 twin the bike seemed perfect. 650 vertical twins have owned the sweet-spot of cool long before McQueen bashed them around the desert and they are still an ideal size and configuration for all around use. Unfortunately the latest vertical twin offerings from other motorcycle manufacturers have sprouted slow-moving tumorous pistons, lost their summer beach-bodies and become uselessly complex. The whole situation kind of put me on edge. I was actually a bit angry: “Royal Enfield better not screw this up,” I mumbled to my cat.
I liked the new Interceptor 650 so much I was going to get really pissed off at Royal Enfield if the bike was crude and uninspiring. Luckily for everyone involved, the Interceptor, or INT, or Cartridge, or Clip or whatever legal BS we are supposed to use, is a great bike. It’s hard to judge long-term quality without the requisite passage of time but from what I can see the 650 is well and truly the Nads.
Help us publish…please click on the popup ads!
In the video I rave about the frame, because it is noticeably well-finished. I couldn’t get over the thing. All the component parts of the RE 650 appear to be designed not only with function in mind but also with an eye toward aesthetics. This is a motorcycle that will look just as good dismantled as it does assembled, like how a Norton 750 looks good in pieces on your cycle bench. Thanks, whoever is responsible for this.
The 650 Royal Enfield engine feels peppy and it breathes well. The bike pulls hard right up until the rev limiter cuts in at 7500 RPM. It feels like a happy engine if you know what I mean. Sitting upright I saw an indicated 115 mph in 5th gear at redline and 6th gear dropped the top end to 110. I think if I didn’t have 75 pounds of touring garbage flapping in the breeze and made myself really small I could have gotten 120 mph in high gear.
The fuel injection on my 650 delivered its tiny spurts of fuel precisely and in a timely fashion. I could not imagine it working any better. On the highway the thing got an amazing 70 miles per gallon. Fuel injection is one of the few modern advances that I think are useful on a motorcycle. Handling was a non-issue: The bike tracked well and the suspension is good enough for me.
The shifting is slick and effortless and if I wasn’t running out of old Cycle magazine issues from the 1970’s to steal complimentary phrases from I’d go on about the transmission for hours. I’d really like to take this bike apart and see what makes it so good.
The brakes were not super powerful. I never felt like the bike wouldn’t stop but I’ve gotten used to incredibly powerful brakes on other bikes. It’s not a deal killer for me because this is a multi-purpose motorcycle, not a race bike. I didn’t care for the Royal Enfield’s anti-lock brake system but in their defense I don’t like anybody’s anti-lock brake system. I’ll have to yank the fuse or defeat the system somehow when I get mine.
Yes, I would actually buy one of these motorcycles if moto-journalism paid in something more fungible than “Likes.” I’m not sure what they will actually sell for yet but it will be less than the other guys. If they make a high-pipe scrambler version all bets are off.
Some motorcycles play much larger than their spec sheets would indicate. The Royal Enfield is one of them. It’s such a joy to travel on a simple, lightweight motorcycle and the pleasing burble exiting from the 650’s exhaust system is music to anyone who rode a Honda twin from the 1970s. The 650 is a bike built to ride and it’s nice to look at parked in the garage.
I’m afraid motorcycle riders have become trapped in the American Dream of bigger is better and more plastic is better. The road grows dimmer and further from their nerve endings in the cause of comfort and technology. Stop now. You can easily find a more powerful motorcycle or find a faster one but you’ll play hell finding a better looking motorcycle than the Royal Enfield 650. And you won’t find one that’s more fun to ride on the street.
If you’d like to read the rest of our recent Royal Enfield Baja adventure ride posts, here are the links…
A couple of months ago Joe Gresh wrote a blog seeking new writers. We picked up Mike Huber, who we already knew from a couple of guest blogs, we have another guy who may come on board (more about that when it’s confirmed), and most recently, Bobbie Surber agreed to join the ExNotes team.
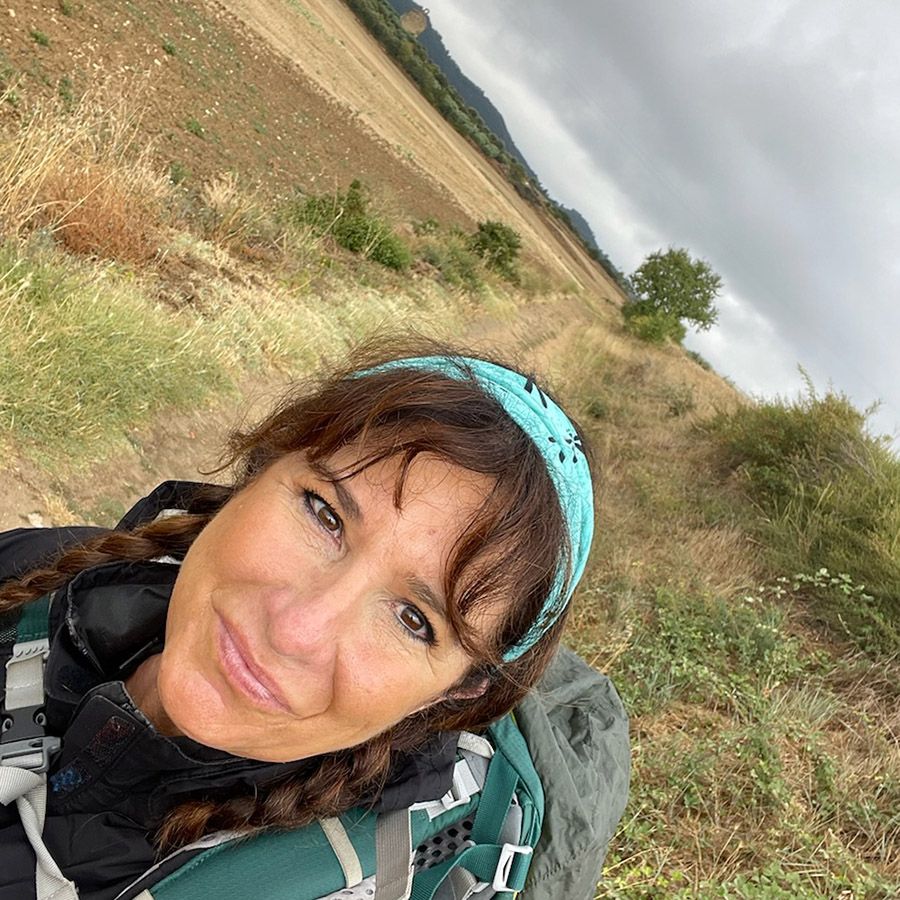
Bobbie’s Tiger. Blue is the fastest color on a Triumph.
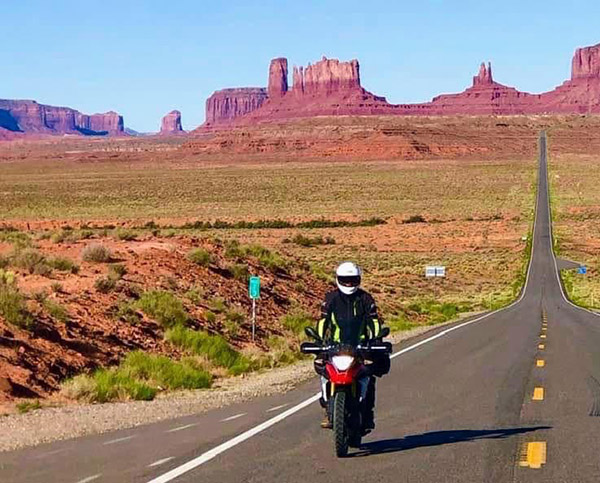
Bobbie is the real deal. She raised four daughters, she’s a construction manager, she’s a rider, and she’s a writer. I know Bobbie rode a G 310 GS BMW all over Baja, she rides a blue Triumph Tiger these days (I used to ride a blue Triumph Tiger, so I know she has good judgement), and she did the Vietnam adventure ride with Mike Huber (a ride you read about on these pages).
Bobbie on her BMW GS in Monument Valley.
Bobbie is an adventurer and she writes well. She will be bringing stories to us on all the above and more, and to start, Bobbie is writing a series on hiking the famed Camino de Santiago across Spain, Portugal, and France. The first installment of this European adventure is going in the queue in the next few days, and I think you will enjoy it. I sure did.
Stay tuned; as always, there are more good stories coming your way.
Please click on the popup ads!
https:/www.ExhaustNotes.us
All kinds of good stuff: Check out the menu on our Home Page.
You know those signs that tell you not to drive into flooded areas?
Every time I’d see one, I always wondered about the target audience. I mean, who would be stupid enough to drive into a flooded area? And if they were that stupid…well, maybe ol’ Darwin had the right idea.
Help us help you…click on the popups!
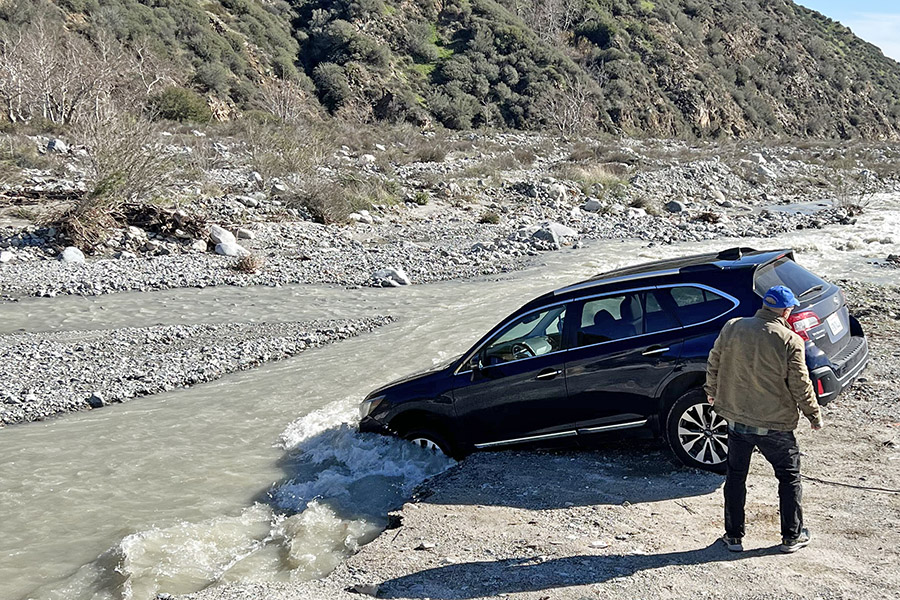
Based on the cover photo, you may have already guessed where this story is going. I don’t have to look very far to find someone stupid enough to “enter when flooded.” I see that guy in the mirror every morning when I shave.
You see, there’s a creek that flows across the dirt road out to the West End Gun Club. I’ve been driving across it for close to 40 years now. Most of the year, it’s a dry creek bed. After a rainy spell, we’ve had times when it was so obviously flooded I wouldn’t attempt to cross it. Most of the time. But other times when the water was flowing, it didn’t look bad enough or deep enough to keep me from taking a chance. I mean, what could go wrong?
I guess I’m one of those guys who has to urinate on the electric fence to see for himself. Yep, I finally got stuck, and stuck good. I always figured with my all wheel drive Subie I could get out of anything. But you know, AWD ain’t the same as 4WD. Something I learned today.
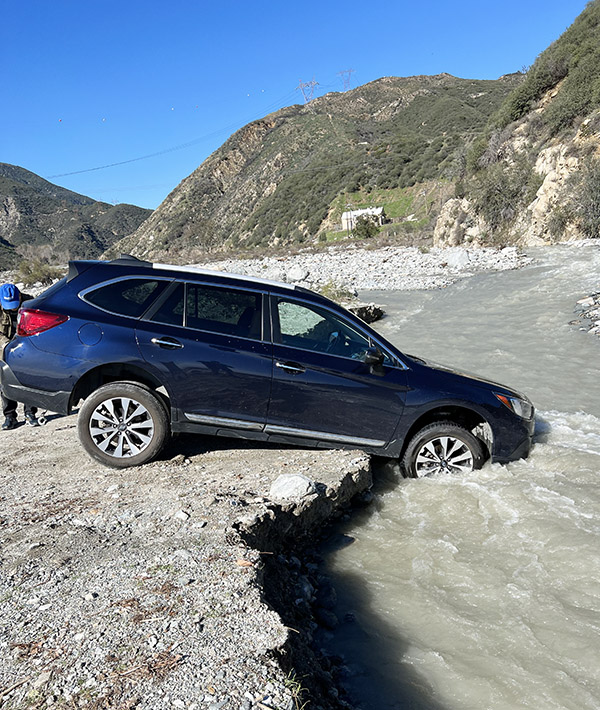
When I heard the underside of the Subie hit the ground on the ledge (that was now more of a bank than a ledge), it hit hard. I felt it as much as heard it. I was in trouble. I tried to back out, but I knew from the downward facing hood the Subie’s butt was in the air and I could feel the front wheels spinning in the water. I was balanced on the bank, and I could feel the car rocking and pivoting slightly to the right. It was like being in a formulaic movie or a bad dream when a car has gone out of control and is hanging over a cliff. I opened the door and the bank was directly under the opening, and as I looked at the ground, the bank was eroding. In the wrong direction. Water started coming over the door sill and into the car.
I beat a hasty exit out the passenger door. Other folks going to the range, wondering if they could cross, had stopped and were watching me. I had set the example. The spectators tried to help by pulling down on the rear bumper. It did no good. I was high sided, and if anything, the car was moving more toward the stream, which was starting to look like Niagara Falls. Yikes.
I called the Auto Club, but they put me on hold. The bank continued to give way under my Subie, so I called 911. They took my info and I never heard from them again, nor did anybody show. You know the old saying…when seconds count, the cops are only minutes away. The other spectators drifted away. I was on my own.
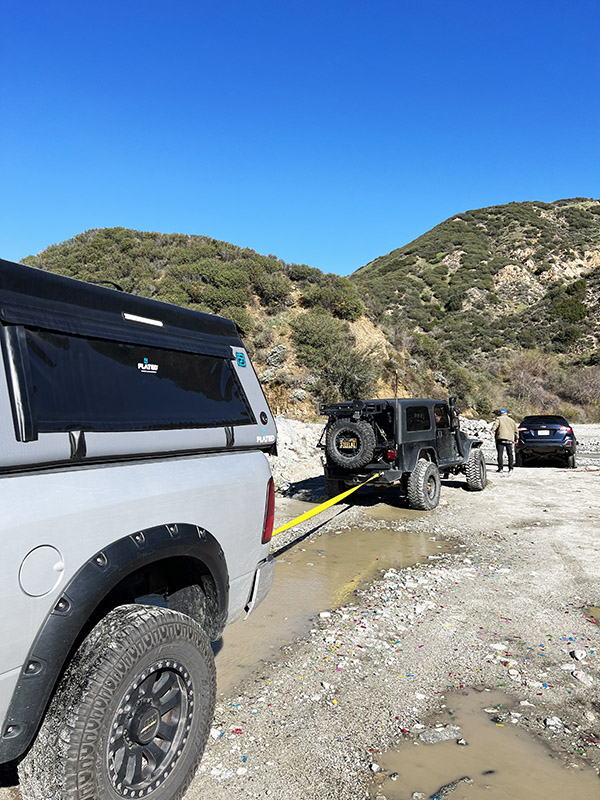
Then a miracle occurred. Good buddy Lee, who I met for the first time this morning, came by in a Jeep. A real Jeep. With a winch. We connected (literally and figuratively), but it was no good. As the winch did its thing, it dragged the Jeep toward the Subie. Lee and I looked at my situation. Lee put boulders in front of the Jeep’s wheels, and the winch dragged them along, too. “If I could hook up to another vehicle,” Lee said, “we could make this work.”
Then the second miracle occurred. Another newly-met good buddy named Aaron rolled up in a big Dodge pickup. He hooked up to Lee’s Jeep, Lee hit the winch button, and just like that (with some God-awful undercarriage scraping and grinding), I was free. For a few seconds, I thought my future held a commission as a U-boat commander, but no more. Lee and Aaron, wherever you are, thanks much!
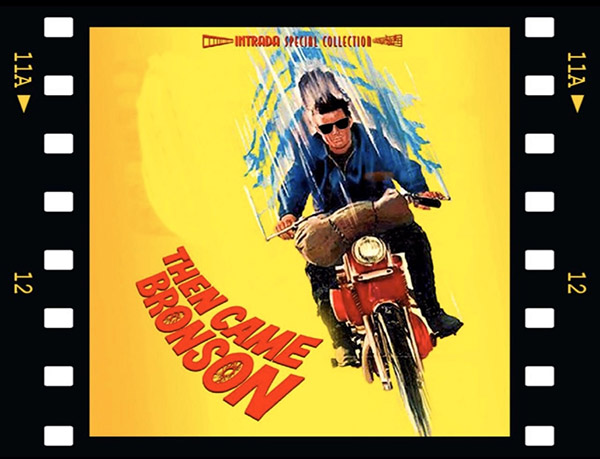
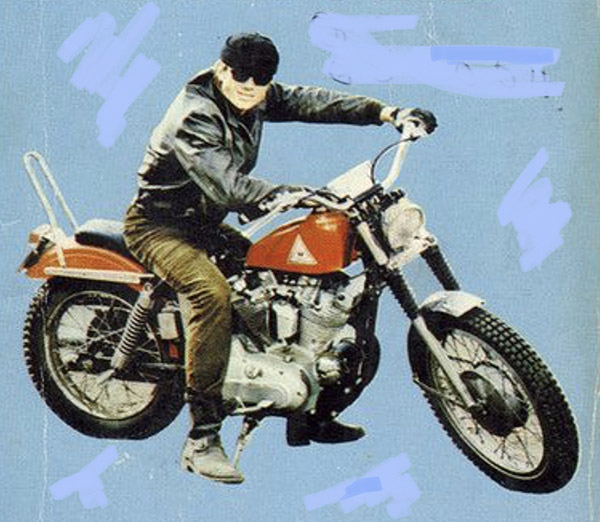
I’ve been on a then came Bronson kick lately. I can’t find any of the TV shows on YouTube but the website Dailymotion has a few complete episodes available free online and I’ve been watching them one a day for a week or so. A bit of backstory for motorcyclists under the age of 105: then came Bronson was an episodic, 1-hour TV drama about a guy traveling the country on his Harley Davidson Sportster. It was sort of like Easy Rider but without the drugs. This was in the era before Sportsters were considered a girl’s bike. In the late 1960’s the Sportster was a high performance motorcycle that ran with the best of the British bikes…in a straight line.
When tcB was a new show I watched it on a black and white television with maybe a 19” diagonal measurement. I was 12 years old and a TV show about motorcycles and motorcyclists not depicted as Hells Angels had never been done. I remember watching the TV show but I can’t remember specific episodes. In those pre-internet, pre-DVD recorder days if you missed the air date it was gone forever. Watching the old show on the Dailymotion site has been like seeing them for the first time.
Please click on those popup ads!
Bronson was from The Bay Area and he chucked it all to cruise around the California backcountry meeting interesting characters and saving damsels in distress. Watch the classic opening scene on YouTube: nobody wanted to be that guy in the station wagon. I guess distress is too strong a word. The damsels were more dissatisfied than distressed. They were small town girls trapped in boring lives and Bronson represented a different ending to the story. Bronson was their ticket to Any-where-else, USA.
James Dean and Michael Parks
Lord knows Bronson never went out of his way to encourage the girls but when you look like James Dean you don’t have to try very hard. Bronson’s sure-fire method for attracting women was to do exactly nothing. He wouldn’t talk unless really pushed into it. He never tried to get fresh or make the first move. Often he would fall asleep on a date with a beautiful woman who was holding up a cardboard sign that said, “Take me now, you idiot!” written in red lipstick. His method may have been sure-fire but his actual success rate was low. It wasn’t long before the girls would get frustrated, give up, and go back to their small town boys
Of course I didn’t notice this strangeness when I was 12 years old. It was enough to see a motorcycle on the television. Looking at the show today it is clear than Bronson suffered from narcolepsy and possibly landed on the high end of the autism spectrum. At times it seemed painful for him to speak, he would grimace before he could manage to drag the gut-hooked words out of his mouth. Sometimes when another character would ask Bronson a question his answer would be to turn away and look off into the distance. It was all too much for him.
It seemed like in almost every episode Bronson’s motorcycle would be wrecked. A car might back into him, he might run into a ditch and bend the forks or a friendly local might ride it into the lake. These crashes were a way to hold Bronson in a town long enough for the local women to throw themselves at him; normally it took two or three days for all of them to have a go at Bronson. If you’re a nitpicker for accuracy the scenes of Bronson repairing his bike will have you yelling, “That’s the fifth time you’ve put the gas tank bolt in!” or, “There’s no way you got that fender straight with two rocks!”
I’m poking fun at then came Bronson but it really was a great show that had a huge influence on my generation of motorcycle riders. Hell, it’s still a great show. Bronson came along at the exact right time to catch the first big wave of what we think of as modern motorcycling, when you could meet the nicest people on a Honda or a meanie on a Yamaha. The show still holds up well to re-watching if you can suspend logic for an hour. And who doesn’t love a show with a bronze-head Rudge in it?
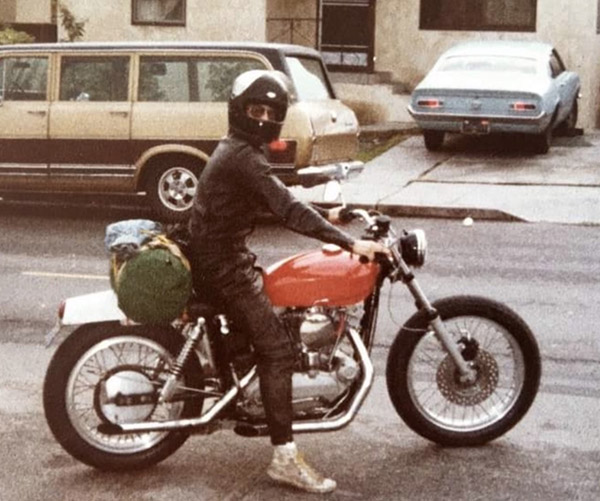
BronsonMe
As you can see in the photos above, watching then came Bronson had absolutely zero effect on me. I was lucky to travel around the country in 1975, only a few years after Bronson aired. The small towns in America still looked like scenes from then came Bronson. Today many of the towns I saw in my travels are boarded up and abandoned. Thriving businesses where I bought gas and a RC cola have crumbled into the ground. Turns out none of those people Bronson met and befriended really wanted to stay in their little towns. They didn’t know where they were going but they ended up somewhere.
After my Bronson binge I’ve been thinking about getting a jet-style, open face helmet like the one Bronson wore in the show. I know a full helmet is safer but I want more interaction with the environment, but not like my face on asphalt interaction. Maybe getting a few bugs in my teeth would be a good thing, and maybe I do talk a little too much. I’ll practice my pained looks and concentrate on the horizon. I wonder if I ignore CT long enough she’ll hold up one of those lipstick-lettered cardboard signs. That would be cool. Go check out then came Bronson on Dailymotion, and hang in there.


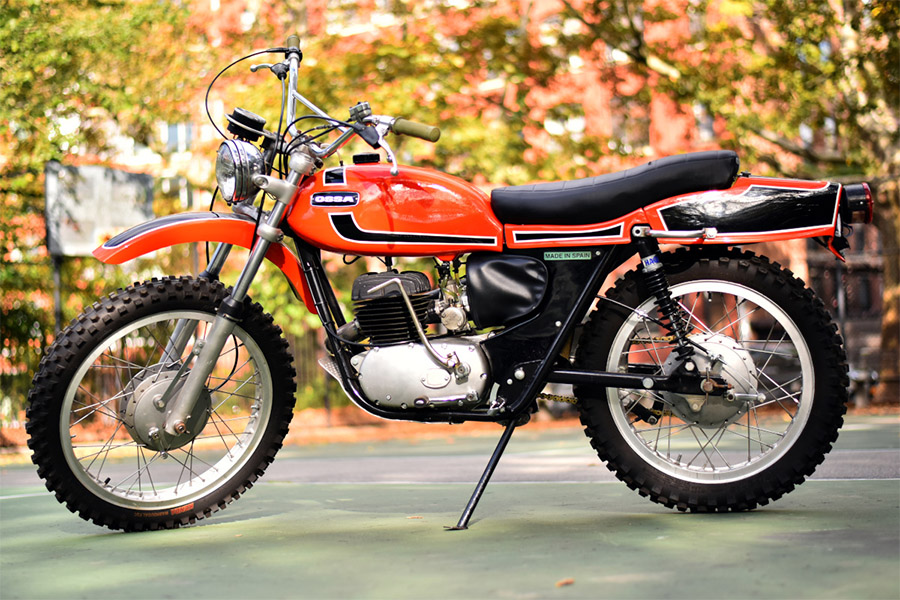
 Mostly Bultacos and Maicos were racing in Haines City back then but one guy had an Ossa Pioneer with the lights removed. The rider was good. He would get crossed up over the jumps and finished in the top 5 against real race bikes. I loved how the rear fender blended into the bike. That fiberglass rear section had a small storage area inside. One of the bike magazines of the era tossed a loose spark plug in the storage and went scrambling. The plug beat a hole in the rear fender and they had the nerve to bitch about it. Hell, I knew at 10 that you have to wrap stuff in rags on a motorcycle.
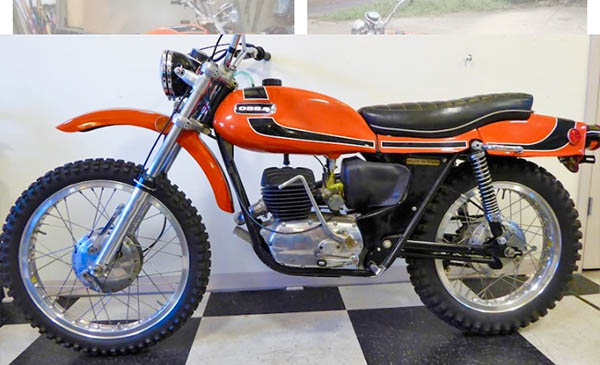 It rains most everyday in Florida and it started pouring. The races kept going for a while but finally had to be called because it was a deluge. You could hardly see to walk. There was no cover so we huddled in the leeward side of the ticket stand out by the entrance. It rained harder, the wind was howling. Wearing only shorts and T-shirts we were getting colder and colder. My lips were turning blue, man.
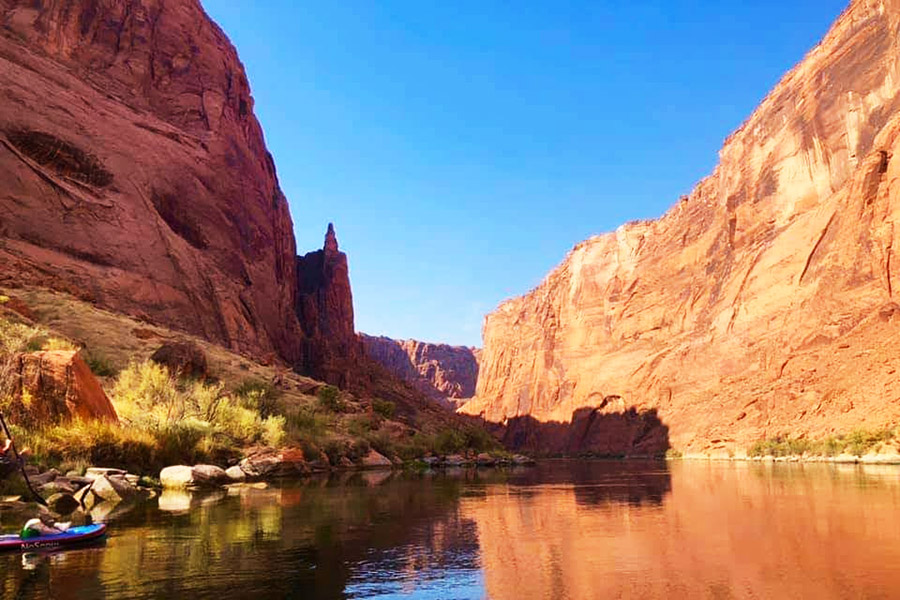
 The adventure began with camping near Page, Arizona, and a day of light paddleboarding on Lake Powell to gain more familiarity and confidence on the board. This was more for myself, as the two friends I was traveling with were both very experienced paddlers. My paddling to this date was limited to a couple of 8-mile runs on the Salt River near Phoenix and a horrible windy day off the Colorado River where we launched from Hoover Dam. The Salt River had portions of minor rapids, but the environment was much tamer than we would experience along the Colorado River.
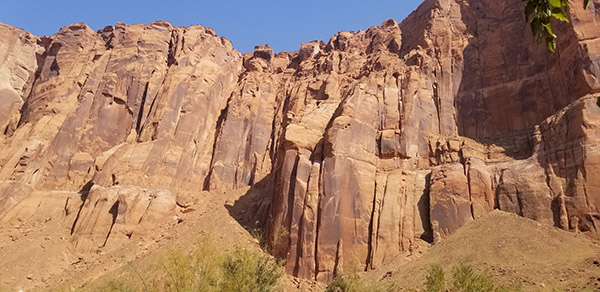


 There are several routes of the Camino de Santiago, including the Camino Frances (French Way), which is the most popular, and the Camino Portugués (Portuguese Way), which starts in Lisbon or begins in Porto for a two-week shorter Camino. The Camino de Santiago is a long-distance walk or hike that typically takes 30-40 days to complete, depending on the route and the pace of the individual pilgrim.