A Colt Visit

The city of Hartford in Connecticut is Mecca if you are a Colt fan (as in Colt firearms), and I sure am a Colt fan.   I grew up seeing Colt .45 sixguns in western movies when I was a kid and I got my first Colt (a .45 ACP 1911 Government Model) when I finished college (and I’ve never not owned at least one Colt since then).  I have no tattoos, but if I were going to get one it would be the Colt logo.

My Colt 1911 has been sending lead downrange for 50 years.

I made a friend in the Colt company when reviving the MacManus award.   I had to be in Hartford recently for a symposium and I told my Colt buddy I’d buy him a beer.  He suggested a tour of the Colt factory.  That was an opportunity I could not let pass.


Popup ads…click on them and we’ll keep the lights on!


The original Colt plant (the one built by Sam Colt) is a National Historic Site.  Time did not permit visiting it, but I could see the blue dome above the old plant from my hotel window.

The original Colt manufacturing facility on the banks of the Connecticut River. I didn’t get to it, but the next time I’m in Hartford I will.

The modern Colt factory is a few miles from downtown Hartford.  It’s what you see in the big photo up top, and it’s where I had the plant tour described in this blog.  The bad news is that photography is prohibited inside the plant (as a manufacturer of military rifles for the US and other countries, Colt can’t have photos of their production processes finding their way to the bad guys).  The good news is that I entered the inner sanctum.  I saw how the M4s, the M16s , the 1911s, the Single Action Armys, the Pythons, and all the other cool stuff are made.  As a manufacturing guy and gun guy with a defense industry background, it was one of the best days of my life.

More good news is that I could take pictures inside the famed Colt Custom Shop.  The Custom Shop is a small group of world class artists who assemble what are arguably the most desirable guns in the world.  Think engraved, gold inlaid, extremely expensive works of the gunmaker’s art.   Guns that are delivered to US presidents, wealthy collectors, and…well, you get the idea.  There’s a two-year waiting list for a Custom Shop Colt firearm, and when delivered, the ticket can exceed the cost of a new car.  On the secondary market, some have been known to exceed the cost of a new home.

Colt Custom Shop handguns, the stuff of dreams.
You can still purchase a brand new Colt 1903 through the Custom Shop. This one is exquisite. I owned one in the 1970s I bought it for $75 and sold for $200 a few months later, thinking I had done well.  Ah, the mistakes we make.
A Custom Shop Anaconda with an inlaid gold bear and extensive engraving.
A closeup of the above Anaconda’s engraving and gold inlay. It’s all done by hand with small hammers and tiny chisels.
An exquisite Single Action Army. The grips are giraffe bone.
A closer look.
Colt’s Custom Shop is producing a series of Single Action Army revolvers for the legendary Texas Rangers.  The Texas Rangers are the oldest law enforcement organization in America.
Colt has a process for making a new gun look aged.  It’s been applied to this Custom Shop Single Action Army.

This was my second visit to Hartford.  When I wrote The Gatling Gun nearly 30 years ago, I contacted Colt to ask if I could visit their archives (the original Gatling guns were built by Colt).   Colt referred me to the Connecticut State Library and Museum.  I went there and I was met by a Connecticut State Trooper who asked me a few questions, took my fingerprints, and ran a background check.   Satisfied I wasn’t a terrorist or a  KGB agent, he issued a laminated permit designating me an official Connecticut state historian.  That gave me access to the archives in a secure area of the Museum.  Poking around in there made for a fun day, and I used materials from those archives when I wrote The Gatling Gun.

Order your own copy of The Gatling Gun!

My visit to the Colt archives three decades ago was impressive.  I handled hand-written documents signed by Dr. Gatling and Samuel Colt.  It was a great day and a lifelong memory.   My recent visit to Colt factory and the Custom Shop (as described in this blog) made for an even better day.   A Colt tattoo….maybe that’s not a bad idea.


Never miss an ExNotes blog:

The last Betty…

Some days at the range I don’t feel like punishing myself with heavy recoil or trying to shoot the tightest possible groups with loads that have been tuned to perfection.  Nope, shooting is fun, and sometimes blasting through a box of ammo is just what the doctor ordered.

A few years ago when we were organizing military surplus rifle fun matches, good buddy Paul showed up with a bunch of zombie targets.  Paul called the zombie Boris and the hostage Betty, and the names stuck.  We had targets left after the match, and yesterday I shot the very last one.

I had my trusty Model 60 Smith and Wesson and a box of 100 .38 Specials I had loaded on my Star progressive reloader.   They were Gardner Cache powder-coated 148-grain wadcutters with 2.7 grains of Bullseye (the go to accuracy load in .38 Special).   I set ol’ Boris and Betty up on the 7-yard line and proceeded to double-action my way through 20 cylinders’ worth of ammo (the cylinder in a Model 60 holds 5 rounds).  There was not a single misfire in the entire 100 rounds, and more importantly, not a single one of them hit Betty.  Boris…he didn’t fare so well.


More Tales of the Gun!


Hit those popup ads, folks!


Never miss an ExNotes blog!

Glendora Ridge Road

Glendora Ridge Road is one of the best kept secrets in southern California, offering 12 miles of well-maintained, low-traffic twisties nestled in the San Gabriel Mountains.  And it’s not just 12 miles…it’s 12 miles with 234 curves (I counted them) through some of the most beautiful country imaginable.  The striking thing about this road is its simultaneous desolation and nearness to civilization.   Glendora Ridge Road is only 45 minutes from downtown Los Angeles.  It’s only 10 minutes from my front door. Given its magnificence and nearby location, you’d think I’d ride it every day. I don’t, but I should.

That’s the ridge Glendora Ridge Road runs along, framed by the Entfield’s instrumentation.

Glendora Ridge Road is a glorious ride, and it’s been a favorite ride for me ever since I arrived in California.  It’s hard to believe just how good it is and just how much of a change it offers between what most folks think southern California is and pure wilderness.  Like I said above, it starts just 10 minutes away from my home.   Ride it and you enter a different world.   When I rode it last week, I saw two other vehicles on the entire ride.  One was a single-cylinder dual sport; the other was a red Ducati.   That’s it:  Just two vehicles, and both were motorcycles.

As is the case with many mountain paths, Glendora Ridge Road began life as a dirt road many decades ago.   Situated high up in the Angeles National Forest, asphalt came to Glendora Ridge Road in the 1970s.  There’s no centerline for most of its length, which requires extra care in navigating its many tight blind corners.  Glendora Ridge Road attracts motorcyclists, bicyclists, and the odd sports car or two.   We also get some ricky racers in modified Honda Civics and the like up in the San Gabriels, so caution is in order.

Yikes! In the spring, you’ll see these guys looking for lady spiders at dusk. They say they’re harmless. I’ll take their word for it.

Glendora Ridge Road runs directly through one of the premier wildflower spots in America (the colors are surreal during April and May when the flowers are blooming…purples, reds, yellows, oranges, and more).   Glendora Ridge Road also borders the San Dimas Experimental Forest, a 32-square mile research area.  I’ve seen deer, fox, bobcat, bear, tarantulas, and snakes up there.  I grabbed the tarantula shot above one evening in the pre-digital days with a 35mm Minolta and a 28mm lens.  I had to get right on top of the spider to get that shot.  I held the camera maybe six inches or so above it, only to later learn those things can jump 10 inches straight up!

I’ve ridden Glendora Ridge Road on virtually every motorcycle I’ve owned in the last 40 years.   We used to do a lot of company rides with CSC Motorcycles, and everyone loved it.  The RX3 is a perfect motorcycle for this ride.  We once did a winter ride when the road was iced over.  We rode it anyway.

The photo opportunities along Glendora Ridge Road are awesome.  These days, I’m down to one motorcycle, and that’s my 650 Enfield.  There are a lot of good spots for getting advertising quality photos on Glendora Ridge Road, and I took advantage of a few.  Glendora Ridge Road has several areas where the cliffs and overhangs provide shade, so even on a bright day you can get great shots without harsh shadows

I pick a motorcycle based on how I know its colors will photograph. I chose wisely, I think.
On Glendora Ridge Road, looking north. It really is this scenic. I had the road and the San Gabriels to myself.  The great Mojave Desert lies on the other side of those mountains.

Glendora Ridge Road runs roughly east to west (or west to east, depending on which way you travel).   I like riding this road in the early morning or at dusk, as it makes for a more interesting ride (fewer folks, and the wildlife is more active.)   In the morning, it’s best to ride in a westerly direction to keep the sun out of your eyes, and vice versa at dusk. The road’s curves make it tempting to go faster than you should, but my advice is to keep a relaxed pace.  Many of the corners are blind, and you never know if there’s a squid pushing too hard coming the other way.

Just as you enter Mt. Baldy Village, the sign for Glendora Ridge Road appears on the left (if you’re not looking for it, you may miss it). You’ll only climb about a half-mile before you hit Cow Canyon Saddle.  It’s a neat place to get a feel for the length and breadth of the valley skirted by Glendora Ridge Road.  There’s a dirt road on the other side of that valley, but it’s not open to the public (the dirt road runs about eight miles to an abandoned tungsten mine). After running west for exactly 12 miles (and as mentioned above, no fewer than 234 curves), you arrive at the intersection of Glendora Ridge Road, Glendora Mountain Road, and East Fork Road.  Glendora Mountain Road meanders down into Glendora.  If you turn right to take East Fork Road, it continues on to Highway 39 above Azusa. The intersection of these three roads is a popular meeting spot where riders stop to talk and take in the view.  On clear days in the winter, you can see the Pacific Ocean and Catalina Island.

Always a good idea. This photo shows Glendora Mountain Road heading up into the San Gabriels.

My choice for the return home on this most recent Enfield ride was Glendora Mountain Road.  It’s equally scenic and a little shorter ride back.  My arthritis was bothering me a bit and even though I was having a great time, my shoulder was reminding me I’m not 17 years old anymore.  It was a good ride down out of the mountains.  There are places on Glendora Mountain Road where you can see Highway 39 and the reservoir above Azusa, as shown in the photo below.

This is a photo stitched together from four photos in PhotoShop. The road at the base of the mountains on the other side of the reservoir is Highway 39, which runs south to Azusa. CSC Motorcycles is located not too far from the notch in the mountains on the left side of this photo.

So there you have it:  Glendora Ridge Road, one of So Cal’s best kept secrets.  If you’re looking for a great ride, this is it.  If you’re up there and you see an old guy on an Enfield nursing his left shoulder, give a wave.


Never miss an ExNotes blog:


You know what to do:  Hit those popup ads!
Book Review: Disappearing Act

On a recent trip to Hawaii, the girls wanted shave ice (a local treat) and we stopped at the Waikoloa mall.  It was a warm afternoon, the line was long, and I wasn’t about to stand in line and wait.  The girls did, and I set off to wander the mall.  Malls all pretty much look the same to me, but I wanted to get my daily steps in and it was an opportunity to do so.

I hadn’t gone very far when I was surprised to see a local authors exhibit.  I stopped to see what was there.  There were several writers, and one was a nice fellow about my age named Ray Pace.  We had a pleasant conversation, I enjoyed his east coast accent, and before I knew it, I bought a signed copy of Ray’s book.

Disappearing Act was a wise choice.  It’s a crime novel that mixes science fiction, Vegas, Chicago, the mob, a private investigator, and assorted characters in an interesting tale.  It was refreshing to read a story with no technical mistakes in the firearms descriptions.  Pace is a good writer (he has the experience for it;  before turning to fiction he was a crime reporter for big city newspapers).  Disappearing Act is 150 pages long and I read it on the flight home from Hawaii.  It’s a light read, a good story, well written, and I enjoyed it.  You will, too.


More reviews!


Hit those popup ads!
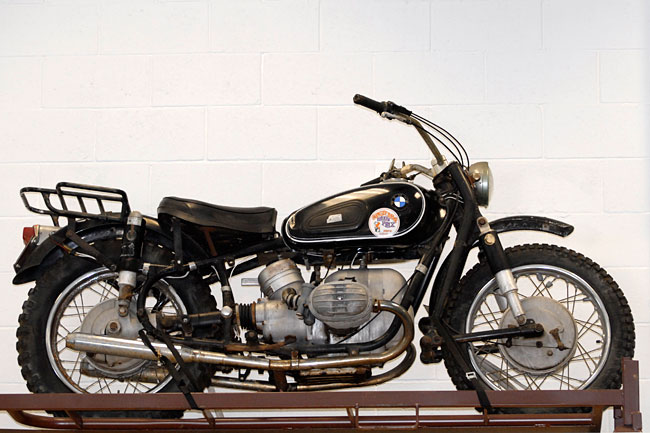
My Best Breakdown Story Ever

Nope, it’s not my breakdown story, and it’s not Gresh’s, either.  This one comes to us as a guest blog from good buddy Bob O, whom you may remember from his earlier blog about a custom handgun by TJ, another good buddy.  I’ll give you the link for that blog later.

Bob was a motorcycle messenger in an earlier life, and this story comes to us from those halcyon days of yesteryear.

Over to you, Bob!


It was some years ago, about 1983 or as kids today would call it, the ancient time before the common use of the Internet or social media. I was working as a motorcycle messenger here in Los Angeles. It was an interesting way to make a living. I had started out as an in-house delivery rider for a travel agency and then moved up to messenger services.  We were based in Century City in West L.A. on the land that had been 20th Century’s Film Corp’s back lot back before the movie industry shrank due to television.  I used to run all day long on the bike (typically about 200 to 250 miles a day). Pick up three messages in Beverly Hills going downtown, pick up one downtown going back to the west side, etc., etc., all day long.

Motorcycles are great for this kind of work in dense LA traffic. Lane splitting is legal in California and that in conjunction with ease of parking made bikes a lot more efficient than cars in both time and cost. I was running a Suzuki GN 400, a forgotten little 400cc single-cylinder street bike that they made for about 3 years. It was left over from the prior year’s production and they were being sold off at a bargain basement price. As I recall I paid $1123 for it brand spanking new. It wasn’t fast and it wasn’t flashy but it was fast enough for messenger work and was about as reliable as an anvil or the sun. And it just sipped fuel.  All in all it could have used a little more uumph power wise but it got the job done.

I lived in the Southbay area of LA which is in the southwest part of the county and the office was in West LA. If the dispatchers could they would try to get me a south run to help pay my way home at the end of the day.  This particular day I was in the office at about 4:30 that afternoon and the day was still frantic but winding down. My dispatcher called my name and told me he had an Orange County for me which was a good one money wise and also because it was southbound. The pick up was in Westwood going to Stanton in Orange County.

I took the dispatch ticket and went downstairs to my bike and off to Westwood I went with a big smile on my face. Got the pick up in Westwood and headed south on the notorious 405 freeway lane splitting merrily on my way through bumper to bumper rush hour traffic. I got to Artesia Boulevard in Torrance and doglegged across the Southbay to pick up the 91 freeway going to Orange County which is a distance of about 5 or so miles on the surface streets.

I was just getting on the 91 when suddenly my rear end started swinging wildly back and forth – Ugh!!!! Damn!!! I blew a rear tire!!  I made my way to the shoulder of the freeway and walked about a hundred feet to a freeway call box. Nobody in those days had cell phones then except rich people and they were the size of a brick so all we had were beepers duct taped to our back pack straps. I got on the phone with the Highway Patrol operator and was trying to get a driver to come and pick up the delivery I had as it had to be there. This was somewhat difficult as the office had closed and we were trying to arrange all this through relays of calls to a nighttime relief driver.

As I was waiting for the operator to come back on the line I heard a horn honking repeatedly. I looked down at the freeway onramp just below me and for some reason there was a guy in a white bobtail truck honking and waving at me. I ignored this friendly gesture as I was in the middle of a minor crisis and also had no idea who the hell it was and was still waiting for the Highway Patrol operator on the call box to come back on the line.

Much to my surprise, the truck did not continue onto the freeway but edged over onto the shoulder where my bike was and started backing up. Well, this required a bit of investigation as it obviously was more than just a friendly hello from someone just passing by, so I put down the call box phone and ran over to the bike while the bobtail reversed to about 20 feet away from the bike. I approached the cab of the truck and miracle of miracles it was a friend of mine who just happened to be getting on the freeway who looked over, recognized me, and stopped. “Hey didn’t you see me waving at you”? Um,…..well yeah but didn’t know it was you”. “So what happened”? “I blew a rear tire” “Hey, no problem, lets put it on the lift gate and I’ll get you home.”

Well, we did just that. Up into the bobtail the Suzuki went, it got tied down, and my bud took me to the stop in Stanton to drop the package and then dropped me off right in my driveway in Redondo Beach. As he drove away I was kind of thinking to myself “did that really just happen or am I dreaming?” Well, it did happen. Sometimes you just get lucky. Real lucky.


That’s a great story, Bob.  Thanks for sharing it with us.  Ride safe and keep your powder dry.

As promised, here’s the link to Bob’s other post.


Do you want to write a guest blog for ExNotes?  Let us know (info@exhaustnotes.us) and we’ll get right bactk to you!


Never miss an ExNotes blog:


Hit those popup ads!  It’s how we keep ExNotes afloat!
1903 Springfield Cast and Jacketed Loads

This is an update on my latest 1903 Springfield load development work.

I purchased this rifle about three years ago assuming the headspace was correct, but it wasn’t.  That’s a risk associated with old military rifles.  Rifle parts are often mixed through the years, and when doing so with the bolt and the barreled action, it’s easy to induce an excess headspace condition.  That’s what I encountered on my rifle, so I had the Civilian Marksmanship Program (CMP) in Anniston, Alabama install a new 1903 barrel and rechamber the rifle.  Live and learn, I guess.  Always check the headspace when purchasing a milsurp rifle.

As it was returned to me from the CMP the rifle shot to the right and jacketed bullets shot way too high (at least I thought it shot way too high, but I was wrong…more on that in a bit).  I  noticed that the front sight was biased to the left (which made the rifle shoot to the right).  I drifted the front sight in its base (it’s a dovetail fitting).  The front sight takes a retaining screw that secures it to the barrel mount, and on my rifle that screw was missing.  It might have shipped that way from the CMP or it might have fallen out.

When the Springfield was returned to me from the CMP, the front sight was biased to the left, as you see here.  I didn’t notice it at first.
A replacement front sight screw.

I wrote to the CMP regarding the missing front sight screw, but I haven’t heard from them and I found a replacement front sight screw on the Sarco website.  I haven’t installed it yet (that will come later).  I drifted the front sight in its dovetail to the right, and that brought the point of impact closer to the point of aim.

Before I get into the reloading specifics, I should explain a bit about the rear sight.  The rear sight on the 1903 Springfield rifle is a complicated device.  It’s called the M1905 rear sight, and it is designed and calibrated for standard military ball ammo (back in the day when the Army used .30 06 ball ammo).   The sight is a ladder type rear sight and it has four aiming methods.  One is the battlesight zero (it’s with the ladder down); the other three are with the ladder up which allows adjusting for various distances.  In the big photo at the top of this blog, you see the rear sight with the ladder up.  In the photo below, you see the rear sight with the ladder down.

The M1905 rear sight assembly on the 1903 Springfield rifle. The sight ladder is in the down, or battlesight zero position. Wow, there’s a lot going on there.

This first aiming method is through the battlesight zero notch with the ladder down. Battlesight zero means the bullet will coincide with the point of aim at 547 yards.  The thought is that if you hold center of mass on a man-sized target at any distance up to 547 yards, you’ll hit the target.  At 100 yards the rifle will shoot way high with the ladder down using the battlesight zero, which is what I experienced.  I did not understand this was a normal occurrence when using the battlesight zero rear sight notch.

The 1903 Springfield’s rear sight in the raised position.  Note that the sides of the rear sight force the crossbar to the left as distance to the target increases.  That’s a built-in feature to compensate for bullet drift to the right at longer distances.  Clever people, those Army engineers were.  This rifle is over 100 years old.

The other three aiming methods all involve shooting with the ladder up (as you see in the above photo).   You can adjust for various ranges from 100 yards out to 2800 yards (which is roughly a mile and a half) by loosening the crossbar lock screw and sliding the crossbar up or down to various indicated ranges on the ladder.  One sighing method uses the crossbar upper notch.  You simply slide the crossbar up or down so that the top of the notch aligns with the estimated distance to the target (in yards) on the ladder’s distance graduations.  Another sighting method uses the crossbar lower notch.  In this case, you slide the crossbar up or down so that the top of this lower notch aligns with the estimated distance to the target.  The last sighting method involves using the crossbar aperture. There’s a horizonal scribe line across the plate containing this aperture, and when using the aperture, you align that scribe line with the estimated distance to the target.  The aperture allows zeroing the rifle for ranges as close at 100 yards, which is where I do most of my shooting.

All the above is calibrated for standard military .30 06 ball ammo.  If you’re shooting cast bullet ammo, or jacketed ammo with bullet weights or velocities other than standard ball ammo, you have to zero your rifle for your specific load.

There’s one other bit of coolness incorporated into the design of this rear sight.  The sight ladder is designed so that as you raise the crossbar, the sighting notches and aperture move to the left.  That’s to compensate for the bullet’s natural drift to the right as distances increase.

It’s all very clever, but in my opinion the Army made it too complicated. The rear sight was probably designed by an engineer who never had to carry or use a rifle in the field or train recruits to do so.  I think most of the guys I served with in the Army would have a hard time remembering all this (I’m an engineer and I struggled to understand it).  Apparently the Army agreed:  They simplified the rear sight on the later 1903A3 rifle.  The 1903A3 rear sight is much better for an infantry rifle.

That’s enough background on the 1903 Springfield sights.  Let’s get to the reloading variables and which loads the Springfield likes.  I prepped several, and I also grabbed some of the ammo I had previously loaded for the M1 Garand.

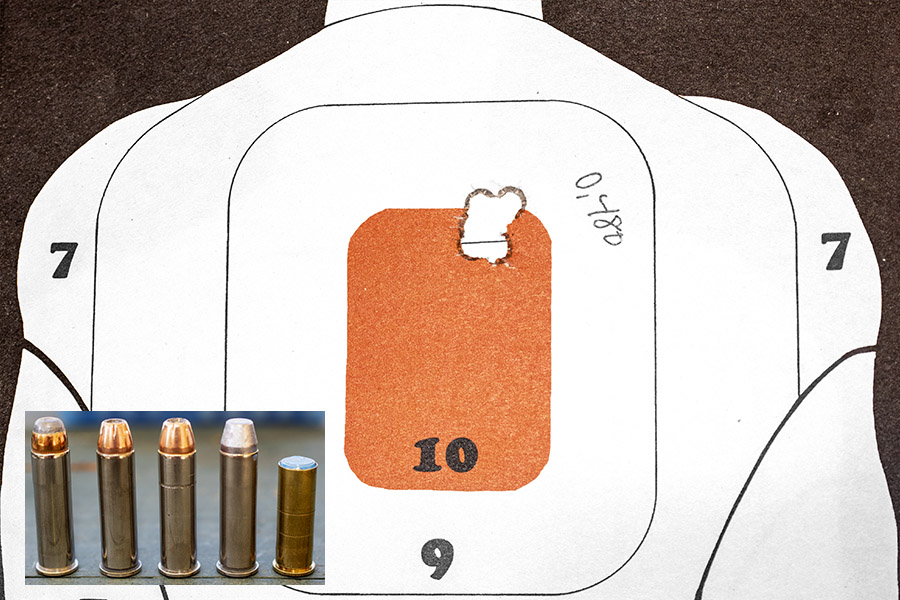
Four bullets used in this testing. From left to right: The Hursman 173-grain cast bullet, the Montana 210-grain cast bullet, the Winchester 150 grain jacketed soft point bullet, and the jacketed Speer 168-grain Match bullet.
The Hursman cast bullet loaded in a .30 06 cartridge.

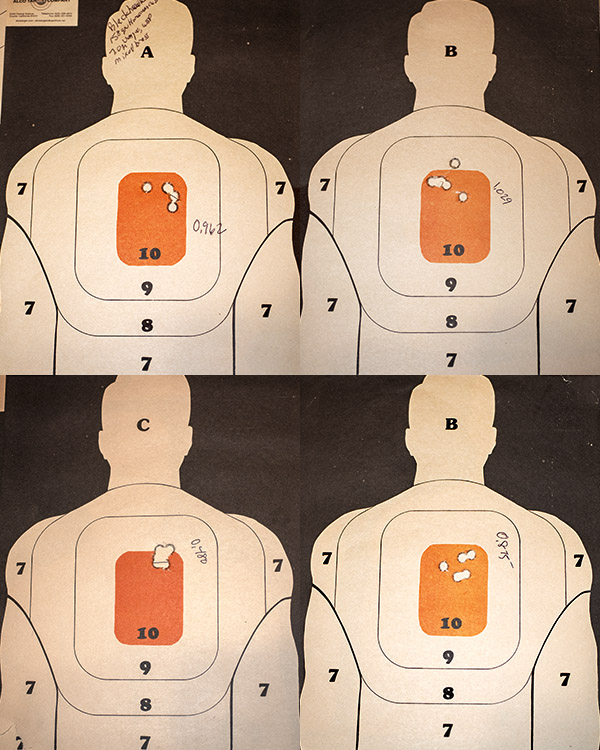
I first fired at a 5o-yard silhouette target to see where the bullets were hitting (there’s lots of real estate on that target).  With the ladder down, the point of impact was to the right and low using the 17.0-grain Trail Boss and 173-grain Hursman bullet load.  With the ladder up, it moved left a little and printed higher using the higher rear sight notch.  For that 0.793 group up top, I used the bottom edge of the upper left box as the aimpoint.  For the other two groups, it was the bottom of the orange bullseye.

An initial target shot with cast bullets and Trail Boss powder. There’s a lot of real estate on this target, so I could see where the rifle was shooting.

I shot groups at 50 yards with several different loads using combinations of the bullets shown above and SR 4759, Trail Boss, 5744, and IMR 4064 propellants, all at 50 yards, and all with neck-sized-only .30 06 brass.  Then I returned a week later and fired groups with the 150-grain jacketed Winchester bullets (again at 50 yards).

After shooting the above groups, I had 20 rounds left with the Trail Boss,  Hursman bullet, and SR 4759 load.  I shot two of them at a clump of dirt at about 80 yards and hit it (I think) both times.   Then I put a 100-yard small bore rifle target up at 100 yards and shot at it with the 173-grain cast bullet SR 4759 load (8 rounds were crimped, and 10 rounds were not).  To my surprise, all 18 rounds were on the paper and 14 of the 18 were in the black.  It’s not that great a 100-yard group, but it shows potential.  All this was with the ladder down using  the battlesight zero sighting approach, so with cast bullets this rifle (at least with the SR 4759 load) is pretty much in the ballpark.

Cast bullets at 100 yards using the battlesight zero rear sight.

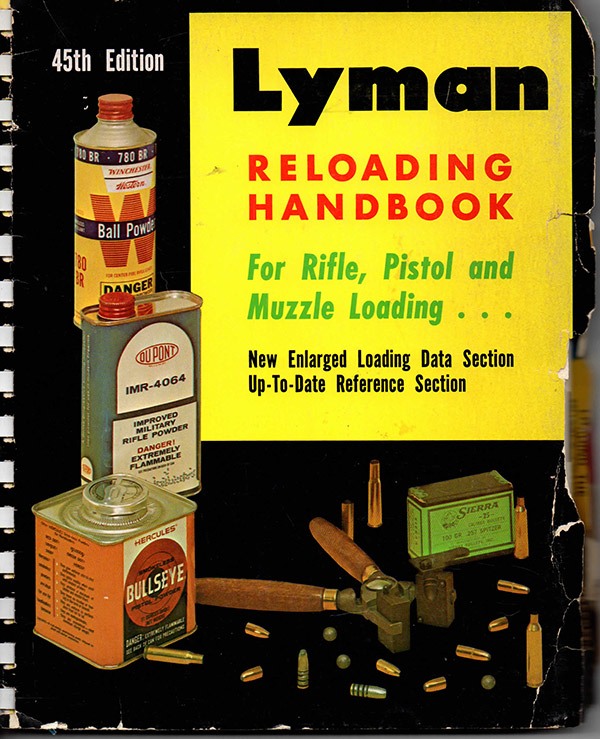
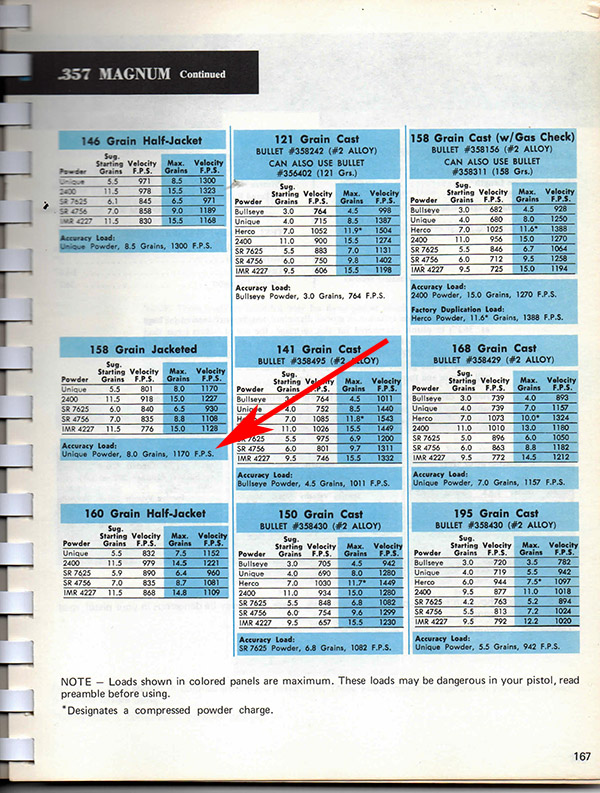
For the jacketed loads, I used the 150-grain Winchester jacketed soft point bullet (I bought a bunch of these a few years ago when somebody had them on sale) and 48.0 grains of IMR 4064.  This is the accuracy load in the Lyman reloading manual with a 150-grain jacketed bullet, and I know from prior development work it is superbly accurate in my Model 70.  It is also a minimum load, which is nice given the 1903’s steel buttplate.  The 1903 did well at 50 yards with the Winchester bullets, so I posted another silhouette target at 100 yards.  I fired three rounds and it was rough shooting at that target.  Using the aperture, I literally could not see the orange bullseye at 100 yards when I focused on the front sight.  The orange bullseye disappeared until I shifted my focus to the target.  I’d acquire the bullseye, then rapidly shift my focus to the front sight and squeeze the trigger.  I did that three times, literally firing blind, and managed to get a 3.050-inch 3-shot group.

The 150-grain jacketed Winchester bullet load at 100 yards. I couldn’t keep the orange bullseye visible using the aperture at 100 yards.

I figured it was time to quit while I was ahead.  I didn’t have any more black bullseye targets with me.  I knew I would be able to see those focusing on the 1903’s front post while sighting with the aperture.  But with the orange bullseyes (like you see in the target above), I might as well have been shooting at night.  I returned to the range a few days later and shot at 100 yards with the jacketed 150-grain Winchester bullets (with the 48.0-grain IMR 4064 load), the 210-grain cast Montana bullets (with the 17.0-grain Trail Boss load), and the 168-grain Speer match bullets (with a 48.0 grain IMR 4064 load).

Using the rear sight aperture, I shot the target below at 100 yards with the 150-grain Winchester jacketed bullet and 48.0 grains of IMR 4064.  I was pleased with the results and I quit after 3 shots (I didn’t want to screw up the group).

Three shots into an inch and three quarters at 100 yards. The load was 48.0 grains of IMR 4064 and the Winchester 150-grain jacketed soft point bullet.  Old eyes and an even older rifle sometimes do great things.  My rifle was manufactured in 1918; I was born in 1951.

I then shot at another 100-yard target with the 210-grain Montana cast bullet (these were loaded with 17.0 grains of Trail Boss).  I used the rear sight’s lower notch for this target.  Hmm, what do you know…the elevation was about perfect without moving anything on the rear sight.

Another 100 yard target, this time with the Montana 210-grain cast bullet and 17.0 grains of Trail Boss. I used the rear sight notch immediately above the aperture without making any adjustments. This is a real sweetheart load with minimal muzzle blast, almost no recoil, and no leading. The cast bullets are not as accurate at 100 yards as are the jacketed bullets, but they are still pretty good.

Finally, I fired eight rounds originally loaded for the Garand (I reload for the Garand in multiples of eight, as that’s what a clip holds), returning again to the rear sight aperture. This load used the 168-grain Speer jacketed boattail hollowpoint bullet and 48.0 grains of IMR 4064 propellant.  The Speer bullets are almost identical to the Sierra match bullet, but the Speer’s ogive is slighly different and it has less bearing area in the barrel.  I called the wizards at Speer about that and they recommended going to a heavier charge than would be used with the comparable Sierra bullet (they specifically recommended 48.0 grains of IMR 4064 for the Garand).  That load was a little warm in the 1903 (the recoil was significantly more than the 150-grain Winchester bullet and the primers had slight flattening).  But it was reasonably accurate.

Eight rounds of .30 06 ammo loaded for the Garand, using the 1903 rear sight aperture, at 100 yards. The astute blogophile will note there appears to be only seven holes; the hole just outside the 10-ring had two bullets pass through it.

My observations and conclusions from the above are:

    • The 1903 Springfield rear sight is needlessly complex for an infantry rifle.  You may feel differently.  Hey, go start your own blog.
    • With my cast bullet loads, there was no leading.   My cast bullets had gas checks (the little copper cup on the bullet base), which helps to prevent leading.
    • The Lyman cast bullet book showed a minimal 5744 load to be the accuracy load for the 210-grain Montana cast bullet.  I did not find that to be the case.
    • Both the Hursman 173-grain and the Montana 210-grain cast bullets were extremely accurate with 17.0 grains of Trail Boss, at least at 50 yards.
    • The Winchester 150-grain jacketed bullet accuracy load, per the Lyman manual, was with 48.0 grains of IMR 4064.  I found this to be a very accurate load.  I didn’t do a lot of work developing a jacketed bullet load.  I’m going to stick with this one for this rifle.
    • Orange bullseyes and aperture rear sights don’t work with my old eyes at 100 yards.  They are okay at 50 yards, but not 100 yards.
    • Both of the jacketed bullet loads I tried (the Speer Garand load and the Lyman 150-grain accuracy load) are accurate.  Without adjusting the rear sight from the 150-grain jacketed bullet setting, the Garand load shoots a little high and to the right, but the group size would fit into the bullseye if the sights were adjusted.
    • The cast bullets are not as accurate as the jacketed bullets at 100 yards.  The cast bullets are comparabily accurate to jacketed bullets at 50 yards, but not at 100.

With regard to shooting both cast and jacketed bullets in the same rifle, I got lucky:  As complicated as that 1903 Springfield rear sight is, I found that one rear sight position shoots to the same point of impact at 100 yards for both my cast bullet accuracy load and my jacketed bullet accuracy load.  Yep, you read that right.  With the rear sight crossbar secured as you see in the photo below, I can use the aperture (denoted by the right arrow) with the 150-grain jacketed bullet load.  Or, I can use the lower crossbar notch (denoted by the left arrow) with the 210-grain cast bullet, 17.0 grains of Trail Boss load.  Both will shoot to the same point of impact at 100 yards.  A friend asked if I tuned the loads to do this.  I wish I could say I had that kind of load development expertise.  Nope, I just got lucky.

One size fits all (sort of). With the 1903’s rear sight in the raised position, I use the notch denoted by the arrow on the left for my cast bullet accuracy load at 100 yards. I use the aperature denoted by the arrow on the right for the 150-grain jacketed bullet load at 100 yards. I don’t need to move the rear sight cross bar up or down.  Sometimes you just get lucky.

One final note that’s sure to set the Internet on fire:  I know this is heresy.  As much as I like my 1903, I think the 91/30 Mosin Nagant is a better rifle. My Mosin groups better at 1oo yards.  But that’s a story for another blog.


Never miss an ExNotes blog:


Tales of the Gun: 1911s, revolvers, 9mm semi-autos, bolt action sporters, milsurps, reloading, big bore rifles, and more.  It’s all right here!


Click on those popups, folks!  It’s what pays the rent!

Sea Turtles and Kaloko-Honokōhau National Historical Park

Wow:  Hawaii is just full of suprises.  The adventure on this fine Hawaiian morning was another National Historical Park, lava fields, a rugged downhill (and then uphill) hike over a jagged lava path, sea turtles, and a rotting meat flower (no kidding!).  A rotting meat flower?  You bet.  Read on and you’ll see.

We asked the Park Ranger at the entrance if we would be able to see the sea turtles, and he told us it all depended on what they were doing. “They might be sleeping, they might be out to sea, or they might be eating…you never know until you’re down there.”

Down there meant taking the 1.3-mile hike to the Pacific’s edge, which we proceeded to do.  We were lucky; the turtles were out in force munching on the algae that grows on the rocks.  They were huge…their shells were maybe three feet long.   It was really something to see.  There were seven or eight turtles in the shallows when we arrived.

On the return hike Sue noticed an unusually attractive and large flower in a ravine next to the lava path.  I had the 24-120 lens on my Nikon and I didn’t want to attempt climbing down the jagged lava to get closer, so I zoomed in and grabbed this shot.

What struck me as unusual about the flower was its size, the fact that it seemed to be growing out of a cactus plant, and the flower’s markings and vibrance.  I wasn’t sure how to start researching a flower from a photo, but while I was looking at the photo Google popped up a Wikipedia link.   The Wikipedia page had a photo, too, and no doubt about it, it was my flower. Here’s what it said:

Stapelia is a genus of low-growing, spineless, stem succulent plants, predominantly from South Africa with a few from other parts of Africa. Several Asian and Latin American species were formerly included but they have all now been transferred to other genera. The flowers of certain species, most notably Stapelia gigantea, can reach 41 cm (16 inches) in diameter when fully open. Most Stapelia flowers are visibly hairy and generate the odor of rotten flesh when they bloom.   The hairy, oddly textured and coloured appearance of many Stapelia flowers has been claimed to resemble that of rotting meat, and this, coupled with their odour, has earned the most commonly grown members of the genus Stapelia the common name of carrion flowers. A notable exception is the sweetly scented Stapelia flavopurpurea. Such odours serve to attract various specialist pollinators including, in the case of carrion-scented blooms, blow flies of the dipteran family Calliphoridae. They frequently lay eggs around the coronae of Stapelia flowers, convinced by the plants’ deception.

I had heard of such flowers and I always wanted to see one.  For me this was a first.  I know what you are thinking, and no, I didn’t get close enough to take a whiff.  Maybe next time.

Here’s the same flyer I showed in a previous post from Hawii.  We weren’t on motorcycles on this trip, but rentals are available and I thought the pricing was reasonable.


Never miss an ExNotes blog:


Want to help?  Hit those popup ads, please!

A European Moto Blog

One of the recent comments on a Joe Gresh blog post had a website address in it and I visited it.  David Skogley’s East Goes West site is a good one.  David is an American who lives and Germany and writes about his motorcycle travels in Europe.  I wrote to David asking if I could mention his blog on ExNotes and here’s his answer:

Hi Joe,

Many thanks for getting in touch and for your kind words about my blog.

I started the blog about four years ago because I just felt like writing about some of the experiences I was having on bikes in and around Berlin, Germany. I’m certainly not a world traveller (other than long ago on a bicycle) but I figured there probably aren’t that many Americans writing about motorcycling in this neck of the woods, so thought I would give it a shot. In the end, it’s been fun and is interesting to see how my writing has slowly changed, even though I have a very small number of people reading what I put out there. It was never intended to be a money maker, just sort of an online diary, I guess. A way of not forgetting what has gone on in an important part of my life. The writing has become quite sporadic, however, as work (and lethargy) often gets in the way.

I’ve put in very little time or effort regading formatting, and requires a lot of scrolling to find the old entries. Have to change this at some point! Right at the beginning I wrote the following short description/explanation, which is only visible if you go way back to the beginning:

“I moved east to Berlin, Germany from the east coast of the US quite a long time ago. I started riding motorcycles not long after. The intention of this blog is to express some thoughts about motorcycles (and other two-wheeled modes of transportation) and things connected to them.”

A short blog about my blog sounds great! Many thanks for your kind offer.

Regards,

David Skogley

I think you’ll enjoy David’s East Goes West site just as I did.  Here’s the link.


Never miss an ExNotes blog!


Hit those pop up ads, please!

I knocked over a vending machine…

I travel a lot.  It’s all secret missions, you know.  Litigations, defense industry work, secret manufacturing processes, and the like.  Don’t tell anyone. Some of my clients insist that I fly first class.  Hey, the customer is always right and if that’s what they want, that’s what I do.  But first class air travel sure isn’t what it used to be.  At least within the US.  It used to be that first class meant you got on the airplane first, an attractive young person took your carry on stuff and put it in the overhead bin for you, that same attractive young person would take your jacket and hang it up for you, someone else would bring you a plate of heated nuts (on a real plate, not plastic or paper), they’d ask what kind of drink you’d like (I always went for 100% blue agave Tequila, whatever you have, please), and all this was within maybe 60 seconds of getting to your seat.  And the meals…wow, they were heavenly.  Like you’d get in a restaurant.  Real food.  Real dishes.  More booze.  Cloth napkins.  It was real, you know, first class treatment.

Today?  You gotta be kidding me, I thought when the guy came around with my “lunch.”  It was a cardboard container with maybe four or five cellophane snack bags.  Like Mom used to put in my lunch when I went to elementary school.  I took the offerings the first time this happened, thinking it was a lot of snacks before they served lunch.  As we neared our destination I realized:  That was lunch.  I asked if their catering service just knocked over a vending machine.   I figured if they are giving me a first class snack, I’m going to give them first class sarcasm.


Don’t forget to click on those pop-up ads!  It’s how we get paid!

Never miss an ExNotes blog.  Sign up here for free!

Truer words were never spoken…

ExNotes features a bunch of things (motorcycles, guns, watches, reloading, and more).  We get way more hits on the gun pieces than we do on anything else, but truth be told, we’re old and we’re not motivated by hits, likes, tweets, or any of the other silliness introduced by the so-called social media platforms.  Gresh and I write because we like to write.  It’s that simple.  Don’t get me wrong:  We love it when you click on the pop up ads that appear on the site and in our blogs because that puts money in our pockets.

On occasion, we’ll hear from some left wing asshole (sorry for the redundancy) with his shorts in a knot when we do a gun blog.  Hey, we get it: Some folks hate guns.  My advice and response has always been simple:  If you don’t like guns, don’t buy one.  If you don’t like a gun blog, don’t read it.

But even a lifelong, died-in-the-wool shooting enthusiast like yours truly feels sick, disgusted, and unspeakably sad at the rash of mass shootings that have become common in the last few years.  I knew a guy who lost a daughter in the Virginia Tech shooting.  The aftermath is gut-wrenching.  I’ve wondered:  Should these high capacity weapons be outlawed?  Then I remembered…guns that hold large quantities of ammo have been around for over a hundred years, and when I was a kid, we didn’t have these mass shootings.  So what’s changed?

A friend sent this YouTube video to me a few days ago.  I can’t remember ever having agreed with Bill Maher on anything (not that he or anyone else needs me to), but I think old Maher nailed it.   Take a look:

As I mentioned above, we like it when you click on the pop up ads. We like it even more when you leave comments. We’re eager to hear from you, and if ever one of our posts deserved comments, this is it.


Never miss an ExNotes blog!


Click on those pop up ads!