The Wayback Machine: Zed’s Not Dead

Our latest Resurrection story about Joe Gresh’s ZRX is not our first big Kawi resurrection story.  Going back a few years, we previously ran a 20-blog series on a Z1 Kawasaki.  This Wayback Machine piece was the culmination of that story, with a link at the end that will take you to the entire series.  Those big Kawis are cool, and the Z1 is unquestionably the coolest of them all.


By Joe Gresh

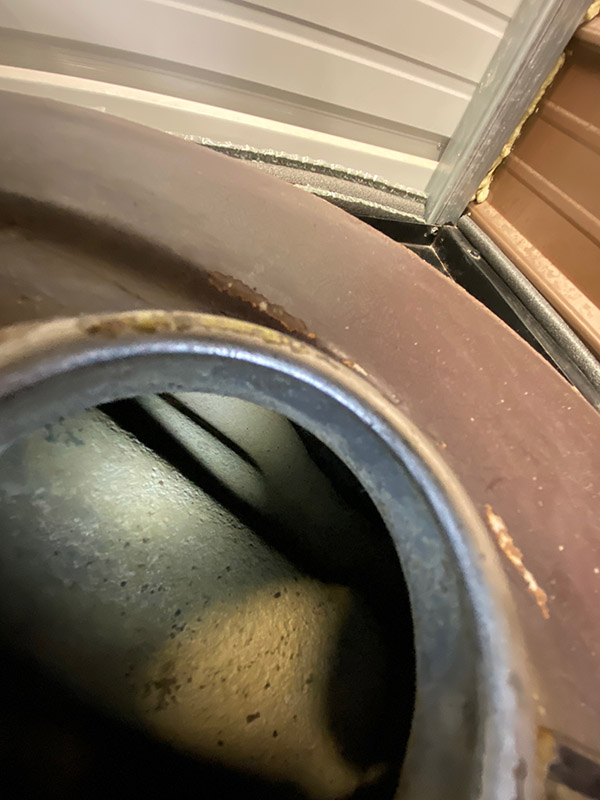
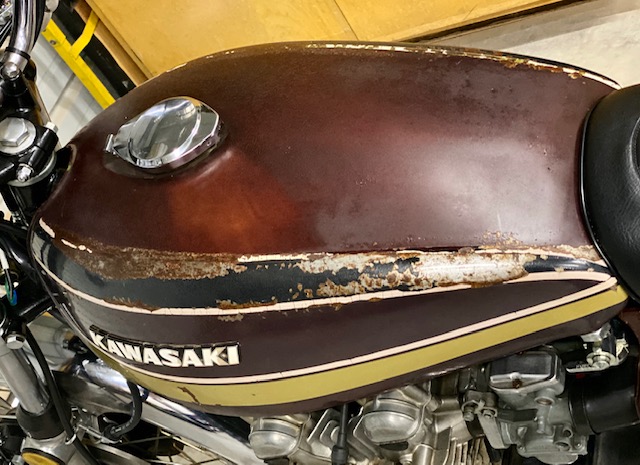
You may recall from Zed 19 I had to re-soak Zed’s gas tank as 10 days were not enough to dissolve the rust. I drained, dried and reloaded the tank with apple cider vinegar and let it sit for 4 more days. This is what it looked like originally:

The second session really knocked most of the rust out. After rinsing I dumped a large box of baking soda into the tank and added clean rainwater sloshing it as I filled to mix thoroughly. I don’t know the chemical reaction that takes place but the baking soda neutralizes the acid, turning the metal a dull grey, almost white color. This treated metal does not flash rust and I’ve been going 3-4 years on another tank I cleaned like this without rust reappearing. It’s like the metal turns passive and stops reacting to oxygen.

If I wasn’t so hell-bent on riding this bike I think I would flush and cider the tank one more time but it looks good enough and I’ve got to ride! I connected a small hose to my shop vac and played it all over inside the tank. I can hear nothing when I shake the tank so at least there are no big chunks loose inside.

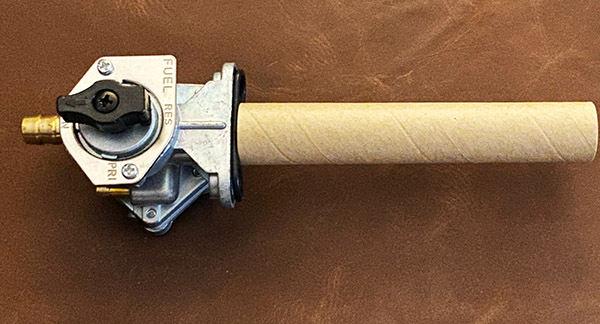
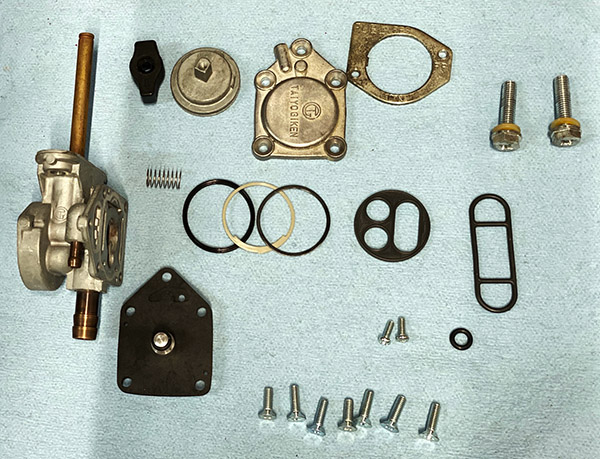
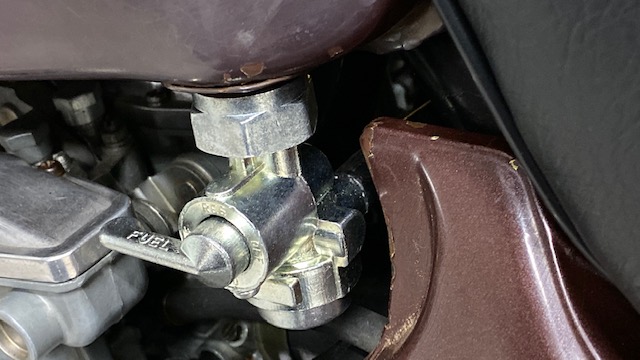
Proving that even the simplest life forms can learn I bought an entire new petcock for $23 rather than the rebuild kit for $8. This is real growth on my part. Usually I buy the kit, mess with it for hours then put it on only to have it leak. Only then will I buy the new one. Kawasaki uses a turnbuckle-type left-hand/right-hand thread on the Z1 petcock. It took about 145 tries to get it to tighten up facing the correct direction.

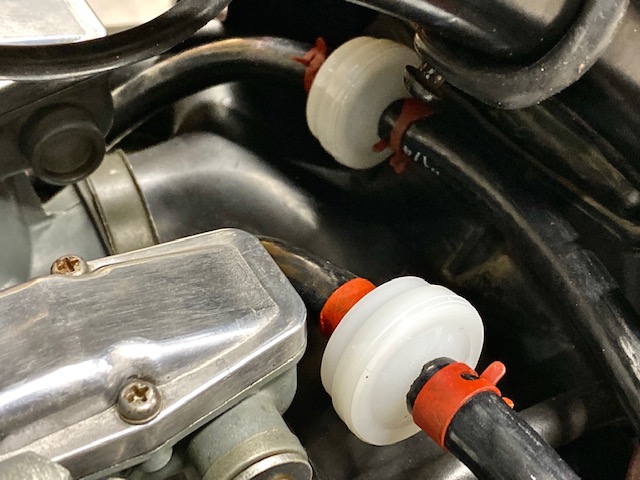
The new petcock has screens inside the tank and a bowl filter but with 40% of Zed’s tank out of my view-field I can only assume the entire tank is as clean as the places I can see. Inline fuel filters, one for each set of two carbs will hopefully catch any debris still in Zed’s tank.

An update on the Z1 Enterprises regulator/rectifier: It works. The battery charges @ 14.8 volts which is still a tad high but much better than the 17 volts Kawasaki’s setup was doing.

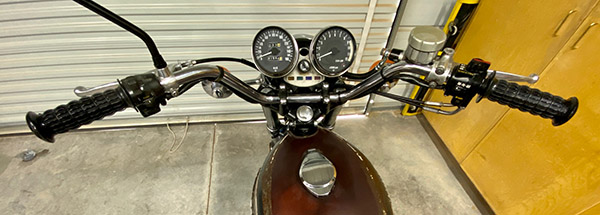
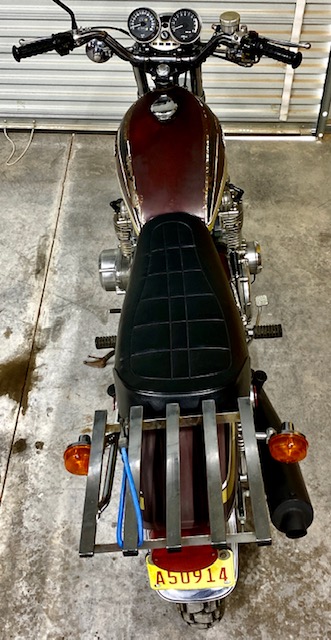
From the top Zed looks pretty well sorted. I took it for a ride and it ran really well for off the bench carb settings. It might be a little rich at idle or it might just be our 6000-foot elevation. I’m not going to tinker with it for now. I’d rather get some miles on the bike.

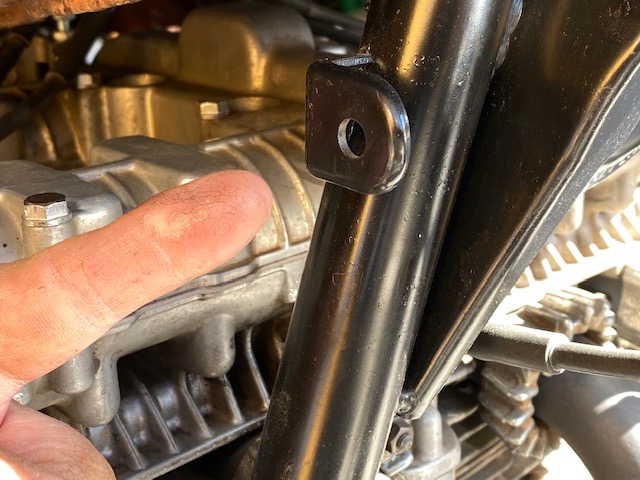
I don’t know what this bracket is for. Located on the right side down tube near the tach drive, it’d too light for a steering damper mount. Anyway, there’s enough stuff on the bike as is so I’m not going to worry about it.

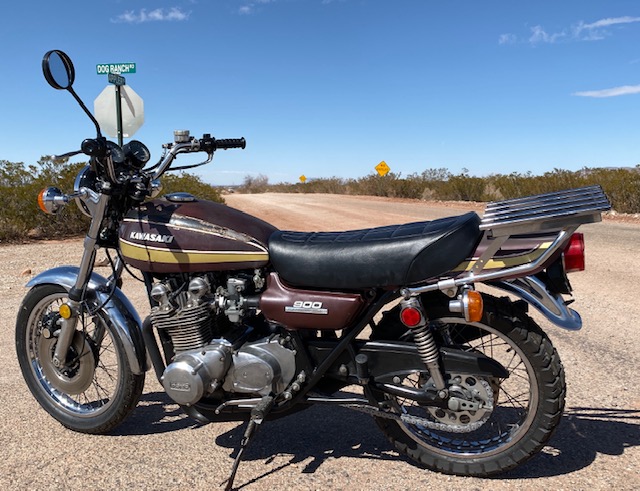
I took Zed to my secret proving grounds and she ran through all 5 gears smoothly. The bike hit 90 MPH without even trying. I’ll need a better front tire to do any high-speed work. The brakes work ok. When you ride a SMR 510 Husqvarna all other motorcycle brakes seem like crap. After 33 miles there are small oil leaks at the tach drive and countershaft area. Maybe the clutch pushrod seal or sprocket seal is the culprit. That stuff is easy to fix.

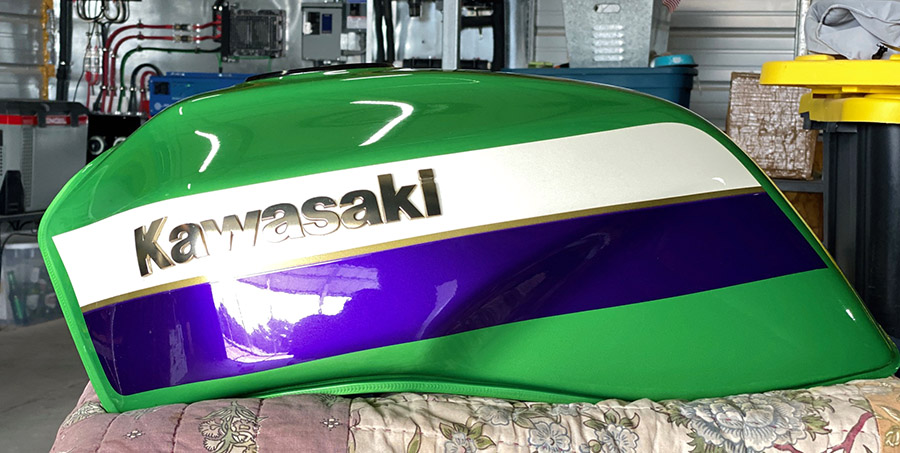
The patina on Zed is excessive, bordering on shabby. The bike sat outside for years and paint wise there’s nothing left to polish or wax. The finish is just not there. The pin striping is cracked and missing sections. I’m not sure what to do about that. On the one hand a ratty bike may be less attractive to thieves and old Z1’s are getting fairly expensive. On the other hand it does look pretty bad. I’ve seen my Enduro buddy Mr. French do some amazing work with rattle cans. Maybe I’ll give it a go. The paint can’t look any worse.


That’s it: from Dead to Zed in 20 easy sessions. Don’t worry, this won’t be the last you’ll hear of Zed. I’ll be doing some long trips on this bike, maybe Mexico, maybe ride to a few flat track races. I’ll update the blog if I do any more major work on the bike. The story of Zed’s resurrection may be ending but the story of Zed is just beginning.


And there you have it.  If you’d like to run through the gears (i.e., the previous 19 installments of Zed’s Not Dead), you can do so here!


Help us continue the content:  Please click on the popup ads!

Life as a Digital Nomad: Part 1 (Testing the Waters)

By Mike Huber

In 2010 the company I worked for gave me my pink slip due to budgetary cuts.  I was feeling distraught and lost because I had been working there for 8 years. Fortunately, I had a great director who helped by transferring me from a management position into a project manager slot that would be fully remote.

Remote positions at the time were called working from home.  It didn’t take long for me to ask myself a question:  What if I didn’t have a home? This mostly was bar talk amongst friends and I didn’t expect the crazy scenarios we discussed to ever become a reality.  Well…it seems planting those seeds in my mind was all it took for them to nurture, and then to grow into 13 years of almost nonstop travel.

The first two years were mostly spent learning to excel in my new position as a project manager along with clumsily discovering how to adjust my work/life balance in creative ways.  This involved motorcycling throughout New England in between work responsibilities.

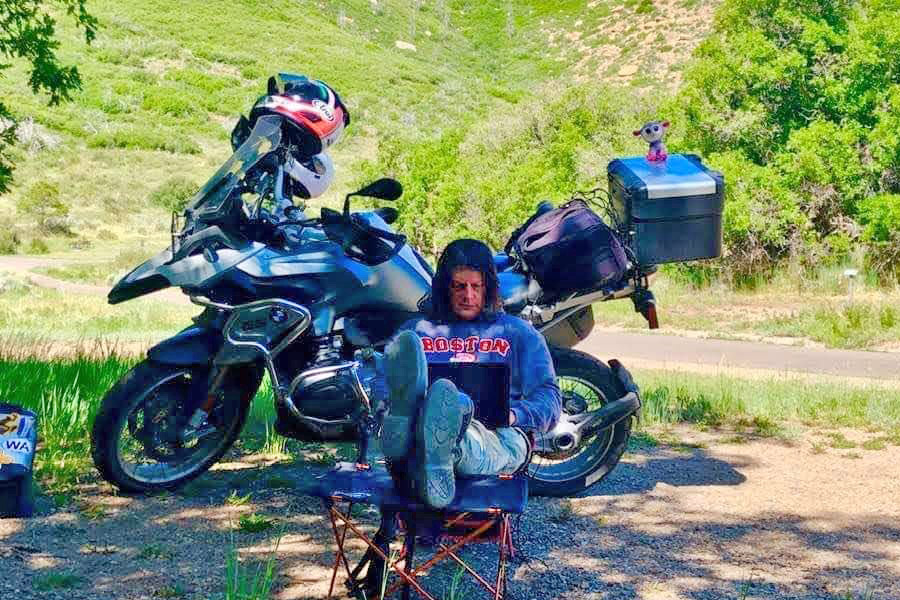
Something I learned early is that there are McDonald’s with wi-fi everywhere, and at the time it was one of the better places to stop to respond to emails or for a conference call (this was a life prior to riding a BMW, so I didn’t require Starbucks).  I timed my rides to reach these locations 10 minutes prior to conference calls.  This allowed me time to set up and prepare for them as needed.

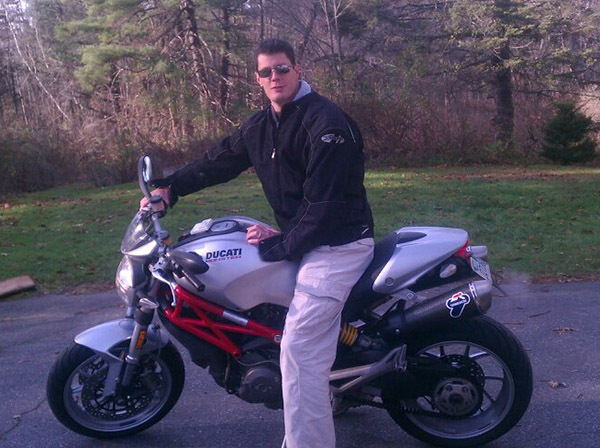
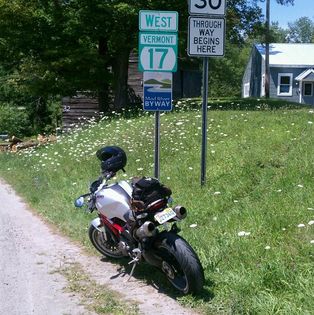
The first day as a remote employee I decided to knock out a ride from Boston to Route 17 in northern Vermont.  Route 17 is also known as the “Little Tail of the Dragon.”  It was May and I was literally working off my Ducati Monster M1100 as I tore up Vermont. Since it took so long to reach Route 17 it made sense to ride it twice to ensure the long ride was worth it and regain the curve back in my tires.  It may have been one of the best days I have ever had working and figured this newfound freedom would provide many opportunities to fill in the gaps that I had been missing by going into a regular office day to day.

Riding all the way to Vermont from Boston on your first day in a new position probably was a bit of overkill.  I was missing calls and hadn’t noticed my phone was constantly ringing in my pocket (an easy oversight being so heavily focused on riding).  I was in flight formation and setting the pace for a flock of mallards that happened to be flying down the White River, which ran parallel to Route 100.  Unbeknownst to me the phone continued ringing as the Ducati’s Termignoni exhaust roared through the Green Mountains while I leaned into corners that followed the river.

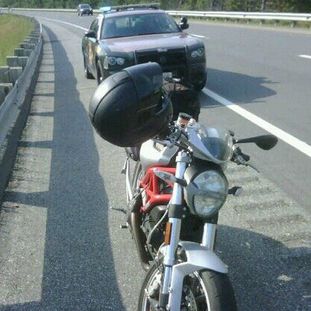
Shortly after parting ways with the mallards and crossing back into New Hampshire, I saw some lights behind me.  It was a New Hampshire State Trooper.  Dammit! I am sure I was speeding, but the question always is how fast. It was fast. As I began talking to the State Trooper to try to minimize the damage, I could now hear my cell phone ringing.  I picked it up as the Trooper ran my information.  It was my new manager based in Virginia calling to introduce herself and ask if I had noticed that I had missed a call I needed to be on.  I stated I was just out getting a coffee (which was 100% true; it’s just that the coffee was 200 miles away).  This was probably one of my more challenging multitask scenarios (i.e., signing a speeding ticket while on an introductory call with my manager).  To this day I feel I would have been able to get out of that ticket had I not been so distracted by work. Lesson 1 as a remote employee learned.

After that day I knew I should take my work a bit more seriously and slow my pace.  I continued to ride, but always ensured I attended every call (which I did over the next 13 years). My work ethic has always been strong, and I didn’t want to compromise this position and what I could possibly do with it by losing my focus.  Continuing to merge my work responsibilities with riding was something that I honed to an art form.

Once I was comfortable performing my work one or two days a week off the motorcycle, I thought I would step the adventure up a notch: California.  I had relatives in Oakland and there was a Harley rental in San Francisco, a short transit ride away.  It made sense to fly there for two weeks and work remotely in a new environment and time zone to see how I would perform.

The test run couldn’t have gone smoother.  I was on Pacific Time when my team was on Eastern Time.  This ensured that by 1:00 p.m. all my tasks and calls were completed.  Having earlier workdays provided much more time to explore San Francisco and the Bay Area.  A couple of vacation days in the mix allowed time to rent a Harley in San Francisco and take a 3-day trip to Tahoe and Yosemite.  Even though I was on vacation those days I felt obliged to join work calls whenever possible just to stay on top of my projects, while obtaining bonus points from management for doing so on my time off.  I felt this made up for my missed meeting when I had first started this position in New Hampshire.

The California trip had solidified my abilities to work from anywhere.  On the return flight to Boston my thoughts focused on a farfetched mindset:  What if I don’t have a home?  It would take a few months of planning and a solid leap of faith.  As with all leaps of faith you never know where or how it will end, but I felt sure I could make this dream a reality. What I didn’t realize is how far I would take this and the new experiences my decision would deliver.  I turned my life into Ferris Bueller’s Day Off on steroids over the next 13 years.

ZRX RX: An ExNotes Resurrextion, Part 2

By Joe Gresh

This ZRX1100 resurrextion started out kind of leisurely. We don’t like stress at ExhaustNotes.us because we are at peace with our surroundings. ExhaustNotes staff have a firm grasp of our place in the universe and see all matter as insignificant much like we see ourselves. There was no big rush, you know? However, things change in life and the ZRX resurrextion timeline has sped up due to the Mud Chuckers wanting to attend the road races July 7-9 at Laguna Seca in California, now known as Polident Speedway. From my house to Laguna Seca is 1150 miles the fast way and we never take the fast way. We might end up doing 2500 or more miles round trip. Thus, the urgency to get the road burner running as none of my other motorcycles are exactly suited to the job.

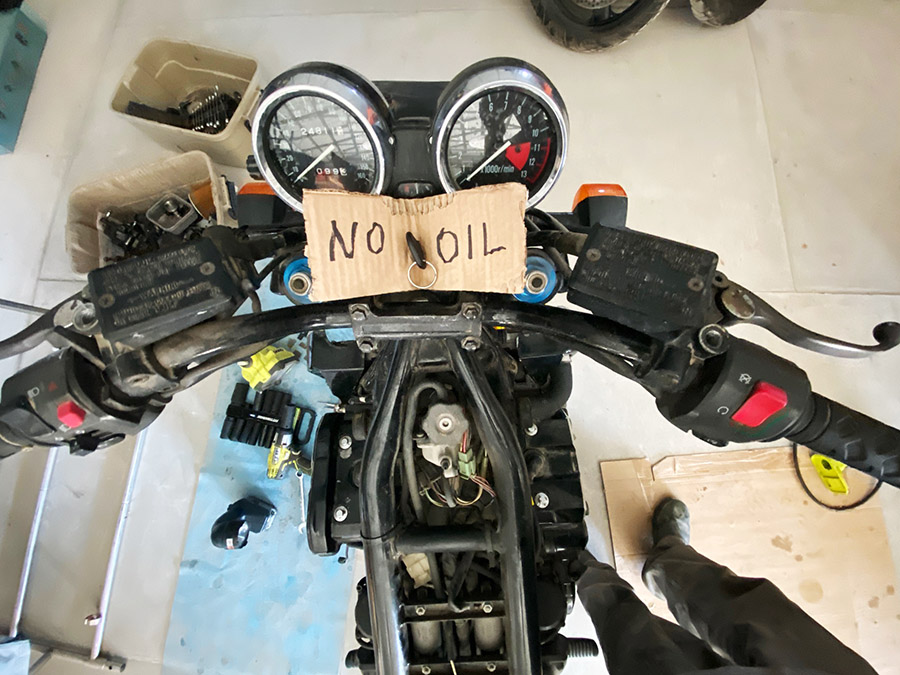
The first thing I did to the ZRX was to remove as much bodywork as possible to prevent the odd dropped wrench or spilled brake fluid from damaging Rex’s somewhat pristine original paintwork.

Kawasaki ZRX1100 bits and pieces have been trickling into the shed at Tinfiny Ranch and we will soon see some progress on the abandoned, neglected motorcycle.

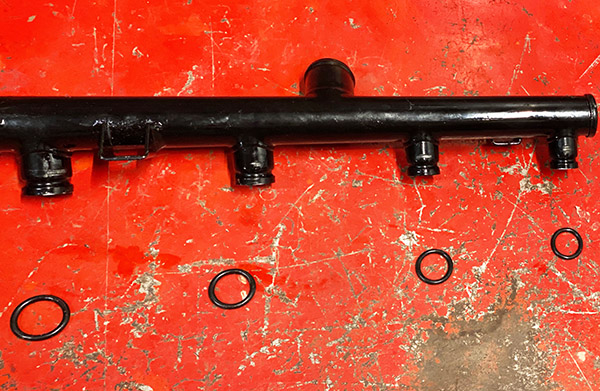
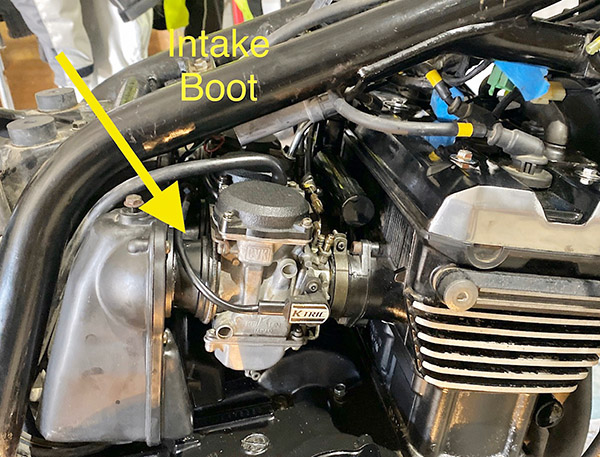
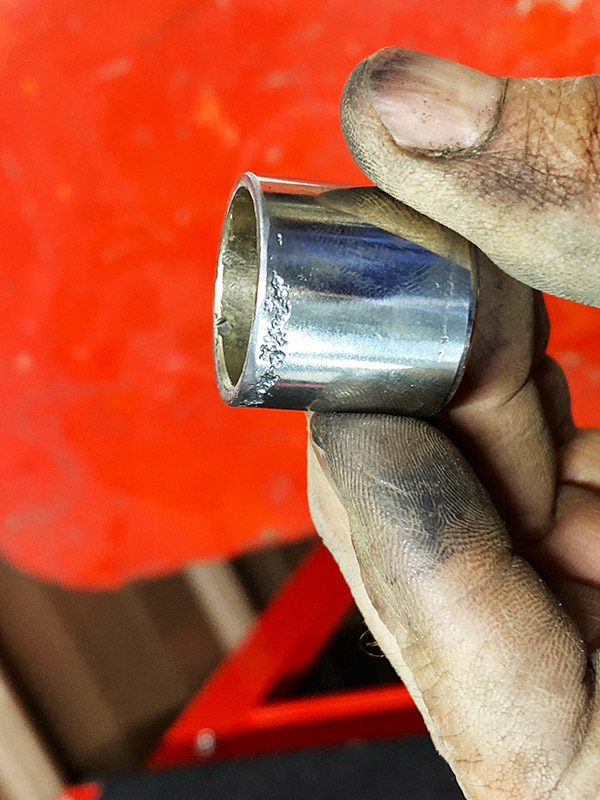
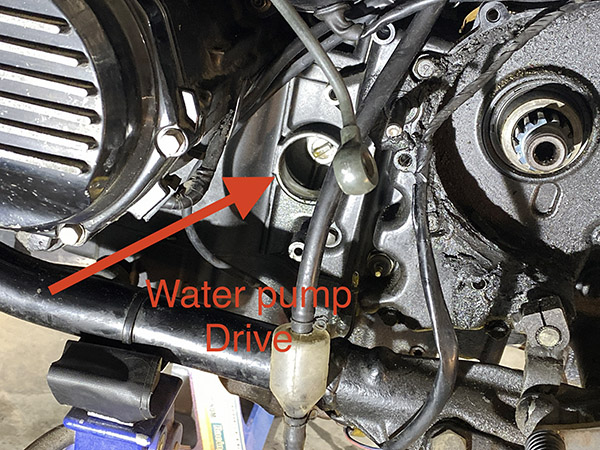
Starting with the coolant leak from under the engine, I have determined the water pump or the O-rings on the pipes connecting to the pump were the culprit. Seeing as the pump is 24 years old I sprung for a new pump on eBay. I imagine I could buy just the mechanical seal and rebuild the water pump but I’m getting lazy.

The coolant pipes are slightly rusty so I’ll have to clean them up and give them a shot of paint. The paint on the front down tubes is chipped from road debris so I’ll touch up those areas also.

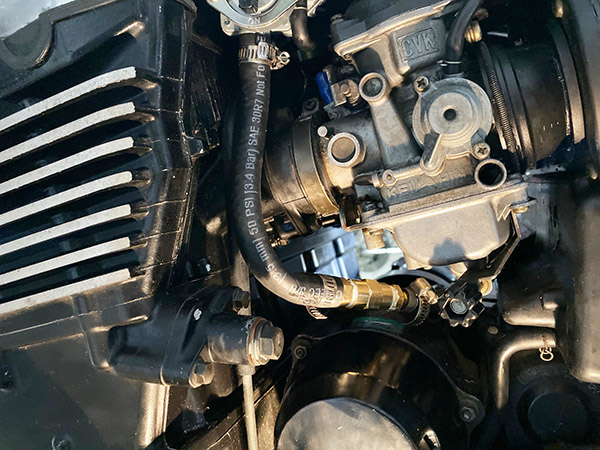
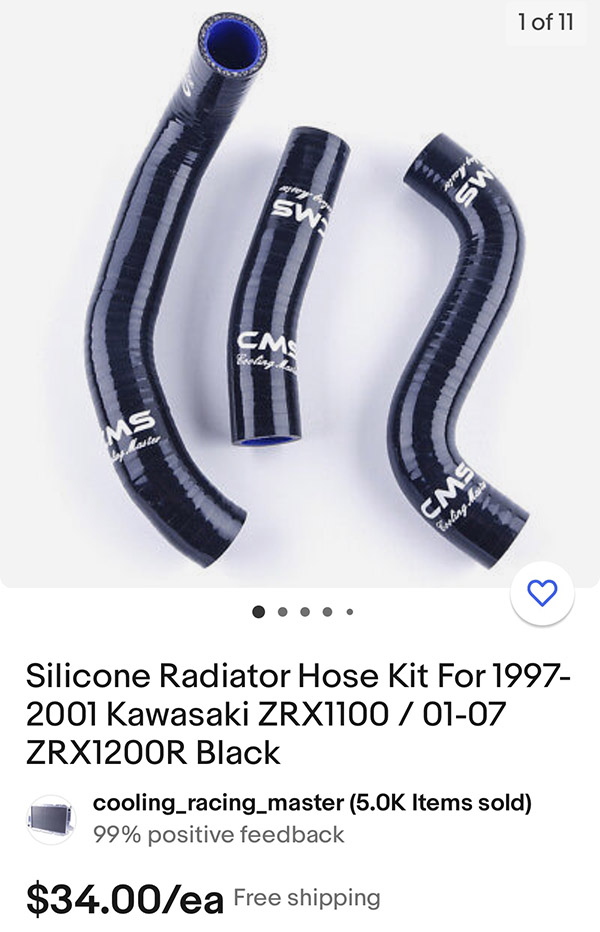
I also bought some new silicone hoses for the pipes. These hoses live directly behind the exhaust headers and while they seemed flexible and in good condition, they are also 24 years old. A lot of stuff on the Rex is 24 years old, because the bike is 24 years old. Funny, it seems like a new model to me. I can remember buying it only a few years old not a long time ago. Is this how aging works? Does time compress making distant events seem close?

The ZRX1100 comes standard with a ground skimming, low-slung exhaust system. The header pipe collector joins under the engine making my motorcycle lift too tall to fit between the pipe and the ground. Even if the jack fit under the bike you’d have to make some spacer blocks to prevent the pipe from hitting the lift. I went with jack stands on both front frame rails and one stand on a cross pipe behind the engine. With this tripod set up the bike feels pretty stable.

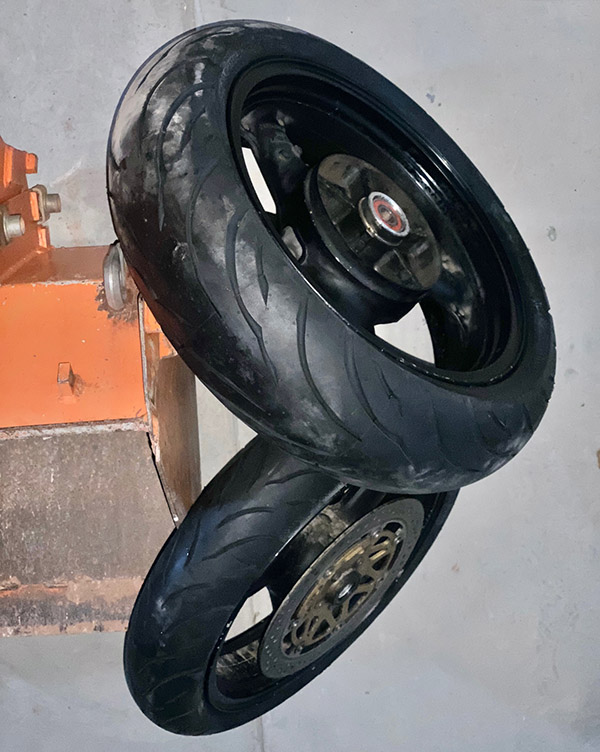
Once jacked up I could remove both wheels for new tires. I also removed the clutch slave cylinder that is leaking and then could access the leaking water pump.

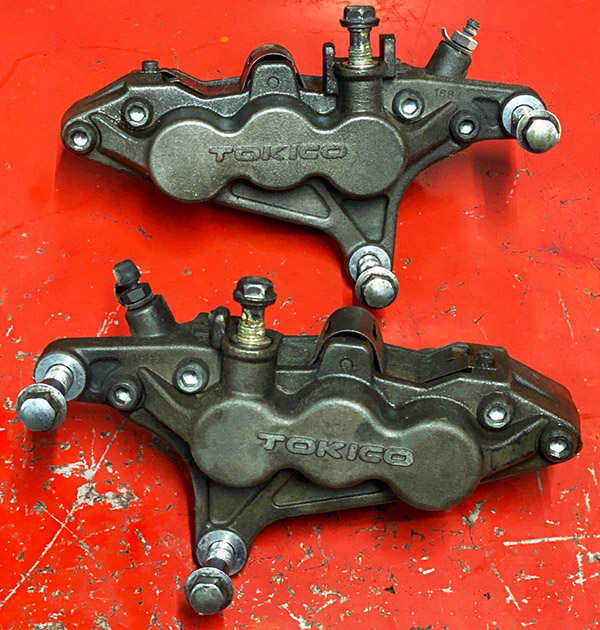
The calipers on the front brakes are stuck.  My caliper rebuild kits came in the mail so I’ll have plenty of piston swapping to keep me busy. This is one of the chores I dread.

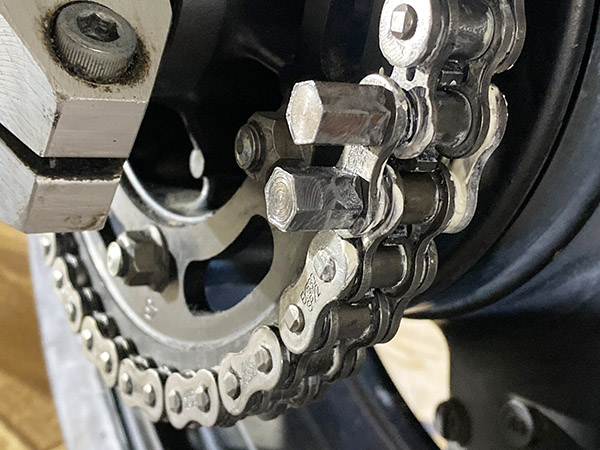
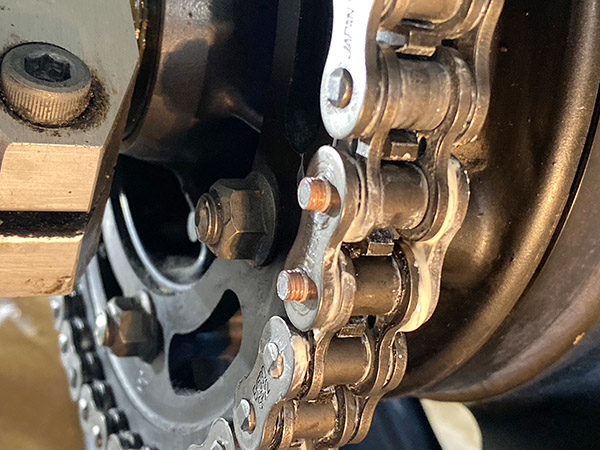
The chain is pretty much worn out. The rollers are loose on the pins and the thing has 25,000 miles on it.  Kawasaki used an endless type chain so I cut it off with a 4-inch abrasive cutting wheel. The rear sprocket looks unworn, which I find amazing, and the front sprocket has just the slightest bit of hooking. Most aftermarket junk won’t last as long as an old, used Kawasaki sprocket. I’ll get a new front sprocket and chain for the bike.

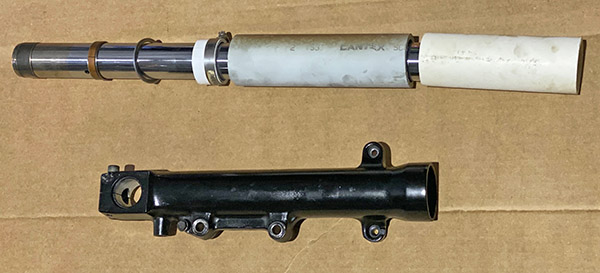
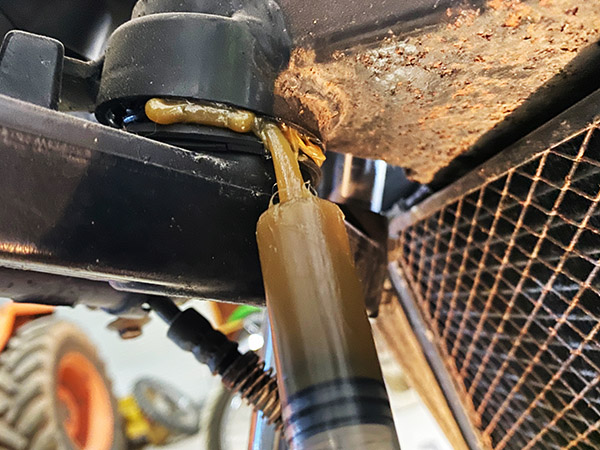
My initial goal with the Kawasaki is to fix the brakes, fork seals and tires. That will upgrade the ZRX to roller status, then I’ll be able to push it outside the shed for a much-needed bath. There is a long way to go to undo the damage 9 years of storage has done to this motorcycle so don’t get ants in your pants. Part 3 to follow, unless I skip to Part 5.


Help us keep the content coming:  Please click on the popup ads!


Here’s Part 1 of the ZRX Resurrection!


Never miss an ExNotes blog:


More Resurrections here!

A Tangerine WRX

There are needs and there are wants.  I don’t need a Subaru WRX, but I sure  want one.  I had my Outback in for service the other day, and the Subie dealer had a bright tangerine WRX on the showroom floor (Subie calls the color Solar Orange Pearl).  Those cars are fast and appealing and I was all over it.  I don’t need another car.  But I sure want the WRX you see above.  I’d name it Il Tangerino.

My 2006 WRX in Rally Blue. The fun factor was off the charts in this car.

Susie and I bought a new WRX in 2006 and it was one of the best and most fun cars we ever owned.  We did a lot of great trips in that car.  It had an automatic transmission (unusual for the WRX) and it was just a hoot to drive.  It felt like a supercharged go kart, which in a way it sort of was.  Turbocharged, anyway.  It would go like a bat out of hell and one time when passing a long string of cars heading north on the 395, I looked down and saw I was doing a cool 140 mph.  It was effortless. Like I said, these cars are fast.

The 2023 WRX. Nice.

I like the orange color.  I had an orange Subie CrossTrek and my friends teased me about its bright orange paint.  Laugh all you want.  The CrossTrek was a good looking car and it was easy to find in a parking lot.

I first drove a WRX when good buddy Tom tossed me the keys to his WRX when we were hanging around Bob Brown’s BMW dealership.  Marty and I took it out for a spin, it was fast, and that ride was all it took.  I bought the blue one you see above a short while later.

The WRX you see here has an automatic transmission. Slick. I want one.

Most WRX Subies have manual transmissions.   Those are okay, but I’m a bit more mature now and I prefer an automatic.  Sit in California traffic a while and you will, too.

The WRX seats are hard but surprisingly comfortable.

I asked the sales guy at the Subie dealership what this one would go for and after the standard line of dealer crap (including the when are you going to buy, how much are you willing to offer, etc….I do love dealers and their sales people), he finally showed me their invoice.  The bottom line is that this Subie would go for something slightly north of $32,000, not counting taxes and other fees.

I love that scoop. It’s for the turbo’s cooler.

My first thought was that $32K is not a bad price for a car like this (I recently read in the Wall Street Journal that the average price for a new GM car is right at $50K today).  The Subie you see here has a 2.4-liter engine and a turbocharger.  You’re supposed to run premium fuel and here in the Peoples Republik premium is running north of $5 per gallon. so that’s probably a deal killer.  But like I said at the start of this blog, there’s needs and there’s wants.  I don’t need a new WRX, but I sure want this one.  If enough of our readers click on the popup ads…who knows?


Never miss an ExNotes blog:


Help us bring more content to you…please click on the popup ads!

Three Favorite Sedona Hikes

By Bobbie Surber

Arizona’s Sedona area offers fantastic hiking.  This blog describes three of my favorites.

Bear Mountain Trail

Bear Mountain provides fantastic red rock views. The start of the trail is at about 4600 feet in elevation from the parking lot. At the final summit, the elevation reaches 6150 feet.  At the summit of Bear Mountain, you can see the San Francisco Peaks in Flagstaff, views of Bell Rock in the Village of Oak Creek, Verde Valley, peaks of Sycamore Canyon, and all West Sedona.

Bear Mountain hiking trails. From top left, going clockwise: Bear Mountain Canyon views, start of the Bear Mountain Trail, the Bear Mountain trailhead, and me atop Bear Mountain.

A warm spring day found me on the Bear Mountain Trail with a new friend I met during a Sedona Meet Up Hiking event. Linda is from New Jersey and is an avid outdoorswoman, hiker, and yoga devotee. I enjoyed Linda’s company as we marveled at the views and shared about our lives, family, and career paths.

I was happy that the Bear Mountain Trail DID NOT kick me in the behind. A challenging hike with an 1800 ft gain over the course of 3 levels of summits. This is a designated wilderness area, so there aren’t any trail markers once you enter the designated area. Watch for trail markings carefully and pay attention, as you will encounter several false summits before reaching the peak. Views along the way revealed stunning red rock slot canyons and an area resembling a mini Grand Canyon. This is a steep trail with some rock scrambling. Please pay attention to the trail, as it is easy to get off track. 2 liters of water is the minimum recommended for this strenuous hike, more on a hot day. A hat and walking poles are also very helpful.

This hike is advanced and difficult. You should be prepared with proper footwear, water, food, and layers of clothes.

Sugarloaf to Lizard Head to Chuck Wagon to Brins Mesa, returning via Jordan Trail

Sunday morning started with a chill in the air and an overcast sky. I postponed getting out of bed and decided on another cup of coffee; my favorite, extra dark roast made strong enough to curl your hair worked its magic as I continued to procrastinate a few moments longer with a leisurely read of the Sunday paper. My hiking shoes waited anxiously beside my bed for the impending long hike. Not sure if it was the regret of a wasted Sunday or the sudden clearing of the clouds, whatever it was, I surrendered, dumped the remainder of my brew, got the hiking shoes on, and headed out the front door.

Coffee Pot Rock.

My goal was to try out Day 1 of a planned 3-day hike in Sedona and the Village of Oak Creek. I headed to the Sugarloaf Trailhead catching the Andante trail over to Chimney Rock Saddle to connect to the Lizard Head trail. This is where I was momentarily lost. OK, not momentarily lost… but I could not locate the %&# trail for about an hour! Man, talk about the embarrassment of getting lost in my backyard!

After bushwhacking and following a new chain-link fence, I found Lizard Head and started the ascent. Within a half hour, I was high up on the side of the mountain, and sure, I was too high for this trail. Thank goodness for cell phones and a call to my friend Doug, the master of all things related to Sedona trails, who knew exactly where I was and assured me I only needed to butt-scoot down the rocks about 100 ft and begin my descent to the bottom of the trail. He was dead on!

The Brins Mesa marker.

Besides my inability to navigate easy-to-locate trails in my backyard, I did not care for this section due to road noise off Dry Creek Rd. This, however, was short-lived as Lizard Head connected to Chuck Wagon trailhead with a lovely new picnic area, maps, and toilets. A fast rest and lunch, and I was back on the Chuck Wagon trail heading to the Brins Mesa trail. Chuck Wagon trail meanders through open vistas and dry gullies with views over Boynton and Secret Canyon. A wonderfully easy trail with outstanding red rock views. By 3 pm, I was at the trailhead of Brins Mesa with the much-needed forest to cool me off. Brins Mesa is always my favorite. Not sure why; perhaps it is the rebirth after the fire of 2006 or the feeling of others that have walked this Mesa for hundreds of years. Whatever the reason, I had a surge of endorphins firing off in my brain, and I was in complete bliss despite a longer-than-expected day of hiking and a start of a dreaded blister on my little toe.

After an enjoyable day of hiking, one might think that nothing could top it. However, heading to the Oak Creek Brewery from the Jordan trailhead for a delicious hotdog and refreshing beer further elevated my experience in Red Rock Country. Spending a Sunday in this manner gives a new meaning to Sunday Funday!

This 12-mile hike is moderate difficulty. Bring plenty of water.

West Fork Trail in Oak Creek Canyon

The West Fork Trail is a moderate hiking trail known for its picturesque views of the red rock canyons and the crystal-clear waters of Oak Creek. The out-and-back trail follows the creek for about 6.4 miles and takes around 2 to 4 hours to complete. It is suitable for hikers of all levels, including families with children. Hikers should wear appropriate gear and bring plenty of water and snacks. You will make numerous water crossings and find that water shoes make the trail more manageable; check the weather forecast for storms and potential flooding.

On the West Fork Trail.

My morning could not have been more perfect. Hot coffee served bedside, the sun shining brightly, two soft-boiled eggs just the way I like them, and an 8 am date with Elaine to hike the Oak Creek Canyon.

West Fork leaves, and the West Fork trailhead.

What I did not expect was to hit the famed West Fork Trail at the perfect date and time to see our Arizona fall leaves at the most glorious time of year. The morning light was enchanting as it filtered into the canyon, backlighting the trees and setting the red rock cliffs glowing with burnt orange with soft buttery yellows and rust red. Childhood joy resurfaced as we worked our way back and forth across Oak Creek; with each turn along the trail, nature revealed yet another excellent view of the Canyon.

West Fork Trail scenes.

It is difficult to describe this trail’s beauty in the fall. The experience goes beyond language; one must turn inward and fully immerse themselves in the earth’s magic beneath their feet. The power of the running creek and the ever-changing red rocks add to the enchantment of the surroundings, creating a truly indescribable experience. The company was as wonderful as the views along this hike.  It was so nice to have some Elaine time and, for a moment, remember what it is like to be removed far from our hectic busy lives and reacquaint with an old friend in an enchanted setting such as this.

Be prepared to face water crossings.


Sedona and the surrounding areas have an abundance of hiking opportunities. Thirty-seven years of living in this Red Rock paradise, and I still have hikes on my list yet to be explored. If you are planning a trip to Sedona, consider using All-Trails and stopping by the Forest Service office for up-to-date restrictions and trail conditions.  If hiking is what gets your mojo on, then Sedona will not disappoint!

The Wayback Machine: How Many Miles Can You Ride In A Day?

By Joe Berk

How many miles can you ride in a day?

About 30 years ago I cranked 1070 miles in one day on a Harley Softail coming home from Mexico (and that was on an older Softail without the rubber mounted engine…it’s the one you see in the photo above).  I was younger and I could ride, as they say, like the wind.  A couple of weeks ago, I did a 250-mile day ride on my Enfield and it about wiped me out.

Gresh and I were talking about this recently, and I thought I would share my thoughts on how many miles you can plan on covering in a day.  Maybe it will influence your planning.  Maybe not.  We get paid the same either way.

1: Age

Like I said above, big miles used to be no big deal for me.  That’s not the case any more.  After substantial scientific study and close observation of my geezer buddies over many decades, I developed a graph showing the relationship between age and how many miles you can reasonably ride in a day.

Like it or not, when we get older, it gets harder to rack up big miles.  Serious scientific study went into the above, so if you want to debate our conclusions, bring facts.  We want to hear them.

2: Weather

Weather plays a big role in how many miles you can ride in a single day, and here at ExNotes we rely heavily on our weather rock before leaving on any ride.  You’ve probably heard about weather rocks.  We sell weather rocks here on ExNotes and they are conveniently sized to fit into a tank bag.  They work like this…you hang the rock from any available support (you have to supply your own string and support).  Here’s how to interpret your weather rock:

    • If the rock is wet, it means it’s raining and you should reduce however many miles you had planned to ride by half.
    • If the rock is swinging, it means it’s windy that day, and you should reduce your miles by maybe a third.
    • If the rock is hot to the touch, it means the temperature is elevated, and you should reduce your miles by maybe a third.  Maybe even more.
    • If the rock is cold, it means it’s cold, and you probably can ride as long as you dress appropriately.  If the rock is really, really cold, though, maybe you should stay home.  If there’s ice on the rock, you definitely should stay home.

ExNotes offers weather rocks in brand-specific models:

    • If you ride a Harley, we offer chrome weather rocks for $395, chrome with conchos and black leather fringe weather rocks for $495, and chrome, conchos, fringe, and matching do rag weather rocks for $595 (freight and setup fees not included).
    • If you ride a BMW, we offer the GS weather rock with an electronically adjustable center of gravity, BMW logos, and a one-year Starbucks gift certificate for $1995.
    • If you ride a Ducati, you probably don’t need a weather rock (Ducati riders generally only ride their motorcycles short distances on clear days, anyway, although if you insist, we can provide a red rock for you personally autographed by the former famous racer of your choice, or we can put several rocks in a bag you can shake to sound like a Ducati clutch).  Ducati rocks are free, or at least that’s what we tell you (we’ll recover the cost on your first valve adjustment and let you think you got the rock for free).
    • If you ride a Chinese motorcycle, we sell an ExNotes weather rock decal for $2 and you can put it on your own rock.

3: Roads

The kind of roads you plan to ride make a huge difference.  If it’s all freeway, you’ll be bored but you can rack up huge miles.  If it’s surface streets (and a lot of us do everything we can to stay off the freeway), you won’t cover as many miles unless you’re riding in Baja, where you can run 140mph+ on the long straights south of Valle de Los Cirios.  If it’s in the mountains, it will be less, unless you’re posting about your skills on Facebook, where the folks who post are world class riders (to hear them tell it).  The same holds true for riding in the dirt.  You just won’t cover as many miles.

4: Headcount

This is the big one, folks.  Maybe I should have listed it first.  If I’m riding by myself or with one of my motorcycle buddies in Baja, I can easily do over 500 miles a day.  Throw in more people, and…well, read on, my friends.

The number of riders in your group has a profound impact on how many miles you can ride in a day.   In the math world, we would say that the miles per day are inversely proportional to the number of riders in your group.

As a starting point (and after extensive research and mathematical modeling), the technical staff here at ExNotes developed Formula A:

A)  Miles per Day = (M)/(N)

where:

M = Miles you want to ride
N = Number of riders in your group

What the above means is that as the number of riders in your group increases, the number of miles you can cover in a day decreases.  That’s because with more riders you’ll start later in the morning, you’ll be stopping more often, and you’ll take more time at each stop.  That is, unless you’re riding with me.  Then Formula A reduces to Formula B:

B)  Miles per Day = M

where:

M = Miles you want to ride

The B in Formula B stands for Berk because basically I’ll leave you behind if you’re not ready when I am.  You can catch up with me later.  You might think I’m joking. I’m not.

Formula A varies a little depending on what kind of riders you have in your group, and especially if you have a Rupert.  Rupert is the guy who takes 20 minutes putting his motorcycle gear back on after every stop.  I once rode with a Rupert who could take 20 minutes just putting his gloves on.  He got better when we threatened to cut a few of his fingers off.

5: Your Motorcycle

There are several motorcycle factors that play a huge role in how many miles you can ride in a day.  In the old days, a motorcycle was a motorcycle and we did it all with a single bike (touring, off-road, canyon carving, adventure riding, etc.).  Today, you gotta get specific:

    • ADV-style bikes are actually pretty comfortable and the ergonomics make sense.  500-mile days are easy.  My KLR 650 was one of the best touring bikes I ever owned.   It had phenomenal ergos.
    • Standard motorcycles are also relatively comfortable and you can probably do 500 miles in a day, but you’ll feel it, especially if your bike does not have a windshield.  My Enfield 650 Interceptor is a good bike, but it’s the one that wiped me out on that recent 250-mile ride.
    • Cruisers look cool in motorcycle ads and they complement do rags and tattoos nicely, but they are less comfortable on long rides.  I’ve found I can reasonably do 350-mile days on a cruiser without needing to see a chiropractor.  Go much beyond that and you’ll feel it.
    • Sportbikes generally cut into big miles, but a lot depends on your age. Good buddy Marty and I rode sportbikes on the 2005 Three Flags Classic (I was on a Triumph Daytona) and we did big mile days on that ride. But I was 20 years younger then and I bent a lot easier.  I wouldn’t want to do it again.
    • Classic bikes generally require shorter daily riding distances, particularly if they are British and equipped with electricals manufactured by Lucas (as in Lucas, the Prince of Darkness).  I think a mid-’60s Triumph Bonneville is the most beautiful motorcycle ever created, but I wouldn’t want to ride Baja on one.

Beyond the style issues outlined above, there are other motorcycle factors to consider:

    • Bigger motors generally mean more miles in a day, but bigger motorcycles can slow you down if they suck up too much fuel.  One year at the International Motorcycle Show, Yamaha’s bikes all had labels that showed, among other things, fuel economy.  The VMax, as noted by Yamaha, averaged 27 miles per gallon.  You’d be making a lot more fuel stops on that one.  27 miles per gallon.  I can’t make up stuff this good.
    • Daily mileage is independent of displacement at 400cc and above (as long as fuel economy is not VMax nutty).  Below 400cc, it gets harder (I think) to crank big miles.  On my 250cc RX3, 500 miles is a big day for me.  But my good buddy Rob once did a 1000-mile Baby Butt on his RX3, so I guess anything is possible.
    • Seats can make a big difference.  I’ve never found any motorcycle seat to be really comfortable, but I have found a few to be god-awful (my Enfield is working hard to earn that title).  If you want to really improve a motorcycle seat so you can up your miles, get a sheepskin cover (I’ve found those to be quite comfortable).  There are other options like inflatable seats or custom made seats, but my advice is don’t waste your money.  A guy showed up with an inflatable seat cover on a group ride once and it slowed us considerably.  It kept blowing off his bike and we had to stop and look for it each time that happened.
    • Fuel tank capacity doesn’t make much difference.  My KLR could go 250 miles on a tank; my TL1000S would start blinking at 105 miles.  You’d think you could ride a lot further with a bigger tank, but I found I need to stop and stretch roughly every hour or two, and if I do that at gas stations, tank capacity doesn’t matter.

What do you think?

So there you have it:  Our thoughts on a complex topic.

We know there are keyboard commandos out there who will take exception to our carefully constructed and presented thoughts.  If you disagree, let’s hear it.  We appreciate all comments, dumbass and otherwise.  Please leave your thoughts here on the blog for others to see.  Don’t waste your time leaving comments on Facebook (all the cool people leave their comments here…only losers post comments on Facebook).  You’ll be a faster rider, you’ll be thinner, and you’ll look better if you post your comments here.  And don’t worry about spelling, punctuation, grammar, or capitalization (believe it or not, it will help our readers assess the validity of your thinking).
Like they say, your mileage may vary, and we’re looking forward to your comments.  If they’re particularly inane, so much the better. We await your inputs.


Some of our more interesting rides?  Right here, folks!


Never miss an ExNotes blog: 


Check out our MotoBooks!

The Rimfire Series: An Early Ruger Single-Six

By Joe Berk

If you like old guns and family heirlooms, you’ll enjoy this blog.  The Ruger Single-Six you see here was my Dad’s gun.  This revolver’s 4-digit, no-prefix serial number puts its date of manufacture at 1954, which means it is just a little bit younger than me.  Ruger introduced the Single-Six in 1953 and they only made 49 of these revolvers that year, so mine is a first year of production revolver.  That’s cool.

Dad kept the Single-Six loaded in a drawer near his bed.  I don’t remember him ever shooting it.  He kept it there just in case.  Storing any gun in a holster is not a good idea (the leather retains moisture) and it had a light coating of surface rust in a few spots when Dad passed.  A bit of 0000 steel wool and oil took the rust off and the gun is in remarkable condition.


Don’t forget to take care of us:  Please click on the popup ads!


You probably noticed the custom walnut grips on this vintage Ruger.  Dad was an excellent stockmaker (his work was on high end shotguns), but the stocks on his personal trap guns were usually kluged-up affairs with adhesive padding on the comb and glued-on spacers to get the fit he wanted.  Dad didn’t care about appearance on his competition guns; all he wanted was a good fit so he could smoke clay pigeons.  The work he did on his friends’ shotguns…that was another story.  Those were stunning.  Those other guys weren’t great shots; they cared more about looks.  Dad was all about breaking pigeons on his guns, bringing home trophies, and bringing home cash (the monetary awards, especially for live pigeon shoots, were significant).   We always had walnut blanks and remnants in Dad’s workshop, and one day when he didn’t have anything else to do he crafted the custom grips you see here.  The wood-to-metal fit and the oil finish is perfect on these.

The right side of my 1954 Ruger Single-Six.
A perfect wood-to-metal finish. They don’t come from Ruger like this.

I wish new Rugers had grips that looked and fit like that.  They don’t.  You may recall the blog I did last year about a new Ruger .357 Magnum Blackhawk.  It’s grip-to-frame fit was atrocious.

A current production Ruger Blackhawk. Somewhere along the line, Ruger lost its attention to detail. These ugly gaps can’t be unseen.

As an original Single-Six, this Ruger is what is referred to as an Old Model.  It doesn’t have the transfer bar safety, and what that means is that if you drop it with the hammer over a loaded chamber, it can fire.  Call me old fashioned; I’ve got my own safety approach to this problem:  Don’t drop the gun.   But that’s just me.

The Old Model Ruger revolvers are elegant.  They are also referred to as three screw Rugers (because they have three screws on the right side; the newer model has two pins instead).  The hammer cocking in the Old Model Rugers is similar to a Colt Single Action Army.  There are four clocks, and that’s cool, too (especially for old guys like me).

The old three-screw configuration.

These old Ruger six shooters are also called flat gates because of the flat gate that opens for loading.  The flat gate feature that didn’t stay on Rugers long.  Ruger went to a contoured loading gate early in their history.  It’s just something that sets this revolver apart.

The flat gate on my Ruger Single-Six.
A better view of the Ruger’s flat loading gate.

The early Rugers had recessed chambers.  I haven’t owned a new Single-Six in decades and I don’t remember if the newer ones do or not.  It’s a classy feature.

Recessed chambers. Back in the day, everything was better.  I know it’s dirty; I took this photo after the range session and before I cleaned it.

You probably noticed the gold inlay in this Ruger’s lettering.  Back in the day, kits to do this at home were popular.  I guess it holds up well; this was done quite a few years ago.  You can still get these gold inlay kits from MidwayUSA.com.

Look for the Forster gold inlay kit on Midwayusa.com.
Fixed sights and gold inlay. These old guns are awesome.

I grabbed an old box of .22 Long Rifle ammo and headed to the range a few days ago.

$8.96 for 550 rounds. We didn’t know how good we had it.
Federal hollow point ammo. You can’t have these in New Jersey or San Francisco (they outlawed hollow point ammo). Sarcasm alert: That’s why their crime rates are so low.
An ammo comparison. From left to right, it’s the Federal .22 Long Rifle hollow points featured in this article, one of my 9mm reloads, and a .357 Magnum hollowpoint.

I ran my targets out to 50 feet at my indoor range and had at it, shooting off hand with a two-hand hold.  As always, the Single-Six did not disappoint.  It has fixed sights, but they are spot on.

I held at 6:00 on the orange bullseye. If I had used a rest, the group would have been much smaller.  For an offhand group, I’m happy.

When first introduced in 1953, the cost of the Single-Six was $57.50.  I grabbed this photo from my old 1956 edition of the Stoeger Shooter’s Bible.  The Single-Six had gone up to $63.25 by 1956.

They don’t do covers like this today: The 1956 Shooter’s Bible.
The ad for Ruger’s Single-Six in 1956. Ruger’s Standard .22 automatic pistol was only $37.50 back then.  The Single-Six was a more expensive handgun.

If you enjoyed this Rimfire Series story, keep an eye on us.  Our next Rimfire Series story will be on a very cool Ruger 10/22 Mannlicher rifle from 1974, one with exceptional walnut.

The same ammo and an old Mannlicher 10/22. Watch ExNotes for the story. It will be the next featured in our Rimfire Series.

If you want to make sure you don’t miss the upcoming 10/22 story, please subscribe to the ExNotes blog:


If you would like to see our earlier blogs on .22 rifles and handguns, here’s a set of links.

A Tale of Two .22s (a CZ Model 452 and a Remington Model 504)

A .22 Colt Trooper Mk III

¡Siluetas Metálicas!

First Person Shooter

A 200th Year Ruger .22

A Tale of Two Springfields

Pandas!

By Joe Berk

The big photo above is shows three very real pandas.  I took it in Chengdu when Gresh and I rode across China.  It’s a little blurry because I was shooting through inch-thick super-smudgy glass.  The photo is for attention only.  This blog is about a different kind of panda.


Help us bring more to you:  Please click on the popup ads!


When I was a pup back in the 1970s, I bought a Seiko chronograph watch in the Kunsan AFB Base Exchange.  The Seiko model number was 6138-8020, and it was $67.  I could have bought a Rolex there, too, but I remember thinking who spends $300 on wristwatch?  Nope, it would be the Seiko for me.

A Seiko 6138-8020 recently advertised on Ebay for close to $2,000.

The Seiko 6138 was an automatic (i.e., self-winding) watch.  It became known as the Panda due to its two black subdials on its white face.  I liked the Seiko a lot.  I was a jogger in those days, and I used the Seiko every day to time my 3-mile runs.  Life was good but I went on to other things.  After the Army I worked in the aerospace industry, and like most engineers I went the digital route (I wore a Casio calculator watch).  When Ebay became a thing I went on a decluttering craze and the Seiko went down the road.   I got $80 for it and I thought I was pretty clever.  Then I watched the price of a 6138 go through the roof.  That may be why I collect watches now.  I’m still trying to make up for that mistake.

I’ve missed my Panda over the years, and I started looking around to see what was available.  There are several.  In my opinion, Breitling makes the best (and best looking) Panda.   Their Premier model is an awesome automatic watch, but who spends $7,299 on a watch?

Breitling’s Premier chronograph.  It’s a Holy Grail kind of a watch.

The Hamilton automatic American Classic is another great looking Panda.  That answers the mail for me, too, but it’s a little bit rich for my blood.  The Hamilton goes for $1,541.

Hamilton makes a Panda chronograph.  Nice, but a little bit pricey.

Seiko has a solar-powered Panda watch in their Prospex line that looks pretty good to me.  It’s a $700 watch.  If you shop around, you can find them for about $500.  That’s not bad, but Seiko also makes that watch with a red and blue face and a red and blue bezel (informally known as the Pepsi), and one of these days I’ll probably pull the trigger on one of those.  So, I took a pass on the Seiko Panda.

Seiko’s Prospex Panda.   This is a very good-looking watch.

Bulova recently got into the Panda shtick as well, with a set of different colors on their Lunar Pilot watch:

The Bulova Lunar Pilot Panda. Nice, and incredibly accurate.

The Bulova is $895.  It’s nice, but a few years ago I bought the black dial Bulova that emulates the watch astronaut Dave Scott wore to the moon.  With a Lunar Pilot already in the collection, I wanted something else.

I’d been thinking about this Panda thing for a couple of years now, and looking at watches from time to time on the Internet, and you know where this is going.  The Internet is insidious, and the marketing emails starting coming in.  Amazon sent one on the Orient Panda and it was $188.  Seiko and Orient are both owned by Epson (yep, the printer company), and I know Orient to be a good watch (I’ve written before about my Orient moonie automatic watch).  Here’s the Orient Panda:

The Orient Panda. I like its looks.

The Orient had great reviews on Amazon, and I liked the look.  One thing I’ve learned the hard way is that it’s hard to judge a watch’s appeal by a photo.  Some that look great in a picture are totally unappealing in person, and vice versa.  But for $188, I’m willing to take a chance.  When the watch arrives (it’s a non-US model and it’s shipping directly from Japan), I’ll let you know how it looks.  I like the metal bracelet; I may spring for a black leather (with white stitching) band (like the Breitling’s) somewhere down the road.

A few general observations on the above watches.  You may have noticed that the bezel rings are different between the Orient Panda and the others.  The Orient has equally-spaced marks that show how many seconds have elapsed when the stopwatch is activated.  All the other Panda watches have what is known as a tachymeter bezel.  The idea behind it is that you can use the tachymeter for determining rate.  If you activate the tachymeter when passing a mile marker and then stop it at the next mile marker, it will tell you your actual speed (as long as you are going faster than 60 mph).  If you are on a production line, you can activate the stop watch when starting one item and stop the watch when the item is completed.   Let’s say it takes 9 seconds to complete one item.  The stop watch’s second hand will point to how many items can be completed in an hour (in this case, 400).   The tachymeter is a cool feature but I have never used it, so the fact that it is not on the Orient is okay by me.

I’ve mentioned automatic and solar powered watches.  An automatic watch is a mechanical, self-winding watch.  For some collectors, there’s a panache associated with a mechanical watch.  I feel that way, and I have automatic watches.  The downsides of an automatic watch are that if you don’t wear them for a few days they stop and then you have to reset them, and they are less accurate (typical automatic watch accuracy is about ±25 seconds per day.  Some are better than others.  If you’re a fanatic about time, you’ll probably reset an automatic watch about once a week.  For watch geeks that’s okay.  We like playing with our watches.

Solar powered watches are essentially quartz watches that are powered by the sun instead of needing a battery.  The downside is the watch has to be in the light (either sunlight or artificial light) a little bit each day to keep running.  The upsides are that if you don’t wear a solar powered watch but keep it where the light hits it, it keeps running, and solar powered (and quartz regulated) watches are phenomenally accurate (to the tune of a few seconds per month).  I have solar powered watches that I haven’t worn for a year or more, and they accurate to within a few seconds of the time.gov website.  That’s pretty cool.

Back to that ride into Chengdu to see the real pandas…you can read all about it in Riding China.  Here’s a short video of Joe Gresh and yours truly slogging through Chengdu traffic on Zongshen RX1 motorcycles.


Never miss an ExNotes blog:


More watch, motorcycle, tool, and other product reviews are here!

The Wayback Machine: ’66 Triumph TT Special

The Triumph TT Special:  Made from 1963 to 1967, in my opinion it made for the ultimate street bike back in the 1960s.  I always wanted one.  It’s an itch I never scratched, and that may be a good thing.  I like to remember it the way I remember it:  The ultimate motorcycle.  I’ve owned a few bikes between then and now that were undoubtedly more powerful, so a TT Special ride today might seem disappointing (and I don’t want to facilitate bursting that bubble).  No, the dream is how I want to remember this motorcycle.


So, some of this is from a blog I did for CSC several years ago, and some of it is new. It’s all centered on one of my all-time dream bikes, the Triumph ’66 TT Special.

A ’66 Triumph TT Special. Love those colors!

Some background:  In the mid-60s, the ultimate street bike was a Triumph TT Special.  The regular Bonneville was a pretty hot number back then, but it came with mufflers, lights, a horn, and all the stuff it needed to be street legal. Those bikes were pegged at 52 horsepower, and although that sounds almost laughable now (as does thinking of a 650 as a big bike), I can tell you from personal experience it was muey rapido. I don’t believe there were any vehicles on the street in those days (on two wheels or four) that were faster than a Triumph Bonneville. And there was especially nothing that was faster than the Triumph TT Special. It took the hot rod twin-carb Bonneville and made it even faster. And cooler looking.  The Triumph TT Special will always hold a special place in my heart.


Don’t forget to click on the popup ads!


I had a spare hour a couple of years ago (yeah, that’s about how it happens), and that’s when I stopped in Bert’s.   My good buddy Ron had a Triumph TT Special on display.  I wondered what most folks thought when they saw the TT Special in Ron’s showroom. Bert’s sells to a mostly younger crowd (you know the type…kids who just got a licenses and go for 170-mph sports bikes), and my guess is they didn’t really “get” the TT Special. I sure did. Like I said, back in the mid-60s the Triumph Bonneville ruled the streets, and the TT Special would absolutely smoke a standard Bonneville.

Back in those days the Triumph factory rated the TT Special at 54 horsepower (as opposed to the standard Bonneville’s 52), but let me tell you there was way more than just 2 horsepower separating these machines. The TT Special was essentially the starting point for a desert racer or flat tracker. They were racing motorcycles. The TT Special was never intended to be a street bike, but some of them ended up on the street. If you rode a TT Special…well, you just couldn’t get any cooler than that.

A ’65 Bonneville TT Special, in the blue and silver colors of that year. This is a beautiful motorcyle on display in the Owens Collection in Diamond Bar, California.

I only knew one guy back then who owned a TT Special (Jimmy something-or-other), and he did what guys did when they owned a TT Special.  He made it street legal, and that effort consisted of a small Bates headlamp, a tail light, and a single rear view mirror.

The first time Jimmy was pulled over in New Jersey the reason was obvious:  He was a young guy on a Triumph TT Special.  Back in those days, that constituted probable cause.  After the officer checked the bike carefully, he gave Jimmy a ticket for not having a horn. It was what we called a “fix it” ticket, because all you had to do was correct the infraction and the ticket was dismissed. Jimmy didn’t want to spend the money (and add the weight) that went with wiring, a switch, and an electronic horn, so he bought a bicycle bulb horn. You know, the kind that attached to the handlebars and had a black bulb on one end and a little trumpet on the other.  It honked when you squeezed the bulb.  Ol’ Jimmy (old now, I guess, if he is even still around) went to the police station, honked his horn, and the police officer dismissed the citation. With a good laugh. It was a good story 50+ years ago and it’s still a good story today.  Simpler times, I guess.

I love the ’66 white and orange color combo, too.  My Dad had a ’66 T120R Bonneville back then (that’s the standard street version of the Bonneville), and it was a dream come true for me.  Those colors (white, with an orange competition stripe framed by gold pinstripes) really worked.  1966 was the first year Triumph went to their smaller fuel tank, and it somehow made the Bonneville even cooler.

My father, an upholsterer by trade, reupholstered his Bonneville with a matching white Naugahyde seat.  Dad put a set of longitudinal pleats on the seat in orange to match those on the tank, and each was bordered by gold piping.  The overall effect was amazing.  It looked like the bike ran under a set of white, gold, and orange paint sprayers.  The effect was electric.  That bike really stood out in 1966, and it continues to stand out in my mind.  In fact, while I was at CSC, that color combo (with Steve Seidner’s concurrence) found its way into one of the new San Gabriel color combos.  Some dreams do come true, I guess!


A Cup O’ Joes includes a few of our Dream Bikes.  You can pick up a copy here.

Never miss an ExNotes blog:

Phavorite Photos: Tall Tales in Chongqing

By Joe Berk

It’s been a little while since we posted a phavorite photo (thanks for the series suggestion, Peter), so I thought we were due.  Usually the pics in our Phavorite Photo series are pics I took, but I can’t take credit for the photo you see above.  Susie was with me when we visited Zongshen to negotiate CSC’s first RX3 order, and during those meetings, Zongshen asked about sending Chinese folks over to ride with us in the United States.  The idea was Zongshen would provide the motorcycles and pay all expenses for a dozen or so riders if we would plan and lead the ride.  During our meeting, good buddy Thomas Fan asked if I had any destination suggestions (Fan is Zonghsen’s marketing director; in the photo above he’s the first guy seated on my left).  Boy, did I ever.  I had a bunch of photos on my laptop from my rides to US National Parks, Baja, and more.  I pulled up the photos, told tall tales about each, and our Chinese hosts were mesmerized.  Sue had the presence of mind to grab my Nikon and snap the photo you see above.   It became an immediate favorite.
Zongshen came through on their promise, and we had a hell of an adventure.  We rode from southern California to Sturgis, cut across the country headed west to the Pacific Coast, and then followed the coast back down to So Cal.  It was a 5,000-mile ride we dubbed the Western America Adventure Ride.  Folks in the US who had purchased RX3 motorcycles joined us on portions of the ride.  It was where I first met Joe Gresh (Motorcyclist magazine sent Joe and he wrote a wonderful story).  The Western America Adventure Ride was a key part of our CSC marketing strategy and it worked.  You can read all about in 5000 Miles At 8000 RPM. Buy the book; don’t wait for the movie.

About those destinations: What Fan didn’t know when he asked if I had any suggestions was that I write the “Destinations” column for Motorcycle Classics magazine.  We did a book on that, too.  You should buy a copy.  If you buy a thousand copies, I’ll ride my Royal Enfield to your place and sign every one of them.


Earlier Phavorite Photos?  You bet!  Click on each to get their story.


Never miss an ExNotes blog…sign up here for free!