By Joe Berk
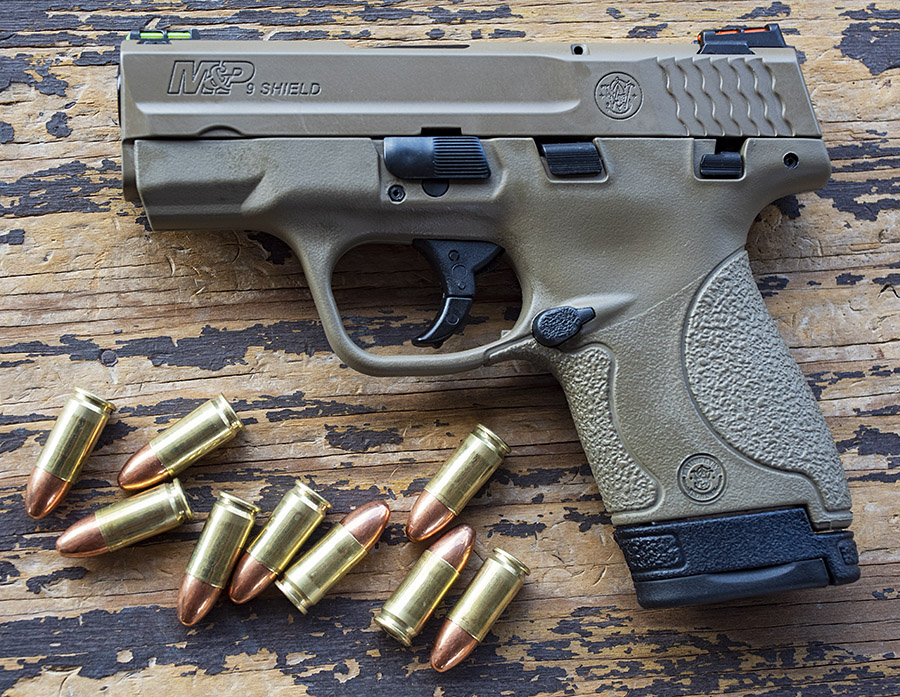
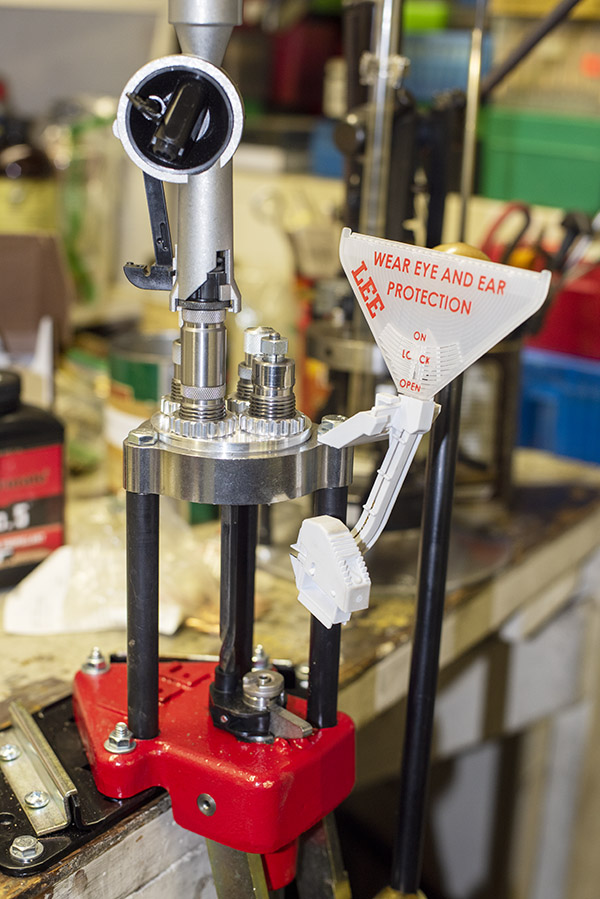
Check out that photo above. It’s a flat dark earth Smith and Wesson M&P 9 Shield, with ammo reloaded using the Lee Classic Turret Press Kit. Yep, this is a “two-fer” blog: A first look at the Shield, and an evaluation of the first loads prepped with the Lee Classic Turret Press Kit.
I initially tried two loads in the Shield:
-
-
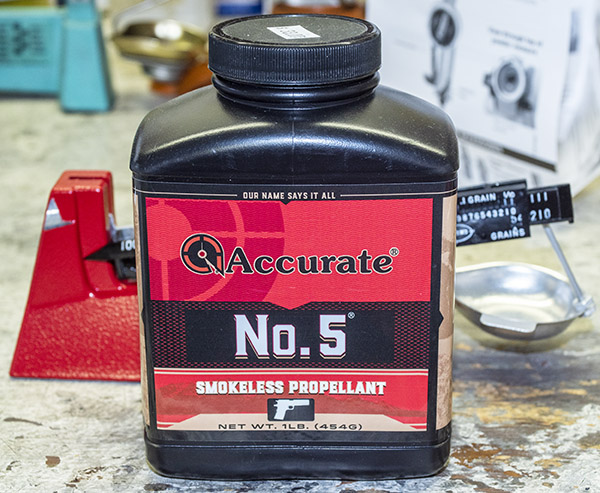
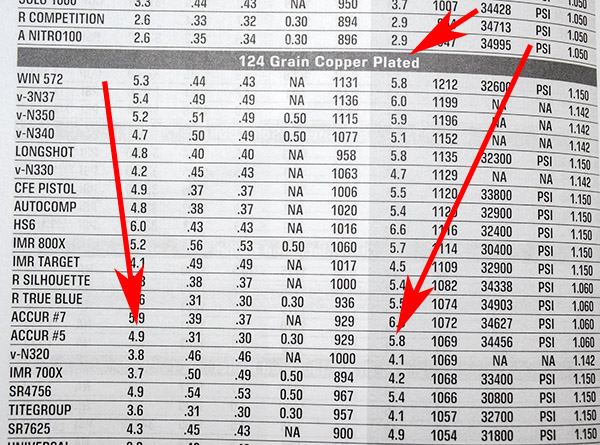
- 124-grain plated roundnose Rainier bullets and 5.2 grains of Accurate No. 5 powder.
- 124-grain plated roundnose Rainier bullets and 5.6 grains of Accurate No. 5 powder.
-
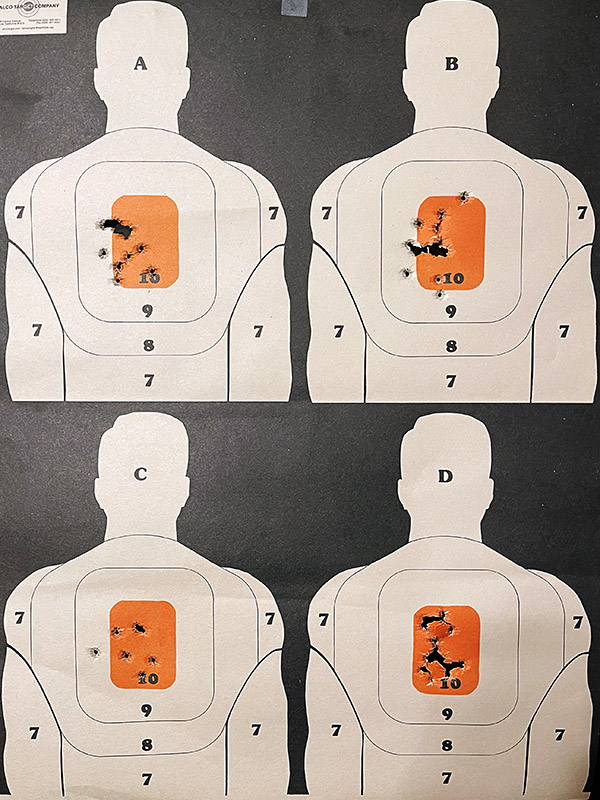
I wanted to start low and work up, partly because that’s good reloading practice and partly because the Shield was new to me and I didn’t know how it would work and what it would like. The first reduced load (5.2 grains of Accurate No. 5 and a 124-grain plated bullet) wouldn’t cycle the Shield’s action. I fired 50 rounds this way, one at a time. I’d have to pull the slide back and release it after each shot. For the Shield portion of the evaluation, I knew I needed to bump up the load. For the ammo portion of the evaluation, every load fed and fired flawlessly. The Lee turret press had done its job.
Bumping up to the 5.6 grains of Accurate No. 5 (still with the 124-grain plated bullet), the Shield’s action cycled but a couple of times the slide closed after the last round in the magazine fired. I fired 50 rounds in this test, loading 5 rounds in the Shield’s magazine each time. The Shield was pushing the slide back far enough to strip off a new round, but on two magazine loadings the slide did not go far enough back to engage the slide stop after the last round. I needed to bump the charge a scosh more. For the ammo eval, every load fed, fired, and ejected flawlessly. Again, the Lee turret press had done its job.
At this point, I knew I needed to go a little higher on the powder charge with the 124-grain plated bullet, and I knew the Lee Classic Turret Press was making good ammo. Everything fed and there were no jams.
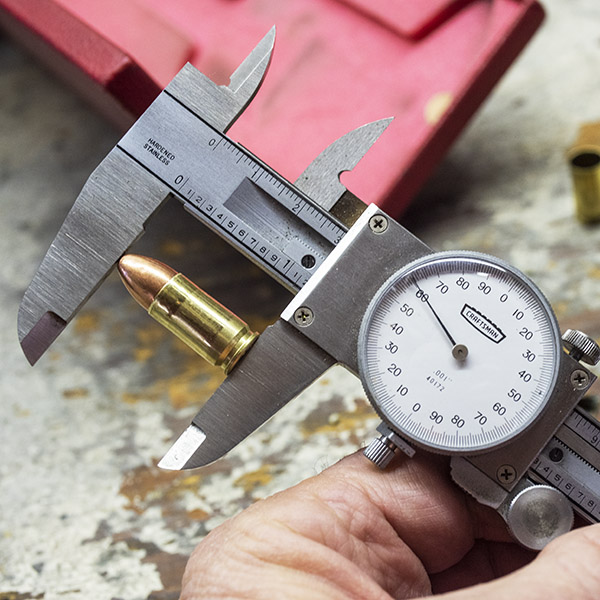
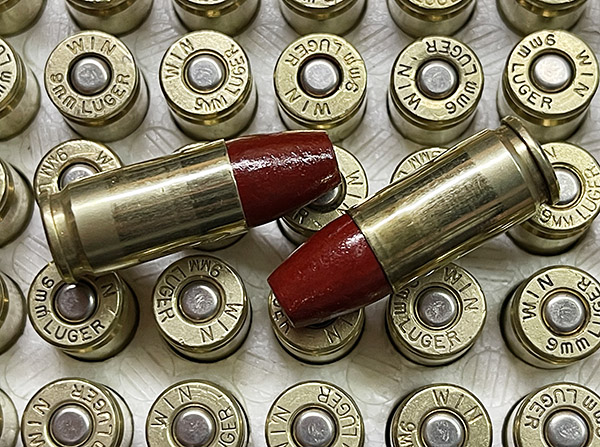
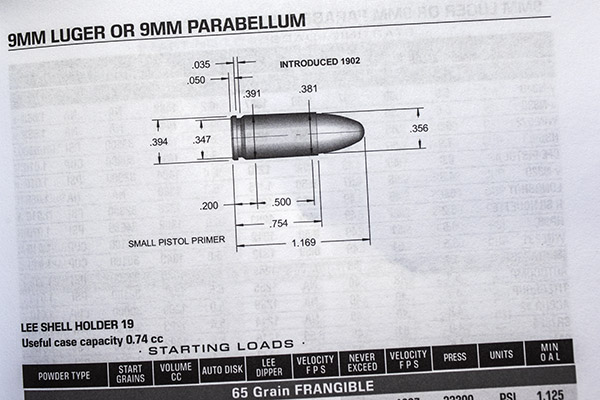
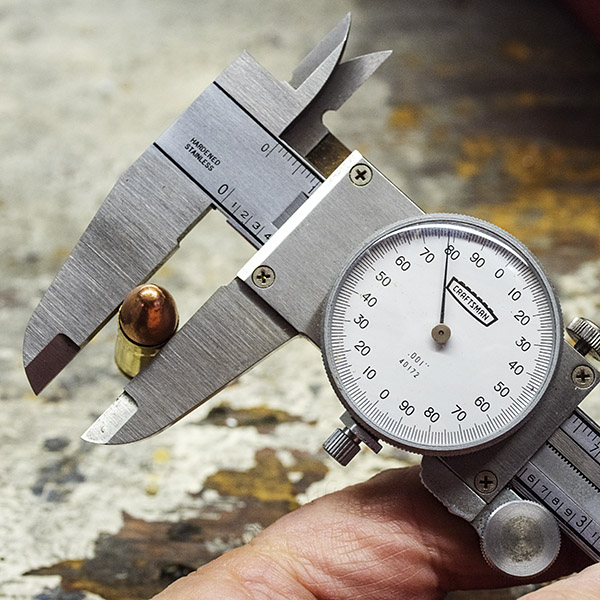
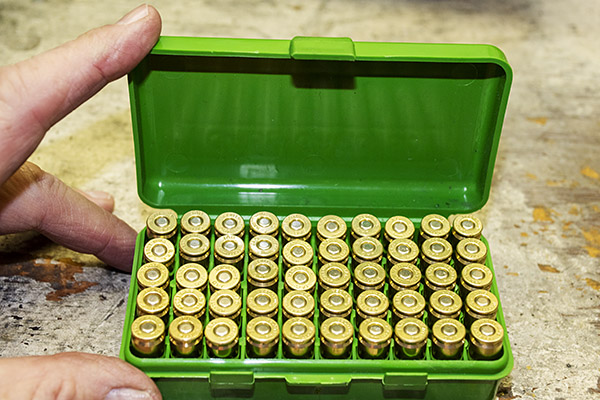
I loaded the above 9mm ammo to an overall length of 1.160 inches, which is longer than I usually load 9mm. The Lee manual has the cartridge overall length with a plated 124-grain Rainier bullet at 1.169 inches. The cartridges would go in the Shield’s magazine and they fed fine when shooting, but when loading them in the magazine, the first cartridge tended to go horizontal instead of being angled up as others were loaded on top of it. That hung up the magazine while cartridges were being loaded into it. In the past, I had normally loaded 9mm at around 1.120 to 1.130 inches overall length. I decided that for my next load I would go up to 5.8 grains of Accurate No. 5, and I would seat the bullets for an overall cartridge length of 1.140 inches. I went home and in 20 minutes I had loaded another 50 rounds. That Lee Classic Turret is fast.

The popup ads keep us going…please click on them!
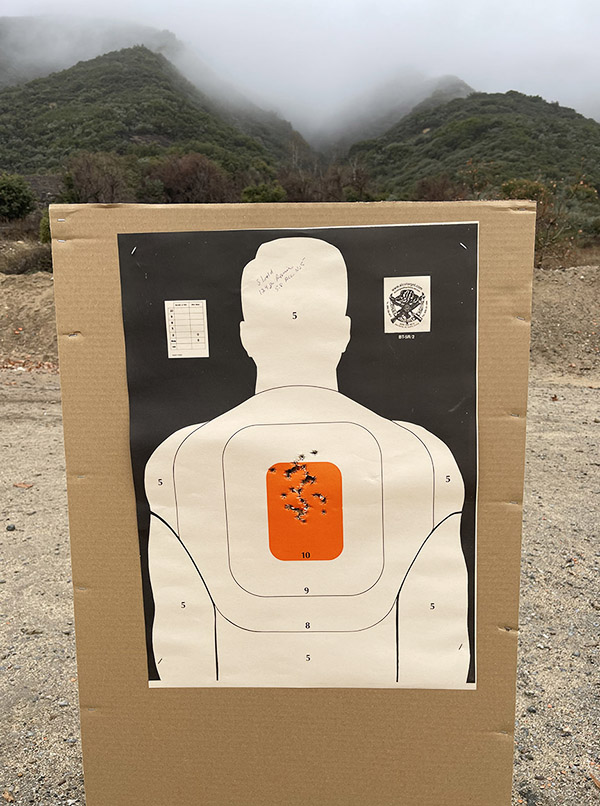
When I returned to the West End Gun Club, I set up a target at 50 feet, took out the Shield, and loaded the first magazine. Loading to a cartridge overall length of 1.140 made it easier to load the magazine. So far, so good.
Next, I fired 20 rounds to assess the ammo’s functionality. Everything worked perfectly. Every round fed, every round ejected, and life was good. The Shield’s bright fixed sights were printing a bit to the left, so I held to the right on a fresh target and rattled off 30 rounds.
The Shield’s recoil was not at all uncomfortable; it was way better than a .38 snubnose revolver. The Shield is a very light pistol (19.0 ounces). That’s lighter than the S&W Model 60 (23.2 ounces) or a Compact 1911 (33.4 ounces). Those weights for the 1911 and the Model 60 may not sound like a lot, but (trust me on this) it’s enough to weigh on you at the end of the day. I guess the Shield’s light weight is the big advantage of a Tupperware gun. I like it, and I like the fact that the gun is pleasant to shoot.
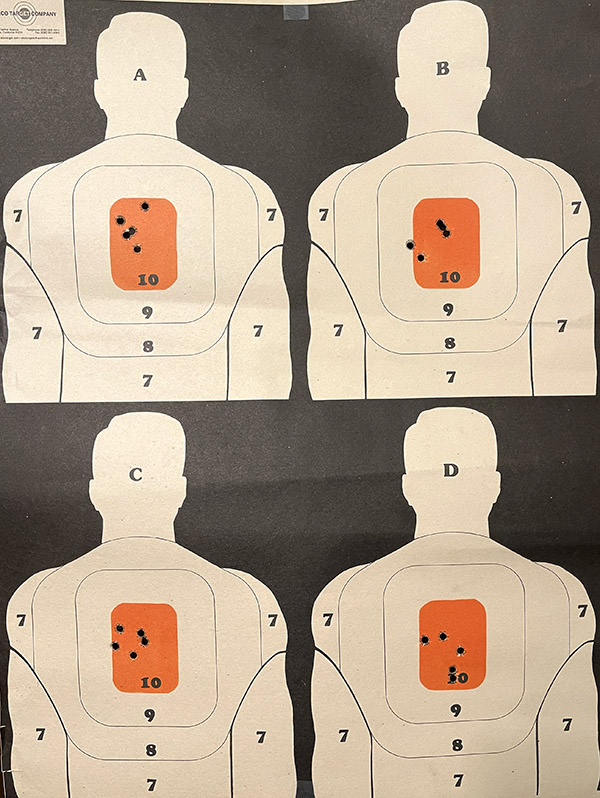
A few days later, I was on an indoor range and I set up the Alco target that has four mini-silhouettes on a single sheet. I ran it out to 21 feet and put 50 rounds on target (dividing them roughly between the four targets), all shot offhand while standing. The load was the same as the one mentioned above. That’s 5.8 grains of Accurate No. 5 and a 124-grain plated Rainier roundnose bullet at an overall cartridge length of 1.140 inches, and for these, I used mixed brass.
I also tried two different powder-coated bullets with Accurate No. 5. One was the 147-grain Boudreau flat nosed bullet with 4.8 grains of Accurate No. 5. This is an accurate load in the Shield (even more so than the plated bullet load mentioned above), but it leaded the bore. The other was the Boudreau 124-grain round nose bullet with 5.4 grains of Accurate No. 5; it, too, leaded the bore. The plated bullets did not lead the bore at all so I think they are a better load. I loaded more 147-grain powder coated bullets with a lighter charge to see if that would eliminate the bore leading, but they did not and I had cycling issues. 4.8 grains of Accurate No. 5 is what this 147-grain powder coated bullet wants.
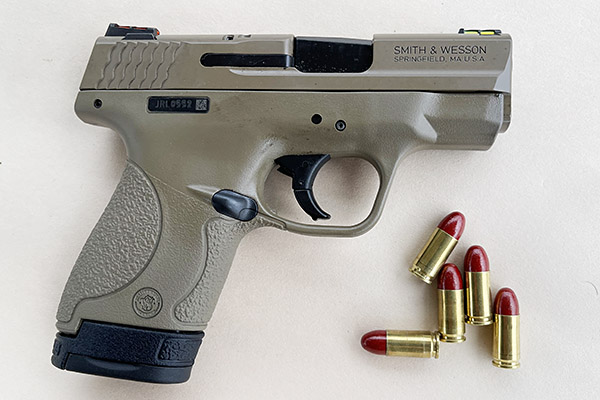
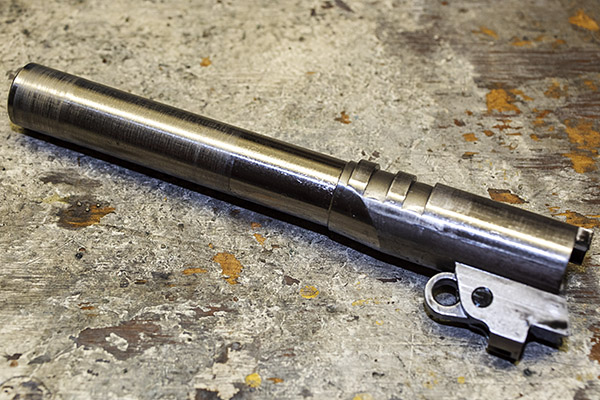
Let’s talk about the Shield a bit. My Shield is the first iteration (not the Shield 2.0, as that model is not sold in California). The Shield has a 3 1/8-inch barrel.
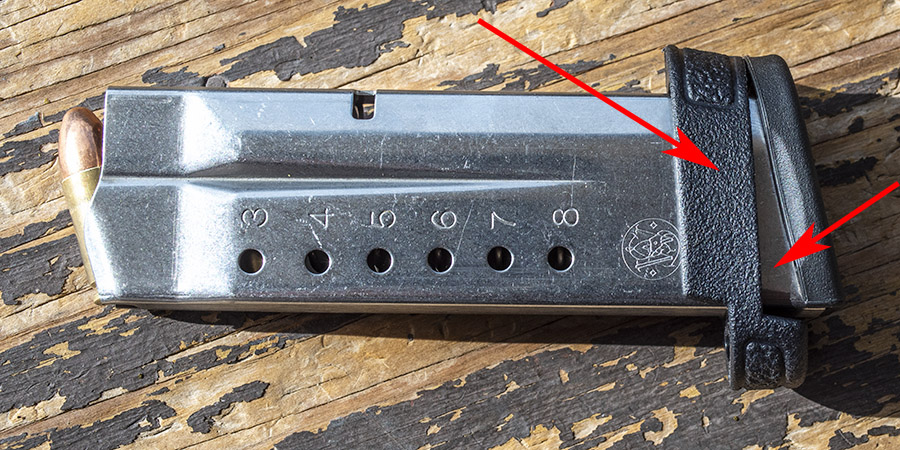
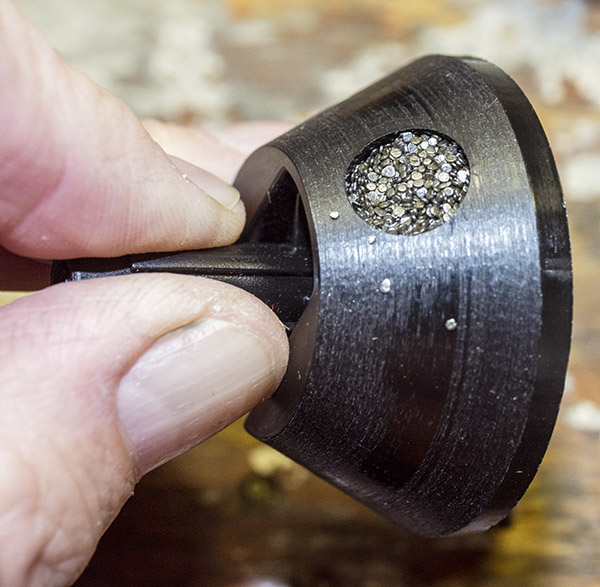
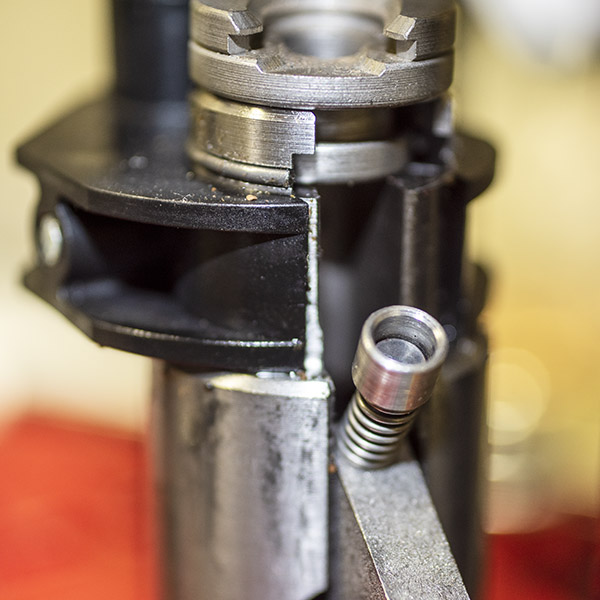
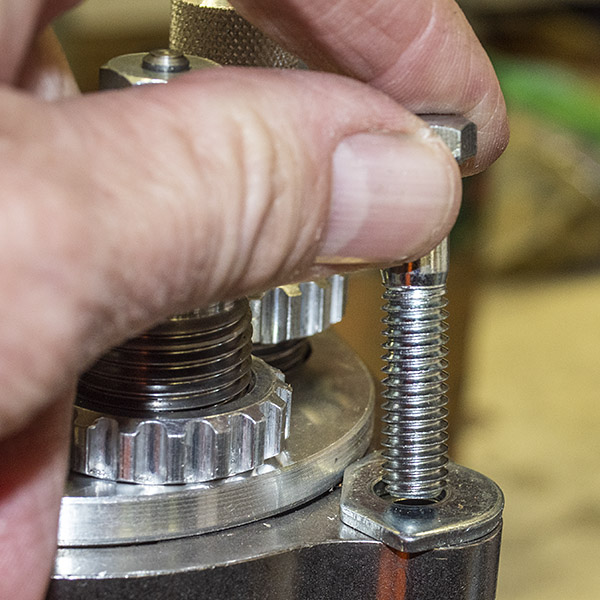
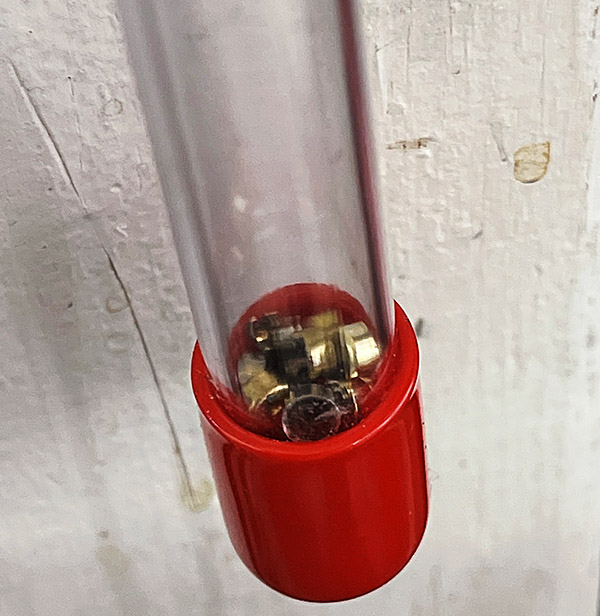
The Shield’s magazine could be better. It has a plastic spacer at the bottom, and that spacer rides up when loading the magazine. Conceivably, it could interfere with seating the magazine in the gun. In my opinion it is a poor design. The collar slides down as easy as it slides up, so that’s good. You get two mags with the Shield. The one you see above holds 8 rounds and it has a grip extender that feels just right to me. There’s another one that doesn’t have the grip extender and it holds 7 rounds. I haven’t done anything with that one, other than checking to make sure it was in the box when I bought the gun.
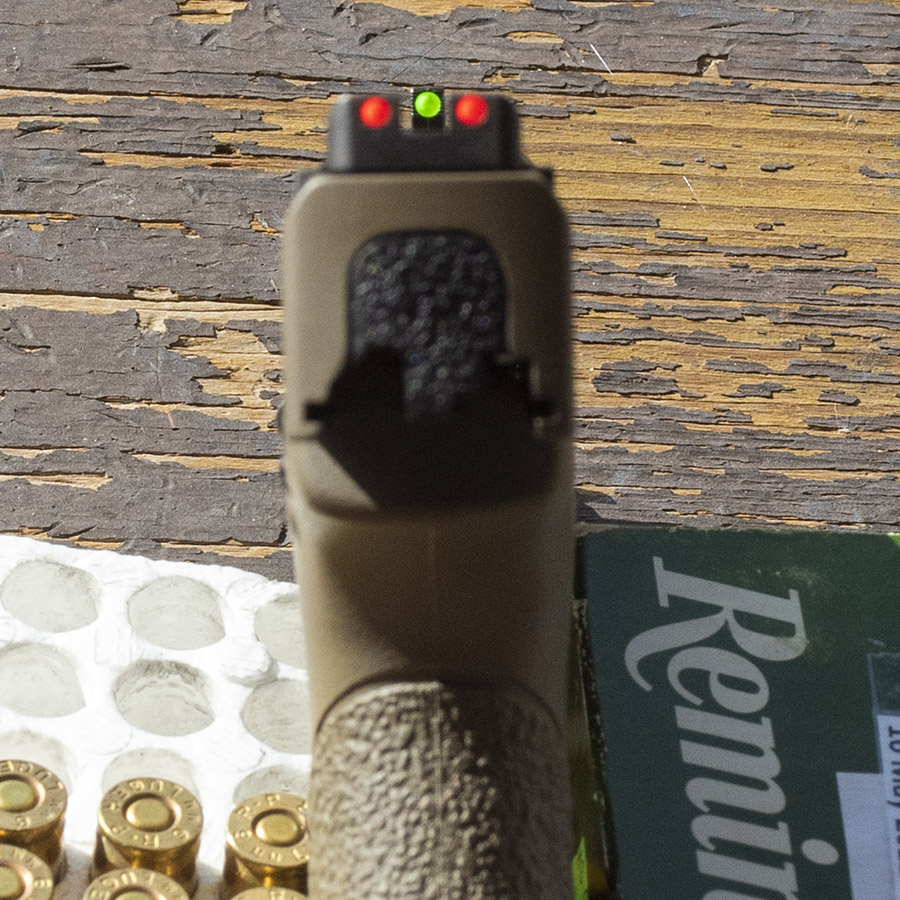
The Shield’s sights are the best I’ve ever used. They are bright and easy to see. The sights let in light from the sides, and that design just flat works. It’s the first gun I have ever shot with these sights. They are better than my SIG P226s’s Tritium sights, and those sights are good. The photo below isn’t enhanced; it’s what the Smith’s sights actually look like.
The Shield’s trigger, in a word, is terrible. There are other triggers available for the Shield, but I will leave this one alone. The trigger got a little better with use and a couple of cleanings (I’ve put about 600 rounds through the Shield so far). The Shield is a striker-fired gun and the trigger is not what I would consider good, but it’s better than it was initially. Compared to a good 1911 like the Springfield, it’s awful. But, it’s good enough to get rounds on target (as you can see above).
The Shield’s slide release, out of the box, was super stiff and essentially unusable. I could release the slide with two thumbs, but not with one. I found it best to pull the slide back and let it go to release the slide. This aspect of the design (or its execution) is poor, and requiring two hands to release the slide is not good for a defensive weapon. A close examination of the slide stop showed that it was rough where it interfaced with the slide, so I judiciously worked it over with 600-grit sandpaper, and it releases more easily now. I can release it with one thumb with no magazine in the gun, but it still takes two thumbs and a lot of effort with the mag inserted and that’s bad. It’s surprising that Smith and Wesson would let this happen.
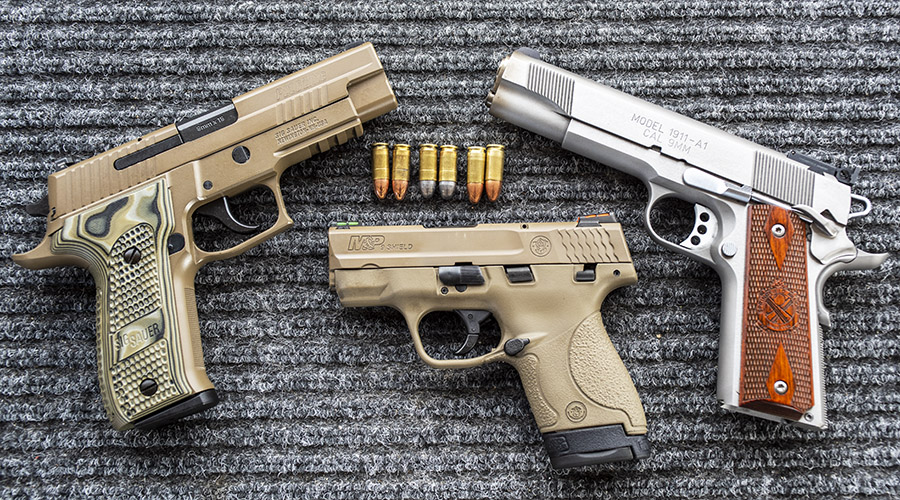
I had the SIG and my 1911 with me when I shot the Shield. The Shield doesn’t look that much smaller in a group photo, but it is flatter and it will carry concealed better. In subsequent blogs, I’ll explore different loads prepared on the Lee Classic Turret press fired in all three of the guns above. I fired a few rounds through the Springfield, and they worked just fine; the same is true for the SIG P226. Interestingly, the lighter loads that wouldn’t work in the Shield did work in the Springfield. It’s counterintuitive, but compact handguns are tougher to make work well than are full size handguns. That’s because the recoil spring in a compact handgun has to be much stiffer than one in a full size gun.
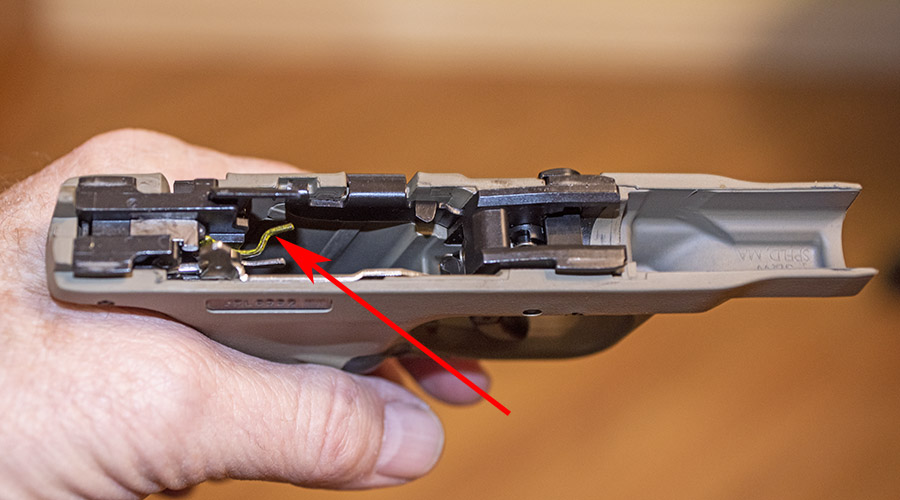
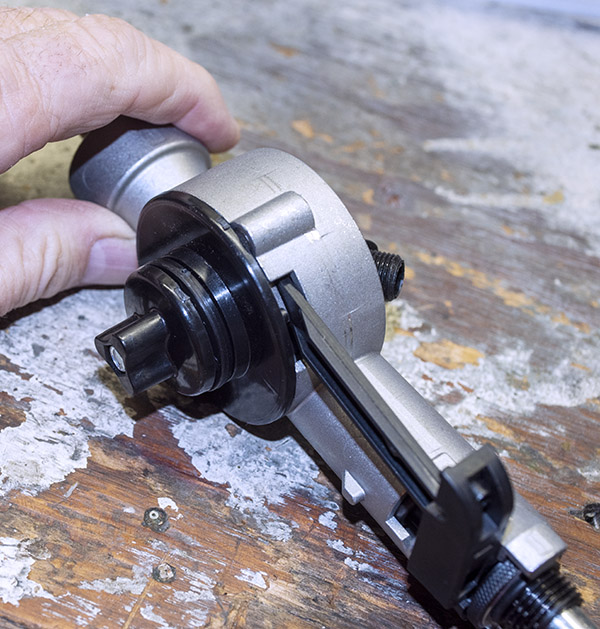
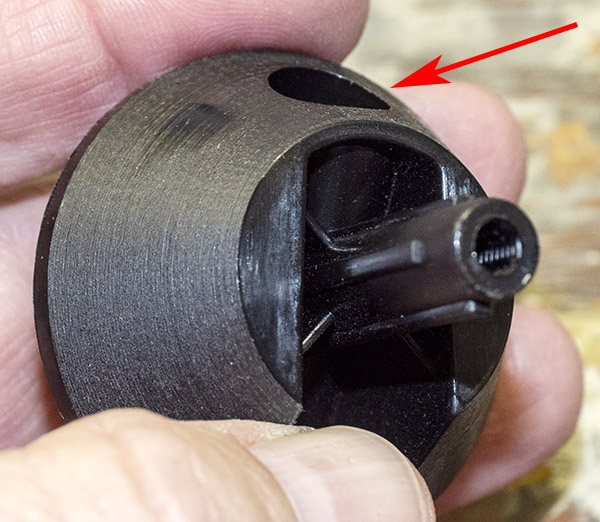
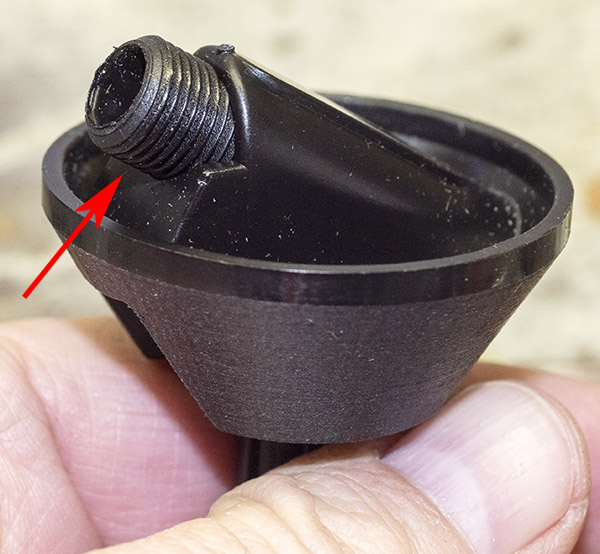
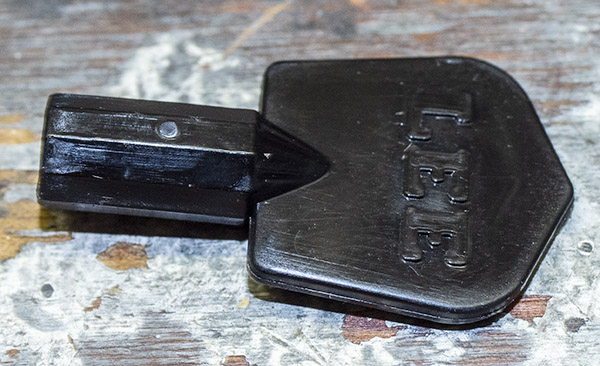
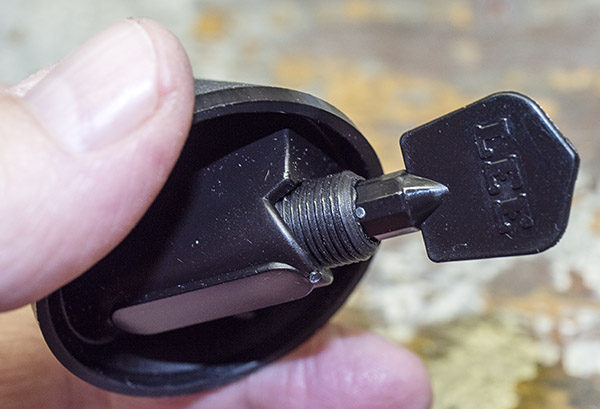
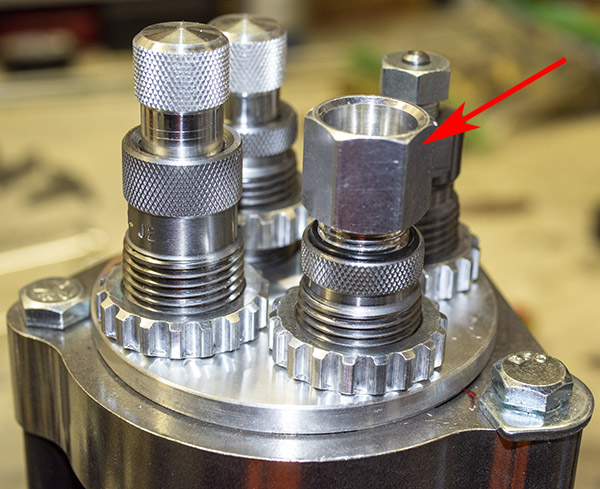
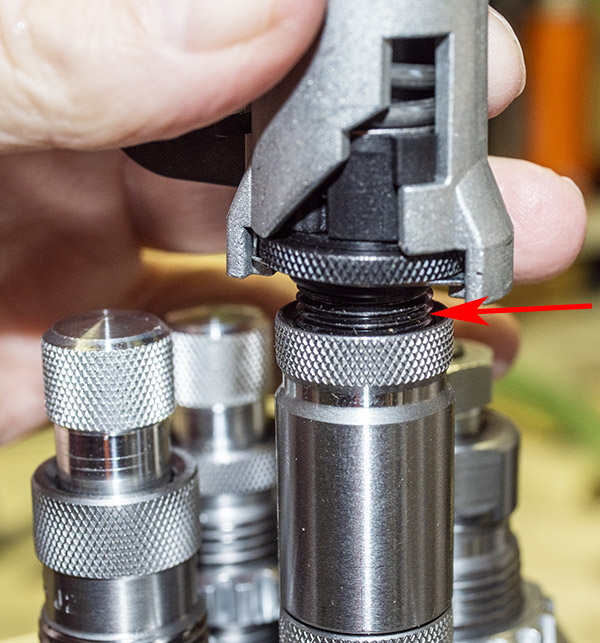
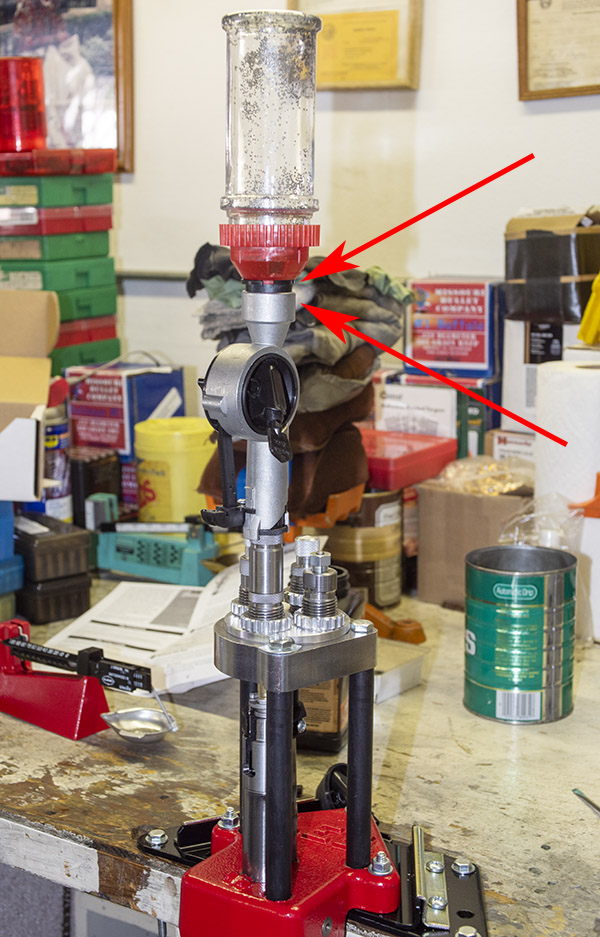
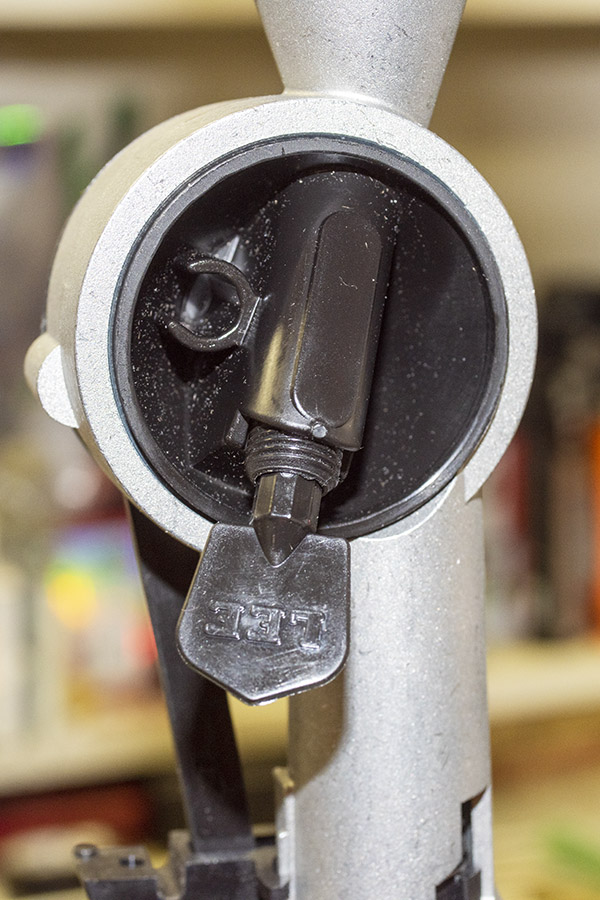
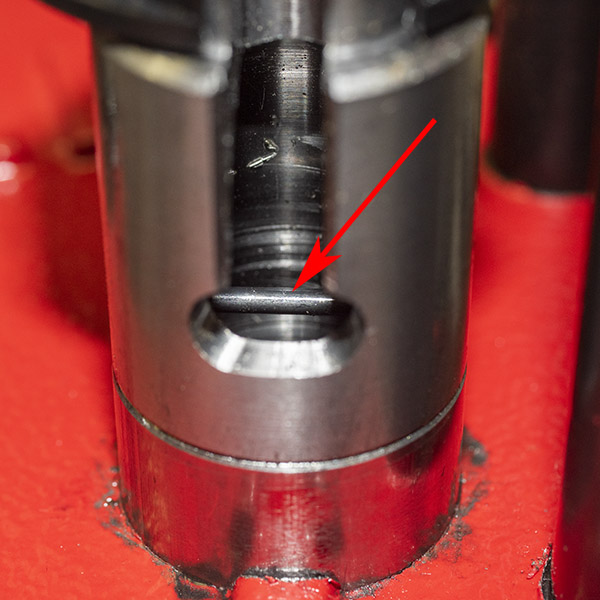
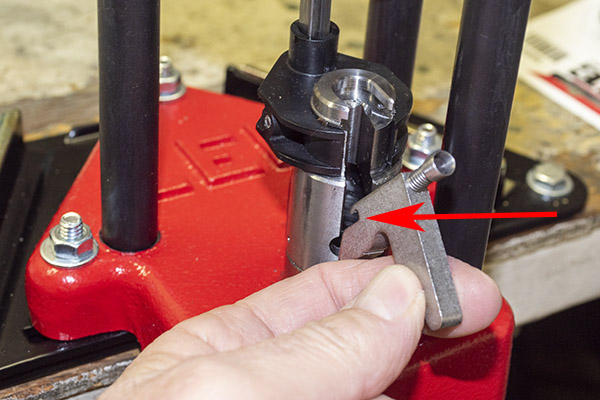
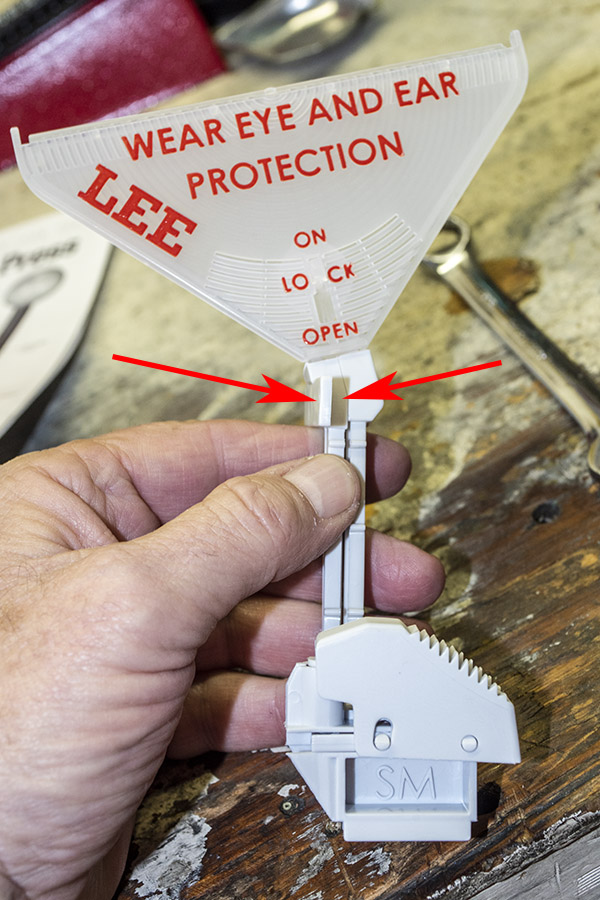
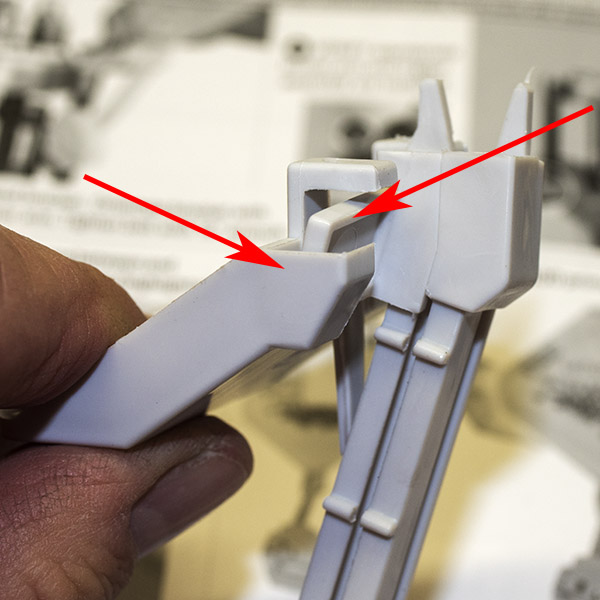
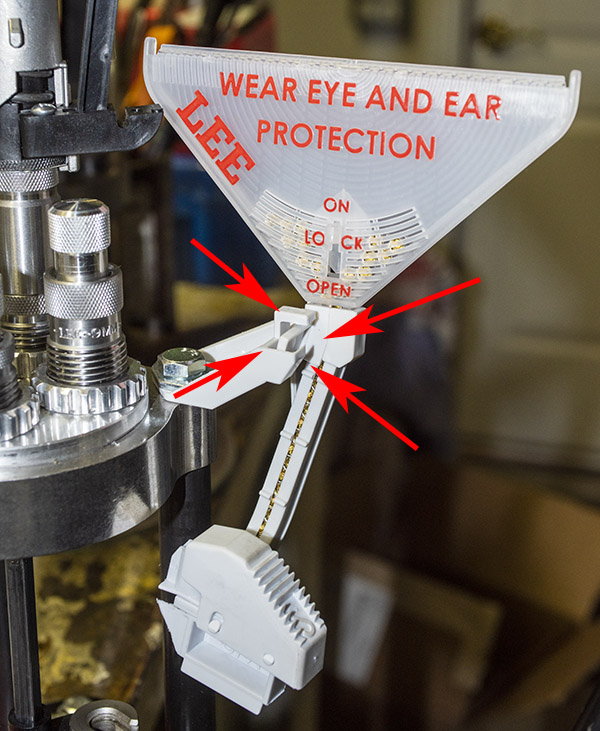
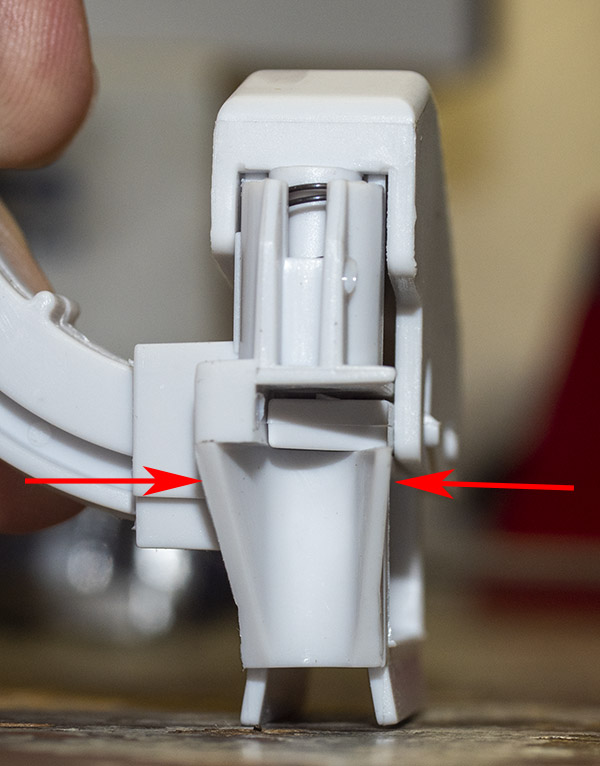
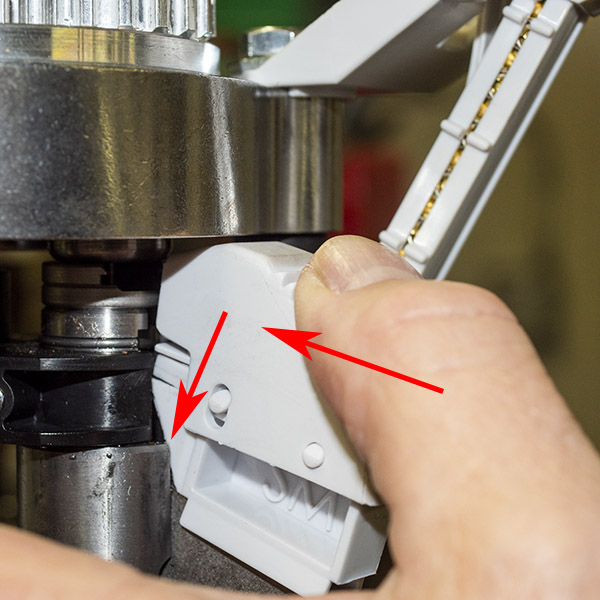
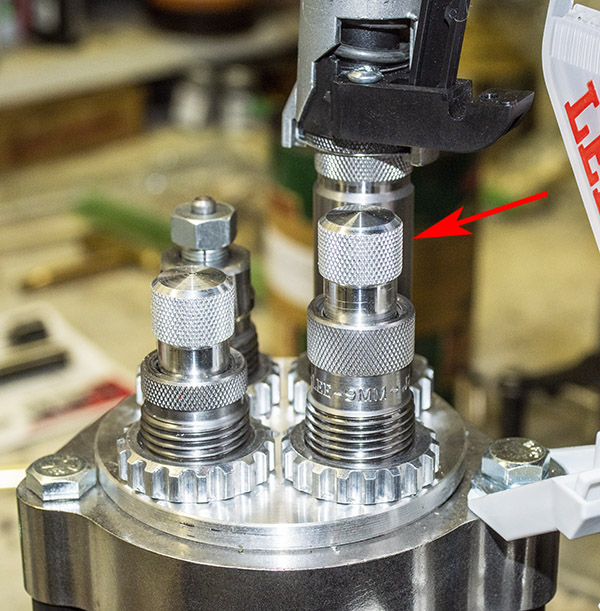
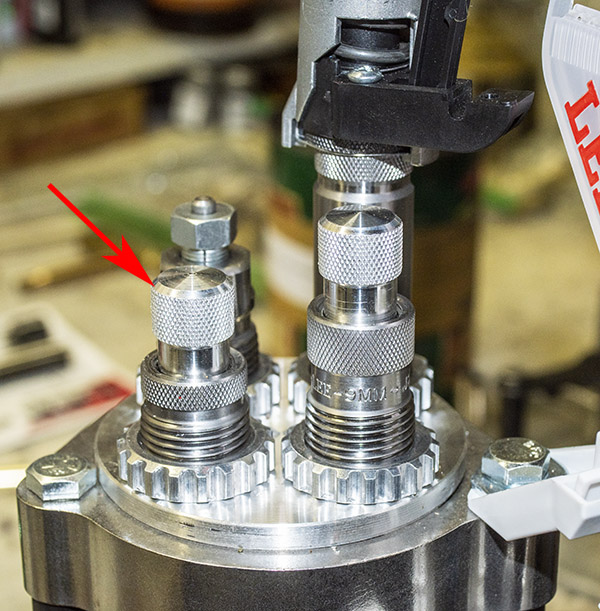
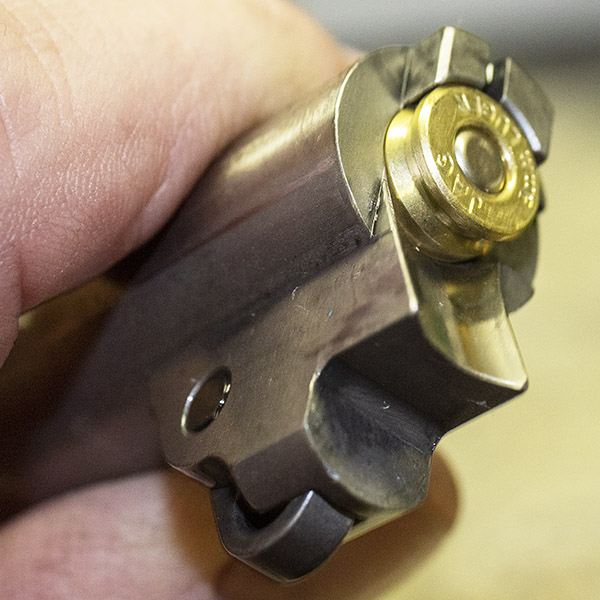
To takedown the Shield, you do not simply unlock the slide takedown lever. There’s a sear deactivation release in the magazine well (identified with a red arrow in the photo above), and you have to push that down before you can turn the slide takedown lever for disassembly. You can’t do it with your finger; you need a small screwdriver or a thin pen. With the SIG, you just turn the slide takedown lever with the slide back.
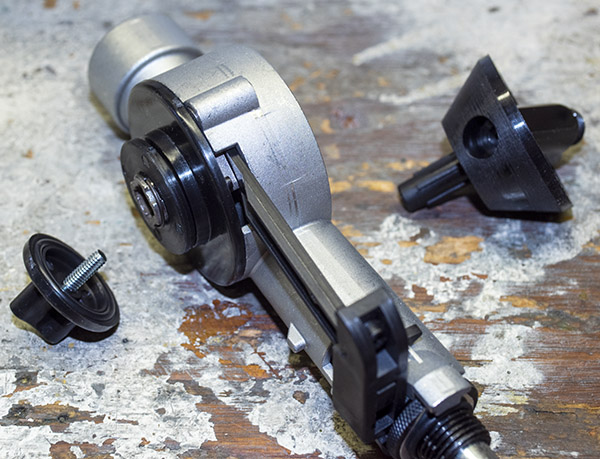
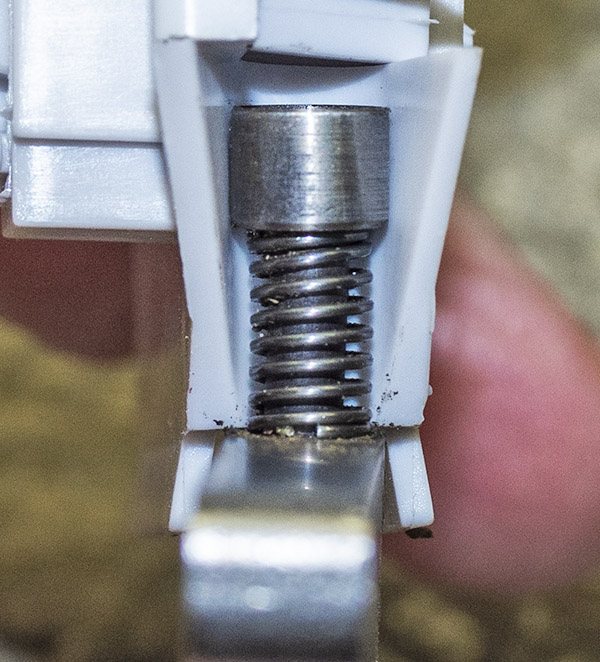
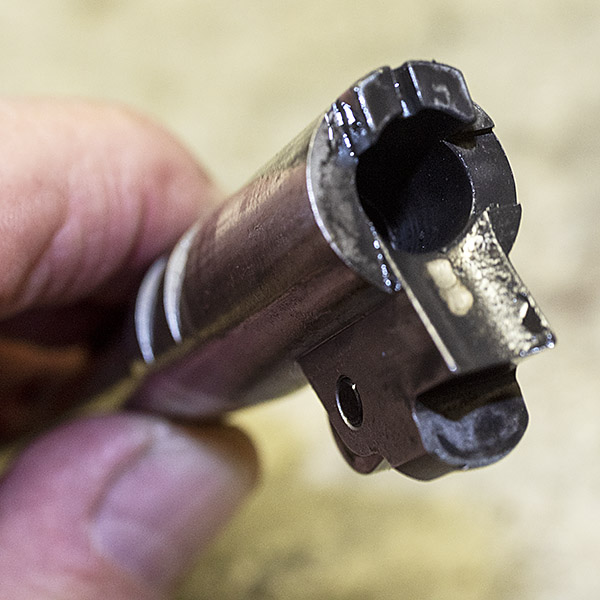
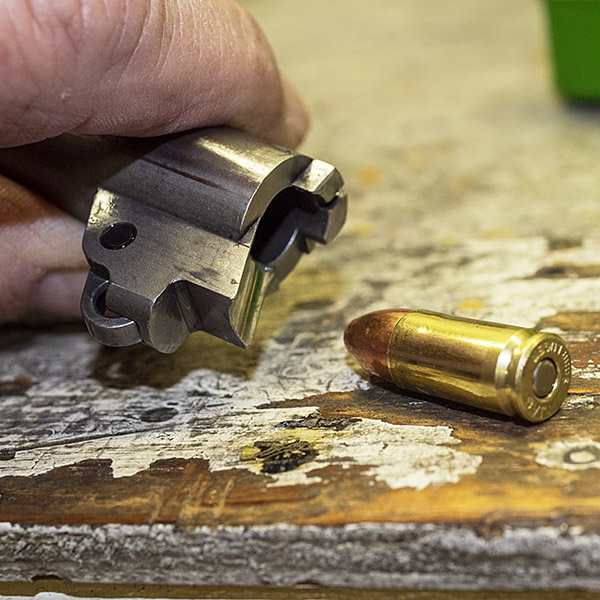
Cleaning the Shield is a breeze. You make sure the gun is unloaded, release the mag, lower the sear deactivation lever, rotate the slide takedown lever, and the gun comes apart. The slide comes off the frame, and the spring subassembly and barrel come out. That’s it. Five parts (the magazine, the receiver, the barrel, the spring subassembly, and the slide.
The plated ammo I loaded on the Lee turret press didn’t lead at all. Zero. Zip. Nada. The powder coated bullets did, which surprised me. All were accurate.
The bottom line? Let me put it this way: I like the Shield; I love the Lee Classic Turret Press kit. The Shield will get better with more shooting and I want to try more loads in it, but that 5.8-grains of Accurate No.5 and 124-grain plated Rainier roundnose load is a winner. The Lee Classic Turret press and all its accessories were good to go right from the beginning. Its design and quality are excellent.
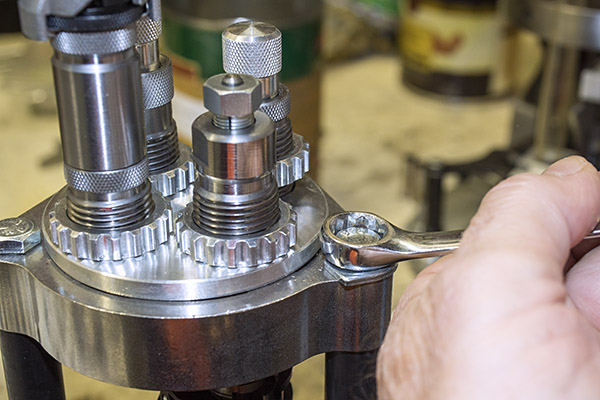
The Lee Classic Turret Press…what can I say? It’s awesome. It’s fast, easy to use, inexpensive, and it makes great ammo. I say it’s the best bang for the buck in the reloading world. As an engineer I’m impressed; as a consumer and reloader I am delighted. I have already fired several hundred rounds loaded on the Lee Classic Turret Press in my Shield, the Springfield, and the SIG and once I settled on a load, every one of them fed, fired, extracted, and ejected perfectly in three different handguns. I had a box of 1000 124-grain plated 9mm bullets a few days ago; I like the Lee turret press so much they’re all gone now (they were either sent downrange or they’ve been loaded and labeled and they’re waiting their turn to go downrange). I love reloading and shooting; I love it even more now that I’m loading with my Lee turret press.
A word of caution here…these loads performed acceptably in my guns. Your firearms may vary and you need to develop your own loads. Always start low and work up in any load development program.
Never miss an ExNotes blog:
More Tales of the Gun!
More information on Lee reloading gear.
Our earlier blogs on Lee equipment:
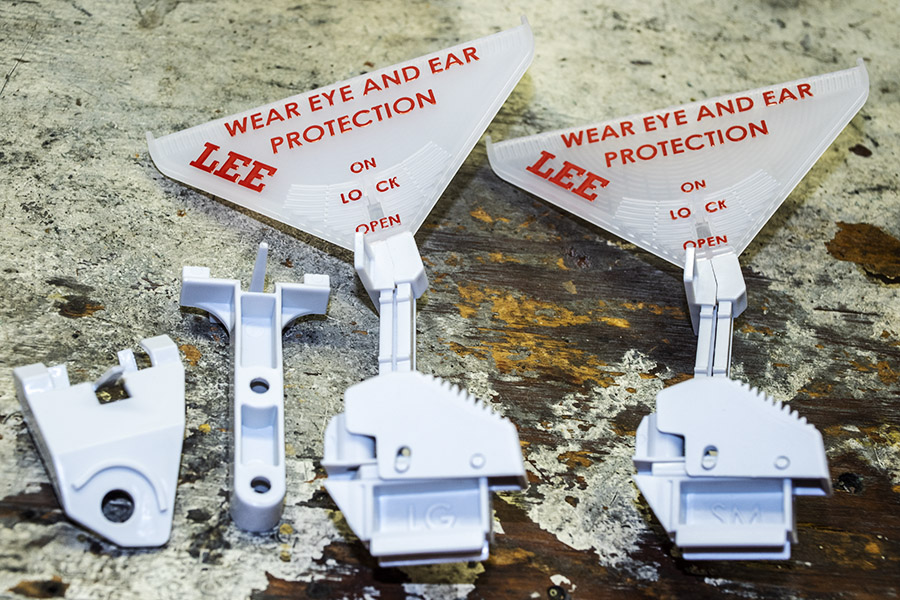
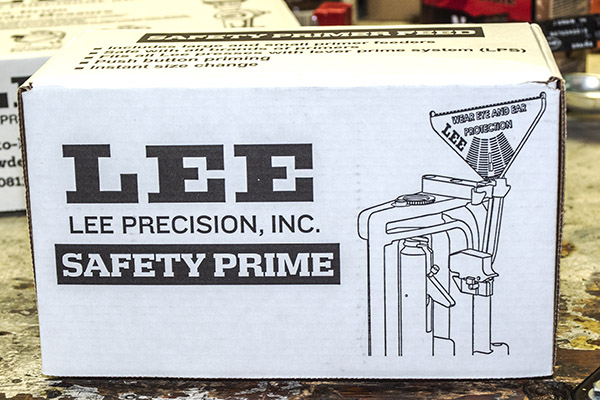
Lee Safety Prime
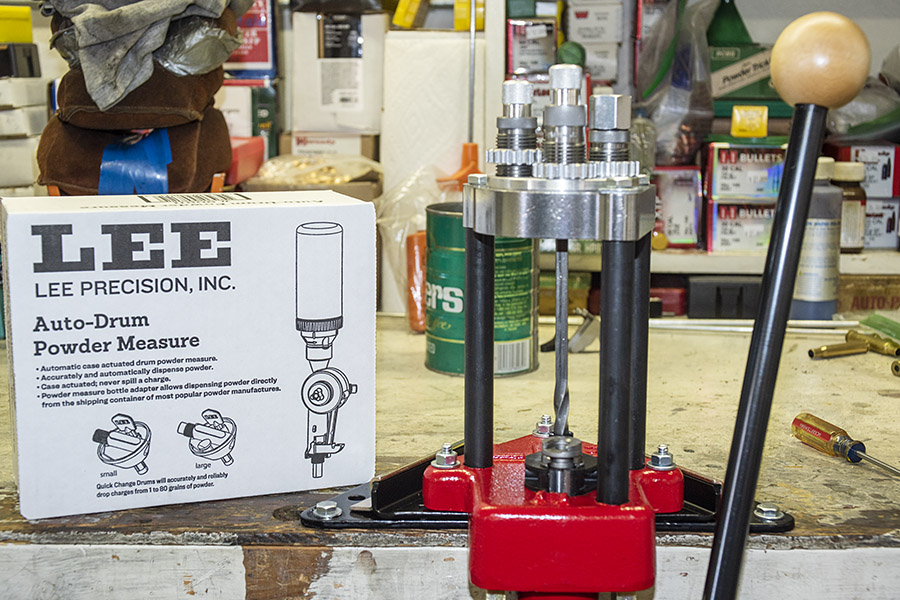
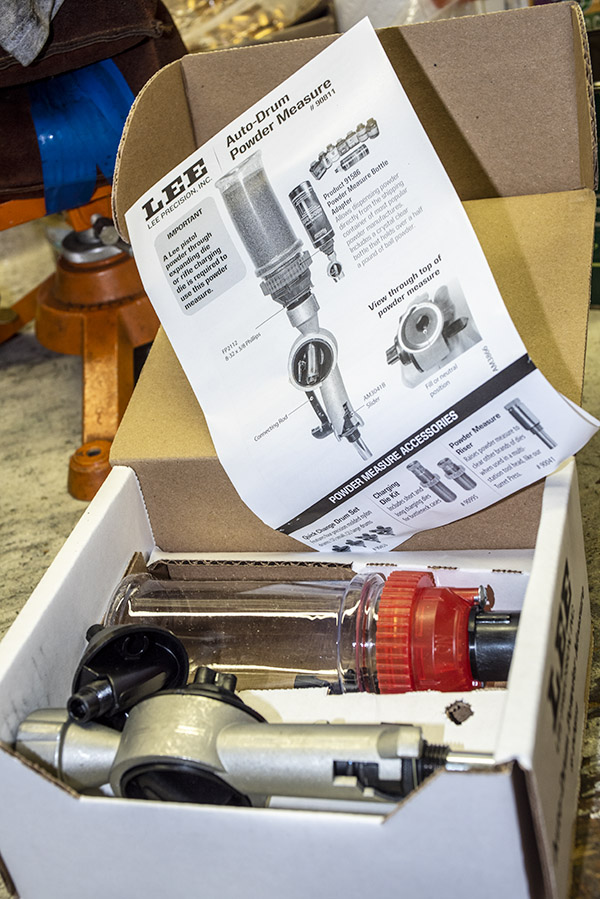
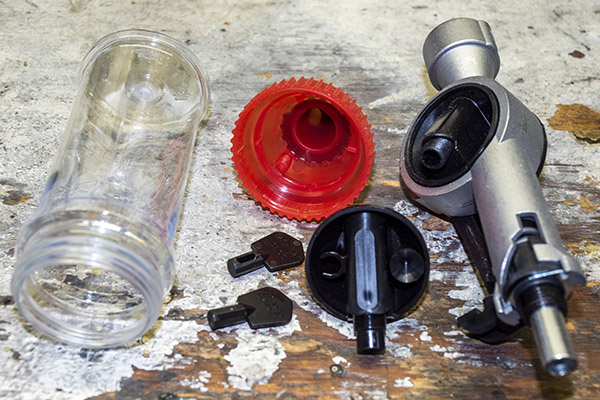
Lee Auto-Drum Powder Measure
Lee Classic Turret Press Kit
Lee Bench Plate
Lee’s Modern Reloading Manual
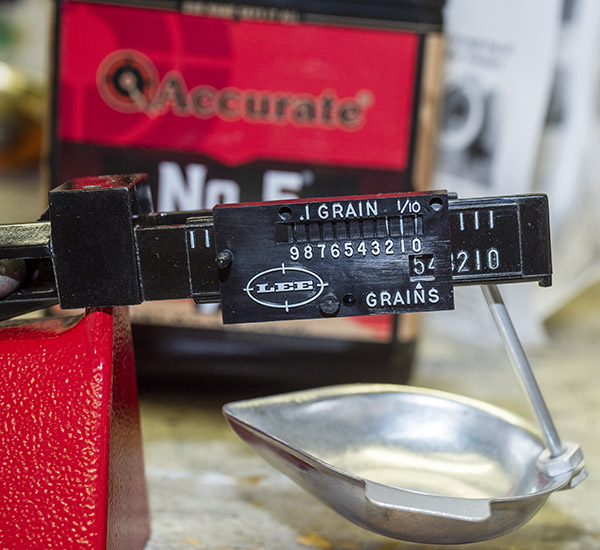
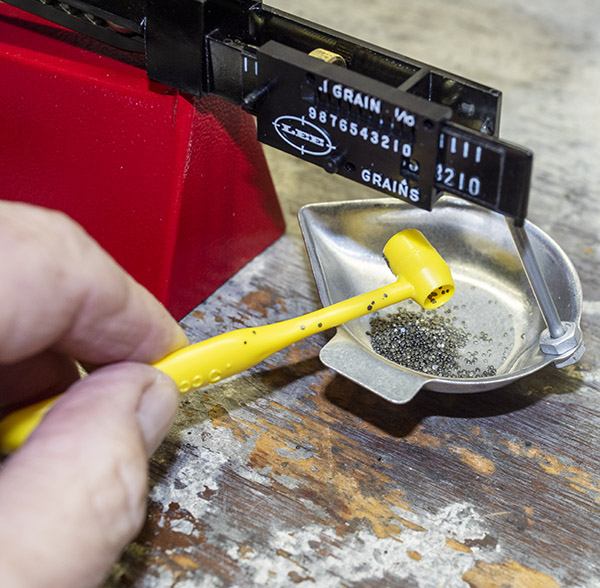
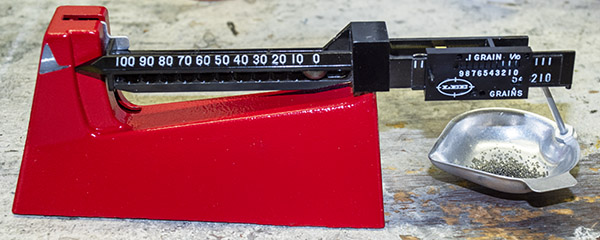
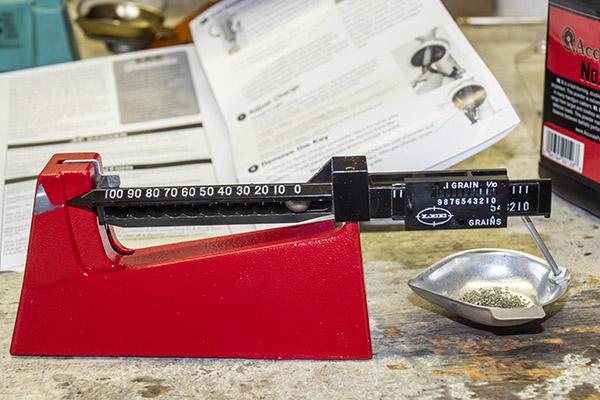
Lee Safety Powder Scale
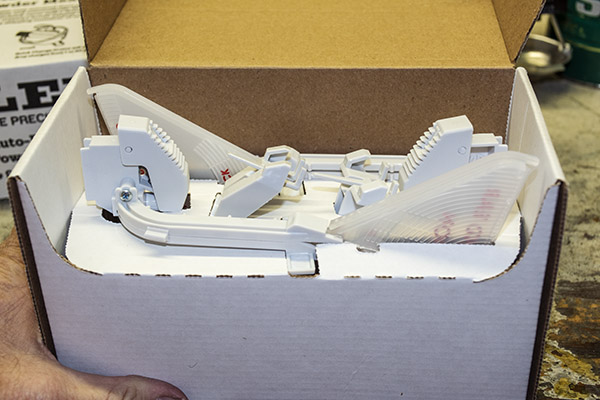
Lee Classic Turret Kit Unpacking
Lee .44 Magnum Dies 1
Lee .44 Magnum Dies 2
Lee .44 Magnum Dies 3
Lee .357 Magnum Dies


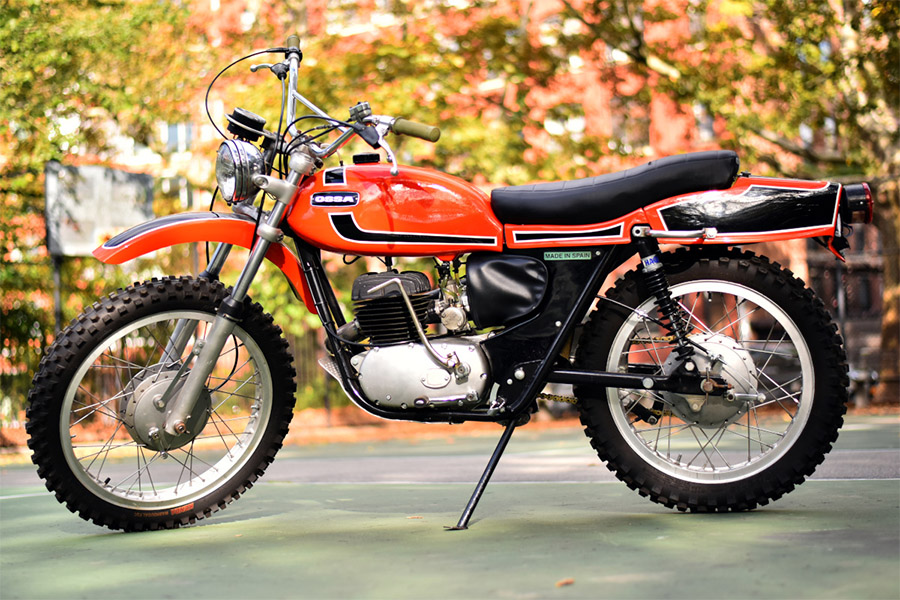
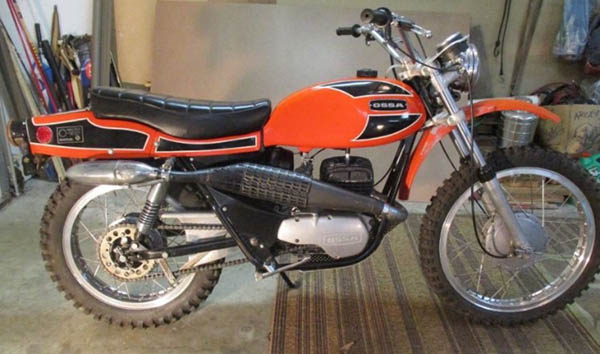
 Mostly Bultacos and Maicos were racing in Haines City back then but one guy had an Ossa Pioneer with the lights removed. The rider was good. He would get crossed up over the jumps and finished in the top 5 against real race bikes. I loved how the rear fender blended into the bike. That fiberglass rear section had a small storage area inside. One of the bike magazines of the era tossed a loose spark plug in the storage and went scrambling. The plug beat a hole in the rear fender and they had the nerve to bitch about it. Hell, I knew at 10 that you have to wrap stuff in rags on a motorcycle.
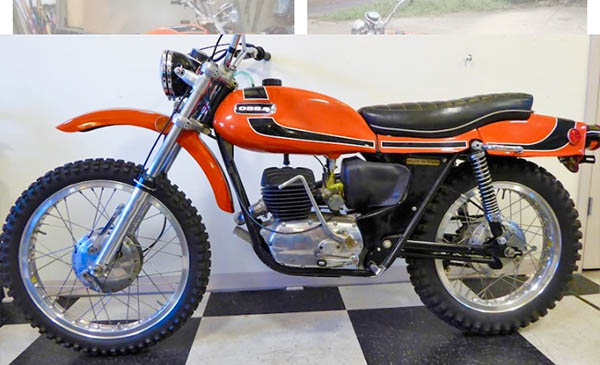 It rains most everyday in Florida and it started pouring. The races kept going for a while but finally had to be called because it was a deluge. You could hardly see to walk. There was no cover so we huddled in the leeward side of the ticket stand out by the entrance. It rained harder, the wind was howling. Wearing only shorts and T-shirts we were getting colder and colder. My lips were turning blue, man.
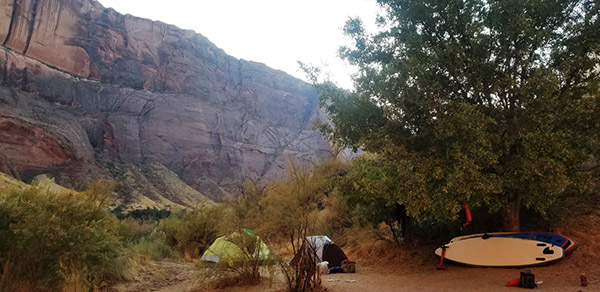
 The adventure began with camping near Page, Arizona, and a day of light paddleboarding on Lake Powell to gain more familiarity and confidence on the board. This was more for myself, as the two friends I was traveling with were both very experienced paddlers. My paddling to this date was limited to a couple of 8-mile runs on the Salt River near Phoenix and a horrible windy day off the Colorado River where we launched from Hoover Dam. The Salt River had portions of minor rapids, but the environment was much tamer than we would experience along the Colorado River.


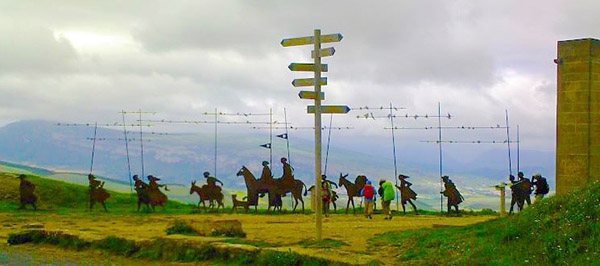 There are several routes of the Camino de Santiago, including the Camino Frances (French Way), which is the most popular, and the Camino Portugués (Portuguese Way), which starts in Lisbon or begins in Porto for a two-week shorter Camino. The Camino de Santiago is a long-distance walk or hike that typically takes 30-40 days to complete, depending on the route and the pace of the individual pilgrim.