Fighting Mud With Mud

By Joe Gresh 

ExhaustNotes readers may think I pour a lot of concrete but that’s not really true. I do pour concrete frequently but only a little at a time. My limiting factor is how much total work I can get done in one day. That number dwindles as I grow older. I pour 30 to 40 60-pound bags of 4000 psi concrete on average. Any more and I start to have problems keeping up the finish work and any less is not worth getting the tools dirty. Cleanup takes a lot of time and if you don’t wash everything each time your tools become encrusted with dried concrete. It’s never fun to work with heavy, dirty tools.

Take my latest project, the driveway in front of the little shack we call The Carriage House.  In an attempt to class up the place I am removing the existing driveway, which consisted of remnants of old rugs thrown over dirt. We acquired the rugs from a Physical Therapy training center. The PT rugs were in great condition and very sturdily constructed. Best of all they were free. The rugs served us well for many years by adding a semi-pervious layer between our feet and the dirt below. Engineered earth is the technical term, I think, for fabric-supported fill.

Of course, old rugs aren’t the most perfect solution for driveways or everyone would be using them. You’d see them in Beverly Hills or New York City, not just in poverty stricken rural areas. After several years the rugs become impregnated with dirt and are impossible to vacuum, much less shampoo. Being semi-pervious you still get mud underneath the rug although you don’t sink in as far as you would if going bare earth.

For this driveway I’m using a decorative finishing method called No Need To Square.  No Need To Square means just that: the concrete is formed and finished in a random pattern giving the illusion of being made from many individual pavers. No Need To Square frees the concrete from The Man’s rigid, conformist hierarchy. It allows the finisher to follow the jagged contours found in the crystalline structure of cast Iron like you see in those electron-microscope photographs. The only constant is the slope that steers water runoff towards the drainage ditch running alongside The Carriage House.

Just as a cubist must master fine arts before experimenting with abstract art, the concrete finisher must master the square before leaving it far behind. Unfortunately, I am neither an artist nor a concrete finisher so things can go pear shaped quickly if you don’t mind your grades.

I’ve purchased a new tool for this driveway project: a belt-mounted tie wire spool. Tie wire is used to tie rebar together so that it doesn’t shift position when the concrete pours into the form or clumsy finishers kick it around when striking off. I owned a spool many years ago when I was a construction worker. My old one was more open, like a cage. You could see the wire in the spool, unlike this new one. I don’t know what happened to that old spool.

You’d think as often as I do little concrete pours I would have bought a wire spool sooner and I would have except for the price. The things are like $47 at Home Depot for an off-brand spool. I found a Klein brand spool on Amazon for only a dollar more than the clone version at HD. I’ve seen cheaper, plastic versions and they probably work fine.

There are basically two types of ties for re-bar: the saddle for tying re-bars that cross at right angles and the plain old loop for tying straight pieces together. I like to make up a bunch of each type before starting to tie. Real iron workers make up saddles and loops as they go so because it’s faster and they don’t have to carry a bunch of little, pre-made bits.  I’m never in a hurry. Sitting in a chair with New Mexico’s warm, winter sun shining down on me gives the pre-tying process a sort of Zen-like quality. Sometimes I fall into a trance and end up making 600 of the things.

If you’ve tied much wire you know how easily an unspooled roll of wire can unwind and get tangled up. Pulling wire from the center results in a pig’s tail that you need to straighten out before using. I always double up my wires, as a single strand is easy to break when twisting the rebar tight. The doubling method uses twice as much wire but it makes for a secure grid of rebar. It’s also easy to get stabbed with tie wire and the spool allows you to wind it back inside for the safety of everyone involved on the project.

I’m going to tackle the driveway in two parts: the southern and northern wings. I’ll do the southern (higher) side first. That will give CT somewhere to park while I work on the northern (lower) section. I expect to be working on the southern section for a month or so before the weather gets too cold and I take a break and go back to tying up loose ends on motorcycles.


Help us help you:  Please click on the popup links!

The Wayback Machine: 7 Favorite Baja Destinations

By Joe Berk

We’re introducing something new here on ExNotes.  We publish new content every other day (sometimes more often, sometimes less often, but we’ve been pretty good about bringing you new stuff).  But what about the days we don’t publish?   We’ve published about 1200 blogs in the last four years, and a lot of them received super responses.  So, on the in between days when when we don’t publish new material, we’re going to select some of our favorites from the past.   This is the first.  Every one of these reruns we’ll be preceded by The Wayback Machine in the title.

Enjoy, my friends.   And don’t forget:

Click on the popup ads!


Baja is a motorcycling paradise and I have a bunch of favorite destinations there.  Seven of them, to be precise, although truth be told, I like everything in Baja except for Tijuana and maybe La Paz and Loreto.  That said, my favorites are:

      • Tecate
      • San Quintin
      • Cataviña
      • Guerrero Negro
      • San Ignacio
      • Santa Rosalia
      • Concepcion Bay

Here’s where they are on a map:

So what’s so great about these places?  Read on, my friends.

Tecate

Tecate is the gateway to the middle of northern Baja, and it’s the easiest point of entry. Both Tijuana and Mexicali are too big and too complicated, and the Mexican Customs guys are too official in those bigger cities.  Tecate is a friendly place.  The last time I picked up a tourist visa in Tecate, the Customs officer tried to sell me salsa he and his family made as a side gig.  That’s what the place is like.  I love it.

If you’re into fine dining (not as in expensive dining, but just great food), it’s hard to go wrong anywhere in Baja.  Tecate has some of the best, from street taco vendors to Malinalli’s to Amore’s.  I could spend a week just in Tecate.  It’s that good.

Uncle Joe Gresh with street tacos in Tecate. Wow, were they ever good.
The buffet at Malinalli’s is regional, awesome, and inexpensive. It’s a hidden treasure.
Dos Joes’ motos on an Enfield expedition that took us through Tecate.
The Tecate brewery dominate the Tecate skyline and is visible from just about anywhere in town. A can of ice cold Tecate with sea salt around the rim and a bit of lime juice…life doesn’t get any better.

San Quintin

San Quintin is 186.4 miles south of the border on Baja’s Pacific coast.  It’s usually a quiet ag town that has a lot of things going for it, including interesting hotels, good food, and Bahia San Quintin.  The Old Mill hotel and its associated restaurant, Eucalipto, is my personal favorite.  The hotel is about 4 miles west of the Transpeninsular Highway, and what used to be a harrowing soft sand ride to it is now easy peasy…the road is paved and riding there is no longer a test of your soft sand riding skills.  The Eucalipto restaurant is second to none.

What could be better than an ice cold Tecate overlooking Bahia San Quintin after a day’s riding in Baja? We once saw a California gray whale from this very spot.

A man, a motorcycle, and Mexico….the sign on the Transpenisular Highway pointing toward Bahia San Quintin and the Old Mill Hotel. The bike? That’s the 650cc Royal Enfield, perfect for riding Baja. But then just about any motorcycle is perfect for riding Baja.
Bahia San Quintin at dawn. It’s an awesome spot.
Uncle Joe enjoying breakfast in the Old Mill’s Eucalipto. It is an exquisite restaurant.

You’ll notice at the top of my scribblings about San Quintin I said it is usually a quiet town.  The one exception for us was when there was a labor riot and we were caught in it.  The Mexican infantryman about 80 miles north of San Quintin told me the road was closed, but his English matched my Spanish (neither are worth a caca), and without me understanding what I was riding into, he let me proceed.  It’s not an experience I would care to repeat.  But it’s the only event of its type I ever experienced in Old Mexico, and I’d go back in a heartbeat.

The Cataviña Boulder Fields

Ah, Cataviña.  Rolling down the Transpeninsular Highway, about 15 miles before you hit the wide spot in the road that is Cataviña you enter the boulder fields.  Other-worldly is not too strong a description, and if the place wasn’t so far south of the border it would probably be used more often by Hollywood in visits to other planets.  The boulders are nearly white, they are huge, and the juxtaposition of their bulk with the bright blue sky punctuated by Cardon cactus.

Pastel geology. The area really is as beautiful as the photos depict it to be.

I get a funny feeling every time I enter this part of Baja. Not funny as in bad, but funny as in I feel like I’m where I belong.  I once rolled through this region in the early morning hours with my daughter and she told me “you know, it’s weird, Dad.  I feel like I’m home.”  She understood (as in completely understood) the magic that is Baja.

I like the area and its stark scenery so much that one of my photos became the cover of Moto Baja!  I grabbed that shot from the saddle at about 30 mph on a CSC 150 Mustang replica, which I subsequently rode all the way down to Cabo San Lucas (that story is here).

You should buy a copy or three. They make great gifts.

Every time I roll through Cataviña with other riders, the dinner conversation invariably turns to how the boulders formed.   When I was teaching at Cal Poly Pomona, I asked one of my colleagues in the Geology Department.  He know the area as soon as I mentioned it.  The answer?  Wind erosion.

Guerrero Negro

The Black Warrior.  The town is named after a ship that went down just off its coast.    It’s a salt mining town exactly halfway down the peninsula, and it’s your ticket in for whale watching and the best fish tacos in Baja (and that’s saying something).  I’ve had a lot of great times in Guerrero Negro.  It’s about 500 miles south of the border.  You can see the giant steel eagle marking the 28th Parallel (the line separating Baja from Baja Sur) a good 20 miles out, and from there, it’s a right turn for the three mile ride west into town.  Malarrimo’s is the best known hotel and whale watching tour, but there are several are they are all equally good.  It you can’t get a room at Malarrimo’s, try the Hotel Don Gus.

CSC RX3 motorcycles at the Hotel Don Gus. We used to do annual Baja tours with CSC…those were fun times and great trips, and introduced a lot of folks to the beauty of Baja.
What it’s all about…getting up close and personal with the California gray whales. They are in town from January through March.
Tony, taco chef extraordinaire. You might think I’m exaggerating. I’m not.
It’s worth the 500-miles trek to Guerrero Negro just to savor Tony’s fish tacos. You might think I’m exaggerating. But like I said above…I’m not.
Man does not live by fish tacos alone, so for breakfast or dinner, it’s either the restaurant at Malaririmo’s or the San Remedio, a block north of the main drag into town. You won’t be disappointed at either.
Sue’s photo of a Guerrero Negro osprey enjoying some sushi.

After you leave Guerrero Negro and continue south, the Transpeninsular Highway turns southeast to take you diagonally across the Baja peninsula. About 70 miles down the road (which is about half the distance to the eastern shores of Baja and the Sea of Cortez along Mexico Highway 1) you’ll see the turn for San Ignacio.  It’s another one of Baja’s gems.

San Ignacio

San Ignacio is an oasis in the middle of the desert that forms much of Baja.  The Jesuits introduced date farming to the region hundreds of years ago, and it’s still here in a big way.  Leave Guerrero Negro, head southeast on Mexico Highway 1, and 70 miles later you run into a Mexican Army checkpoint, a series of switchbacks through a lava field, and when you see the date palms, turn right.

An oasis is usually formed by a volcano, and when a volcano is done discussing politics, it forms a lake. That’s the San Ignacio volcano and its lake, visible on the left as you ride into town.
The San Ignacio church, built as a mission in the 1700s, dominates the center of San Ignacio. It’s a beautiful spot, one of the most photogenic in all of Baja.
Another photo of the San Ignacio Mission. You’ll want to grab some photos in San Ignacio.
Dates? Nope, not on that trip, but dates are one of the things San Ignacio is known for. I’ll bet they are delicious.

San Ignacio has a town square that’s right out of central casting, there’s a little restaurant that serves the best chile rellenos in all of Mexico (I’m not exaggerating), and the place just has a laid back, relaxing feel about it.

Santa Rosalia

You know, this town is another one of Baja’s best kept secrets.  As you travel south on Highway 1, San Ignacio is the first town you encounter after traveling diagonally across the peninsula.  Folks dismiss it because it’s an industrial town, but they do so in ignorance.  There’s a lot of cool stuff in this place.

The ride into Santa Rosalia a few years ago with novelist Simon Gandolfi, Arlene Battishill, J Brandon, John Welker, and yours truly. That’s a dead fish I’m holding.  We did a round trip to Cabo San Lucas on 150cc Mustang replicas, just to say that we could.

One of the things that’s unique about Santa Rosalia is the all-wooden architecture.  The town was originally built by a French mining company (Boleo) and they built it they way they did in France.  Like the Hotel Frances, which sits high on a mesa overlooking the town and the Sea of Cortez.  I love staying there.

The Hotel Frances. It used to be a brothel.

There’s a cool mining musuem a block or two away from the Frances, and it’s worth a visit, too.

The mining museum in Santa Rosalia.

There are many cool things in Santa Rosalia, and one of the best is the Georg Eiffel church.  It was designed by the same guy guy who did the Eiffel town.

Santa Rosalia’s church. It’s an unexpected delight.  And I’m not even Catholic.
Inside Santa Rosalia’s Georg Eiffel church.
Stained glass. Photos ops abound in Santa Rosalia.

I’ve heard people dismiss Santa Rosalia as a gritty, industrial place not worth a stop.   Trust me on this:  They’re wrong.  It’s one of my favorite Baja spots.

Bahía Concepción

Concepción Bay is easily the most scenic spot in Baja.  It’s just south of Mulege (another delightful little town, and the subject of an upcoming ExNotes blog).  Bahía Concepción runs for maybe 20 miles along the eastern edge of the Baja peninsula.  I’ve seen whales from the highway while riding along its edge, the beaches are magnificent, and the photo ops just don’t stop.  The contrast between the mountains and Cardon cactus on one side and the pelicans diving into bright green water is view from the saddle you won’t soon forget.

On one of many rides along Bahía Concepción, good buddy Joe Lee and yours truly rode our Triumph Triples. This is a favorite shot of mine.
Besides “wow,” what can I say?
World-famous novelist and motorcycle adventurer Simon Gandolfi andn yours truly on 150cc scooters. We were on our way back from Cabo San Lucas when we stopped for this Bahía Concepción photo.  Hardtail 150cc scooters.  Up and down the length of Baja.  I think about that ride every time I see a GS parked at a Starbuck’s.

So there you have it:  My take on seven favorite spots in Baja?  How about you?  Do you have any favorite Baja destinations?  Let us know here in the comments sction!


More on Baja?  You bet!


Headed into Baja?  Make sure you insure with the best – BajaBound!

Cuba Bound

By Mike Huber

So, I had just finished a certification exam that required more studying than I care to discuss. It was December 2008, and I was mentally exhausted and in much need of a beach vacation to reward myself for passing this rigorous exam.  At the time I happened to be visiting Montreal and decided to hit up a travel agent to see what deals were available.  My only criteria were sun, beach, and relaxation.  It is rare that I ever take time to slow down, even on vacation.  It seems most of my vacations leave me more exhausted than relaxed (even though they are pretty rewarding).  At this juncture in my life I needed a “time out” to bask in the accomplishment of passing that exam, so I wasn’t looking for anything too adventurous.

The travel agent in Montreal listened to my criteria and recommended Mexico or Cuba.  As a citizen of the United States, I thought I was not allowed in Cuba and when asking the agent, she assured me it was not a problem.  Cuba was much less expensive than Mexico, it would meet my beach requirements, and it was off the beaten path since Americans were not formally supposed to travel there.  Cuba it is!

The flight to Havana was a short 3 hours from Montreal and I was already yearning for a Cuban cigar and a glass of Havana rum while admiring sights along the white sand beaches.  Once the flight began to descend it hit me as I could see the last of the Florida Keys fading away from the plane window “Wow, I wonder how much that travel agent really knew about the embargo for Americans.” I was about to find out.

Feeling a little bit nervous as I entered the immigration queue, I saw those ahead of me enter this little glass box.  The doors closed, they showed their travel documents, and once the doors opened on the other side they were officially in Cuba.  As it became my turn I entered the glass box, it closed, I showed my American passport when the immigration agent looked at it.  He said “Uno momento” and went in back to gather with four other agents who looked at me, then at my passport, and began passing it around like a Mickey Mantle rookie card.  Ahhhh, this is how my Locked up Abroad episode would begin I thought.

The Cuban people love Americans, and it is so rare an occurrence to see an actual American passport that it draws a lot of curiosity and attention, something I wasn’t particularly looking for.  When the agent went to stamp my passport, I quickly remembered about the embargo.  A Cuban stamp in my passport would not go over well when I returned to the United States next week.

“No Stamp por favor” I said nervously. He laughed said no problem and opened the glass box for me to enter Cuba. I made it! This is so cool!

What little I knew of Cuba was that my entire wallet was now useless. Health insurance, credit cards, ATM access:  Nothing would be accepted in this country due to the embargo.  I had about $200 Canadian and reservations to an all-inclusive resort to ensure I could enjoy a week relaxing and not worryimg about the limitations due to lack of cash.  This idea worked perfectly, with the exception that my travels would be limited to short day trips near the resort in Veracruz, and it wouldn’t allow me to visit Havana.

This was all fine with me.  I was able to relax at the beach while still having the ability to leave the resort to take in some local food and sights.  This included cigar stores, drooling over the 1950’s cars that were still in pristine condition, and of course soaking up some much-needed sun. The resort where I was staying was filled with Canadians and whenever they had those silly contests in the evening they would always ask where the person was from.  I was tempted every time I was called upon to grab the microphone and loudly say “The United States of America,” and then I would revel in the silence that was sure to follow that statement.  For once I listened to my Dad’s advice (Don’t do anything stupid, Mike).  For the entire trip I identified as a Canadian from Toronto (I couldn’t say Montreal as I didn’t speak French) and I successfully avoided the temptation to say otherwise.

As the week came to a close, I had a great tan.  I was relaxed and refreshed both mentally and physically. Mission accomplished!

Once we began our descent into Montreal a revelation hit me: I still had to re-enter the United States, with a tan, in January, from Montreal.  Would the US Immigration agent know I was in Cuba?

When the plane hit the tarmac, I did what any mature person who thought they were about to get into trouble does. I phoned my Mom and let her know that I may have overstepped, and she may be receiving a call from the US State Department in reference to my traveling shenanigans.  After hanging up the phone I felt a tap on my shoulder.  It was a friend I had made at the resort.  He happened to be sitting behind me and overheard the conversation with my mom.  He let me know that I could use him as an alibi and that he was a member of a health club in Montreal that had tanning beds.  That seemed to be a solid response to any questioning I might soon face.  I’ll go with that, I decided. I began to feel a bit more confident as I nervously crossed into Vermont. The US Immigration officer had no questions for me and simply said “Welcome home Mr. Huber,” as he waved my car onward. It was only about 10 degrees that night, yet I still could feel the warmth from the Cuban sun glowing while breathing a sigh of relief I happily drove by the “Welcome to The United States of America” sign.  Cuba let me accomplish all my relaxation goals and tacked on a pretty cool story along the way.


If you would like to read more about motorcycling in Cuba, take a look at Christopher Baker’s Mi Moto Fidel.


Keep on clicking:  Click on those popup ads!


Never miss an ExNotes blog:
Lee Classic Turret Press Kit 1: Unpacking

By Joe Berk

We’re writing a series of blogs on the Lee Precision Classic Turret Press Kit, and this first one focuses on unpacking and taking an initial look at the kit. I think the YouTube kids call this a “reveal.”  I’ll just call it unboxing and seeing what’s in the box.  I thought I could do a single blog on the Classic Turret Press Kit, but there’s too much included in the kit and too much that’s new to me to handle in one blog.  We’re going to instead do a series of blogs:  One on each item that’s included with the kit, a blog on setting the press and dies up, a blog on reloading with the Lee equipment, and a blog on how the ammo reloaded with the Classic Turret Press Kit performs.   There’s a lot here.  You’ll get a feel for just how much in this initial blog on the Classic Turret Press Kit.

Here’s the picture on Lee’s website for the kit, which Lee advertises for $380.

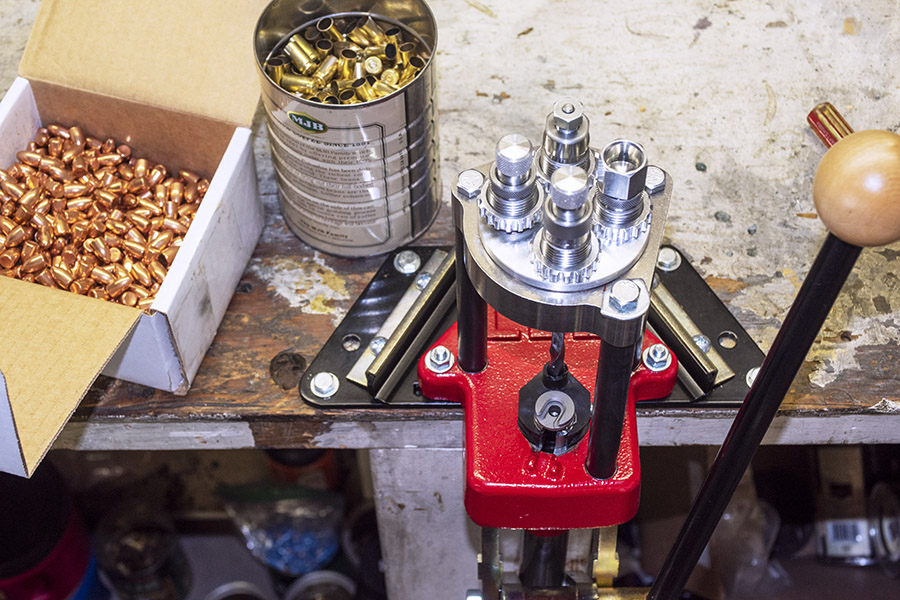
The photo above shows everything set up, but the photo doesn’t do justice to the excitement associated with getting this kit, taking everything out of the box, and opening it.  Nor does it convey what I expect to be the satisfaction I’ll experience with using the Lee equipment.  That will be the subject of future blogs.  Think of this first blog as Christmas morning. That’s what opening and unpacking the Lee kit felt like to me.

ExNotes blog readers will recall that good buddy Jose left a comment on one of our Lee Deluxe 4-die set blogs.   Jose told us about his Lee turret press.  He wrote a guest blog or two for us here on ExNotes and he is a Ruger No. 1 aficionado, which means he stands tall with me.  After reading Jose’s comments, I had to check out the Lee Classic Turret Press Kit myself, and after poking around on Lee’s site a bit and seeing what the Lee kit included, I knew I wanted one.  I specifically wanted to set it up for 9mm using Lee’s Deluxe 4-die set.  I’ve been using older 9mm dies from various die makers, and my reloads would sometimes jam.  With my old dies, the crimps were inconsistent, and I knew from my experience with Lee’s .357 and .44 Magnum Deluxe dies I wouldn’t have that problem with Lee equipment.  I have the Lee Deluxe handgun die sets in 38 Special/357 Magnum, 44 Special/44 Magnum, .45 Colt, and .30 Carbine, and the ammo I reload with those dies is exceptional (better than anything I loaded with other manufacturers’ dies).  I use Lee dies for several rifle cartridges, and I have more than a few other bits of Lee equipment.  I’ve been pleased with all of it.

Lee advertises that their Classic Turret Press Kit includes everything needed to start making ammo, except for the dies and, of course, the components (brass, powder, primers, and bullets).   I have plenty of components, and the thought of wringing out the Lee gear, writing about it, and testing the ammo in a couple of my favorite 9mm handguns checked all the boxes for me.  This will be a fun project and I want to share the excitement with you.

I placed my order with Lee for the Classic Turret Press Kit, the Bench Plate Kit (something I saw on their website that appealed to me), and the 9mm dies.  It all arrived a few days later, well packed in a single box.  I was impressed with how fast it arrived (it shipped during the holiday season) and the packaging.  The Lee folks have done this before; it’s first class customer service.

This is the right time of year to open a box full of goodies and examine the contents.  I was a kid on Christmas morning.  This was fun!

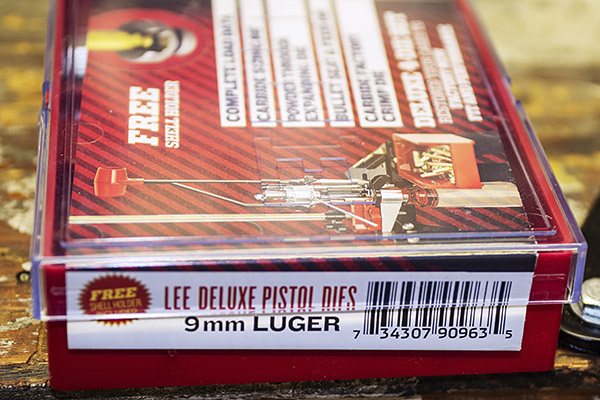
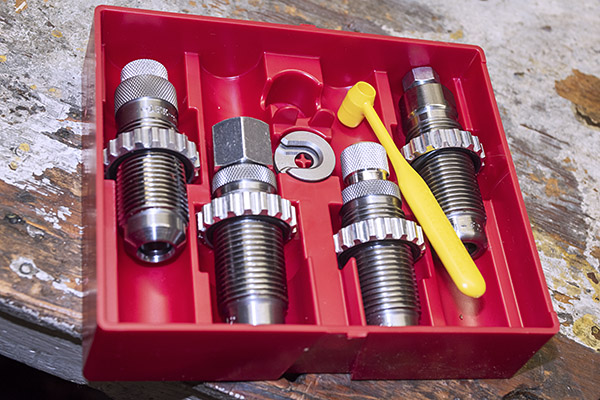
When I opened the outer container, I saw my 9mm Deluxe 4-die set and the Lee bench plate.

As I mentioned above, I’m a firm believer in Lee’s Deluxe dies.  I can’t wait to put these to work making 9mm ammunition for my SIG P226 Scorpion and Springfield Armory 1911.

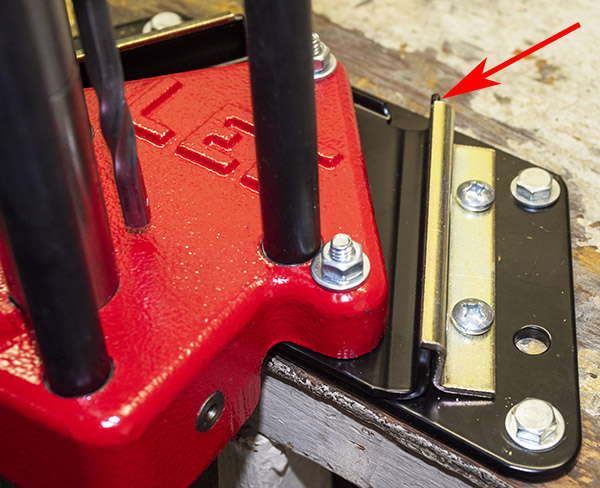
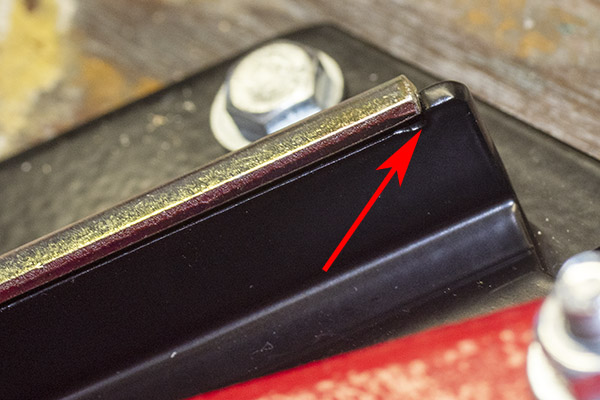
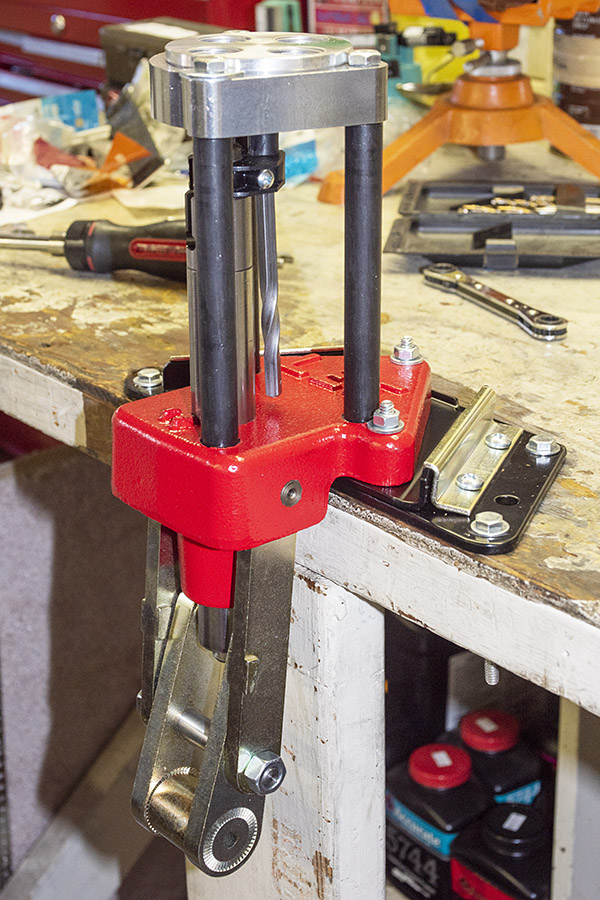
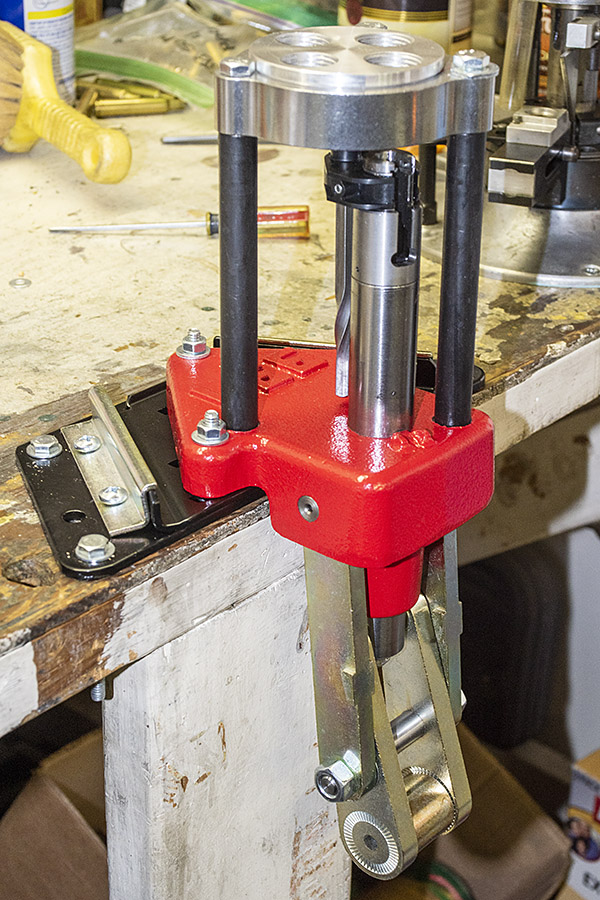
The idea behind the Lee Bench Plate is that it’s a quick detach/attach mount for a Lee press. It’s not included with the Classic Turret Press Kit (it’s priced at $39 on Lee’s website), but I like the idea of being able to quickly remove the press from my reloading bench.  You’ll get a complete report on setting up and using the Bench Plate in a future ExNotes blog.

After unpacking the 9mm dies and the bench plate, I pulled out the Lee Classic Turret Press Kit.  This was like one of those Russian dolls.  I was peeling the onion and enjoying it.

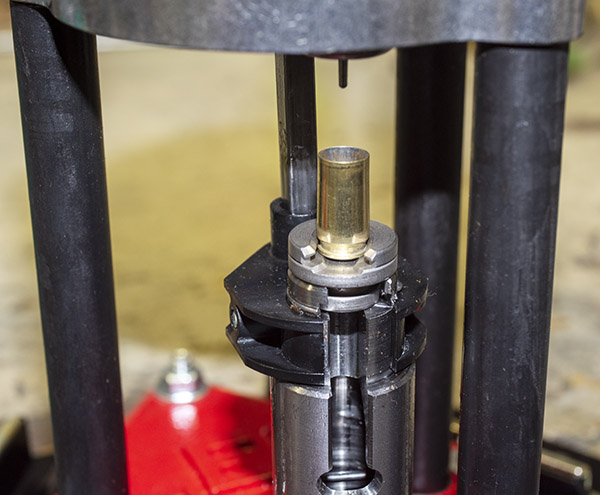
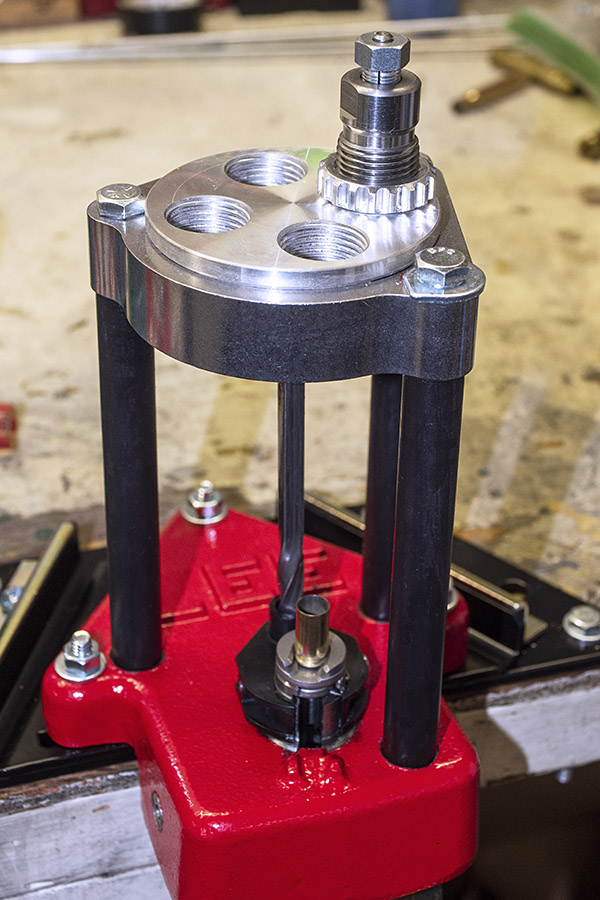
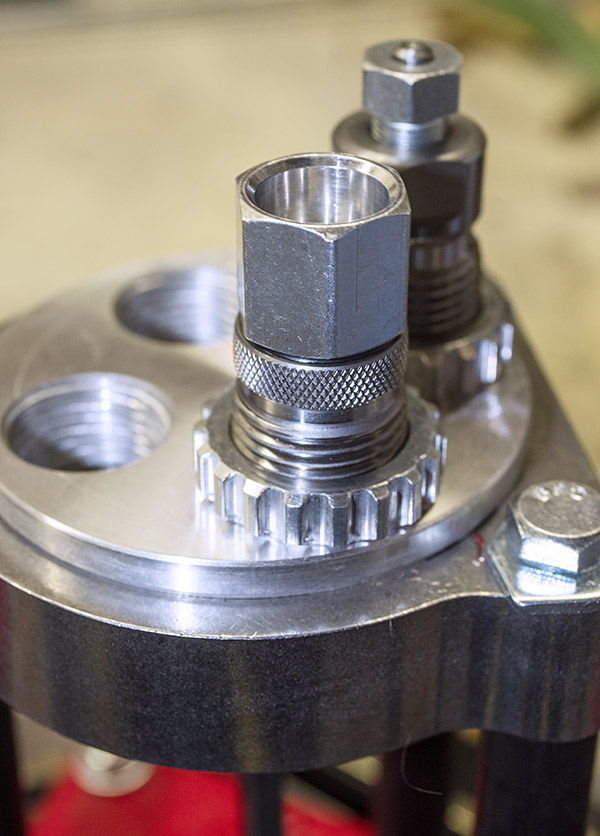
When I opened the Lee Classic Turret Press Kit, I found the Lee Safety Primer Feed, a tube of Lee Resizing Lube, and the Lee Case Conditioning Kit.

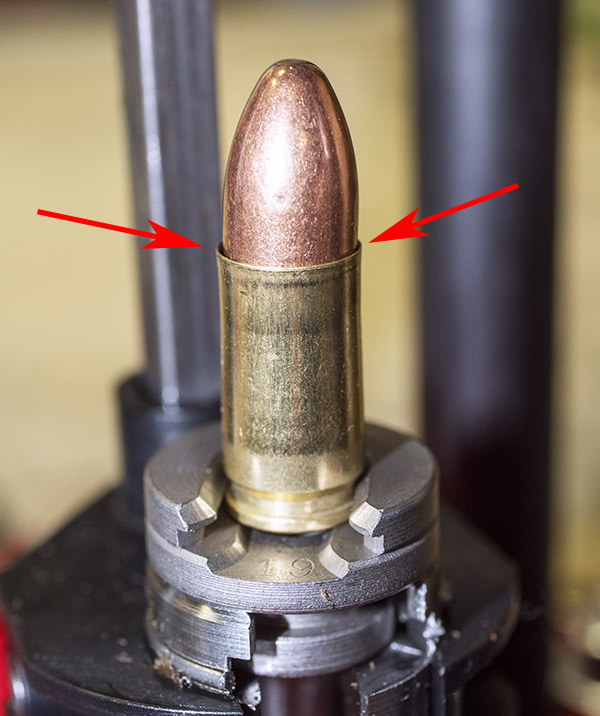
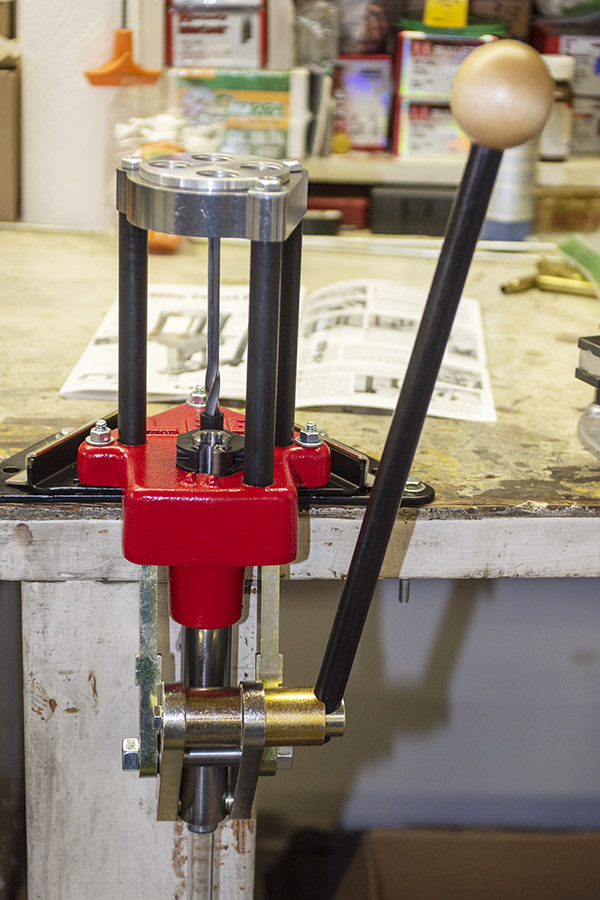
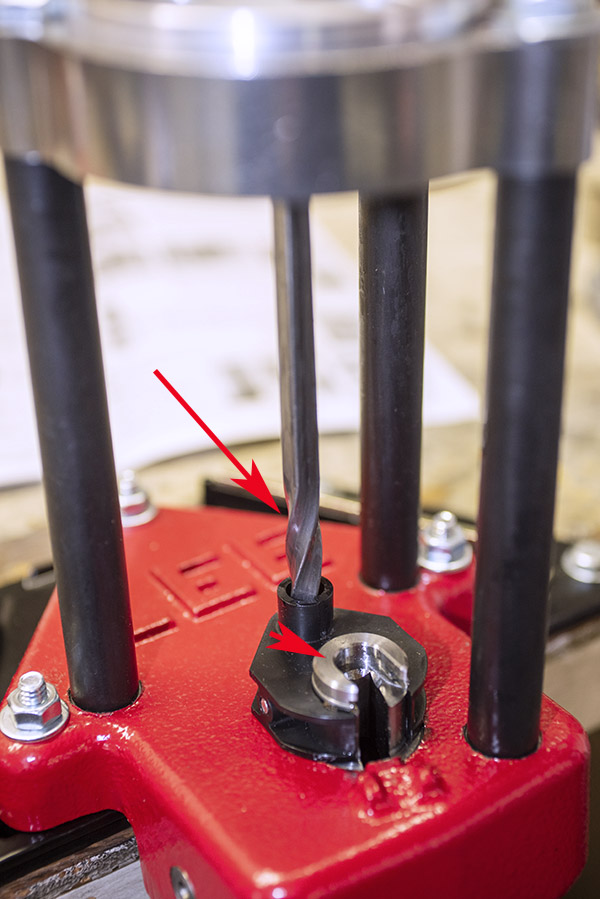
The Lee Safety Primer Feed (shown in the two photos below) is a device I have not used before.  I’ll explain how it works in a future blog.  I have three other Lee priming devices and I’ve been using them for decades with no problems.  The Lee Safety Primer Feed sells for $30.

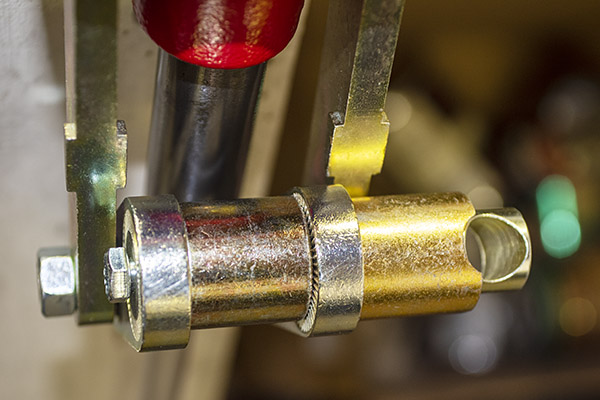
Lee includes their Case Conditioning Kit (see the photo below) with the Classic Turret Press Kit.  The Case Conditioning Kit consists of a primer pocket cleaner, a case cutter and locking stud, and a chamfer to bevel the case mouth after it has been trimmed.  I have not used these tools from Lee before; it will be interesting to see how they perform.  I have other equipment that performs these tasks, but I had to buy those items separately.  With the Lee Classic Turret Press Kit, it’s all included. The Case Conditioning Kit lists for $12.98 on the Lee site.

I won’t need the Lee Resizing Lube shown below because my new Lee 9mm dies include a carbide resizer (which negates the need for case lubrication).  Not having to lube the cases is a good thing.  On rifle cases, though, lube is necessary, so I’ll put the lube to good use on those.   The price for Lee’s Resizing Lube is $5.98.

The Lee Classic Turret Press Kit includes Lee’s Modern Reloading manual (a sizeable book, comparable to the manuals from Hornady, Speer, Sierra, and other reloading component companies), and a Hodgdon reloading pamphlet.  I’m looking forward to reviewing the Lee manual.  I’ve been reloading a long time, but I still learn something new every time I pick up a reloading manual.  If you were to buy the Lee Modern Reloading manual separately, it sells for $40.98.  Lee also includes the Hodgdon Data Manual with the Classic Turret Press Kit.  I’ve seen the pamphlets from Hodgdon before; I’ll take a look at this one and share my impressions in a subsequent blog.

Next out of the box was Lee’s Auto-Drum Powder Measure.  I’ve used an older Lee version of this device.  I’m not familiar with how the new one works, but I’m looking forward to finding out.  The Auto-Drum Powder Measure is infinitely adjustable.  That’s a good thing.  The older version used a charging plate with discrete increments; infinite adjustment is a much better way to go.  The Auto-Drum Powder Measure automatically charges the case with with each stroke of the press.  If purchased separately, the Auto-Drum Powder Measure sells for $55.00.

Lee includes a Powder Measure Riser in the Classic Turret Press Kit (see the photo below).  This is used with the Auto-Drum Powder Measure to position the powder dispenser above the priming mechanism (it allows adequate clearance).   The Powder Measure Riser sells for $9.98 on the Lee site.

There’s a balance beam scale (the Lee Safety Powder Scale) in the Classic Turret Kit.   This is a standard reloading scale.  The Safety Powder Scale is $46.98 on the Lee site.  You might wonder:  Why use a simple mechanical scale when there are digital scales and digital powder dispensers?  The reasons are simplicity, reliability, and cost.  I have friends that use digital scales, and they report inaccuracies induced by nearby metal objects (have any of those on your reloading bench?), slow operation, and of course, much greater expense.  For me a simple balance beam scale works best; it’s what I’ve been using for 50 years.   The Lee Safety Powder Scale is new to me, and I’ll report how it works.

At this point, I had one more box to open, and it contained the Classic Turret Press.  Lee lists the Classic Turret Press at $220.  Like everything else in the Lee Classic Turret Press Kit, the Classic Turret Press was well packaged.

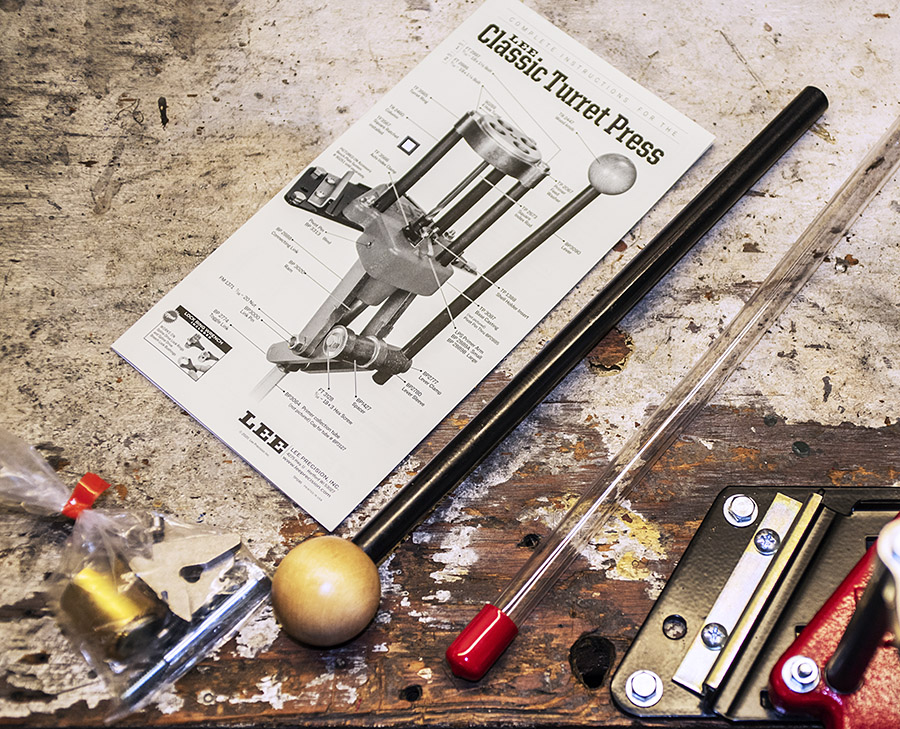
The Classic Turret Press is massive.   It’s beefy, it’s heavy, and it looks to be well built. What you see below is the press, along with the operating handle, a spent primer catch tube (a nice touch), the four position turret head, and the hardware required to assemble it.

So there you have it:  The Lee Classic Turret Press Kit.  You might have noticed that I listed the cost for each item above separately, along with a link to the appropriate Lee page.  I thought it would be interesting to sum the prices and compare the total to Lee’s Classic Turret Press Kit price:

At Lee’s price of $380 for the Classic Turret Press Kit, it’s a good deal compared to buying the items separately.  But Lee goes a step further.  They recognize that retailers often sell the individual items and the Classic Turret Press Kit at lower prices, and Lee states on their site that you can find lower prices by visiting a Lee retailer.  One of the best places to find lower prices is Amazon.  I encourage you to explore Lee’s website, and to take a look at Lee gear on Amazon.

This project is going to be fun, folks.  Keep an eye on the ExhaustNotes blog as we put the Lee Classic Turret Press Kit through its paces.


Like what you see here? Don’t forget to help us by clicking on the popup ads!


There are many more shooting and reloading stories on Tales of the Gun.  Hope on over and take a look.


In the spirit of complete disclosure:  Lee liked our blogs on the .357 Magnum and .44 Magnum Deluxe 4-die sets and they asked us to similarly review the Classic Turret Press Kit.  Lee provided the kit to us at no charge.  But rest assured: That won’t color our judgment or what we report.  You will get the complete story, warts and all.

Naco Taco Thanksgiving Run

By Mike Huber

For most, Thanksgiving is a time to spend with family and friends watching football and performing the “eat, drink, nap, repeat” cycle.  This is, of course, never a bad way to spend this holiday but finding myself in Bisbee, Arizona I thought changing it up from the traditional turkey feast would be beneficial.

Bisbee, Arizona is a late 1880s copper mining town that turned in its explosives, shovels, and rock drills to grow into a more artistic town with historic hotels, quirky shops, and lots of festivals.  Being that this tiny community is nestled in the canyons of southernmost Arizona (just minutes from the Mexican border), an idea struck me.  I had not visited Mexico since February, and although this sounds crazy, I was craving tacos.  Being this close to Mexico it felt almost a necessity to partake in a run to the border to extinguish my craving.

Fifteen minutes later I found myself parking the car and walking about 50 yards through a turnstile much like you would see in a New York City subway entrance.  It was that easy and I was in Naco, Mexico.  Another 200 yards and I was at a restaurant called Asadero Los Molcajetes which I had frequented several times when I crossed on my BMW GS to ride mainland Mexico.  This restaurant to me always represented the gateway to Mexico and was a symbol of happiness.

Asadero Los Molcajetes is a perfect stop for when you are riding across and must get your visa stamped and the bikes inspected since it is right next to where you have those tasks completed.  The restaurant provides you the opportunity to celebrate entering Mexico with some outstanding tacos (along with a cold Pacifico or margarita) to wash them down, while taking in that special moment to realize that your trip has officially begun.

The tacos were exactly what I had been craving.  Even before the tacos were served, we had a large plate of several different hot sauces.  Chips, cucumbers, and onions rounded out this first course.  Usually, chips in any Mexican restaurant are one of my biggest diet downfalls.  They put that bowl out and its rare I don’t require it to be reloaded prior to my food arriving.  By then I am much too full to fully enjoy the meal.  This time, however, I managed what little self-control I have and made sure to go easy so that I could enjoy the carne asada tacos.

The brilliance of Mexico is that when you order two tacos, there is an extra shell underneath.  This is for when all that deliciousness of your fully loaded taco falls out. BOOM! You now have a third taco!

After four tacos (six with the extra shells and my sloppiness) I felt just as full as I would have had I eaten a normal Thanksgiving feast. It was time to burn off a few calories by walking around Naco before my 200-yard journey back to the United States. Returning to the United States was just as easy as entering Mexico. “Reason for your trip to Mexico, sir?”.  I simply stated, “Thanksgiving tacos, sir,” and I was waved through.

A unique Thanksgiving for sure and as I drove back to Bisbee, I could feel it was time for a solid nap. The nap would signify completing the “eat, drink, nap, repeat” cycle.  I next started wondering how late Asadero Los Molcajetes was open for the possibly of Cycle Number Two.


Do us a solid:   Please click on the popup ads!

Here’s why you should click on those popup ads!


If you’re heading into Mexico, be sure to insure with BajaBound Insurance!

Old Town Albuquerque

Our destination on this trip was the Albuquerque Balloon Fiesta (the 50th Anniversary Balloon Fiesta, at that!), and we stayed in Albuquerque for the event.  One of the stops on this adventure was old town Albuquerque.  Touristy?  You bet.  But it was still fun.  I had my Nikon and a 24-120 lens (a real boat anchor camera and lens, to be sure), but I enjoyed myself wandering around and taking pictures.

A plaque below the statue shown in this blog’s featured photo.

That fellow in the statue up above?  That’s Don Francisco Cuervo y Valdés, Spanish governor of New Mexico, who founded La Villa Real de San Francisco de Alburquerque (what we know as Albuquerque) in April 23, 1706.

Albuquerque is one of the oldest towns in New Mexico.

Albuquerque, population 550,000, is New Mexico’s biggest city.  We were there for four days.  We hit old town Albuquerque on Day 1.  Kitschy, corny, but cool.  We enjoyed it, and there were plenty of photo ops.  There’s a lot to see and do in Gresh’s home state.

A ristra is a cluster of dried red chiles you see hanging in many places in New Mexico. They can be decorative, ot they can be used for cooking. This one was hanging in a doorway in old town Albuquerque.
Another ristra hanging in old town Albuquerque.
A salsa store. There’s lots of it in old town Albuquerque.

On this topic of chiles and authentic New Mexico salsas: In New Mexico Mexican restaurants the question that every waiter asks is:  Green or red?  That’s for the kind of salsa you want with your meal.  Red salsa is made of crushed red chiles that are reconstituted into a red liquid salsa.   Green is a bit chunkier with larger pepper pieces included in the mix.  They told us that green is the spicier of the two, but I think it depends on the restaurant.  The New Mexicans advised us that a good answer for the red or green question is “Christmas, on the side.”  You know, red and green.  That will get you a dish of each salsa.

A doorway to one of the many shops in old town Albuquerque.
A shop window in old town Albuquerque.
A cool bench in Old Town.

Our tour guide advised us to avoid the restaurants in old town Albuquerque, so we ate at a Mexican place just outside of Old Town.  I love New Mexico, but I’m convinced any restaurant in or close to a tourist destination is going to be mediocre.  Our lunch didn’t change my mind.

One of the restaurants in Old Town.

The San Felipe de Neri Church is one of the oldest buildings in Albuquerque.  It dominates old town Albuquerque.  This church was originally used by Franciscan missionaries.  It’s still in use.  All of the tourists (and there were a lot of them) congregated outside the church.  I checked the door and it was unlocked.  I ducked inside and grabbed a quick available light photo.

Inside the San Felipe de Neri Church. I have more than a few photos that look like this from visits to churches elsewhere, including some dynamite photos from the missions in Baja. I use the last pew as a camera rest.

So there you have it…one guy’s photo interpretation of an afternoon walk through old town Albuquerque.  The Balloon Fiesta is coming up in a near term future blog.   Stay tuned.


Hit those popup ads, folks!  We need your help!


Never miss an ExNotes blog:

Check out a few of our epic rides here!

Acid Reflux: Yamaha RD350 Battery Box

I’ve been putting miles on the 1974 RD350 in the last few months, almost doubling the 4100 miles that showed on the bike’s odometer when I first got it. As my confidence in the bike increases so do the miles racked up in a single ride. This increase in running time has led to a problem with the battery that was installed in the RD350.

The battery seemed to work okay; it held a charge and didn’t use too much electrolyte but the fill plugs located on top were seeping a bit of acid. The caps felt snug and the battery vent was not clogged yet after a long ride the acid-damp lay heavy on the battery and even started dripping down the sides. I sort of let it slide for a while. Riding the RD is too much fun and stopping the bike for maintenance seemed like a waste of good weather.

Now that it’s a bit cooler I tackled the battery situation. The acid had dripped down onto the swing arm and corroded the battery box along with the small coil spring that keeps the oil tank vent from kinking. My laziness always comes back to haunt me.

I took the battery box, along with the attached rectifier and voltage regulator out of the frame and washed everything down with a mix of baking soda and water. The affected paint fell off in large chunks. I dismantled the electrical components and soaked the battery box in Evap-Rust then wire brushed any loose paint.

It was a nippy week at The Ranch so painting the box in 50-degree weather was a challenge. I heated the rattle can and the battery box to within 2.8 degrees of each other (measured via a recently calibrated fingertip) then shot the box with primer and two coats of Krylon satin black. I used a brush to apply paint to the bare spots on the swing arm.

It all came out good enough and anyway, I’m riding this bike, not showing it.  The electrical bits, being directly under the battery did not suffer any acid corrosion. I cleaned them up and reassembled the mess into the motorcycle.

Many older motorcycles do not regulate their voltage as precisely as you would like and my Yamaha RD350 is one of the many. With the headlights on and engine revving I measured 14/14.1 volts at the battery. This is ideal. With the headlights off 15 volts were going into the battery. 15 volts is a little too high for comfort but I decided that since I leave the headlights on all the time the original regulator would be okay.

My good buddy Deet told me about using sealed, AGM type, alarm-system/UPS batteries in old bikes. I have had one of them in Godzilla, the 1971 RT1-B for a couple years and it has been working great. These type batteries hold a charge much longer than flooded lead acid batteries. The new one I bought on Amazon has a high tolerance for high voltage; it can handle up to 15-volts charging. These AGM standby batteries can withstand constant trickle charging and long periods of inactivity, which describes vintage motorcycle riding to a tee. The small spade terminals on these batteries are not made for large current loads like an electric starter or lighting up the strip in Las Vegas but they can handle motorcycle lighting and ignition circuits without complaint.

At 4AH the new battery has a bit less capacity than the leaky old 5.5AH unit I took out but I think it will work okay. Close enough counts in hand grenades, horseshoes and motorcycle batteries.

The new battery is a skosh smaller than the old battery so I used some closed-cell packing foam to keep the thing from rattling around inside the battery box. The RD350 is once again ready to rumble. From my experience with the RT1-B, I’m not anticipating any problems with the RD350 but I’ll be sure to let ExhaustNotes readers know if I have any issues with the new AGM set up.


Do a friend a favor or ten:  Click on those popup ads!


Never miss an ExNotes blog:
The 2022 ExNotes Gift Guide

Most gift guides are hokey.  Not this one.  In keeping with our theme of shooting, motorcycles, and other interesting things, here are our recommended gifts and associated links.  It’s good stuff.  Purchase the things we recommend through the links we include here and you’ll ride faster, you’ll shoot straighter, you’ll weigh less, you’ll be better looking, and you’ll be one of the cool kids. (I took an advertising class and that’s the essence of what good advertising is supposed to do.)  Without further ado (I have no idea what “ado” means, but if you say it during a wedding ceremony, you’re married), here you go.

Motorcycle Bungee Pack

Few things in our lives are as useful as a bungee cord, and it you want a nice gift for a motorcyclist, this Motorcycle Bungee Pack answers the mail.  It includes an assortment of bungees and a cargo net, and it’s a sure thing whoever receives a gift like this will put it to good use.

A New BMW R 1250 GS

Well, sort of, although if any of our readers want to buy us a new BMW GS, that would be nice, too.  Nope, what we’re referring to here are Maisto motorcycle models.  They’re pretty cool, they’re high quality, and at approximately $20, they won’t break the bank.   Maisto offers several other models, too, like the S1000RR you see at the top of this blog.

A Case of Mobil 1 Moto Oil

It doesn’t get any better than Mobil 1 4T synthetic oil for motorcycles.  If you want to really impress someone, give them a case of Mobil 1 4T for their motorcycle.  It’s only $79.00 and trust me on this, they will remember you every time they shift or blip the throttle.

Portable Jump Starter

We carried and used a portable jump starter on the Enfield Baja ride, and trust me, it was worth its weight in gold.  There are several models available, and they start around $52.  This Litake portable jump starter is small enough to carry on a motorcycle and it makes a great gift.

Lee Precision Reloading Gear

If you’re not reloading, your missing out on half the fun in the shooting sports.  Making the decision to become a reloader can be a bit initimidating, but the major equipment manufacturers make it easy for anyone to start.   If you want to start with a simple single-stage press, our advice is to go with Lee’s Challenger Kit for $229.

A single stage reloader is a good way to start, and the Lee Anniversary kit shown above is a good one.   You can buy it directly from Lee or from Amazon.

If the person you are giving the reloading kit to (which can be you, by the way) wants to reload at higher rates,  you might consider the Lee Classic Turret kit for $380:

You can buy the Lee Classic Turret kit directly from Lee or from Amazon.

With either kit, the person receiving the gift will need a set of dies specific to the cartridge to be reloaded.  We think Lee Precision makes the the best dies at any price (these are $78.00).

You can buy the above dies directly from Lee, or you can purchase them from Amazon.

Cool Watches

There are three or four you might consider.  We’ve recently written about Casio’s G-Shock GD400 series.  These are reasonably priced, they are incredibly accurate, they offer a world-time quick change capability, and a bunch of other features (illuminated dial, stopwatch, countdown timer, and more).   Casio offers these for both men (at $89.95) and women ($53.95).  I wear a G-Shock and so does Susie.

If you want something more formal, our recommendation is to get an automatic watch.  There’s something elegant about a selfwinding mechanical watch, and Orient is one of most exclusive brands out there at a very reasonable price.  Two personal favorites are the Moonphase (from $274.95 to $374.95, depending on color) and the Mako dive watches (at $147.95).  I wear an Orient rose gold Moonphase when I’m trying to impress Gresh, and it’s a classy timepiece.

Toolkits

We very recently posted about a Wohngeist toolkit retailing for $2,895 (we’re not advising buying it, unless you feel a need to flush money down the toilet).  A far better choice is any of several toolkits available at much more reasonable prices, like this one for $49.95.  These make great gifts, and they won’t break the bank.

Buck Knives

Give someone a Buck knife, and you’ll have a friend for life.  That’s how long the Buck will last, too.  Buck makes a bunch of different knives, you can have them customized, you can have them engraved, or you can buy one off the shelf, so to speak.  My personal favorite is the Buck 110 folder (shown in the photo below), but any Buck knife makes a wonderful gift.  Buck 110 folders start at around $60.

Trickle Me Elmo Battery Tenders

There are few things as useful to a motorcyclist than a Battery Tender.  I’ve been using these for decades.  A motorcycle with a topped-off battery runs better, and I’m coinvinced routinely plugging your bike into a Battery Tender extends the battery’s life.  I regularly get between 4 and 6 years out of a motorcycle battery, and the Battery Tender is the reason why.  These things are inexpensive ($39.95), and if they wear out, that would be news to me.  I’ve been using mine for about 15 years and it’s still going strong.

Stop and Go Mini Compressors

Get a flat on your motorcycle out in the middle of nowhere and you’ll wish you had one of these, and so will all of your motorcycle friends.  It happened to me more than a few times (on the Three Flags Rally, in China, and out in the boonies exploring the Mojave Desert).  The Stop and Go Mini Compressor will pay for itself the next time you need to inflate a tire out there, and if you’re one of those folks who drops the air pressure when you see a dirt road, this will get you back up to street pressures quickly.

Our Motorcycle Books

Hey, what can I say.   If you’re going to buy a motorcycle book, why not buy one I wrote?  They’re inexpensive and folks say they’re pretty good.  If you’re one of those folks tempted to wait for the movie instead of reading the book, don’t hold your breath.  There were some preliminary discussions for a movie series, but when I suggested Leonardo di Caprio play me, the studio responded with Danny De Vito and talks broke down (so don’t wait for the movies).

Take a look at this selection of outstanding moto stories, pick the ones you’d like, and Mr. Bezos will have them in the mail to you muey pronto!

Haix Boots

The problem with motorcycle boots is they’re uncomfortable when you get off the motorcycle, especially if you have to walk anywhere.  About 20 years ago I picked up a pair of Haix boots (a favorite of police, firemen, and other first responders) and I never look back.  They are the only boots I wear when I ride a motorcycle.  A pair of Haix boots lasts about 10 years, and they are extremely comfortable.  They’re a bit more than most combat boots at $259.99, but they last a long time and the increase in comfort makes them well worth the price of admission.

Bianchi Belts

I bought my Bianchi belt years ago and I think it is one of the best purchases I ever made.  I wear it any time I need to wear a belt unless I have to dress up for a deposition or a formal event.  The Bianchi is just plain comfortable, it doesn’t wear out, and for its intended purpose (supporting a holster) it is superb.  You’d be surprised how much of a difference a good belt makes if you’re carrying a firearm (unless you already have a Bianchi belt, in which case you wouldn’t be surprised at all).  But you don’t need to carry a gun to appreciate this belt.  Like I said, I wear mine all the time.  The Bianchi belt retails on Amazon for $66.02 (why they add the $0.02 is beyond me), and it’s worth every penny (even those extra two pennies Bezos tacks on).

Batdorf and Bronson Coffee

Batdorf and Bronson coffee is the best coffee in the world.  Yeah, that’s my opinion, but try it and you’ll agree.  Buy a selection of Batdorf and Bronson coffee for a holiday gift and you’ll make a friend for life.


So there you have it:  Our 2022 gift recommendations.  And don’t forget:

The best gift you can give to us is to continue clicking on those popup ads!


Never miss an ExNotes blog:
Water Security

As mentioned in a previous ExhaustNotes story titled “Guilt Trip,” our water well at the ranch has become unreliable. In order to quickly bring some stability to the situation we decided to install a storage tank and re-shuffle the way water is delivered to our shack.

After pouring a slab to support the new, 3000-gallon water tank we had the local Tank Guy deliver Big ‘Mo to the ranch. Big ‘Mo cost $2800 delivered to our door and that’s a bit expensive but it seems like everything costs more since the Covid crisis eased up. Home Depot has a 2500-gallon tank that is slightly lighter construction for $2300 plus $80 delivery plus tax so the per gallon price is comparable. Buying local means the Tank Guy will spend his money locally. Anyway, I don’t like the way our local Home Depot stores their tank inventory. They put the tanks on their sides instead of the bottom. This makes it easier to move the tanks with a forklift but I suspect it does the tank no good having all the weight where it’s not designed to go.

The Tank Guy stores his tanks upright, just north of Tularosa in a big field across from the railroad overpass. Our tank showed up securely strapped to a trailer…on its side. But only for the time it took to arrive at the ranch. These tanks look huge but they are rotocast plastic and are not that heavy. The 3000-gallon tank weighs 500 pounds. It took the Tank Guy, the Tank Guy’s wife and me to slide the tank up a ramp I handily screwed together earlier for pouring the tank slab.

I installed two ball valves in the bottom of the tank, one ¾-inch for the output and one ½-inch to fill the tank. Tank filling can be done three ways: by water delivery truck, gravity fed from the upper level shed storage tank, or by pumping well water into the tank. A jumble of shut-off valves can be juggled to pressure feed the house from the well, from Big ‘Mo via a centrifugal pump or by gravity from the upper level storage. I’m into redundancy when it comes to water.

If you live in areas that freeze you’ll want to add a pipe heater and insulate any exposed pipe. The black tank helps keep the water from freezing and when the sun comes out we rarely get days under 40 degrees so water freezing in the tank has not been an issue so far.

I took this re-plumbing opportunity to eliminate the water softener and reduce the size of the very old well pump expansion tank. The water softener periodically runs a flush cycle and being on a fixed water supply we can’t waste water like that. The bladder inside the big expansion tank became porous over the years and water had migrated to the dry side causing rust. Plus it was too damn big. I’m thinking it will make a great stand alone fireplace or smoker.

From Big ‘Mo water is piped through a mesh screen filter, a one-way check valve and into a centrifugal pump that provides 40psi of pressure to a large 5-micron filter and on to the house plumbing. The pump has its own small expansion tank that seems to keep a fairly steady flow of water to the fixtures. You can see the flow increase a bit when the pump cycles but nothing a rough, tough, couple of pioneers like CT and I can’t handle.

Since we’ve moved from hot, humid Florida to a colder climate I’ve learned that PVC plumbing is not ideal in freezing conditions. Going forward I’m trying to use PEX plumbing in all my projects and I’ve been happy with the results so far. PEX uses a more flexible pipe that is crimped onto brass PEX fittings with brass/copper-ish crimp rings. You’ll need a special PEX crimp tool to compress the rings onto the PEX fittings. Once crimped, you can spin PEX pipe on its brass fitting (within reason) without causing a leak. I haven’t had one PEX-related leak yet, even when tight working conditions result in a less than optimal crimp. I wish I could say the same for the PEX-to-threaded-pipe connections. One thing to keep in mind is that PEX pipe is not UV resistant so cover any pipes that will see sunlight.

Like most plumbing systems PEX has to be cut and pipes replaced if you need to change anything. You’ll need a PEX removal tool if you want to reuse the brass PEX fittings and why wouldn’t you want to reuse them? The ability to reuse PEX fittings is a big deal. When is the last time you were able to reuse a glued PVC fitting or soldered copper fitting? The removal tool cuts the crimp ring without cutting into the PEX barb. Once the ring is out of the way you can crimp V-shaped depressions around the bit of PEX stuck on the barb. Crimping the Vee’s causes the PEX pipe circumference to expand and the pipe will slide right of the barb without causing undue stress.

It’s a bad feeling when your well runs dry. All of a sudden your shack becomes unlivable. But by building in a little extra infrastructure we have water security even if it means buying water from our local water delivery service. And I have plans on the table for catching much more rain during the next monsoon season that will nearly eliminate our reliance on bought water.


Do us a solid and click on the popup ads!


Never miss an ExNotes blog:
Tools Do Not A Carpenter Make

I spotted the tool kit you see above in a Wall Street Journal list of suggested gifts.  It’s made by an outfit in Switzerland and the price (as quoted by the Wall Street Journal) is an astonishing $2,850.  Yes, you read that right:  $2,850.  Thinking it had to be a mistake (even Snap-On tools are not that expensive), I got on the Internet.  Yep.  $2,850.  I’m thinking that kit above is maybe $50 worth of tools.   So I looked around a little and saw the same Wohngeist tool kit from another retailer for $3,000.  And then another for $2,800.  I imagine the people who picked it up for $2,800 felt they scored quite the bargain.

Want another shocker?  All three of the online retailers, quoting the prices you see above, are sold out.  Gresh and Huber, we are in the wrong business.

Here’s another Wohngeist tool kit for those of you who don’t want to spend $2,895.  This one is only $1,895.  Like my people say:  Such a deal!

If you’re thinking of something more down to earth, you can always pick up a basic tool kit from Amazon.  This one was $49.  It looks pretty good to me and it’s more in line with what I’m used to spending.  I’m an Amazon kind of guy.

I think the Amazon version has more screwdrivers and it has a ratchet and sockets.  The Wohngeist kit does not.  What were you expecting for $2,895?  I know, I know, the Amazon kit doesn’t have that nifty fold-out ruler.  But I already own a tape measure.  So I’m covered.

Not content with that find, I checked to see if Amazon had a motorcycle tool kit.  Here’s one that looks like it came right out of my 1965 Honda Super 90, and it’s only $12.95.

I don’t still have the Super 90, but I do still have the tools.  Somewhere.


We’ve written other blogs about motorcycle tool kits.  This one explains my approach for identifying and carrying the tools I may need.  It contains links to Gresh’s and Huber’s blogs on the same topic, too.


Watch for our 2022 Christmas, Hanukkah, and Festivus gift guide.  It’s coming up soon.


Never miss an ExNotes blog:

Help us keep the stories coming:  Click on those popup ads!