Tequila!

Jose Cuervo is no friend of mine.   Not after I’ve seen how (and where) the good stuff is made.

This, my friends, is the story of how tequila is manufactured.  It occurs in one place and one place only:  Tequila, Mexico.   And it all begins with the blue agave plant.  That’s what you see in the big photo above.

Yes, Tequila actually is a place.  It’s about 50 miles northwest of Guadalajara, Mexico.

The origins of this story, for me, go back to the early 1990s, when Baja John and I rode our motorcycles the length of Baja and then took the ferry across the Sea of Cortez to mainland Mexico. John and I stayed in beautiful Guadalajara for a few days on that awesome trip and I fell in love with the place.  I was determined to get back there someday, and that someday occurred sooner rather than later.  Just prior to a 4-day Memorial Day weekend in 2003, I bought three AeroMexico tickets, and Susie, our daughter Erica, and I explored Guadalajara and the interesting places around it. One of those places was Tequila, with good buddy Carlos as our guide.  You’ll see Carlos a photo or two down.

Making tequila starts in the fields with the blue agave harvest.  The blue agave is a majestic plant that grows in the red earth of the region, where the soil, water, sunlight, and everything else the tequilameisters worry about is Goldilocks perfect.

The blue agave takes about 8 years to reach maturity, and each one produces about 8 bottles of tequila.  As you might imagine, security around these fields is tight.

The guys that harvest the agave plant are the Airborne Rangers of the operation.  They chop away the pineapple leaves (the pineapple is the plant’s heart), and they do so with a tool that made me nervous just looking at it.  It’s a deal that has a plate-sized blade on the end of a long handle.   The operators keep the plates razor sharp (they carry stones and sharpen the blades constantly).  The scary part is they hold the pineapple down with one foot and whack at it with that tool, missing their toes by millimeters.  The plants are tough, the guys work quickly, and when I asked our guide Carlos about it (that’s Carlos in the photo above), he told me accidents are not unheard of out in these fields.  Think about that the next time you sip a good tequila.

Here’s the agave field after it has been harvested.

The pineapples weigh between 80 and 120 pounds, so the guys doing this get a workout all day long.  I imagine the truck you see below was resting on its axles after it had been fully loaded.  I’ll bet those guys sleep well at night.

The pineapples are then transported to the factory to be turned into tequila.  The process goes like this:  Bake, squeeze, ferment, distill (a little or a lot), age (a little or a lot), bottle, label, and drink (a little or a lot).

But I’m getting ahead of myself.  Let’s throttle back a bit to see what it all looks like.

Caldera is Spanish for boiler, and the heat and steam produced by the boilers is needed for the slow agave pineapple bake.   Hang in there; this is about to get very interesting.

The tequila pineapples are delivered to the hornos in the factory.  Horno is Spanish for oven. It’s where all that heat and steam from the calderas gets put to good use.

The hornos are room-sized brick ovens that are stacked full of the harvested agave pineapples.  Think of them as immense crock pots.

After an all-day bake, the pineapples are soft and mushy.  Carlos peeled off a piece for us and we tasted it.  The plant had a sweet and faint tequila flavor, but it contained no alcohol yet. It would make for a good candy, but the plants are too valuable for that.  There’s more money in turning them into tequila.

The baked blue agave hearts then go through crushers, which separate the juice from the pulp.

The juice goes on to giant vats (we’ll see those in a second) and the pulp is sold separately as an agricultural byproduct.  Farms use it for feed (lucky cows, I guess) or compost.

The vats shown below are where the agave juice ferments for 2 to 5 days.  That’s where it develops its initial alcohol content.   Carlos explained that it is basically a tequila-based beer at this point.  When the Spaniards arrived in the New World, they found the native Mexicans making and drinking this.  The Spaniard’s contribution to the development of tequila was the distillation process, and that’s what takes this gift of the gods from agave beer to tequila.

I noticed that some of the vats were bubbling, and I asked Carlos if there were air injectors or heaters in the vats.  Nope, that bubbling occurs naturally as a consequence of the fermentation process.

The factory helps the process by planting fruit trees that attract a certain kind of insect around the fermentation building.  The bugs are drawn to the scent of the fermenting tequila juice.  They fly into the vats and drown, and their decomposition accelerates the fermentation. It’s a good thing I developed a taste for tequila before I knew that.

The photo below shows the distillation line.

Distillation is followed by aging in oak barrels, and how that’s done is a big part of what makes for different grades of tequila.

The pecking order for different tequila grades goes something like this:

    • Cheap tequila is produced from the juice of the agave plant mixed with other juices.  You can get a pretty nasty hangover from this kind of tequila (like I said at the beginning of the this blog, Jose Cuervo is no friend of mine).
    • The next big step up is tequila made of 100% blue agave juice.  If it’s that kind of tequila, there will be a notation somewhere on the label that says 100% agave. If it doesn’t have that, it’s the cheap stuff, not matter what some smooth-talking liquor store dude tries to tell you.  100% blue agave tequila is less likely to give you a hangover, too.
    • Higher grade tequilas are aged in oak barrels, and the amount of time they are aged makes for a better grade of tequila. Longer is better.
    • Really good tequila is distilled multiple times and aged.
    • Really, really good tequila is aged for 2 years in French oak barrels. This kind of tequila has a dark brown appearance, and when you turn it in the light, it looks like it contains little flecks of gold (it doesn’t actually have flecks of anything in it, but it looks like little pieces of gold). This tequila can go for hundreds of dollars a bottle.

After distillation (and after aging, if you’re going for the good stuff), the next step is bottling.   Then the bottles are labeled, and then they’re packaged.

Our tour was at the La Cofradia distillery in Tequila, about an hour northwest of downtown Guadalajara. Surprisingly, the La Cofradia distillery had a tasting room (just like you’d see at a vineyard), and we sampled different tequilas after the tour.  The bottle that our guide, Carlos, is holding in the photo below is the good stuff with the dark brown color and gold flecks. I tried a sip, and it was very, very smooth indeed.  I was tempted, but I wasn’t going to drop $400 (in 2003, or for that matter, at any other time) on a bottle of tequila.

Just for giggles, I Googled “expensive tequilas” and I found that you can pretty much go crazy spending money on tequila, including one that sells for $6700.  I’m not into it like that.  I’ve found that the best place to buy reasonably-priced 100% blue agave tequila is Costco.

I am glad we visited Guadalajara and Tequila when we did.  With the pandemic and the drug cartel situation down there, I don’t know if I would do it again today.  I looked up Guadalajara safety and it’s rated as a medium risk city.  By today’s standards, that’s probably accurate.  Truth be told, I’d much rather visit Guadalajara than, say, Portland, Chicago, or Seattle these days.  The pandemic will pass; the drug situation in Mexico will take longer.  I hope the Mexican government gets on top of it soon.  I’d like to explore mainland Mexico again.


If you’re planning a ride into Mexico, make sure you insure with the best and our favorite:  BajaBound!

Want to know more about riding in Baja?  Just click here.


If you enjoyed reading about how tequila is produced, you might enjoy our story on Jack Daniel’s, too.

It’s not a BSA!

I saw this YouTube video a few days ago on the Royal Enfield 650 Interceptor, and I’ve been meaning to post it here on the ExNotes blog.  I think YouTube motorcycle reviews are generally a time suck, but I enjoyed this one.  The dude who made it (MotoSlug, a guy I never heard of before) nailed it, I think, with his description of the Enfield, its capabilities, and the riding experience.  It’s no BSA, Senator, but it’s still a fun ride. Actually, it’s way better than any BSA I ever rode.

I’m inspired. It’s late afternoon here in So Cal, which is to say it’s hot.  When things cool off in a couple of hours, I’m going to fire up my Enfield (that’s it in the photo above) and go for a ride.


Read our story about riding Enfields in Baja here.

Product Review: Chase Harper 650 Tank Bag

I’ve dropped a lot of usable content on Facebook without thinking about it. Good stories that would have made excellent topics for an ExhaustNotes.us blog post and I’ve screwed around and published them on Facebook’s Anti-Social Network. To what end? All it does is supply the buoyant pontoons that support a miserable, never-ending political tussle on my Facebook feed. My Chase Harper magnetic tank bag is a perfect example. Why haven’t I written a product review on this thing?

Until John Burns over at Motorcycle.com brought up tank bags I had completely forgotten I had one. I bought the Chase Harper 650 the day Berk and I left for our 650/500 Royal Enfield Baja trip. Neither Royal Enfield was set up with luggage so we strapped our gear on the bikes as best we could. I started out on the 500cc Bullet and I had so much junk to carry I used a backpack to hold some of it.

I’m a proponent of letting the motorcycle carry as much weight as possible. Slinging 20 pounds of junk onto your back and then pounding on city streets is not smart or sexy. My back was already hurting. We were working our way south to pick up a freeway when I called out to Berk, “Is there a motorcycle shop around here? I need to get a tank bag.”

“Yeah, follow me.” I followed Berk through the nondescript Californian sprawl and we arrived at a motorcycle accessory shop that was not named CycleGear. The shop guys came out and ogled the (at the time a new model not yet sold) Royal Enfield 650. We shot the breeze for a bit and then went inside to look at tank bags. Which didn’t take long because they only had one in stock: the Chase Harper 650.

The Model 650 is as plain as you can make a tank bag. It has a few zipper compartments and four strong magnets to hold the thing to your tank. Nothing expands or is special. Chase Harper is proud of their motorcycle products and prices them accordingly. The thing was like 90 dollars! As it was the display model, kind of dusty and missing the box and paperwork I asked the guys for a discount. No deal.

Berk started telling them how we were famous motojournalists. The clerks shook their heads, neither having heard of or read our stuff. I showed them a few tired old Motorcyclist Magazine stories on my cell phone and they seemed really interested but would not budge on the price. “We’ve already reduced the price on that bag, we can’t go any lower.” I bet Peter Egan could have gotten the price down. The fastest way to end this ego shattering indignity was to fork over the money and haul ass as fast as we could.

The bag was a great relief for my back. It held my camera, wallet, phone and enough stuff that I could survive a day or two on the hoof. Whenever Berk and I went into a store or restaurant I took the bag with me. The magnets make that so easy. I didn’t like that the bag had no rain cover. Those soulless misers at the motorcycle shop not called CycleGear said it was rain resistant. Whenever a motorcycle gear manufacturer says a product is resistant to rain you can take that to mean the damn thing is a sponge. I mean, anything that doesn’t dissolve like sugar when it gets wet could be described as resistant to rain.

As it turns out we didn’t hit any rain on our ride through Baja and the tank bag worked out perfectly fine. I got the 650 Royal Enfield up to an indicated 115 miles per hour and it stayed put like it was made to do 115.

In all the time I have owned the C-H bag I never really looked it over too closely. I didn’t see any straps for using the bag like a backpack. This is a common feature on tank bags. It wasn’t until Burns’ brought up tank bags on Facebook that Steve, another C-H 650 user told me that the straps were hidden in a zipper compartment under the grab handle.

And they were! Well hidden, I wonder if I the shop not named CycleGear had given me the original paperwork for the 650 would I have found the straps sooner? Probably not: I would have tossed the paperwork anyway. I’m a rebel, man.

The interior of the C-H 650 is plush, deep red. I feel like I have a bordello between my legs whenever I open the lid. Well padded, my camera gear survived Baja’s bumpy roads unscathed.

The lid of the 650 has quite a few features. There’s a bungee cord crisscrossing the top to hold odd shaped bits. Behind the mesh map holder there is yet another zipper for papers and what not.

Finally, there is a front-opening pouch with a red plastic liner that might keep something dry depending on how much the zipper leaks. I haven’t used any of these little hidey-holes so I can’t say if they are worthwhile. I toss everything into the main compartment.

The backside of the C-H 650 is not covered in super soft material. It’s more like vinyl. I had no tank scratches using the 650. There is one clip on the front and two clips on the back that I imagine could be used for strapping the bag to non-metallic gas tanks. I did not get the parts that would affix the bag to a non-metallic tank. They might be an extra cost item or you-know-who lost them at that shop not named CycleGear.

Overall I’m happy if not ecstatic with the Chase Harper tank bag. Just remember to bring plastic bags to protect your stuff in the rain. It did the job I needed it to do for much more money than I thought it should. For only having one, dusty tank bag the shop not named CycleGear did ok. My last tank bag lasted 10 years. This one looks sturdy enough to go the same distance.

Land O’ Goshen: A Janus ride!

Janus Motorcycles has a series of videos on their motorcycles, and this is the latest with Jordan and Josiah.  There are few things that sound as good as a single-cylinder motorcycle accelerating, and that comes across loud and clear in the video.  Enjoy, my friends.

Watching the Janus video reminded me of the Baja ride I took with Jordan and Devin (you can read about that adventure here).  It was cool, riding the jewel-like, CG-engined, Janus motorcycles across northern Baja.  We may do that again at some point in the Covid-free future and that would be fun.  We sure had a great time on our Janus Baja adventure.


You can read about our other rides here, and more on things to see and do in Baja here.

12 Tips for Hot Weather Riding

I visited Chiriaco Summit and the Patton Museum last week (we’ll have a blog on it soon) and it was awesome.  But wow, was it ever hot.  As in 111 degrees when we left, and that’s not an unusually warm day out there in the Sonoran Desert.  The next town over is called Thermal, and a little further north there’s this place called Death Valley.  Death Valley recorded a whopping 131 degrees three weeks ago.  Sensing a pattern?

Looks like the Mojave, doesn’t it? Nope. That’s Joe Gresh in the Gobi Desert. Gresh and I rode across it after coming down off the Tibetan Plateau. It was a bit warm out there.

Yeah, it gets warm in these parts, and in other parts of the world as well.  Hot weather is not ideal riding weather, to say the least, but sometimes we find ourselves riding in shake and bake conditions. I’ve done it. I rode a 150cc scooter all the way down to Cabo and back in Baja’s hottest month of the year (September, when it was well over a hundred degrees every day).  It was humid down there, too, once we crossed over to the Sea of Cortez side of the peninsula.  We were literally entering the tropics as we crossed the Tropic of Cancer.  Whoa, that was rough riding!

Simon Gandolfi, suspenders flying in the breeze, riding my Mustang replica bike south of the Tropic of Cancer in Baja California Sur. It was one of the hottest rides I ever experienced.

When we did the Western America Adventure Ride with CSC and the guys from Zongshen, we rode through the same corridors described earlier above, riding across California and the Mojave Desert, through Joshua Tree, and on into Arizona with temps approaching 110 degrees.  That was brutal riding.

King Kong and Mr. Zuo in Joshua Tree National Park. That was another brutally hot day.  Higher higher temps were still in front of us when we later rolled through Amboy, California. This picture became the cover photo for 5000 Miles At 8000 RPM.  You should buy a copy or three (they make great gifts).

The ride across China that Joe Gresh and I did had similar challenges.  It started out hot, then it got cold as we rode into the Tibetan Plateau, and then it became brutally hot and humid as we descended into central China and rode east to Qingdao.  That was a 38-day ride, and I’d guess it was well over 100 degrees for at least 30 of those 38 days.

The risk, of course, is heat stroke, and it’s often not the kind of thing you can feel coming on.   You’ll think you’re okay one minute, and the next you’re waking up in an emergency room wondering what happened.  If you start to feel a headache while riding in hot weather, you are already perilously close to heat stroke.  You need to stop, drink copious amounts of water, and get some shade.   The better approach, though, is to not let yourself get anywhere near that condition, and that’s what this article is all about.

It almost seems like heresy to say it, but my first bit of advice about riding in hot weather is:  Don’t.  Given the choice, postpone the ride.  But let’s assume that this is not an option, as was the case for each of the rides mentioned above.  Okay, then…here’s my guidance on the topic.

12 Hot Weather Riding Tips

One: Don’t ride naked.  I’m not trying to be funny here, and I’m not implying you might be the kind of person who would go down the road wearing nothing at all (although there is that story about Gresh riding around with only a bathrobe).  Nope, what I’m talking about is not shucking your safety gear.  You have to wear it.  All of it.  ATGATT.  All the gear, all the time.  You can’t peel it off just because it’s hot.  It’s saved my life.

My Viking Cycles mesh jacket and the mighty Enfield.

Two: Wear a good mesh jacket.   These are available from several sources.  I have a Viking Cycles jacket I’m wearing these days and it works well.  I wore a Joe Rocket mesh jacket on the ride across China and it made a big difference.  You can get them from Viking Cycles, CSC Motorcycles, British Motorcycle Gear, and other sources.  Trust me on this…you need a ventilated jacket for riding in hot weather.  EDIT:  We’re getting interesting comments advising not wearing a mesh jacket in hot weather.  Make sure you read the comments below, and for those of you who responded, thanks very much!

Three: Use a cooling vest.  These things actually work, but they’re not as easy to use as it sounds.  They don’t work for long, but they work.  The idea is you soak them, and then wear them under a jacket.  The airflow causes the water in the vest to evaporate and that cools the vest and you.  I’ve found that on really hot days these vests need to be remoistened about every thirty minutes, but you should be stopping that often anyway (more on that later).  It’s the remoistening part that I don’t like.  It seems like they take forever to soak up water when you remoisten them.  I’ve found it easer to just get my clothes wet (see the next point below).

Four: Go soak your head (and everything else).  Don’t laugh; I’ve done this.  On the Baja ride I mentioned above, it was so unbearably hot that we took to pouring water down the inside of our riding jackets and inside our helmets at every stop.  We became rolling evaporative coolers.  It helped.

Five: Change your riding hours.  On the really hot days, I like to hit the road at 0:Dark:30.  Get out and get a hundred or so miles in before it gets unbearably hot.  You’d need good lighting on your bike to do this (I generally don’t like to ride at night, but I’ll make an exception when I know it’s going to be hot).   This is difficult to do when riding in a group because it’s hard to get everybody moving that early.  If it was just me and Gresh or Welker, we’d leave way early and get in a couple of hours of riding (or more) before the sun comes up.

We knew it was going to be brutally hot riding through Joshua Tree and the Mojave Desert, so we left just before sunup on the first day of the Western America Adventure Ride.

Six: Drink a lot of water.  The problem with riding in high temperatures is you don’t realize how much water you lose through perspiration.  My advice is to stop every 30 minutes and drink a bottled water.  Like I said above, most of us ain’t spring chickens, and you might be wondering if this means you’re going to be stopping a lot to pee.  Hey, it’s a common old guy problem, but it won’t be in hot weather.  Drink a lot of water; you’ll lose it through perspiration as you ride.

Seven: Avoid alcoholic beverages.  Alcohol will cause you to dehydrate more rapidly, and that’s the opposite of what we’re trying to do here.  You shouldn’t be consuming alcohol on a motorcycle ride anyway.  Drinking any kind of alcohol while riding in hot weather is just stupid.  Where I found you really have to watch this is when riding in a large group (there will be one or two riders who have to have that beer or two at lunch).

Beer is good, especially when it’s a Tecate at the Old Mill in Baja overlooking Bahia San Quintin. But save it for the end of the day, when the bikes are parked for the night.

Eight: Stop regularly to cool off.  Find a bit of shade or someplace air conditioned, and get off the bike to cool down.   When I ride in hot weather, I usually stop to cool off and rehydrate every 30 minutes or so.

Stopping to cool off at the Tropic of Cancer. Wow, it was hot and humid down there!  We were off standing in the shade, drinking bottled water.

Nine: Keep your tires at recommended pressures.  Another thing you definitely don’t want on a hot day is underinflated tires.  Tires flex with every rotation, and flexing causes the tires to heat.  Throw in high road surface temperatures with underinflated tires, and you’re flirting with a blowout.  This is especially important to remember if you’re one of those guys or gals who deflate their tires for dirt riding.  Don’t forget to pump them back up when you get back on the asphalt.

Ten: Don’t speed.  Tar melts on hot days, and melted tar is slick.  Factor that into your riding when it gets toasty.

A meal fit for a king, but not for lunch. You wouldn’t want to ride in hot weather immediately after this Baja seafood extravaganza.

Eleven: Eat light.  Don’t over indulge.  Heavy meals put a strain on your digestive system and your heart, and that can elevate your body temperature.  When I was involved in testing munitions out in the Mojave on hot days (where it was sometimes over 120 degrees), we always brought along melons for lunch and nothing else.  We didn’t need to keep them cool.  They were a great treat, they seemed to make it a little cooler on those horrifically hot days, and they help to keep you hydrated.  Good buddy Sergeant Zuo seemed to know all about that in China, too.  We were riding through Ledu in central China one ferociously hot day when our favorite Chinese NCO stopped the group, disappeared, and returned with a couple of watermelons.  That was a welcome respite and a marvelous treat.  We ate a lot of watermelon in China.

Gresh taking a break in Ledu, China. That’s the Yellow River (China’s Mother River) behind Uncle Joe.

Twelve:  Lighten up on the low sodium schtick.  A lot of us older guys try to watch our sodium intake.  When I was in the Army, they actually gave us salt tabs on really hot days when we were in the field, the theory being that we needed the sodium because we were losing so much through perspiration.  I later heard the Army reversed that practice, but the fact is you lose a lot of minerals through perspiration.  I don’t worry about my sodium intake when riding on hot days.


So there you have it.   You know, most folks who ride motorcycles these days…well, how can I say this delicately?  We aren’t spring chickens anymore.  Motorcycling tends to be a thing mostly enjoyed by full-figured senior citizens, and we have to take care of ourselves, especially when we venture out on hot days.

If you other ideas about hot weather riding, let us know in the Comments section.  We love hearing from you.

Product Review: Xtreme Power 14-inch Electric, Wet/Dry Concrete Saw

Recently we added a paver patio to Tinfiny Ranch’s ever-growing suite of stone and concrete structure. The pavers we used weren’t exactly made for paving. They were that pressure molded, popcorn cement stuff, like a two-cell block but these were all solid. I have a great assortment of 4x8x16 blocks and less, but still plenty of 8x8x16 blocks. I got them at a surplus materials auction for only 20 dollars. No one else bid on them because they are kind of an odd block.

The only catch was you had to move them. The blocks are not that heavy individually but the repetition of loading several hundred of them into The Bomber, a 1990 4X4 GMC Suburban (last year of the solid front axle!) had me questioning the wisdom of bidding so high.

When I bought the blocks I had no immediate plans for them, it was just too good of a deal to pass up. It took three trips to load and move the blocks from the auction yard back home. I made a neat, orderly pile up in the higher reaches of Tinfiny Ranch. The blocks sat there a couple years, not bothering anyone.

During that time I built a retaining wall and leveled the back yard, then I poured a decorative concrete slab around the side and back of the little shack we call home. When I got to the section where the septic tank was buried I had to stop pouring concrete. At this stage of the construction process those $20, auction concrete blocks started to look like a canny deal. Unlike real pavers these blocks were 4 to 8 inches thick. That means I needed a way to cut the blocks to fit the odd shapes mandated by my out-of-square building techniques. I purposely make my home projects cockeyed. It makes them easy to identify if they are ever stolen, like the VIN number on your motorcycle.

Which is, even I have to admit, a really long introduction to this concrete saw review.

I didn’t plan to buy Xtreme Power’s 14-inch electric, concrete wet-saw because I already had a 12-inch Hitachi concrete saw. It’s kind of funny in a sad, losing-my-mind sort of way but it had been so long since I used the Hitachi I forgot what size it was and bought a new 14-inch, wet-cutting, diamond blade for it. Naturally the 14-inch blade wouldn’t fit into the 12-inch saw. Side by side the 14-inch saw is much larger than the 12-inch. It just goes to show you how a couple inches can make a big difference.

My wife CT, constantly bucking for wife of the century, suggested I check the prices on a new 14-inch saw to fit the blade I had instead of buying yet another 12-inch blade to fit the saw I had. There were other, mitigating circumstances that I didn’t let CT know about. One of them was the fact that the Hitachi was never made to be used wet. It was a dry saw. My Pop welded in a threaded bung for a garden hose and for years we used it plugged into 120 volts while standing in water. We did this because we were construction workers and simply not very bright.

It was only a hundred bucks more to buy a whole new saw rather than eat the sunk costs of the 14-inch diamond blade and buy another 12-inch diamond blade. A big plus is that the Xtreme Power saw is built from the factory to be used wet. All gripping surfaces are electrically isolated and the power cord has one of those super-sensitive GFI-type circuit breakers to prevent idiots like me from electrocuting themselves.

Spinning a 14-inch blade through concrete is not an easy thing to do. It takes lots of power and with a 15-amp rating the Extreme Power saw uses just about all the current your standard household receptacle will supply. You won’t be running this saw on a 100-foot extension cord.

Concrete saws rotate the opposite direction from wood cutting circular saws. Meaning if the saw binds it jumps forward instead of kicking back. Even if it doesn’t bind you have to restrain the saw rather than push it forwards. It’s a handful to keep the thing going in the direction you want.

Xtreme Power’s 14-inch saw was not without its faults. The saw came with a strange water connection than won’t fit any US-spec water hose. I had to replace the stock fitting but the step-down in size from garden hose to saw fitting was huge. I made a spooky looking plastic adaptor to accommodate the size issue.

Once connected to water I opened the hose bib and the small hoses promptly blew off and squirted water into the inner reaches my nice new 14-inch Xtreme Power saw. This didn’t bother me, as the manufacturer must have anticipated a wet saw getting wet. Xtreme Power uses water supply hoses that are a soft silicone type of material; so soft they won’t stay on the hose barbs. A few wraps of bailing wire around the hoses secured them and left a nice, sharp barb to cut my hand on should I ever relax my vigilance in the future.

My water supply problems were not over yet. In use those super soft hoses manage to kink easily, stopping the water flow to the blade. It’s easy to tell when the water stops because clouds of cement dust billow from the blade housing. There you are, trying to steer a heavy, bucking saw while holding the water supply hose in a position that won’t cause it to kink. I’m amazed I didn’t sever both my feet with the damn thing. New, stiffer hoses will be installed before I use the 14-incher again.

Ignoring the water hose problem for the moment this saw cuts concrete like butter. I can make a foot-long, 4-inch deep concrete cut in about a minute. There’s no dust but a slurry of concrete mud slinging out the back of the machine means you won’t be carving the Thanksgiving turkey with this thing.

Being a wet cutting saw the blade housing has to cover a large percentage of the blade to prevent the user from being splattered with mud. This housing makes seeing where the blade is cutting nearly impossible. You have to kind of wing it. There’s a notch on the shoe to use as a guide. I had good luck eyeballing the line using the edge of the shoe and the edge of the material as a guide.

Which brings us to another problem with using a 14-inch blade to cut 4-inches of concrete: You may luck out and make a straight cut from the side the saw is on but that big blade has other ideas and will wander outboard leaving behind a tapered cut as the blade flexes. A multitude of passes with shallower cuts would be a better idea but I needed to move on so I chopped the pavers in one pass. Precision is not my bag when it comes to stone work.

Out of the box, the Xtreme Power saw is not ready to work. You’ll need to redo the water hose system before attempting any cuts. I was cutting really thick blocks so for regular pavers the blade wandering issue probably won’t be a problem. This saw is big and heavy but it has to be because of the size blade it swings. Xtreme thoughtfully included a set of wheels that would come in handy if you were cutting many feet of expansion joints or grooving an area for non-skid. I’d like to rig a handlebar system so the saw could be used as a walk-behind unit.

I can’t comment on longevity. I’ve used the saw two days in total. Amazon has them for $200 with free shipping. That’s a little more expensive than renting a saw for two days but probably less than renting a saw for a week. The blade is not included. You’ll have to buy that separately, which is how I got into this mess in the first place.


You’ll find more Product Reviews here, and if you like Gresh’s writing (and who doesn’t?), here’s a link to more Joe!

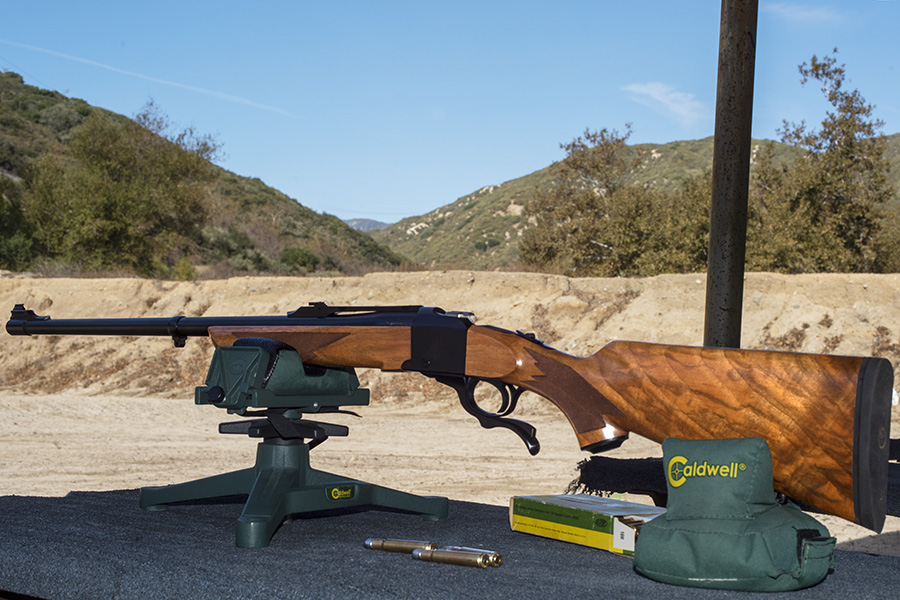
A .257 Bob Triple A French Walnut Kimber

I like fancy walnut.  I won’t buy a gun unless it has exceptional wood and it’s in chambered in a round I already shoot (I don’t want to buy new dies and components, and with the exception of .22 Long Rifle, I only shoot what I reload).  On rare occasions I’ll come across a rifle with wood so exceptional, though, that I’ll set aside my caliber rule. This is a story of one such rifle: A Kimber 84 Classic Select chambered in .257 Roberts.

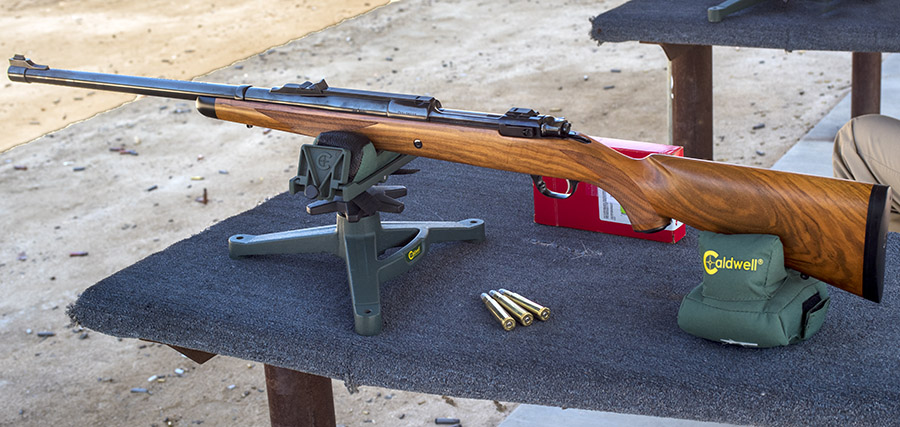
The Kimber “Select” designation means the rifle has been selected for the figure in its stock, but I’d seen any number of Select Kimbers with mediocre wood.   That’s not the case here, though.   The two photos directly below were straight from the Gunbroker.com ad, and I’d never seen one as beautiful as the auction photos indicated.

I knew I wanted the rifle, but I was a bit skeptical because I’d talked to a guy at the range with a .257 Roberts Kimber.   When I asked him how it shot, he just looked down and shook his head.  “With that pencil weight barrel, it’s hard to hold 3 inches,” he said.   “Good enough for deer, I guess.”

But still, that wood.  When I saw those photos above online, I called the store behind the Gunbroker ad.  “Is it really as nice as the pictures?” I asked.

“We were stunned when we opened the box,” the guy at the other end said, “so the answer is yes.  We’ve never seen one like it.”

That cut it for me.  The rifle had a “buy now” price posted on Gunbroker, and that’s what I did.  The time to buy something exceptional is when you see it.  I suspect if I had let the auction for the Kimber run its course, the bidding would have taken the price well north of the buy now number.

I was a little leery of the .257 Roberts cartridge having had zero experience with it, but everything I read about it was good.  Ned Roberts (a gun writer and wildcat cartridge developer in the 1920s) necked down the 7mm Mauser round to .25 caliber (the actual bullet diameter is 0.257 inch).  Remington added legitimacy to the cartridge by offering it in 1934.  Folks say it’s perfect for hunting everything from groundhogs to deer.  All that sounded great, but I remembered that guy with his .257 Bob at the gun club.  I need not have worried, though.  You’ll see why in a minute.

So how did the Kimber shoot?  In a word, it was fantastic.  How about sub-half-minute groups the first time out?

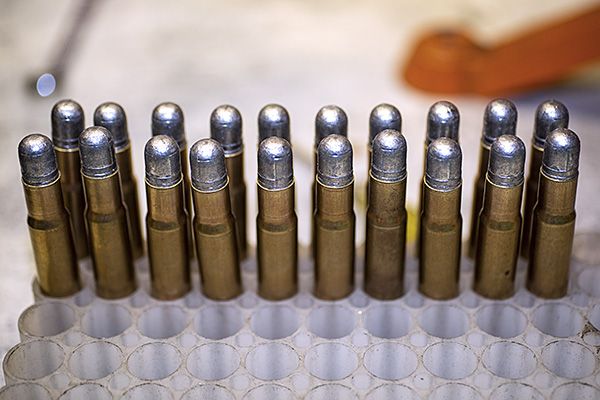
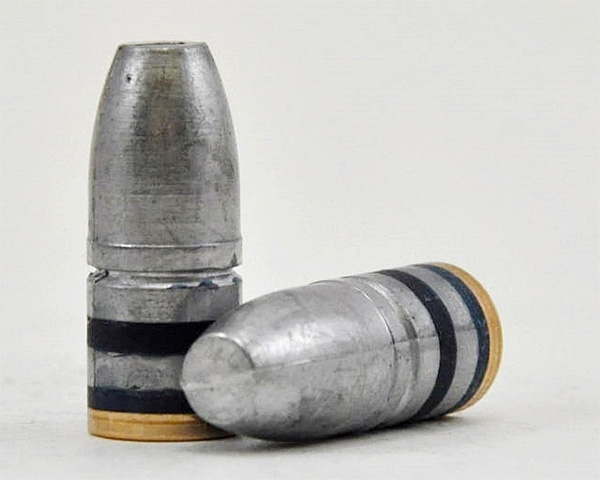
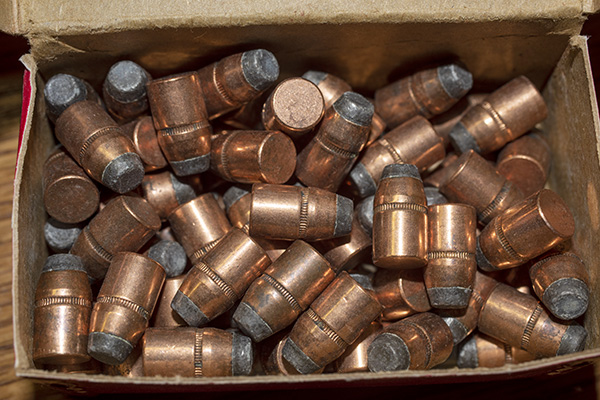
The secret sauce for the Kimber is 36.5 grains of IMR 4320 propellant under the 100-grain Sierra jacketed softpoint bullet (their No. 1620 bullet).  My Lyman manual lists a propellant range for that bullet of 36.0 to 40.0 grains.  I had three loads prepared that went up to 38.0 grains, but I found the 38.0-grain load too hot (the bolt was difficult to open).  You should always start low and work up, and I had just proven that.  Every rifle is different (even when they are identical), and 38.0 grains was too hot in my rifle.  The 36.5-grain load was the Goldilocks load:  It was just right.


More beautiful wood and secret sauce reloading recipes?   You can read them right here!
Squeeze Me: KLR250 Refresh, Reflash and Rehash Part 3

The KLR250 refurbishment has been going slowly but in addition to that I’m not getting much done otherwise. It’s the heat. Temperatures at Tinfiny Ranch have been hovering around 100 degrees or more and under these conditions it’s all I can do to press paper firebricks.

I did manage to order a brake caliper kit from England. The Widow Maker’s front brake gave me lots of problems at Daytona this year. The caliper was mightily stuck and the master cylinder was odd feeling. I managed to get the brake working well enough for Bike Week and replaced the master cylinder in a previous R, R & R episode but I didn’t trust my half-assed Florida Man repairs on the caliper.

The Brakemasters rebuild kit was very complete and was inexpensive to boot. The Widowmaker’s original rubber parts lasted through 20 years of neglect so the new stuff has a steep hill to climb. The only part I didn’t care for was the new bleeder nipple. The replacement nipple did not want to thread in easily. I could have forced it and remolded the aluminum caliper threads but instead used the old nipple, which threaded in by hand.

As expected, the caliper job went well. Old motorcycles with single-piston calipers are a breeze to repair. The hardest part was fitting the dust seal into the caliper body and then fitting the piston. I didn’t remember how I did the trick last March and was getting frustrated. Thank goodness for YouTube; I pulled up a quick search on caliper dust boot installation and there was a guy showing me how to do the deal.

I think in March I used a beer can to make an expander sleeve for the piston and then slid the piston into the (already installed in the caliper) boot. It just wasn’t working this time. Maybe fresh rubber is stronger than 20-year-old rubber. YouTube man fitted the boot to the piston first (the opposite of what I was doing) and let a short length of rubber hang off the back. That hanging bit was then pushed and prodded into its groove on the caliper. Once the dust boot is in the groove the piston can be slid into the caliper all the way until the piston groove catches the other end of the boot. With all the talk of grooves this sounds confusing but that’s why YouTube videos are so nice. YouTube Man’s method worked great and the caliper is now ready for reinstallation.

If it cools off a little I’ll tackle the fork seals and re-grease the steering head bearings next. And keep making firebricks, of course.


More on the KLR250 and other moto-resurrection stuff is on the ExNotes Resurrections page!

I Got Mine: Viking Cycle’s Ironside Mesh Jacket

You already read about Joe Gresh’s Viking Cycles jacket. I received my Viking jacket around the same time Gresh received his. Like Joe’s jacket, mine is vented, and that’s entirely appropriate for the extreme heat we are having here in So Cal.  It flows a lot of air, and once moving, riding in hot weather is tolerable.  And you have to love the orange on this jacket.  Orange is the fastest color; if you don’t believe me, just ask good buddy Orlando.  That’s Orlando and Velma in RAZ (you know, the Rachel Autonomous Zone, where ketchup bottles are assigned to specific tables).  Those two never miss an opportunity to pose with an orange motorcycle.

The Viking is a good-looking jacket, with plenty of pockets.   There are two chest pockets, two belly pockets, and a pocket suitable for cell phones or eyeglasses just inside the zipper.

The inside pocket…suitable for shades, or maybe a cell phone.  The zippers all appear to be of good quality, too.

About those belly pockets…they are sized perfectly for holding a lot of different things.  Baseball hats, cell phones, Yoo-Hoo boxes, and more.

My jacket came with a spec card, and rather than try to describe the specs myself, I’ll let the card do the talking.

The jacket had a desiccant pouch in one of the pockets.  I always wonder what prompts warnings on things.  Take a look:

Don’t eat the desiccant.  Seriously?  You know the good folks who make these things put that warning on the desiccant because somebody did.  Even with warnings, though, people still do the things the warnings warn them not to do.  You know, folks who urinate on the electric fence because they just have to find out for themselves.  Some of those people vote, too.  But I digress. Back to the main attraction, and that’s my review of the Viking Cycles jacket.  It’s made in Pakistan.  That’s okay by me.

Like most motorcycle jackets, the Viking Cycles jacket has a beltline adjustment strap and straps for adjusting sleeve flop.  The jacket also has a removable liner, and mine has the pocket tether and hook Gresh already mentioned in his review, presumably for a spare key.

As Joe Gresh commented in his jacket review, the Viking jacket’s price is surprisingly low at $49.99.  I’ve had lots of motorcycle jackets over the last few decades; this price is way lower than anything I’ve had before, even considering employee discounts and inflation.  I believe the Viking Cycles jacket is of comparable quality to most other jackets I’ve had, and better than most.  Time will tell, but so far, things are looking good.


Read our Product Reviews here!
Turnbull Guns

My Dad was a world-class trapshooter and he owned more than a few exotic shotguns when I was a kid.  I didn’t know much about them but the names and the quality of those trap guns impressed me even as a little guy.  Ljutic, Parker, Winchester, Perazzi, L.C. Smith, and others were stacked in every corner of our little place in New Jersey, and the colors, the wood, and the engraving stuck in my mind.  Of particular interest to me were the fine walnut and the exotic colors.  Dad explained that the swirling grays, browns, and blues on the receiver were done with an exotic color case hardening process that used bone charcoal laid on the parts at high temperature.   It’s magical stuff.  I didn’t understand all of it then and I don’t pretend to understand all of it now, but I sure like the way those guns looked.

Fast forward 50 years or so, and I learned of a company in New York called Turnbull Manufacturing.   Doug Turnbull runs it and the focus originally was on firearms restoration.   As part of that, Turnbull researched the history and lost art of color case hardening so he could include it as part of the restoration process.   Turnbull’s work was stunning, and it didn’t take long until a few firearms manufacturers and gun distributors realized it would make a highly-marketable feature on limited runs of new guns.

The Turnbull 1917 Smith and Wesson

A 1917 Smith and Wesson, part of a limited run offered more than a decade ago with Turnbull color case hardening. The photo doesn’t do the gun justice; it’s beautiful.

15 years ago Smith and Wesson introduced a reissue of its World War I Model 1917 for a very short time, and as part of that deal, the new Smith included Turnbull color case hardening on the frame.  I saw one of the Turnbull 1917 revolvers at a local Bass Pro and it sat in the display case for months.  Where I live, the rage is all plastic guns that wannabe gangbangers hold sideways like they see in movies released by folks whose entire knowledge of guns could fit on the head of a pin (with room left over for the Gettysburg Address), so the re-release of the Turnbull 1917 Smith stayed in the Bass Pro display case for a long time.   It was a thousand dollar handgun that Bass Pro had marked down to $695, and it still hadn’t moved.

A few weeks later I stopped at Bass Pro and the 1917 was still there.  I asked the kid behind the counter what they would take for it; he read the price tag and told me $695.  Would you consider less, I asked.  I’d have to ask the manager, he said, looking at me and not moving.  Why don’t you do that, I answered.  He finally realized his job was to sell stuff and I was a real live customer, so he took off in search of whoever the boss was.

“We’ll take 30 off,” Junior said when he returned.

“Is that percent, or dollars?”

He smiled.  “Dollars.”  It was still a hell of a deal and I pulled the trigger (pardon the pun; some of these almost suggest themselves).

All that, and it shoots, too! The fixed sights are right on the money with 185-grain jacketed hollow points over 7.0 grains of Unique.

I love my 1917 and I love shooting it.  It’s accurate.  It looks cool, it hits where I want it to hit, and it’s a .45.  It makes me feel like Indiana Jones.  And there’s one more cool thing…this gun carries well.  Indiana Jones has nothing on me.  That Cairo guy cloaked in black twirling the big sword?  Bring him on.

Turnbull’s 1895 Marlin

Next up?  That would be my 1895 Marlin in .45-70.   Turnbull did a series of these, too.  That Marlin 1895 with Turnbull’s color case hardening hit home for me as soon as I saw photos of it.  I had to have one.

One of a limited number of Turnbull finished Marlin 1895 rifles in .45 70 Government. In addition to the color case hardening on the metal bits, Turnbull also refinished the stock and fore end to match the colors on rifles that left the Marlin plant a century ago.

Back in the late 1800s and early 1900s, factory Marlin lever guns were color case hardened.  I am a big fan of .45 70 Marlins (as a quick review of Tales of the Gun will show you), and an 1895 with the Turnbull treatment was irresistible.

Turnbull did a magnificent job on these.   It’s more than just color case hardening on the receiver.  Other bits and pieces received the Turnbull treatment, and Turnbull refinished the stocks with a red stain like Marlins had a hundred years ago.   The Turnbull Marlins are very limited production items, and Turnbull had photos of each Marlin they offered with this treatment.  The photos you see here are the actual rifle I selected.

Color case hardening is like highly-figured exhibition grade walnut. It looks alive, it changes subtly under varying light conditions, and it is mesmerizing.

I’d like to be able to say a got a hell of deal on this one, and in a sense I did:  I paid list price for the Turnbull 1895, and that was still a good deal.  To make it even better, shortly after I purchased the rifle Turnbull bumped the price significantly.  Got in under the wire on that one, I did.

The Turnbull Ruger Super Blackhawk

But wait:  There’s more!  I’ve been a Ruger fan for years.  That particular affliction started with a Super Blackhawk I bought when I was in the Army in the 1970s.  I shot it in International Handgun Metallic Silhouette matches back in the day, and I still shoot it.  Rugers are great guns and they last forever.
Yours truly on the Fort Bliss Rifle and Pistol Club firing line in 1976. The game was metallic silhouette and the Ruger Super Blackhawk was perfect for it.

You can guess where this story is going:  Turnbull teamed with Talo (a Ruger distributor) a couple of years ago to add Turnbull color case hardening to a limited run of Ruger Super Blackhawks.   Wow!  .44 Magnum, a Super Blackhawk, and Turnbull color case hardening.  It’s like these guys knew me personally.  I kept an eye on Gunbroker.com and when one of the gun outfits advertised these guns at something like 30% below list…well, you know how that wave crashed on shore.  It’s an awesome handgun and I had it on the range out at the West End Gun Club just last week.
A Turnbull-finished Ruger Super Blackhawk. You can still find these brand new on Gunbroker.com, but when they’re gone, they’re gone. This is a gun that will only go up in value.
The Turnbull color case hardening treatment just flat out works on a Ruger Super Blackhawk. No two guns are exactly alike.
A view of the right side of my Super Blackhawk. I shoot a light .44 Magnum load in mine, as I’m not trying to knock over metallic silhouette rams at 200 meters these days. But if I wanted to, I still could.

If you want to learn more about Turnbull, their guns, and their services, you might want to poke around a bit on the Turnbull site.  The photography and the info there make it worth a visit.


More Tales of the Gun stories?  You bet!