101 years old, and counting…

By Joe Berk

It was one of the ones that got away, that Colt 1917 was, and I regretted it for years.  I like to describe some of the firearms I’ve let get away as ones I’ve stupidly sold but I don’t like being redundant, so let’s just say I sold it.  It was stupid to sell any of them, and having been on a quest for a decade or so to replace the ones I’ve stupidly sold (oops, there I go again), I can tell you that I’m not selling any of my guns.  You might be wondering where I’m going with this story, but wonder no more.  It’s all about a magnificent score, in this case, a US Army Colt Model 1917 .45 ACP revolver.  To jump ahead for just a second, this is the one that is on its way to being mine…

A magnificent original finish Model 1917 Colt revolver. Those are genuine elk antler grips. What appears to be an unblued area near the front sight is not…read on for more information.

The 1917s are interesting handguns, and yeah, that’s plural.  There were two of them:  A Colt, and a Smith and Wesson.  In a very real sense, they are handguns that were never meant to be.  The 1911 Automatic came on the scene in 1911, and the plan was to ultimately incorporate it throughout our Armed Forces.  But life is what happens when you’re making plans, and the US Government generally moves slowly.  When we entered World War I in 1917, there weren’t enough 1911s to go around, so the US Army turned on Smith and Colt to make their large frame revolvers in .45 ACP, and that’s how the 1917s came to be.  It was an emergency measure to make up for what we didn’t have yet, and that was enough 1911s to go around.

Major General James E. Rudder, who carried a Colt 1917 when ascending Normandy’s Pointe du Hoc cliffs on D-Day.

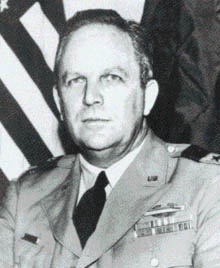
When World War II happened, the US military had plenty of 1911s, but there was at least one soldier who preferred the 1917.   Interestingly, I recently read an account in American Rifleman magazine (yeah, I’m a strong NRA supporter and I watch Fox News, too) about 34-year-old Lieutenant Colonel James E. Rudder, who led the U.S. Army Rangers when they scaled the cliffs at Pointe du Hoc in Normandy on D-Day.   Colonel Rudder carried a 1917 Colt instead of a 1911 auto (presumably, a 1917 that had been through the arsenal refurb and wore a Parkerized finish).  Rudder was an interesting man.  He held numerous awards for valor, he retired from the Army as a Major General, and he then went on to become president of Texas A&M University.  The American Rifleman article was about Rudder’s 1917 Colt, which he preferred to the 1911 auto because of its greater reliability.  Ah, if these guns could talk…


Help us keep the lights on…please click on the popup ads!


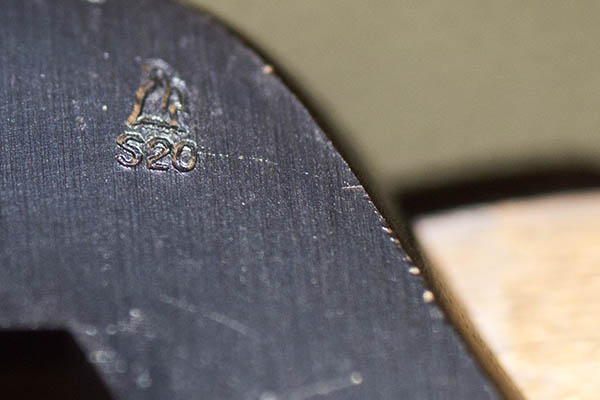
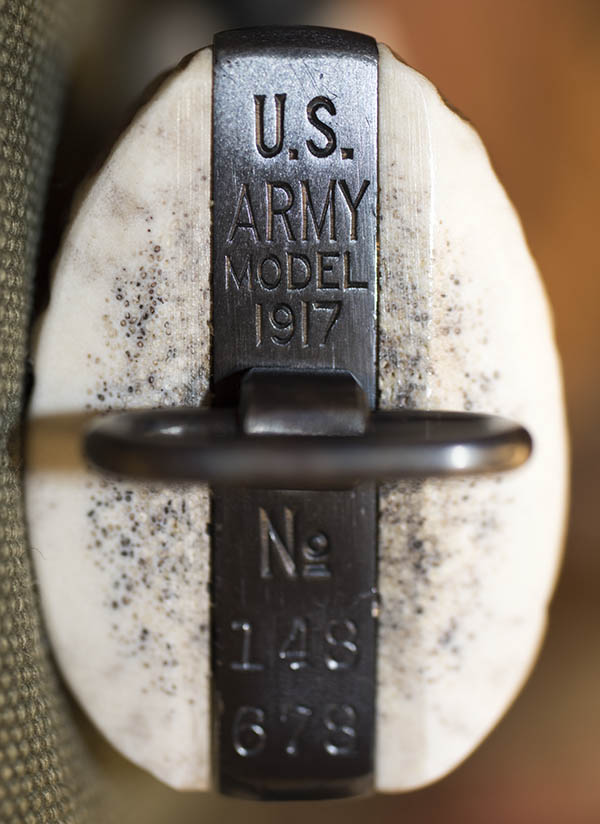
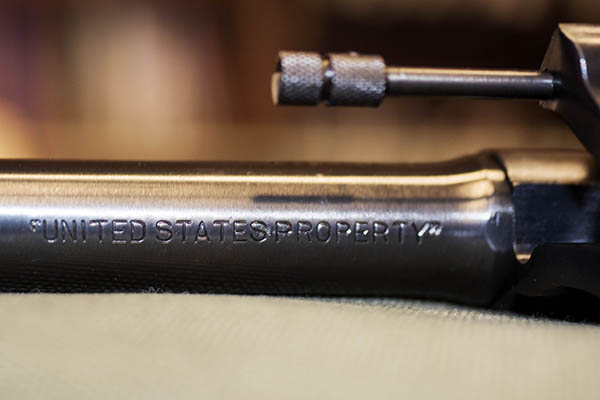
In the 1970s, when I was in the US Army stationed at Fort Bliss, Texas, I bought a 1917 Colt revolver at the El Paso gun show.  I didn’t know too much about these guns then, except that they were large frame revolvers and they didn’t cost too much. I think I paid something like $125 for mine.  It was cool. Big, heavy, Parkerized, and it shot the .45 ACP cartridge, a round I had already recognized as the ultimate handgun chambering.  I had a .45 auto (a Government Model 1911), and having a revolver chambered for the same round felt like it was the right thing to do.  My 1917 had interesting markings…it said US Army, United States Property, and all kinds of cool stuff.   I liked it.  I shot that revolver for a while, I had fun with it, and then I sold it to someone who wanted it more than I did.  I think I got $200 for it, and in those days I fancied myself a Texas wheeler dealer gun guy.

But that 1917 danced around in my head for decades. I liked it and I missed it,  and I wished I had kept it.  Finally, a few years ago I started hunting for a replacement.  The problem is, living  here in the Peoples Republik of Kalifornia, I couldn’t look outside the left-leaning anti-gun liberal looney bin we call home, as the Model 1917 isn’t on our roster of handguns approved for sale here.  If I was to find one, it would have to be one already here in LeftyLand, and that cut my options considerably.  I kept an eye on the local gun shops (it’s okay if the gun is already in California, but the way the law is written I couldn’t bring in a 1917 from out of state). I checked Gunbroker.com (the premier site for gun sales) every few weeks.  And I watched a California-specific site, Calguns.net.  I kept looking, but none of the 1917s I saw looked nice enough for my tastes, or they were out ot state, or they were priced in the stratosphere.

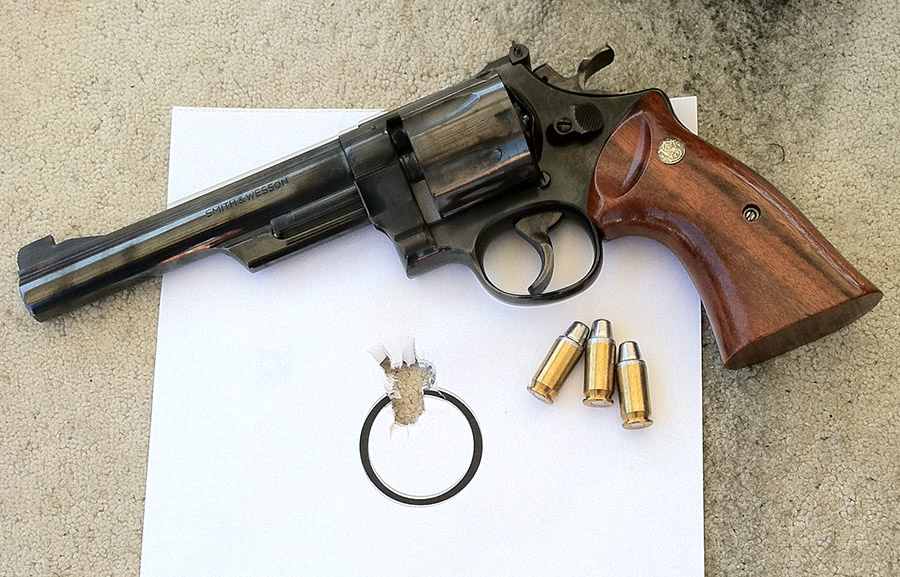
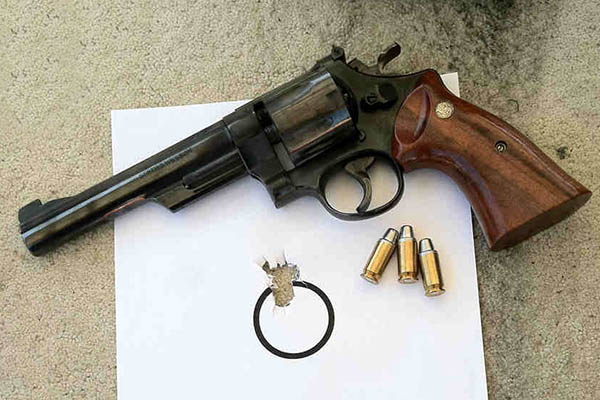
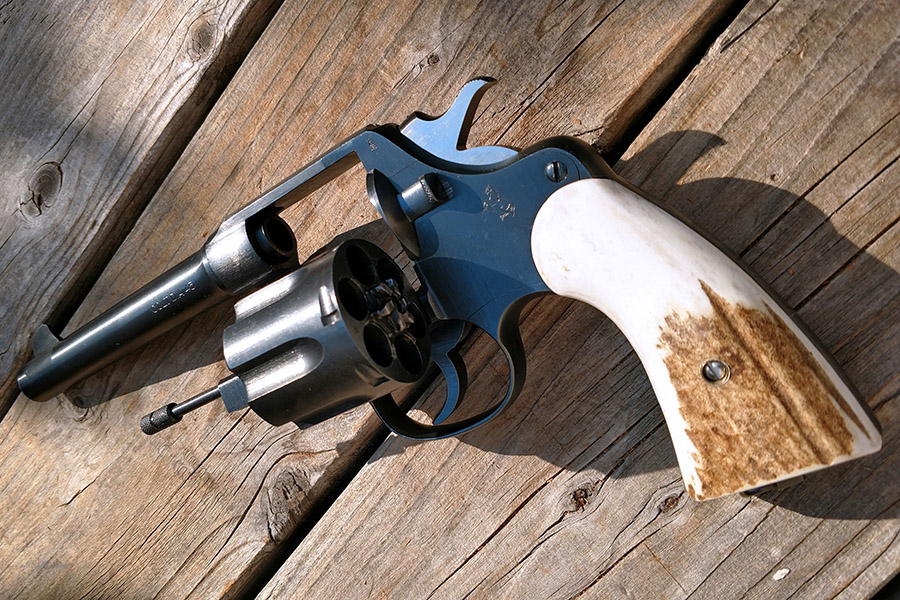
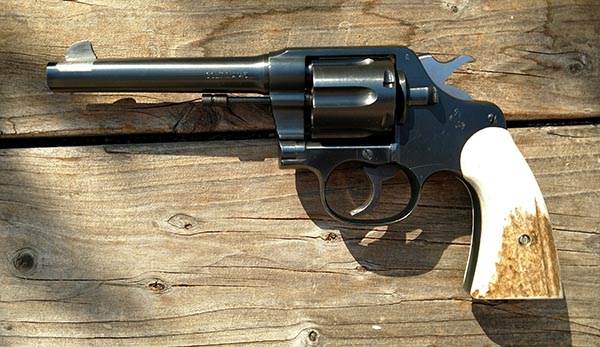
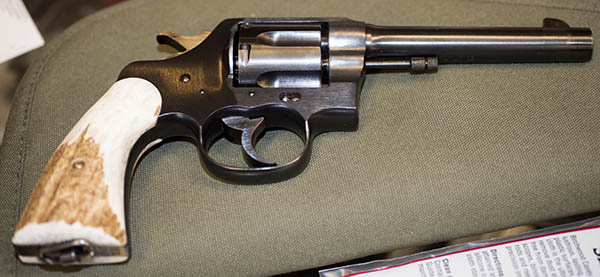
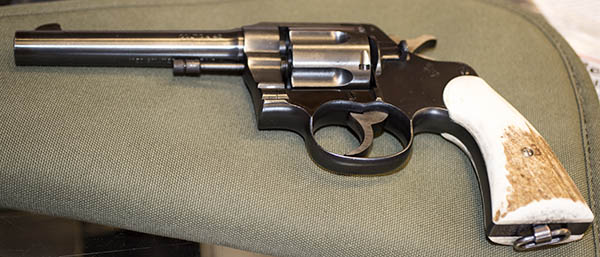
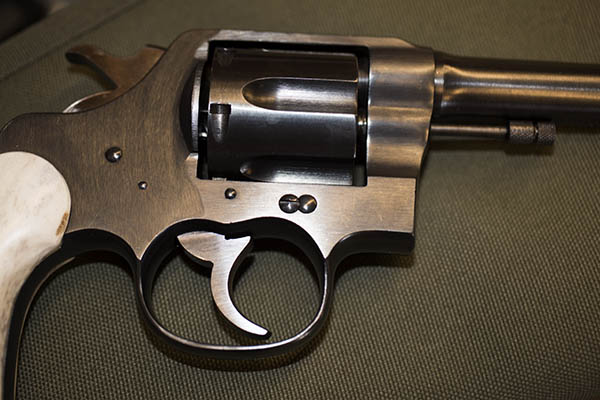
Then I hit paydirt.  Big time.  I saw the 1917 you see in the photo above in a post on the Calguns.net site a couple of weeks ago.  It looked to me like it had been reblued (because my earlier 1917 had been Parkerized and I’d never seen one that wasn’t) and the genuine stag grips were appealing (the 1917s originally wore uncheckered walnut grips).  Those genuine stag grips all by themselves are a big ticket item and to me they look like they belong on a 1917.  Unoriginal, yeah, but they sure looked good.  The reblue (I thought) and the elk grips took away from the gun’s authenticity, but I liked the look. In fact, I liked it a lot.

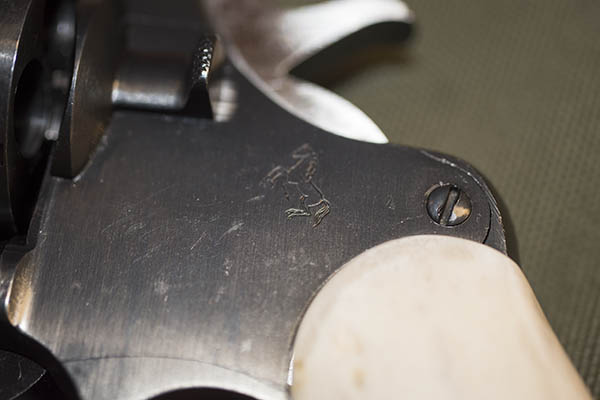
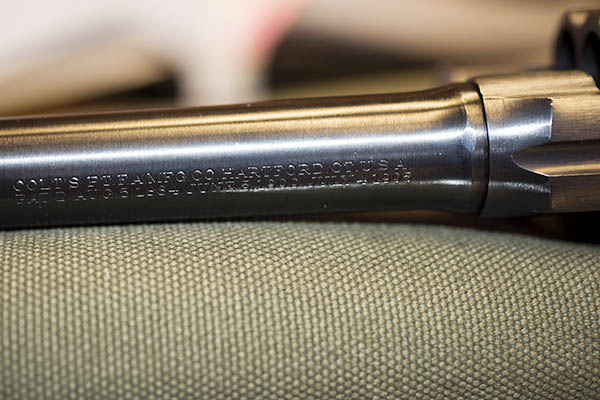
I sent a message to the advertiser (who became my new good buddy Jim), and I learned that the gun had not been reblued.  It wore its original brushed blue finish, and the direction of the brushing was an indication of its originality.   The 1917s went through an arsenal refinish between the wars, Jim explained, and that’s when they were Parkerized.  The original finish is the one you see in the photos here.  I researched what Jim told me, and yup, he had it right.  That made the gun even more appealing.  (That brushed blue original finish and the brushing direction is what made the area on either side of the front sight look unblued when the camera’s flash hit it, but it is, in fact, blued). This particular 1917 is unfired other than proof rounds at the Colt factory, and this particular handgun was manufactured in Hartford, Connecticut, in 1918.   Yep, it is 101 years old.  And it’s essentially a new gun.

All right, I decided, I’d most likely never get an opportunity like this again.  Jim and I met at Imbert and Smithers in Redwood City to legally transfer ownership, and I was blown away when I saw the revolver in person.   It is stunning.  The guy behind the counter, a dude about my age, was similarly impressed.  “I’ve never seen one in this condition,” he said, and he called the gunsmith over to look at it. I’ll admit it: I like having a gun that’s the center of attention in a circle of folks who know guns.  It’s a cool feeling.

Okay, enough bragging with words.  Let me do so with a few photos I shot yesterday at the start of my 10-day cooling off period…

The 1917 Colt, chambered in .45 ACP, wearing the factory original finish.
The view from the left. The elk antler grips work. It’s an elegant handgun.
The Prancing Pony. Colt more properly calls its logo the “Rampant Colt.” Prancing Pony works for me. It’s one of the world iconic logos.
The proof mark, showing that the revolver had been fired with a proof pressure test round at the factory.
Yep. US Army Model 1917. Lanyard ring. I love the look of this thing.
Good buddy Jim explained the brush blued finish on these guns to me. They have a unique pattern, and you can see some of it on the right side of the 1917’s frame.   It’s beautiful.
The Colt roll marks on top of the 1917’s 5.5-inch barrel.
United States Property, the rollmarked lettering on the barrel’s underside.

You might be wondering:  Am I actually going to shoot this revolver?

You bet.  And you’ll read about it here when I do.  Just 9 more days, and I’ll be fully cooled off.  And then this puppy is mine.


Read more Tales of the Gun, right here!


Never miss an ExNotes blog!  Sign up here for free!

Reloading Part I: Equipment and Components

The finished product:  Reloaded .45 ACP ammunition. This handcrafted ammo is tailored for my 1911, and it is much more accurate than factory ammunition.  Our blogs on reloading will cover the equipment and components needed, and the steps involved, in reloading ammo for the .45 Automatic.

I’ve had a few requests for a blog on reloading.   You know, not just favored loads for different cartridges, but how to go about reloading.  I know it can be a bit intimidating if you’ve never done it, but (trust me on this), learning how to reload adds an entirely new dimension to shooting, and many of us view reloading as being as much fun as shooting.  In fact, one of my friends often jokes about shooting…he says it’s what we do so we get to reload ammo again.

A very cool guy named Roy Johnson taught me how to reload when I was in the Army.   I was assigned to Fort Bliss, Texas, and Roy ran the Rod and Gun club there.  Roy was a colorful El Paso fixture, and they named the road to the Rod and Gun club Roy Johnson Lane when he died.  I was 22 years old when Roy taught me how to reload, and I’ve been reloading ever since.

I thought I would approach this topic in two or three parts, with the first blog focused on the equipment and components you’ll need to reload, and a subsequent blog or two on the actual reloading process.  I had to pick a cartridge, so I thought I would start with the first one I learned to reload:  The .45 ACP.

With that as a backdrop, here we go…


Reloading reverses the process of firing a bullet, and reversing that process requires several pieces of equipment.

One part of the equipment list is the dies that force the fired brass case back into shape (the brass expanded during firing) and knock the used primer out of the case.

A set of RCBS carbide dies for the .45 ACP cartridge.
A die set consists for a pistol cartridge typically includes three dies. From left to right, they are the resizing die (it sizes the brass case back to original dimensions and punches the primer out of the case), the expander die (it opens and flares the case mouth to accept the new bullet), and the seating die (it seats the new bullet in the case and removes the case mouth flare).

I stick with RCBS dies, as I’ve learned over the years they work best, but there are other manufacturers out there.  I also use Lee dies for a few of the cartridges I reload (they are typically less expensive than RCBS dies, and they are as good).  An added advantage of the Lee dies is that they include the shellholder with the die set, so you don’t have to buy a separate shellholder and pay extra for it.  I don’t care for Hornady dies, but as they say, your mileage may vary.  I’m the guy doing the writing here, so I’ll share my experiences and preferences, and I like RCBS and Lee.  A new set of RCBS carbide dies are a little north of $50; Lee dies are typically $10 to $15 less than the RCBS dies (and like I said earlier, the Lee dies come with a shellholder).

The business end of the carbide resizing die. The red arrow points to the carbide insert.

I use carbide dies for pistol cartridges.  A carbide die has a super-hard carbide insert that interfaces with the brass case, and it allows you to squeeze the case back to its unfired configuration without having to lubricate the case first.  The downside is that carbide dies are slightly more expensive than non-carbide dies.  For straight-walled pistol cartridges, there are three dies in a set.  We’ll discuss in more detail what each does in Part II of this series.

You will also need a reloading press and a shellholder for the brass cartridge case.   I use an RCBS Rockchucker press I bought new nearly 50 years ago when Roy Johnson taught me how to reload.  A good press lasts forever.

The RCBS Rockchucker reloading press. A good one lasts forever. The red arrow points to the shell holder. Different cartridges take different shell holders. We’ll see how all this stuff is used in Part II of our reloading series.

A scale is necessary for measuring propellant charges (also referred to as powder).   Several companies offer scales specifically designed for reloading.

My RCBS reloading scale. Like the Rockchucker press shown above, I’ve been using this for a half century.

It’s a good idea to have reloading trays for the cartridges.   These are relatively inexpensive, and they seem to last forever, too.

Reloading trays. These hold the brass cases we are going to reload, and allow for easy tracking and inspection of each reloading process step.

A powder dispenser allows you to dispense the correct amount of propellant in each cartridge case.

A powder dispenser, and the propellant I like to use for loading .45 ACP ammunition. I bought that dispenser back in the day, along with the scale and the press. My preferred propellant is Unique.

At this point, we’ve covered the equipment necessary; let’s now turn to the components.  One is the propellant you see in the photo above.  As seen in the photo below, for the .45 ACP cartridge, I prefer Unique.

You’ll need previously-fired cartridge cases.  You can also buy new brass that has never been loaded if you don’t have any, or you can buy factory ammo, shoot it, and save the brass.  I don’t think I’ve ever purchased new brass for the .45 ACP, mostly I had plenty available from my days in the Army.  The .45 ACP cartridge is a relatively low-pressure cartridge, and the brass seems to last forever.  I’ve been reloading the brass you see here for a long time.

Fired .45 ACP brass. It’s dirty. I usually polish mine, but it’s not necessary that you do so. We’ll talk more about that in the next blog.
Polished .45 ACP brass. It cleans up well and it seems to last forever (look at the stamps on the two cases on the left).

You’ll need primers.  The primer is the little cap that the firing pin strikes when you pull the trigger.   There are two or three companies making primers these days.  I usually buy whatever the shop has in stock.  I haven’t found that primers make a difference in accuracy or reliability for handgun shooting.

Winchester primers. We’ll talk about the tool you see below the primers, and how to install the primers, in the next blog.

And finally, you will need bullets.  I’m using moly-coated 230-grain roundnose lead bullets these days, like you see in the photo below, mostly because I have a bunch of them in my reloading locker.  Many other bullet configurations are available.

Bullets. I usually buy them in boxes of 500 because I do a lot of shooting. There are different kinds of bullets available, but that’s a discussion for another time, too. If you’re just starting out and you’re reloading .45 ACP ammo, my advice is to get a 230-grain roundnose bullet in either cast or jacketed flavors. It will feed reliability in nearly any 1911. We’ll talk more about this in the next blog, too.

There’s one other item I strongly recommend you purchase, and that’s a reloading manual.  These manuals list different loads for different cartridges and different bullets and propellants.  The whole idea here is to experiment with these combinations (within the parameters provided by the manuals) to find the recipe that produces the best accuracy and reliability in your gun.  My preference is the Lyman manual, as it lists different bullet manufacturers and cast bullets, too.  You can buy manuals from the bullet manufacturers, but the downside there is they only show data for their bullets.

You can buy all of the equipment separately (as I did a long time ago) or you can buy a complete kit that has everything you need to get started.   RCBS has a kit that goes for about $350.  Lee has a similar kit for a lot less (about $150), and it will get you into the reloading game.  I have a friend who bought the Lee kit a few years ago, he uses it to reload .308 Winchester ammo for his Model 700 Remington, and the ammo he makes routinely delivers 1/2-inch groups at 100 yards.  With either kit, you’ll need to buy the dies required for the cartridge you wish to reload, and the components as described above.

You might be wondering:  Where do you buy this stuff?  Most gun stores sell reloading equipment and components.  Cabela’s and Bass Pro are two that come to mind.  You can also buy components and equipment online from places like Amazon, Midway, Natchez Shooter’s Supply, Grafs, and other places.  Buying the energetic components online gets a bit more complicated (propellants and primers), but the stores can fill you in on that.  In most areas, there’s usually a shop that is known for being the best in your neck of the woods for reloading stuff, and you can find these places with a quick Google search or by asking around.

So there you have it.  I’ve described the equipment and the dies you’ll need to reload the .45 ACP, but the procedures I’ll describe in subsequent blogs will be the same for nearly any handgun cartridge (.38 Special, .537 Magnum, .380, 9mm, .40 S&W, .44 Magnum, and .45 Colt).  All you need will be different dies and shellholders, and of course, different types of bullets.

Our next reloading blog will cover the first steps of the reloading process.  Stay tuned; it’s coming up!


Read our other Tales of the Gun stories for the loads we prefer.  Disagree with anything above or want to toss your $0.02 into the discussion?  Hey, there’s a comments section below and we’d love to hear from you.

One last thing…ever wonder what the “ACP” stands for in .45 ACP?  Well, here you go…wonder no more.

Applying Taguchi to Load Development

By Joe Berk

People reload ammunition for different reasons.   It used to be you could save money by reloading, and I suppose for the more exotic cartridges (any Weatherby ammo, the big elephant rounds like .458 Win Mag, the .416 Rigby, etc.) that’s still the case.  It’s not the case for the more common rounds like 9mm, .45 ACP, and .223 Remington; bulk ammo for those is so inexpensive you’d be hard pressed to reload for as little as that ammo costs.  Sometimes people reload because factory ammo is no longer available or it’s very tough to find.  But most of us reload for accuracy.  We can experiment with different combinations of components and tailor a combo to a particular firearm to find the sweet spot…that combination of components that provides the tightest groups.  I’m in that category; it’s why I reload.

When I’m testing for accuracy and I get a tight group, I always wonder:  Is it because of the combination of components, or is it just a random event?  Usually, if the group size is repeatable, we conclude that it is the component combination, and not just a random good group that results from all the planets coming into alignment.  But is there a better way?   You know, one that shows with more certainty that it’s the component combination, and not just a fluke?

This article is a bit different.  It’s not just a story about a gun or about reloading ammunition.  It includes those things, but it’s more.  This story is about applying the Taguchi design of experiments technique to .45 ACP load development for ammo to be used in a Smith and Wesson Model 25 revolver (the one you see in the photo above).

I’m guessing you probably never heard of Taguchi.  That’s okay; most folks have not.  Taguchi testing is a statistical design of experiments approach that allows evaluating the impact of several variables simultaneously while minimizing sample size.  The technique is often used in engineering development activities, and I used it regularly when I was in the aerospace world.  The technique was pioneered by Genichi Taguchi in Japan after World War II, and made its way to the US in the mid-1980s.  I used the Taguchi technique when I ran engineering and manufacturing groups in Aerojet Ordnance (a munitions developer and manufacturer) and Sargent Fletcher Company (a fuel tank and aerial refueling company).

Taguchi testing is a powerful technique because it allows identifying which variables are significant and which are not.   Engineers are interested in both.  It lets you know which variables you need to control tightly during production (that is, which tolerances have to be tight), and it identifies the others that are not so critical.  Both are good things to know. If we know which variables are significant and where they need to be, we can change nominal values, tighten tolerances, and maybe do other things to achieve a desired output. If we know which variables are not significant, it means they require less control.   We can loosen tolerances on these variables, and most of the time, that means costs go down.

Like I said above, I used Taguchi testing in an engineering and manufacturing environment with great success.  The Taguchi approach did great things for us.  When I worked in the cluster bomb business, it allowed us to get the reliability of our munitions close to 100%.   When I worked in a company that designed and manufactured aerial refueling equipment (think the refueling scene in the movie, Top Gun), it helped us to identify and control factors influencing filament-wound F-18 drop tanks.  In that same company, it helped us fix a 20-year-old reliability problem on a guillotine system designed to cut and clamp aerial refueling hoses if failures elsewhere in the refueling system prevented rewinding the hose.  You don’t want to land in an airplane trailing a hose filled with JP4 jet fuel.  Good stuff, Taguchi testing is.

As you know from reading our other Tales of the Gun stories, the idea in reloading is to find the secret sauce…the perfect recipe of bullet weight, propellant, brass case manufacturer, and more, to find the best accuracy for a given firearm.   Hey, I thought…I could apply the Taguchi technique to this challenge.

When you do a Taguchi experiment, you need to define a quantifiable output variable, and you need to identify the factors that might influence it.  The output variable here is obvious:  It’s group size on the target.  The input variables are obvious, too.  They would include propellant type, propellant charge, primer type, bullet weight, brass type, bullet seating depth, and bullet crimp.  We’re trying to find which of these factors provides the best accuracy.  I wanted to turn my Model 25 Smith and Wesson into a hand-held tack driver.

The Model 25 is an N-frame Smith and Wesson revolver chambered for the .45 ACP pistol cartridge. It is a superbly accurate handgun, as attested to by the target above.

When Taguchi developed his testing approach, he made it simple for his followers.   One of the things he did was define a simple test matrix, which he called an L8 orthogonal array.  It sounds complicated, but it’s not.  It just means you can evaluate up to seven different input variables with each at two different levels.  That’s a bit complicated, but understanding it is a little easier if you see an example.   Here’s what the standard Taguchi L8 orthogonal array  (along with the results) looked like for my Model 25 load development testing:

As the above table shows, three sets of data were collected.  I tested each load configuration three times (Groups A, B, and C), and I measured the group size of each 3-shot group.  Those group sizes became the output variables.

The next step involved taking the above data and doing a standard Taguchi ANOVA (that’s an acronym for analysis of variance).  ANOVA is the statistical method used for evaluating the output data (in our case, the group sizes) to assess which of the above input variables most influenced accuracy.  That’s a complex set of calcs greatly simplified by using Excel.   The idea here is to find the factor with the largest ANOVA result.   You see, any time you measure a set of results, there’s going to be variation in the results.  Where it gets complicated is the variation can be due to randomness (the variation in the results that would occur if you left all of the inputs the same).  Or, the variation can be due to something we changed.  We want to know if the differences are due to something we did (like changing or adjusting a component) or if they are due to randomness alone.   I cranked through the ANOVA calcs with Excel, and here’s what I obtained…

The above results suggest that crimping (squeezing the bullet by slightly deforming the case mouth inward) has the greatest effect on accuracy (it had the largest ANOVA calculated result).  The results suggest that cartridges with no crimp are more accurate than rounds with the bullet crimped.  But it’s a suggestion only; it doesn’t mean it’s true.   The next step is to evaluate if the differences are statistically significant, and doing that requires the next step in the ANOVA process.  This gets really complicated (hey, I’m an engineer), but the bottom line is that we’re going to calculate a number called the f-ratio, and then compare our calculated f-ratio to a reference f-ratio.  If the calculated f-ratio (the one based on the test results above) exceeds the reference f-ratio, it means that crimping versus no crimping makes a statistically significant difference in accuracy.  If it not not exceed the reference f-ratio, it means the difference is due to randomness.   Using Excel’s data analysis feature (the f-test for two samples, for you engineers out there) on the crimp-vs-no-crimp results shows the following:

Since the calculated f-ratio (3.817) does not exceed the critical f-ratio (5.391), I could not conclude that the findings are statistically significant.  What that means is that the difference in accuracy for the crimped versus uncrimped rounds is due to randomness alone.

Whew!  So what does all the above mean?

All right, here we go.  This particular revolver shot all of the loads extremely well. Many of the groups (all fired at a range of 50 feet) were well under an inch.  Operator error (i.e., inaccuracies resulting from my unsteadiness) overpowered any of the factors evaluated in this experiment.  In other words, my unsteadiness was making a far bigger difference than any change in the reloading recipe.

Although the test shows that accuracy results were not significantly different, this is good information to know. What it means is that all of the test loads (the different reloading recipes) are reasonably accurate.  If I had used a machine rest, I might have seen a statistically significant difference.  Stated differently, the test told me that I needed to use a machine rest with this gun to see which load parameters were really playing a role in accuracy.  Without it, my flaky shooting skills (or as the statisticians like to say, my randomness) overpowered any accuracy gains to be realized by playing with component  factors.

That said, though, I like that 4.2 grains of Bullseye load with the 200 grain semi-wadcutter bullet, and it’s what I load for my Model 25.  But I now know…the gun shoots any of these loads well, and crimping versus no crimping doesn’t really make a difference.


Check out our other Tales of the Gun stories here.


Join our Facebook ExNotes page!


Never miss an ExNotes blog:


Help us keep the lights on:


Don’t forget: Visit our advertisers!


The 1911

I’m a huge fan of the 1911, going all the way back to 1973. That’s when I graduated college and headed off to the Army. I went to college on an ROTC scholarship, and I had the same spot in the Corps of Cadets as Colin D. MacManus did when he graduated a few years before me in 1965. Captain MacManus was killed in action in Vietnam, and every year after that, his family awarded a Colt 1911 to the graduating senior who held his position. I was that guy in 1973, and that was my first .45 auto.

Back then, times were different. I had to get a permit to own the .45, but it was more a formality than anything else. We could shoot in our backyard, we often did, and my father and I couldn’t wait to put the .45 through its paces. Like I said, we couldn’t wait, but that was only one thing we couldn’t do. The other was hit the target. We set up a target 30 feet away (a soda can), and trying as best we could, the only thing we hit was the ground halfway between us and that soda can. A lot of dirt flew.  There’s a lot of lead buried in what used to be our backyard.  Don’t tell the EPA.

Fast forward a few weeks, and I got lucky. The Army sent me to graduate school, and the ROTC detachment got a new Sergeant Major, one Emory L. Hickman. Sergeant Major Hickman had spent most of his career in Vietnam and the Army Marksmanship Training Unit, where the finest pistoleros in the world live. He was the real deal: A warrior and an expert pistol shot. I told him of my plight (the evasive can of pop) and he laughed. The Sergeant Major schooled me on the fundamentals of handling the 1911, he coached me on the pistol range, and he taught me how to put those big old 230-grain FMJ bullets pretty much exactly where I wanted them to go. Thank you, Sergeant Major Hickman.

Fast forward several decades and dozens of 1911s later, and that brings us to this morning at the West End Gun Club, where I and my Rock Island Compact 1911 did, once again, what the old Sergeant Major taught me to do.

And about that Rock Island 1911…it’s a short little thing, and it’s a blast to shoot. Around here in the People’s Republic of Kalifornia, Rock Island 1911s go for $500 brand new (that’s a tremendous value). They are inexpensive, but they are not cheap. The Rock Island 1911 is a real handgun with its Parkerized finish, all steel construction, wood grips, and GI sights (none of that black plastic silliness here). It reminds me a lot of the 1911s I carried in the Army. I love shooting my Rock Island Compact, it hits well, and I can still put my shots where I want to.  Sergeant Major Hickman would be 92 years old today if he was still around (I’m guessing he’s not); wherever he is, he’d be proud. He taught me well.


More Tales of the Gun are here!


Never miss an ExNotes blog:


Hit those popup ads!