The Bisley Revisited

By Joe Berk

One thing about Ruger:  Nobody can top their customer service.    Ruger may not explicitly state their firearms come with a lifetime warranty, but in effect, they do.

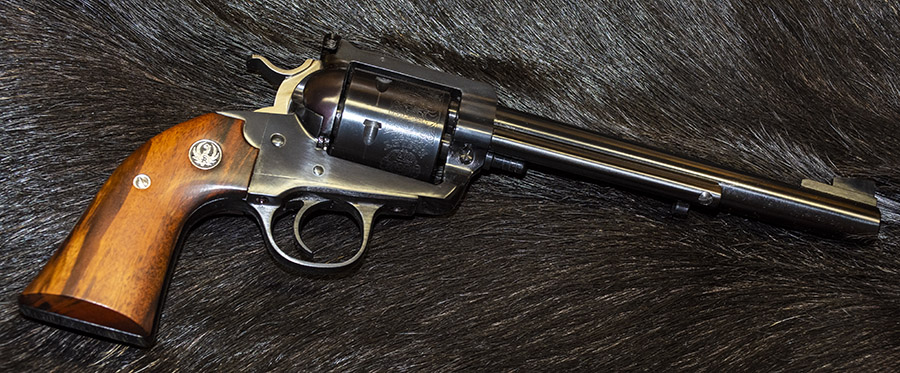
You may remember my story on the Ruger Bisley I won in a Rock Island Auction (I wrote about it several months ago).  I had wanted a .357 Magnum Bisley for its heavy construction and longer barrel and, truth be told, I was surprised that my bid prevailed.  When I won the Rock Island Auction, I ponied up all the nutty fees that come with such an undertaking (they are significant), and then when I received the Bisley I was disappointed.  It wasn’t particularly accurate (the group sizes were mediocre), and it shot so far to the left the rear sight had to be adjusted all the way to the right to get the shots on paper.

I figured I was kind of stuck with the Bisley and my initial thought was I’d look at the gun for a while, stick it in the safe, and then maybe sell it somewhere down the line.  But it bothered me.  Owning a firearm that doesn’t meet my expectations doesn’t set easy.  If there’s such a thing as having an obsessive-compulsive disorder with firearms that are less than perfect, I’d make for a good clinical study.

I wrote to Ruger and told them what I wanted, which was an accurate Bisley  that didn’t shoot to the left.  I told them the revolver left their plant in 1986, so I was more than willing to pay whatever it took to make me happy.  I also mentioned that I wanted to buy new grip frame screws and a new ejector rod shroud (cosmetically, they looked beat up).  And finally, I mentioned that extraction was difficult with hotter loads.  I asked the Ruger folks to hone the chamber walls so the fired cases would extract easily.

Ruger charged me $45 for a Fedex mailer (which they emailed to me), told me how to package my revolver (a plain brown box, with nothing on the outside to indicate its contents), and advised it could be 4 to 6 weeks before I saw the gun again.  Four days later, it was on its way back to me, with no additional charges other than the initial $45 I paid for the Fedex mailer.
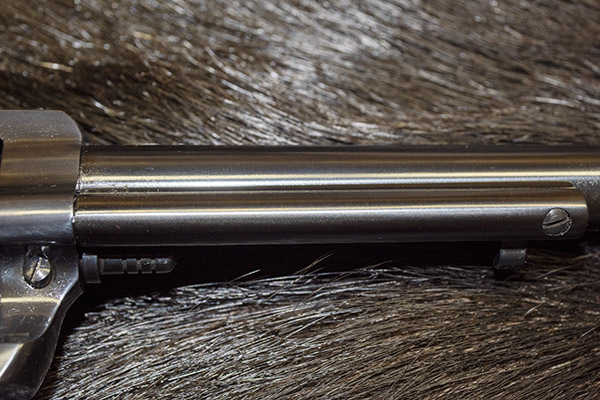
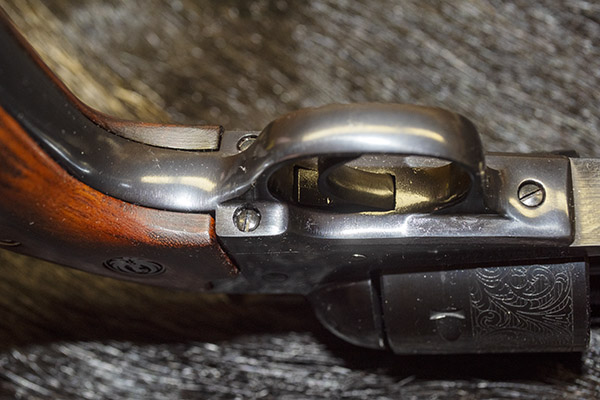
A new ejector shroud on the Bisley.
New grip screws all the way around.
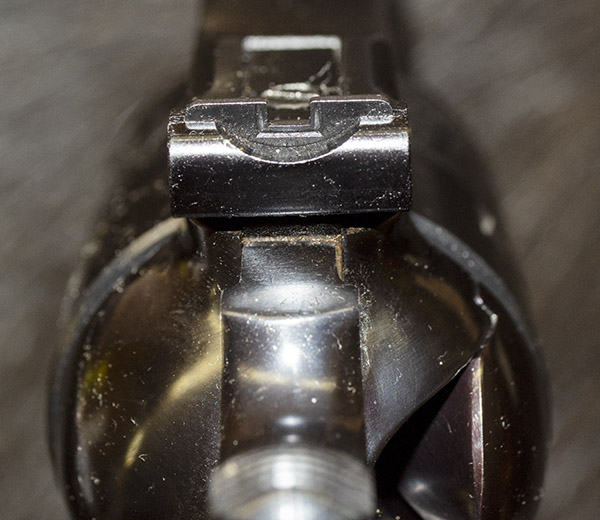
The rear sight, approximately centered. This is way better than what it was when I returned the Ruger.
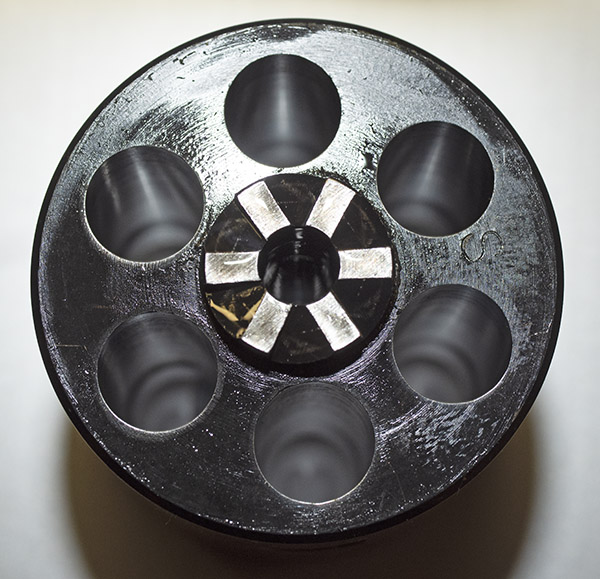
Ruger honed the chamber walls to prevent sticky extraction. The gun extracts flawlessly.

Ruger mentioned in the paperwork returned with the gun that they retorqued the barrel, installed a new ejector shroud, honed the chambers,  replaced all the grip screws, test fired it, and sent it home.  The first thing I looked at was the rear sight.  Comfortingly, it was a lot closer to being centered than it was when I sent the gun to them.

So how did it do?
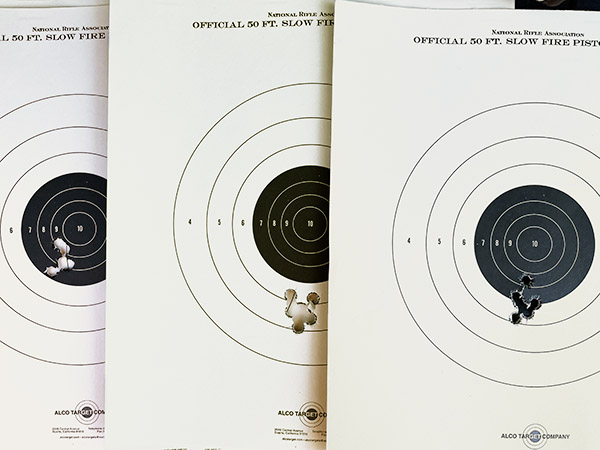
Yessiree, that’s what I’m talking about!

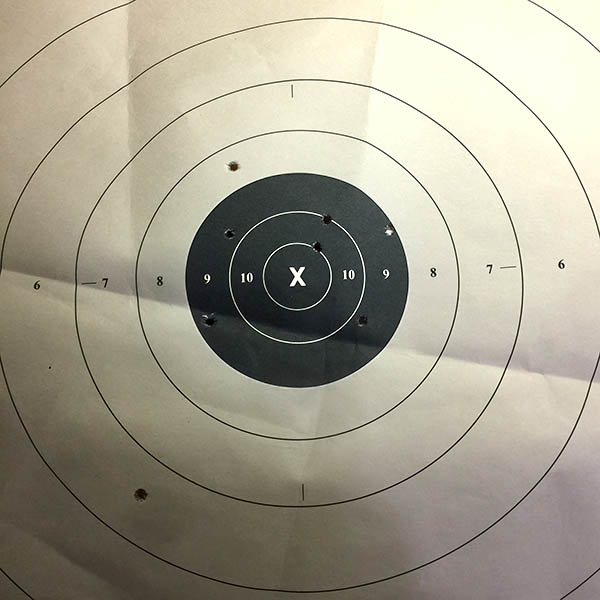
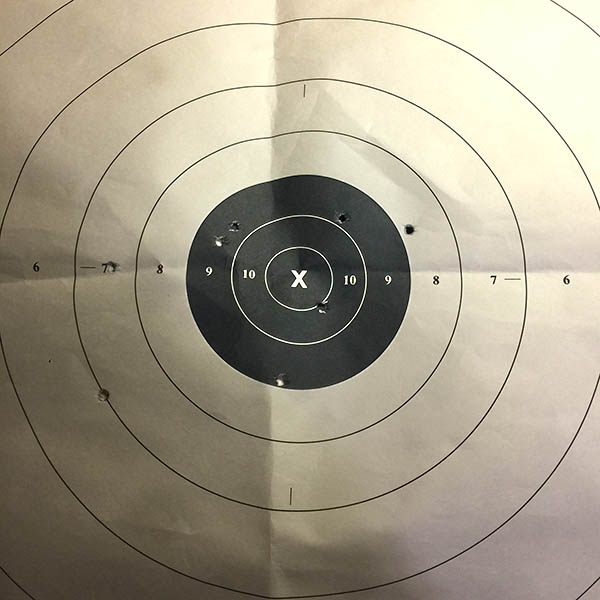
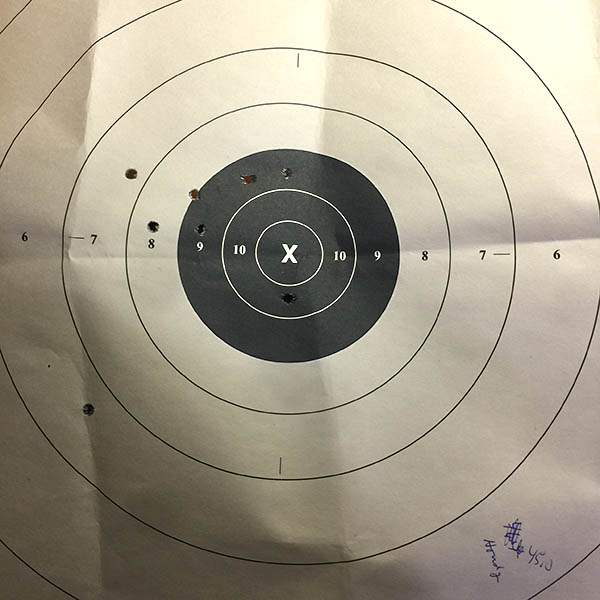
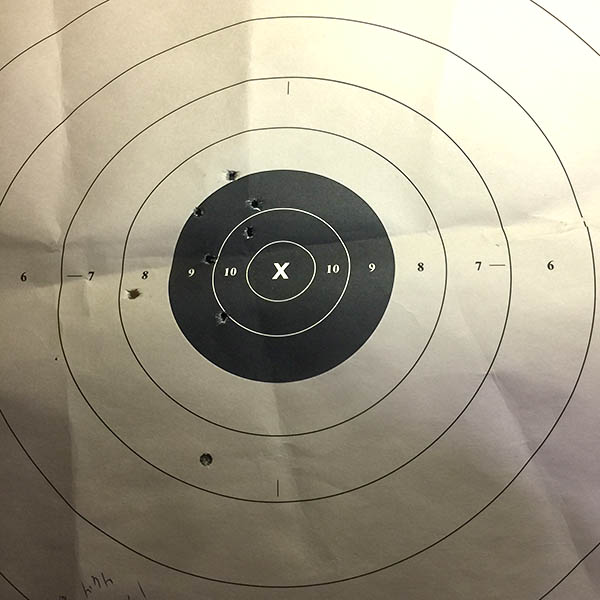
Just fine, thanks.  The day I received it, I hopped in the Subie, motored over to my indoor range, and fired three different .357 loads at 10 meters.   Now, I know 10 meters is only 30 feet, but I wanted to get an idea how the revolver was working.   One load was a relatively mild Bullseye-powered concoction with cast 158-grain bullets, another was a gonzo 158-grain Hornady jacketed bullet load with a max charge of Unique, and the third was an even more energetic load with the same 158-grain jacketed hollow point Hornady bullet and a max load of Winchester 296 propellant.  On that indoor range, even with my Walker electronic earmuffs, the concussion of the big Bisley and its full throated .357 loads was starting to give me a headache.  But the targets?   Oh, boy…the Bisley and I were back in business.  I ran another target out to 50 feet (the longest range available at the indoor range), and that group was just as good as the ones at 30 feet.
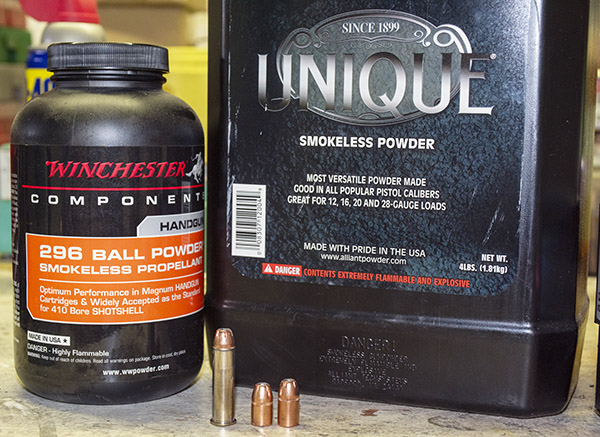
Winchester’s 296, Unique, a finished .357 Magnum cartridge, the 158-grain Hornady XTP bullet, and the 180-grain Hornady XTP bullet.
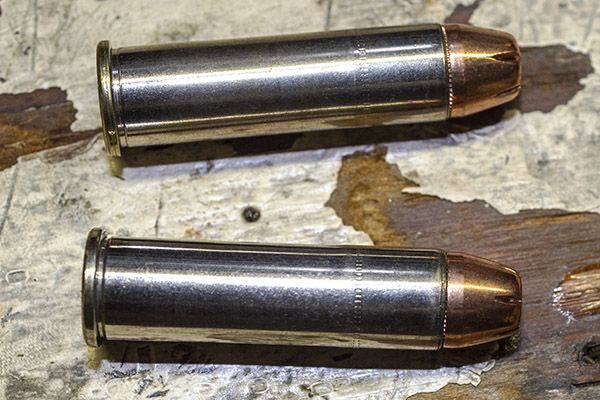
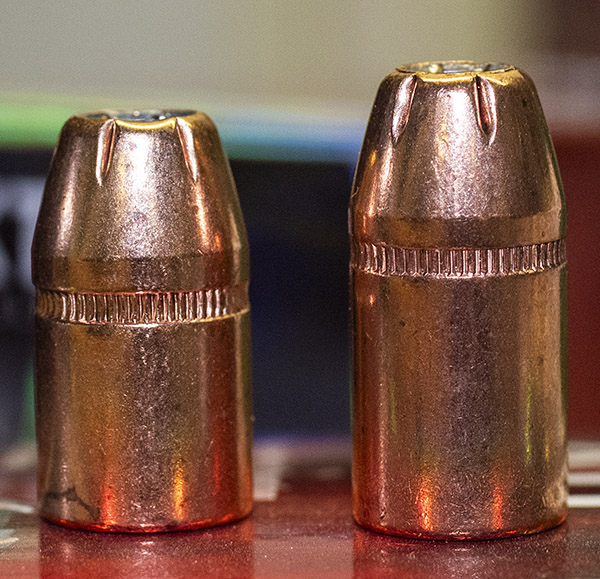
A macro shot of the Hornady 159-grain and 180-grain XTP bullets. Viewed from outside the cartridge case, the bullets appear identical. The difference is in their length below the cannelure.
A couple of loaded .357 Magnum cartridges. I’ve always liked the .357 Magnum cartridge.

The day after that, I took the Bisley to our Wednesday morning Geezer get-together at the West End Gun Club.  I had three things in mind: I wanted to show off a bit to my friends, I wanted to chronograph the two balls-out .357 loads I mentioned above, and I wanted to see how the revolver would do at 100 yards.   Yes, you read that right:  100 yards.
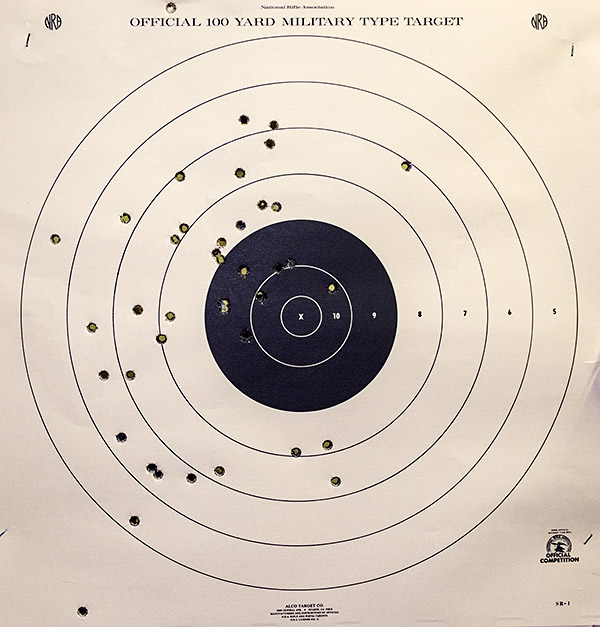
100 yards with the Bisley. The first 30 shots or so were with the Unique load. When i switched over to the 296 load, the group tightened. Next time I’m out I’ll try the 180-grain bullets with 296 and dial in a little windage.

My buddy Kevin spotted for me with his spotting scope, and he was amazed with the first load (8.0 grains of Unique and the 158-grain Hornady jacketed hollow points).  Kevin gave a hearty “whoa!” and I suspected things were looking good.

Kevin said several of the shots (after I had warmed up a bit and got into my long-range groove) grouped like I was shooting a rifle.  I sure didn’t mind hearing that.  I checked the chronograph and the velocities were respectable, too.  The bullets were hitting to the left a bit, but I had room to adjust the rear sight to bring that in.  And where a gun prints on target is a function of how it is held.  I wasn’t consistent with the Bisley yet (I actually haven’t shot it that much).
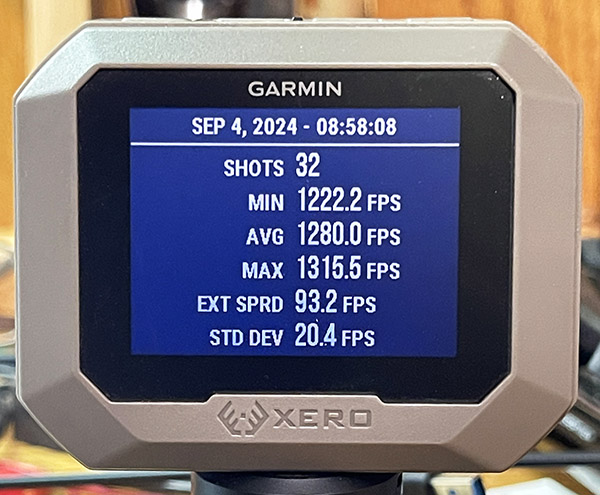
The 158-grain Hornady bullet with 8.0 grains of Unique. It’s a max load and velocities were respectable, but not like what I attained with Winchester 295.

Then I switched to the heavier-duty 296 load (with the same Hornady XTP bullet), and wowee, I was keeping them in the black on that same 100-yard rifle target.  And those loads were smoking hot.  Winchester;s 296 propellant is good stuff.  Check this out.
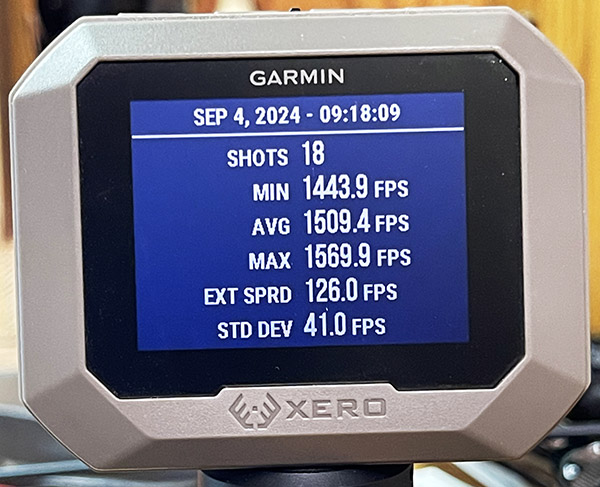
Whoa, baby! 1500 fps plus! 296 is a dynamite powder in the .357 Magnum.

All the cartridge cases extracted easily and even with the 1500 feet per second 296 load above, there were no pressure signs (other than a hellacious muzzle blast). As mentioned above, Ruger honed the chambers for me and the prior extraction issues had evaporated.

With replacement of the grip frame screws and the ejector shroud, the Bisley looks like a new revolver.  And other than me paying for the initial shipping to Ruger, it was all on the house (Ruger’s house, that is).  Bear in mind what I said earlier in this blog:  The Bisley, purchased used, is a 38-year-old revolver.

The Bisley went from being a regret to a gun I’m excited about owning.  You probably know that Ruger also made these guns in other chamberings, to include .44 Magnum and .45 Colt, and you might be wondering why I wanted the .357 Magnum.  Back in the 1970s when I was a handgun metallic silhouette shooter, I competed with a .357 Magnum and I was a rarity.  While everyone else was shooting a .44 Magnum or a .45 Colt, or custom-built bolt-action handguns shooting what were essentially rifle cartridges, I was one of the very few people (in fact, the only one I knew of) who shot a .357 Magnum in that game.  With the right loads, the .357 would topple the 200-meter rams (the toughest target to knock over) more reliably than either the .44 Magnum or the .45 Colt, so there was a certain coolness (and a bit of smugness) on my part associated with that.  The other reason is weight.  When Ruger chambers different cartridges in the same firearm, the gun’s external dimensions remain the same, so the .357 Magnum Bisley weighs more than the .44 Magnum or the .45 Colt versions.  More weight means the gun holds steadier and that means greater accuracy.

What’s next for this revolver is working up a load with Hornady’s 180-grain jacketed hollow point bullet and 296 powder and getting the sights dialed in at 50, 100, 150, and 200 yards (the four stages of a handgun metallic silhouette competition).  When I used to compete in metallic silhouette competition, I used a cast 200-grain bullet, but nobody makes that bullet commercially.   Well, almost nobody.  I previously found a guy who sold a 200-grain bullet for the .357, but his bullets leaded terribly and accuracy fell off after the first three or four rounds (and cleaning the bore was a pain).  If I can get the 180-grain jacketed bullets to group well, I think the metallic silhouette rams at 200 yards won’t know the difference between a 200-grain cast bullet and a 180-grain jacketed bullet, and I may get back in the game.  We’ll see.
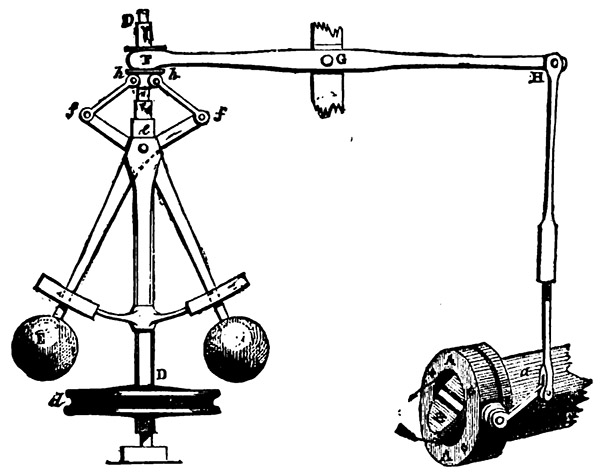

That term:  Balls out.  You might think it’s a crude anatomical and testicular reference, but it’s not.  Engine governors used to use lever-suspended rotating metal balls that moved further away from their axis of rotation as rpm increased.  When the engine speed reached a preset maximum value allowed by the governor, the centrifugal outward movement of the balls operated a lever that prohibit engine speed from going any higher.  At that point, the engine was running “balls out.”


Never miss an ExNotes blog:


Don’t forget: Visit our advertisers!


Three .243 Ruger No. 1 Loads

By Joe Berk

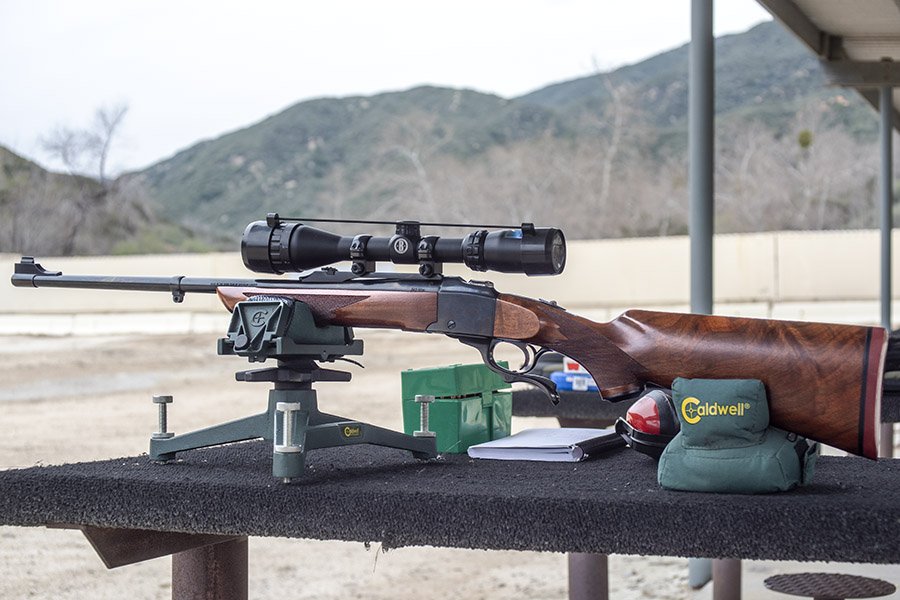
This story is about finding a decent load for my .243 200th Year Ruger No. 1 rifle.  The rifle is 48 years old now, but the old girl can still get it on.  I didn’t think my Ruger was particularly accurate at first, but wow, it’s a shooter.

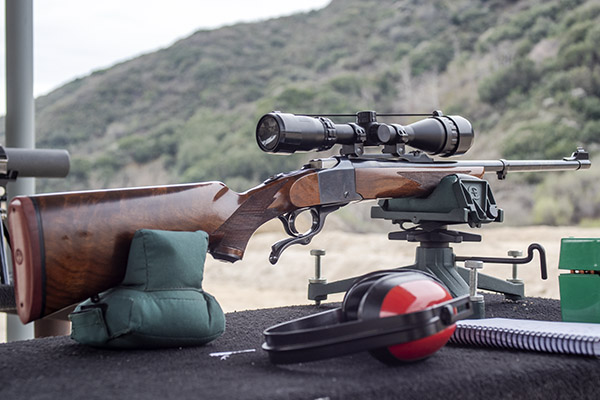
Good wood, a good looking 200th Year Ruger No.1A, and a day on the range. Life is good.

I’ve tried a lot of loads in this rifle and I probably would have given up except for what I saw happen with another shooter.  He had a .243 No. 1 in the 1B configuration (that’s the one with no iron sights, a 26-inch barrel, and a beavertail forearm), and he didn’t like it at all.  To me, not liking a Ruger No. 1 is a crime against nature, but that guy was frustrated with his .243 and he had given up on it.  He spent good money (Ruger No. 1 rifles sell for around $2,000 today) and it just seemed like a shame.  When I first tried my .243 No. 1 it wasn’t very accurate, but I decided I wasn’t going to be that other guy.  I was confident I could find a good load.  Actually, I found three, and they are listed below by bullet weight.  They are all of comparable accuracy in my rifle.

Accuracy Load No. 1

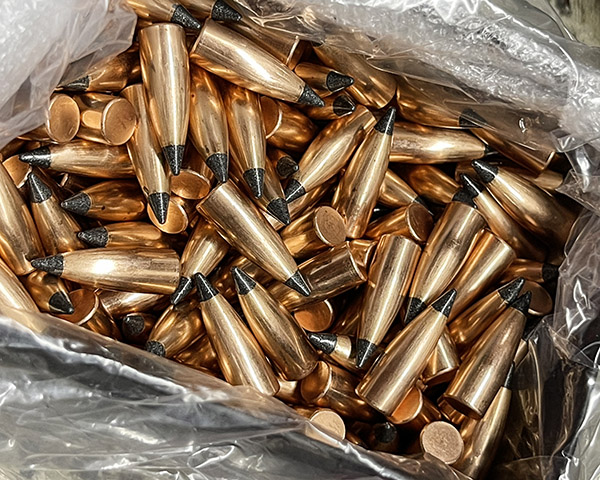
Nosler 55-grain .243 bullets. It’s the lightest bullet available for the .243.
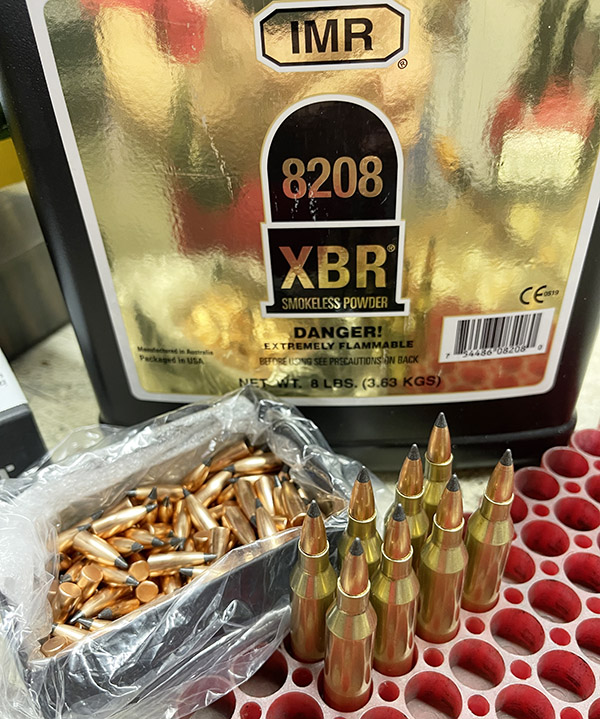
Bullets, loaded ammo, and XBR 8208 propellant.

My first accuracy load for this rifle is the 55-grain Nosler Varmegeddon flat base bullet with 40.0 grains of XBR 8208 propellant.  I seated the bullets to a cartridge overall length of 2.606 inches without a crimp, but I haven’t experimented with bullet seating depth or crimping.  I used Fiocchi large rifle primers because at the time, primers were scarce and I bought 1500 of the Fiocchis when I could.

Accuracy Load No. 2

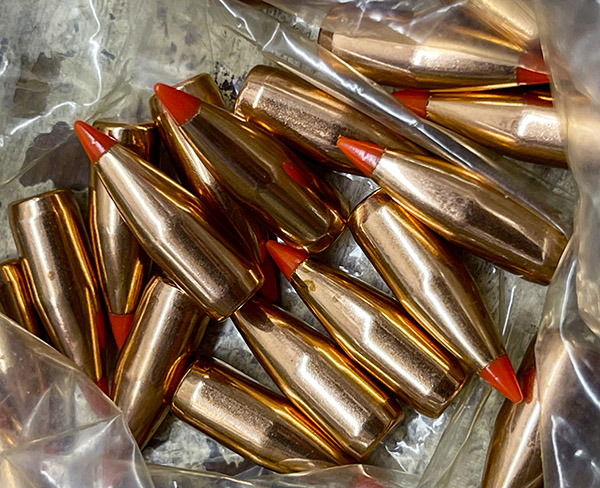
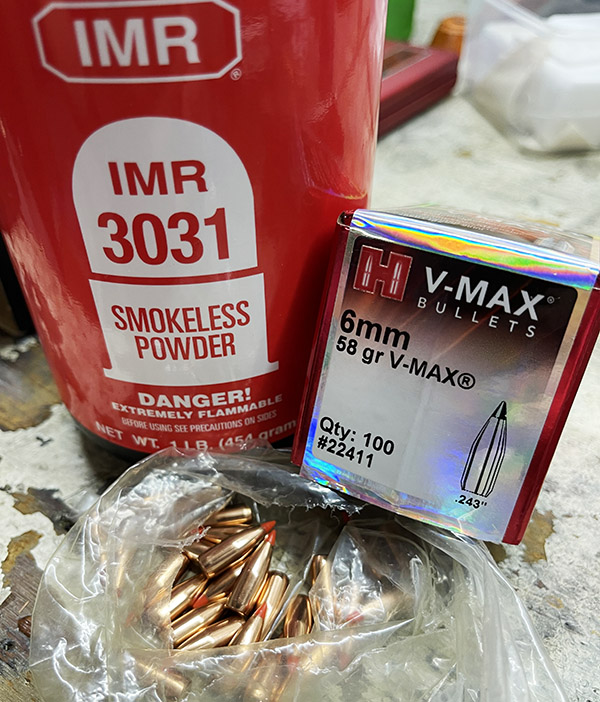
Hornady 58-grain VMax bullets. Hornady makes a good-looking bullet.
I shot all the rounds I loaded with this bullet, so this picture will have to do.

Another excellent load is the 58-grain Hornady VMax bullet with 42.0 grains of IMR 3031 propellant.  I ordinarily wouldn’t use IMR 3031 in the .243, but I had a tiny bit of it left from some development work on another cartridge and good buddy Kevin told me IMR 3031 was his powder of choice for the .243. It was a good recommendation.  I set these rounds up with a cartridge overall length of 2.620 inches.   Like the load above, I have not tried different seating depths or crimping.

Accuracy Load No. 3

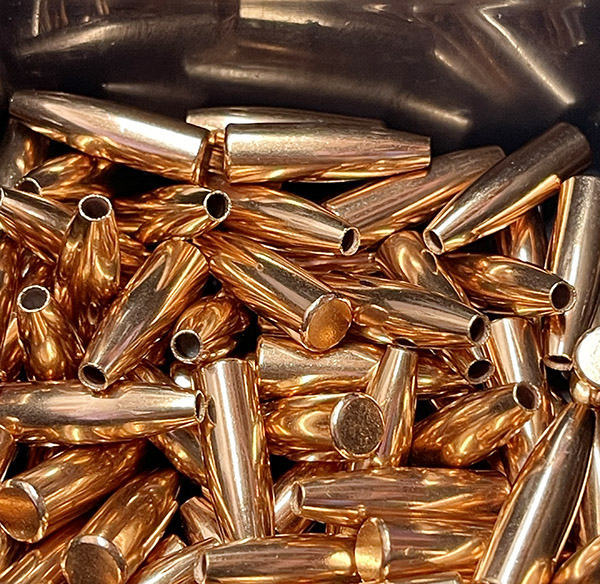
Cavernous hollowpoints in the 75-grain Speer varmint bullets. These shoot exceptionally well.
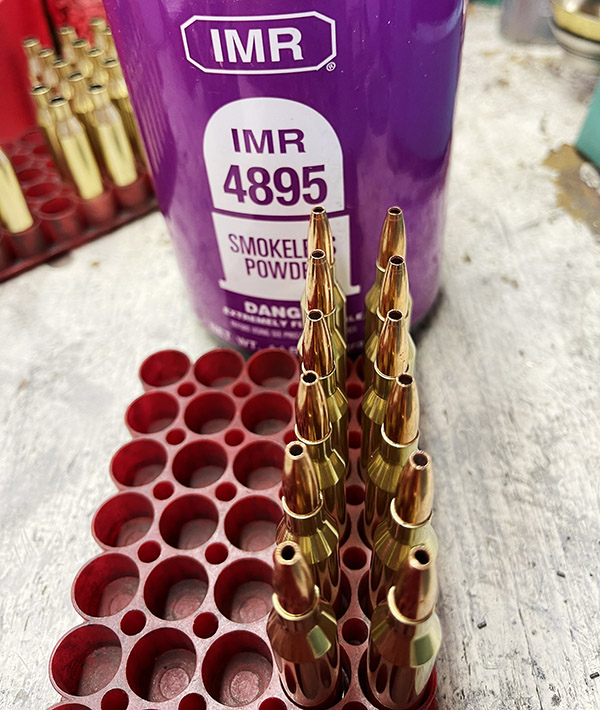
I found IMR 4895 works well with the Speer 75-grain bullets.

My third accuracy load is the 75-grain Speer Varmint hollowpoint bullet with 39.0 grains of IMR 4895 propellant.   I loaded this round to an overall length of 2.620 inches, and like the others above, I have not experimented with overall length or crimping.

What I Haven’t Tried and What Didn’t Work (for me)

I have a couple of boxes of 65-grain Hornady V-Max bullets and I’ve only tried them with a few powders.  So far, nothing gave me acceptable accuracy with these bullets.

.243 ammo loaded with PRVI 100-grain bullets. I couldn’t find the secret sauce to make this bullet accurate. Hornady 100-grain bullets weren’t any better.

I also have a bunch of 100-grain bullets (from Hornady and PRVI).  Neither of these 100-grain bullets grouped well.  They stabilized (no target key holing), but the groups just weren’t very good.  That’s okay; I’m not going to use the .243 on pigs or deer.  But if I ever took it varmint hunting, the accuracy loads listed above would get the job done.

The Bottom Line

Typical results with the accuracy loads listed above.

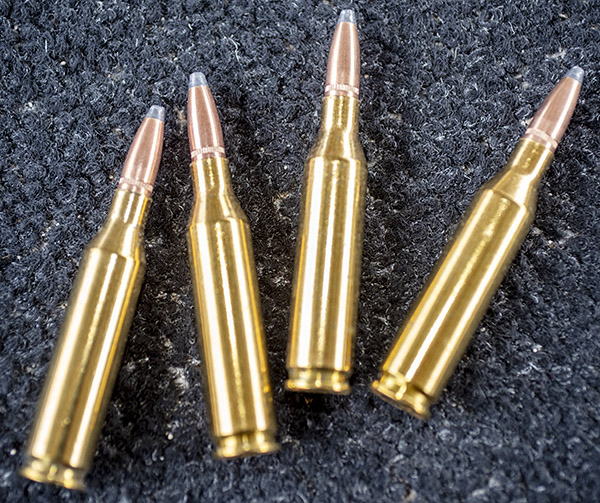
Any of the above loads will shoot a three-shot group at or below 0.75 inches at 100 yards.  The groups would be tighter with a more skilled rifleman. For me, getting the old .243 to group into three quarters of an inch is good enough.  I’ll call it a day with load development on this rifle and stick with the loads above.  On to the next rifle.  Stay tuned.


Never miss an ExNotes blog:


Don’t forget: Visit our advertisers!


Quality Ain’t Job One At Winchester These Days

By Joe Berk

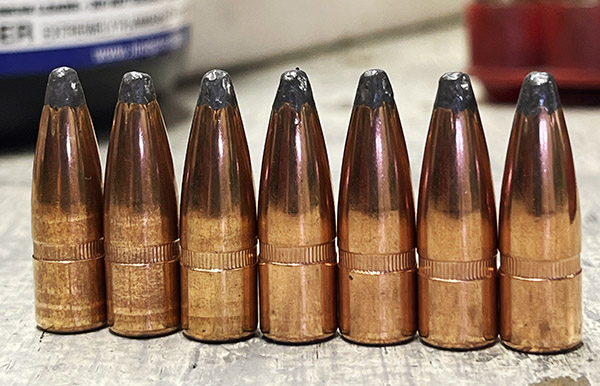
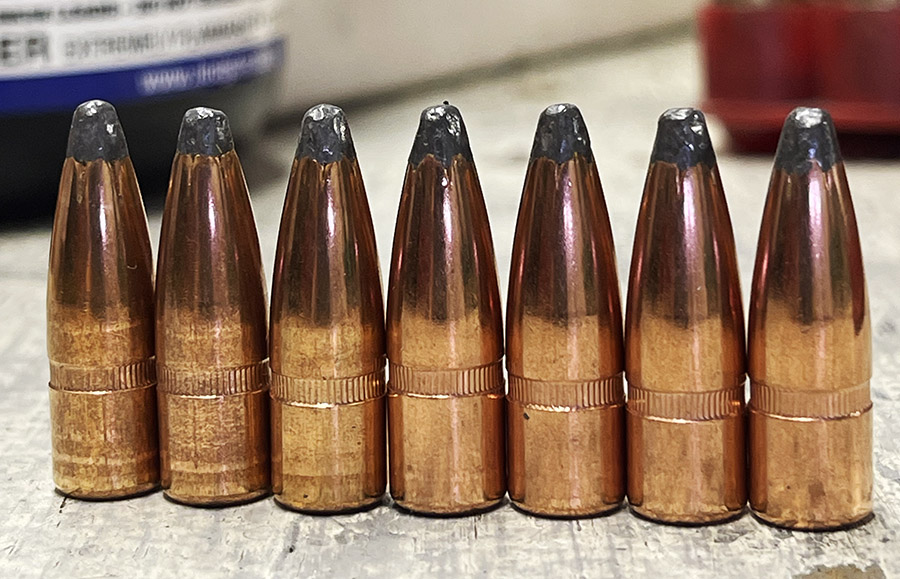
Notice anything flaky about the bullets above?  At first, I didn’t.  But it’s there.  Read on, my friends.


I confirmed a couple of good loads for the .30 06 Weatherby this morning and several months of trying different bullet weights, powders, powder charges, seating depths, and more.  In the past, one of my favorite bullets for both the .30 06 and .300 H&H cartridges has been the Winchester 150-grain jacketed softpoint so I wanted to try these again, but they have been unavailable for a long time.

When the Winchester bullets finally came back on the market again a few months ago, I bought 1000.  Sometimes they grouped well in my Weatherby, at other times they did not.  I got to where I worked up a load with 51.0 grains of IMR 4064 (a max load for this bullet) and that had shown promise, but I’d get a good group and then a bad one.  I was pretty sure it wasn’t me being flaky behind the gun; things looked good through the scope when I pulled the trigger.

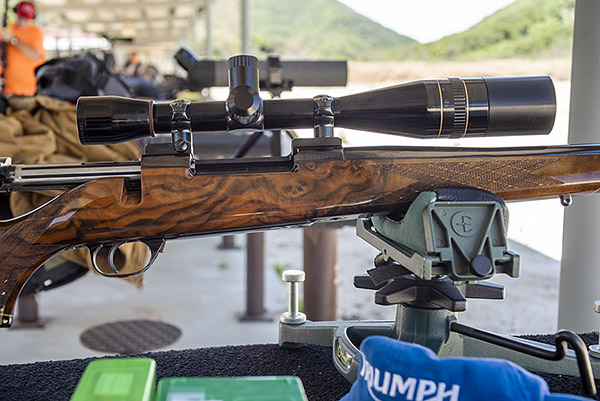
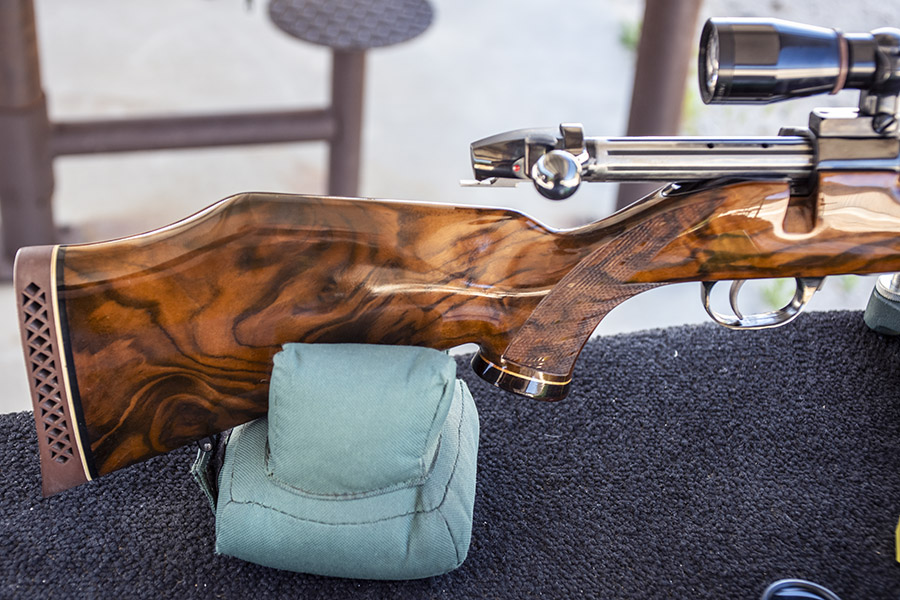
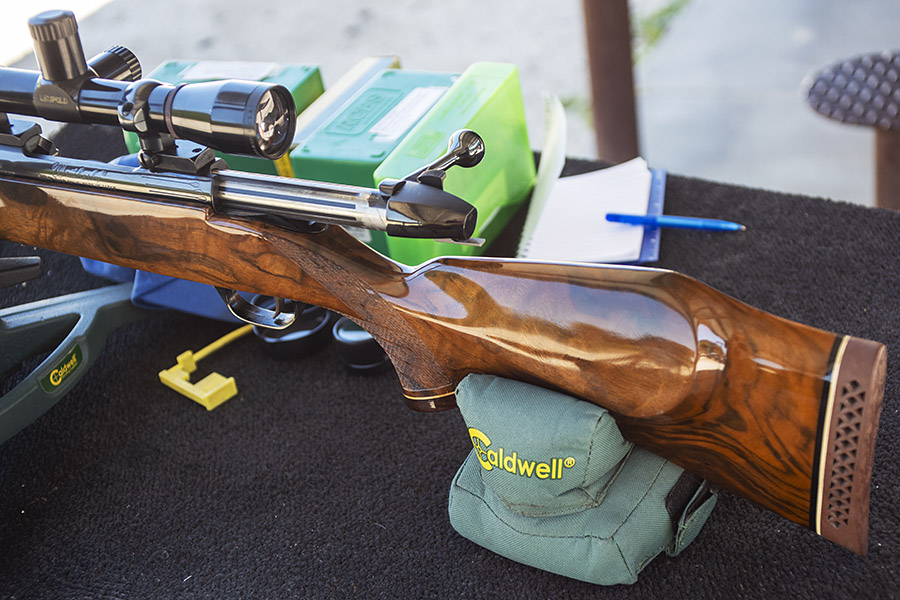
My 40-year-old Weatherby Mk V, chambered in .30 06 Springfield. It’s a beautiful rifle.
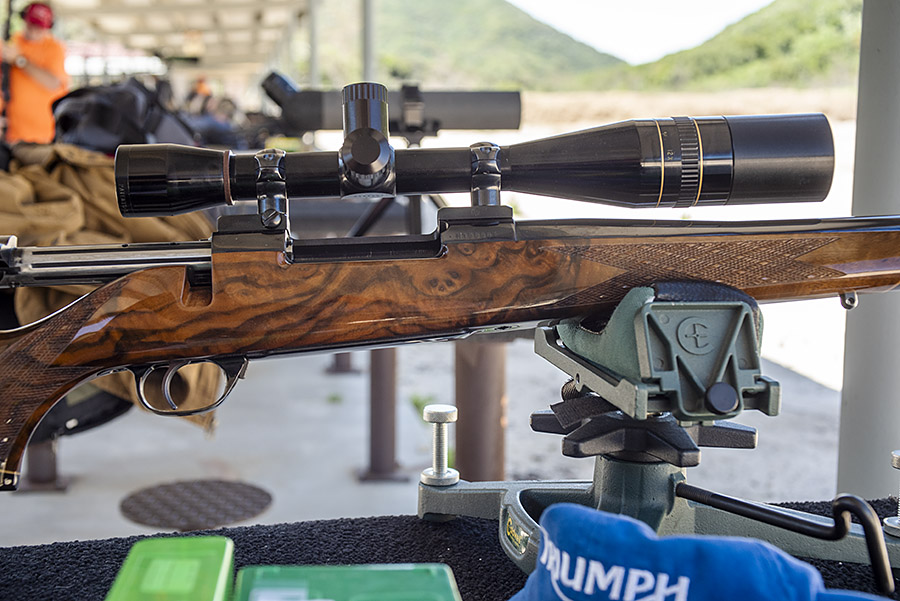
That’s a 1980s-ish 12X Leupold Silhouette scope on the Weatherby.

I found that how I positioned the rifle in the Caldwell rest made a difference.  If I had the rifle positioned so that the rest was just forward of the rifle’s floorplate, it grouped well; if I had the rifle positioned further back, it did not group as well.   Even while taking care to appropriately position the rifle, though, the Winchester bullets grouped erratically.   I’d get good groups and then I’d get bad groups.

Then one day after another frustratingly inconsistent range session, I returned home, cleaned the rifle, resized the brass, threw the brass in the tumbler, and was reloading it with the above load when I noticed that the bullet cannelures were not at consistent heights above the case mouth after seating the bullets.  Hmmmm.

Winchester 150-gr JSP bullets.  Note the cannelure location inconsistences.

So I lined up some bullets on the bench, and son of a gun, the cannelures were all over the place on the bullets (with regard to height above the bullet base).  I bitched to Winchester about this through their website and they agreed to refund what I had paid for the bullets.  They even had a UPS guy stop by and give me a prepaid shipper to return them.  I didn’t want to, though, because the bullets had done well in the past, and I still wasn’t certain that the cannelure location issue was affecting accuracy.

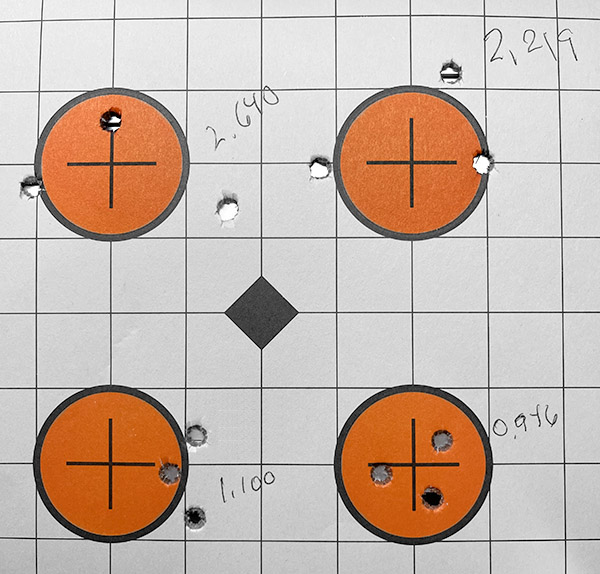
So I reloaded another 12 rounds and before I did so, I sorted the Winchester bullets by cannelure height.  I loaded 6 cartridges with bullets that had cannelures at what appeared to be approximately the same location, and I took the bullets I had screened with what were obvious cannelure location differences and loaded 6 more rounds.  The next morning I got out early to beat the heat and set up a 100 yard target at the West End Gun Club.  I proved my hypothesis:  The cannelure height variability was degrading accuracy significantly.

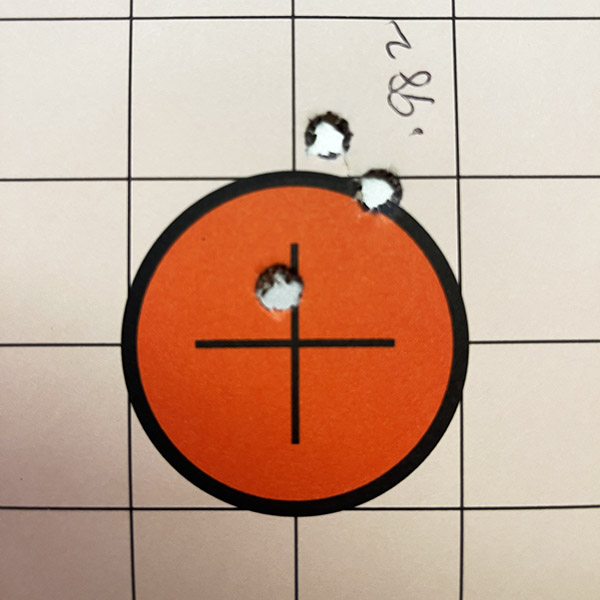
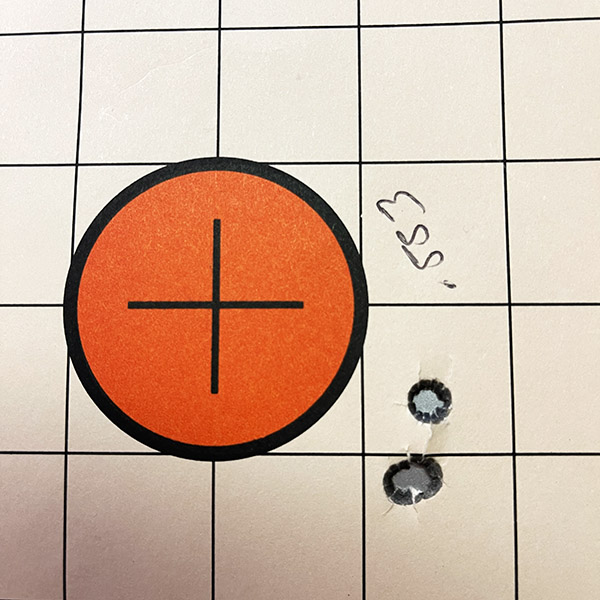
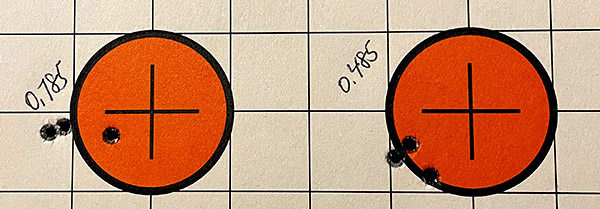
The top two groups had bullets with inconsistent cannelure heights.  The bottom two groups had bullets with cannelure heights that were located in approximately the same spot, and the groups with those bullets were much smaller.

The group sizes for bullets with the same cannelure locations returned minute-of-angle groups; the group sizes for bullets with random cannelure height locations were more than twice the size of the consistent-cannelure-location bullets.  Duh.  I proved (at least to myself) that this cannelure height location issue is making a difference.  I can hypothesize that cannelure location can affect the bullet’s center of gravity, center of pressure, drag, and perhaps other aerodynamic and mass properties characteristics.   The bottom line to me is that cannelure location variability plays a big role.  Winchester screwed the pooch when they made these bullets, which is a shame.  I should also mention that these bullets were not sold as seconds.  They were supposed to be good bullets.  An old line company with a name like Winchester ought to be making a quality product, but they clearly are not.  That notwithstanding, I think I’ll keep the bullets and sort them.  I’ll use what I cull out for open sight rifles, or maybe I’ll sell them to a gas station and they can melt them down for wheel weights.

Yeah, I could just send the bullets back.  To Winchester’s credit, they were willing to refund what I had paid for the bullets.  But they disappointed me, and I have to tell you, I spent a lot of time and money in wasted components trying to shoot good groups with lousy bullets.  What I’d really like is a note from Winchester telling me they’ve fixed the problem, and then I’d buy another thousand bullets.

You might wonder:  Why not just use Hornady’s comparable 150-grain jacketed soft point bullet?  It’s a logical question.  I tried that with the same load, and it wasn’t as accurate as the screened Winchester bullets (even though the cannelure location was consistent on the Hornady bullets).

I did find a Hornady bullet and a load that worked well in this rifle, though, and that’s the 130-grain Hornady jacketed soft point bullet with 53.0 grains of IMR 4320 (a max load, so work up to it).  It shoots slightly high and to the right compared to the load above.  IMR 4320 is no longer in production, but I have a stash and I’ll continue to use it.  This load is also extremely accurate in my Ruger No. 1A.


Wondering about the chrono results for the loads described above?  Here they are, as shot from my 26-inch barreled Weatherby Mark V:

150-grain Winchester Loads

    • 150-grain Winchester jacketed soft point bullet, 51.0 grains of IMR 4064, no crimp, cartridge overall length 3.250 inches, Fiocchi large rifle primer, inconsistent bullet height cannelure
    • Min velocity: 2861.7 fps
    • Avg velocity: 2891.8 fps
    • Max velocity: 2909.8 fps
    • Extreme spread: 48.1 fps
    • Standard deviation:  15.9 fps
    • 150-grain Winchester jacketed soft point bullet, 51.0 grains of IMR 4064, no crimp, cartridge overall length 3.250 inches, Fiocchi large rifle primer, screened for consistent bullet height cannelure
    • Min velocity: 2902.9 fps
    • Avg velocity: 2912.5 fps
    • Max velocity: 2933.1 fps
    • Extreme spread: 30.2 fps
    • Standard deviation:  10.0 fps
  • 130-grain Hornady Load
    • Load:  130-grain Hornady jacketed soft point bullet, 53.0 grains of IMR 4320, no crimp, cartridge overall length 3.095 inches, Fiocchi large rifle primer
    • Min velocity: 3022.8 fps
    • Avg velocity: 3037.2 fps
    • Max velocity: 3063.8 fps
    • Extreme spread: 40.9 fps
    • Standard deviation:  10.9 fps

Never miss an ExNotes blog:


Don’t forget: Visit our advertisers!


A Mark V ’06

By Joe Berk

I had my .30 06 Weatherby out last weekend.  It was the first time I fired this rifle in maybe 35 years.  I bought it at the Weatherby plant in South Gate, California, back when they used to let you in the warehouse to select the wood you wanted.

Fancy walnut and deep, deep bluing. I think I paid something around $300 for this rifle, new, in the 1980s. I’ll never sell it.

When I first shot this rifle in the mid-1980s, it didn’t group very well with my favorite .30 06 load (a 130-grain Hornady jacketed softpoint bullet and a max load of IMR 4320).  That was the load I used in my Ruger No. 1 chasing jackrabbits in west Texas.  Other things intervened to capture my attention, and I never got around to finding a load for this rifle.

Fast forward several decades, and for this outing I grabbed what was available in the ammo locker:  A box of 168-grain Speer jacketed hollow point boat tail bullets (my Garand load), another box with Remington 180-grain jacketed soft point bullets (which are unfortunately no longer available), and a third box with 150-grain Hornady jacketed soft point bullets and 48.0 grains of IMR 4320 (which is also no longer available).  What I learned on this most recent outing is that my Weatherby really likes the 180-grain Remington bullets and 48.0 grains of IMR 4064.  It did acceptably well (for hunting purposes) with the other two loads, but that 180-grain Remington bullet and IMR 4064 is what answers the mail for me.  It’s one of the places where accuracy lives in this rifle.

Before I left the house, I ran an oiled patch down the bore because as I said above the rifle hadn’t been shot in literally decades.  When I first set up on the range, the rifle was throwing shots all over the place for the first few rounds.  Then, either I or the rifle (or both of us) settled down and the Weatherby started grouping.  Most of the other groups were in the 1.2-inch to 2.1-inch range (which is good enough for hunting deer and pigs), but the rifle really liked that 180-grain load.  I’m talking sub-minute-of-angle.  I couldn’t do this with every group, but it tells me the rifle will do its job (if I do mine).

When assessing a hunting rifle’s accuracy, I typically shoot 3-shot groups at 100 yards off the bench. Some folks like to shoot 5-shot groups, but it’s pretty hard to get the animals to sit still for 5 shots.
Two shots through the same hole, and one a half inch away. I wish I could do this every time. The rifle is way more accurate than I am.

I was pleased with how the rifle performed, and I’ll probably start bringing it to the range more often.

A 12X, fixed-power Leupold scope with target knob adjustments and a sunshade. This is a nice setup.

I originally set up the 12X Leupold scope and this rifle for shooting in the standing position, so the scope sits high on the rifle.  When I bought the rifle, I thought I would shoot metallic silhouette with it, but I never did. With the scope as high as it is, it was awkward shooting from the bench.  That probably had something to do with the other groups opening up a bit, but I’m not complaining.

I wish Remington still sold bullets separately, but hey, life goes on.  I have two boxes of the Remington bullets left, and when they’re gone, they’re gone.  I also have a couple of boxes of Speer 180-grain jacketed bullets, and when I’ve run through my stash of Remington 180 bullets, I’ll try the Speers next.  Speer still makes those.  There are a few other loads I’m going to try, too.  I’ll keep you posted.


Never miss an ExNotes blog:


Don’t forget: Visit our advertisers!


Ruger Blackhawk Accuracy Testing

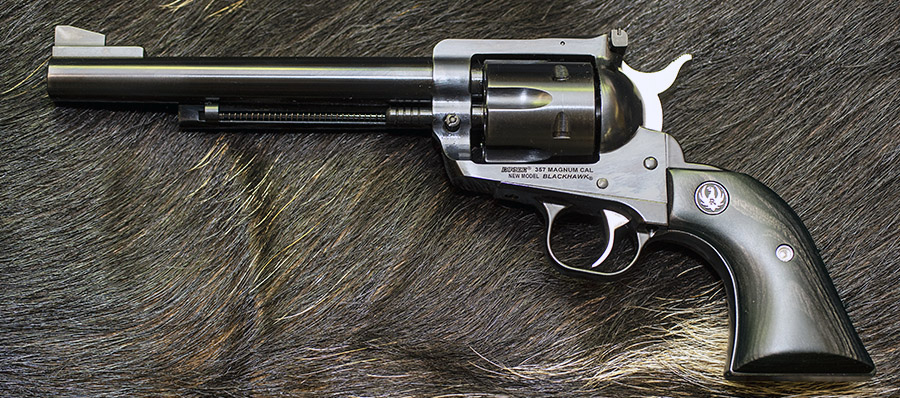
I recently tested several loads for accuracy in my Ruger .357 Magnum New Model Blackhawk.

The Ruger New Model .357 Blackhawk.

The .357 Magnum Blackhawk is available with either a 4 5/8-inch or a 6 1/2-inch barrel; mine is the 6 1/2-inch version.   I like a longer barrel when I have a choice.

In this test series, I fired four 5-shot groups at 50 feet and then calculated the average group size for each load.  I did not use a machine rest (more on that later); I used a two-hand hold rested on the bench, with no support for the barrel or any other part of the gun.

The Loads

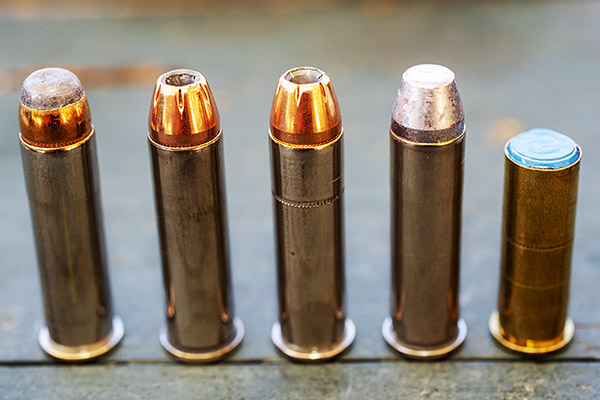
I tested with five bullets and three propellants:

      • The Hornady 158-grain XTP jacketed hollow point
      • The Speer 158-grain jacketed soft point
      • The Hornady 110-grain jacketed hollow point
      • A cast 158-grain truncated flat point
      • A cast 148-grain powder coated double-ended wadcutter
      • Unique
      • Bullseye
      • Winchester 296
From left to right, the Speer 158-grain jacketed soft point, the Hornady 158-grain jacketed hollow point (designated by Hornady as XTPs), the Hornady 110-grain jacketed hollow point, a cast 158-grain truncated flat point, and the Gardner 148-grain powder coated double ended wadcutter (the wadcutters are loaded in .38 Special brass).

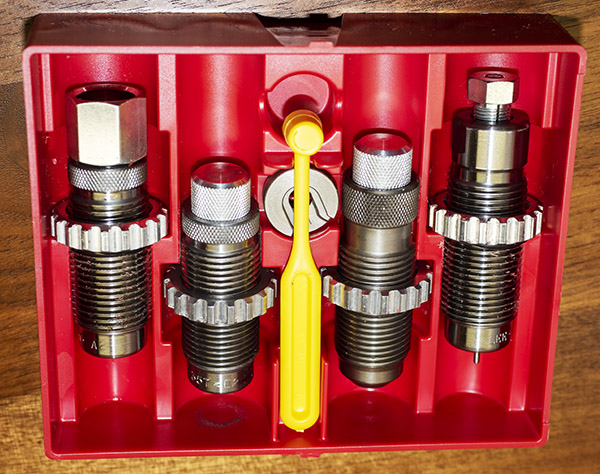
All loads were prepared using my new Lee Deluxe 4-die .357 Magnum reloading dies, with the exception of the .38 Special wadcutter ammo.  All loads were crimped.  I recently did a blog on the Lee dies.  I think they are the best dies I’ve ever used.  If you’re considering a set of Lee dies, a good place to buy them is on Amazon.

Lee’s Deluxe 4-Die Set. These do a fantastic job.

You can also buy directly from Lee Precision.

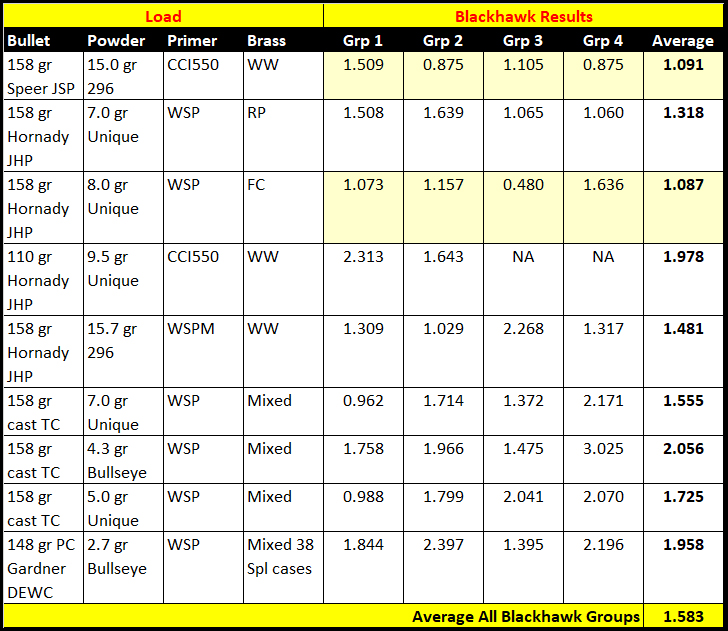
The different load recipes are identified in the table below.

The Results

Here are the results:

The biggest variable in this test series is me.  But, I’m what you get.

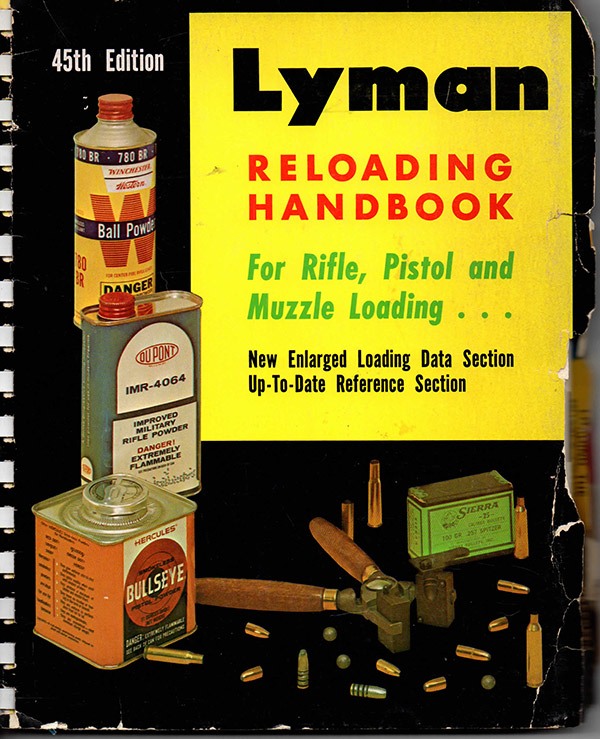
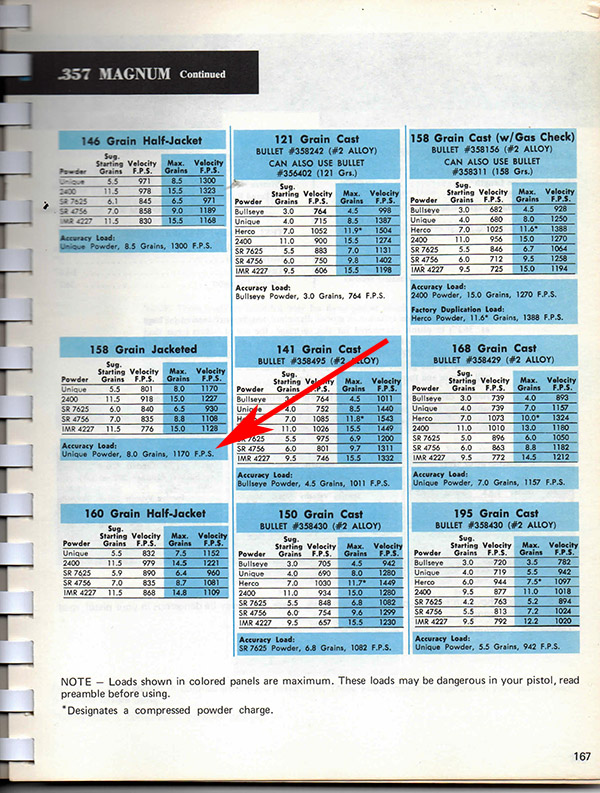
The most accurate load was 8.0 grains of Unique with the 158-grain Hornady jacketed hollow point bullet and a regular (non-magnum) primer.  You won’t find this load in any modern reloading manual.   It’s one that was in Lyman’s 45th edition manual (printed in 1970) as their accuracy load with a 158-grain jacketed bullet.  Sometimes there are jewels hidden in those old reloading manuals.  There are folks who say you shouldn’t use loads from old manuals.  When I do, I work up to them, watching for pressure signs.  Another one of my old reloading books goes up to 8.5 grains of Unique with a 158-grain jacketed bullet.  I didn’t go there because I didn’t need to.

The Lyman 45th Edition Reloading Handbook. I still use it. These older books contain loads the newer reloading manuals do not.
Back in 1970, the good folks at Lyman identified 8.0 grains of Unique and a 158-grain jacketed bullet as their accuracy load. They were right!

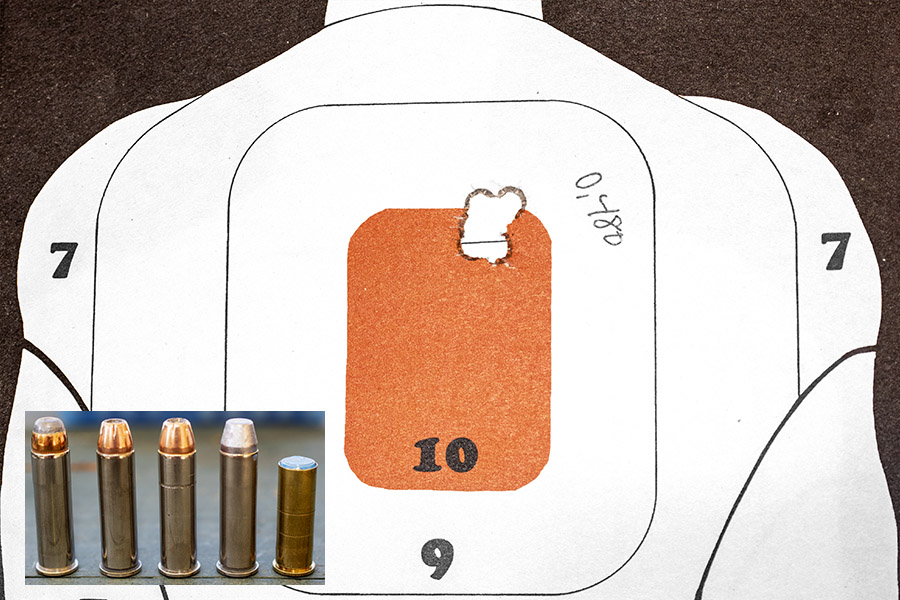
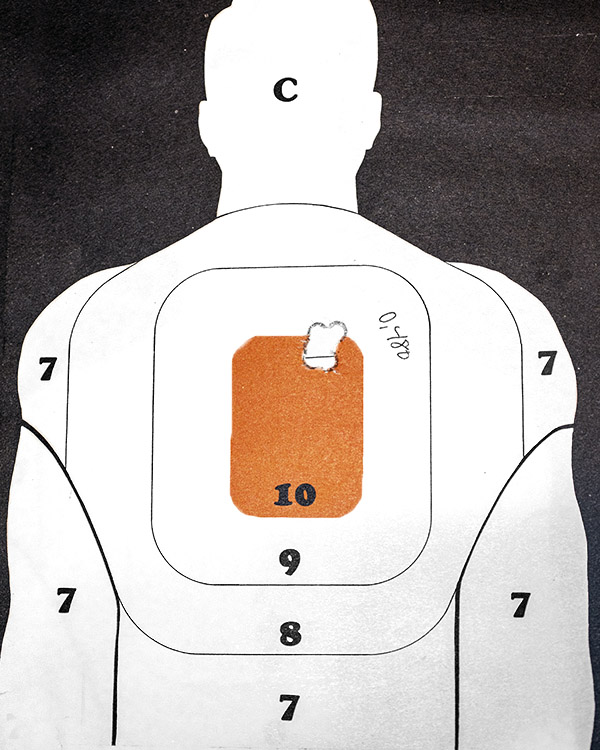
Recoil with the Lyman accuracy load identified above was moderate, and there were no excess pressure indications (extraction was easy, and the primers were not flattened).  I tried 7.0 grains of Unique first, and it was so calm I had no qualms about going to the Lyman-recommended 8.0-grain load.  I was impressed with the 8.0 grains of Unique and 158-grain Hornady jacketed hollow point load.  One of the groups was a one-holer (five shots clustered in a single ragged hole).   Was that simply a fluke?  I don’t think so.  The other groups with this load were larger, but that was undoubtedly me.

I wish I could do this every time.  This target was brought to you by 8.0 grains of Unique and the Hornady 158-grain jacketed hollow point bullet.

The second most accurate load (which is essentially as accurate as the load above) was the 158-grain Speer jacketed soft point bullet with 15.0 grains of Winchester 296 and a magnum primer.   These bullets are still listed on the Speer website, but good luck finding them.  No one has them in stock.  The ones I used were from a stash I picked up from my good buddy Paul.  Winchester 296 is a good powder for magnum handgun cartridges and it’s been one of my favorites for years.  I was a bit surprised that 296 did not take the accuracy honors, but it was pretty close.  296 is a slower burning powder, and the reloading manuals show it gives the highest muzzle velocity.  Recoil (and muzzle blast and flash) are significant with this powder.

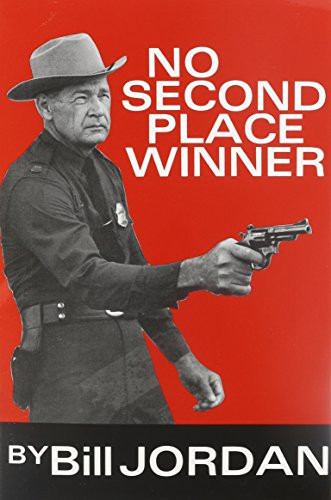
Trust me on this: Bill Jordan’s No Second Place Winner is a good read.

The difference in average group size between the most accurate load and the next most accurate load was only 0.004 inches (the most accurate group average was 1.087 inches, the next most accurate group average was 1.o91 inches).  That’s nothing, really.   And I didn’t go higher or lower with the 296 charge with the second-place load; I only tried 15.0 grains.  It’s likely that variations in the 296 charge would have shown a slighly different charge to be better.  Maybe Bill Jordan (who carried a .357 Magnum) had it wrong:  There is a second place winner.

Surprisingly, one of my previous accuracy loads (a near-max load of Unique with the Hornady 110-grain jacketed hollow point bullet) was not a good load in the Blackhawk.  Accuracy was okay, but it was a fierce load and the cases would not extract (I had to take the cylinder out and drive the cases out with a rod).   I only fired two groups with this load and then I stopped.  This is a load that worked well in previous .357 Magnums, including a stainless steel Blackhawk, an earlier version of the Colt Python, a Smith and Wesson Model 27, and my current production Colt Python.  I had the Python with me so I fired a couple of groups with it.  It worked fine (it was accurate and extraction was easy).  I proved, once again, that every gun is different with regard to what it likes.

What I thought would be a good load (a 158-grain cast bullet and 7.0 grains of Unique) was not.  It was just okay accuracy-wise, but it leaded the bore big time and accuracy grew worse with each group fired as the leading increased.  That wasn’t unique to the Blackhawk, either.  It did the same thing in the Colt Python.  These cast bullets are fairly hard, but the charge (7.0 grains of Unique) is driving the bullets to approximately 1200 feet per second, and it appears that’s enough to induce leading.  The bullets are sized to .358 inches, so they should be sealing adequately.

The above observation led to a quest for a load using these cast bullets that wouldn’t lead the bore, and I tried a couple that kept velocity below 1000 feet per second (4.3 grains of Bullseye, and 5.0 grains of Unique).   Neither produced appreciable leading, but the accuracy was mediocre.

Mild leading after the 4.3-grain Bullseye and 5.0-grain Unique cast bullet loads. These loads kept the velocity below 1000 feet per second.

After cleaning the bore, I tried the standard .38 Special target load:  2.7 grains of Bullseye and a 148-grain double ended wadcutter.  I used Jim Gardner’s powder coated wadcutters and ammo I reloaded with my Star  progressive machine.  Accuracy was okay, but not exceptional.

Machine Rest versus Hand-Held Shooting

On the topic of machine rests, I don’t have one.  In the past, keyboard commandos criticized me for that.  I was recently was in the Colt plant in Connecticut.  The Colt manager took us through the famed Colt Custom Shop and he showed me one of their custom gun test targets.  It looked like my targets…four shots clusted into a cloverleaf with a single flyer.  I asked my Colt buddy about the distance and if Colt used a machine rest.   He told me the distance was 45 feet and said they do not use a machine rest.  “A good shooter will outshoot a machine rest,” he said.  I thought that was interesting and I liked hearing it.  I never felt a need to use a machine rest and what the Colt guy said reinforced that.

A Note on Safety

This blog describes loads I developed for use in my revolver.  Don’t simply run with them.  They work for me; I make no conclusions (nor should you) about what they will do in your guns.  Consult a reloading manual, start at the minimum load, gradually work up, and always watch for pressure signs.

What’s Next?

I have a blog in work that compares the Blackhawk to the Colt Python, and part of that is assessing how the Python groups with the same loads listed above.  I think you’ll enjoy reading it.  Stay tuned, folks.


Keep us in components…click on those popup ads!


Never miss an ExNotes blog!


More gun and reloading stuff?  You bet!

A 6.5 Creedmoor Browning X-Bolt

Yeah, I’ve become a 6.5 Creedmoor believer.  This is a superior cartridge and accuracy seems to just come naturally with it.

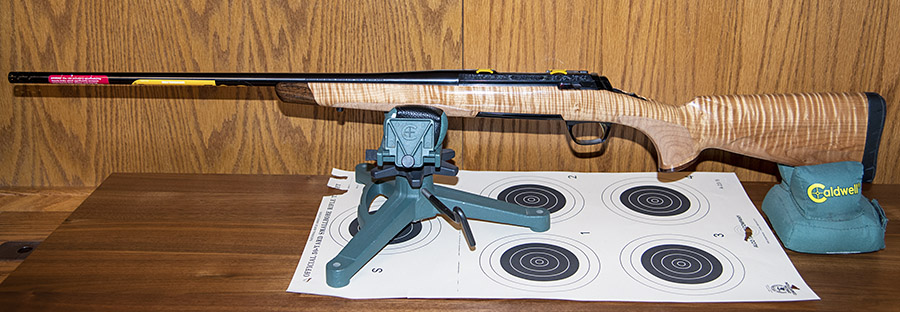
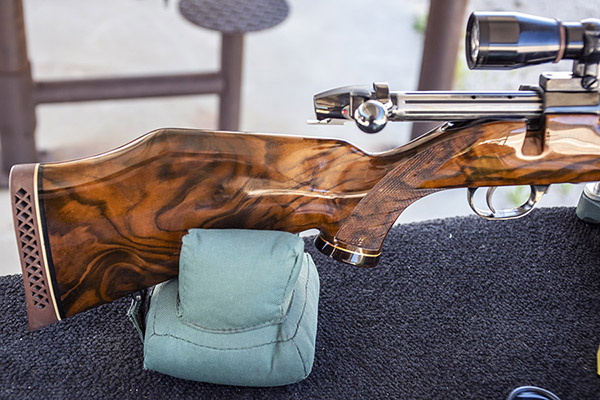
The rifle you see above is a maple-stocked Browning X-Bolt.  It’s from a limited run and it sure is good looking.  I bought it from a small shop in in Lamar, Colorado, when I was there on a recent secret mission.  The dealer wouldn’t ship it to California so it had to go the long way around: Lamar, Colorado, to Raleigh, North Carolina, to Riverside, California, and then finally to me after I waited the obligatory 10-day cooling off period (I have to be the coolest guy in California; I’ve cooled off so many times).  California has extra requirements for shipping guns to FFL holders here and the dealer in Colorado didn’t want to mess with our nutty requirements.  The reshipper guy in North Carolina makes a living doing this (who says government can’t stimulate trade?).  It’s crazy, but that’s our leftist Utopia here in the Golden State.  I sometimes wonder if our firearms regs have ever actually prevented a crime.

Anyway, to leave the politics behind, a couple of weeks ago when I was on the range a good friend gave me a box of once-fired 6.5 Creedmoor brass another shooter had left behind.   That was a sign, and I figured I’d reload it for the first range session with the new Browning.

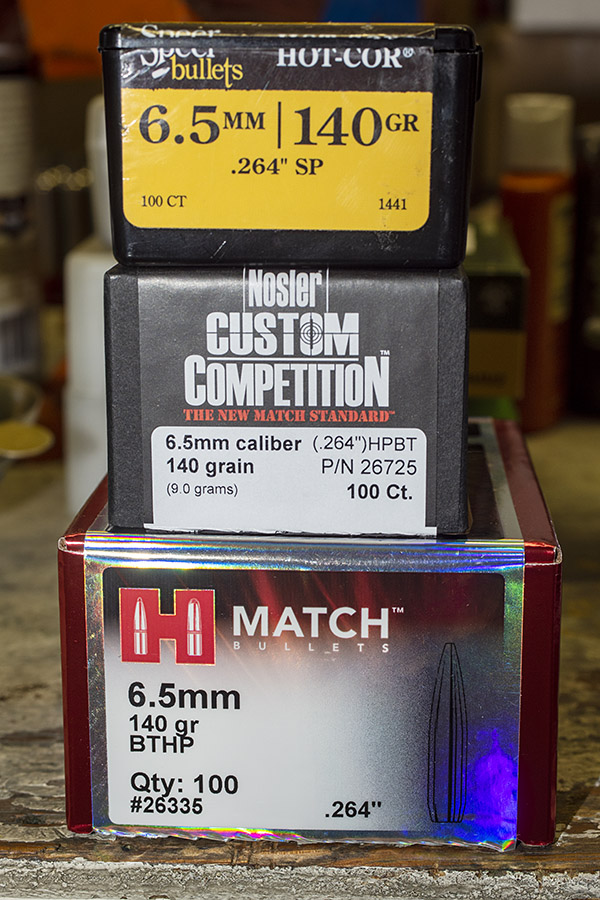
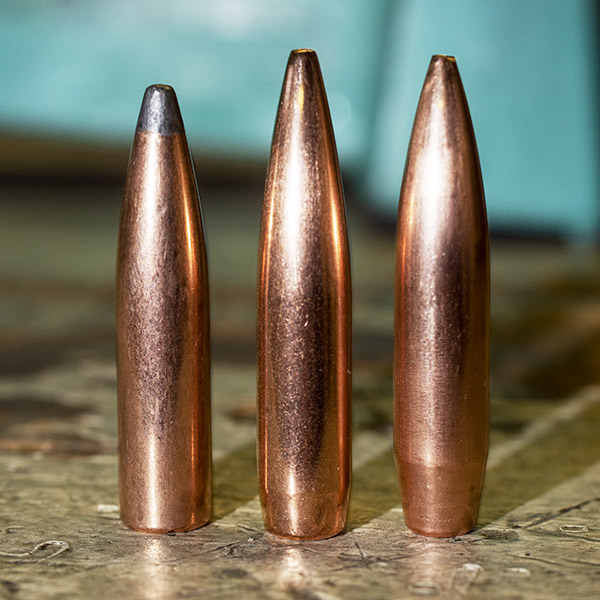
Speer, Hornady, and Nosler 6.5mm bullets.

I already had stocked up on 6.5 Creedmoor bullets.  I am probably on every reloading retailer’s email list and I get a dozen advertising emails every day.  With components being in short supply nationally, if I see anything I might use I pick it up.  Like the maple Browning you see above, the time to buy something that’s hard to get is when you see it (to quote Mike Wolfe).

That’s the Speer 140-grain jacketed softpoint on the left, the Hornady 140-grain jacketed boattail hollowpoint in the middle, and the Nosler 140-grain jacketed boattail hollowpoint on the right. The Nosler has a longer boattail than the Hornady, and the ogive is blunter.

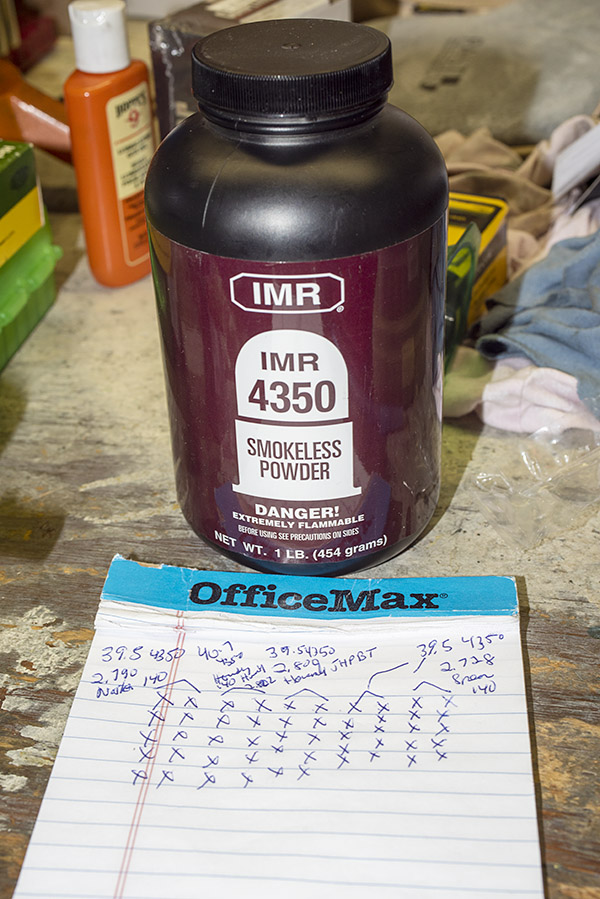
From everything I’ve read and my limited experience loading for a Ruger 6.5 Creedmoor No. 1 (see my recent blog on the 6.5 Creedmoor Ruger No. 1), IMR 4350 propellant is the secret sauce for accuracy with this cartridge.  I had some under the reloading bench and it got the nod for this load session.

That’s how I keep track of what I’m loading at the bench. I’ll transfer that information to a reloading label that goes on the rifle ammo container.

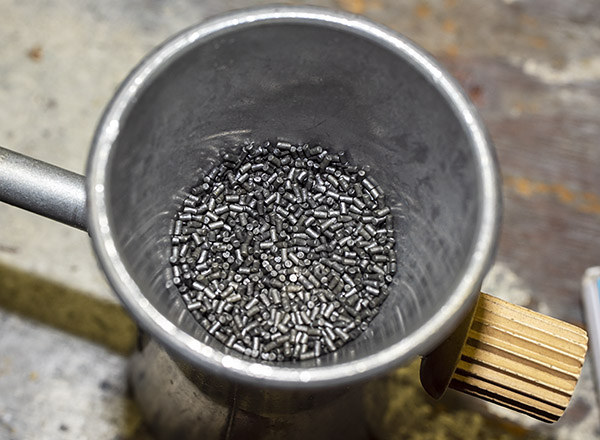
IMR 4350 is an extruded stick powder, and it doesn’t meter consistently through the powder dispenser.  I use an RCBS trickler I’ve had for 50 years.  The idea is that you drop a charge into a loading pan, it goes on the scale, and then you trickle in extra powder (a particle or two) at a time with the trickler to arrive at the exact weight.

An old and well worn RCBS powder trickler. It works well and although it sounds slow, it goes pretty quickly.

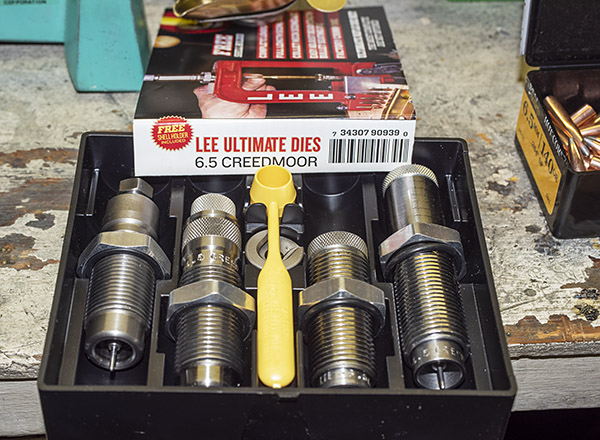
I have a set of Lee dies I use for the 6.5 Creedmoor.  It’s Lee’s “ultimate” four-die set, which includes a full length resizing die and decapper, a neck-size-only die and decapper, the bullet seating die (which includes a roll crimping feature), and a factory crimp die.  Lee dies are inexpensive and they work well.  Their customer service is superb, too.  I full length resized this batch and I didn’t crimp.  I’ll experiment with that later.  For this load, I just wanted to get pointed in the right direction.  The refinements will come later (if they are needed).

The Lee 6.5 Creedmoor die set. Lee dies include the shell holder; most other manufacturers’ die sets do not. Lee makes good gear.

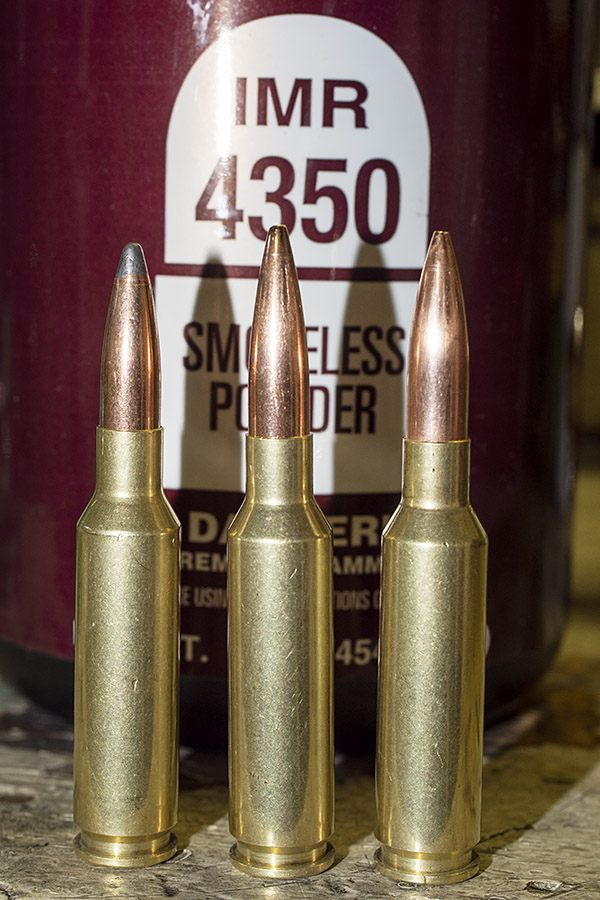
After charging the primed cases with IMR 4350, I seated the bullets.  The long, heavy-for-caliber bullets and the relatively short 6.5 Creedmoor brass make for cartridges that look like hypodermic needles.  It’s good looking ammo.

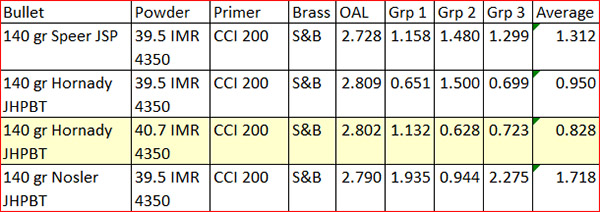
So how did the new 6.5 Creedmoor do?   It was very cold and very windy when I went to the range.  I had hoped for more pictures of the Browning in the daylight but it was so windy I didn’t want to chance the photos (I was afraid the wind would knock the rifle out of its Caldwell rest).   There was only one other shooter out there; most folks were probably staying warm at home.  I shot at 100 yards and the wind notwithstanding, this puppy can shoot.  Here are the results from my first box of reloaded ammo…there are a few erratic groups, but they were due to me and the wind.

Here’s what the best groups looked like:

The Browning likes the 140 grain Hornady jacketed hollowpoint boattail bullets, which is good because I have a couple of boxes of those.  Going up to 40.7 grains of  IMR 4350 helped a bit.   After I fired these rounds, I could chamber a fired case without it sticking, so I am going to load another 20 cartridges that I will neck size only.

The scope I bought for this rifle is a Vortex 4×12 (it’s made in China).  This was the first time I used a Vortex.  The optics are very clear.  Because of the wind and the cold temperatures I didn’t try to adjust the parallax; I just set the parallax adjustment at 100 yards and shot (I’ll adjust the parallax next time, assuming the weather cooperates).  The Vortex click adjustments for windage and elevation are not as tactilely distinct as they are on a Leupold or a Weaver.   The clicks are squishy and I had to look at the turret graduations to keep track.  Eh, it’s a $170 scope. You get what you pay for. Sometimes.

The recoil on the 6.5 Creedmore is moderate; maybe a little less than a .308.  The Browning has a removable muzzle brake, and that helps.

The maple Browning (especially this one) really stands out.  There were three rangemasters and one other shooter on the range the day I shot it.  Everyone stopped what they were doing to look at the rifle.  They thought it was a custom gun.  This Browning X-Bolt is a beautiful firearm.  And it shoots, too.


Never miss an ExNotes blog:  Sign up here for free!

More gun stories?  You bet!


Hey, don’t forget to click on the ads appearing on this page….it’s how we get paid!

The Model 52 Smith and Wesson

I’m a lucky guy.  One of the Holy Grail pieces in my collection is a Model 52 Smith and Wesson.   These guns were discontinued nearly 30 years ago and a lot of folks (myself included) consider them to be the finest handguns ever manufactured.  I had always wanted one, and finally, after pestering a good friend relentlessly, he agreed to sell me his.

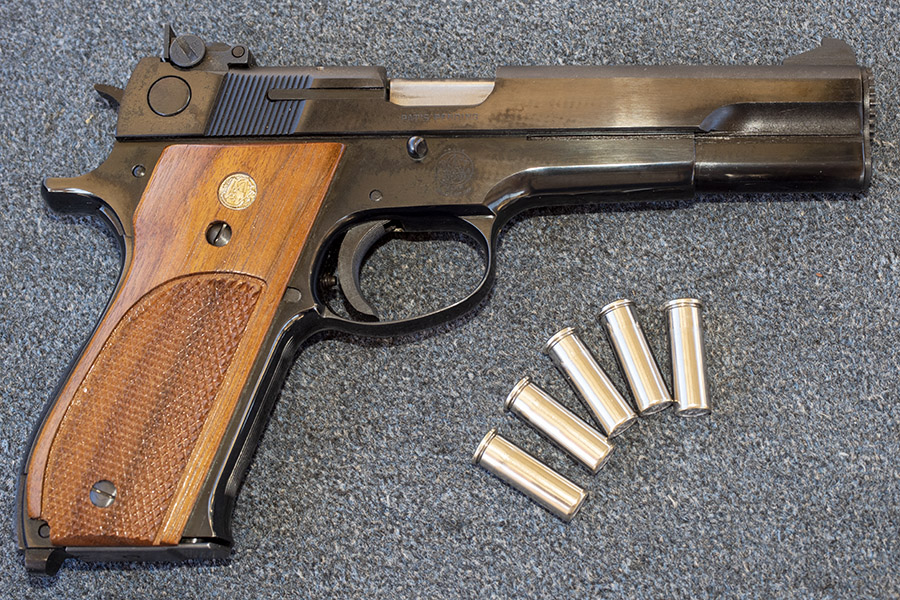
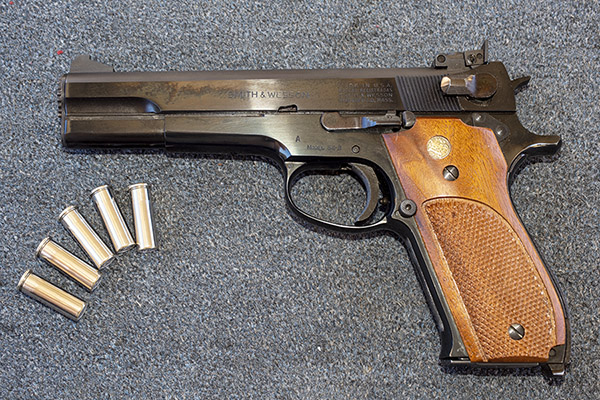
An impressive target handgun: The Smith and Wesson Model 52-2. It has one of the best triggers I’ve ever experienced.

The Model 52 was built as a no-compromise bullseye target handgun chambered for mid-range .38 Special wadcutter ammunition.  What that means is that it’s not a duty weapon or a concealed carry weapon.  It’s a full-sized, 5-inch-barreled, adjustable sights, tightly-clearanced handgun with but one objective in mind:  Shooting tiny groups with wadcutter ammo.

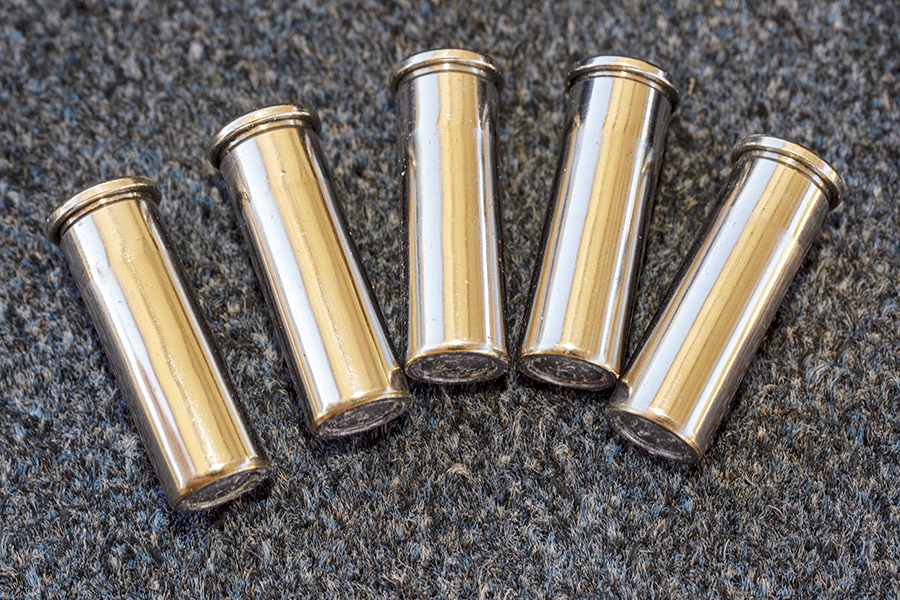
The .38 Special cartridge has been around forever, and the target variant uses a wadcutter bullet.  One of my friends saw these and commented that it was odd-looking ammo, and I guess if you’re not a gun nut it probably is.  The bullets fit flush with the case mouth, and because of the sharp shoulder at the front of the bullet, they cut a clean hole in the target (hence the “wadcutter” designation).

.38 Special wadcutter ammo, reloaded on a Star reloading machine. The secret sauce (not so secret, actually) is a 148 grain wadcutter bullet seated flush and 2.7 grains of Bullseye propellant.

I love reloading .38 Special wadcutter ammo, especially now that I am doing so on my resurrected Star reloader.  You can read about that here.

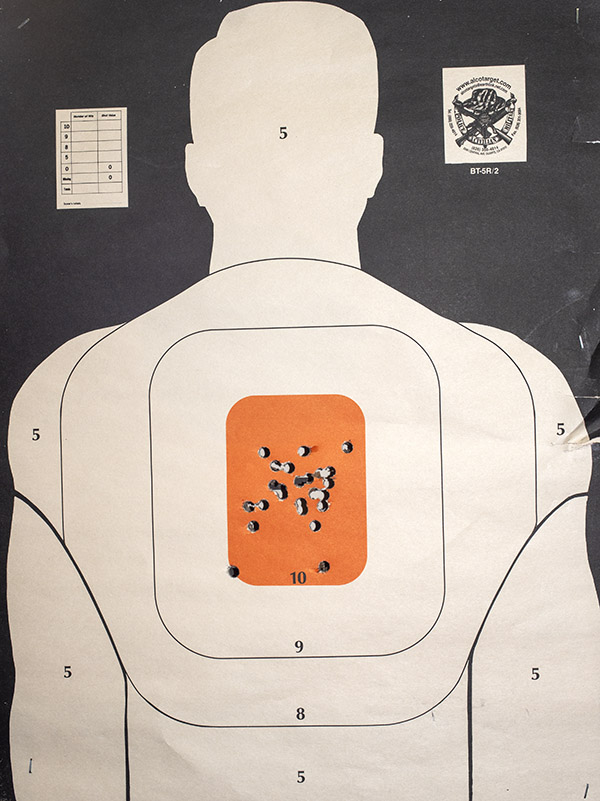
You can see the clean holes cut by the wadcutter bullets in the target below, and that’s a typical target for me when I’m on the range with the Model 52.  What you see below is a target with 25 shots at 25 yards shot from the standing position.

25 rounds at 25 yards from the Model 52, all in the bullseye. I’m a ham-and-eggs pistolero; guys who are good can shoot much tighter groups.

Yeah, I know, 2 of the 25 shots were a bit low in the orange bullseye.  A gnat landed on my front sight twice during the string of 25.  (That’s my story and I’m sticking to it.)

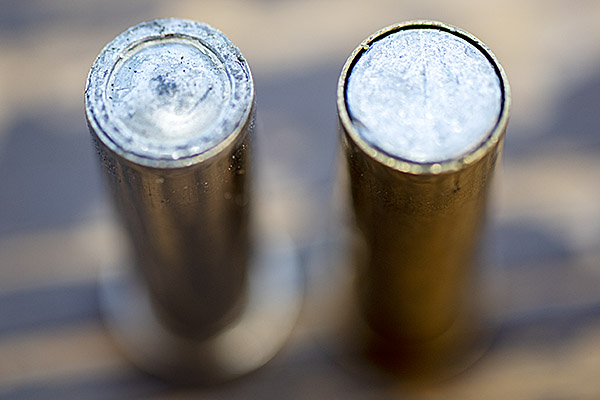
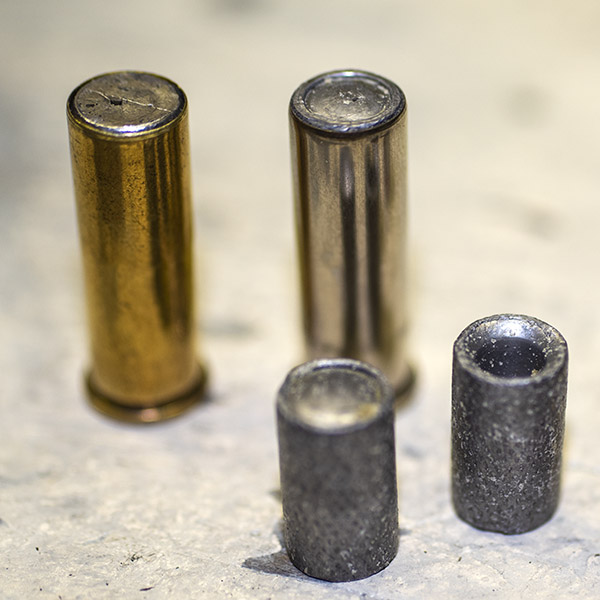
That’s a Hornady hollow-base wadcutter on the left, and the Missouri Bullets cast double-ended wadcutter on the right. The HBWC is orientation sensitive; the DEWC is not.
Reloaded HBWC and DEWC cartridges, with two of the double-ended wadcutter bullets that show the wadcutter end (which faces forward in the cartridge) and the hollow base end. These HBWC projectiles are Hornady bullets.

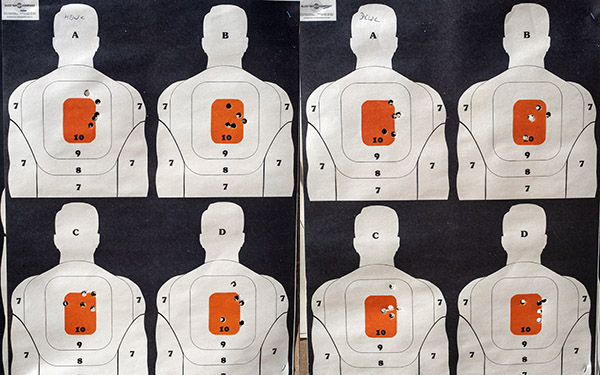
Next question:  Which is more accurate in the Model 52, the hollow-base wadcutters or the double-ended wadcutters?   The two I tried are the Missouri cast double-ended wadcutter, and the Hornady swaged hollow-base wadcutter.   Here’s what they look liked (with me behind the gun) on a set of 50-ft targets:

50-ft targets used for comparing DEWC bullets versus HBWC bullets. These targets are about one-fourth the size of the silhouette target shown above.

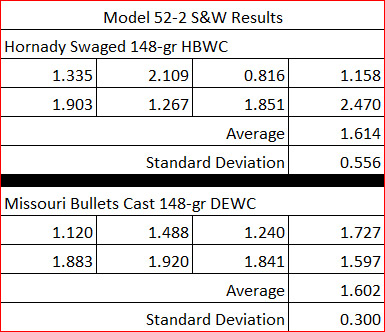
And here’s the group size data from the 16 five-shot groups I fired a couple of days ago (all dimensions are in inches).  It was all focused on answering the question:  Which is more accurate?  Hollow-base wadcutters, or double-ended wadcutters?

The load was 2.7 grains of Bullseye, a CCI 500 primer, and mixed brass for all of the above groups.  They were all shot at 50 feet.  So, to answer the accuracy question, to me the difference is trivial (it’s less than a 1% difference when comparing hollow-base to double-ended wadcutter average groups).   The standard deviation (a measure of the variability in the group size) was a little bigger for the hollow-base wadcutters, but the difference was probably a statistcal anomaly and it was more due to me, I think, than anything else.

Folks often wonder how the Smith and Wesson wizards managed to get a semi-auto to feed wadcutter ammo.  It’s partly in the magazine design and partly in the ramping (but mostly in the magazine).  The Model 52 magazine is designed to only hold 5 rounds, and if the bullet protrudes beyond the case mouth, it won’t fit into the magazine.  The magazine holds the the top cartridge nearly perfectly in alignment with the chamber, and when the slide pushes the round forward, it glides right in.    It will even do so with an empty case, as the video below shows.

The Model 52 was first introduced by Smith and Wesson in 1961.  It was based on Smith’s 9mm Model 39, but it had a steel frame (instead of an aluminum frame, although Smith also made a small number of Model 39s with steel frames), a 5-inch barrel (instead of the 39’s 4-inch barrel), and target-grade sights adjustable for windage and elevation (instead of the 39’s windage-adjustable-only sights).  The original Model 52 had the Model 39’s double action first shot capability, although I’ve never seen a no-dash Model 52.   In 1963 Smith incorporated a better single-action-only trigger and the 52 became the 52-1, and then in 1970 it became the 52-2 when Smith incorporated a better extractor.  Mine is the 52-2.

I was lucky…when my friend sold the Model 52 to me, he had the complete package:  The original blue Smith and Wesson box, the paperwork that came with the new gun, and all of the tools and accessories (including the barrel bushing wrench).

You might be wondering:  Which is more accurate?  The Model 52 Smith and Wesson, or the new Colt Python?  They are both fine and accurate handguns, but in my hands and after coming back from good buddy TJ and TJ’s Custom Gunworks with a crisp single-action trigger, the Python gets top billing in the accuracy department.  You can read about the Python’s accuracy with wadcutter .38 Special ammo here.

Never miss any of our ExNotes blogs on guns, bicycles, motorcycles, construction equipment, product reviews, and all the rest.  Subscribe for free here!


More Tales of the Gun?  You bet!


Click on those popup ads!

Getting into Reloading

You’ve thought about reloading, you’ve read stuff from us and others about the benefits of reloading, and you want to do it.  But how?

Hey, I was born into it.  My Dad was a reloader and I had a pretty good idea what to do when I wanted to start, but the urge to do so didn’t hit until I was a young guy in the Army at Fort Bliss.  I was lucky.  The guy who ran the Fort Bliss Gun Club (Roy Johnson) had a room set up for just that purpose and he walked me through the process some 50 years ago.  But Roy has gone on to his reward, you’re probably not stationed at Fort Bliss, and you want to get into the game.   That’s what this blog focuses on, and in particular, the equipment you’ll need to get started.

Inside the Fort Bliss Gun Club. This is a fabulous place where I spent a lot of time as a young Army dude. Next time I’m in El Paso you can bet I’ll stop in again.

Reloading Advantages

There are three advantages to reloading:  Cost, accuracy, and availability.
Generally, reloaded ammo costs less than factory ammo, and in some cases (especially for more exotic rifle ammunition), the savings are huge.   For example, factory .416 Rigby ammo costs $170 for a box of 20 rounds; I can reload .416 Rigby ammo for well under a buck a round.

From an accuracy perspective, reloading is the only way to go.  You can tailor a load to a particular firearm by varying bullet type, bullet seating depth, crimp, powder type, powder charge, brass, and primers to arrive at a combination that delivers superior accuracy (and it’s fun doing this).  I have rifles that shoot 3-inch groups at 100 yards with factory ammo; with my custom reloads, I can get half-inch groups.

Today, if you reload and you’ve laid in a good stock of components, you can reload your way through any ammo shortages.  Nobody has .45 ACP, 9mm, or .223 ammo in stock right now; I have enough components on hand to reload thousands of rounds.  I’m on the range two or three times a week enjoying my shooting hobby while other folks are online whining about not being able to buy ammo.

What You Will Need

The things you will need to start reloading fall into two categories:  The reloading equipment, and the reloading components.  The reloading components are the things that combine to bring an empty brass cartridge case back to life (that includes the bullets, the propellant, and the primers).  The reloading equipment includes the gear you need to take the components and turn them into a ready-to-fire cartridge.

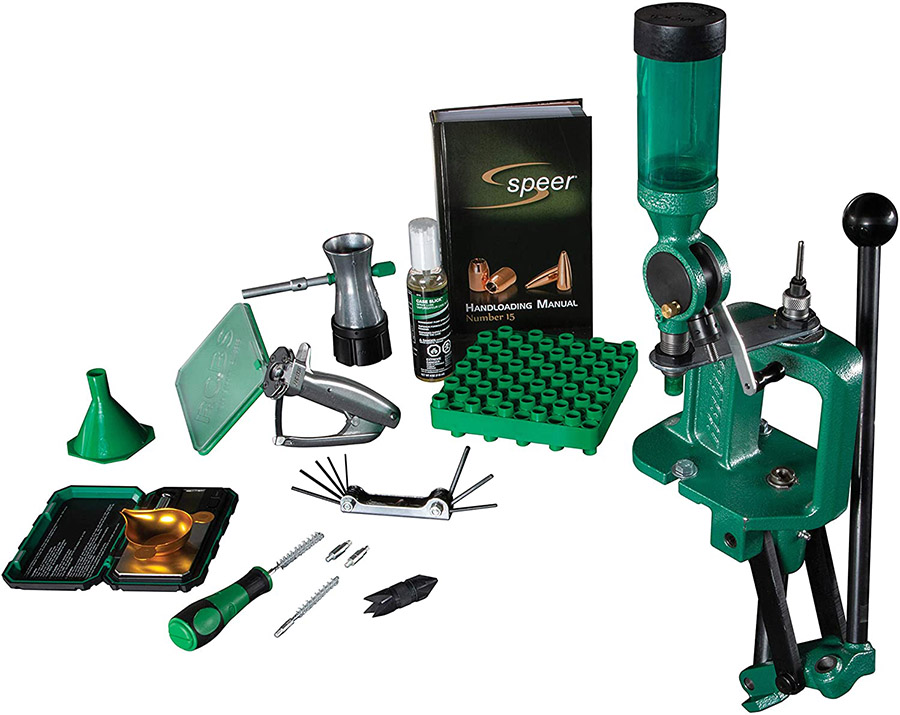
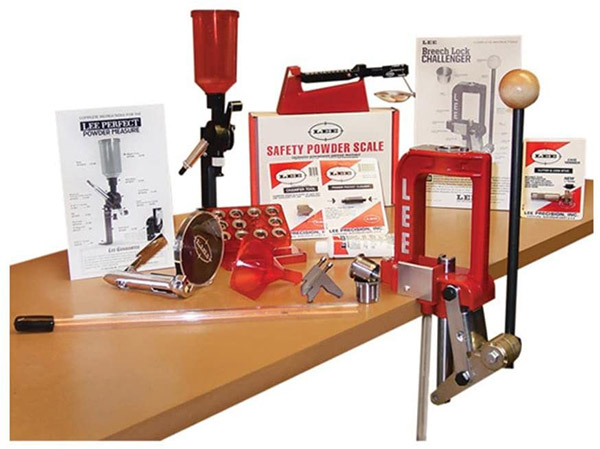
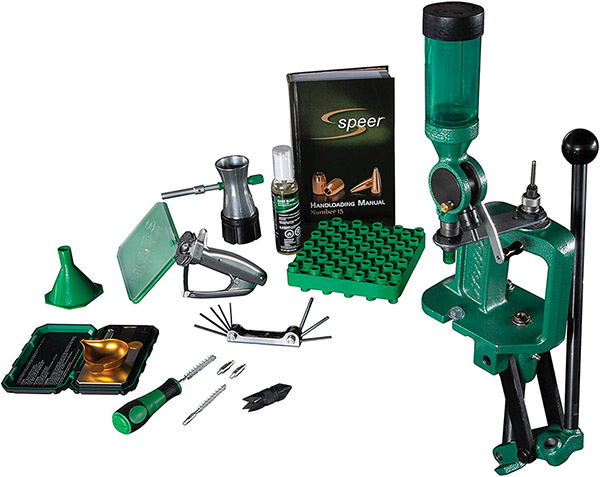
If you want to get into the reloading game, I believe the best way to do so is to buy a complete equipment reloading package from one of the suppliers like RCBS or Lee.  That’s the RCBS kit shown in the big photo above.  I’ll talk about it, the Lee kit, and a couple of others further down in this blog.   First, let’s review each bit of gear.

The Reloading Press

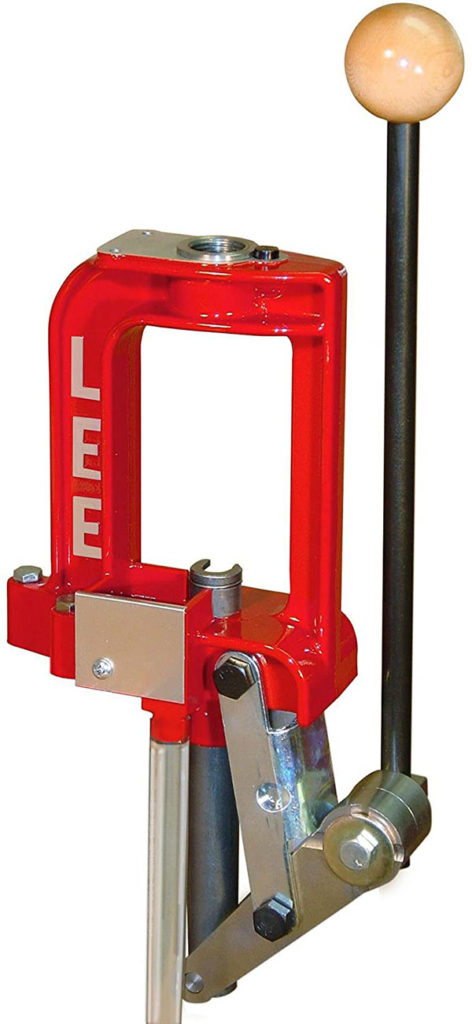
That’s the lever-operated press that accepts the dies (more on that in a second) for reloading your ammo, and sometimes the press includes a mechanism for seating primers in the cartridge case after the old primer has been removed.  In other cases, a separate priming tool is used.   Presses are offered by RCBS, Lee, Lyman, Hornady, and other companies.

The Lee Challenger press. It’s a decent unit at a decent price, and an ideal way to get started in reloading.

Dies

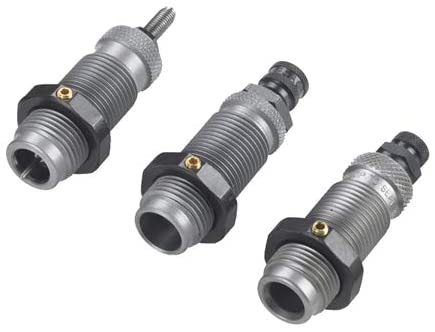
The dies are cartridge specific.  For handgun cartridges, the die set usually includes three dies; for rifle cartridges, the die set usually includes two dies.  The good news is that die threads are pretty much standardized, and every company’s dies will fit every company’s reloading press.  In other words, if you buy Lee dies, they’ll work on an RCBS press.  If you buy RCBS dies, they’ll work on a Lee press.  Dies are offered by several companies, with the most popular brands being Lee and RCBS.

A three-die pistol set from RCBS.  The first die knocks out the old primer and resizes the fired case.  The second die flares the case mouth to accept a new bullet. The third die seats the new bullet and, if you want, crimps the bullet in place.
An RCBS two-die rifle set.  The first die knocks out the fired primer and returns the case to its original dimensions.  The second die seats the bullet and, if desired, crimps it in place.
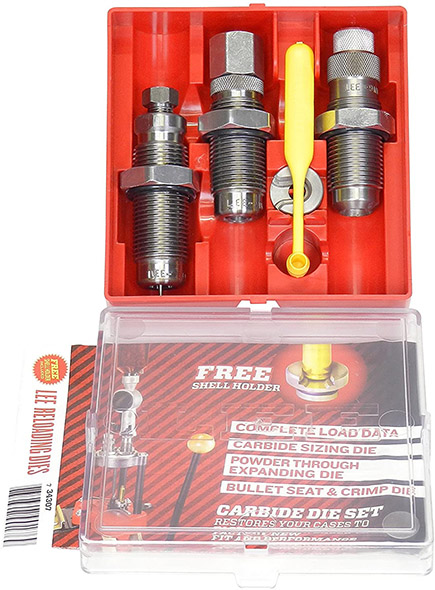
A three-die pistol cartridge set from Lee Precision. Lee includes the shell holder with their die sets.

Shell Holder

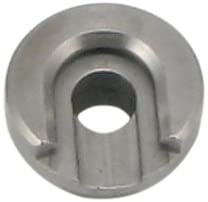
You will need a shell holder for the cartridges you wish to reload.  That’s the piece that holds the cartridge case in place so the press can push it up into the die and then extract it from the die.  RCBS does not include the shell holder with their die sets (so you’ll need to buy RCBS shell holders separately); just about all other die makers do (when you buy their dies, the die set includes a shell holder for that cartridge).

A shell holder. You need to buy these separately if you buy RCBS dies.

A Powder Dispenser

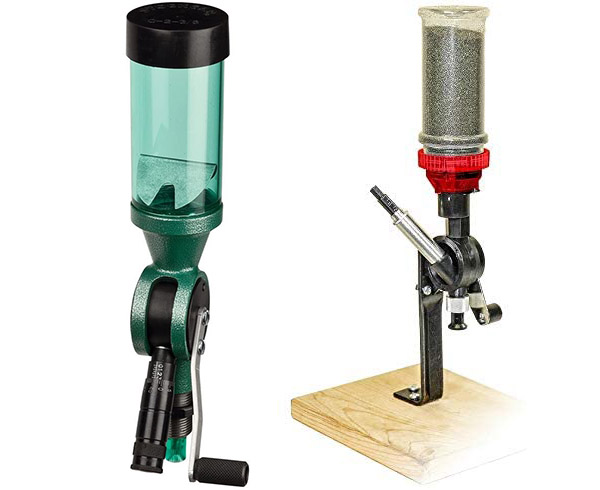
This is a device for dropping a precisely-metered powder charge into each cartridge case.   There are fancy (read: expensive) electronic powder dispensers, but you don’t need those to get started and a lot of folks (myself included) don’t like them.  A simple mechanical dispenser will work fine (as mine has been doing for 50 years).  Both RCBS and Lee offer good powder dispensers; the Lee is substantially less expensive.

An RCBS powder dispenser on the left, the Lee powder dispenser on the right.

A Powder Scale

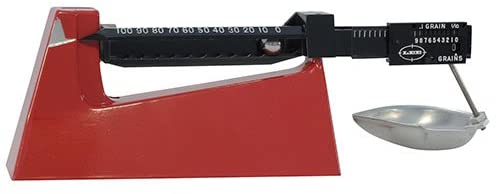
This is a simple balance beam scale to allow you to measure the weight of the propellant charge and adjust the powder dispenser to throw that charge.  There are electronic scales, too, but they add complexity and considerable expense where none is required.  Again, the dominant brands are Lee and RCBS.

A simple Lee balance beam reloading scale. These scales can measure to a tenth of a grain.

Cartridge Trays

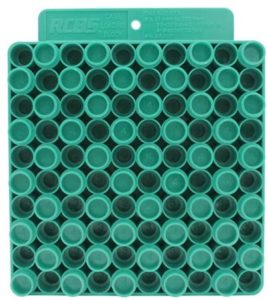
When we reload, we use a cartridge tray (to hold the cartridges as we work through the process of reloading).  A variety of manufacturers offer these.

An RCBS cartridge tray. These are available from several manufacturers. I’ve been using mine for nearly 50 years.

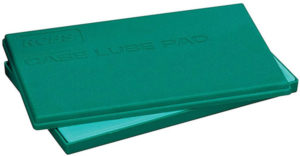
A Case Lube Pad

This is a simple foam pad.  You put case lube on the pad and roll the brass cases on it to lubricate the exterior prior to running them through the resizing die (the first die used in the reloading process).  If you have a straight wall pistol cartridge, you can buy tungsten carbide dies that don’t require lubing the cartridge cases.  If you’re going to reload 9mm, .38 Special/.357 Magnum, .45 Auto, or .45 Colt, my advice is to spend the few extra bucks and get the carbide dies.

An RCBS case lube pad. You put a bit of case lube on the pad and roll the brass on it to lube the cases prior to running them through the resizing die.

Case Lube

This is the lube used as described above.  To mention it again, if you’re going to reload straight wall pistol cartridges and you buy tungsten carbide dies, you won’t need case lube (or the case lube pad).

RCBS case lube.

Alternatively, you can buy spray-on case lubes, which eliminate the need for the case lube pad.  I’ve tried spray-on case lubes and I prefer using the pad and case lube instead.  Other reloaders like the spray-on approach better.

A Primer Seating Tool

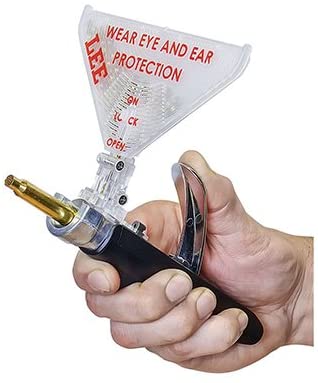
Some reloading equipment companies incorporate a primer seating tool in their press; others offer separate primer seating tools.  I have an RCBS press that came with the primer seating tool, but I like using a manual hand priming tool instead.  Several manufacturers offer these; I use one from Lee.

The Lee hand priming tool. These work well. You can feel each primer seating and better control seating depth with these hand priming tools.

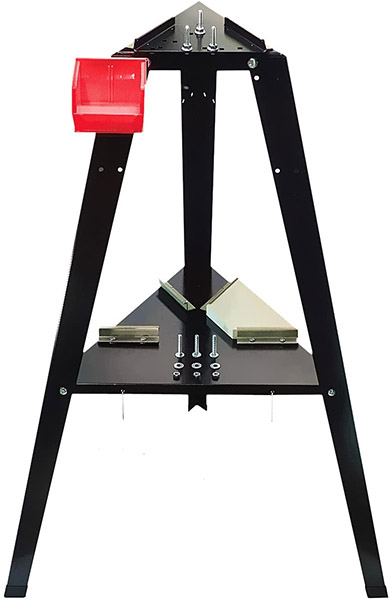
A Bench

You may already have a sturdy workbench where you can mount the reloading press; if not, there are reloading-specific benches available.

A Lee reloading bench. These work well if you don’t have a workbench for mounting your press.

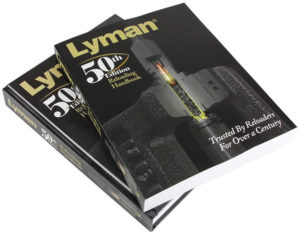
A Reloading Manual

There are several available, including the excellent offerings from Sierra, Speer, Hornady, and Lyman.  Don’t think you can skip this; a good reloading manual is a must-have item for any reloader.  They all explain the reloading process at the beginning, and they include safe recommended load levels for nearly all cartridges.  I’ve acquired several reloading manuals over the years and they are all good; my favorites are the ones from Lyman.  Others are published by bullet manufacturers (these include the manuals from Hornady, Speer, and Sierra) and those manuals include loads only for their bullets.  The Lyman manual is more generic.  But like I said, they’re all good.

I have reloading manuals going back 50 years. The Lyman manuals are probably the best.

That’s the reloading equipment.  In addition to that, you’re going to need the ingredients for the cartridges you want to reload.  That includes the brass cases, the bullets, the powder, and the primers.

Brass Cartridge Cases

You can buy virgin brass online, you can buy once-fired brass at the range or at most gunstores, or you can do like most of us have done:  Save your brass when you shoot factory ammo and reload it.

.35 Whelen brass waiting to be charged with propellant.  This ammo costs $43 for a box of 20 factory rounds (and you can’t find anybody who has it in stock right now); I can reload it for under 50 cents a round.

Bullets

You’ll need bullets to reload your ammo.  There are lots of options here, and they basically break down into either cast or jacketed bullets.  I’m a big fan of cast bullets for handgun and reduced velocity rifle reloads, and I use jacketed bullets for full-bore factory level (high velocity) rifle loads.   Most folks these days order bullets online from reloading suppliers like MidwayUSA, Graf’s, MidSouth, Powder Valley, Natchez Shooting Supplies, and others.  Smaller gun stores are disappearing, and you usually don’t find decent prices at the big chain stores.

Cast bullets waiting to be loaded into .45 ACP cases.

Propellant

For lack of a better term, we usually call propellants “powder,” and there are a wide variety of powders available.  The reloading manuals show which powders work best for the cartridge you wish to reload.

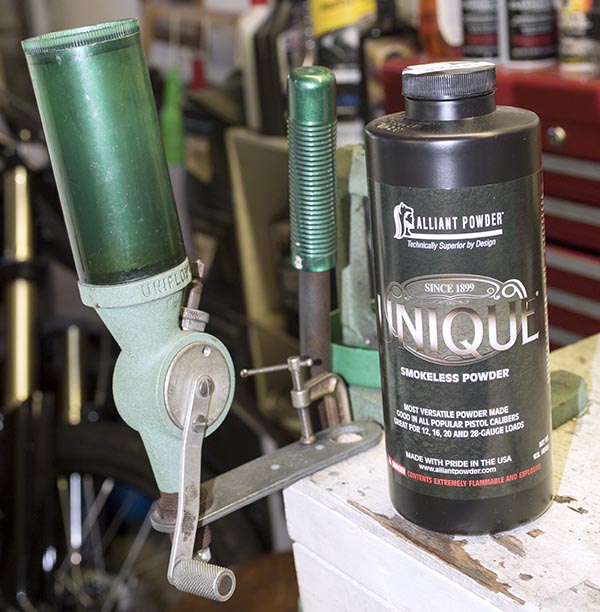
Unique propellant and my RCBS powder dispenser. The reloading manuals will help you select the powder you need.  Unique is a good general purpose propellant I’ve used for a variety of handgun cartridges and a few cast bullet rifle loads.

Primers

The primer is the component that lights the candle when you pull the trigger.   There are several primer suppliers.  The trick today is finding them, as there has been a run on primers since the pandemic began.  If you can find primers in a local shop, buy them.  The same suppliers listed above for bullets also sell primers (they are all out of stock now, but that will change as supply catches up with demand).

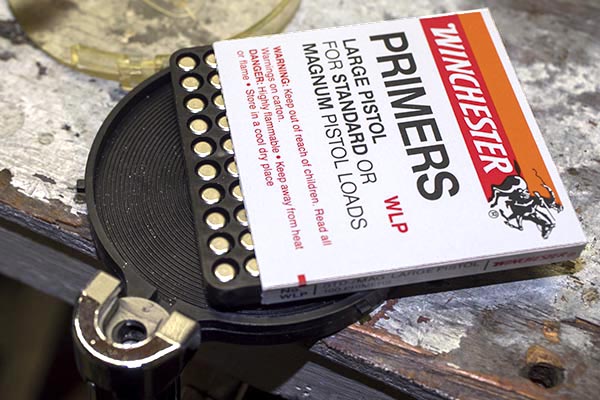
Winchester primers being loaded into my Lee hand priming tool. Other primer makes include Remington, CCI, Federal, and a few more.

The Best Equipment Approach:  A Complete Kit

As I mentioned at the start of this blog, I believe the best way to get into the game is to buy a complete equipment reloading package from one of the reloading equipment suppliers.   My advice if you are a new reloader is to go with the Lee package.  It’s the least expensive and if you decide that reloading is not for you, you’ve minimized your cash outlay.  I should add, however, that I don’t know anybody who ever tried reloading who didn’t get hooked on it.  It is a marvelous hobby, and I believe it is as much fun as shooting.

I’ve used reloading equipment over the years from all the manufacturers.  My personal setup is centered around an RCBS Rockchucker, but equipment from any of the suppliers is good.  Basically, you can’t go wrong in this game from an equipment perspective.  With that said, let’s take a look at what’s out there.

First, the Lee Challenger reloading kit:

The Lee Challenger reloading kit. These were sold out on Amazon (and everywhere else) when this blog was published. Keep an eye on the Amazon site; it’s a good place to order the kit.
There’s only one problem with the Lee Challenger reloading kit:  It’s such a good deal (well under $200 for the entire kit) that literally everyone is out of stock right now.  As you know, we’re going through unprecedented times in the shooting world (guns, ammo, and reloading components are sold out due to the civil insurrection in many large cities, a new anti-gun administration on the horizon, and the global pandemic).  That will change, but at this instant, no one I could find has the Lee kit in stock.

Next up is the RCBS kit:

The RCBS reloading kit. RCBS makes high quality equipment that will last a lifetime. It costs more, but it’s worth it.

I’ve been using RCBS equipment for the last 50 years, and I believe it to be the best.  It is built to last.  If I couldn’t get the Lee package as a newbie, or if your budget will allow it, I’d go with RCBS equipment.  At about $400, it’s just over twice the price of the Lee kit, but it’s still a great deal compared to buying all the different equipment items separately.  The RCBS package shown above includes an electronic scale instead of a beam scale, a powder trickler (it allows you to finesse adding individual powder kernels to attain a precise charge weight), and a couple of case preparation tools that the Lee kit doesn’t include.

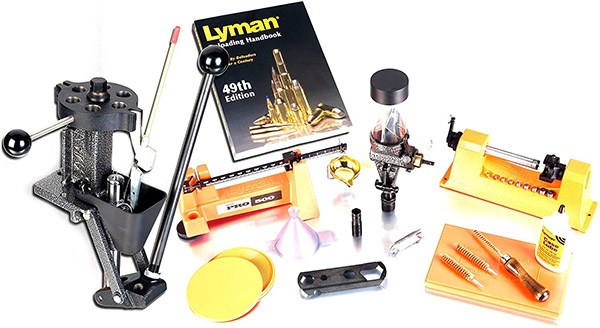
Lyman is another outfit offering a complete reloading kit:

Lyman’s reloading equipment package.

What’s a bit different about the Lyman kit is that it comes with a turret press, which allows you to mount all the dies in the press head and rotate them as you progress through the various reloading steps.  I’m not a big fan of this approach; other folks are.  The Lyman kit is just under $1000; the turret press and the inclusion of a case trimmer are what drive the price to that level.

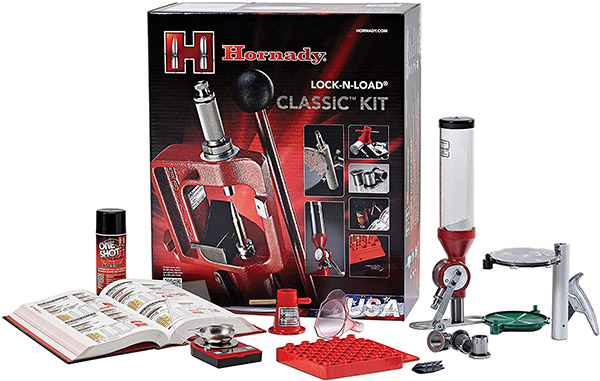
And Hornady has a kit as well:

Hornady’s reloading package. I have the least experience with Hornady reloading gear, and I’m not wild about their dies. Hornady bullets are fantastic.

The Hornady kit is about $550.  That’s substantially less than the Lyman kit, but more than either the Lee or the RCBS kits.

So there you have it.  Remember that no matter which reloading kit you buy, you’ll still need dies and a shellholder specific to your cartridge.  You’ll probably want to purchase more equipment as your reloading interest develops, including more dies (so you can reload more calibers), case cleaning and polishing accessories, a micrometer, and more.  But what we’ve outlined here will get you started and keep you in the game for years.


In this blog we’ve covered the equipment you’ll need to get into reloading.  If you would like to read about how to use this equipment, we have you covered there, too.  We have a bunch of information on reloading various cartridges on our Tales of the Gun page, and a complete series on reloading handgun ammo that you can review here:

Reloading .45 ACP Ammo:  Part I
Reloading .45 ACP Ammo:  Part II
Reloading .45 ACP Ammo:  Part III
Reloading .45 ACP Ammo:  Part IV

If you would like to watch a quick video of yours truly reloading ammo with cast bullets for a Mosin-Nagant rifle, check this out:


Never miss an ExNotes blog!

A Garand Update: Speer and Hornady

The M1 Garand on the bench at the West End Gun Club.

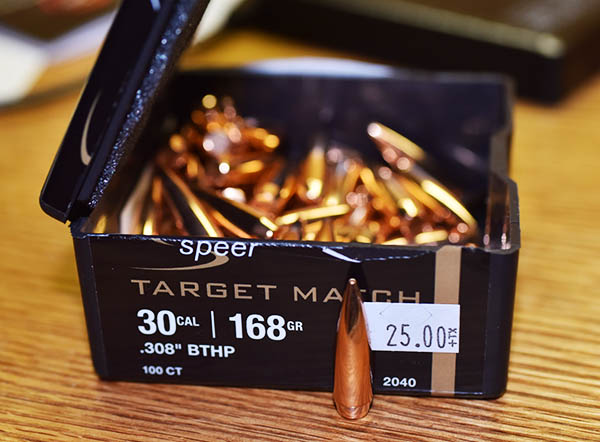
A couple of weeks ago I wrote about new bullets I had purchased for the Garand. They are Speer 168-grain Target Match bullets, and they’re designed to go head-to-head with the benchmark bullet in this arena, the Sierra 168-grain jacketed boat tail hollow point bullet. As you will recall, I talked to the Speer engineer and he recommended bumping the IMR 4064 propellant charge up from what I had tried previously and seating the bullets out a little further.

Speer 168-grain jacketed hollow point boat tail bullets.

I only had 20 Speer bullets left from the box of 100 I initially purchased and Phillips, my local dealer, didn’t have any more.   I also had a couple of boxes of 178-grain Hornady AMAX bullets in my stash and my Hornady reloading manual had a Garand-specific load for these, so I loaded some of them for testing in the Garand as well.   You can’t just use any .30 06 load for the Garand; the loads have to be specific for the Garand.  If you go outside of what’s recommended for these rifles, you can damage the rifle.

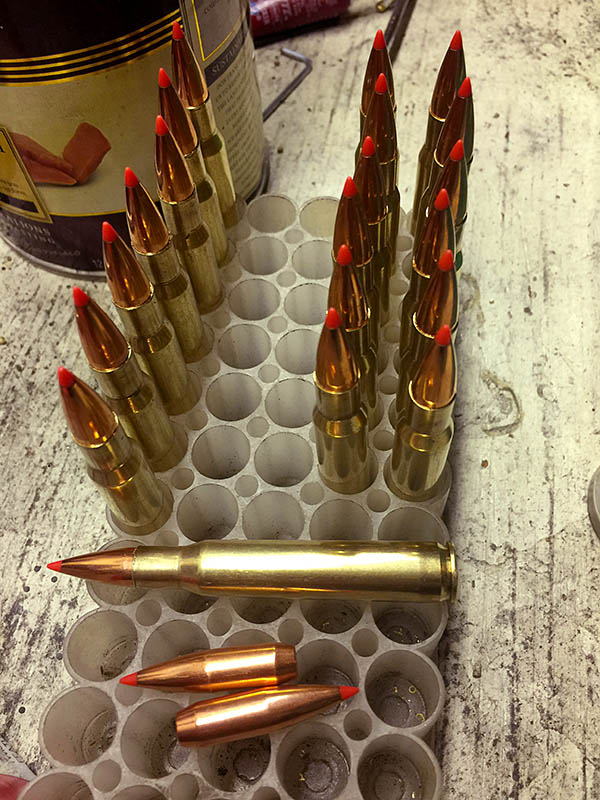
Reloaded .30 06 ammunition with Hornady’s 178 grain AMAX bullets. I was concerned about the plastic tips hitting the feed ramp, but I need not have been. These bullets performed well.

It was windy out at the West End Gun Club this past weekend, so I don’t know if my results were the result of the load, or the wind, my shooting abilities, or all of the above. Take my results as an indication of what might work, not the ultimate authoritative conclusion on either bullet’s inherent accuracy.  And as regards my propellant charges, work from your own manual.  You will want to develop your own loads, starting at the bottom of the range and working up.

My testing for this session was limited.  I had two loads for each bullet (both the Hornady and the Speer bullets), and all were with IMR 4064 propellant.  I did all of my testing from the bench at 100 yards.

For the 178-grain Hornady AMAX bullets, I used 45.0 and 46.4 grains of IMR 4064, and a cartridge overall length of 3.240 inches.   This load came right out of the Hornady reloading manual.  For the 168-grain Speer bullets bullets, I used 47.0 and 48.0 grains of IMR 4064, and a cartridge overall length of 3.295 inches (as recommended by Speer).   All loads were with Remington brass and CCI 200 primers. I trimmed the brass to 2.500 inches. This was the 6th firing of these cases in the Garand with these cases.

I reloaded and fired a total of 40 rounds for this test.  I reload for the Garand in multiples of eight cartridges (because that’s what the en bloc clip holds), and like I said above, I only had 20 of the Speer bullets left.  So bear with me (this is going to get a little complicated).   I had one clip of eight rounds with the 168-grain Speers at 47.0 grains of IMR 4064, and one clip of eight rounds with the 168-grain Speers at 48.0 grains of IMR 4064.   Then I did another clip of eight with the 178-grain Hornady bullets at 45.0 grains of IMR 4064, and a fourth clip of eight with the 178-grain Hornady bullets at 46.4 grains of IMR 4064.  That left four of the Speer 168-grain bullets, so I loaded those four with 47.0 grains of IMR 4064, and then I loaded another four rounds with the Hornady 178-grain bullets and 45.0 grains of IMR 4064.   Yep, you read that right.  That en bloc clip had two different loads in it.

I had a concern that the plastic tips on the Hornady 178-grain AMAX bullets might be damaged sliding up the Garand’s feed ramp, but that didn’t occur. At the seating depth Hornady recommended, the bullets are pointed into the chamber and the tips never touched the feed ramp.

None of the 40 cartridges exhibited any pressure signs. There were no flattened primers, no excessive muzzle blast, no case ruptures, no extraction issues, or anything of that nature. Everything fed and ejected normally.

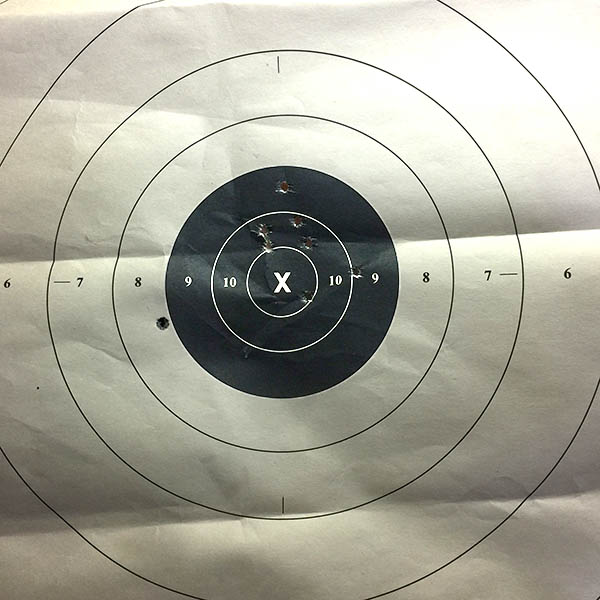
I fired the mixed clip of Hornady and Speer bullets first, and surprisingly, it was my best group of the day (it was also the only group I fired where there was a lull in the wind that morning). The first four shots were with the Hornady bullets, and of these, only one was just outside the bullseye (it might have been the first round fired from the cold, oiled barrel). All the remaining seven rounds shot into a pretty tight group, with six of the seven in the 10 ring. The bottom line based on this one group to me was that either load (the 178-grain Hornady load at 45.0 grains of 4064, and the 168-grain Speer load at 47.0 grains of 4064) were awesome, and both shot to the same point of impact.

The next group up was the 168-grain Speers with 47.0 grains of IMR 4064. I couldn’t duplicate my prior results as shown in the above photo. Six shots were in the black, two were out, and of these two, one was down in the 6 ring. It could have been the wind, or it could have been me.  Most likely it was me (the wind wasn’t blowing down).

Then I fired the clip of eight with the Speer 168-grain bullets and 48.0 grains of IMR 4064.  Five shots were in the black and three were outside, with one low at 7:00 in the 6 ring again.

It was on to the Hornady 178-grain bullets, first at 45.0 grains of IMR 4064.  Five shots were in the black, one was in the 8 ring at 9:00, one was in the 7 ring at 10:00, and again, I had one shot go low in the 6 ring at 7:00. The group was biased to the left. That was probably the wind.

And finally, I shot the Hornady 178-grain bullets at 46.4 grains of IMR 4064.  6 were in the black, 1 was in the 8 ring at 9:00, and yet again, 1 was in the 6 ring at 7:00.  These were a little more tightly clustered favoring the left side of the bullseye, consistent with the wind pushing the shots to one side (the wind at the West End Gun Club always blows northeast to southwest, pushing the shots to the left).

The bottom line is that any of loads could be good, but that first clip of mixed bullets was (for a guy at my low talent level) phenomenal. The wind no doubt distorted my results (along with my lack of consistency shooting the Garand). I have 180 of the Hornady bullets left, and I’m going to load them at 45.0 grains of IMR 4064. I’ll buy more of the 168 gr Speer bullets because they did well, too, and I’ll load them at 47.0 grains.  I’m just not that good to say with certainty which load is best; the variability in group size you see here is probably more me than anything else.

The Speer bullets are the least expensive of the three brands I’ve tried in the Garand at $25/100. Next up are the Hornady AMAX bullets at $32/100. The Sierra 168-grain MatchKing bullets (not tested yesterday, as I had used all of them previously) are the most expensive at $37/100. If there’s a difference in performance between the bullets, I’m not good enough to see it. I have 180 of the Hornady bullets left, and I’m going to load them at 45.0 grains of IMR 4064 later today. I’ll buy more of the 168-grain Speer bullets because they did well, too, and I’ll load them with 47.0 grains of IMR 4064.

So which bullet works best in the Garand?  Any of these are better than I am, and for a guy like me, evaluating accuracy at 100 yards with iron sights is subjective at best (my old eyes ain’t what they used to be).   But I’m having fun, and I love shooting my Garand.


Read more on the Garand (and many more) rifles and handguns here.


Never miss an ExNotes blog.  Sign up!