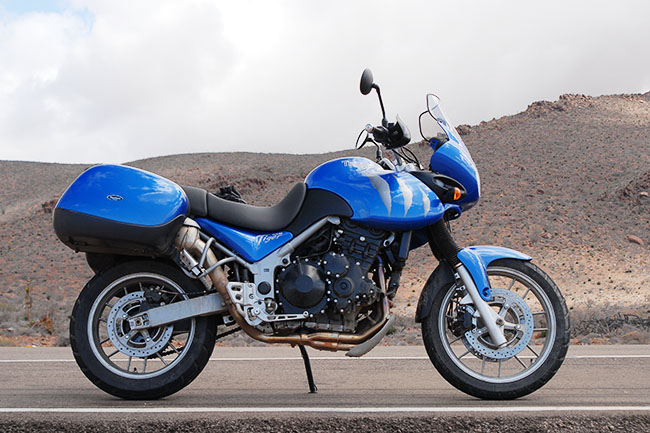
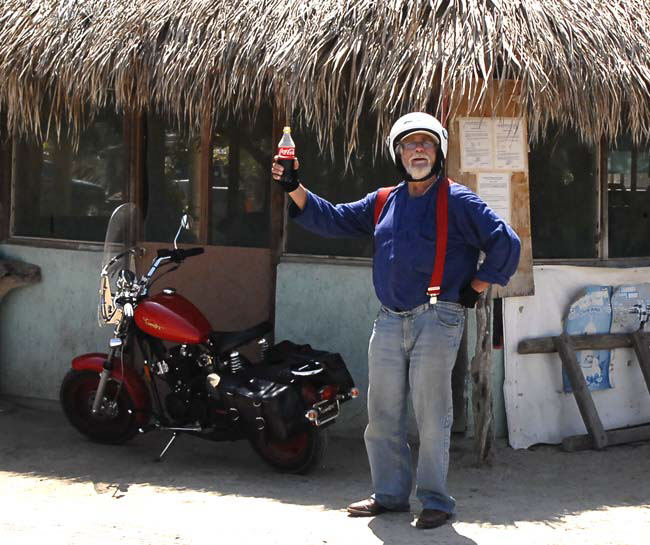
The RX3-to-RX4 comparison continues. We’ll pick up several more areas in this blog. Note that we’ve added an RX4 page to the ExhaustNotes website, too. More on that in a bit; for now, on to the comparo!
Starting at the back of both bikes, the RX4 has a subfender behind the rear wheel. The RX3 does not. Take a look…
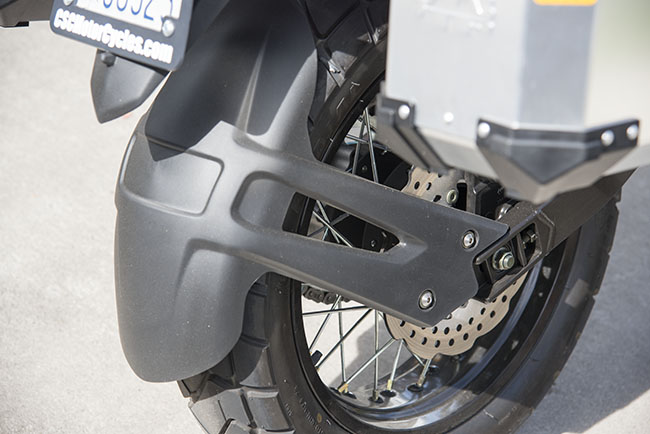
When CSC specified what they wanted on the RX3 a few years ago, they opted to leave the subfender off. I didn’t like the subfender, I thought it was ugly, and I didn’t see a need for it. I thought leaving it off was a good move.
You might think the RX3 subfender could have been added as an aftermarket accessory. It can, but it’s not easy. On the RX3, adding the subfender actually requires a different swingarm, so if you wanted to add a subfender you would have to replace the entire swingarm. That’s because the swingarm mounting points for the subfender are built into the swingarm (you can see that on the RX4 subfender photo, too). When CSC was defining the RX3 configuration, the question became why not just specify the swingarm that can accept the subfender, and offer the subfender later as an accessory? The reason is that because without the subfender, the swingarm looks goofy. It’s got this big mounting bracket at the rear on the right side, hanging out in space with nothing mounted on it.
Personally, I could do without the subfender on either bike. It just adds weight and I don’t care for the look. But that’s my preference. Your mileage may vary.
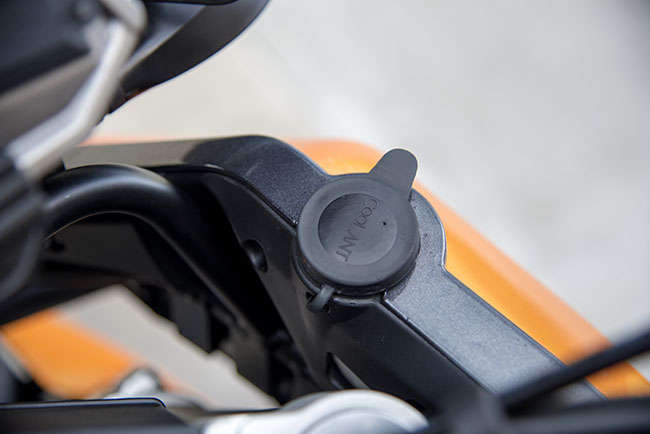
Moving back to the front of the bikes, the RX4 incorporates a radiator bottle fill port on the bodywork to the right of the fuel tank. It’s easily accessible (far more so than the radiator bottle fill port on the RX3, which is tucked under the fairing). This was a good way to go on the RX4. You know that if you have ever needed to add fluid on the RX3 it’s not easy to get the radiator bottle. Score one for the RX4. I like the RX4 approach better.
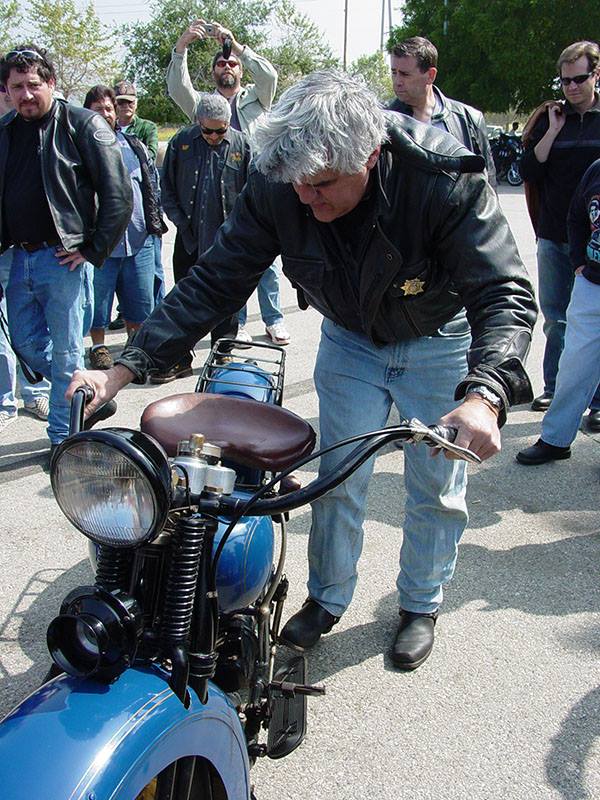
The sidestands (or kickstands) on the two bikes are similar…and in the two photos below, you can see that the two bikes use the same footpegs. These are good footpegs, I think, because you can remove the rubber inserts if you wish. I never have done that, but I suppose there are guys out there who think they need to do that.
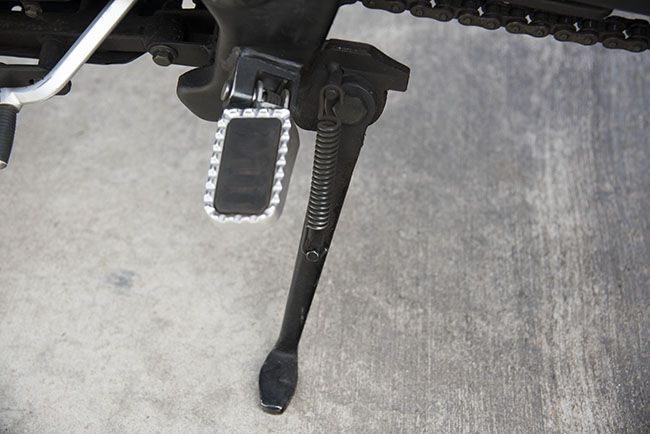
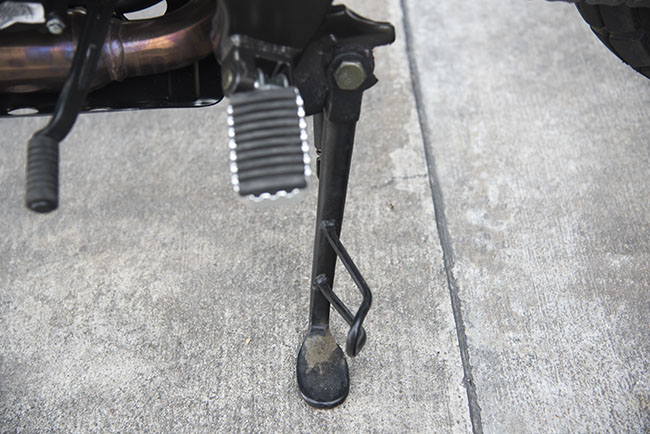
I find it very easy to reach the kickstand on my RX3; on the RX4 it was not as easy for me. That could just be me being used to the RX3.
Neither the RX3 nor the RX4 have a centerstand as standard equipment. It’s an option on the RX3 and I imagine it will become an option on the RX4, although it will be little harder for CSC to add a centerstand to the RX4. On the rear suspension linkage photos (they’re coming up next), you’ll notice that the RX3 has two mounting points that CSC uses for the bike’s optional centerstand. When I first saw those underframe mounting points on the RX3 in China, I assumed Zongshen added them because they anticipated adding a centerstand, but that wasn’t the reason. Zongshen uses the below-the-frame mounting points as an assembly aid during RX3 production as the bike is traveling down the assembly line.
Zongshen also has temporary centerstands (it takes two of these to lift the bike’s rear wheel off the ground) for use if you need to fix a flat tire, and I think CSC sells them if you want to buy a pair. I have a couple I carry around in my RX3, but (knock wood) I have never used them. I got a flat on the ride across China, though, and one of the RX3 clubmen we rode with in Beijing had the accessory maintenance centerstands with him. They work well, and that guy had my flat fixed in no time flat (pardon the pun).
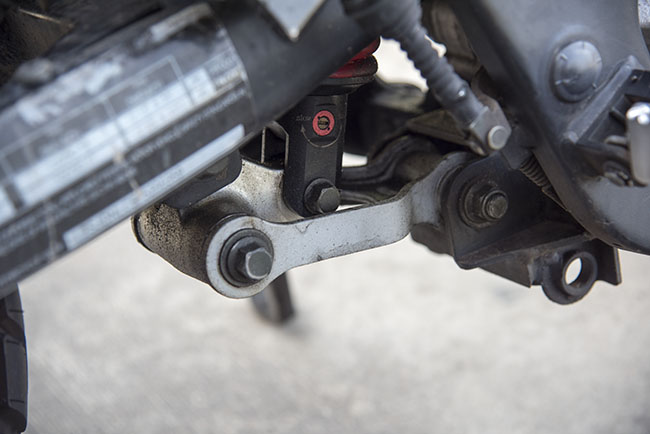
That said, let’s move on to the rear suspension comparison. Here’s the rear suspension linkage on the RX3. Note that the RX3 linkage is constructed of stamped metal pieces. This is the setup that CSC changes when you buy an RX3 lowering kit.
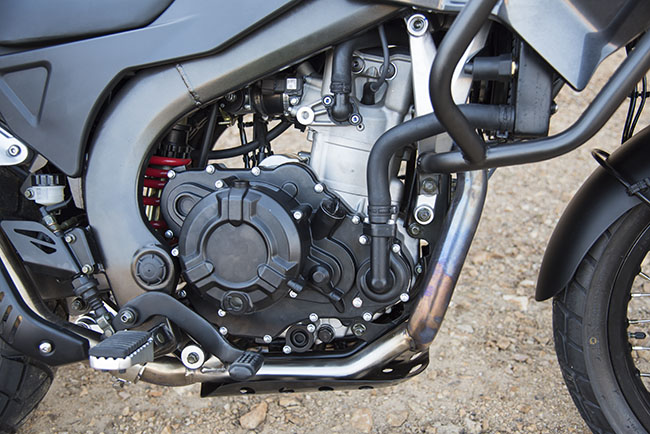
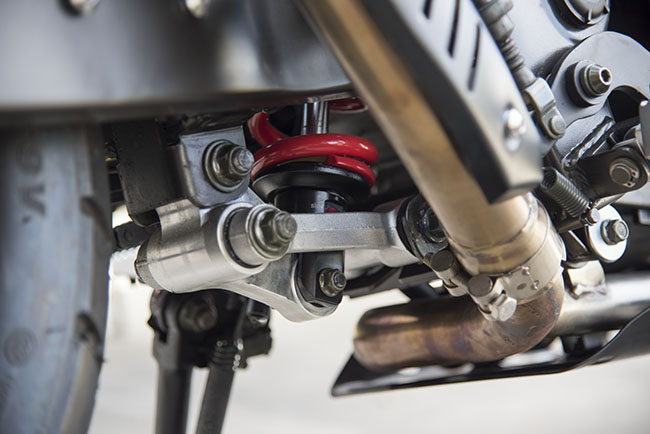
The RX4 rear suspension linkage is substantially beefier, and it uses cast metal bits instead of stampings. It’s one of the reasons why the RX4 is heavier than the RX3.
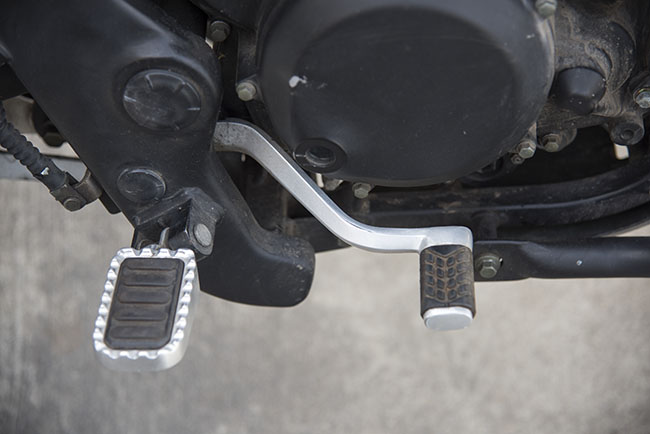
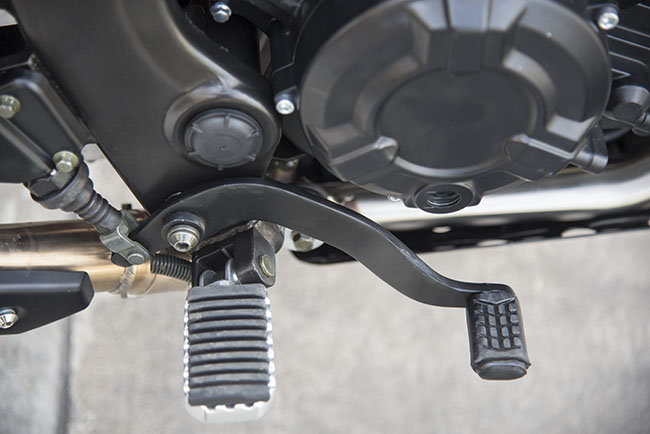
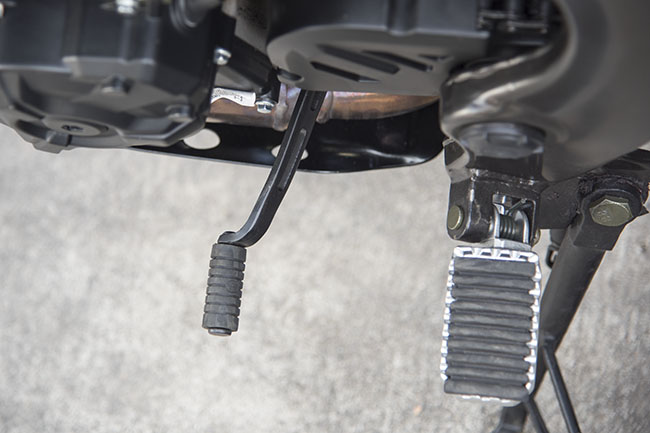
The shift levers and the rear brake levers are different on the two bikes. The RX3 uses cast parts; the RX4 uses what appear to be stamped weldments. The photos below show the shift and brake levers on the RX3. Note that they are cast bits, they are painted silver, and they have a nice look to them.
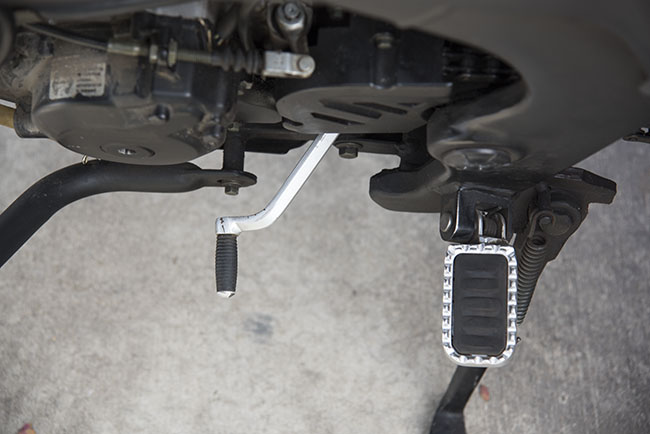
On the RX4, the shift and brake levers appear to be stamped weldments painted black to match the frame. In my opinion, they are not as nice looking as the ones on the RX3, but I suppose you could make the argument that if you bend the RX4 parts in a spill, the levers on the RX4 will be easier to fix than would be the RX3’s castings.
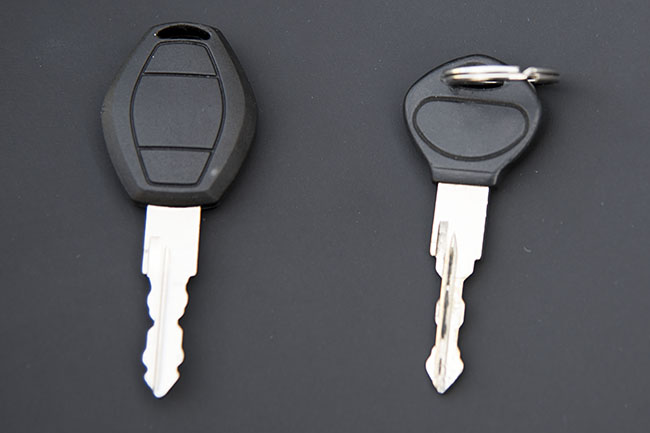
The RX4 I’ve been riding has two ignition keys. One looks like a regular ignition key, and it fits the ignition lock, the standard luggage, the gas cap, and the rear seat release (just like the RX3). The other key that comes with the RX4 has a smaller black plastic handle. I don’t know why the two RX4 keys are different. I had a similar two-key arrangement when I owned a 1997 Suzuki TL1000S. The regular key (with the larger black plastic handle) was for normal use, and the one with the smaller black handle was in case the bike had an electrical issue and the fuel injection didn’t work correctly. It was designed to put the TL into a “limp home” mode. I never had to use it. I don’t think that’s what’s going on here, but I don’t know for sure. It’s one of those things I’ll have to ask the wizards at Zongshen about.
The black plastic handle on the RX4 key is larger than is the one on the RX3 key. Here’s a photo showing the RX4 key and the RX3 key…
The rear brake master cylinders on the two motorcycles are also different. Here’s what they look like…
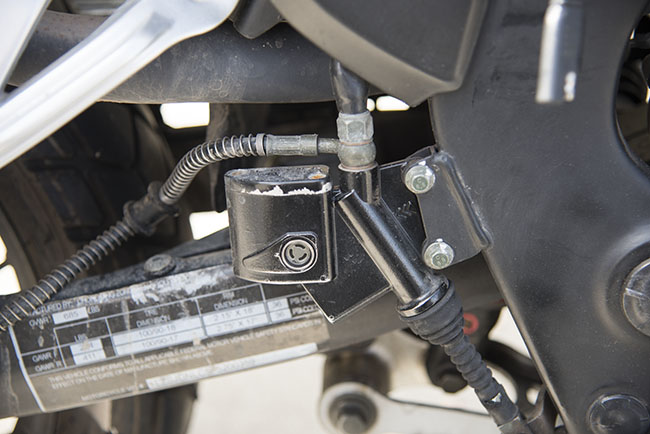
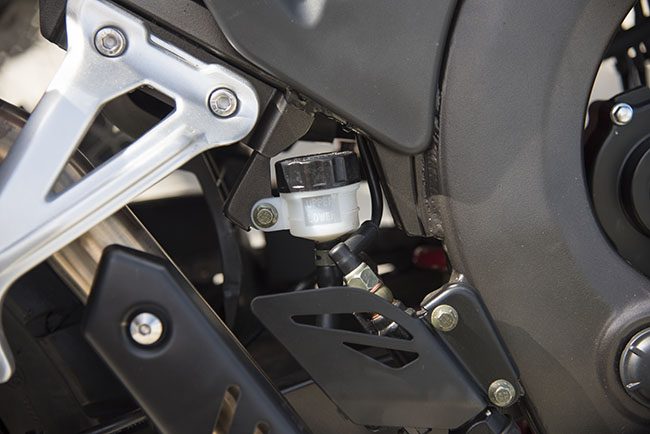
I like the rear master cylinder on the RX4 much more than the one on the RX3. You can just unscrew the RX4 cap to get to the reservoir, while on the RX3 rear master cylinder you need a Phillips head screwdriver and you have to remove two screws. The more-complicated RX3 design has a story behind it. Originally, the RX3 rear master cylinder was a much smaller affair. One of the CSC consultants advised that it was too small for its location near the exhaust pipe (the concern was that the master cylinder would be heated by the exhaust pipe and this could adversely affect brake performance). It never was an issue when riding the preproduction RX3 motorcycles or the RX3s we rode across China (both had the original design master cylinder), but I guess if you pay consultants you take their advice. On the RX3 I would have just gone with a conventional master cylinder like the one on the RX4 (which is similar to master cylinders on just about every other motorcycle on the planet). But Zongshen wanted to design a custom rear master cylinder for the RX3, and that’s how that strange-looking tapered affair on the RX3 came to be. In my opinion, the one on the RX4 is a better approach.
That’s enough for this blog, folks. Again, CSC asked me to mention that they are taking deposits now on the RX4, and if you want to get on board, here’s the link to do so.
Okay, okay….just two more things.
I’ve got a couple more blogs coming up on the RX4, including one I’m polishing now comparing the CSC RX4 to the Kawasaki KLR 650 (as my good buddy Chris suggested; it’s one that will probably draw lots of comments). You’ll want to keep an eye on the ExNotes site for the latest tech info on the RX4. And as promised, here’s the ExhaustNotes RX4 index page! Click on it and you’ll find an easy way to get to all of our RX4 articles.
And as mentioned before, please consider adding your email address for an auto-notify every time we post a blog (there’s a place do to that near the top of this page on the right). Do that and you’ll be eligible for our newest contest. On a quarterly basis, provided we get at least another 200 folks sign up each quarter, we’ll give away a copy of either Moto Colombia, Riding China, or 5000 Miles at 8000 RPM to a name drawn at random from our email database. The first winner will be announced sometime around Christmas this year. Please encourage your friends to sign up, too. If you’re already on the list, you’re eligible for the first drawing. We don’t give or sell our email list to anyone, so your address is safe with us.
 Kawasaki’s bold new W800 Café looks a lot like a restyled W800 standard but we here at Wild Conjecture have no way of confirming this statement. You see, Wild Conjecture by its very name is nothing but guesses bulked up with opinion into a plausible hunch.
 Kawasaki claims the styling is inspired by Kawasaki’s W1 650, which taken to its logical conclusion would mean the Café was inspired by an ancient 1950’s BSA A7 (later becoming the A10) twin. And that’s not a bad thing. For years the W1 650 held the title of the largest displacement motorcycle built in Japan until the CB750 Honda came sauntering into the room.
 For me, the Café looks good overall but misses the mark in a few key areas. The colors shown on Kawasaki’s web site are dreadful. The faring and side covers are a mismatch for the fenders and gas tank. I know this is done on purpose but a bike like this should have an all alloy tank with chrome fenders. Kudos to Kawasaki for trying something different. Better luck next time.
 The forks, side covers, rear fender and exhaust all look great to me. I like the shaft-driven camshaft and the air-cooling system. Hopefully you’ll be able to buy the thing without anti-lock brakes but I suspect the days of ABS delete are nearly over.
 Progress has slowed on Zed. I really wanted to start the beast up. The problem is I haven’t figured out the ignition advancer issue yet. My E-buddy Skip sent me two of the things but neither one will work on the 1975 Z1 crankshaft end. I feel bad that Skip is trying to do me a favor and that the poor guy has to keep digging around in his parts stash. It goes to show you: no good deed goes unpunished. I am going to suck it up and buy a new, $159 advancer from
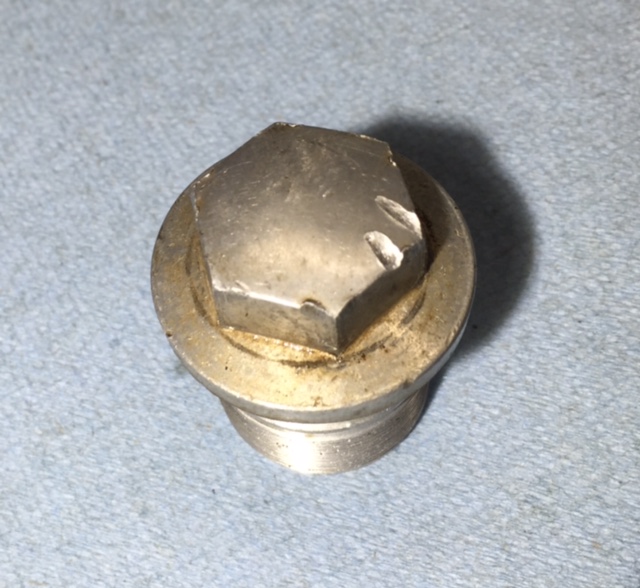
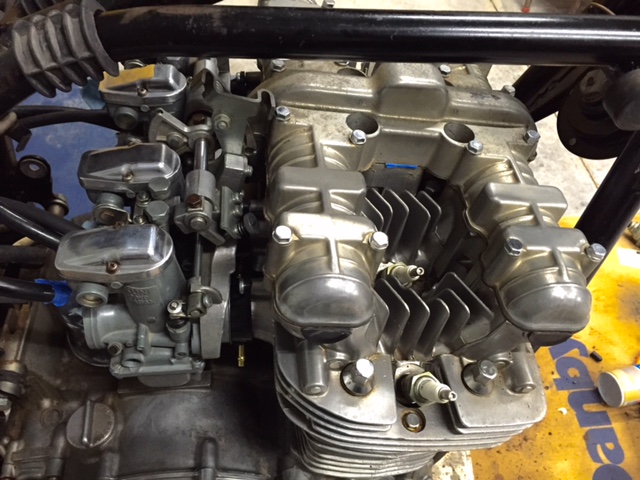
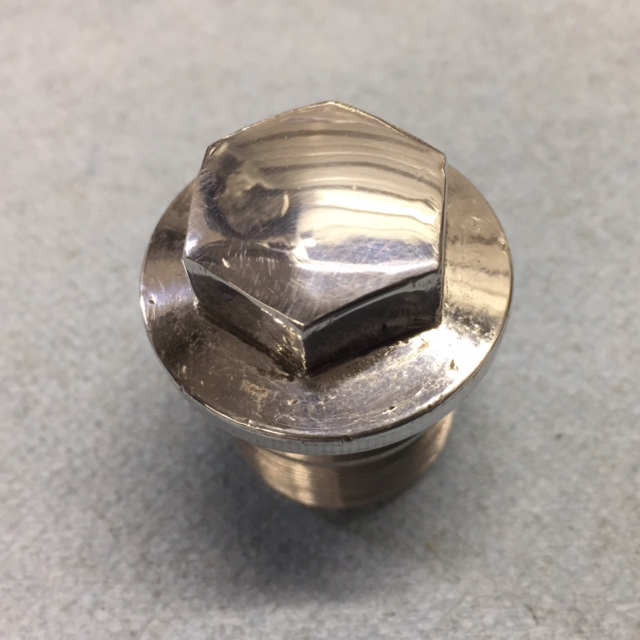 Meanwhile, I’m not ignoring the rest of the bike. Let’s face it, even if the engine is shot I have to get this bike running. The front forks were leaking and contained about 3 ounces of oil between both fork legs. This is down a bit from the 5.7 ounces per leg suggested in my shop manual. I know I said this was not going to be a show bike restoration but I couldn’t bear a future staring at this gouged fork cap bolt so I sanded the thing smooth and gave it a lick of polish. Of course this means that I have to do the other side also.
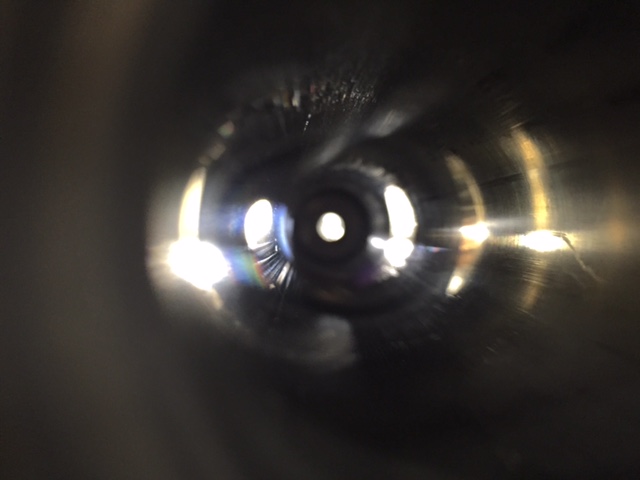 The internals of the forks were covered in sticky black goo, which required a ton of solvent and liberal doses of carb cleaner to cut loose. Then came rags stuffed down the tubes and pushed back and forth using a drill bit extension. The sliders came polished from the factory and since they were preserved under a coat of oil it took no time at all to spiff them up without crossing over to the dreaded Show Bike threshold.
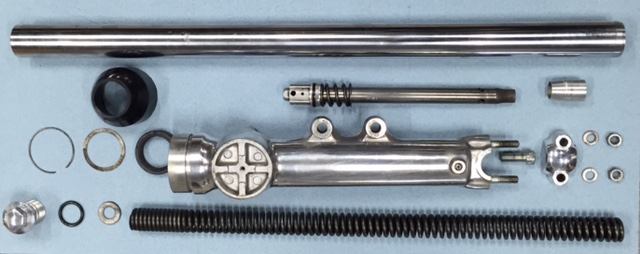 All the fork parts look usable if not perfect. The upper section of the fork tubes that were covered by the headlight brackets is pretty rusty. I’ve polished it off a bit and will lube the rusty areas to prevent further rust. None of the rust will show on the assembled forks but I’ll have to deduct points when the bike is in the Pebble Beach show.
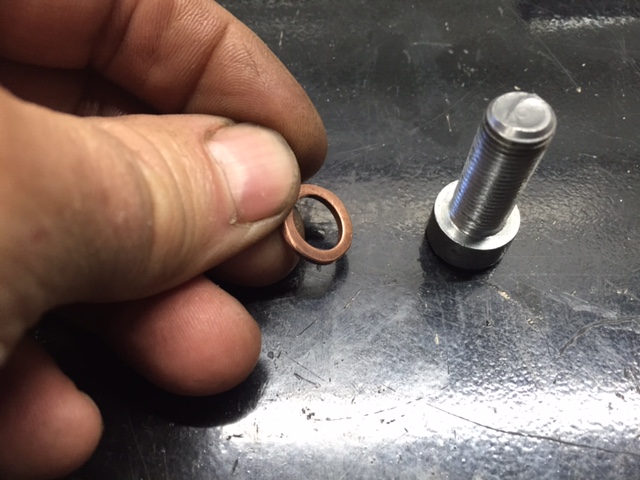 The fork sliders are held to the damping rod via this Allen-head bolt. There was a fiber washer to seal in the fork oil but I don’t have any fiber washers. I ended up grinding a copper washer to fit and I only have one of those. Looks like a trip to Harbor Freight is in order to buy their 5090 Copper Washer Warehouse kit.
 The clutch actuator was in good shape but dirty and dry. Most of the ones I bought for my old Yamaha had the helix cracked. I suffered along with the cracked helix until Hunter found a new, re-pop part and sent it to me, asking if he could have some of the ones I’d stolen from him in exchange. I have no idea what the old man is on about. This Kawasaki part is much sturdier than the Yamaha part and crack free so that’s one point to Kawasaki in the red-hot clutch actuator wars.
 I’m placing another big order with