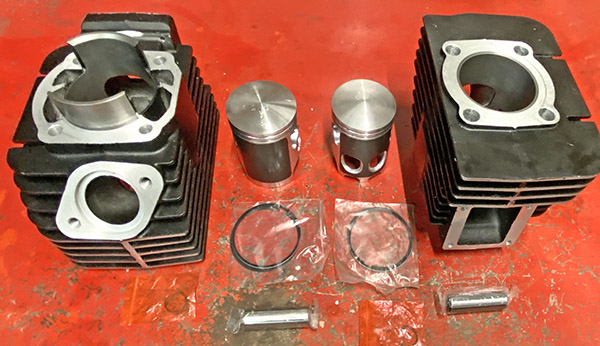
Parts for Yamaha’s RD350 are fairly easy to get but that didn’t stop me from hoarding a new top end set from eBay for the low, low price of $190. For that paltry sum you get two brand new cylinders, two brand new pistons, two brand new ring sets and two brand new wristpins with keepers. My buddy Bodden tried to warn me off the kit saying that the Teutonic name was a ruse and that Yamaha parts are far superior and I believe him. Still, $190 for an entire new top end? I had to bite.
First, there’s nothing wrong with my RD350; it runs great. I bought the Kveldwulf kit more as a spare and hedge against future scarcity. The kit is made in China; you know how international relations are going. We could be cut off at any moment. Unlike many people I don’t have a kneejerk reaction to Chinese products. I give them a chance to see if they are any good. In retrospect I probably should have bought an American made replacement RD350 top end kit (and I will if a company in the USA ever decides to manufacture one).
This particular top end kit has its problems. The biggest problem is that the right side piston won’t actually fit through the right side bore. The piston slides in about halfway and stops. Of course I could force it but the bike would only run a few minutes before it seized up. The left side is better but still feels a bit tight to me. What this means is I’ll have to have the cylinders bored to suit the piston size, a process that will probably cost more than the whole Kveldwulf kit.
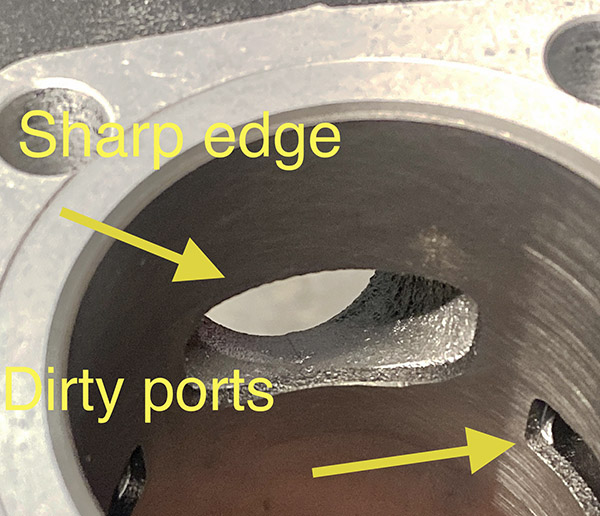
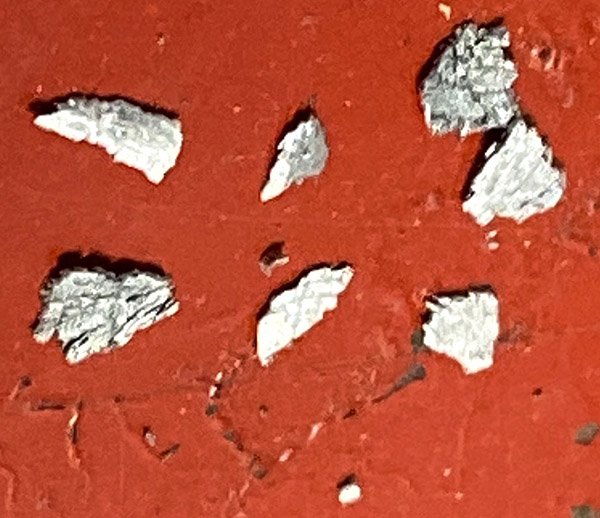
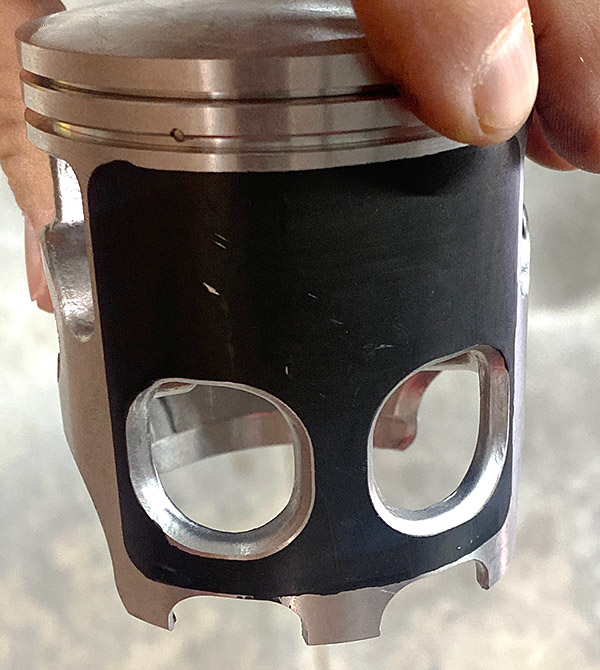
The ports on the kit cylinders are sharp edged and dirty looking. I think I’ll need to chamfer the port edges before using the cylinders or the thing will probably snag a ring. It wouldn’t hurt to run a burr through the ports to knock down some of the roughness either. When I unpacked the box there were quite a few loose bits of aluminum sprinkled throughout. A thorough cleaning is in order before bolting these parts onto my RD350. So the kit is not at a plug and play type deal.
The Kveldwulf pistons come with a Teflon-looking coating. I usually don’t like any of these new-fangled coatings and prefer plain old aluminum. I don’t have my RD350 apart so I can’t check the cut-away skirt and windows to see if the stock piston is the same. I’d also like to compare the ports to a stock cylinder to see how close the new stuff comes to original.
My best translation of Kveldwulf is “night wolf” and the prospects are indeed dim for this dog of an RD350 top end kit. I haven’t decided if I’m going to send it back and put up with that hassle or keep the kit and spend the time and money to remedy all its faults. I suppose if you had a RD350 that was missing its top end or it was severely corroded with broken fins the Kveldwulf kit would move you closer to the goal of a running motorcycle. You’ll have some sweat equity in the thing for sure.
If you have a stock RD350 and want to experiment with altering the ports but don’t want to mess up the original stuff this kit would be a cheap way to learn about two-stroke power bands without risking a ton of money. Then again, maybe I just got a dud. I’ll try to contact the eBay seller; they might take this top end set back and send me another one that is machined correctly. As delivered, I would only use the Kveldwulf kit as a last resort if my top end were totally wiped out, which is a hard thing to do with all the oversize pistons available. I’ll keep you updated whatever happens.
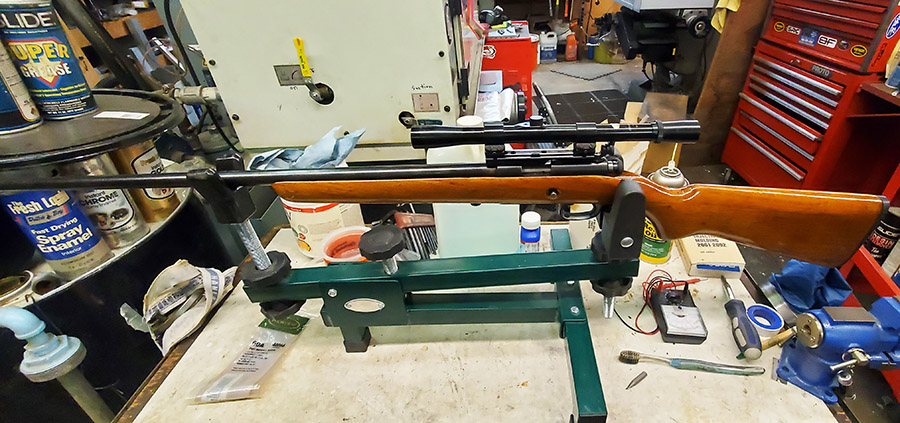
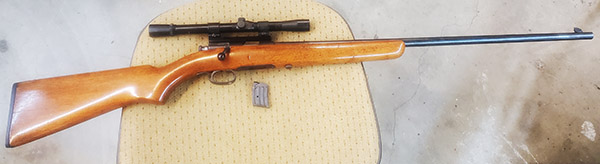
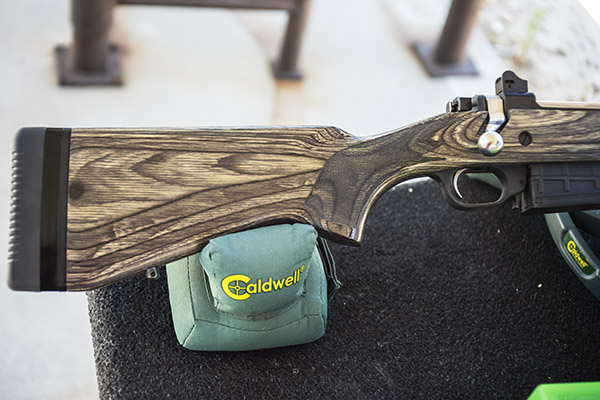
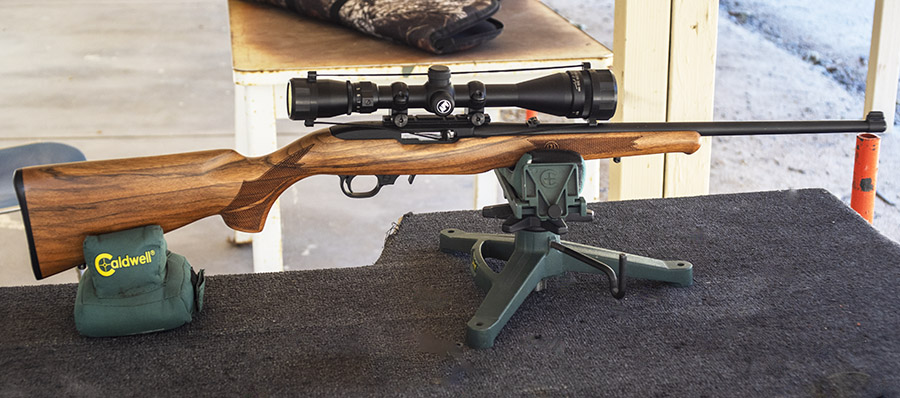
After seeing Joe Berk’s article on the .22 bolt action Springfield rifle, I thought about my recent project Model 69 Winchester. I bought it from my favorite gunstore. It was in pretty bad shape when I bought it and it was obviously well used. The Winchester had a screw for a bolt handle that did not work well, a homemade peep sight, the rifle was rusty, and it had a dinged-up stock with a lot of miles on it. I bought the rifle for $150 knowing it would make for a good project. I wanted to fix and preserve it as a plinker.
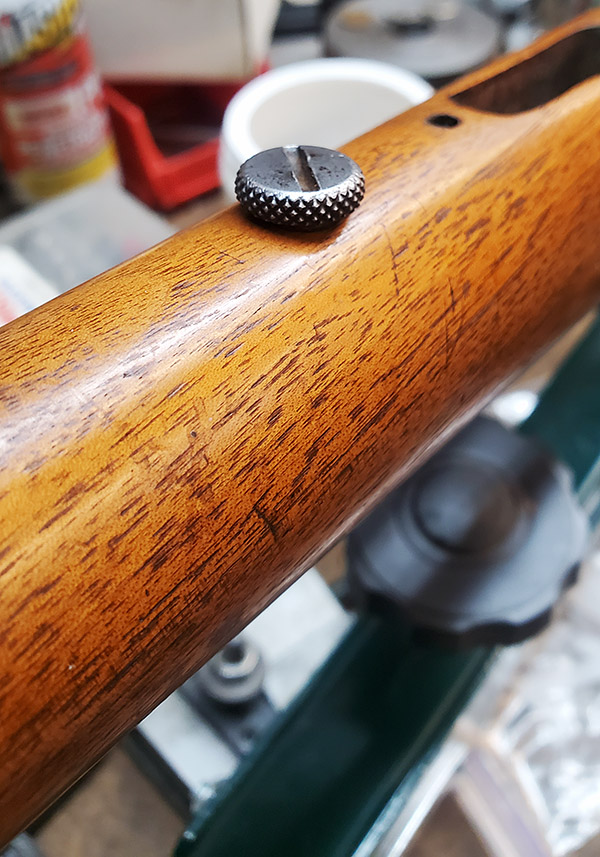
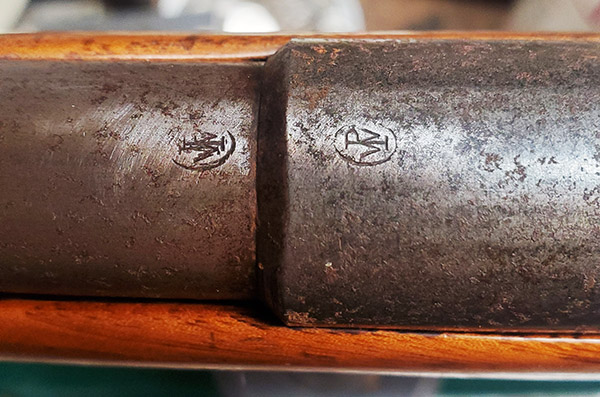
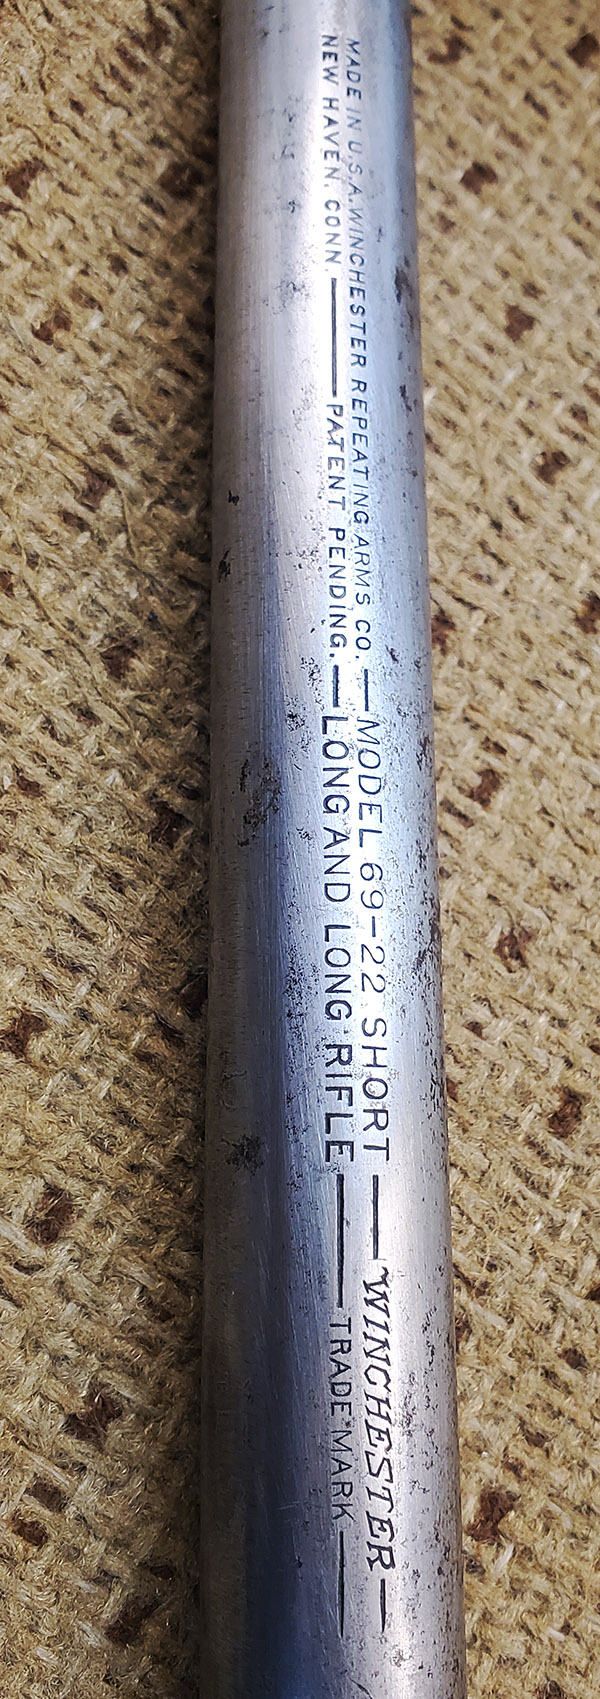
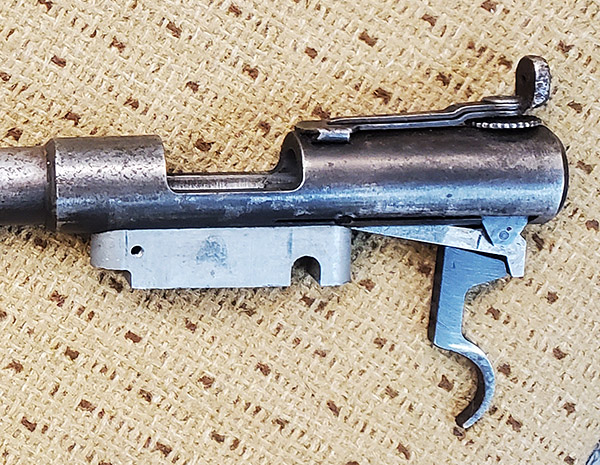
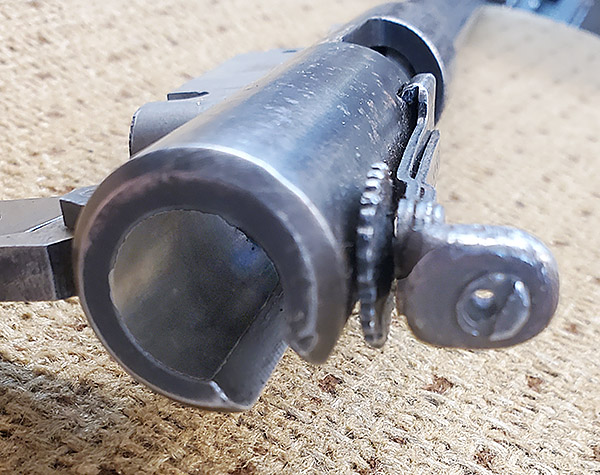
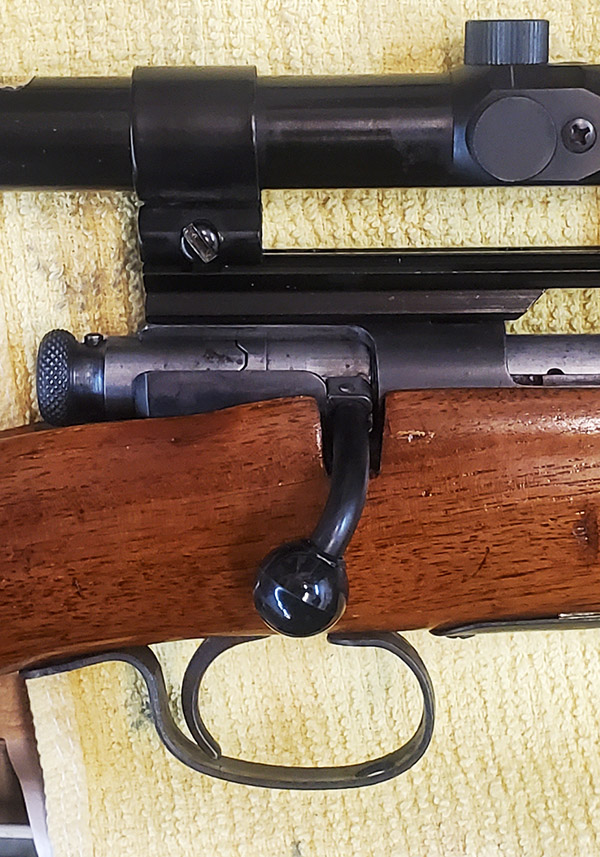
The Model 69 Winchester is an old magazine fed rifle made in 1936. It is an interesting vintage .22. I believe it was made around 1935 based on the exposed side magazine release and the exposed screw that holds the barrel to the stock (as shown in the above photo). These two features make it one of the earlier Model 69 rifles Winchester produced.
The finish on the barrel and the receiver had left the building a long time ago. It exhibited what might be called an authentic patina, but to me it was just rust and I wanted to prevent it from heading further down that road. I sanded it very lightly and used Birchwood Casey cold blue to preserve it. That turned out well eonugh, but it was not as good as a hot blue job would have been. Maybe I will clean it better and redo it someday. But my cold blue approach had the rifle looking good (I think for now the steel finish is good enough), so I continued fixing other things.
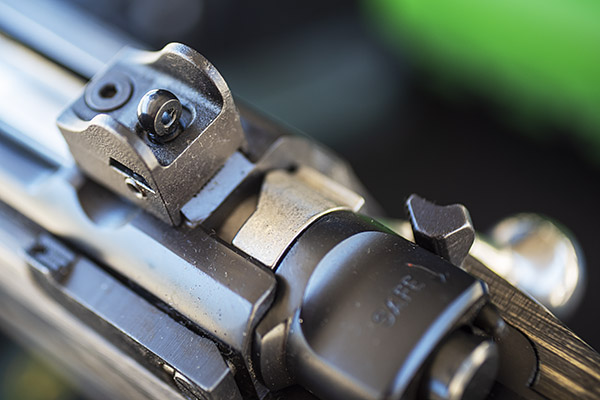
The rifle’s original peep sights had been “fixed” (read: Bubba’d) by a shade tree gunsmith. The sights worked, but they looked terrible. Bubba had drilled out the original aperture and tapped it to a larger thread. Then he took and sawed off a length of all thread (all thread is threaded rod) after drilling a small hole way off center. Maybe he did that to allow for windage by rotating it in the threads…who knows? Or maybe he was just sloppy.
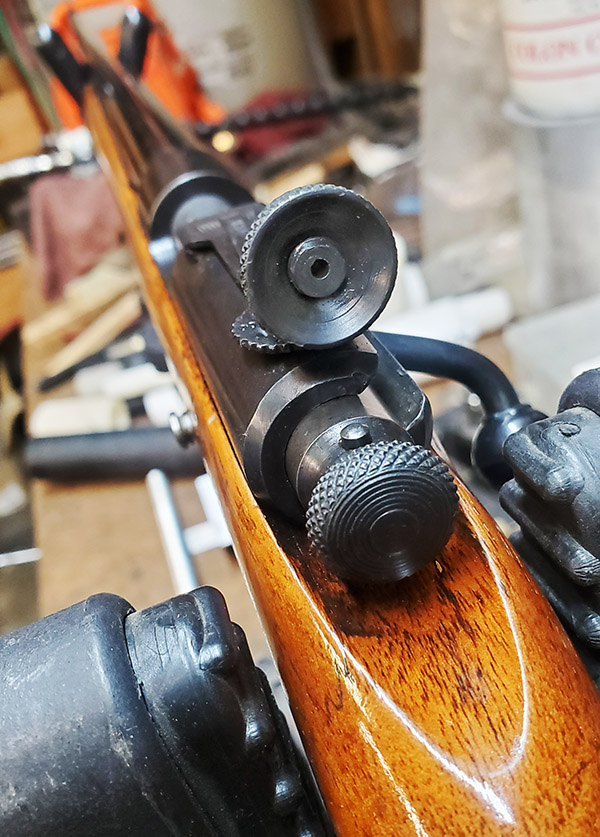
I machined a nicer-looking knurled retina (see the picture above), but I ended up putting a scope on it, so for now the peeper looks good but is not used. I’ve seen comparable sights on Ebay for over $225, so I’ve got that going for me.
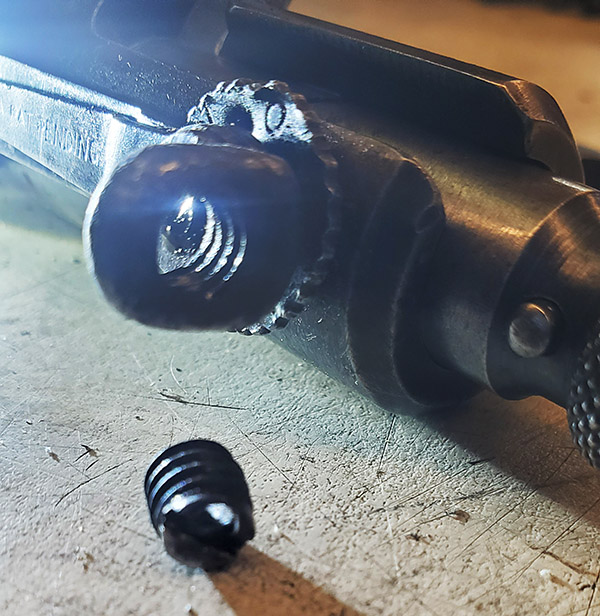
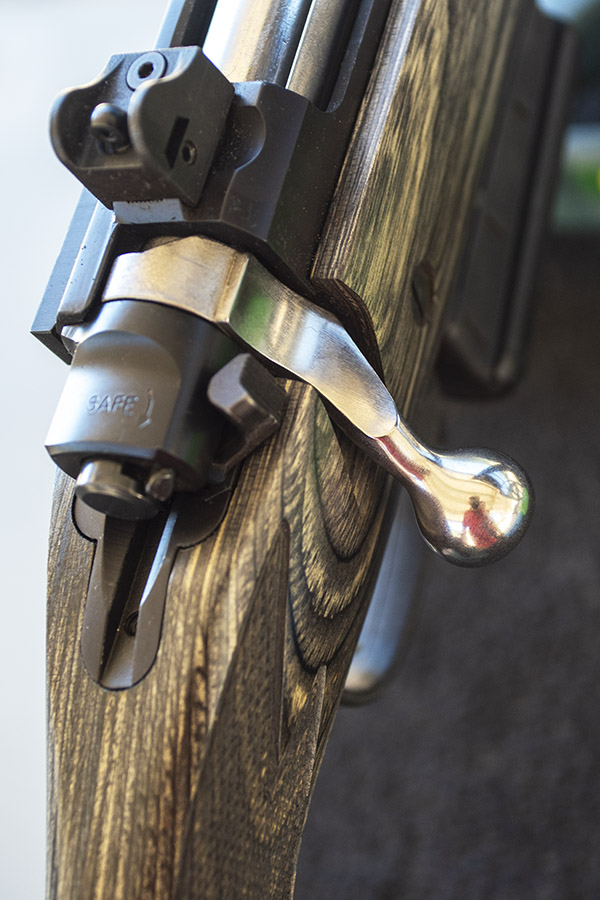
The old bolt handle was a standard screw from someone’s grandpa’s blacksmith stable. It didn’t work. The handle needs to go through two sleeves to cock the firing pin properly. It wasn’t too hard to make a new one that works well. I had the little ball end you see above in my tool box for years. It was waiting for me to use it on something, and it looks like it belongs on this rifle.
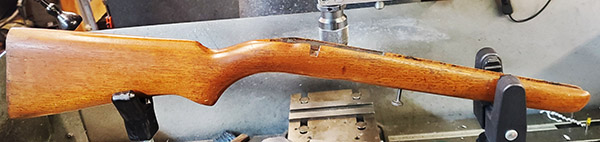
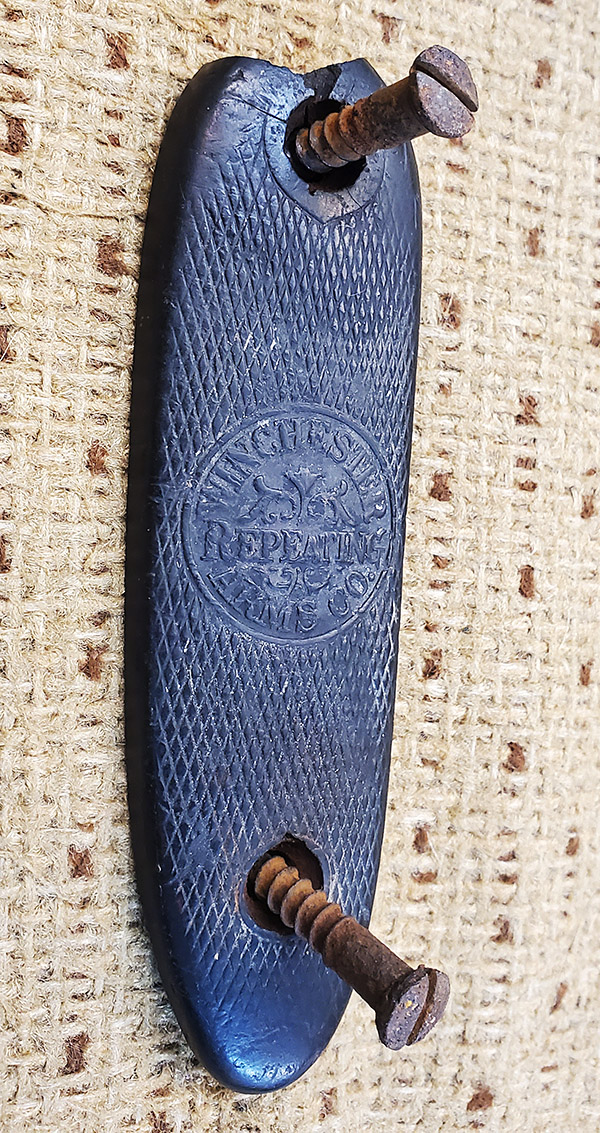
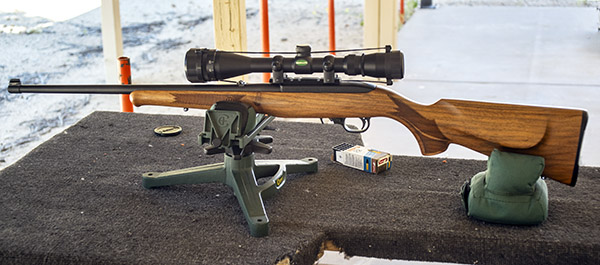
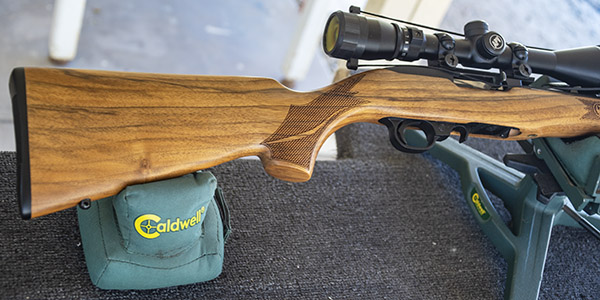
The rifle’s wood stock showed its 85-plus years of use, so I sanded it lightly, stained it, and gave it a clear varnish finish. I similarly cleaned up the buttplate and its screws. I think it all turned out well.
After doing the above work, it was time to sight the rifle in. Waiting until it was dark, I clamped the rifle in a cleaning rest so it wouldn’t move on the table. With the bolt taken out I could look through the barrel at a distant streetlight. I then looked through the scope and adjusted the scope’s windage and elevation so it was right on the streetlight several hundred yards away. After making sure the barrel and scope were secure, I tried the rifle on the farm the next day. The rifle can shoot .22 Short, Long, and Long Rifle ammunition. I could hit dirt clods fairly consistently from 40 to 100 yards away. That’s good enough for now. After shooting it for the first time, I had to go out and celebrated with a Yoo-Hoo and a new box of 50 rounds. I’ll next shoot at a paper target from a rest to hold it steadier then my 66-year-old arms can.
Overall, resurrecting the Model 69 Winchester has been a fun and satisfying project. It didn’t cost very much and gave life back to this 85-year-old firearm that is a hoot to shoot. It would be great for a youth rifle and for teaching kids to shoot. The rifle is small and light, and it can be taken apart for cleaning and reassembling quickly.
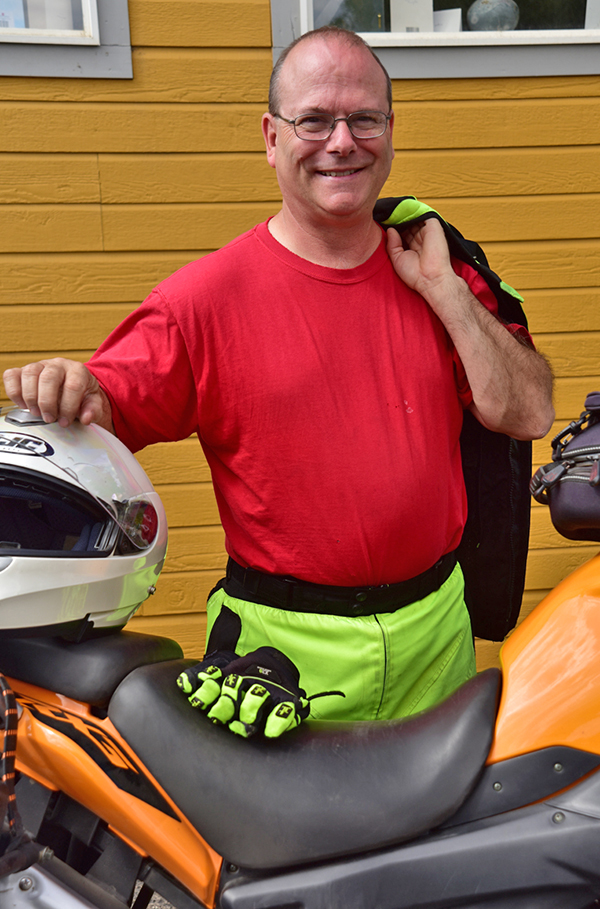
Meet our newest contributor: Rob Morel
Rob Morel is a good guy…a considerate, literate, and motorific kind of man. I first met Rob on the Western America Adventure Ride, when guys who owned Zongshen RX3 motorcycles joined Joe Gresh, a group of Chinese riders, a couple of guys from Colombia, and yours truly for our 5,000-mile romp around the US. Rob joined us in Idaho, and I knew I was going to like him the minute I saw the guy seated by the side of the road, waiting for us, somewhere before we crossed into Hells Canyon. It said a lot about Rob: He would be ready, he wouldn’t hold the rest of the group up, and he put others ahead of himself. Like I said, I liked him instantly. Rob has ridden with us a number of times…on that first Western America Adventure Ride, in Baja, on another ride through the Southwest, and more. He’s a machinist, a motorcyclist, a shooter, and a writer. This is Rob’s first piece as an ExNotes contributor. Welcome aboard, Rob, and thanks for this story!
California’s Pacific Coast Highway is one of the best motorcycle roads on the planet, and I never miss an opportunity to travel it. One of my favorite destinations on the Pacific Coast Highway is Hearst Castle. We’ve written about it previously here on ExNotes.
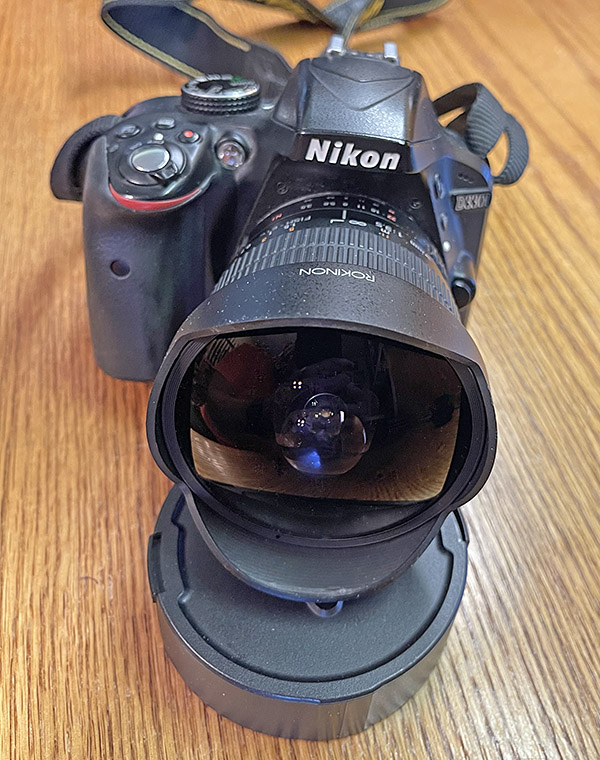
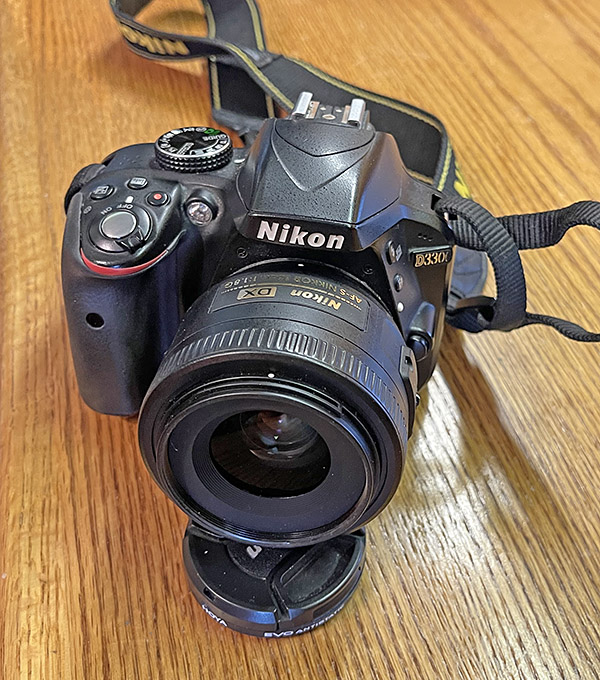
As the title of this blog implies, base camp was in Cayucos, California, instead of Cambria (more on that below). And from a photography perspective, instead of lugging around my boat-anchor, full-frame Nikon D810, I took the smaller and lighter Nikon D3300 with a “walking around” 18-55mm lens and a Rokinon 8mm (a super wide angle). I’ve been using that combination more and more lately.
The Rokinon 8mm super wide angle lens. Manual everything, it’s fun to use and it does a surprisingly good job.There’s not much in San Simeon, so people who visit Hearst Castle usually stay in Cambria. We stayed a stone’s throw away from Cambria in Cayucos, which is just north of Morro Bay.
Most folks who visit Hearst Castle stay in Cambria, a touristy, kitschy spot just down the road from San Simeon (the Hearst Castle location). This time we tried Cayucos, a tiny town that’s a bit further south down the Pacific Coast Highway. It’s friendlier, less expensive, and for my money, a lot nicer and more enjoyable than Cambria. Sue and I stayed in the Sunset Inn, a bed and breakfast in Cayucos. If you’re in Cayucos, the Ludano restaurant is the place for dinner (William Randolph Hearst was a regular here while building Hearst Castle). For a more casual Cayucos dining experience, Duckie’s (near the Cayucos Pier) is an awesome walkup seafood restaurant (try the fish and chips; they were great).
Hearst Castle, as seen through the Rokinon 8mm super wide.The Neptune swimming pool at Hearst Castle.One of the Hearst Castle’s guest bedrooms.The Hearst Castle dining room.Hearst Castle’s indoor swimming pool.
The Rokinon lens is strictly a manual affair. It doesn’t autofocus and it doesn’t work with the camera’s automatic metering features. It’s manual everything…focus, f stop, ISO, and shutter speed. The focus part was easy…I simply cranked the focus ring all the way over to infinity (with a wide-angle lens, that works). For ISO, shutter speed, and f stop, I used the camera’s histogram. Shoot, check the histogram, adjust, shoot again, check the histogram, adjust, and keep going until things are just right. Too dark, and I adjusted the shutter speed, the f stop, and the ISO until the histogram showed everything between the histogram upper and lower limits. Too light, and I made adjustments in the opposite direction. For the money, the Rokinon lens is a lot of fun, and I like the effects I get with a wide -angle lens. Some folks don’t. That’s okay. It’s my gear and these are my photos.
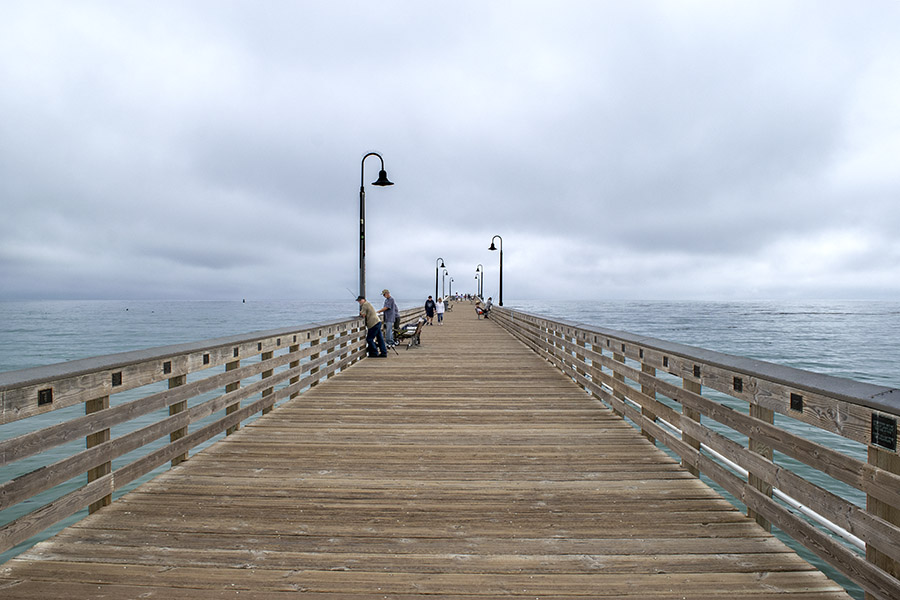
As mentioned earlier, I also used the Nikon 18-55mm lens on this trip. It’s not the sharpest lens but that’s okay. I’m not the sharpest matzoh in the box, either, and a matching lens fits me well. When I shoot in RAW (the camera’s capture everything, sort-it-out-later-in-Photoshop mode), the 18-55mm lens works surprisingly well, like in the photo at the top of this blog. It’s a shot of the Cayucos Pier, in which I did a little bit of post-processing to darken the sky and the water. I’m pleased with the results.
While we walked the pier, we talked to folks who were fishing from it. The fishing was good: Halibut, perch, and one fellow had landed a 4-foot shark earlier in the day (I wish I had been there when that happened; that would have been a hell of a picture).
The Nikon D3300 digital single lens reflex camera and the 18-55mm zoom lens that comes with the camera. It’s not a super sharp lens, but it’s not super expensive, either.
I took the photo below with the 18-55mm lens just a few miles up the Pacific Coast Highway. These are elephant seals and I liked how this photo turned out, too.
One of several elephant seal vista points along California’s magnificent Pacific Coast Highway. The two in the water was grunting loudly at each other in a domination contest. These seals can weigh up to 5,000 pounds.
You know, the discussions about lenses, cameras, and photography can go on endlessly. Sometimes all you need is a cell phone. I was blown away by the photos Joe Gresh grabbed when he recently visited Laguna Seca after riding his Kawasaki ZRX from New Mexico. Joe shot all of those with his iPhone, which is a much easier way to go on a motorcycle. When I travel with a digital single lens reflex camera on a motorcycle, the camera and a couple of lenses steal a lot of saddlebag space. There’s advantages and disadvantages to everything, I guess.
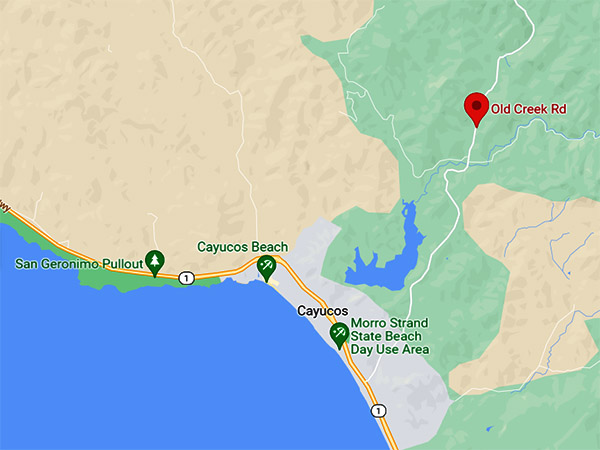
Old Creek Road out of Cayucos is a fun ride.
Riding the Pacific Coast Highway is a bucket list ride, and if you get an opportunity to do so, you should grab it. The area I’m describing in this blog is roughly halfway between San Francisco and Los Angeles. The Pacific Coast Highway is currently closed around Gordo (well north of San Simeon), but that still leaves a lot of nice riding on the table. One of the best rides is Old Creek Road northeast out of Cayucos. It’s a lightly traveled and grand road, full of twisties, and it cuts through the California wine country to link up with State Route 46 (another fine road through the wine country). A few miles further east, 46 intersects Highway 41, and that’s where James Dean lost his life in a car accident (there’s a sign marking the spot). There are a lot of interesting things and a lot of interesting roads in California.
Rifles, that is…two Ruger rifles. I’ve written about them before, but it’s been a while since I shot either one and with the stream crossing to the West End Gun Club almost manageable these days (more on that later), I thought I would take them out to the 100-yard range. I shoot handguns regularly (at least a couple of times a week) on the indoor 50-foot pistol range closer to home, but there are times when the high-powered-rifle-on-a-football-field-length-range itch needs to be scratched.
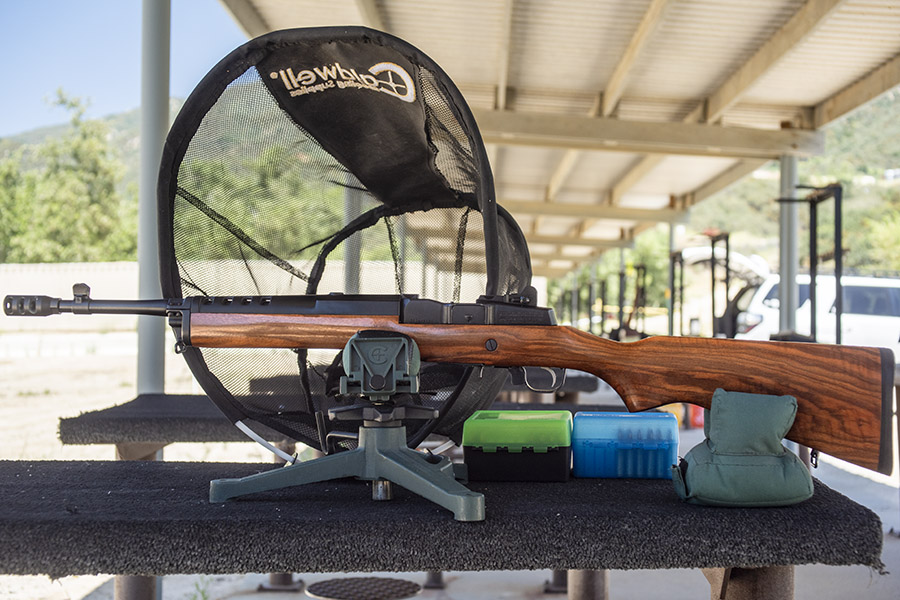
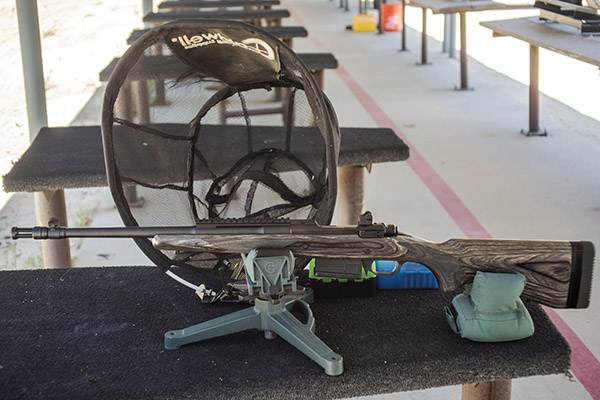
The two Ruger rifles in this article are two of my favorites: A Davidson’s Circassian-stocked Mini 14 (the one in the photo above) and the Ruger GSR (GSR stands for Gunsite Scout Rifle). The Davidson’s Mini 14 1was a 2009 offering with (as the name implies) a Circassian walnut stock. Back then the Circassian Mini’s $700 price seemed high, but I’ve been at this for a while and I know that when a gun’s price seems high it only means I’m buying too soon. The price will always catch up with the calendar, and that’s certainly been the case with this rifle. It originally came with two 30-round mags and a flash suppressor. California being what it is meant I couldn’t own the rifle as Ruger built it. I had to leave the 30-round mags with the out-of-state dealer, and because of the flash suppressor, it had to ship to the Class III dealer here in La La Land.
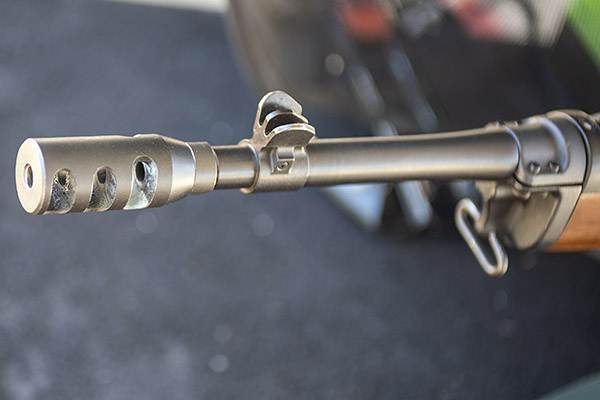
Circassian walnut from the port side. It sure looks good.The California-legal muzzle brake. I wonder what the California legislators were smoking when they passed that law.
The California Class III dealer replaced the flash suppressor with a muzzle brake (which I think looks even more intimidating and I had to buy a 10-round La-La-Land-legal magazine for my Mini.
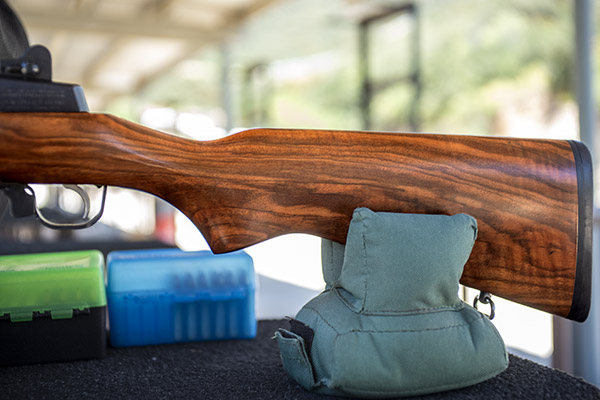
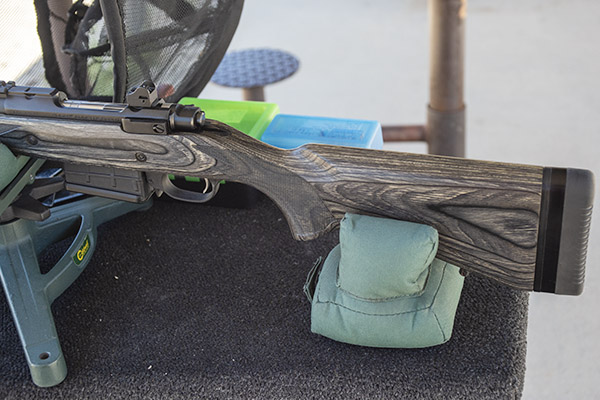
Circassian walnut from starboard side. This is the fanciest Mini 14 I’ve ever seen.
You might be wondering: Where can I get a Mini with a stock like this one?
The short answer is: You can’t. I watched the gun sale websites for months looking for a Davidson’s Circassian Mini 14 until I found one with nice wood (most had straight-grained, broomstick grade wood). When I saw the one you see here, I pounded (and I’m glad I did). You just don’t see Mini 14 rifles with wood like this one. It’s all mostly black plastic stuff on the range these days, which is almost a crime against nature.
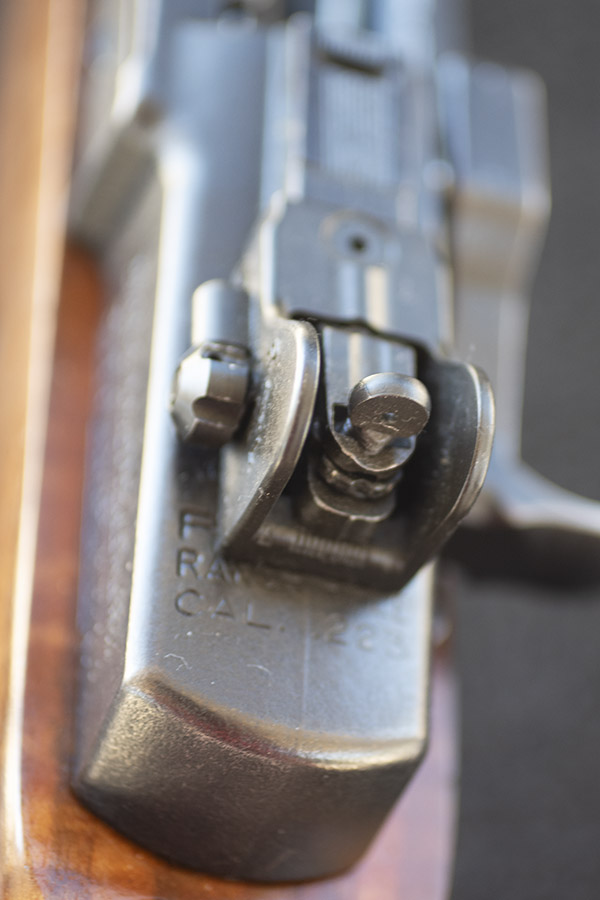
The Techsites rear sight on my Mini 14. It has a slightly smaller aperture and better adjustability than the stock Mini 14 rear site.
I’ve done a few mods to my Mini 14 to improve its accuracy, and I’ve detailed this in prior blogs (I’ve provide a link at the end of this article). The Reader’s Digest version is I’ve added a Techsites rear aperture sight to replace the Ruger sight, I’ve glass-bedded the action, and I’ve done a fair amount of experimentation to find the right load.
So how does the Circassian Mini 14 shoot? It does very well. I grabbed two loads: A full metal jacketed load with Hornady’s 62-grain bullet, and another with Hornady’s 55-grain V-Max bullets. You can see the results below.
A bunch of shots at 100 yards with one of my favorite loads: The 62-grain Hornady full metal jacket boattail bullet and 25.0 grains of XBR 8208 propellant. This ammo was necked sized only, which usually is more accurate in my Mini 14. I held at 6:00 on all targets shown here.Another 100-yard Mini 14 target with two different loads, both using the 55-grain Hornady VMax bullet and 24.5 grains of ARComp propellant. The very tight 5-shot group was shot with bullets that were not crimped. The larger group was the same load, but the bullets were crimped. Surprisingly, both loads were full length resized. As mentioned in the photo above, neck-sizing usually provides better accuracy in this rifle.
The second rifle in this Tale of Two Rugers story is the Ruger GSR in .308 Winchester. This is an amazing (and amazingly accurate) rifle, but it didn’t start out that way.
How I purchased this rifle is kind of a funny story. I had oral surgery to start the process of installing two fake teeth, and the doc knocked me out with anesthetics. They warned me I would be in no shape to drive home, so good buddy Jim Wile volunteered to do the driving. Jim’s gone on to his reward (RIP, Jim). On the ride home, in a drugged but conscious state, I told Jim about this new GSR rifle Ruger had introduced, and we somehow managed to convince ourselves we each needed one. They say you should not buy guns when you’re under the influence. Like Hunter Biden, though, I didn’t heed that advice and Jim followed my lead.
The Ruger GSR on the range at the West End Gun Club.
The GSR is Ruger’s interpretation of the Scout rifle concept first put forth by a gun writer named Jeff Cooper. Cooper’s concept was a short-barreled rifle that would hold a scope in a forward location and make for a sort of do-anything long gun. Steyr built the first commercially available Cooper-inspired Scout rifle, and then about a decade later Ruger followed suit. Mossberg has one now, too (good buddy Johnny G has one). The Steyr is crazy expensive, the Ruger started out at a reasonable price but has since gone kind of crazy (along with everything else), and (in my opinion) the Mossberg is the best value (it’s a fine rifle and one I’ll probably own some day).
The left side of the Ruger GSR. Note the laminated stock, which provides a very stable bed for the barreled action.The GSR as seen from the right.A Ruger .308 selfie.The Ruger’s aperture rear sight. It’s similar to the original Mini 14 site. Techsites doesn’t offer a replacement rear site for the GSR; if they did, I would have a Techsites rear sight on this rifle.The Ruger GSR flash suppressor. It’s the same type that originally came on the Mini 14. On a bolt action rifle, it’s legal in Calilornia; on a semi-auto, it is not.
When I first took delivery of the GSR, it was a real disappointment. As had been the case with half the guns I bought in the last couple of decades, it had to go back to the manufacturer. The problem was that the rifle printed way to the right, and there wasn’t enough adjustment in the rear aperture to get it back to the point of aim. I returned it to Ruger, they greatly relieved the stock around the barrel, and I had it back in about a week. When I took it out to the range the same week it was returned, I was astonished by its accuracy.
A target I shot a few years ago. The GSR can be amazingly accurate. The difference between the two groups is probably due to how I held the rifle. The upper group is one of the best I’ve ever shot with open sights.
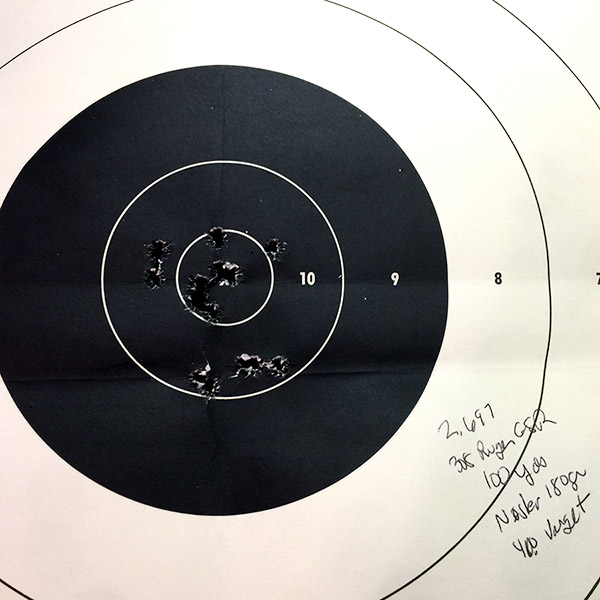
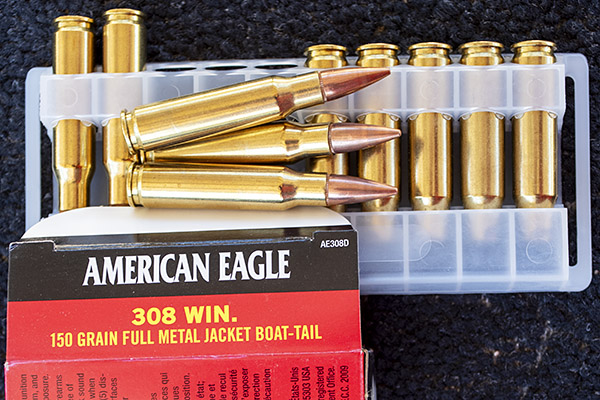
But that group above was then and this is now. I had not fired the GSR in a few years. I grabbed two loads for this rifle (a load I had developed for my M1A Springfield, and a box of Federal factory ammo with full metal jacket 150-grain bullets).
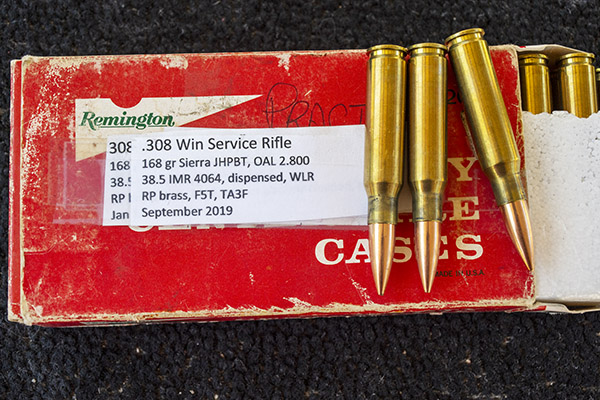
Federal American Eagle .308 ammo. I bought a bunch of this a few years ago for the brass; this ammo was about the same price as .308 brass.My reloaded ammo. This load shoots extremely well in my Springfield Armory M1A.
I only fired a couple of 5-shot groups at 100 yards with the GSR. It was getting late in the day, I was getting tired, I had not fired the rifle in a long time (shooting is a perishable skill), and I realized I wasn’t giving the rifle a fair shake.
With the same rear sight adjustment used for the previous GSR target shown a couple of paragraphs above, the Federal factory 150 grain load shot high and to the left. The group is considerably larger than the load with 180-grain Noslers and Varget propellant.Another 5-shot group, this time with 168-grain Sierra hollowpoint bullets and IMR 4064 propellant (the accuracy load for my Springfield M1A). The load doesn’t perform as well in my GSR as it does in the M1A, but it’s still substantially better than the Federal factory ammo. It’s why I reload.
That stream crossing I mentioned at the start of this blog? Lytle Creek flows across the dirt road going into Meyers Canyon, and it can be a real challenge at times. With all the rain and snow we’ve had this past winter, the reservoirs are full and the snow up in the San Gabriels is still melting. You may remember the blog I wrote about the time I high sided my Subie attempting a crossing. The stream is down a scosh since then, but it’s still not an easy crossing. Here’s a video I made on the way out on this trip after visiting the range with the Mini 14 and the Ruger GSR.
I’ll be shooting the GSR more in the coming weeks now that I’m back into the swing of shooting a .308 off the bench, so watch for more stories on it. I think I can do better than the groups you see above.
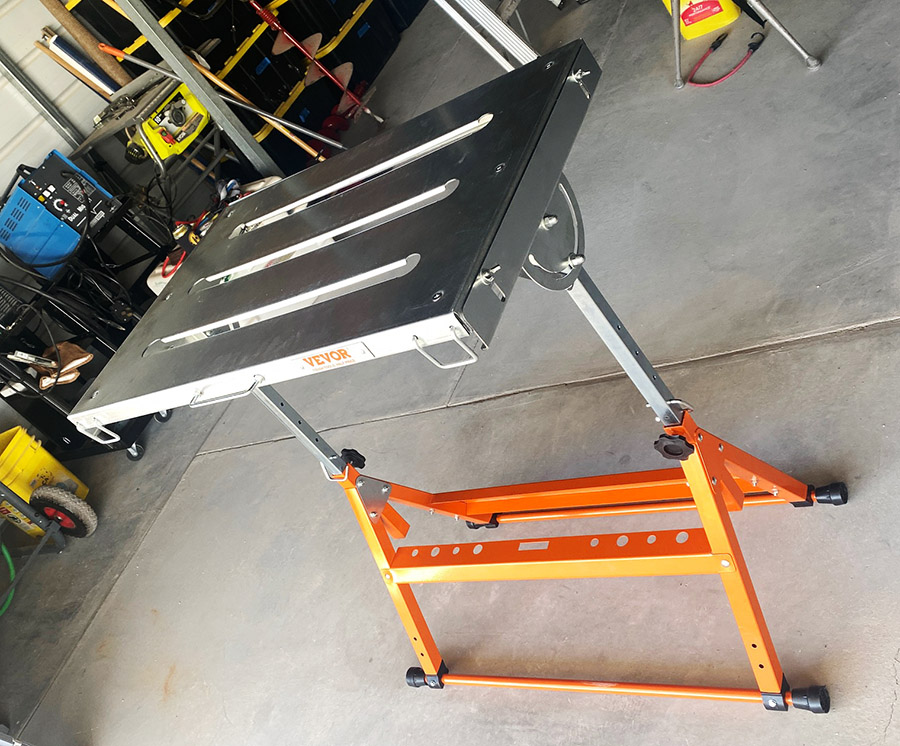
I’ve gotten an undeserved reputation as a China booster. Some Internet wags think I work for China and must be getting a cut from the sales of products I test. Any time you guys want to get serious and ban all products from China let me know. I’m with you, man. I wish I got a cut from the sale of Chinese imports but the truth is, many times Chinese stuff is the only stuff I can afford. Take this Vevor welding table I bought on Amazon. At $62 including shipping it was even cheaper than the Harbor Freight welding table that looks like the exact same unit.
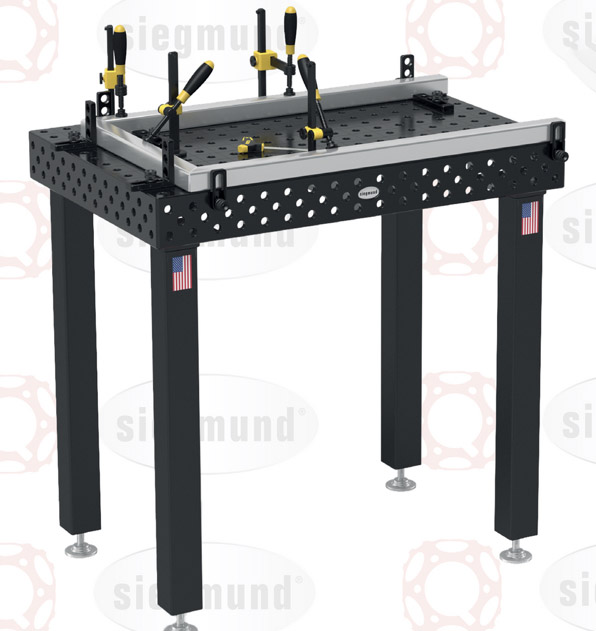
For fun I tried to find a similar sized, made-in-USA, welding table and the cheapest one I could find was from a company called Siegmund. The Siegmund table is way, way nicer than the Vevor and it comes with a bunch of clamping accessories included. The Siegmund costs $2569.00 plus shipping. For me, the choice isn’t made-in-USA vs made-in-China: the choice is a cheap welding table or no welding table at all.
Maybe if I ran a welding shop I’d bite the bullet and get the Siegmund, but that’s not exactly true. If I ran a welding shop I’d probably make my own welding table. It doesn’t matter for this product review because I don’t run a welding shop and I never will.
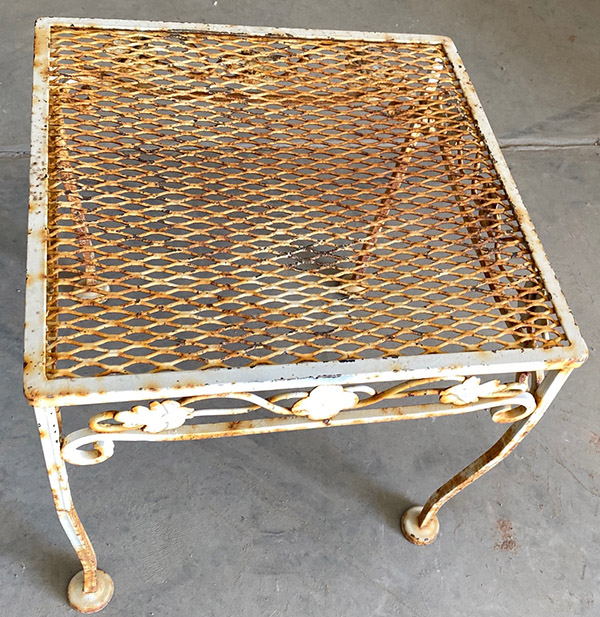
My previous welding table was a small, outdoor side table made from expanded metal mesh. It was too low and I was on my knees to do the welding. Everyone knows you have to be in a comfortable position to lay down a steady bead, more so when you can’t weld very well in the first place.
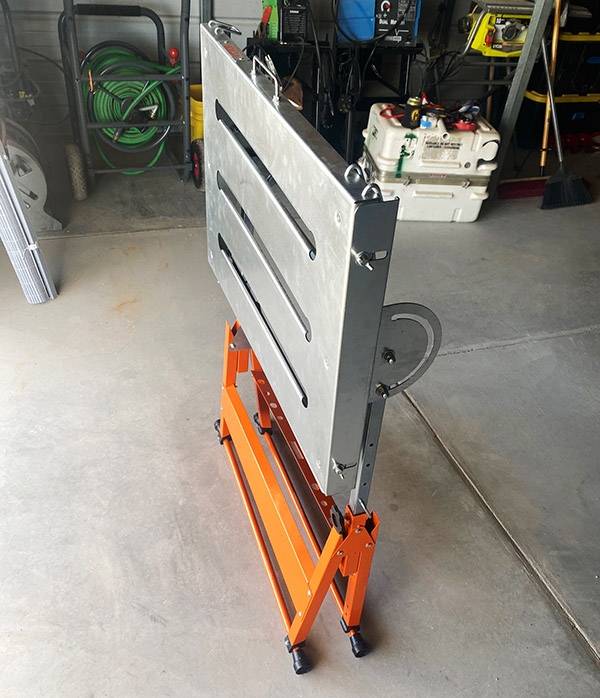
The Vevor welding table is one of those generic designs that are manufactured by many different factories in China. It has a tilting feature that I don’t foresee using but you never know. Out of the box the table comes complete with all the nuts, bolts, and screws needed for assembly. It’s easy to put together. It took me only 45 minutes and I’m a slow learner.
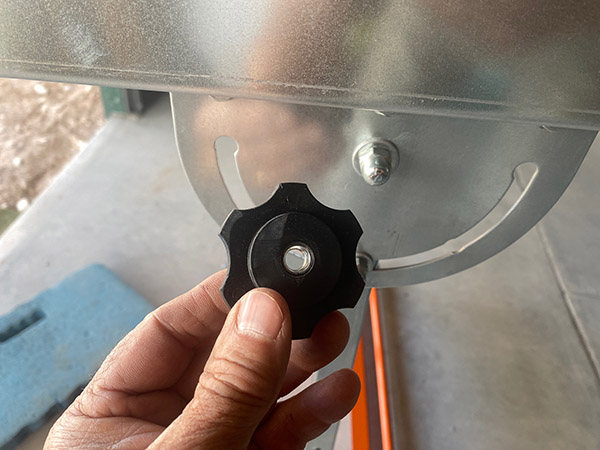
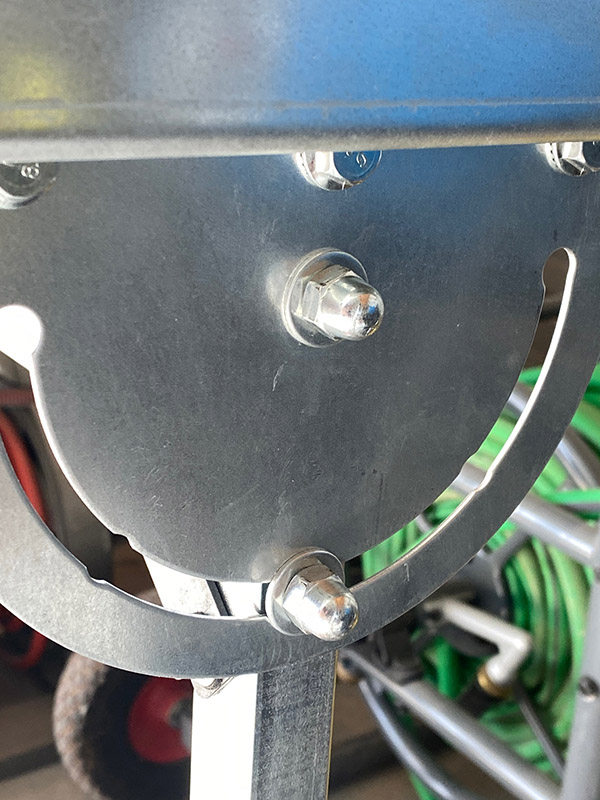
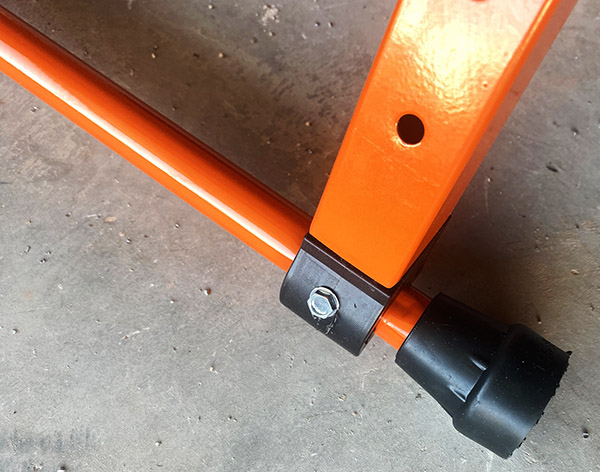
As delivered, the table worked fine, but there were several tiny modifications that made the thing much better. The tilting arc has two wing nuts and two plastic knobs on each side to lock the table in position. It’s almost impossible to get these fasteners tight enough to prevent the table from slipping when you push on the edge. It’s probably not a problem for welding but I replaced the factory hardware with acorn nuts. Once the acorn nuts are tightened with a wrench the table no longer slips.
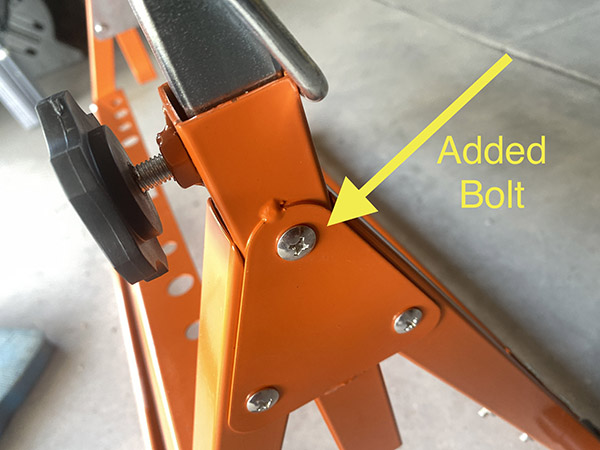
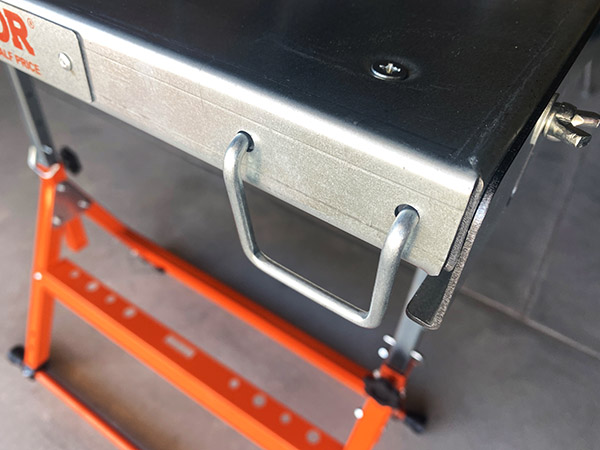
I like my welding table high so that I have a better chance of seeing what I’m doing. The Vevor comes with two pins that allow height adjustability but even in the highest setting it was too low. If you weld from a chair it would be ok. I extended the table another inch and drilled the upright for a bolt/screw. To lower the table, I’ll have to remove the bolt but it will only take a moment.
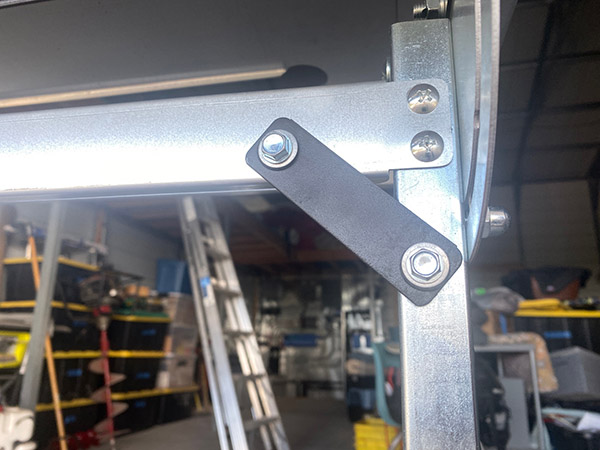
I added two side braces to take a little side to side wobble out of the table. It’s relatively stable now.
The Vevor table folds for storage and came with wheels to roll the thing around. I didn’t use the wheels as the table is not very heavy and you can lift it easily.
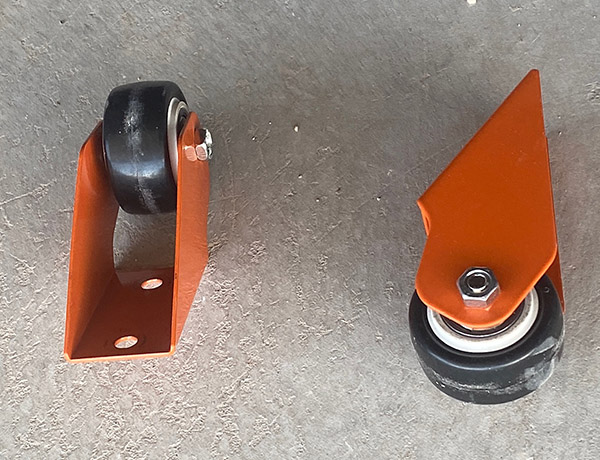
The feet on the Vevor are an odd setup. Four plastic pieces fit into the ends of the legs and two crossbars with rubber tips snap into the plastic pieces. The crossbars fall out of the plastic easily so I drilled and added 4 screws to hold them in place.
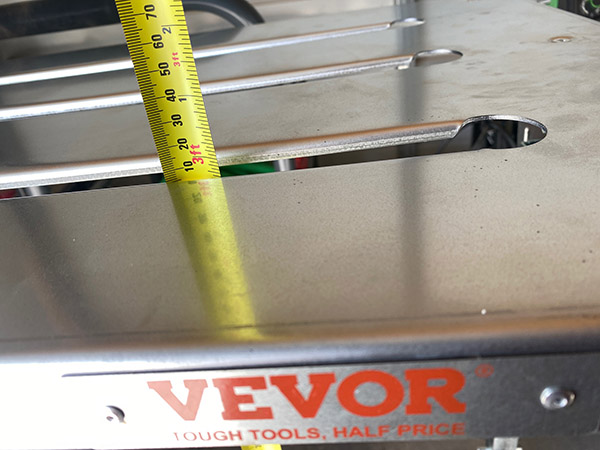
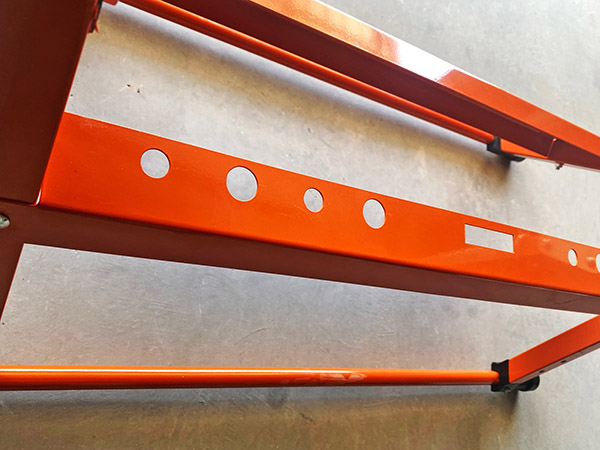
Once I modded the Vevor welding table it felt sturdy. There are a few neat and not so neat features. The tabletop has slots for clamps but is not very thick metal (it’s about 2.4mm). It racks pretty easy until you flatten it out and tighten the tilt nuts. For electric welding it will probably be okay; gas welding may warp the top. On the sides are fences that you can raise beyond the tabletop to provide a handy place to clamp your work. Lowered, the fences are out of the way and razor sharp so watch your elbows. The lower cross brace on the Vevor comes with several size holes for tool/clamp storage and a couple loops to hang whatever you want to hang.
For a measly $62 you get a lot of welding table from Vevor. I’m satisfied with the thing and as soon as I clear out all the flammable stuff lying around the shed I’m going to test the table under real life conditions. Watch this space for a follow up report.
The famous line was from a Clint Eastwood movie, I think, but regardless it rings true for me as I ease into my salad years. Or is that my pabulum years? Recently I did a few simple mathematical equations and then ran the results through my life expectancy chart. The results were not encouraging. I would need to live another 124 years, 7 months to complete all the projects I’ve started. That’s if I didn’t gain any additional projects in the ensuing 124 years. Unfortunately, the projects still drift in by ones and twos. It’s time I got to know my limitations.
I was building the driveway retaining wall at The Ranch when the epiphany came. I looked around at the tools spread around the front yard, the stack of lumber and the pallets of concrete and decided that there was just no way to do it all and that I needed to shed a few projects. At least get them off my books. The low hanging fruit was first to go.
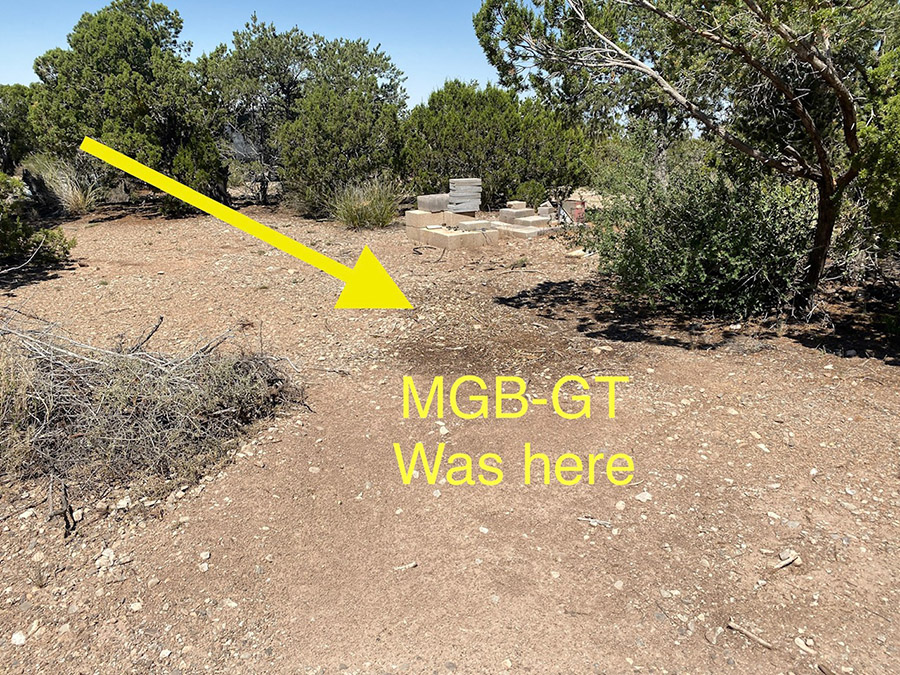
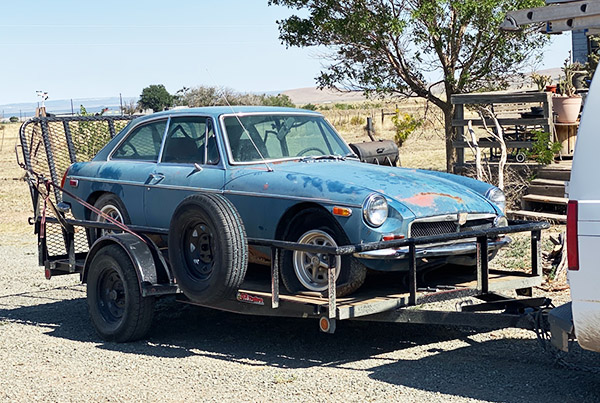
The 1974 MGB-GT was a candidate because I haven’t spent much money on it yet and it’s a huge, time consuming proposition. It needs many, many manhours and truthfully I never really wanted a MGB-GT anyway. It was just on the land when we bought the place and I thought it was a cool looking car. I bandied about about selling it but the prospect of wading through all the Internet scammers and tire kickers didn’t appeal to me. My buddy Mike from the Carrizozo Mud Chuckers expressed an interest in the car so I made him a deal he couldn’t refuse: I gave it to him.
Before you get all wound up and start telling me how you would have given me $500 for the car I have this to say: “No, you wouldn’t.” Just like you wouldn’t buy a Janus if it had an American made V-twin engine or an electric car if it went 100 miles further on a charge. Mike has a trailer that fit the MBG perfectly and we loaded it up using two come-alongs in series. With 3 flat tires it took about a half-hour to move the car 20 feet. Inches add up to miles and the blue, MGB is now residing 69 miles away at Mud Chuckers central. Seeing the car roll off the property gave me a real lift. It’s like I bought an extra year of my life.
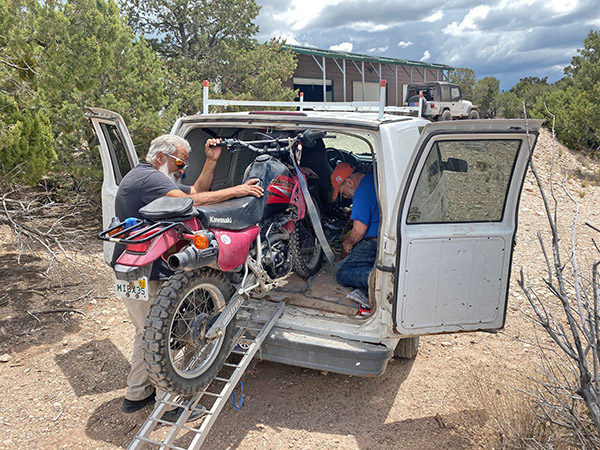
The next thing to go was the KLR250. When I had the Love Shack in Florida the KLR was the bike I left in the shed. Whenever we were in residence the KLR faithfully dragged me around central Florida. It wasn’t fast but I could hold 70mph on the highway if there wasn’t a headwind. The KLR sat as we moved junk across the country and then sat in the shed here at The Ranch for a few years. You know how that goes. The carb gummed up and it wouldn’t start.
I decided to sell the bike but first I had to fix the front brake, fork seals and replace the front tire. After accomplishing those chores I wandered off to construction projects and the KLR languished. The final straw was when I skipped over the KLR250 to get the ZRX1100 running. I realized that the liquid-cooled 6-speed enduro bike had fallen completely off the to-do list.
Mike came to the rescue again and picked up the KLR250 for a cool 1000 dollars and dragged it back to his place. He has since replaced the stock constant velocity carb with a Mikuni clone off of Amazon and the bike starts and moves under its own power again. The new carb is jetted too rich so there’s a bit more fettling to be done but I won’t be doing it.
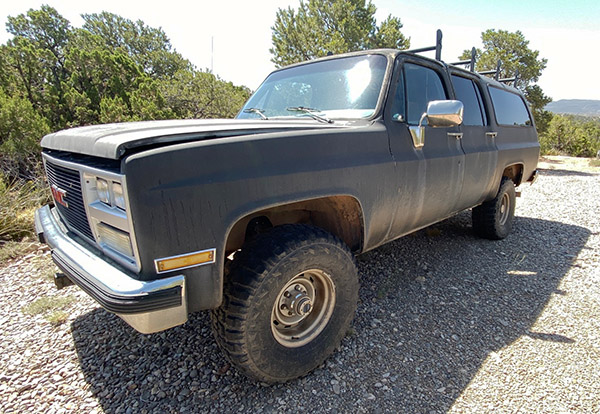
Having those two projects out of the way emboldened me to get rid of more junk. The Bomber is on the chopping block. I originally bought the Bomber for its running gear. I planned to put the Bomber’s small block Chevy and ½ ton running gear into Brumby (the Jeep). But the Bomber was so handy for hauling concrete the Jeep swap never took place. CT signed me up for a Lowes card and with the card Lowes will deliver anything to The Ranch for $20. This means no more concrete hauling and no need for the Bomber along with the Bomber’s tags and insurance.
I’ve got a few things to fix on the Bomber but I think I can get $1500 or so for the beast and that will be another project off my books and another year of my life back.
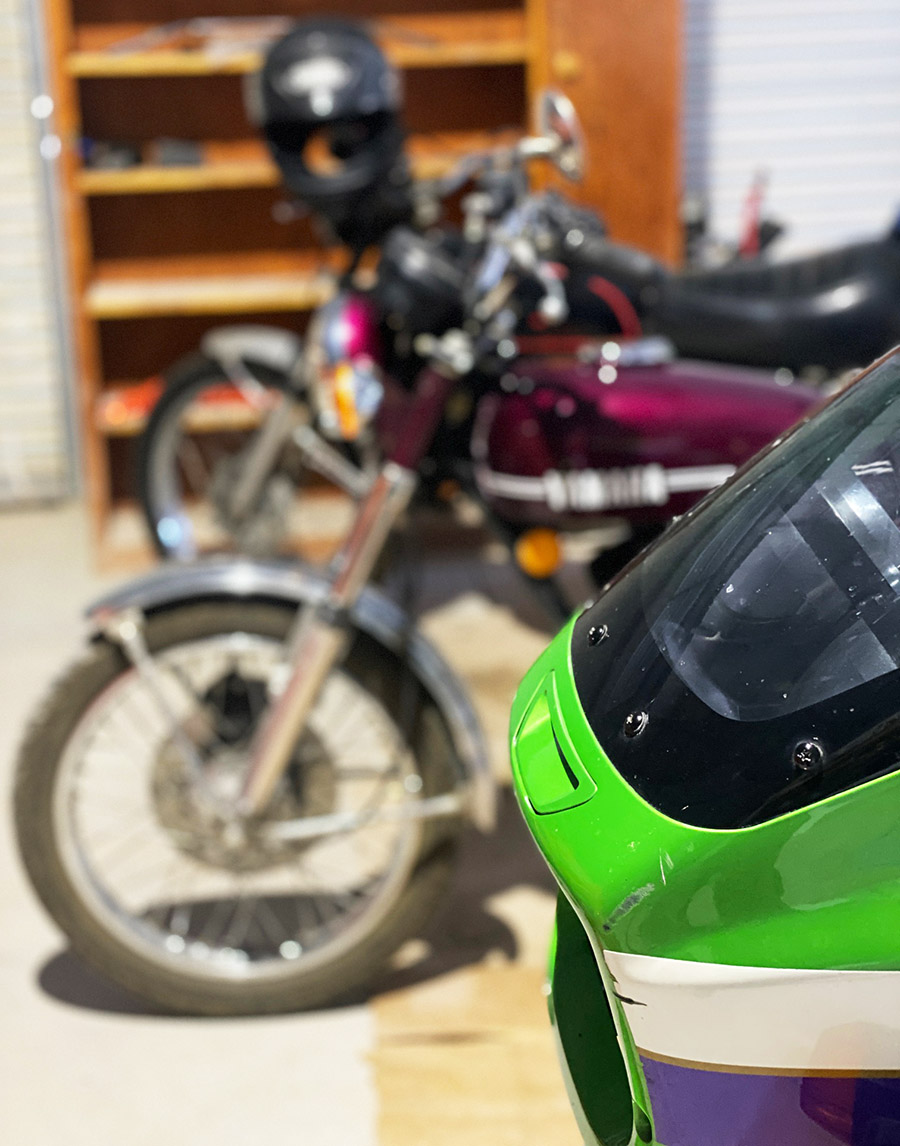
The trend line is clear to see: Stuff not getting used is going away. The 1975 Kawasaki 900 isn’t even safe now that the ZRX1100 is running. It has become too valuable and selling it would enable me to finish a few other projects, like my Honda 50 with a 140cc Lifan motor. Zed mostly sits because the purple Yamaha RD350 has taken over top spot in the vintage street bike category. I can only ride so many motorcycles at once.
You may say I’m getting lazy or maybe just old but I say I’m being realistic. There are still a few old motorcycles I’d like to own and clearing the decks is a time-honored tradition for normal people. Anyone need a Huffy beach cruiser with a 60cc two-stroke motor attached? It’s too fast downhill and too slow uphill. The thing is going to kill me if I don’t get rid of it.
One of the many disadvantages of big, heavy motorcycles is the extra strain they place on your body doing routine maintenance. Oiling the chain, a simple task on a lightweight motorcycle (you just lean the bike onto its kickstand and spray away) becomes a chore lifting and spinning bit by bit. God help you if you get a flat or need to remove a wheel.
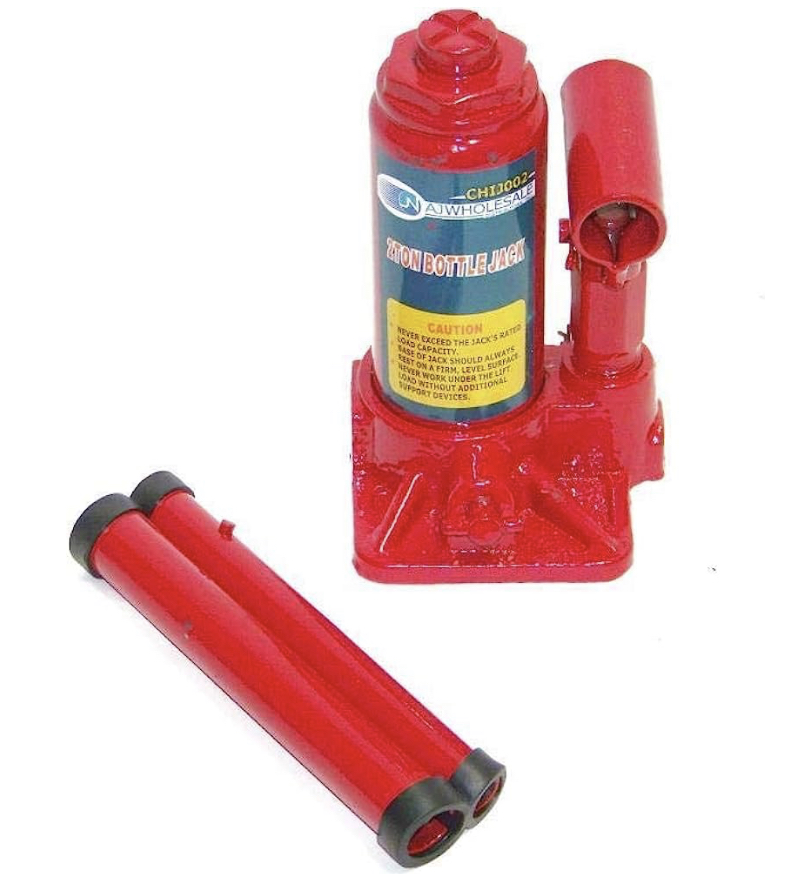
Motorcycles used to come with center stands (a few still do) and seeing how obese modern bikes have become I don’t know why manufacturers don’t tack on a bit more junk that would be actually useful. I’d rather have a center stand than a thin film instrument cluster, ride mode selector or ABS brakes. Here’s a link to the Amazon motorcycle jack.
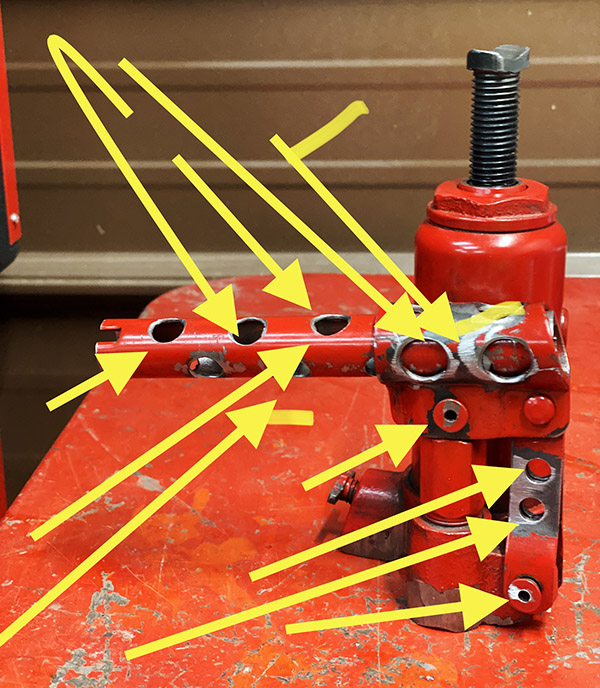
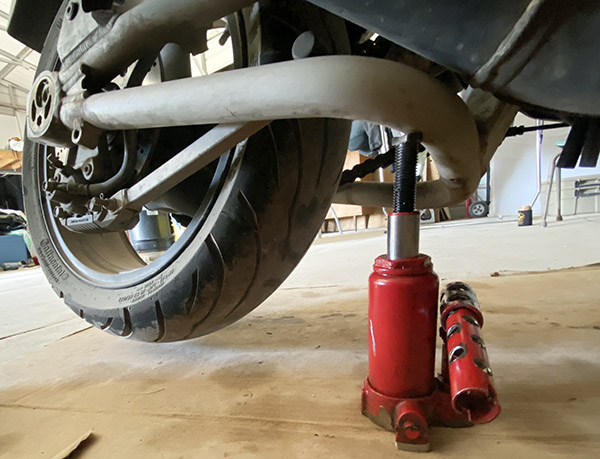
This El Cheapo, Chinese 2-ton hydraulic Jack is slightly shorter than the other El Cheapo Chinese jacks and as such it is low enough to fit under your swing arm or front frame rail. Positioned correctly, you can rig a stable 3-point setup to lift either end of your portly motorcycle.
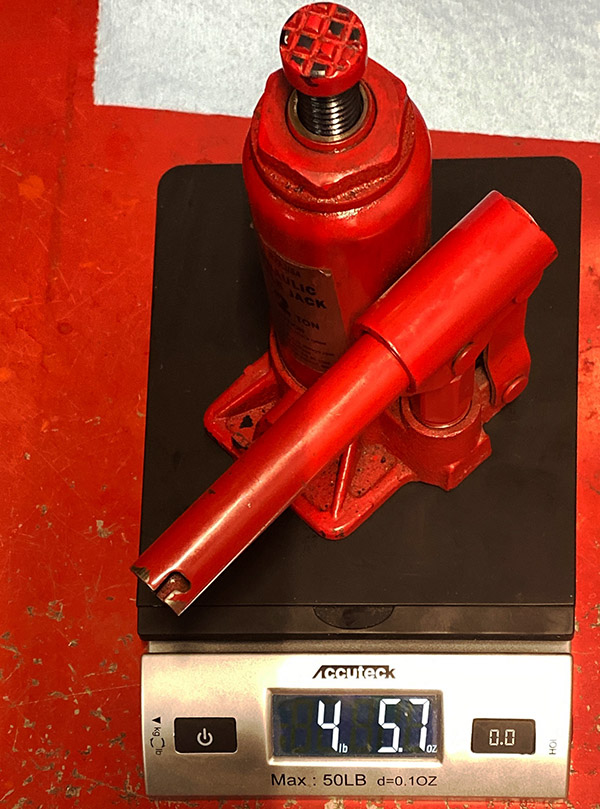
But the thing isn’t exactly travel friendly. Weighing in at a stout 4 pounds, 5.7 ounces it is not the sort of thing you want to carry around on your motorcycle unless you’re taking a long-ish trip. Of course I’m taking a long-ish trip so I decided to trim some excess weight off of the jack.
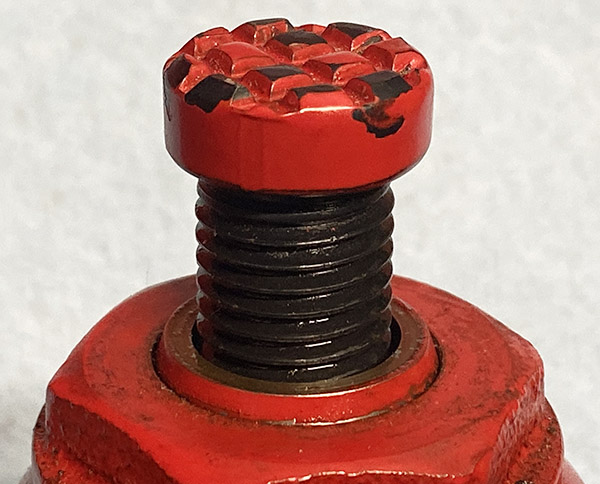
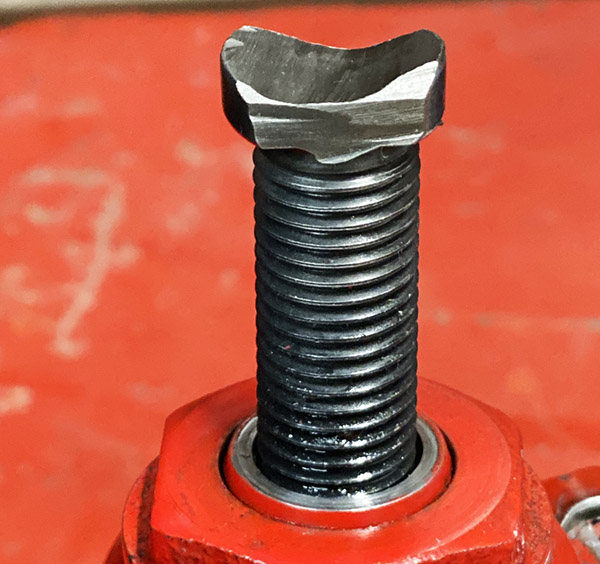
As delivered, the jack’s working end isn’t ideal for round tubes like a swing arm or frame so I chopped the sides off and ground a swale into the face in the hope of preventing the jack from slipping when in use. This worked pretty well it turns out, and while I wouldn’t jump up and down on the motorcycle while suspended it was fairly stable. Saving a few ounces was an added plus.
Since I’m using only a fraction of the jack’s 2-ton capacity I decided it was safe to Swiss cheese the extension lever and pivoting mechanism. This included drilling the pivot pins and connecting rod.
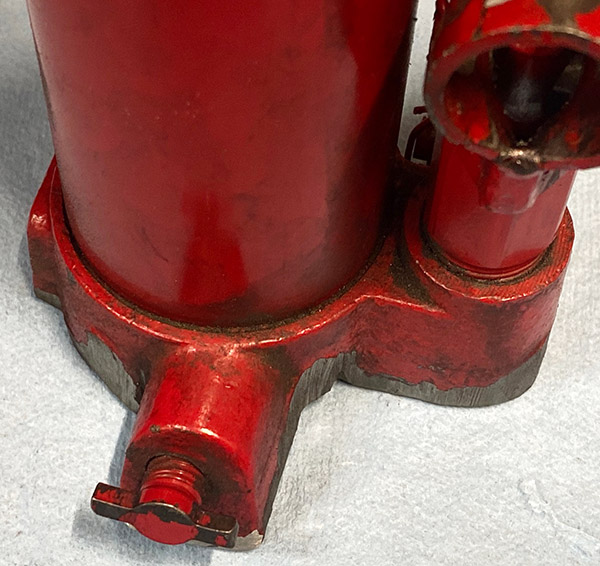
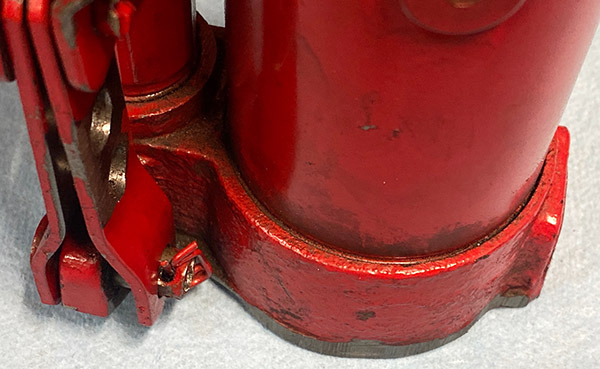
All this drilling removed a satisfying amount of weight and the jack was no worse for the damage. I know what you’re thinking: “Why stop there?” The base of the jack is a cast iron affair with plenty of ribbing and surface area. Again, I’ll only be lifting a few hundred pounds at most so I don’t need quite so much strength. I attacked the base with a 4-inch cutting wheel and removed everything that didn’t look like an elephant.
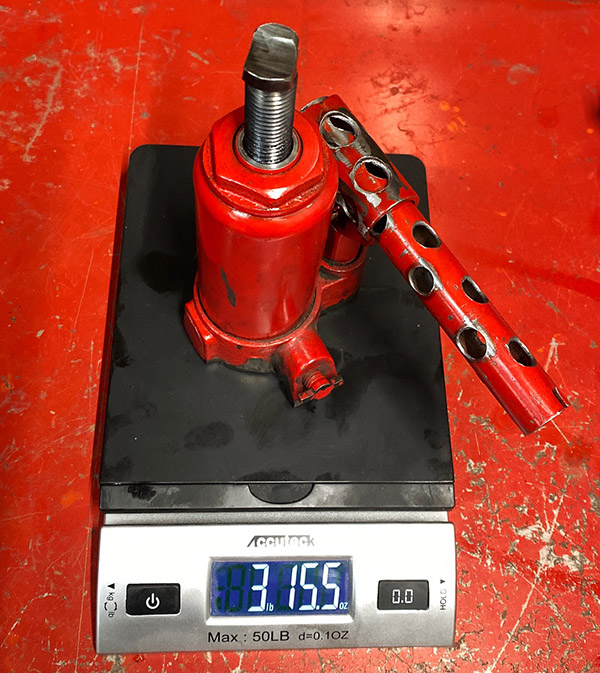
Trimming all that excess fat felt good and the resulting 3-pound, 15.5 ounce reading means I got rid of around a half-pound of useless weight and the jack looks better, has lower cholesterol, and can fit into its old high-school clothing again.
As far as the jack function, it works as you’d expect although it will slowly lose pressure overnight and lets the bike back down. Plan accordingly if you want the bike jacked up more than 5-6 hours. I see a few more places that I can trim but my recent experience grinding through a 200-dollar brake caliper gave me pause. I don’t want to hit an artery. I’ll need to look inside to determine how far I can go with the grinder but I believe I can thin the base at least 1/8 inch and cut a lot more metal around the pressure release valve. I’d like to get the jack down to 3-1/2 pounds just to see if I can. This will do for now, I’ll bring the jack along with me to Laguna Seca next week so if you’re in the area you can stop by and check it out.
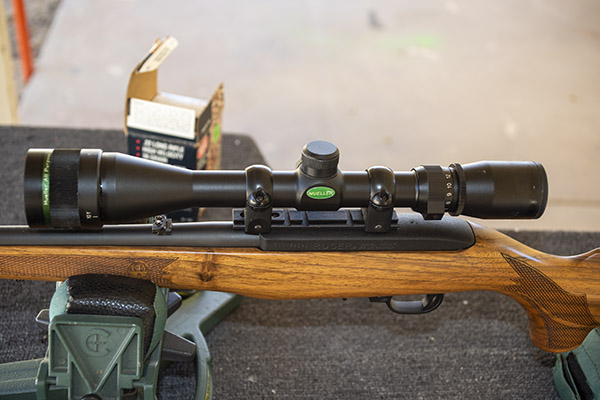
Nearly 15 years ago, TALO (a firearms distributor) offered a unique version of Ruger’s 10/22. It was a model with a French walnut stock. As a guy who appreciates good wood and a long time 10/22 fan, I knew I wanted one. The rifles were offered initially at $419, but I knew the price would only go. It’s hard to go wrong with a Ruger 10/22, especially if it is a limited edition.
I contacted an executive with Turner’s (a sporting goods chain) and told them I and several of my friends wanted to buy these, and asked if they would consider buying a group of them and allowing us to select the ones we wanted before they went on the shelves. Turner’s went along with my nutty idea, and I and my friends each bought one.
TALO’s French walnut 10/22 on the bench at the West End Gun Club.I’m pretty sure Ruger and TALO subcontracted the 10/22 French walnut stocks to Altamont. The checkering, fit, and finish is flawless.The French walnut 10/22 starboard side view.
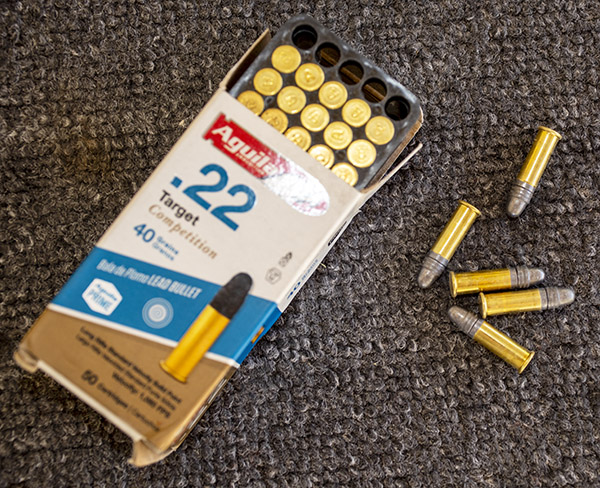
The French walnut 10/22s were flawless, and I actually bought two. I gifted one to a friend who steered a big chunk of consulting work way my way, and I kept the one you see here. I tried several different brands of .22 ammo to find the one it liked best (it was Aguila Target ammo), and I bought a bunch of that shortly after I finished my testing.
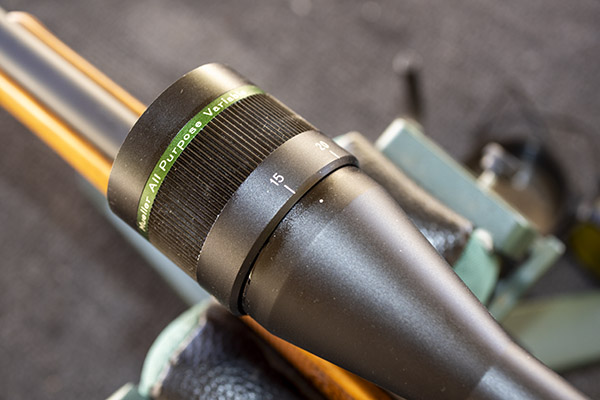
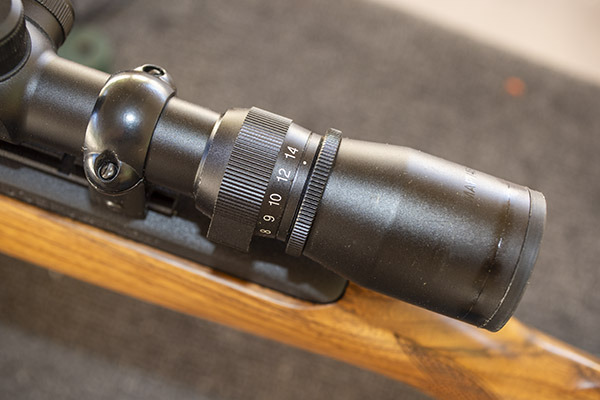
I already knew that I liked the Mueller 4.5×14 scope on a .22, so I bought one and mounted it on the rifle. It’s a great scope, sharp, clear, and with several features I like.
The 4.5×14 Mueller scope.The Mueller scope incorporates a parallax adjustment feature on the objective end. I dialed it down to 50 feet.The Mueller scope cranked all the way up to 14-power magnification.
Most recently, I had the French walnut 10/22 out at the range. As always, it performed brilliantly. I’ve competed with this rifle in the WEGC metalllic silhouette matches, and I sometimes bring it to the range just to plink. It’s a fabulous rifle.
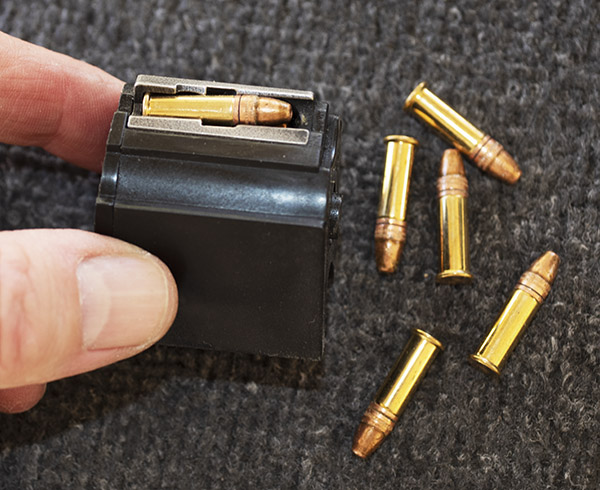
The famous Ruger 10/22 rotary magazine in the rifle. It holds 10 rounds. I load only five at a time.Cartridges in the 10/22 rotary magazine.
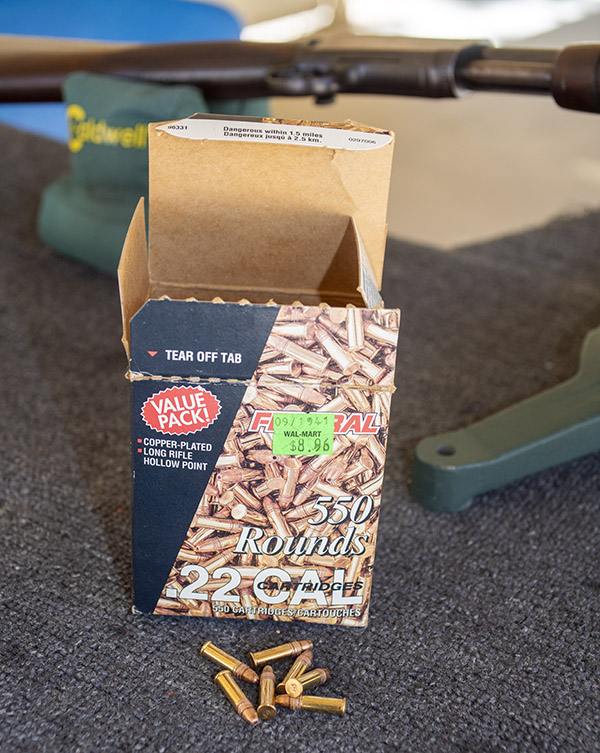
I took the 10/22 with me on the same day I shot my old Winchester Model 62, using the same three types of ammo on a 50-foot NRA target.
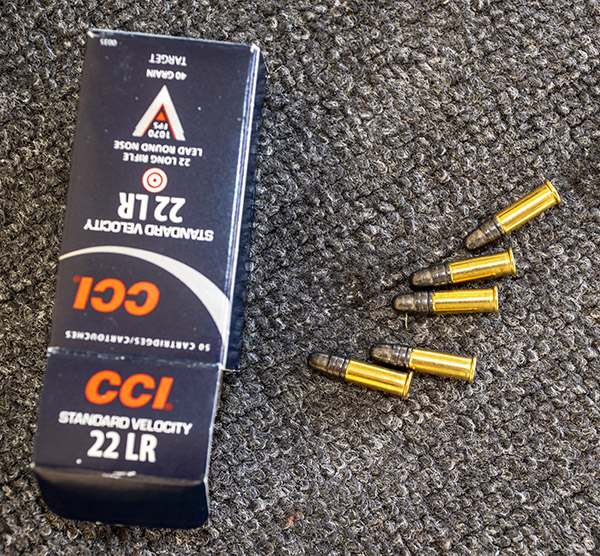
I’m nearing the end of this old box of Federal high velocity ammo. It was good while it lasted.CCI standard velocity .22 ammo. This is good stuff.Aguila .22 Long Rifle target ammo. I found this to be very accurate in my .22 rifles.
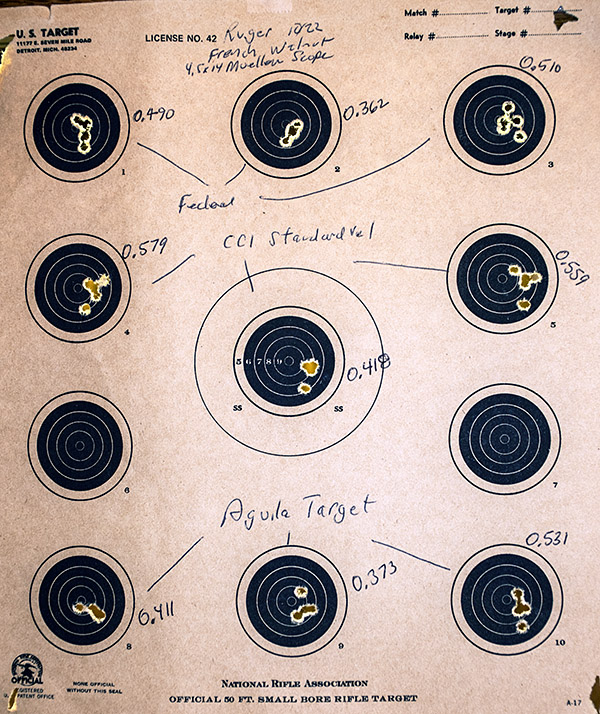
The 10/22 did a fine job. As usual, the Aguila ammo turned in good results. The Federal high velocity and CCI ammo did a surprisingly good job, too.
The results on a paper target with Federal, CCI, and Aguila ammunition. The distance was 50 feet.
If you are looking for a good .22 firearm, the 10/22 is hard to beat. At more than 7 milli0n produced, the 10/22 has sold more rifles commercially than any other firearm (there are military rifles that have higher production numbers, like the Mosin Nagant and the AK-47, but in terms of commercially available .22s, the 10/22 is it). There’s a huge aftermarket in 10/22 parts, too. You just can’t go wrong with a 10/22. I’ve owned several over the years and I still have three, including an older 10/22 Mannlicher with exceptional walnut and a 200th year 10/22 Deluxe model (Ruger roll marked “Made in the 200th Year of American Liberty” on every rifle they manufactured in 1976). Sometime in the near future I’ll dig out the 200th year 10/22 and post a blog on it.
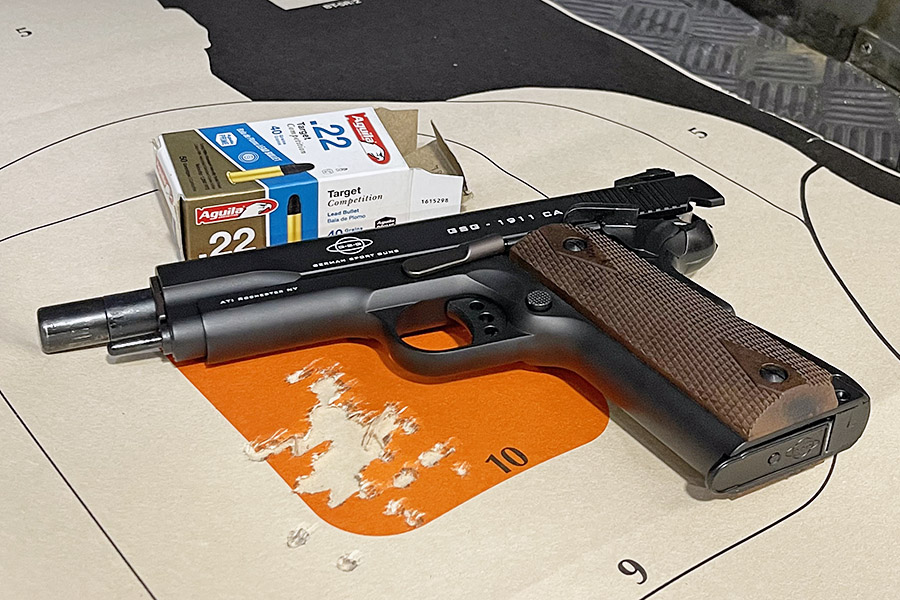
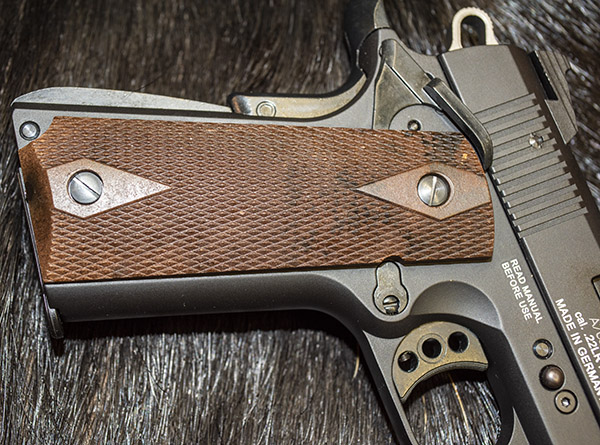
A few years ago I was in a local Turner’s sporting goods store (Turner’s is a big sporting goods chain in the southwestern US) and they had a sale on GSG .22 LR 1911s. I think I paid $229 for it and I’ll admit it: The GSG was an impulse buy. I didn’t need it, but for $229 I thought any kind of 1911 would not be a mistake (I just checked the Turner’s website and they are now $379.99; that’s still not bad). I put the gun in the safe when I bought it and pretty much forgot about it.
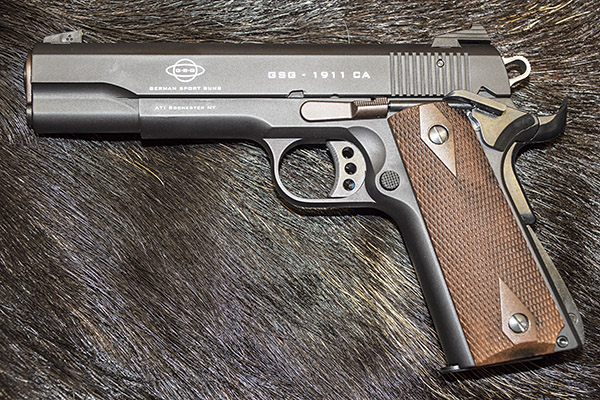
The GSG .22 1911. All the controls are the same as a real 1911. Note the competition/target-style hammer, the extended beavertail grip safety, the target-style trigger, and the Patridge-style front sight.
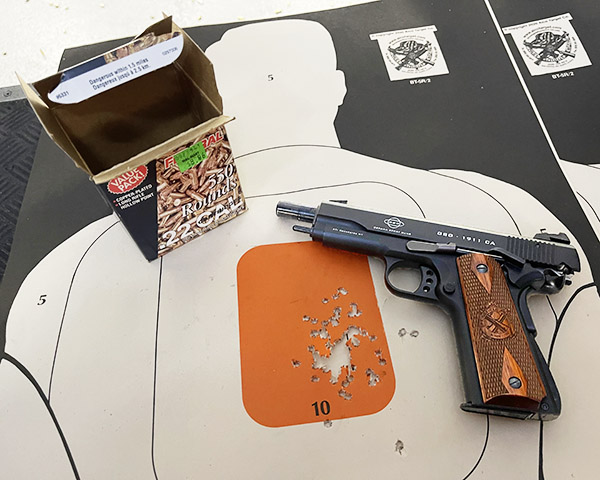
I had owned the GSG .22 for several years and I hadn’t fired it. Then, one fine recent morning when I was putting my 9mm 1911 in the range bag, I realized it was dumb not to shoot the little .22. It’s not like it’s ever going to be a collectible, so I thought I might have some fun and enjoy it. The GSG went into the bag, too, for its first firing session.
To my surprise, the GSG is surprisingly accurate and it is fun to shoot. The feel is just like a real 1911 except it’s a bit lighter (as near as I can tell, the exterior dimensions are identical to a full-sized 1911). The trigger is a little on the heavy side (especially after shooting my TJ-modified 9mm Springfield Armory 1911 with its 2 1/2-pound trigger), but the GSG trigger is creep free.
As you can see on the target above (at the top of this blog), the GSG shot slightly to the left. I could see on the slide that the rear sight it was not centered. I fixed that. The rear sight is drift adjustable (it’s held in place with a setscrew), so I moved it a scosh to the right.
The GSG has decent whitish/yellowish (almost aged ivory in color) dot sights front and rear. About that target above: It’s a box of 50 Aguila .22 target loads at 10 yards, with a two-hand hold, firing offhand. I have no excuse for the two outside the 10-ring.
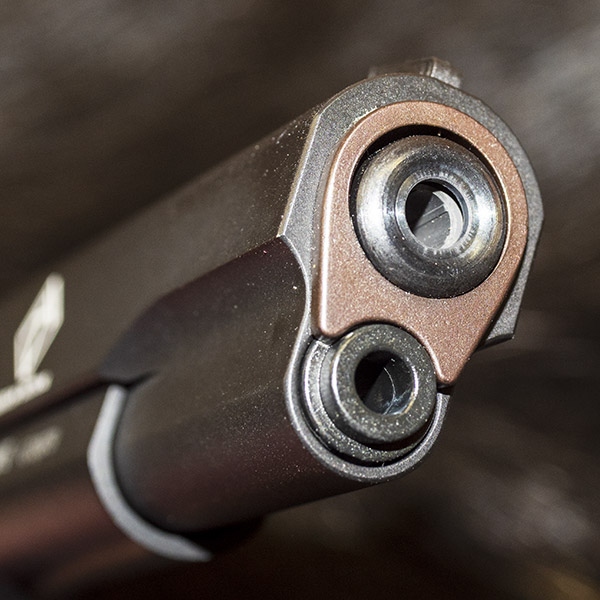
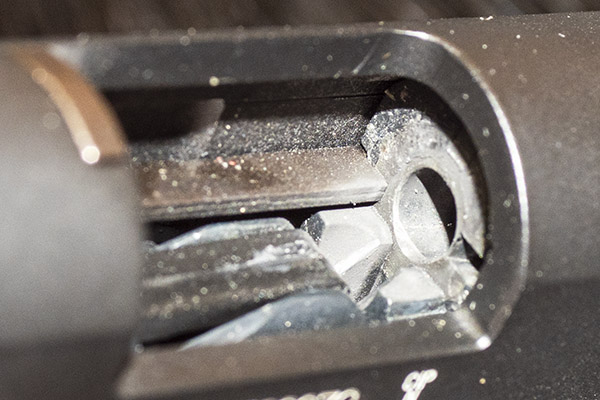
The front sight. I’m sure it’s plastic, but the dot has the appearance of aged ivory. It’s dovetail mounted, and it appears to have a set screw retainer.The rear sight, with the same faux ivory dots. The sights are good. As delivered (and as you can see in this photo) the rear sight is biased slightly to the left. The GSG shot a little to the left for me. I may move the sight over to the right a little bit.The business end. I haven’t taken the gun apart to clean it yet. There appears to be zero bore leading after firing that first box of 50 rounds.The boiler room after 50 rounds. There were no extraction failures. I had one stovepipe, but the gun is brand new. I hadn’t even oiled it before taking the little GSG to the range.The grips appear to be some kind of plastic. That’s okay; I have a brand new set of diamond-checkered Springfield Armory 1911 Cocobolo grips I’ll use as replacements.
There’s a fair amount of plastic on this gun and I think the finish is some kind of paint, but the gun looks and feels good. The GSG is not a Wilson or a Les Baer 1911, but it doesn’t cost $3500, either.
I don’t know how the GSG takes down or what it looks like inside. I suppose it’s time to read the instructions, and I need to do that so I can clean it. Watch for more on this fun little 1911. You’ll see it right here on our Rimfire Series of blogs. Don’t forget to check out our other gun and reloading articles, which are indexed for your convenience on our Tales of the Gun page.
A quick edit: I took the grips that split on my Springfield Armory 9mm 1911, superglued them back together, and installed them on the GSG .22 (I had to relieve the safety cutout on the right grip to get them to fit). The Springfield grips look good, and they feel better than the injection molded plastic grips than came on the GSG. I had the GSG on the range a couple of days ago and I sent a quick 100 rounds downrange.
The GSG now shoots very slightly to the right, but I’m going to leave it alone until I try the next batch of ammo (I ran out of the Federal ammo you see above). The GSG is 100% reliable with high velocity .22 ammo; it experiences an occasional failure to fully cycle with standard velocity ammo.
I probably shouldn’t badmouth them because they seem to have the business model sewn up and are industry giants, but Partzilla sucks. I’ve ordered quite a few ZRX parts from them and several things they do annoy me. First, I get CT to order everything because it just works out better. Next, many parts you take the time to look up on their parts diagrams are not priced unless you go through the hassle of signing in to their website. Comparison shopping is difficult. The worst is when the page shows the part as available and in reality they don’t have it. This happened to me with the reed valve gaskets. The site said available (which is not the same thing as in stock) but I’ve been waiting about 3 weeks. CT emailed Partzilla about the situation and got a semi-snarky email in return. Is it better to lose a sale or lose a customer?
I get my Kawasaki parts from Southwest Suzuki Kawasaki in Alamogordo now. It’s actually faster than Partzilla and they give me a little discount if the part is outrageous (like those float needles). I go see Dave or Taylor at Southwest with part numbers I get off the Internet and the stuff is there within a week. Maybe the massive vertical integration of the ‘Zilla monster has reached an evolutionary dead end. I’m done with them, no matter that they’ve bought the first three pages of results on Google.
Rant over.
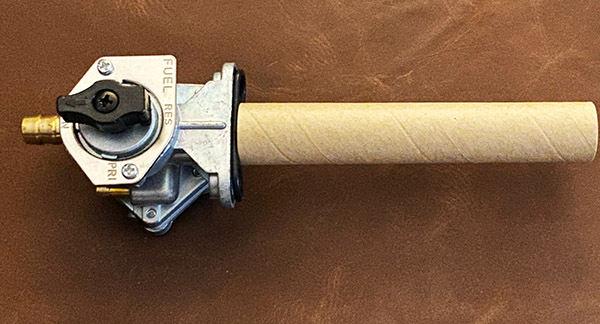
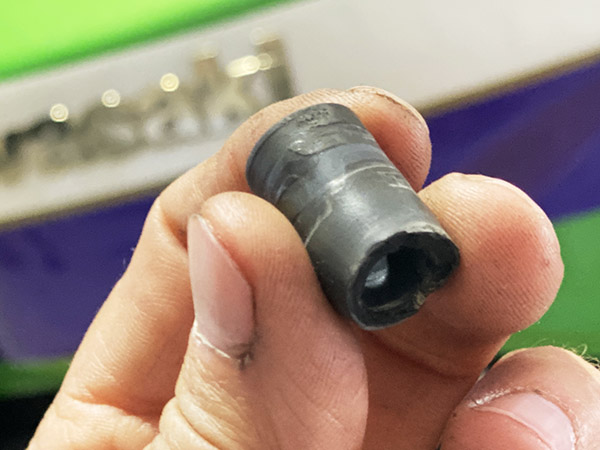
My Chinese petcock showed up and it looks exactly like the original Kawasaki petcock and fit perfectly. Unfortunately, when I tried to connect the old fuel line it had a pinhole leak right where the line expands from 5/16-inch to 3/8-inch. I don’t know why Kawasaki went with the oddball molded fuel line. A 5/16-inch line will provide plenty of fuel to the 1100cc Kawasaki engine.
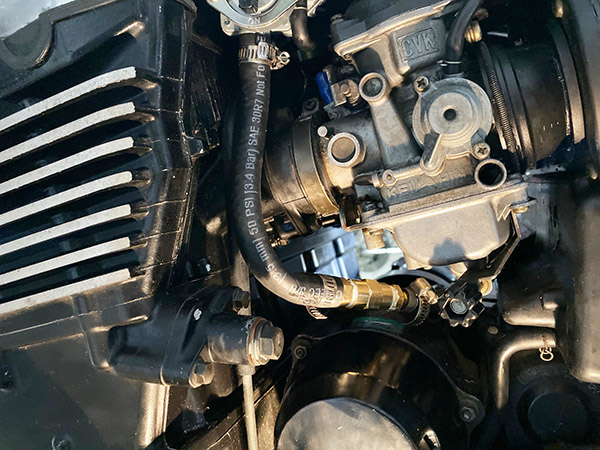
This is horrible but there are reasons why it is horrible. First, the OEM Kawasaki fuel line would need to be ordered and I don’t want to wait for it. Second, The original line connects to a plastic T-fitting between the No. 2 and No. 3 carburetors. Knowing my luck with old plastic fittings, I feared that replacing the hose entirely would lead to a broken T-fitting, which would mean pulling those damn carbs again. Then there’s the wait for a new T-fitting. I decided to let sleeping T-fittings lie and added a 3/8-inch to 5/16-inch hose barb adaptor complete with an ugly pipe connection between the two. Then I ran a new 3/8-inch line to the petcock. I mean to fix this mess later on but it works and doesn’t leak.
I gave up on getting the gaskets for the reed valves and made two block-off plates to seal the air intake to the exhaust ports. Then I spun up a little aluminum plug to seal the hole in the airbox where the reeds connected. I didn’t take photos of this part because I was in a hurry to hear the bike run.
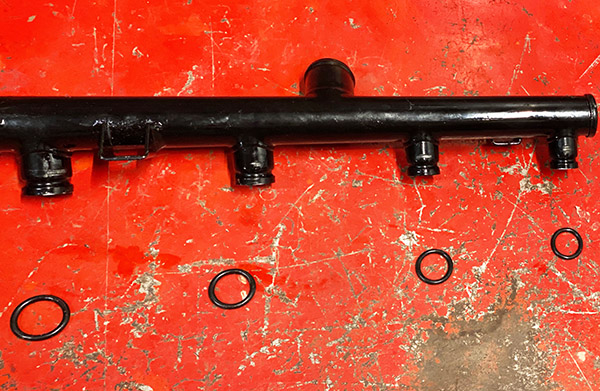
I installed the rest of the radiator plumbing and started to fill the Kawasaki radiator with coolant and found the slippery green stuff running out the bottom as fast as I put it in. The front log manifold was pissing coolant, which was odd because I had replaced the four O-rings with new Kawasaki parts. This log manifold is behind the header pipes and not easy to access. Off came the pipe and the O-rings looked like they were deformed a bit.
My mistake was lubing the O-rings on the pipe manifold. This made them too slippery and when the pipe was pushed into position the rings slid out of the pipe O-ring grooves. I gave the rings a through examination and decided to clean all traces of lube from the pipe and O-rings. I shoved the thing back together, reconnected the hoses and it leaked as much as it did last time.
I pulled the log manifold for the third time and cussing up a storm. I tossed the new Kawasaki O-rings and dug some Harbor Freight O-rings out of an assorted kit I bought years ago. I was so frustrated I managed to cross thread one of the bolts that hold the manifold onto the engine block. Back off comes the manifold. For the fourth time. Remember, I’m doing all this behind the header pipes and I can barely get my fingers between the pipes.
I managed to get a tap started into the cross-threaded hole and using the tip of a finger to hold the tap and needle nose pliers to turn it, I ran the tap into the hole and straightened out the cross-threaded bit. Amazingly, the hole holds tension and I got the manifold back in place and the hoses connected. The manifold didn’t leak.
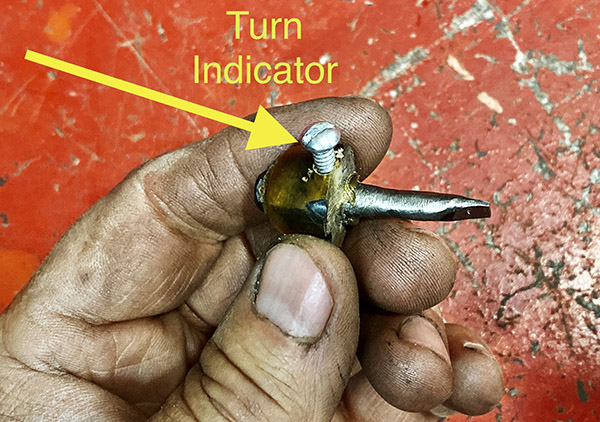
With the radiator full of coolant I started the bike. It smoked quite a bit but after a few minutes the smoke eased off. I had set the idle screws at 1-1/2 turns out but the bike seemed rich. The idle mixture screws are accessible with the carbs on the bike but you need a special, shorty screwdriver to turn them. I made one out of bits and pieces. Make sure you have some sort of identifier so you can count the turns by feel. I used a small screw as my tactile-pointer and reset the screws to 1 turn out.
I tossed the seat on the bike and went for celebratory tacos at the Alomar Diner in Tularosa. The bike ran fair if a little rich. After I ate the tacos the bike wouldn’t start. What with everything having been messed with in the preceding weeks I wasn’t sure where to begin. So I kept cranking. And Cranking. And cranking.
Then I started smelling gas so I held the throttle wide open and cranked some more. The bike started making sounds like it wanted to start. I kept cranking. The Kawasaki sputtered to life stinking of fuel. I rode the bike home and it was running rich. I calculated my fuel mileage as 36 miles to a gallon. The ZRX1100 fuel tank vent was whistling like a teapot on boil and gave a gush of pressure when I opened the gas cap. This led me to believe there was a problem with venting.
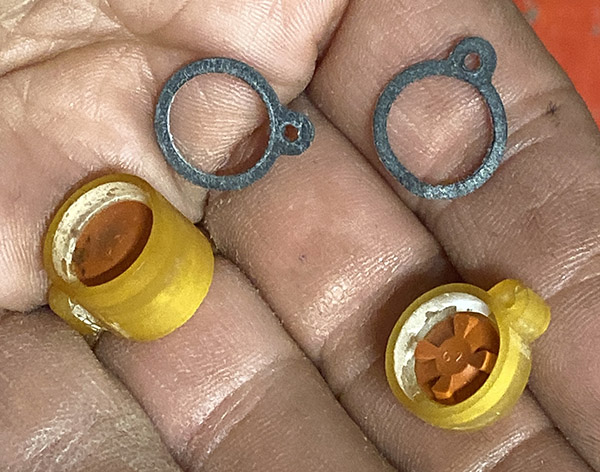
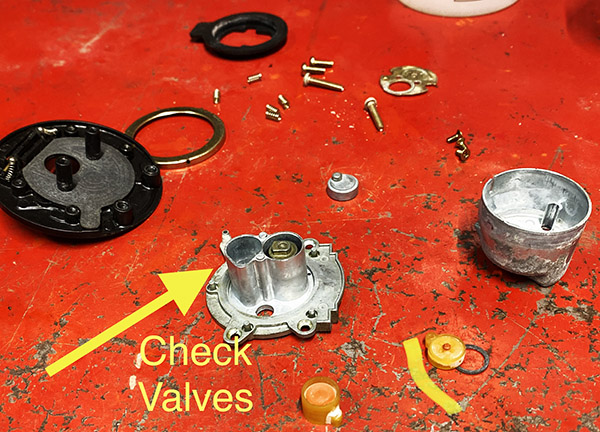
Inside the ZRX gas cap is some sort of check valve assembly. It consists of two little red rubber valves and I couldn’t figure out how tank pressure was supposed to vent out. The ZRX has a vacuum operated petcock and with only a little pressure the shutoff diaphragm can be overridden. It’s a fine line. Naturally, removing the source of the problem is easier than making it work as intended so I removed the check valves and the bike whistled no more.
The bike was running much better and if anything was now lean-ish off idle. I did a 200-mile test loop through the mountains and the old ZRX1100 returned 53 miles to a gallon.
The Rex is running pretty well right now. I hate to do it but I’m going to buy four more Kawasaki O-rings for that coolant manifold and try again. Even though they aren’t leaking I don’t trust the Harbor Freight O-rings for longevity. I’ll order a new OEM fuel hose and I might take a stab at installing it. I also want a new fan switch O-ring for the radiator. I’m also going to set the idle mixture screws to 1-1/4 turns to see if it helps the off-idle lean spot, The ZRX stumbles a bit off the start. Once all this is sorted, watch for a ride report on the ZRX1100 in a future ExNotes blog.