TJ’s Latest Custom Handguns

By Joe Berk

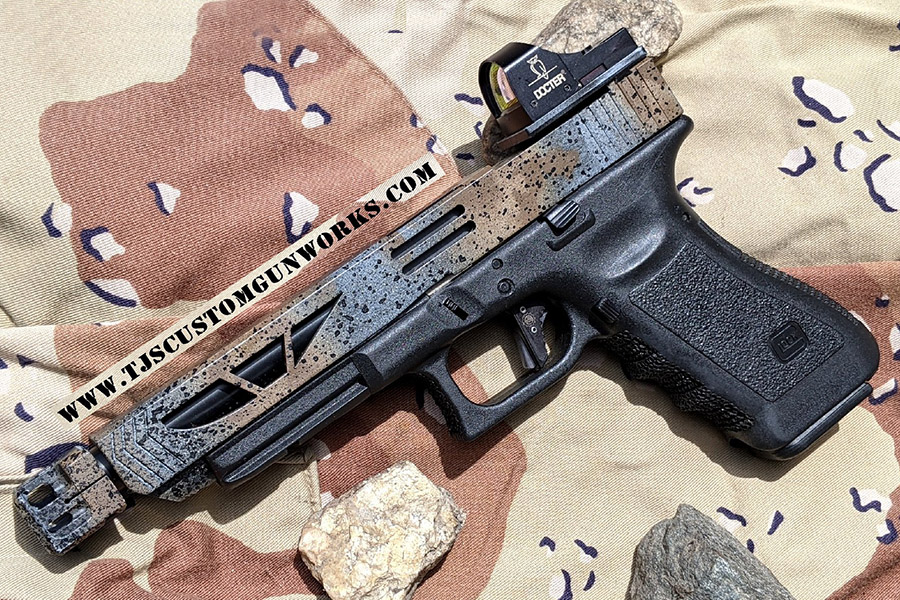
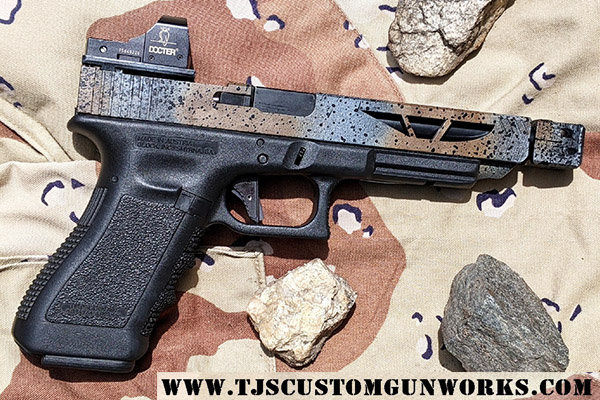
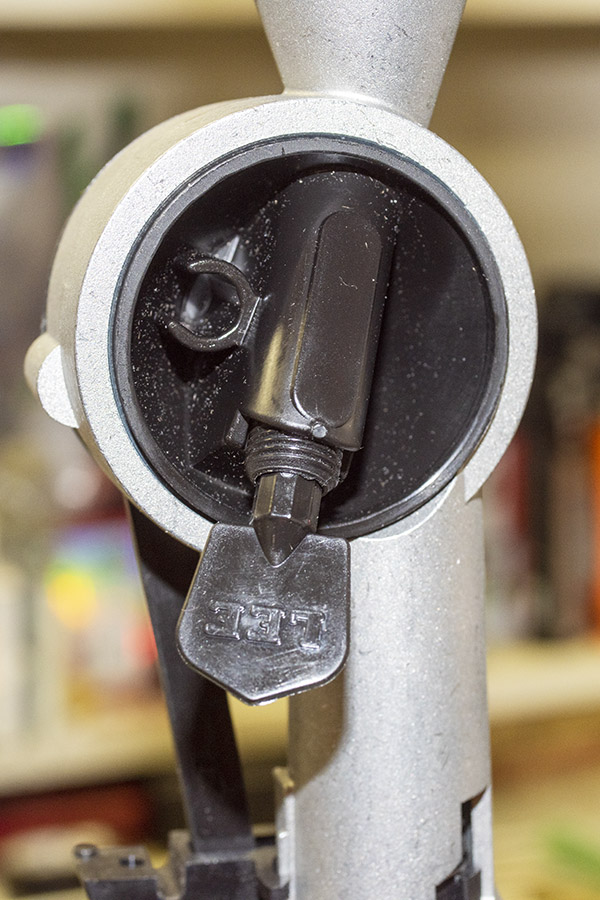
I had lunch with good buddy TJ (of TJ’s Custom Gunworks) recently and he showed me an LAR Grizzly .45 Winchester Magnum handgun he recently completed.  It’s wild.  It’s the one you see in the photo above and in the additional photos below.   Here’s TJ’s description:

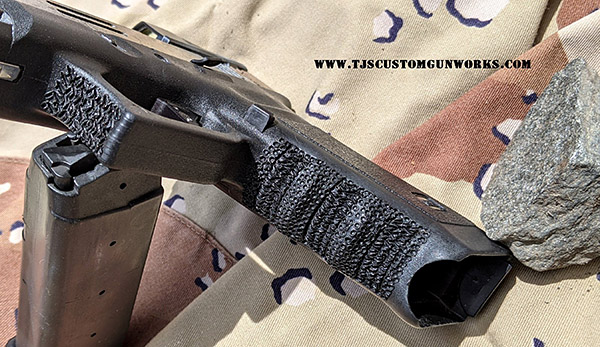
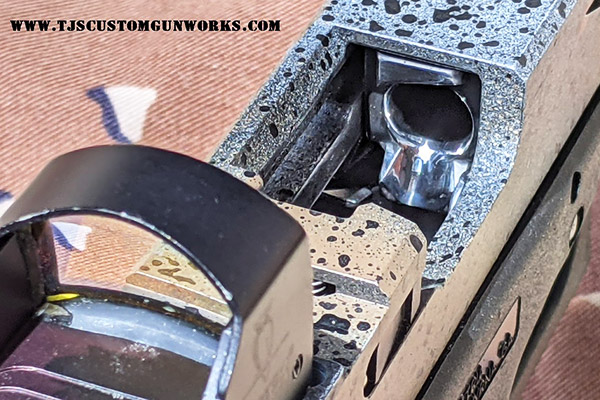
The Path of Bushido, a custom L.A.R. Grizzly .45 Winchester Magnum (it’s a supersized 1911). This handgun is Duracoated with Skulls of Death and Kanji characters depicting the seven Samurai virtues of the Bushido. This magnum features the typical 1911 match action, trigger, and reliability work, as well as barrel and bushing clearance reduction. The gun also has melted edges, a speckled Duracoat finish, a Bullet-guide rod, and Millett target sights with orange DayGlo on the front.

The photos can only begin to the do justice to this stunning handgun (trust me, I’ve seen it in person).  And that .45 Win Mag cartridge…think of it as the illegitimate offspring of the already-powerful .45 ACP cartridge (my favorite, by the way) and the .44 Magnum.  It’s a very impressive hand cannon.

One of the things I like best about TJ’s latest creation is the Millett sights.  In my opinion, there are none better.  I have these on both my Rock Island Compact 1911 and my bright stainless Colt 1911, and TJ is the pistolsmith who installed them on both guns.

If you were wondering about the Bushido emblems on the Grizzly, here’s an explanation:

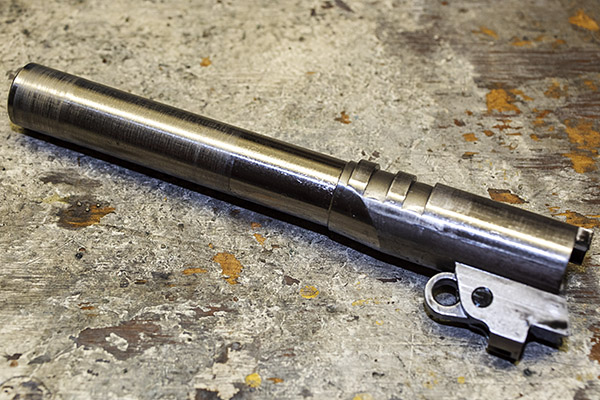
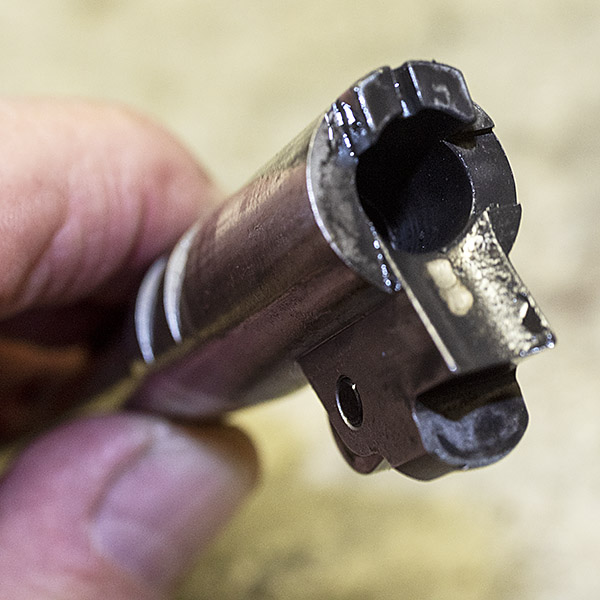
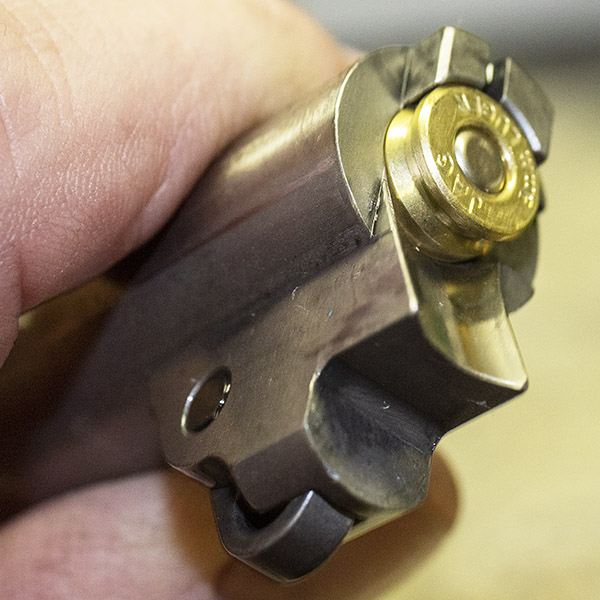
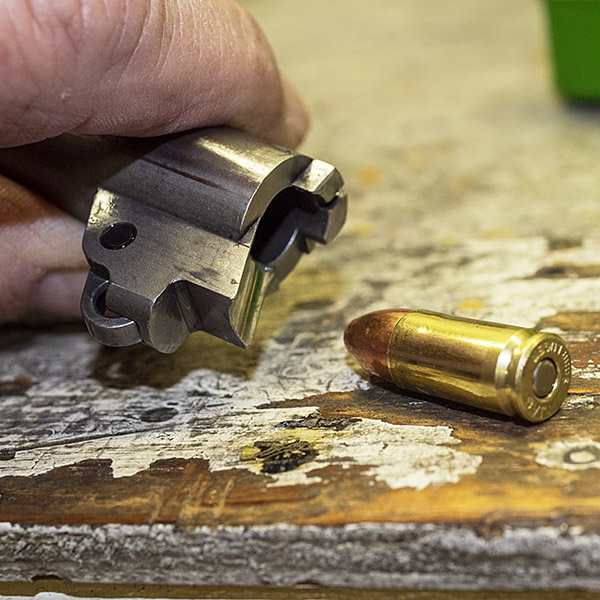
I asked TJ what the Grizzly looked like before he worked his magic, and TJ shared this photo with me:

At the end of our visit, I asked TJ what else he’s been up to lately.  Take a look.  These are magnificent.  This first one is a SIG P239 with black camo treatment, a jeweled hammer, a rounded trigger, and lots of internal smoothing and reliability enhancement.

This next one is compact Colt Agent 1911 with Tiger Duracoat and a matching a matching TJ’s knife.

This is another compact 1911 (a Colt Defender) with a camo surface treatment and all the internal reliability action work.  It’s not easy to get a compact 1911 to perform, but TJ sure did it on mine.  I’ve put thousands of rounds through my TJ-customized Rock Island Compact.  TJ took what was a relatively unreliable gun and turned it into a masterpiece.

Here’s a TJ-modded Ruger Match Champion revolver, with jeweled bits, recontoured trigger, and an action job.

One last photo…this is a SIG P220 grip in which TJ custom inlayed the US government insignia.  TJ does a lot of work for senior government folks here and abroad.  It’s cool stuff.

I’ve had six handguns and a rifle customized by TJ, and every one of them is a stellar example of his craftsmanship.  These include my Model 59, a bright stainless Colt 1911, my MacManus Colt 1911, the Rock Island Compact, a Model 60 Smith and Wesson snubbie, a Ruger Mini 14, and my new Colt Python.   In addition to my guns, folks who follow the ExNotes blog took my advice and had TJ work on their guns, like Marty with his custom Colt Combat Commander, Bob with his Beretta 92, and others who are not listed here.  You might have noticed that TJ advertises here on ExNotes.  If you want to reach the folks who follow the blog, you might consider doing so, too.   You can contact us at info@ExhaustNotes.us and you can reach TJ by clicking on the link below.


Lee Classic Turret Press Kit Part 2: The Lee Safety Powder Scale

By Joe Berk

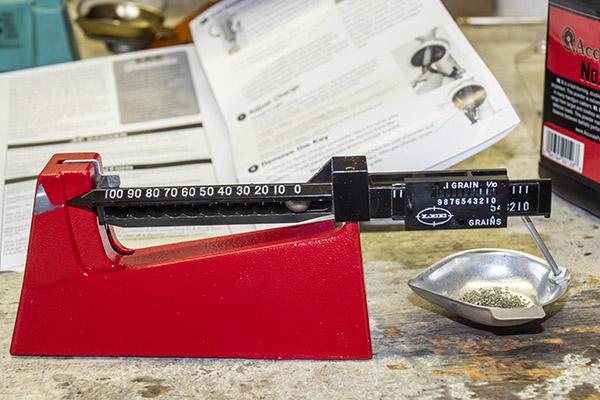
This is the next installment of our Lee Classic Turret Press Kit series, and this article focuses on Lee’s Safety Powder Scale.  It’s the scale you see in the above photo and in the photos that follow.  I haven’t assembled the turret press yet (that’s coming).  Before I get to that, I’m doing this blog on the Lee scale, and then others on the Lee reloading manual and the Lee bench plate.  These will be followed by blogs on the Lee turret press, the powder dispenser, the priming tool, and the 9mm dies I’ll use with this equipment.

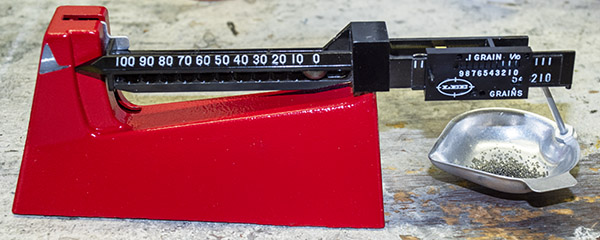
My new Lee Safety Powder Scale. I used a .223 caliber 62-grain Hornady full metal jacket bullet to check my zero and the scale’s accuracy.  Yep.  It’s good.
Packaging

The box you see below was inside the Classic Turret Press Kit, and the Turret Press Kit’s box was inside a bigger box.   It’s a box in a box (you know, Russian doll packaging, like I mentioned in the first blog on the Turret Press Kit). The Lee packaging is good.  Everything arrived undamaged.

The Lee Safety Powder Scale box. It’s well packaged.
What’s inside the Lee Safety Powder Scale box. You get the scale base, the balance beam, and the pan.
Lee Safety Scale Components

As mentioned in the photo above, there are three components in the Lee Safety Scale.  These are the scale base (that’s the cast red frame in the photo below), the beam (I call it a balance beam; it’s the black subassembly in the photo below), and the pan (that’s where the material to be weighed is placed).  The pan has an attached hook on it (it’s the bar extending up in the photo below) that hooks onto the right end of the beam.

The Lee base, balance beam, and pan.

The red base has a machined groove on the piece that extends up on the right side.  The beam is placed over this, and it balances on a knife edge in this groove. There are magnets in the base to dampen the beam’s movement as it balances.   The photo below shows the scale with everything in place.

The assembled Lee Safety Powder scale.  The left arrow points to the index mark (the beam should point to it when weighing), the bottom arrow points to the 10-grain poise (more on it below), the center top arrow points to the 10-grain increments and markings on the balance beam, and the right arrow points to the 1-grain/.01-grain poise.

The magnetic beam dampers in the scale base work.  When weighing powder charges with the Lee scale, the beam balanced in just a couple of oscillations.

The Lee balance beam is a molded phenolic subassembly with two poises.  “Poise” an engineering term for the movable weights that balance the beam.  It’s a term Lee uses in their documentation.

When I was Director of Engineering at Aerojet (we designed and manufactured munitions…big stuff, 2000-pound bombs, anti-armor munitions, and other things I can’t tell you about), we used plastic on as many parts as possible (rather than metal) because plastic was less expensive, it does not not corrode, it can be molded to exact dimensions, and moving parts are less likely to jam.  Lee makes some of these same points in their literature.  My point here is this: Don’t dismiss the Lee balance beam because it is a phenolic part.  From an engineering perspective, it is the right choice.  As Richard Lee (Lee Precision Products founder) stated in his excellent reloading manual, Modern Reloading:

Lee Safety Scale has a phenolic beam.  Like a glass thermometer, if it is not broken it is still accurate.

Incidentally, the next blog in this series will be on Lee’s Modern Reloading book.  I’m reading it now and it’s good.

The Lee pan is a one-piece subassembly that consists of an arm (the pan hangs from it on the right side of the beam) and the pan.  The pan can be a bit difficult to get under a powder dispenser because the arm gets in the way.   That’s not a big deal, and when I was weighing .357 Magnum charges with the Lee scale (so I could adjust my powder dispenser to drop the correct charge), it didn’t affect my ability to catch and weigh the powder.

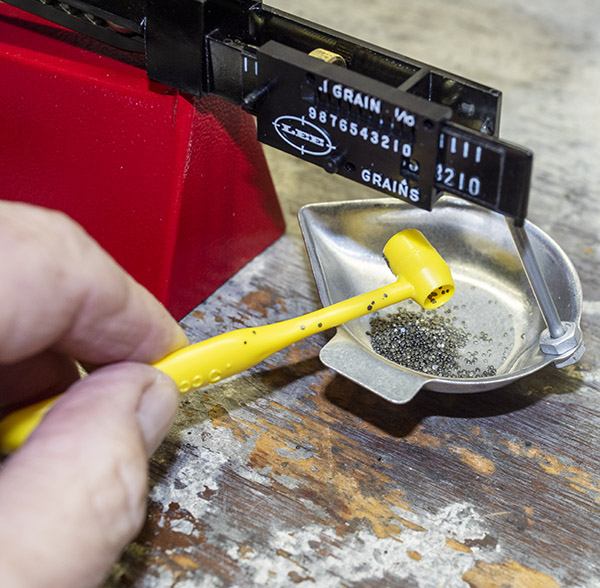
The arm on the Lee pan interfered with getting the pan directly underneath the powder dispenser, but it was a minor inconvenience.  That’s 8.0 grains of Unique you see above.
Measurement Range

The Lee scale can measure up to 110 grains.  That’s good news and bad news.  Most of us use powder scales for measuring powder, and if that’s your purpose, the Lee scale is the right tool.  The 110-grain measurement range gives superior sensitivity for detecting slight weight differences.  Other balance beam reloading scales can weigh up to 510 grains, but they do so with the same range of motion as the Lee scale, and that means they don’t provide the same sensitivity.

Sometimes we wish to weigh bullets (competitive bench rest shooters and cast bullet shooters might want to sort bullets by weight).  On the Lee scale, you can only weigh bullets that are 110 grains or less.  I’m what I would call a serious reloader, and in the last 50 years, I might have weighed bullets maybe a half dozen times.  I’m happy to lose the ability to weigh bullets in exhange for the increased sensitivity I’ll get when weighing powder charges with the Lee scale.  Your mileage may vary.

The bottom line is this:  For weighing powder, the Lee scale does a superior job within its measurement range, and that range is adequate for any thing I shoot (that includes .22 Hornet, .416 Rigby, .458 Win Mag, and many handgun and rifle cartridges in between).  For weighing bullets over 110 grains, you would be better served with scales offering a greater range than the Lee scale, but you give up accuracy with those scales.  Do you really need the increased weight range?  Most of us do not.

Zeroing the Scale

Like all scales, the Lee Safety Scale requires zeroing before use.  Lee incorporates a threaded brass  weight (in the form of a wheel) in the balance beam to move the beam up or down on its pivot in the base.

The Lee balance beam.  The black arrow on the right is used for zeroing the scale, which is explained below.  The red arrow points to the 10-grain poise.

The idea is you set the both poises to zero (see below).  To set the 10-grain poise to zero, you roll it all the way to the right, and it comes to rest on the zero marker.  The balance beam has ridges that will position the 10-grain poise ball bearing in 10-grain increments, starting at 0 and going up to 100 grains.  To set the 1-grain poise to zero, you slide it all the way to the right, and lock the poise in the zero position with a little locking button on the bottom of the poise.

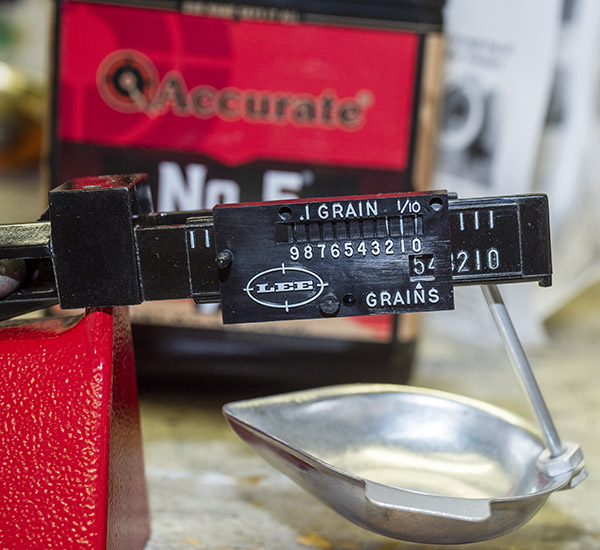
The 1-grain poise in the 0 position. The lower left red arrow points to the poise locking button (you push it in to lock the poise in place). The lower right arrow points to the 0 grains reading. The upper red arrow points to a protuberance that can be used as a little handle to move the poise. The “.1 grain” marking denotes the Vernier lines and windows used for reading tenths of a grain.

When the two poises are set to zero (as explained above), the brass wheel in the balance beam can be rotated to zero the scale.  As the brass wheel is rotated, it moves to either the left or right along its threaded shaft depending on which way the wheel is turned.  The idea is to turn the wheel until the balance beam is aligned with the index mark on the scale base as shown below.

The balance beam’s brass wheel. It’s used for zeroing the scale.
The lower black arrow points to the 10-grain poise. It’s a captured ball bearing that can be moved in 10-grain increments. In this photo, it’s in the 0 grains position. The right arrow points to the 1-grain poise.   The left black arrow points to the balance beam aligned with the base index mark.
Using the Lee Safety Scale

Using the scale after it has been zeroed when setting up a powder dispenser involves setting the desired powder charge with the 10-grain and 1-grain poises, and then adjusting the dispenser to provide an amount of powder that matches the scale adjustment.  It’s fairly straightforward, although using the 1-grain poise with its Vernier tenth-grain readings may be new to some people.

Or, you may have an item you wish to weigh.   Reading the scale is the same in either case.  It involves setting the 10-grain poise in the appropriate notch, and then moving the 1-grain poise to the appropriate place.

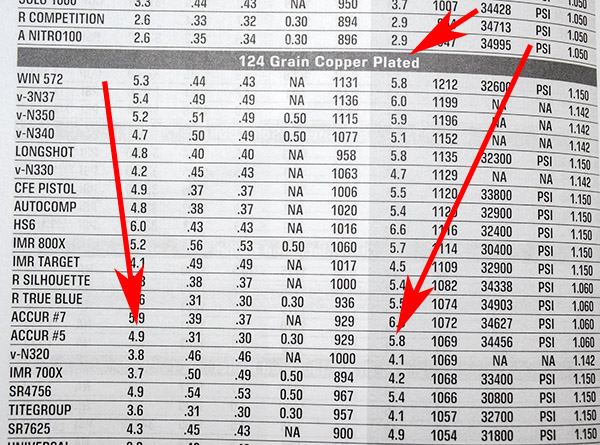
After I had zeroed the scale, I wanted to check its accuracy.  I weighed a .224-inch diameter, 62-grain Hornady jacketed boattail bullet to do this.  I put the bullet in the pan, moved the 10-grain poise to the 60-grain position, and then moved the 1-grain poise laterally along the balance beam until the beam was aligned with the base index mark.

A 62-grain Hornady bullet in the Lee scale pan.
The balance beam is balanced, with the pointed aligned to the base index marrk. The 10-grain poise is in the 60-grain notch.

Using the 1-grain poise is a bit tricky.  In the photo below you can see that the poise shows 2 grains in the lower window.  The Vernier windows on top of the 1-grain poise show that the 0 and .9 grain windows are aligned with visible lines, and a window is just a bit aligned with the .1 grain windows above and below the 0 and 9 windows.   Like I said, interpreting the Vernier approach is a bit complicated, but the Lee instructions contain several photos explaining how to do it.  What you see below for this measurement is interpreted to mean that the weight in tenths of a grain around the 2 grains in the lower window is somewhere between 1.9, 2.0, and 2.1 grains, and I interpolated that as 0.0 grains away from 2.0 grains.   Stated differently, the measured bullet weight is 62.0 grains, which is exactly what it is supposed to be.

The Lee 1-grain poise.  This sliding weight (or poise) is used for reading grains and tenths of a grain. Grains are read in the window denoted by the right arrow. Tenths of a grain are interpolated with a Vernier-based set of lines and windows denoted by the left arrow.

As a check, I also measured the bullet’s weight with the RCBS scale I’ve been using for the last 50 years, and it returned the same weight:  62.0 grains.

Cost

Lee did their usual outstanding job here:  The Lee Safety Scale price is significantly lower than the competition.  The Lee scale lists for $46.98 on the Lee website (interestingly, they also list factory second scales for $31.32).   You can also purchase the Lee scale from Amazon and other retail outlets, and Lee tells you on their website that their retailers typically have lower prices than Lee advertises.

The nearest competitor to the Lee scale is the RCBS M500 mechanical scale, and that lists for $125.99 on the RCBS website.  From a cost perspective, Lee is the clear winner here.

Documentation

The Lee scale includes a single-sheet, two-page instruction sheet.  It’s good, and it provides all the information you need to set up and use the Lee scale.  As mentioned above, the Lee instructions include information on using the Vernier feature on the 1-grain poise.

The Bottom Line

The Lee Safety Scale is accurate, inexpensive (less than half the cost of competitor products), and well built.  Reading the Vernier scale to get tenths of a grain takes a little bit of study and practice, but once you get it, you’ll find it quick and easy to use.  This is a good scale, it will serve any reloader well, and it should last a lifetime (and then some).


Help us out!  Please click on the popup ads!  And check out what else is available from Lee Precision.

Never miss an ExNotes blog:

Read our blogs on unveiling the Lee Classic Turret Kit and the Lee Deluxe 4-die sets:

The Wayback Machine: Eleanor II

By Joe Berk

You’ll recall a recent blog where I waxed eloquent about Eleanor, my Ruger RSM .416 Rigby rifle.   In that blog, I talked about reduced loads using 350-grain cast Montana bullets and 5744 and Trail Boss propellant.  It was fun…the Trail Boss loads had milder recoil and “good enough” (but not stellar) accuracy.  Take a look at these 50-yard targets:

The above target on the left was with 30.0 grains of Trail Boss; the one on the right was with 34.0 grains of Trail Boss.  I could feel a tiny bit more recoil with the 34.0-grain load, but both were light loads with modest recoil.   Weirdly, the point of impact shifted sharply to the right with the lighter load, but it moved back to the center with the 34.0-grain load (and it was slightly higher).  The Trail Boss loads shot okay, but they weren’t running in the same league as the load I had shot the prior week with 5744 propellant and the same Montana Bullet Works 350-grain bullet, as you can see from the 50-yard targets below.

I could see what I was getting with the Trail Boss and I could see that it wasn’t grouping nearly as well as the 5744 loads at 50 yards, so that stopped my testing with Trail Boss (that, and the fact that I had used up all my Trail Boss cartridges).

I was curious:  How would Eleanor do at 100 yards?  I still had some of the 5744 loads left, so I posted a couple of 100-yard targets and let Eleanor have her way.  I first fired a 3-shot group and after looking through my spotting scope, I was surprised to see how well they grouped.

I thought maybe that target was a random success, and I didn’t want to ruin it by throwing more shots at it.  So I fired another 3-shot group at the second target, and then another three at that same target.  That’s the one you see below.

Before all you keyboard commandos start telling me that these results are nothing special, allow me to point out that these are 100-yard groups using  open sights on an elephant rifle.   I’m calling it good to go.  Like I said earlier, when the elephants become an invasive species here in So Cal, I’m ready.   The load is 45.0 grains of 5744 (it’s the load the Lyman Cast Bullet Handbook specified as the accuracy load, and they were right), the 350-grain Montana Bullet Works .416 bullet sized to .417 and crimped in the cannelure, Hornady brass, and a CCI-200 primer.  I didn’t weigh each charge; I just adjusted my RCBS powder dispenser and cranked them out.  If you were wondering, I use Lyman dies for this cartridge.

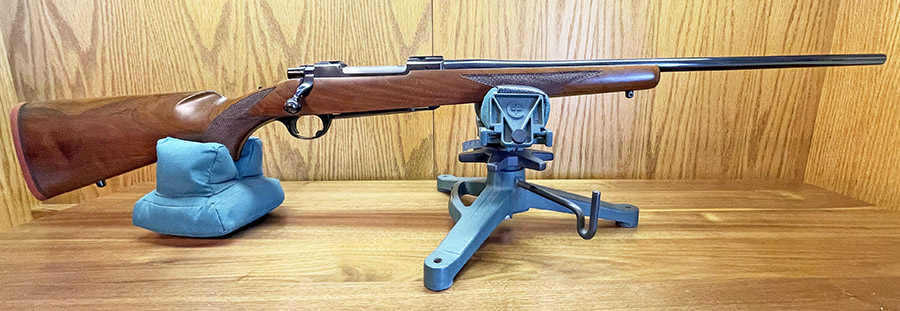
A bit more about Eleanor:  The rifle is a Ruger 77 that the good folks from New Hampshire call an Express or RSM model (I think RSM stood for Ruger Safari Magnum).  They made them in 375 H&H, 416 Rigby, and 458 Lott (kind of a magnum .458 Magnum).  Ruger also made a similar one in a few of the standard calibers (7mm Mag, 30 06, and 300 Win Mag, and maybe one or two others).  These rifles were a bit pricey when Ruger sold them in the late 1990s/early 2000s, but evidently not pricey enough.  They were too expensive to manufacture, so Ruger stopped making them.  When you see these rifles come up for sale today (which doesn’t happen very often), they command a premium.  I wish I had bought one in 30 06 when they were first offered; to me, that would be the perfect rifle.

The rear sight on a Ruger RSM rifle is of the African “Express” style.  The elevation adjustment consists of a fixed and two flip-up blades, and they all have a very shallow V.  I guess the idea of that shallow V is that it lets you see more in case an elephant is charging.  The sight has two flip up blades behind the fixed blade; as range increases, you flip up the second blade, and if it is an even longer shot, you go for the third blade.  I got lucky, for me, the fixed rear sight blade is perfect with this load.  I made a minor adjustment for windage, and the elevation is spot on with a 6:00 hold at both 50 yards and 100 yards.

Incidentally, that rib the rear sight sits on?  It’s not a separate piece.  It and the barrel were turned and milled from one solid piece of steel.  It’s one of the reasons these rifles were too expensive to manufacture.

The front sight is the typical brass bead (you can sort of see it in the featured photo at the top of this blog), which I usually don’t like, but with these results I can’t complain.  I’ve shot better groups with two or three other open sight rifles using jacketed bullets at 100 yards; this is the best any cast bullet has ever done for me.


Popups:  Click on them to keep us going!

Want to see the first installment of the Eleanor story?  It’s right here.

Check out our other guns and reloading articles here.

Tough to get to a gunstore to buy targets?  Range fees for targets too high? Do what I do and order them online.  They’re delivered right to your door and they’re less expensive, too.

Need a calipers for measuring your group size?  This is a great place to find great calipers at a great price.

Want to check out Montana Bullets?   Here’s a link to their website.  Tell them Joe sent you.  Trust me on this:  These are best cast bullets I’ve ever used.


Never miss an ExNotes blog! Subscribe for free!

Lee Classic Turret Press Kit 1: Unpacking

By Joe Berk

We’re writing a series of blogs on the Lee Precision Classic Turret Press Kit, and this first one focuses on unpacking and taking an initial look at the kit. I think the YouTube kids call this a “reveal.”  I’ll just call it unboxing and seeing what’s in the box.  I thought I could do a single blog on the Classic Turret Press Kit, but there’s too much included in the kit and too much that’s new to me to handle in one blog.  We’re going to instead do a series of blogs:  One on each item that’s included with the kit, a blog on setting the press and dies up, a blog on reloading with the Lee equipment, and a blog on how the ammo reloaded with the Classic Turret Press Kit performs.   There’s a lot here.  You’ll get a feel for just how much in this initial blog on the Classic Turret Press Kit.

Here’s the picture on Lee’s website for the kit, which Lee advertises for $380.

The photo above shows everything set up, but the photo doesn’t do justice to the excitement associated with getting this kit, taking everything out of the box, and opening it.  Nor does it convey what I expect to be the satisfaction I’ll experience with using the Lee equipment.  That will be the subject of future blogs.  Think of this first blog as Christmas morning. That’s what opening and unpacking the Lee kit felt like to me.

ExNotes blog readers will recall that good buddy Jose left a comment on one of our Lee Deluxe 4-die set blogs.   Jose told us about his Lee turret press.  He wrote a guest blog or two for us here on ExNotes and he is a Ruger No. 1 aficionado, which means he stands tall with me.  After reading Jose’s comments, I had to check out the Lee Classic Turret Press Kit myself, and after poking around on Lee’s site a bit and seeing what the Lee kit included, I knew I wanted one.  I specifically wanted to set it up for 9mm using Lee’s Deluxe 4-die set.  I’ve been using older 9mm dies from various die makers, and my reloads would sometimes jam.  With my old dies, the crimps were inconsistent, and I knew from my experience with Lee’s .357 and .44 Magnum Deluxe dies I wouldn’t have that problem with Lee equipment.  I have the Lee Deluxe handgun die sets in 38 Special/357 Magnum, 44 Special/44 Magnum, .45 Colt, and .30 Carbine, and the ammo I reload with those dies is exceptional (better than anything I loaded with other manufacturers’ dies).  I use Lee dies for several rifle cartridges, and I have more than a few other bits of Lee equipment.  I’ve been pleased with all of it.

Lee advertises that their Classic Turret Press Kit includes everything needed to start making ammo, except for the dies and, of course, the components (brass, powder, primers, and bullets).   I have plenty of components, and the thought of wringing out the Lee gear, writing about it, and testing the ammo in a couple of my favorite 9mm handguns checked all the boxes for me.  This will be a fun project and I want to share the excitement with you.

I placed my order with Lee for the Classic Turret Press Kit, the Bench Plate Kit (something I saw on their website that appealed to me), and the 9mm dies.  It all arrived a few days later, well packed in a single box.  I was impressed with how fast it arrived (it shipped during the holiday season) and the packaging.  The Lee folks have done this before; it’s first class customer service.

This is the right time of year to open a box full of goodies and examine the contents.  I was a kid on Christmas morning.  This was fun!

When I opened the outer container, I saw my 9mm Deluxe 4-die set and the Lee bench plate.

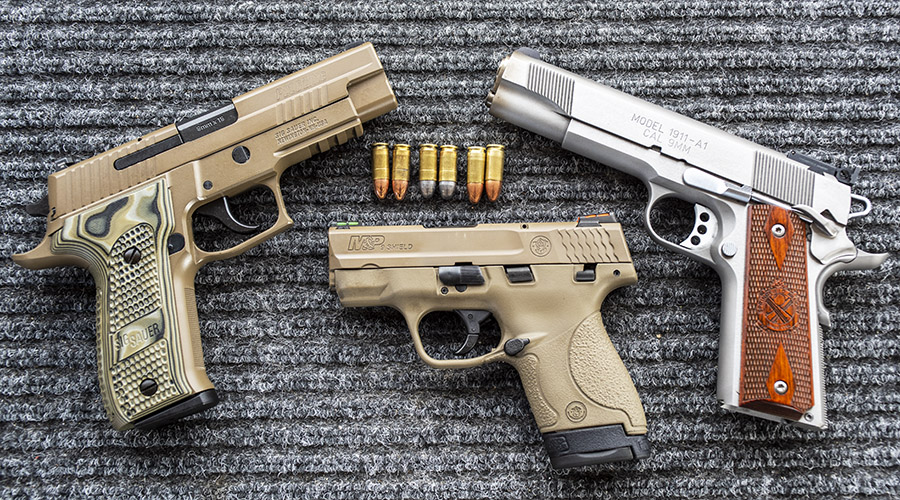
As I mentioned above, I’m a firm believer in Lee’s Deluxe dies.  I can’t wait to put these to work making 9mm ammunition for my SIG P226 Scorpion and Springfield Armory 1911.

The idea behind the Lee Bench Plate is that it’s a quick detach/attach mount for a Lee press. It’s not included with the Classic Turret Press Kit (it’s priced at $39 on Lee’s website), but I like the idea of being able to quickly remove the press from my reloading bench.  You’ll get a complete report on setting up and using the Bench Plate in a future ExNotes blog.

After unpacking the 9mm dies and the bench plate, I pulled out the Lee Classic Turret Press Kit.  This was like one of those Russian dolls.  I was peeling the onion and enjoying it.

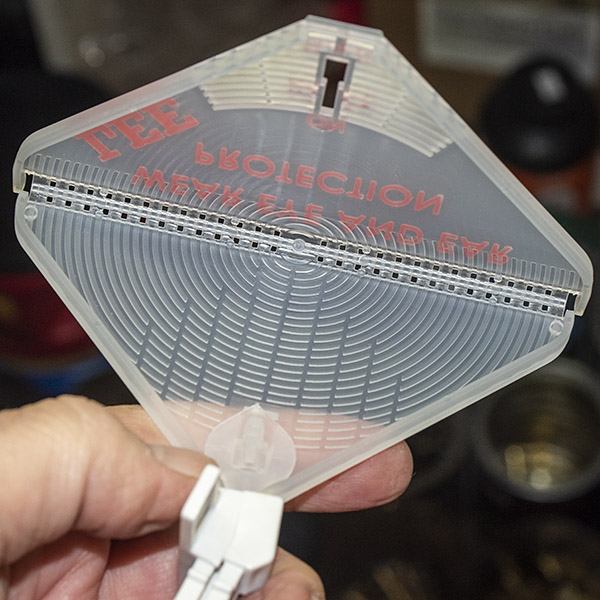
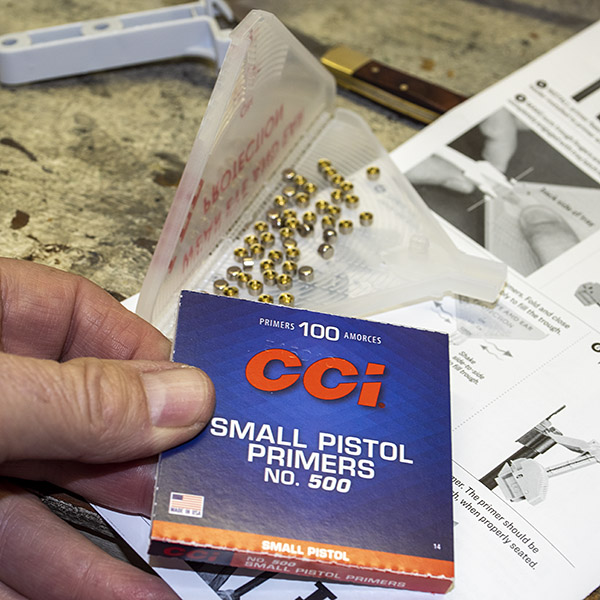
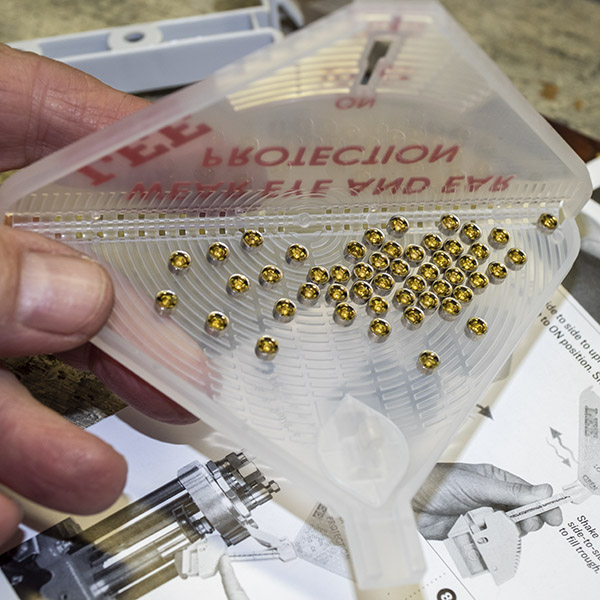
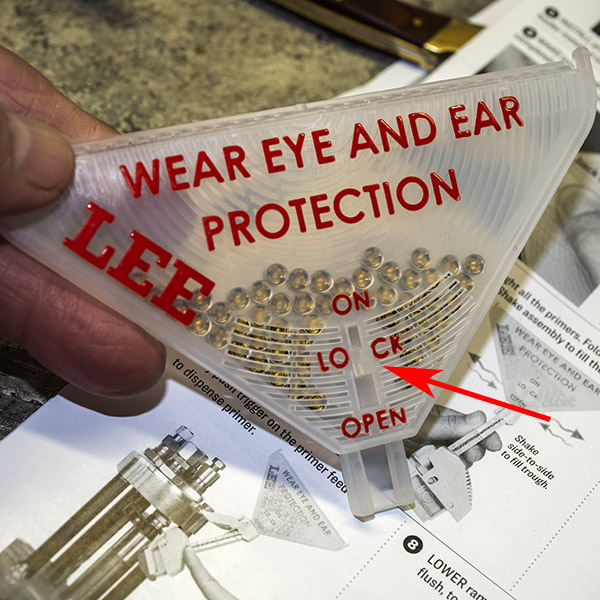
When I opened the Lee Classic Turret Press Kit, I found the Lee Safety Primer Feed, a tube of Lee Resizing Lube, and the Lee Case Conditioning Kit.

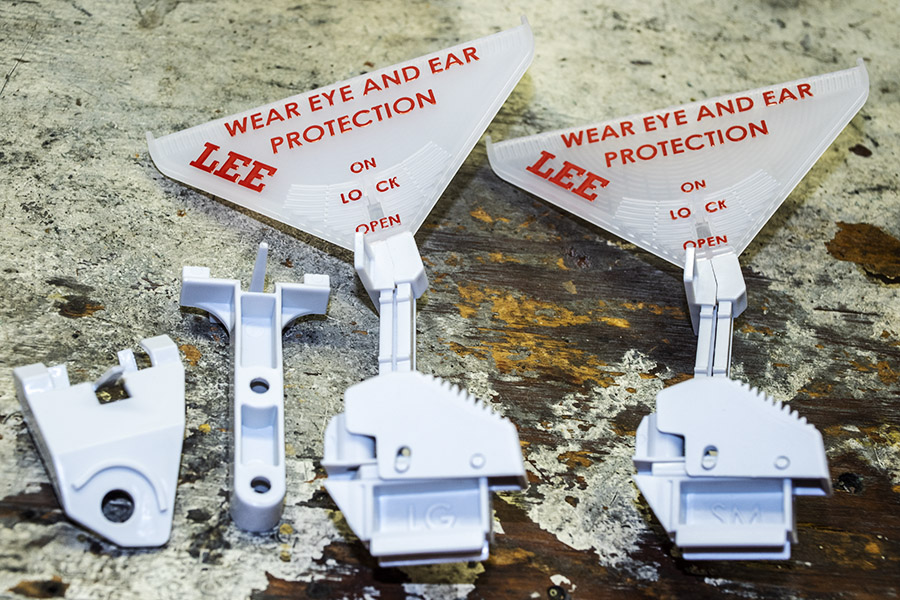
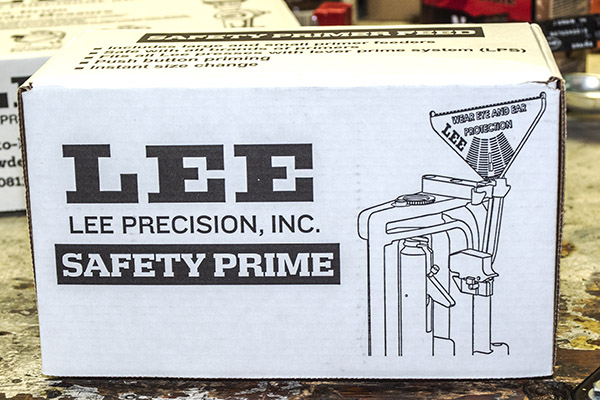
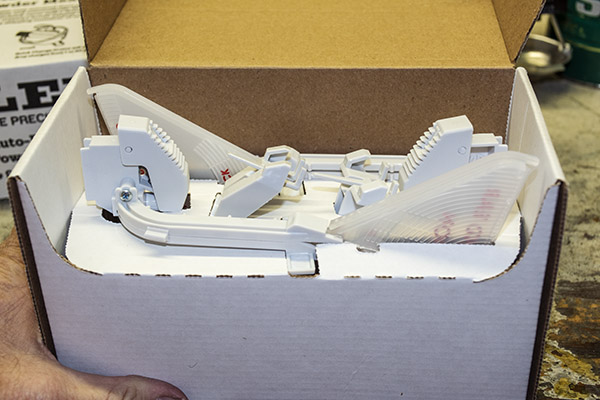
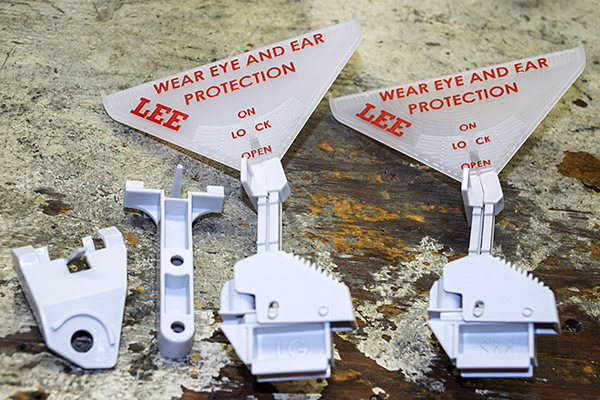
The Lee Safety Primer Feed (shown in the two photos below) is a device I have not used before.  I’ll explain how it works in a future blog.  I have three other Lee priming devices and I’ve been using them for decades with no problems.  The Lee Safety Primer Feed sells for $30.

Lee includes their Case Conditioning Kit (see the photo below) with the Classic Turret Press Kit.  The Case Conditioning Kit consists of a primer pocket cleaner, a case cutter and locking stud, and a chamfer to bevel the case mouth after it has been trimmed.  I have not used these tools from Lee before; it will be interesting to see how they perform.  I have other equipment that performs these tasks, but I had to buy those items separately.  With the Lee Classic Turret Press Kit, it’s all included. The Case Conditioning Kit lists for $12.98 on the Lee site.

I won’t need the Lee Resizing Lube shown below because my new Lee 9mm dies include a carbide resizer (which negates the need for case lubrication).  Not having to lube the cases is a good thing.  On rifle cases, though, lube is necessary, so I’ll put the lube to good use on those.   The price for Lee’s Resizing Lube is $5.98.

The Lee Classic Turret Press Kit includes Lee’s Modern Reloading manual (a sizeable book, comparable to the manuals from Hornady, Speer, Sierra, and other reloading component companies), and a Hodgdon reloading pamphlet.  I’m looking forward to reviewing the Lee manual.  I’ve been reloading a long time, but I still learn something new every time I pick up a reloading manual.  If you were to buy the Lee Modern Reloading manual separately, it sells for $40.98.  Lee also includes the Hodgdon Data Manual with the Classic Turret Press Kit.  I’ve seen the pamphlets from Hodgdon before; I’ll take a look at this one and share my impressions in a subsequent blog.

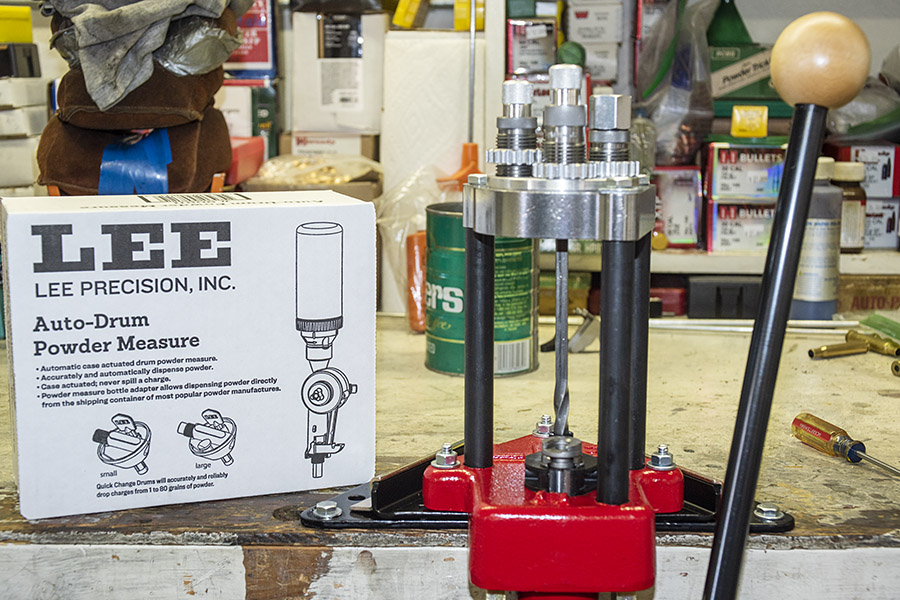
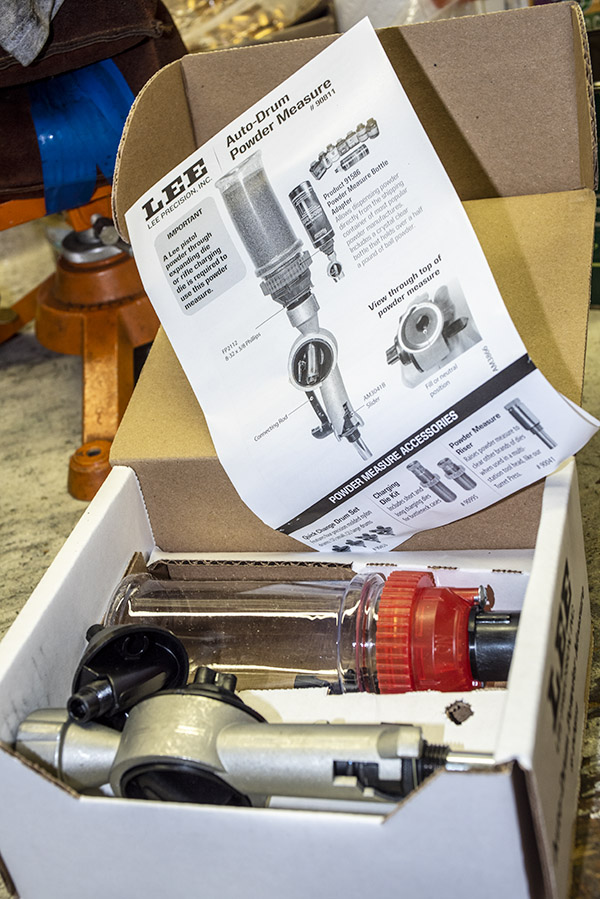
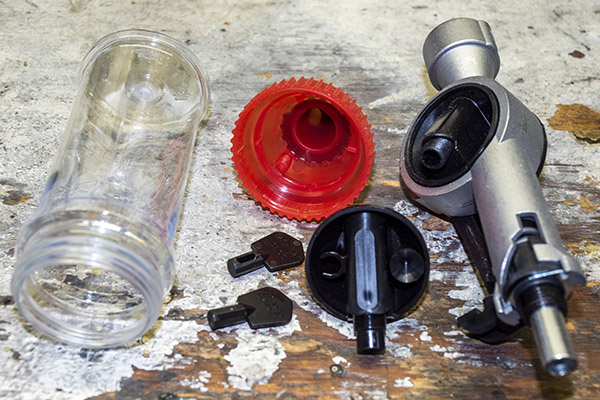
Next out of the box was Lee’s Auto-Drum Powder Measure.  I’ve used an older Lee version of this device.  I’m not familiar with how the new one works, but I’m looking forward to finding out.  The Auto-Drum Powder Measure is infinitely adjustable.  That’s a good thing.  The older version used a charging plate with discrete increments; infinite adjustment is a much better way to go.  The Auto-Drum Powder Measure automatically charges the case with with each stroke of the press.  If purchased separately, the Auto-Drum Powder Measure sells for $55.00.

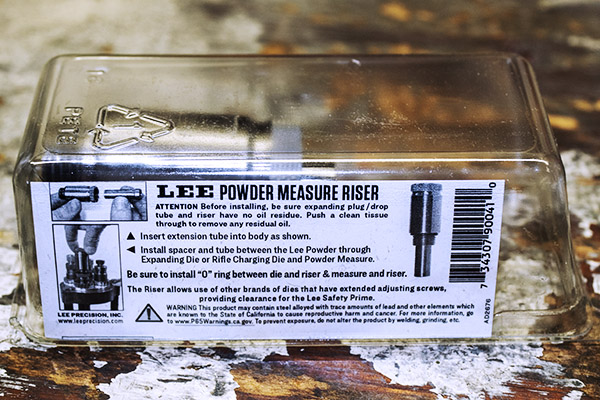
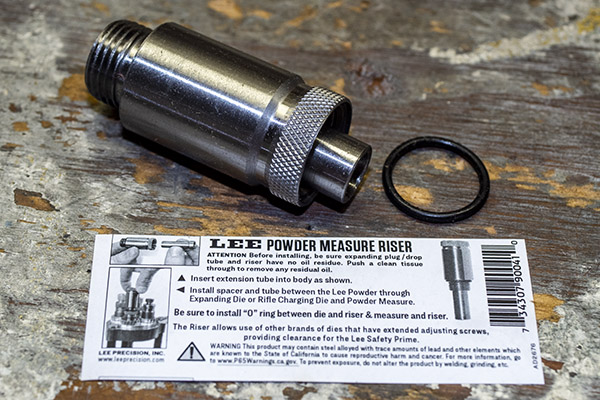
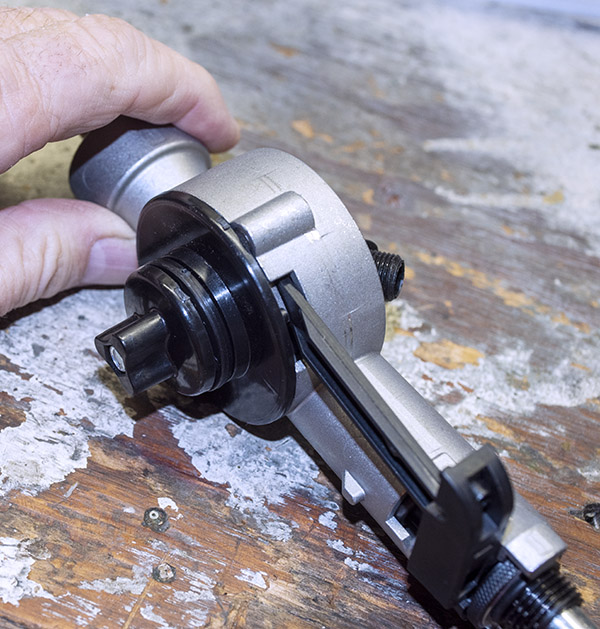
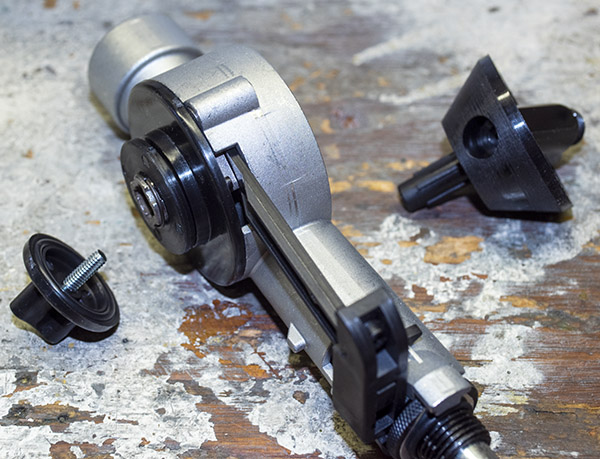
Lee includes a Powder Measure Riser in the Classic Turret Press Kit (see the photo below).  This is used with the Auto-Drum Powder Measure to position the powder dispenser above the priming mechanism (it allows adequate clearance).   The Powder Measure Riser sells for $9.98 on the Lee site.

There’s a balance beam scale (the Lee Safety Powder Scale) in the Classic Turret Kit.   This is a standard reloading scale.  The Safety Powder Scale is $46.98 on the Lee site.  You might wonder:  Why use a simple mechanical scale when there are digital scales and digital powder dispensers?  The reasons are simplicity, reliability, and cost.  I have friends that use digital scales, and they report inaccuracies induced by nearby metal objects (have any of those on your reloading bench?), slow operation, and of course, much greater expense.  For me a simple balance beam scale works best; it’s what I’ve been using for 50 years.   The Lee Safety Powder Scale is new to me, and I’ll report how it works.

At this point, I had one more box to open, and it contained the Classic Turret Press.  Lee lists the Classic Turret Press at $220.  Like everything else in the Lee Classic Turret Press Kit, the Classic Turret Press was well packaged.

The Classic Turret Press is massive.   It’s beefy, it’s heavy, and it looks to be well built. What you see below is the press, along with the operating handle, a spent primer catch tube (a nice touch), the four position turret head, and the hardware required to assemble it.

So there you have it:  The Lee Classic Turret Press Kit.  You might have noticed that I listed the cost for each item above separately, along with a link to the appropriate Lee page.  I thought it would be interesting to sum the prices and compare the total to Lee’s Classic Turret Press Kit price:

At Lee’s price of $380 for the Classic Turret Press Kit, it’s a good deal compared to buying the items separately.  But Lee goes a step further.  They recognize that retailers often sell the individual items and the Classic Turret Press Kit at lower prices, and Lee states on their site that you can find lower prices by visiting a Lee retailer.  One of the best places to find lower prices is Amazon.  I encourage you to explore Lee’s website, and to take a look at Lee gear on Amazon.

This project is going to be fun, folks.  Keep an eye on the ExhaustNotes blog as we put the Lee Classic Turret Press Kit through its paces.


Like what you see here? Don’t forget to help us by clicking on the popup ads!


There are many more shooting and reloading stories on Tales of the Gun.  Hope on over and take a look.


In the spirit of complete disclosure:  Lee liked our blogs on the .357 Magnum and .44 Magnum Deluxe 4-die sets and they asked us to similarly review the Classic Turret Press Kit.  Lee provided the kit to us at no charge.  But rest assured: That won’t color our judgment or what we report.  You will get the complete story, warts and all.

The White Sands Missile Range

I first visited White Sands Missile Range in the mid-1970s when I was in the Army stationed at Fort Bliss, Texas.  I visited two places that day 50 years ago:  The White Sands Missile Range, and White Sands National Park.  I did the same most recently (i.e., hitting both spots on the same day) with Joe Gresh and Susie.  We recently posted about White Sands National Park.  Today, the focus is on the WSMR Missile Park, a display of military equipment just inside the White Sands Missile Range main gate.

WSMR is a place with history.   It doesn’t go back that far…it was created in July 1945, right at the end of World War II, when we grabbed all those Nazis for our space program (the Russians were doing the same). A lot of them were sent to White Sands, along with a hundred German V2 rockets.  We cut our space program teeth on them, launching two thirds of our V2 stash and studying the rest before we started building and testing American versions.  Our first atomic bomb was tested on the northern edge of White Sands Missile Range.  When I was based at nearby Fort Bliss to the south, we heard stories about missiles launched from White Sands that went a bit wide of their mark and landed in Mexico (as in Old Mexico, not New Mexico).  Like I said, there’s a lot of history here.

It used to be that you could just drive onto White Sands Missile Range and visit the missile park.  In those days, they had a German V2 on display along with perhaps a dozen or so other US missiles.  But that was then, and thanks to Osama Bin Laden, this is now.  Now, you have to park outside the main gate, show ID to the minders, fill out a form saying you’re not evil, and get permission to walk onto the base.  From the main gate, it’s maybe a couple hundred yards to get to the missile park.  The indoor stuff (including that old V2) was locked up when we visited, so all we could see was the stuff on display outside.  But that was good enough, at least until the skies opened up and the rains came down.

The photo ops were fantastic…military missiles, gun systems, and aircraft against the bright blue New Mexico sky, with a bit of cloud cover to soften the shadows.  We had a blast.  Figuratively speaking, of course.

Joe Gresh, asking what would happen if he pushed that button.
The Fat Man (I am referring to the atomic bomb).  Gresh has been dieting, and doing pretty well at it.
The mulitple launch rocket system, or MLRS.
There are all kinds of cool missiles on display here. It’s free, too.  We used to build plastic models of these things when I was a kid.
A US Navy 5-inch gun. Gresh climbed inside the turret when it started to rain.
A Nike Hercules anti-aircraft missile, successor to the Nike Ajax. The Nike Hercules could carry a nuke. Although designed as an anti-aircraft weapon, the nuclear-armed Hercules could be used against ground as well as airborne targets. Don’t ask me how I know.
When it started to rain, Susie and I jumped beneath the wing of an F-4 Phantom.

We only stayed about an hour at the White Sands Missile Range, our visit shortened by the rain and the fact that the indoor displays were closed.  But that’s okay.  We’ll hit this place again on the next visit to New Mexico.


Keep us going!  Here’s why you should click on those popup ads!


Become a paid ExNotes writer!


Never miss an ExNotes blog:
Part 3: Lee’s .44 Fab Four Conclusions

This is our third and final blog on the Lee .44 Magnum Deluxe 4-die set.  We posted an initial blog on the four dies and their components, and then a second blog on how to setup each die in the reloading press.  This last blog on the .44 Magnum Deluxe 4-die set shows how my reloaded ammo performed and wraps up my thoughts on the Lee 4-die set’s advantages.


Keep us afloat:  Click on those popup ads!


Here’s the bottom line:  The Lee Deluxe 4-die set is easy to set up, it makes accurate ammo, and it positively prevents bullet pull under recoil.  Lee’s locking, crimping, and decapping pin retention approaches are superior and the Lee dies cost less.  It’s a better product at a lower price.

That said, let’s take a look at the specifics.

.44 Magnum ammo loaded with Lee’s Deluxe 4-die set.  It’s good looking, consistent, and accurate ammo.

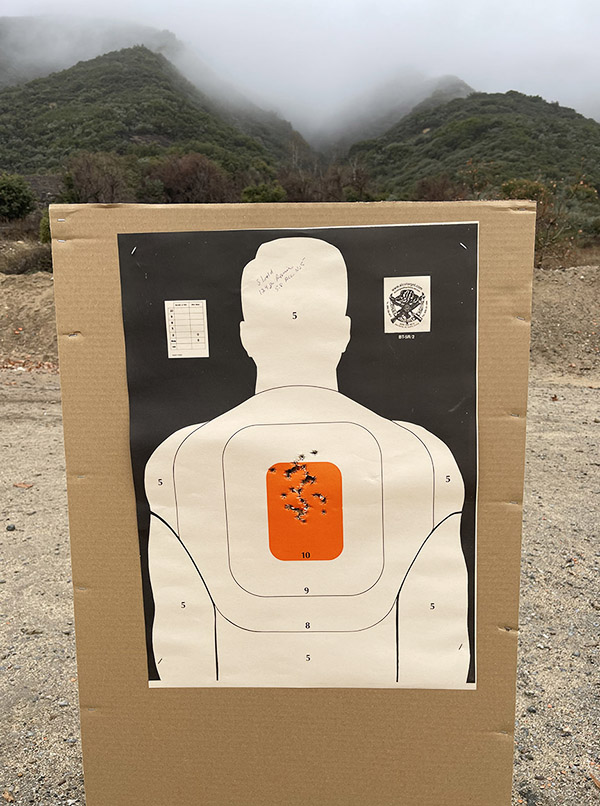
I used my Turnbull Ruger Super Blackhawk for this test series.  It’s the gun you see in the big photo at the top of this blog.  I fired 5-shot groups at 50 feet from a bench, using a two-hand hold and resting my hands on the bench.  No other part of the revolver was supported and I did not use a machine rest.  I held at 6:00 on the orange bullseye.

Superb Accuracy

This, to me  (and I imagine to most reloaders) is the most crucial aspect in evaluating any reloading equipment, and in my experience, Lee’s Deluxe 4-die set provides superior accuracy.  I was more than pleased with the results.  The targets below speak for themselves.  My preferred .44 Magnum load of 6.0 grains of Bullseye with a 240-grain cast semiwadcutter bullet, reloaded with Lee’s Deluxed 4-dies set worked well.  It was accurate, and barrel leading and recoil were minimal.  I know you can load hotter .44 Magnum loads.  Read that sentence again, and put the accent on you.  A 240-grain projectile at just under 1000 feet per second (which is what my load provides) works fine for me.

A one-hole, 5-shot group brought to you by Lee’s Deluxe 4-die set.
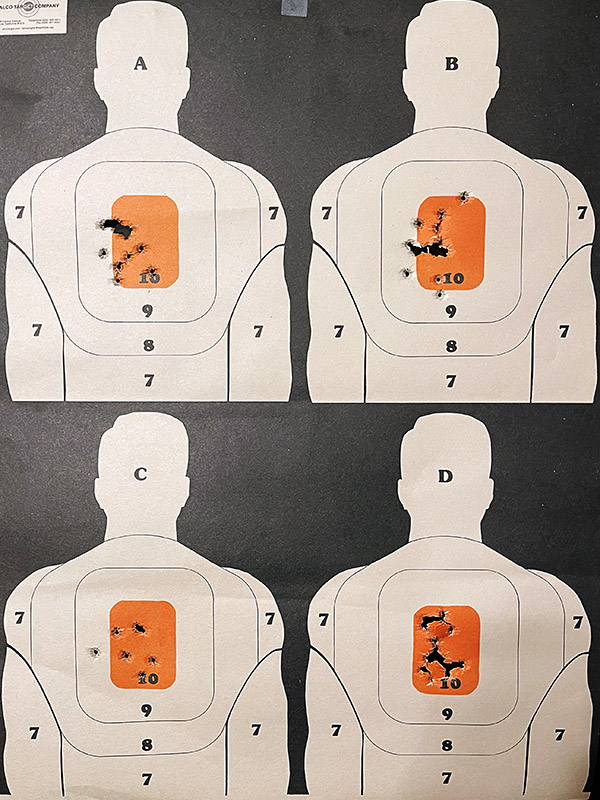
Typical .44 Magnum groups at 50 feet with ammo loaded on Lee’s Deluxe 4-die set.
Modest barrel leading after 50 rounds of .44 Magnum ammo with cast bullets.

Groups that tore one ragged hole were typical.   That speaks highly of the Lee die set’s ability to produce consistent ammo.

Consistent Crimping

The Lee factory crimp die is just a better approach than any other die maker’s.  It gives a better crimp, it assures cartridge chambering, and I believe it maintains better bullet alignment in the case.  Yeah, you can crimp in a separate step with the bullet seating die, but then you wouldn’t have the carbide straightening and alignment features you get in the Lee factory crimp die.  It’s a better approach that better aligns the bullet in the case and guarantees reliable chambering.

A beautiful and consistent crimp.

Simply put, with the Lee factory crimp die there is no bullet movement under recoil.   None of the cartridges in this test series experienced bullet pull under recoil.  The Lee crimp die does a great job in locking the bullets in place.  In similar testing using a Lee Deluxe 4-die set in .357 Magnum, I found that regular crimping (i.e., not using the Lee factory crimp die) allowed bullet pull, but crimping with the Lee factory crimp die did not.  This .44 Magnum reloaded ammo performed similarly.

Easy Die Adjustability

The Lee dies are easy to adjust and they stay in adjustment.  I like Lee’s incorporation of orings for holding the locknut in place and for locking the die position in the press.

Lee uses orings extensively for lockrings and other adjustments. The approach works.

When I first encountered Lee’s oring approach 40+ years ago, I thought it was a bit sketchy, but I’ve come around.  I believe this is better than using a standard locknut, even when the locknut uses a set screw to lock it in place on the die body.   The Lee approach is easier to use.  You can remove the die and preserve the adjustment without damaging the die body threads.  I’ve never had a Lee die go out of adjustment, and to my surprise, none of the orings on any of my Lee dies ever deteriorated or otherwise failed (and some of my Lee dies are more than 30 years old).  Even if an oring did fail, based on my prior experience with Lee Precision I’m pretty sure if I (or you) called Lee, they’d ship a replacement for free.

Free Shellholder

As mentioned previously in one of the blogs in this series, I like the fact that a Lee die set includes the shell holder.

Lee provides a free shellholder with their dies. It’s the right thing to do.

With most (maybe all) other die manufacturers, you have to buy the shellholder separately.  That’s an inconvenience and an added expense.  I like Lee’s approach better.

Better Decapping Pin Retention

I like Lee’s approach for securing the sizing die decapping pin better than the approach used by the other guys.

The Lee decapping pin retention approach is a superior engineeirng design.

With other manufacturers’ dies, if something obstructs the decapping pin, it’s easy to bend or break the decapping pin.  When that happens, a reloading session is over until a new pin is installed.  With Lee’s approach, an obstruction just backs the decapping pin out of the locking collet, and if that occurs, it only takes a minute to fix.

Lower Cost

Lee dies are less expensive than other dies.  Simply put, you get more bang for your buck with Lee dies.

The Bottom Line

As I said above, the .44 Magnum Lee Deluxe 4-die set is easy to set up, it makes accurate ammo, and it positively prevents bullet pull under recoil.  Lee’s locking, crimping, and decapping pin retention approaches are superior and the Lee dies cost less.  It’s a better product at a lower price.


Here are links to our earlier blogs on Lee dies:

Lee’s Deluxe .357 Magnum 4-die set.
Part I: Lee’s Deluxe .44 Magnum 4-die set.
Part II:  Lee’s Deluxe .44 Magnum 4-die set.


Like our shooting and reloading articles?  There are a lot more here!


Never miss an ExNotes blog.  Get a free subscription here:


Keep us afloat:  Click on those popup ads!


For more info on Lee Precision reloading equipment, click on the image below:

The Pima Air and Space Museum Nose Art

We recently blogged about a visit to the Pima Air and Space Museum.  This  blog returns to that Tucson attraction with a feature on aircraft nose art.

Aircraft nose art goes back to at least 1913, when the Italians painted a sea monster on a flying boat.  The aircraft nose art concept continued in World War I and really emerged as a folk art form in World War II.  On US World War II aircraft this occurred primarily in the Army Air Corps (the Air Force was not yet a separate service).  Nose art emerged again during the Vietnam War and continued in the Gulf wars.  Today, even some commercial jetliners have it (most notably Southwest Air).

The Pima Air and Space Museum contains numerous nose art examples, a few of which I photographed during our recent visit.  One aircraft with interesting and colorful nose is a B-24 that started life as a US aircraft and was later flown by the Indian Air Force.  It’s the photo you see at the top of this blog.

An Indian Air Force B-24 Liberator. The B-24s were built by Ford. By the end of World War II, we were building them at a rate of one per hour.
A closer look at the Indian B-24 aircraft’s nose art.
The opposite side of the Indian B-24.

This nose art on a B-29 shows a map of North America.

A Boeing B-29 Bomber.
The other side of the B-29.

Political correctness today precludes pinup nose art, but it was prevalent in earlier times.

A Bell P39 Airacobra.
A Lockheed S3B Viking. The Navy, for the most part, did not allow nose art during World War II.  They later changed their WWII stance.
A Douglas A20G with an unusual bit of nose art.

Nose art often featured animals.   Here’s a interesting take on a Curtiss P-40 and an A-10 Warthog.

A Curtiss P-40 sporting an Arizona rattlesnake.
A Fairchild A-10 Warthog trainer with a warthog painted on its nose.

Gaping shark’s mouths with threatening teeth have adorned many combat aircraft including fighters, observation aircraft, electronic warfare aircraft, and helicopters.

A Grumman OV-1 Mohawk.
A Republic F-105G Wild Weasel.
A Grumman F-14 Tomcat.
A Bell UH-1 Huey.

Here’s an interesting special ops helicopter with unusual nose art.  Star Wars, as interpreted by a special ops team.

A Bell OH-58 Kiowa Special Ops helicopter with a Hans Solo nose art treatment.

We’ll have another blog or three on the Pima Air and Space Museum.  There’s just too much to fit into a single blog, so please stay tuned.


Please keep clicking on the popup ads.  We get paid every time you do!


Never miss an ExNotes blog!

Part 2: Lee’s Fab Four for the .44

This is the second blog in our series of three articles on the Lee Deluxe 4-die set.  The first blog focused on the dies and their components; this blog focuses on how to set up the dies in a press.

1. Shellholder

As a first step, I inserted the shell holder (No. 11 in Lee’s numbering system) into the press ram.  It’s a no brainer, but I wanted to mention that Lee includes the shellholder with their dies, which is a nice touch.

The Lee shellholder in the press ram.

2. Resizing

I then raised the reloading press ram, and threaded in the sizing die in until it made contact with the shell holder.  After the bottom of the sizing die contacted the shell holder, I lowered the press a bit, turned the die into the press a bit more, and tested it by raising the ram again.  I wanted to feel just a bit of pushback on the ram.

The shellholder (lower arrow) in intimate contact with thre sizing die (upper arrow).

Once I felt resistance in the ram lever with the ram fully raised, I screwed the sizing die’s locking ring all the way down to the press head.

Screwing down the sizing die locking ring.

Once that adjustment was made, I don’t have to adjust the sizing die again for future reloading sessions.  I can unscrew it by grabbing the locking ring and unscrewing it from the press head.  The locking ring’s oring prevents the locking ring from inadvertently moving on the die body.  All I need to do is screw the sizing die into the press.

The sizing die locking ring screwed all the way down to the press head.

At this point, I proceeded to size 50 cases.  I inserted each into the shell holder and raised the ram fully.  This both knocked out the old primer and resized each case.

Sizing .44 Magnum cases and punching out the spent primers.
An ejected, spent primer.
.44 Magnum case with primer removed.

3.  Expanding

After completing the resizing operation, I unscrewed the sizing die from the press and partially screwed in the expander die (just a couple of turns at this point).  I placed a resized cartridge case in the shell holder and raised the ram fully.

The Lee expander die in the reloading press.

I then continued to screw in the expander die until I felt the cartridge case touching the expander die.  I then lowered the ram slightly and screwed the expander die a little further into the press, raising the ram and then lowering it again.  I repeated this in minor increments to get the desired amount of flare on the case mouth.   I knew I only needed a little bit, just enough to allow a bullet to start in the case mouth.  When I do this part of the expander die installation, I check for adequate case mouth flare by taking a bullet and checking to see if it can start in the case mouth.

I used Missouri Bullet Company 240-grain cast bullets for these reloads.
The 240-grain Missouri bullets.

I don’t put too much flare on the case mouth.  All that’s necessary is enough to allow the bullet to start into the case mouth.

The case on the left has not had the case mount expanded; the case on the right has had the case mouth expanded. Only a small flare is necessary.

Once the bullet could start to enter the case mouth, I knew I had enough flare.  At that point, I raised the ram with the case in the shellholder.  The case is now in intimate contact with the expander, preventing any expander die rotation.  I then threaded the locking ring all the way down on the expander die, locking it in place in the press.

Screwing down the locking ring after the expander die has been adjusted.
The expander die lock ring locked in position.

Once I had locked the expander die in place, I proceeded to run all 50 cartridge cases through it.

50 Starline cases that have been run through the expander die. I usually reload handgun cases in multiples of 50.

After completing that operation, I grabbed the expander die by its locking collar and unscrewed it.   It, too (like the sizing die) now had the locking ring in the right place, and it would not require adjustment for future reloading sessions (for .44 Magnum ammo; if I wanted to load .44 Special ammo, the shorter .44 Special cases would require making the adjustment described above again).

4.  Priming

At this point, I seated primers in all 50 cases.  I use an older Lee priming tool that is no longer available from Lee.  My Lee priming tool is close to 50 years old, which says a lot about the quality and durability of Lee reloading equipment.  I’m not going to spend too much time today talking about seating the primers, as this blog is focused on the Lee Deluxe 4-die set.  I may do a future blog on the latest Lee priming equipment.

My old Lee priming tool. It still does a great job.

5. Charging

After priming, I charged the cases with propellant.  My load is 6.0 grains of Bullseye powder with a 240-grain Missouri Bullet Company semiwadcutter bullet.   You won’t find that load in modern reloading manuals.  I have a library of old reloading manuals; this one is from an earlier Lyman cast bullet handbook.

An oldie but still a goodie. I use Bullseye powder for several different handgun loads.
An older Lyman Cast Bullet Handbook with a great load for the .44 Magnum.
6.0 grains of Bullseye with a 240-grain cast bullet works well in the .44 Magnum.
50 Starline cases primed and charged with Bullseye propellant.

6.  Bullet Seating

I next seated the bullets using the bullet seating die.  The bullet seating die can also be used to crimp the bullet in place, but I don’t crimp with this die.  To prevent the bullet seating die’s internal crimping ring from crimping the bullet, I screwed the bullet seater nearly all the way into the bullet seating die (I wanted the bullet seater to reach the bullet before the die’s crimping feature reaches the case mouth).  I then adjusted the bullet seating depth by screwing the die body deeper into the press.

A .44 Magnum cartridge about to have its bullet seated to the correct depth. The upper arrow points to the bullet seater adjustment; the lower arrow points to the locking ring.

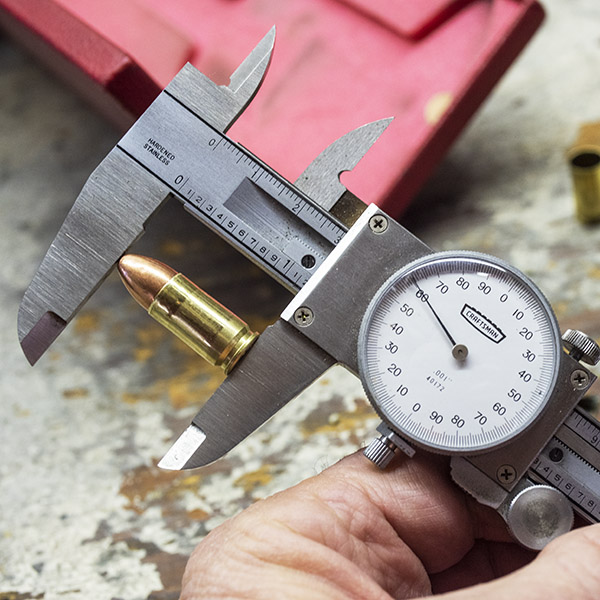
I adjusted the die deeper into the press until the bullet was seated to its crimping groove.  This resulted in an overall cartridge length of 1.600 inches.

Having a good calipers helps reloading enormously.
The 240-grain bullet seated at an overall cartridge length of 1.600 inches, but not yet crimped in place.

After I had achieved the desired bullet seating depth, with the ram raised and a cartridge with a seated bullet in the shell holder, I screwed down the die’s lock ring to lock the die in place.  I then seated the bullets in all 50 cartridges.

7. Crimping

The last die is the crimping die.  Here’s what it looks like.

The Lee Factory Crimp Die. This is a stellar bit of reloading equipment.

To install and adjust the crimping die, I raised the ram without a cartridge in the shellholder.  I then screwed the die fully into the press head until the bottom of the crimping die firmly contacted the shellholder.  At that point, I backed the crimp adjuster nearly fully  out (until I knew it would not contact the cartridge case).  I needed to do this step without a cartridge in the press because if I tried to do it with a cartridge in the press, I might have overcrimped the bullet in the case before I had the crimp adjustment correct.

The shellholder in intimate contact with the bottom of the Lee factory crimp die.
The factory crimp die locking ring, fully screwed down on the die body.

I lowered the ram, installed a cartridge that had not been crimped into the shellholder, and raised the ram fully.   I lowered the crimp adjuster until it contacted the cartridge case (I could feel when it did do by increased resistance on the crimp adjuster as I screwed it into the die body).

The crimp adjuster.

I then withdrew the ram slighly and turned the crimp adjuster in a little bit more.  I backed off the ram and examined the crimp.  I repeated this process (backing off the ram, screwing the crimp adjuster in a bit more, and examining the crimp) until I was satisfied with the crimp.

A crimped .44 Magnum cartridge. The Lee factory crimp die does a great job.

Once I was satisfied with crimp, I crimped all 50 cartridges.

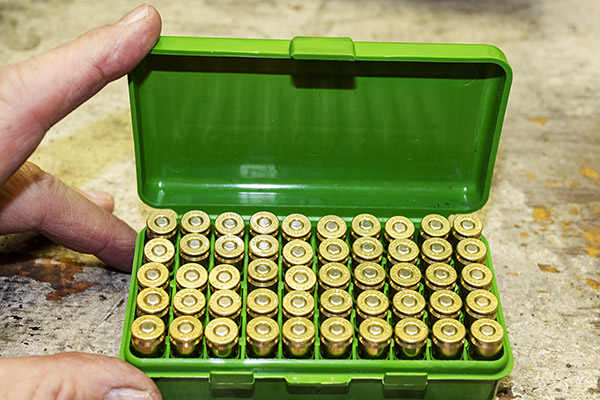
50 reloaded .44 Magnum cartridges.
Reloaded ammo in the cartridge box.

The last step for me was to label my newly reloaded box of .44 Magnum ammunition.

Labeling is critical. If I don’t do this immediately after loading the ammo, I might forget what the recipe was.

I had my 50 rounds of reloaded .44 Magnum ammo; the next step was a trip to the range to see how it shot.   That blog will post in about a week.  A spoiler alert…this ammo performed magnificently.  Stay tuned, and you’ll see.


Keep hitting those popup ads!  You’ve been helping us enormously and we appreciate it!


Never miss an ExNotes blog!


For more info on Lee Precision reloading equipment, click on the image below:

Part 1: Lee’s Fab Four for the .44

A month or so ago I wrote a blog about Lee’s .357 Magnum Deluxe 4-die set.  I liked those dies so much I picked up a Lee 4-die set in .44 Magnum.  I am similarly pleased with this latest set of dies.  There’s too much info to fit into one blog post, so I’m presenting it in three blogs:

      • This first blog is about the four different dies, what each does, and the parts in each die.  Lee’s engineering is superior, and this blog showcases it.
      • A second blog will focus on installing each die in my loading press, and how to adjust the dies to make world class .44 Magnum ammunition.  Watch for this blog within the week.
      • A third (and concluding) blog reveals how ammunition loaded with the Lee dies performed.  The ammo was stellar and I’m a believer.  Lee’s Deluxe 4-die set is a magnificent product and it makes magnificent ammunition.  But don’t take my word for it.  You’ll see it in the groups I shot.  The accuracy blog will post in about two weeks.

So, here we go.  When I reload, I start with fired ammo brass cartridge cases, like you see below.

Fired .44 Magnum ammo brass cases, loaded into the vibratory cleaner.  The vibratory cleaner polishes the brass cartridge cases.   This makes the cases look good, but more importantly, it prevents them from slipping rearward against the cylinder walls when the reloaded ammo is fired.

And when I finish, this is what I have…newly reloaded ammunition as good as or better than factory ammo, at a fraction of the cost of factory ammo.  That “as good as or better than factory ammo” descriptor is misleading.  My ammo is better.

A box of reloaded .44 Magnum ammo, custom tailored to my requirements, and capable of superior accuracy.

As most of you know, a gun chambered in .44 Magnum can also shoot .44 Special ammo (just like a .357 Magnum can shoot .38 Special).  .44 Magnum dies can be used for reloading .44 Special ammo.

The label for each Lee die set is a printed instruction and load data sheet. The boxes are indexed and they stack nicely.

Lee dies come in a hard plastic case with a clear cover.  The cover is removed by inserting a flat blade screwdriver on either side.

The plastic cover needs a little coaxing with a flat blade screwdriver to open. The cover includes a recess for screwdriver insertion.

The Lee label unfolds to reveal directions on using the dies along with a bunch of other information, including several suggested loads.  Over the last five decades, I’ve found a few .44 Magnum loads I like, and in particular, I have a favorite load I shoot in the Ruger Super Blackhawk.   I will share more of that with you in the next blog in this series.

The Lee instruction sheet includes load data and other information.

Lee’s Deluxe 4-die set consists of four dies, a shellholder, and a powder cup:

      • A carbide sizing die.
      • An expander die.
      • A bullet seating die.
      • A factory crimp die.

Here’s what the die set looks like after you remove the cover.

The Lee .44 Magnum/.44 Special Deluxe 4-die set. From left to right, it’s the factory crimp die, the expander die, the yellow powder cup, the shellholder, the bullet seating die, and the sizer die.

1. Sizing Die

The sizing die is a sizing and decapping die.  When this die is installed in the reloading press and a fired brass case is inserted into it by raising the press ram, two things occur:

      • The cartridge case is resized to its original diameter (it expanded when the cartridge was fired, so it needs to be resized to specification dimensions).  The Lee die is a carbide die, which means is has a very hard carbide steel tube inside the die body.   Because it is a carbide die, there’s no need to lubricate the cartridge cases for the resizing operation (like you have to do with plain steel dies).  Carbide dies are much preferred for this reason.
      • The used primer is pushed out of the cartridge case (this is the decapping operation).

Here’s the sizing die.

The Lee sizing die. The red arrow points to the locking collar.

Here’s the sizing die from the bottom:

The top arrow points to the locking ring. It has an oring that holds the locking ring in place. The locking ring is screwed down on the threaded die body to lock the die body in place. The middle arrow points to the carbide sizing insert. The center ring points to the decapping pin, which pushes the spent primer out of the cartridge case.

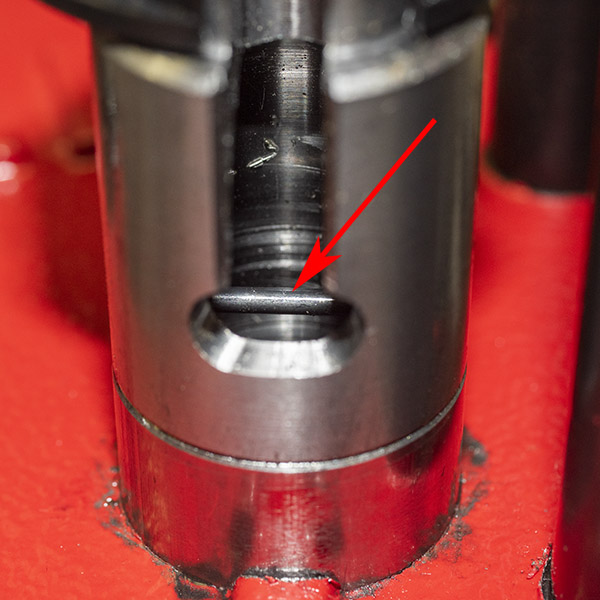
Viewed from above, the decapping pin is secured by a threaded collet that screws into the die body.  It’s a good approach because if there is an obstruction (if the pin hits the case bottom rather than the primer through hole, or if the primer through hole is blocked), the decapping pin simply pushes up in the threaded collet nut.  This prevents bending or breaking.

The upper arrow points to the top of the decapping pin. The lower arrow points to the threaded collet that secures the decapping pin in the die body.

2. Expander Die

Once the cartridge case has been resized in the sizer die, it needs to be opened up slightly and the case mouth needs to be flared to allow a new bullet to be started in the case.  This is accomplished with the expander die.  Like each die in the Lee Deluxe 4-die set, this die includes a locking ring to lock the die in the reloading press.   Some reloaders charge the case (add powder to the case) during the expander die operation.  I don’t reload this way, and I don’t know any reloaders who do.

The Lee expander die consists of six components.  These are:

      • The die body.
      • The locking ring and its oring.
      • An oring between the die body and the through hole insert.
      • An expander.
      • The through hole insert.

These components are shown in the photo below.

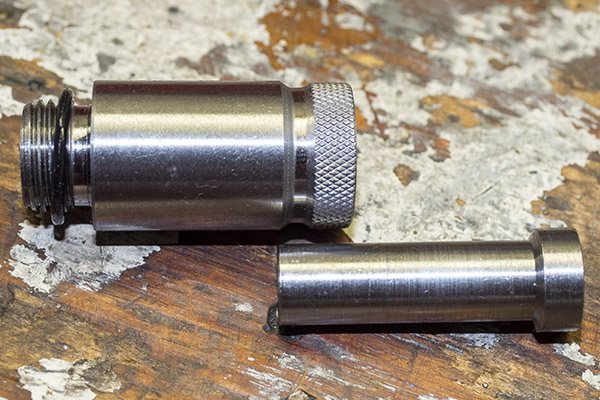
Expander die parts. The die body, the locking ring, and the oring are shown as a subassembly on the left. The arrow points to the expander. The part on the right is the powder through hole insert.

The expander slides up in the die body when a cartridge case is inserted by the press ram.   When it reaches the end of its travel, a ramp in the expander plug creates a flare on the case mouth. This is what will allow a new bullet to be inserted in the cartridge case.  In the photo below, the expander plug is inverted from its installed orientation to allow a better view of this ramp

The arrows point to the ramped surface that creates a flare in the case mouth.

You might wonder why there is a powder through hole component at the top of the expander die, and why the ramped expander plug is allowed to move up and down as a cartridge case is inserted into the expander die.  The through hole allows inserting powder into the case with the powder cup (which I don’t use).  Other Lee reloading gear uses the expander plug up and down motion to activate automatic powder dispensing devices (this is the approach used on Lee’s progressive reloaders).

The business end of the Lee expander die. The red arrow points to the expander plug as the cartridge case sees it.
The cartridge case on the left has not been through the expander; the cartridge case on the right has been through the expander. Notice the very slight flare on the right cartridge case mouth. This will allow starting a bullet into the case.

3.  Bullet Seating Die

The bullet seating die is the third die in the Lee Deluxe 4-die set.  This one is a bit more complicated than the first two because there are two adjustments, and this die can also be used as a crimping die.   With the 4-die set, I am not going to use this die for crimping.  I am only going to use it for seating the bullet to its required position in the cartridge case.

The bullet seating die is shown below.

The bullet seating die. The upper arrow points to the bullet seating adjuster, the middle arrow points to the die body, and the lower arrow points to the locking ring.

Here’s Lee’s illustration of the bullet seating die.

From the outside, the bullet seating die and the factory crimp die appear to be almost identical.   The easiest way to distinguish them is by the size of the knurled segment on top and by the length of the die body.

The bullet seating die is on the left; the crimping die is on the right. The bullet seating die has a longer knurled section and the die body is longer.

The bullet seating die parts include:

      • The die body.
      • The bullet-seating adjuster and its locking oring.
      • The locking ring and its oring.
      • The bullet seater.

These parts are shown below.

From left to right, this photo shows the bullet seating die body and locking ring, the bullet seater (denoted by the arrow), and the bullet-seating adjuster and its locking oring.
The bullet seater.
The bullet seater as seen by the bullet.  The arrow points to the bullet seater.

I mentioned above that I use this third die in the Lee Deluxe 4-die seat only to seat the bullet.  It can also be used to crimp the cartridge case around the bullet, but I don’t crimp with this die.  I use the Lee factory crimp die for crimping.

The bullet seating die also includes a crimping ramp in the die body, as shown by the arrow.

To adjust the die to do this, I run the bullet-seating adjuster well into the die body so that it pushes the bullet to its desired seating depth before the crimping feature reaches the cartridge case.   I’ll describe this adjustment in more detail in tomorrow’s blog.

You might wonder:  Why not do both (bullet seating and crimping) with this one die?   Some folks do, and if you have the Lee 3-die set (not the Deluxe 4-die set), that is your only option for crimping.  But this approach has the bullet still being inserted into the case as the crimping operation occurs, which invites potential bullet misalignment.  To get around that, I use the fourth die in the Lee Deluxe 4-die set (the factory crimp die).

4. Factory Crimp Die

The factory crimp die does three things:

      • It roll crimps the bullet in place.
      • It maintains bullet alignment in the cartridge case.
      • It removes any imperfections in the cartridge case to assure easy chambering.

Here’s the factory crimp die.

Here’s Lee’s illustration of the factory crimp die:

The factory crimp die has the following parts:

      • The die body.
      • The locking ring and its oring.
      • A carbide crimper sleeve.
      • The crimping adjuster and its locking oring.

These parts are shown below.

The Lee factory crimp die disassembled. From left to right, this photo shows the die body and its locking ring, the carbide crimper sleeve (indicated by the red arrow), and the crimp adjuster and its locking oring.
The carbide crimper. The red arrow points to the crimping ring inside the carbide crimper. Note that this feature must point down when the die is assembled; this piece is orientation sensitive.

The carbide crimper shown above requires the cartridge case to enter the carbide crimper sleeve before the crimp is executed.  This is an important feature, as it maintains bullet alignment with the case as the crimp is achieved and prevents case deformation that could interfere with chambering.  Also, the bullet is not moving further into the case as the crimp is achieved, which is what would occur if I used the bullet seating die to crimp the case.

The factory crimp die as seen by the cartridge. The upper arrow points to the crimper sleeve; the lower arrow points to the crimping ring within the crimper sleeve.

There’s another carbide ring at the base of the factory crimp die, shown by the photo below.

Lower carbide ring in the Lee factory crimp die.

The factory crimp die lower carbide ring both prevents and removes any deformation in the cartridge case when the case is crimped and the cartridge is inserted and withdrawn from the die.  This assures easy chambering and bullet-to-case alignment.


So there you have it.  In our next blog, which will post in about a week, I’ll explain how I set up each of the dies in my press.

You might be wondering:  Do these Lee dies really work?  The short answer is an emphatic yes.  I found when loading .357 Magnum ammo with the Lee Deluxe 4-die set that accuracy improved and bullet pull (bullets backing out under recoil) was eliminated.  To jump ahead a bit, the .44 Magnum Deluxe 4-die set described in this blog resulted in stellar accuracy.  I’ll cover that in a third blog, which will publish in about two weeks.  Before I get there, though, here’s a teaser photo:

One of a limited run of Turnbull color case hardened Ruger Super Blackhawks, and targets shot with ammo reloaded using Lee’s Deluxe 4-die set.

If you want to make sure you don’t miss any of the upcoming .44 Magnum Lee Deluxe 4-die set blogs, grab your free ExNotes subscription here:


Keep us going!  Here’s why you should click on those popup ads!


Become a paid ExNotes writer!


For more info on Lee Precision reloading equipment, click on the image below:

The Pima Warthog

The Pima Air and Space Museum has an A-10 Warthog on display.  That’s an impressive aircraft with impressive features.  The most impressive, I  think, is the Warthog’s GAU-8/A 30mm Gatling gun.  “GAU” is the military abbreviation for modern Gatlings.  It stands for Gun, Automatic, Utility, and it’s pronounced “Gow.”

Viewed from the front, the A-10’s Gatling gun seems like it is offset from the aircraft center line.  The reason is only one barrel fires at a time as the barrel cluster rotates, and it does so when it is on the aircraft centerline.  When firing at the gun’s maximum rate (4,000 shots per minute), the recoil equals the A-10’s 18,000-pound max thrust.  If the firing barrel was not on the aircraft centerline, the gun would steer the aircraft when firing.

The Fairchild A-10 Warthog.

The photo below shows the A-10’s Gatling muzzle clamp, which is the device that holds the gun’s seven barrels together at the forward end.  The barrels are welded shut on this display aircraft to prevent a bad guy from stealing and using the gun.

The A-10 muzzle clamp. The rifling in each barrel is visible here.  30mm is 4.6mm larger than 1 inch.

The muzzle clamp’s center bolt secures the muzzle clamp to the barrel cluster.  Maintenance folks never stand in front of the gun when removing the muzzle clamp.  Applying torque to the muzzle clamp bolt might rotate the barrel cluster, doing so could bring the firing barrel into position, and if the gun is loaded, it might fire.  In the old days of the Civil War era Gatling guns, it was not uncommon for a soldier to inadvertently fire a round when attempting to remove the muzzle clamp.

Here’s the  A-10’s GAU-8/A Gatling removed from the aircraft (another Pima Air and Space Museum display item).  It’s about the same length as a Volkswagen Beetle.

The A-10 GAU-8/A Gatling gun. These guns were manufactured by General Electric in Burlington, Vermont.

This next photo shows the gun’s bolts (there’s one for each barrel).  It also shows the elliptical cam path in the gun’s rear housing.  The elliptical cam path that drives the bolts back and forth as the barrel cluster rotates.  That was Dr. Gatling’s original idea.  All Gatling guns use this concept, from the first Gatling gun in 1862 to the modern Gatlings.

The Gating gun’s rear housing assembly.

If you are interested in the Gatling gun, its history, and its current applications, you might want to pick up a copy of The Gatling Gun.


Never miss an ExNotes blog:

Please click on the popup ads…it’s how we pay the rent!