Evel Knievel and East Windsor

It was the summer of 1966, I was a skinny little 15-year-old kid, my Dad owned a new Triumph Bonneville, and I was in hog heaven.  We were going to the motorcycle races.  A big night out in those days was the East Windsor Speedway, a half-mile dirt track oval where they raced everything.  Stock cars, two-strokes, and the big bikes.  Not just locals, either.  Harley’s Bart Markel (National No. 1), Triumph’s Gary Nixon (National No. 9), and more.  It was the 4th of July weekend and it was 55 years ago.  I remember it like it was last week.

East Windsor Speedway put on quite a show.  Dad and I rode there on the Bonneville.   I fancied myself a motorcycle guy and it just didn’t get any better than the half-mile dirt oval at East Windsor.  The fun started right in the parking lot with hundreds of fans’ motorcycles.  Fins and twins (everything was an air-cooled twin in those days), carbs, chrome, custom paint, custom seats, and more.  It was all England and America and a little bit of Japan:  Triumph, BSA, Honda, Harley, Suzuki, Yamaha…you get the idea.  Italy and Ducati were yet to be discovered, only weirdos rode BMWs (remember those strange sideways kick starters?), and weirdos definitely didn’t go to the races.  A new Bonneville was $1320 and a Honda Super Hawk (electric start, no less) was only about $600.  It all seemed so attainable.

The East Windsor Speedway’s stands, abandoned and overgrown several years ago, are no more.
The infield, now covered with tract homes.

The East Windsor Speedway is long gone now, shut down by noise complaints from the encroaching ‘burbs and then plowed over for more cookie cutter homes.  It’s a pity, really.

East Windsor always put on quite a show, but that 4th of July evening was a six sigma outlier on the right side of the bell curve.  Stock car racing was first, then the 250cc class (love that smell!), then the big boys (including Nixon and Markel), then the main event (Evel Knievel!)…and it was all washed down with a 4th of July fireworks display that was as good as I had ever seen.  That warm New Jersey night out started before the sun went down and finished around midnight. I think the cost to get in was something like $2.50.

Evel Knievel was the highlight for me and I think for everyone else, too.  Evel was just starting to get famous, and here he was in person.  White leathers and a cape trimmed in red and blue on the 4th of July.  (Gresh and I always wanted capes, but we had to wait 50 years and go to China to get ours.)  A Harley V-twin, with monstrous ramps set up on the infield (one for liftoff and one for landing), with a couple of Greyhounds in between (buses, that is…not the dogs).
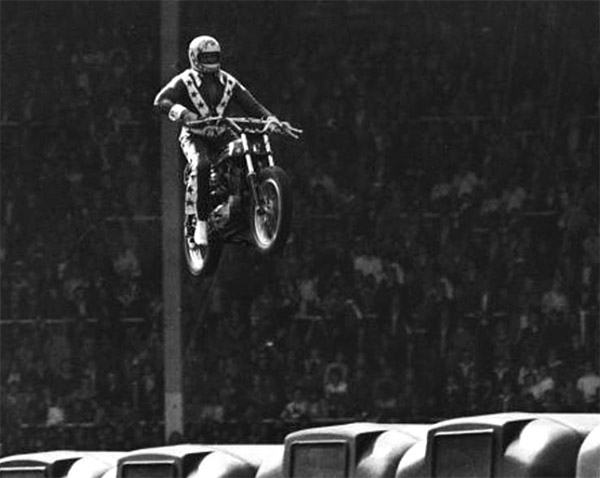
The Evel show…multiple passes and then he was up in the air.

The crowd fell silent as Evel revved the 750 Harley and then accelerated.  But it wasn’t up the ramp.  Nope, Evel (ever the showman) accelerated alongside the ramps and the buses when we all expected him to jump. Faked us out, he did. Then he looped around to start again.  Ah, I get it, we all thought.  That was just to gage his acceleration before hitting the ramps for real.  The anticipation built.  Thousands held their breath as Evel accelerated again, but he faked us out with another run alongside the ramps.  Okay, all part of the show.  A third time….maybe this would be it…but no, it was yet another tease.  Back to the start point, more revving, and by now we were wise to the ways of Evel.  We all thought it would be another feint.  But nope, this was the real deal…up the ramp rapidly and suddenly there he was:  Airborne Evel, sailing up and over the buses, suspended high in the evening air, and then back down on the landing ramp.  He hit the brakes hard, struggling to stop before running out of room, the Harley’s rear end sashaying around like an exotic dancer in a room full of big tippers.

The crowd went nuts.  A seismic cheer drowned out the mighty Milwaukee sound machine.  We had seen Evel, the man and the motorcycle.  Airborne and in person, flying over the buses that would have you leave the driving to them.  It was awesome.

It all happened 55 years ago.  Evel, my Dad, and the East Windsor Speedway have gone on to their reward and I’m officially a geezer drawing Social Security.  But that evening?  It will live in my memory forever.


Never miss an ExNotes blog…sign up for a free subscription here!

A Model 625 load…

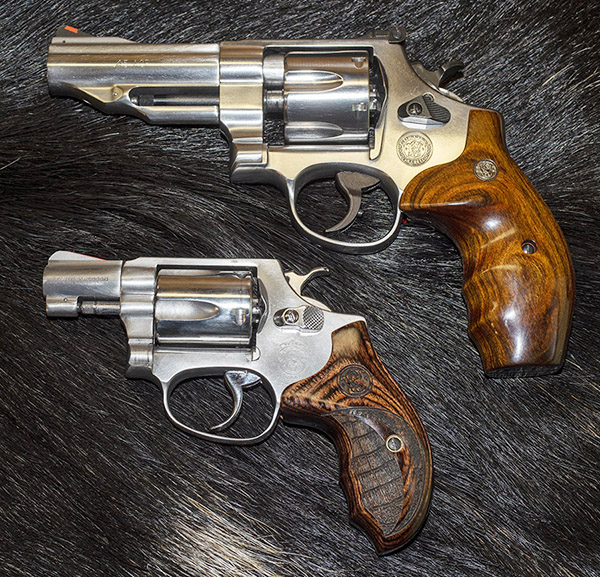
When I first posted about the Model 60 load development plan and the Altamont grips I bought from good buddy Paul, the cover photo showed my recently-acquired Model 60 snubbie and a Smith and Wesson Performance Center Model 625 I’ve owned for years.

The Model 625 and the Model 60.

I like that photo because the two stainless steel Smiths look great on the wild boar skin.  That skin is from a pig hunt Paul and I did in Arizona a few years ago.

The earlier blog was about finding an accuracy load for the Model 60, but a few people wrote to ask if I had a favorite load for the Model 625.  I do: My usual accuracy load for the 625 is a cast 200-grain cast semiwadcutter bullet (sized to .452 inches) over 4.2 grains of Bullseye.

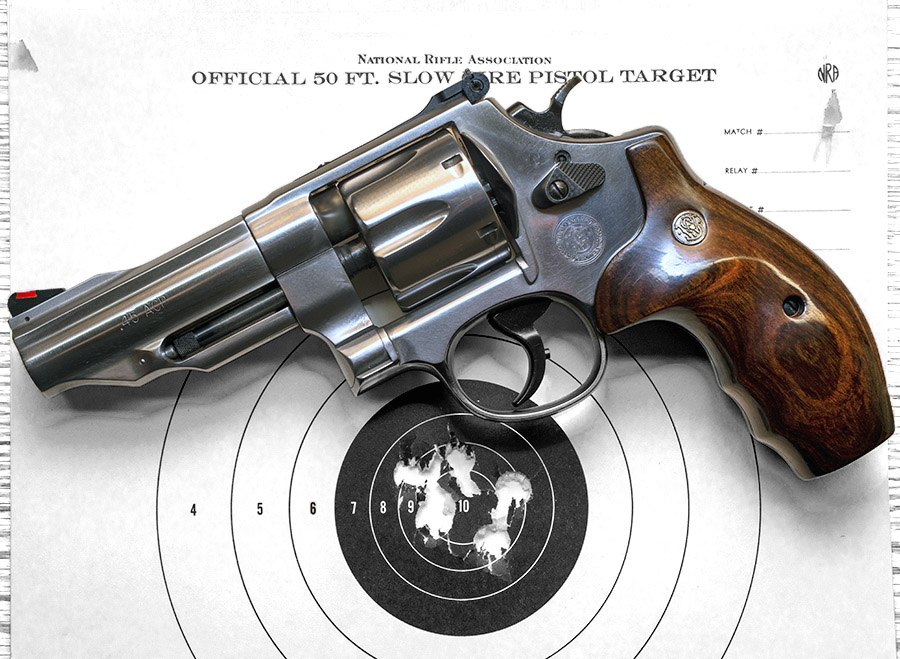
When I went to the range to run a few rounds through the 625 I picked a box of ammo I had reloaded in 2014.  It was different than my usual accuracy load.  I used the same bullet (a 200-grain cast semi-wadcutter), but instead of Bullseye I had loaded these over 6.0 grains of Unique.  And instead of .45 ACP brass in star clips, I used AutoRim brass.  This is the load I fired that 6-shot group you see in the cover photo above for this blog, and it’s a honey.  The group, that is…not the photo (it’s hard to get true colors when using an iPhone in the shade).  I shot at 50 feet while standing…there’s no rest for the Model 625 or the weary.

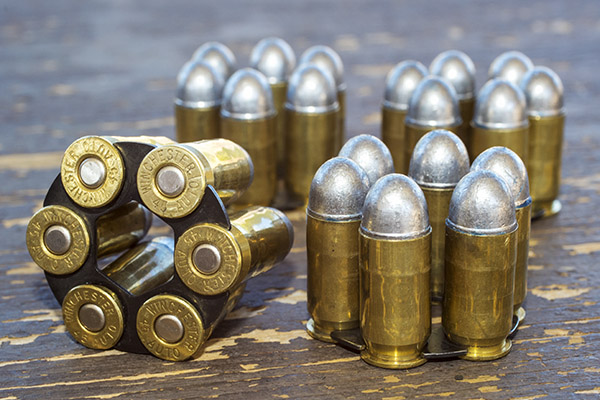
.45 ACP cartridges in star clips for the Model 625. These are loaded with 230-grain cast roundnose Missouri bullets.
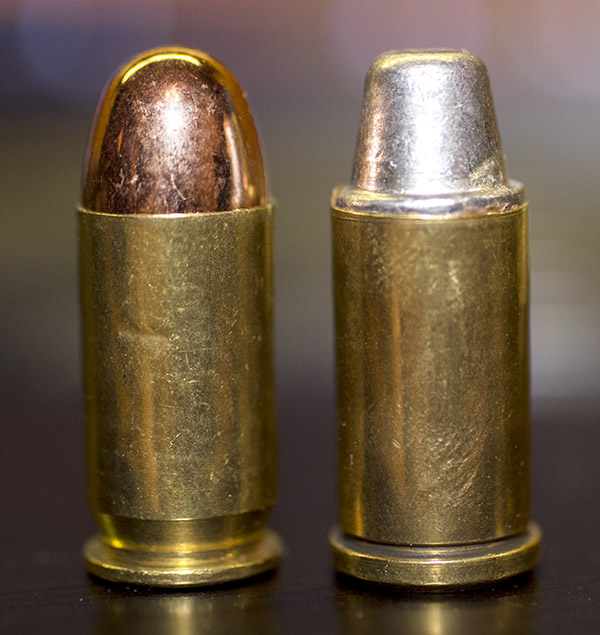
The .45 ACP cartridge (left) and the .45 AutoRim cartridge (right). The AutoRim cartridge is designed for use in the Model 625 without star clips. The ACP cartridge has a 230-grain roundnose Xtreme bullet; the AutoRim cartridge has Missouri’s 200-grain semi-wadcutter.

The AutoRim brass is in the tumbler as I write this and when I reload it I’m going to go with the same load: The 200-grain cast semi-wadcutter over 6.0 grains of Unique.  It seems to be working for me.


Help keep us afloat:  Please click on the popup ads!

Never miss an ExNotes blog:  Sign up here for free!


More Tales of the Gun stories are here:

Phavorite Photos

Good buddy Python Pete wrote to me with a suggestion a few weeks ago.  His comment and idea was that I probably had thousands of photos (which I do) and I probably had a few favorites (which I do).  His suggestion was to share those here on the ExNotes blog. I thought that was a sterling idea.

I shot the photo you see above on a sultry night in Bangkok’s Arab district (every night is sultry in Bangkok).  The street is unofficially called Soi Arab; officially it’s Sukhumvit Soi 3/1.  That road (and sidestreets off it) are lined with Middle Eastern restaurants, a cuisine I love.

Bangkok’s Arab district attracts many folks from the Middle East partly due to its proximity to those countries, partly due to a vibrant nightlife, and partly due to a world class hospital that treats people from that part of the world.  Me?  I was in town to teach a couple of engineering courses and enjoy Bangkok. It’s one of the world’s great cities.  Take it from me:  Never say no to an opportunity to visit Bangkok.

So as I liked to do, I walked to Soi Arab and sat down at a sidewalk cafe and  ordered a plate of hummus and chips.  While I was enjoying my dinner a group of several Middle Eastern types entered and sat at a nearby table.  All but one were burly guys dressed in dark business suits.  The exception was an elegant older gentleman dressed in traditional Arab garb.  Distinguished would be an appropriate but not quite adequate adjective.   Majestic would be more on the mark.

I kept stealing glances at this fellow, thinking it would be great to grab a picture.  I guess I was a little too obvious.  I noticed a couple of the dark suiters with him (obvious security types) were looking directly me.  One of them stood up and walked over to me.

“Uh oh,” I thought.

“Is there a problem?” the man asked.

“Uh, well, no,” I said with mixed emotions.  I wanted to get what I knew would be a great photo, but I also wanted to continue breathing.  “It’s like this,” I said, “I’m an amateur photographer and your principal would make for a very dramatic image.  I don’t wish to offend or insult, but I’m wondering if there’s any way I could take a picture of your distinguished protectee.”  As I said it I realized how stupid that sounded.  Anyone who travels with bodyguards doesn’t want to be photographed.  But the words were out there.  The words “rendition” and “beheading” crossed my mind.

The security guy looked at me.  He didn’t know what to think (I’m told I sometimes have that effect on people).  He walked back to his table and leaned over to whisper to the man you see above.  The flowing headdress turned my way, I saw a smile and he motioned me over to his table.  I had my Nikon and I got the photo you see above in a single shot.  I have no idea who he is, why he was in town, or exactly where he was from, but that photo is one of my all time favorites.

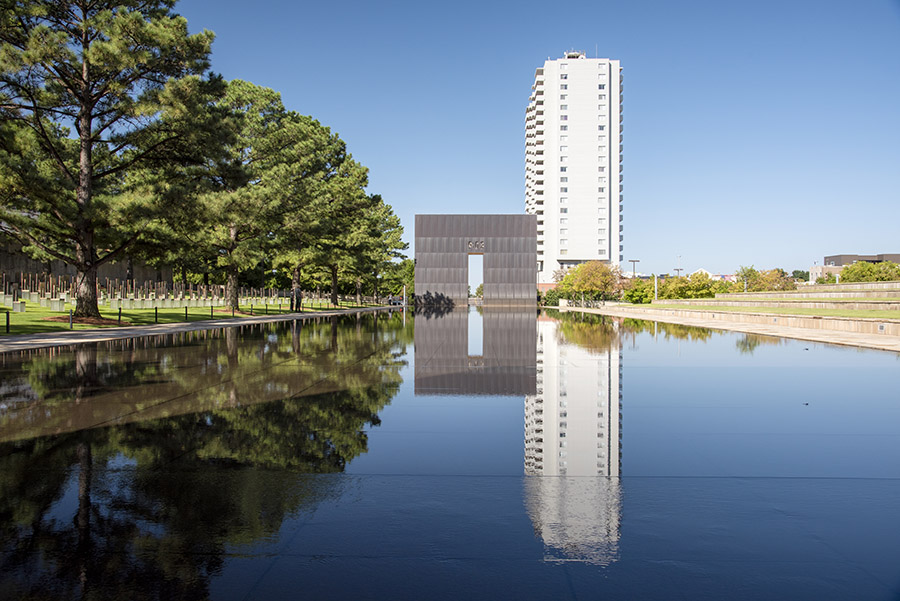
Tulsa and Oklahoma’s Green Country

You may recall that about a year and a half ago I did a blog on our visit to Oklahoma and the great riding in the eastern half of the state around the Tulsa area.  I wrote a piece about that for Motorcycle Classics magazine and you can get to most of it online here.  You can pick up a copy of the latest issue at your local newstand.  Better yet, subscribe to Motorcycle Classics.

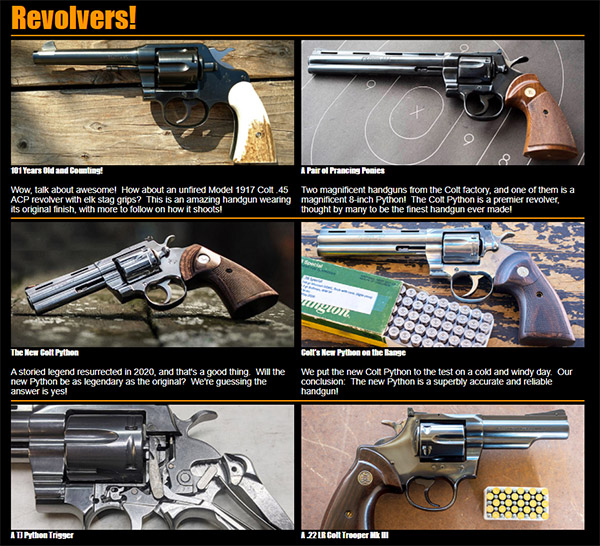
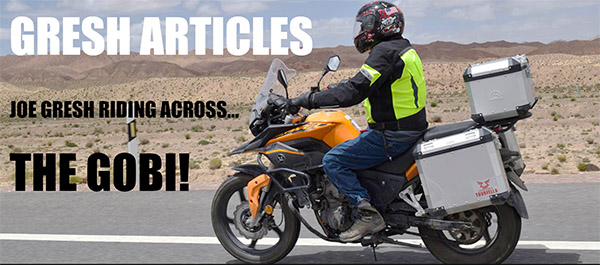
Your two blogmeisters (yours truly and Joe Gresh) have been published in several motorcycle magazines and other publications both in print and in the digital world.  You can get to a partial compendium of our articles by clicking here for me and here for Gresh (or by clicking on either of the above photos).


Never miss an ExNotes blog.  Subscribe here for free!

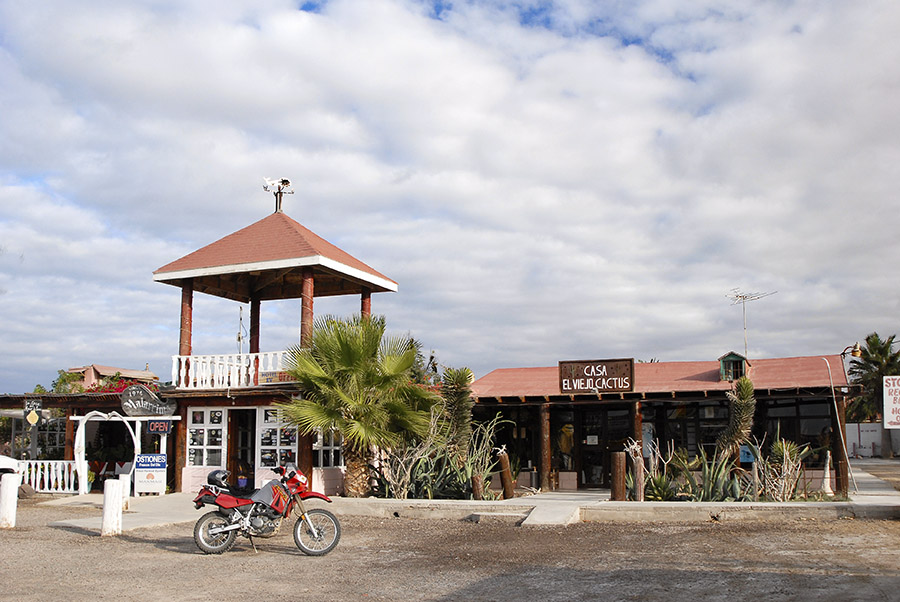
Favorite Baja Hotels: Guerrero Negro’s Malarrimo’s

This blog grew longer than I had planned.  I thought I would touch on Malarrimo’s (one of my favorite hotels in Baja) and that would be it, but I realized once I got into it that there’s a lot more to the story and Guerrero Negro.


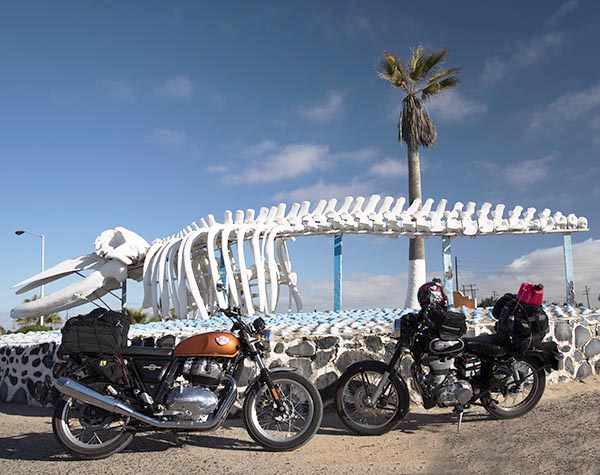
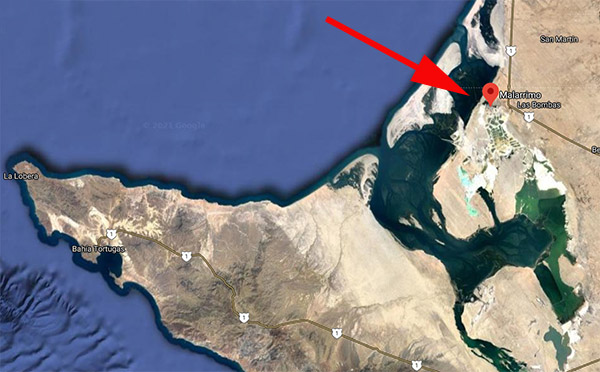
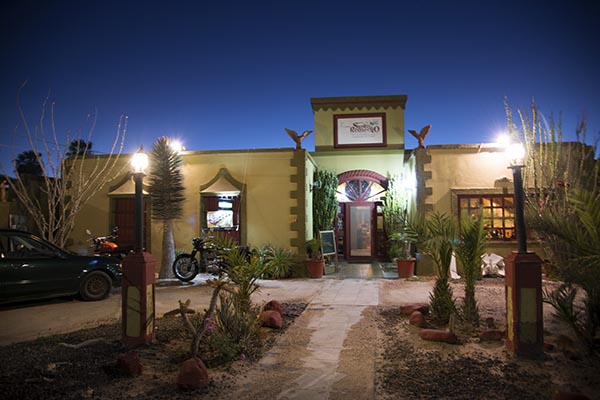
If you’re headed into Baja, especially if you’re headed there to see the whales, you’d be hardpressed to find a better hotel than Malarrimo’s in Guerrero Negro.  Guerrero Negro is at the halfway point when headed down the Baja peninsula (it’s about 450 miles south of the border).  It’s located along the 28th Parallel,  the dividing line between Baja and Baja Sur (Baja’s two Mexican states).

Although some might be inclined to dismiss Guerrero Negro because as little more than a gritty industrial town, it’s actually a pretty cool place to visit and a good base for further explorations.  There’s whale watching, the ecological preserve, salt mining, the nearby cave paintings, the food, and more.

Ah, the food.  As Gresh so aptly put it, no one loses weight on a Baja ride with me.  I’ll get to that in a minute.

Don Enrique Achoy founded Malarimmo’s about a half century ago, and it has remained a family business.  He was ahead of his time, offering eco tours to see the whales, the ecological preserve surrounding Scammon’s Lagoon, and more.   There are other hotels in Guerrero Negro, but I always check Malarimmo’s first.  It’s not fancy and at around $65 per night it’s a tiny bit expensive for Baja, but it is inviting. it’s clean, and I just feel good there.  The restaurant is arguably the best in town, and I love the bar (more on both in just a bit).

Getting There

Malarrimo’s is easy to find.  Just head south on the Transpeninsular Highway from the border for 450 miles.  You’ll see a huge metal eagle at Parallelo 28 and a Mexican military base.  Shortly after that, you’ll see a sign pointing to the right and Guerrero Negro.

Take that right, and Malarimmo’s will be on your right as you enter town.  You can’t miss it.  Incidentally, the lagoon you see in the satellite photo above is Scammon’s Lagoon.  It’s where the whales will be, which takes me to our next topic.

Whale Watching

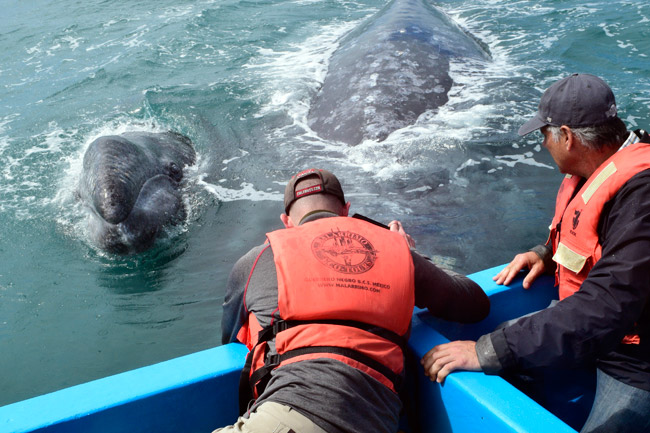
Whale watching tours are available from January through March when the California gray whales are in town, and it is a life changing experience. Those are strong words and you might be tempted to dismiss them as hyperbole.  Take one of Malarrimo’s 4-hour, $50 whale watching tours out on Scammon’s Lagoon and then you tell me.  I’ll bet you come away feeling the same way.

We have a lot more on whale watching on our Baja page, so I won’t spend too much time here on it.  Trust me on this, though:  It is like nothing you have ever done.

The Ecological Preserve

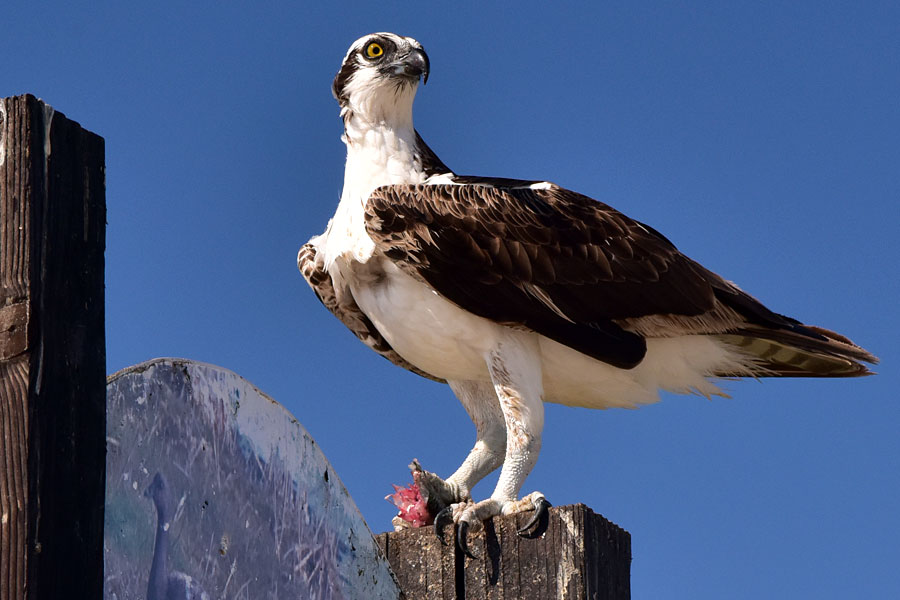
When you get a whale tour at Malarimmo’s, it will take about a half hour in a Malarimmo van to get to the where the pangas (the small boats that take you out to see the whales) are docked, and on that ride, you pass through an ecological preserve that is home to more than 150 wildlife species.  You’ll see many nesting ospreys (a bird of prey), and if you’re lucky (like we have been) you’ll get to see an osprey enjoying a bit of sushi.  It’s a fun thing to encounter.

Salt Mining

Guerrero Negro is a company town, and the company is Mitsubishi, which owns (along with the Mexican government) the salt processing operation.  It’s one of the largest salt producing regions in the world.  They use an interesting approach: Flooding the coastal plains near the town with seawater, allowing the water to evaporate, and then using earth moving equipment to scrape up the salt that remains behind.

Guerrero Negro Cuisine

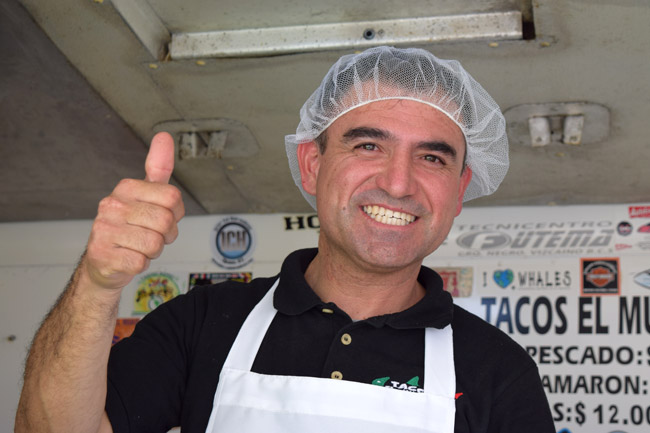
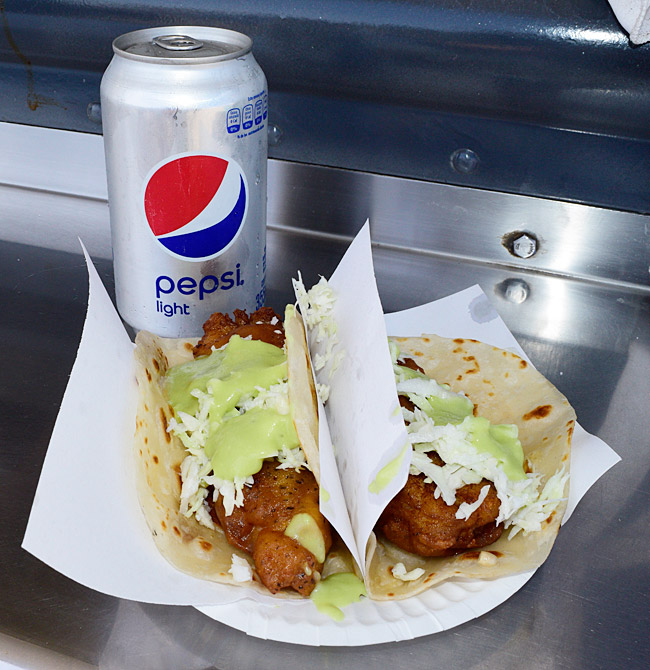
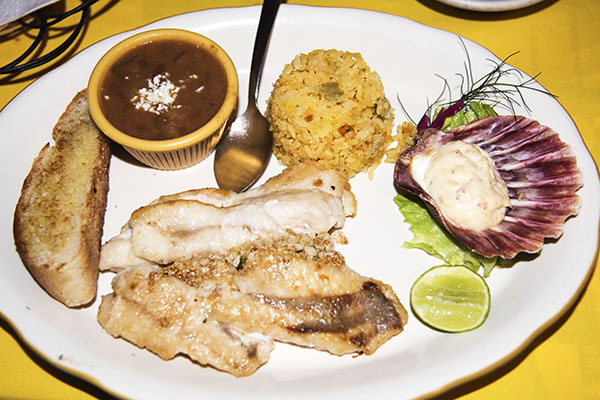
No discussion of Guerrero Negro would be complete without a discussion of the cuisine down there.  In a word, it’s wonderful.  My favorite meal?  Fish tacos, served right off the truck (caught fresh daily) by my good buddy Tony.  No one I’ve ever taken there has had anything but high praise for these incredible treats.

Another place I like is San Remedios, a restaurant a block or two north of the man drag through Guerrero Negro.  Just head west a few blocks from Malarrimo’s, turn right, and you’ll find it.  The food is awesome and the young ladies who serve it are stunning.

I’ve already mentioned the restaurant and bar at Malarimmo’s.  You can’t have a bad meal at the Malarrimo’s restaurant, and the bar…wow, it’s interesting.  The Guerrero Negro area forms a big hook out in the Pacific Ocean with the hook’s U facing north (you can see that in the satellite photo above).  As a result, a lot of interesting stuff washes up on shore in that area, and Malarrimo’s has a collection of it hanging from the roof in their bar.  It’s pretty cool.

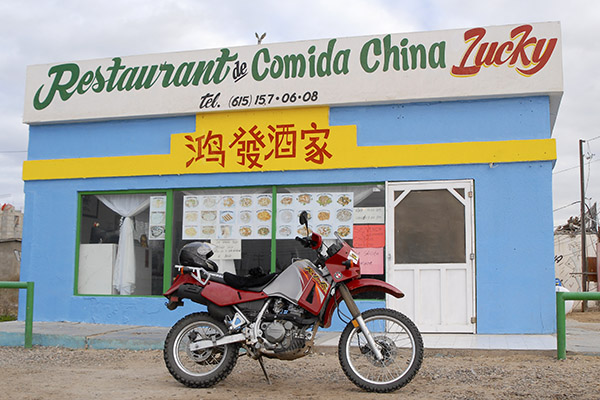
There are other restaurants in Guerrero Negro, too, and I try to make it a point to try a new one each time I am there.  Baja John and I enjoyed an amazing Chinese dinner in Guerrero Negro on one trip; try Lucky’s if you feel like something different.

The Cave Paintings

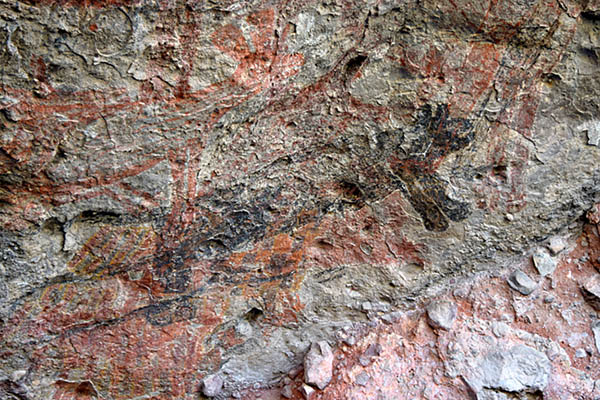
There are several cave paintings located throughout Baja.  This is real Indiana Jones stuff; the cave paintings are estimated to be about 10,000 years old and not much is known about the people who put them there.  They are all relatively remote, too, but one of the easier (I’m using that word in a comparative sense) ones to get to are the cave paintings in Baja’s Sierra San Francisco Mountains.

The cave paintings near Guerrero Negro are further south and east of the Transpeninsular Highway (Highway 1, the main and often only road running north and south in Baja).  You take Highway 1 south and then turn left after passing through the town of Vizcaino to head east and up into the Sierra Francisco mountains.  It’s a magnificent ride with an awesome climb into the mountains, then the road turns to dirt and then it becomes, for lack of a better word, gnarly.  You buy tickets and secure a guide in a small village, and then double back for maybe a mile to see the paintings.  If you have a 4WD car or a dual sport (or ADV) motorcycle, you can get there on your own; if you don’t, you can grab a tour that leaves from Malarimmo’s.  It will take most of a day to get out there, see the paintings, and get back to Guerrero Negro, but it’s well worth it.

There’s a lot more to Baja’s cave paintings, but it’s too much to include here.  Watch for a future blog on this topic.


So there you have it:  Guerrero Negro, Malarimmo’s, and a bunch of things you can do while in that area.  I love everything about Baja, and I especially love the Guerrero Negro area.  You will, too.


When you head into Mexico, make sure you insure with BajaBound.  They are the best, and they are the only insurance company we will ever use.

img


More Baja, including a list of our other favorite Baja hotels and things to see and do, is here on the ExNotes Baja page.


Never miss an ExNotes blog:  Sign up here!

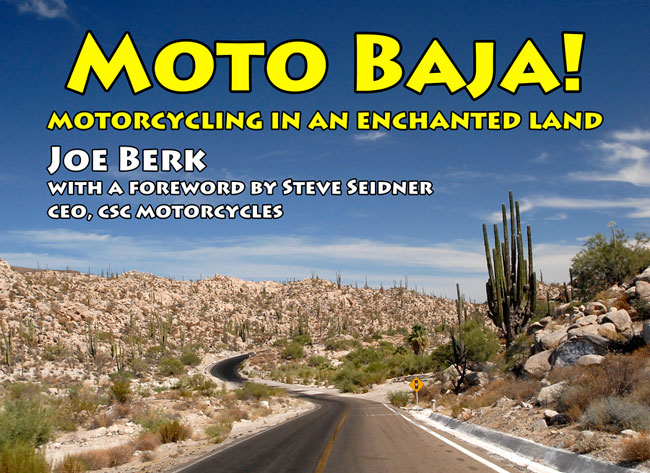
So what’s it like to ride in Baja?  You can learn more with Moto Baja!

Enfield Recall and First Service Quotes

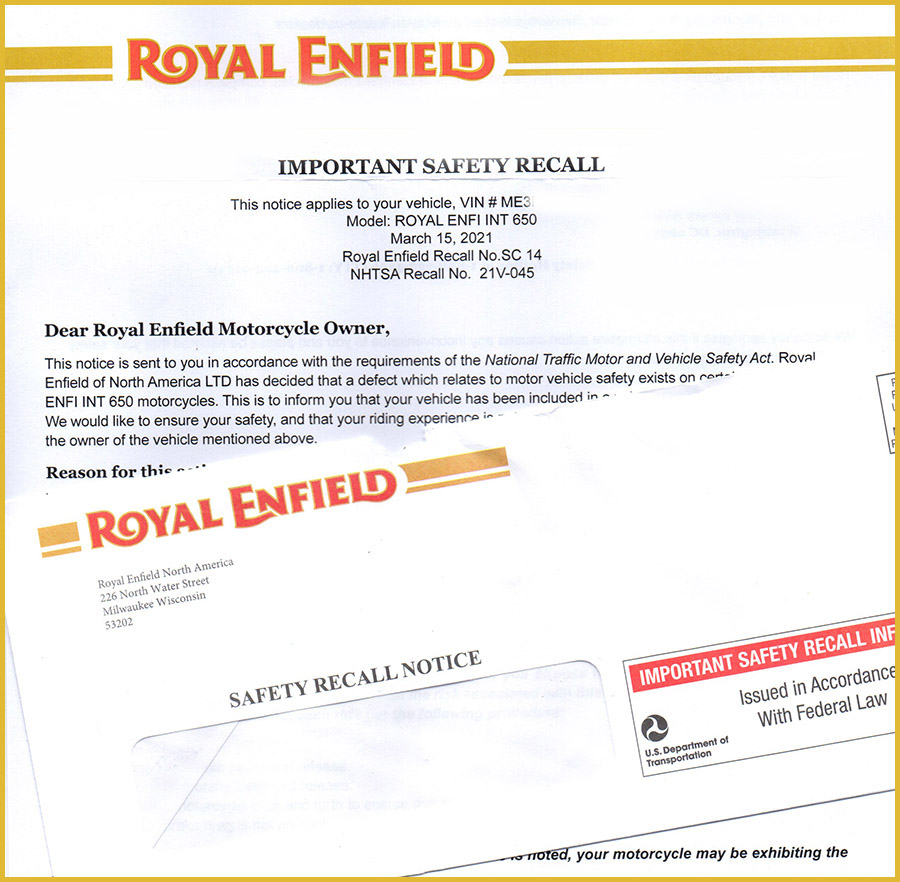
Things happen, I guess, and one of the things that’s happened to me lately is my new Royal Enfield 650 Interceptor was recalled.  As recalls go, it’s not that serious, I suppose.  It has to do with brake caliper corrosion, and from what I’ve read, it might be related to road salt as used in the snowy parts of our country.  Ain’t no snow in So Cal unless you get way up in the mountains, and we don’t use road salt.  Eh, I don’t know…if all the dealer is going to do is look at it and tell me it’s not corroded, hell, I can do that.  Maybe they’re replacing all of them.   I gotta look into this more.  I have had bad experiences on product recalls (including with my Henry 45 70 rifle), so unless the concern is real, I tend not to act on these things.

I thought that as long as I was going to be making an appointment to have the brake calipers checked out, I might as well go ahead and schedule the first maintenance.  Whoa, was that ever educational.  The first service is basically a valve adjustment, an oil and filter change, tightening the chain, checking the nuts and bolts for tightness, etc.  You know, basic stuff.

I started by calling the dealer closest to me (Southern California Royal Enfield), and they quoted $580 for the service.  Wow.  There’s no shims and buckets in the valve adjustment (it’s just threaded locknuts, like on the CSC bikes or a Moto Guzzi), so the valve adjustment should go pretty quickly.   $580. Wow, that’s steep, I thought.  Especially for a service that I doubt would take even two hours.  So I called Pro-Italia over in Glendale.  They came in at $110 less than the boys in Brea ($470 for the first service, after they first told me it was $440, then $450, and then finally when I asked if they were sure about the number, the kid looked it up and told me it was $470).  Wow, that’s quite a swing, and I’m not too sure about Glendale’s competence.   They’re the same boys who sent Gresh and me down to Baja on a Bullet with nearly no oil, a rusty chain, and a battery that died on Day 3 (you can read about that here).

Then I got interested in how much price variation for the same service I could find, so I called the Royal Enfield dealer in San Diego (Rocket Motorcycles).  They won the prize for the lowest quote at $368.55, which almost seemed sort of reasonable to me.  San Diego is 120 miles south of here, though, so it’s really a nonstarter for me.  I thought I would try one more, so I called the Royal Enfield dealer in San Jose, and not surprisingly, they got top billing at $600.  Hey, those Bay Area and Silicon Valley entrepreneurial types are rolling in dough.

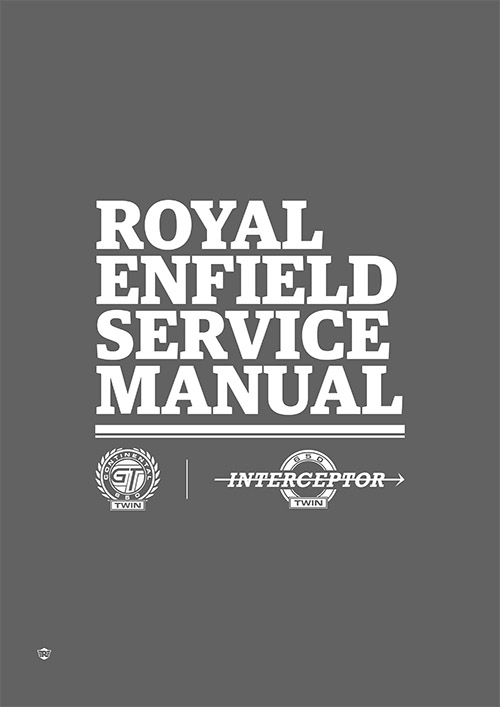
If I lived in San Diego, I’d think about heading over there, but I’m not going to do that.  I’m the guy that wrote most of the service manuals for CSC (with a lot of the “how to” demonstrated and explained by Gerry Edwards), and the Royal Enfield service manual is a free download.

The biggest part of the first service is adjusting the valves, and I doubt that would take more than an hour.  I can change the oil and the filter, and I can tighten and lube a chain.  I know which way I’m going on this.  I may bring the Enfield in for the caliper recall because that’s a freebie.  As for the first service, I’ll pick up the synthetic oil and a filter, do the valve adjustment and the rest, and keep that $368, or $470, or $580, or $600 where it belongs:  In my pocket.


Never miss an ExNotes blog!


Read the entire Enfield Baja trials (for both the Bullet and the Interceptor) here!
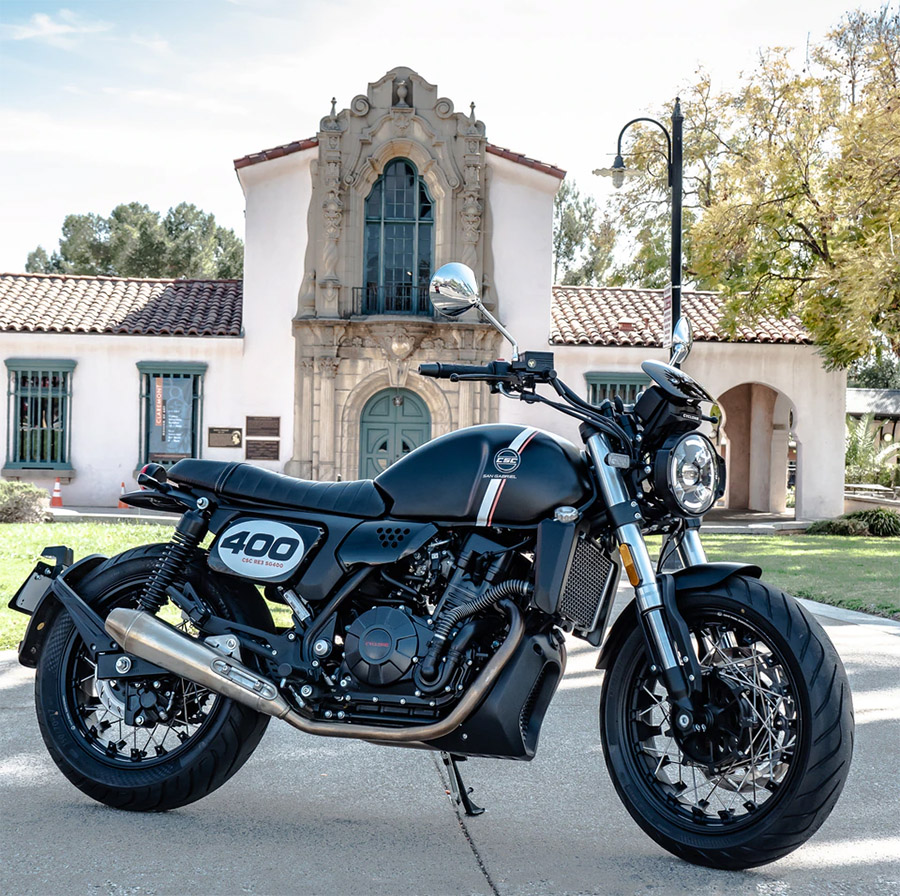
CSC’s New 400 Twins!

Boy oh boy, the 400cc market segment is hot.  It was the RX4, then we learned the Janus 450cc Halcyon is coming, and now, CSC just announced two stunning 400cc twins!  Check this out!

I’ve seen both bikes in person at CSC, and I can tell you the bikes look even better up close and personal than they do in the photos.  CSC has quite an extensive line of motorcycles, electric motorcycles, and ebikes, and now these new 400cc twins will broaden their appeal even further.  Check them out at the CSC Motorcycles website!


Model 60 S&W Load Test Results

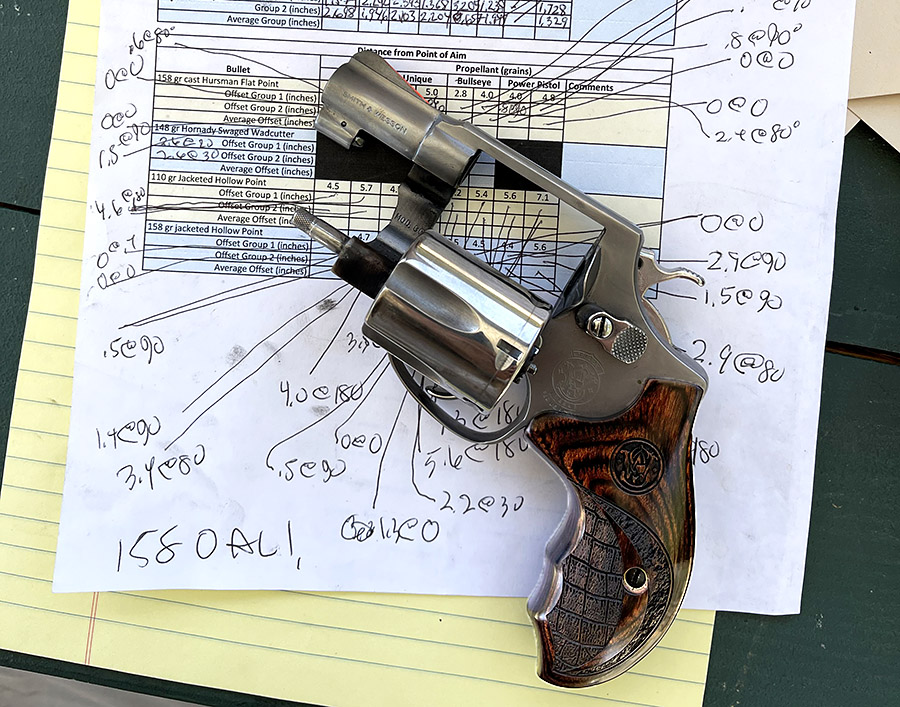
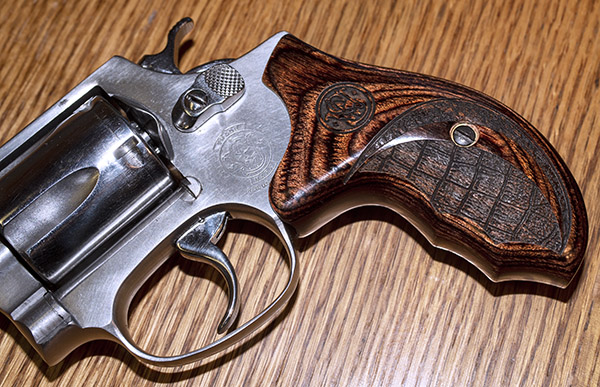
A week or so ago I posted a load development plan for my .38 Special Smith and Wesson Model 60, and I recently finished the Model 60 load testing.  The Model 60 with its new Altamont grips and the custom work good buddy TJ did for me is surprisingly accurate.

Altamont grips on the Model 60. They improved accuracy significantly.

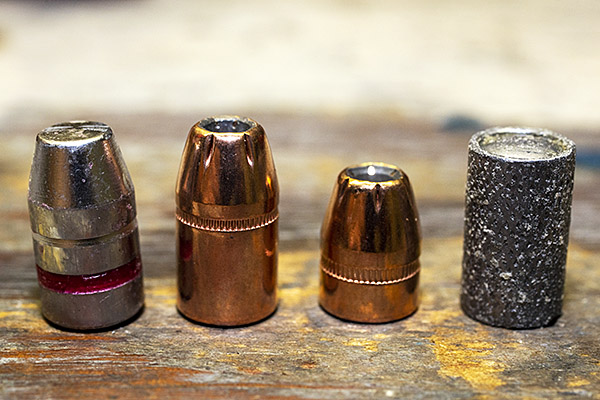
I tested four bullets and four different propellants at two different levels, and I fired two 3-shot groups with each load combination.  The one exception was the Hornady 148-grain swaged hollow base wadcutter bullet, which I tested with one propellant (Bullseye) at one level (2.7 grains).  I did that because the wadcutter load is my standard target load (and it’s what my Star progressive reloader is set up to produce).  The other bullets were the Hornady 110-grain jacketed hollow point, the Hornady 158-grain jacketed hollow point, and a cast 158-grain flatpoint bullet a local caster produces.

The four bullets used for this test: The 158-grain cast flatpoint, the 158-grain Hornady jacketed hollow point, the 110-grain jacketed hollow point, and the Hornady 148 grain hollow base wadcutter.
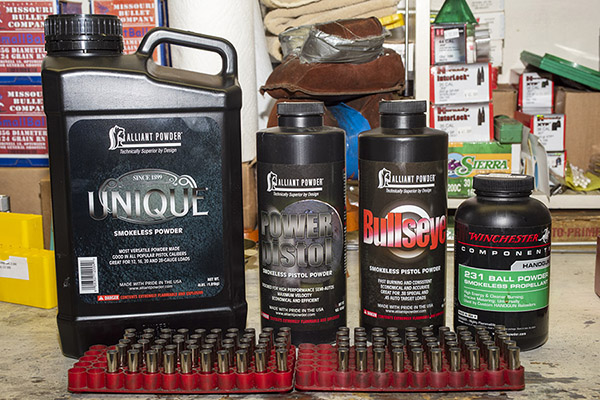
Four propellants used for this test: Unique, Power Pistol, Bullseye, and Winchester 231.

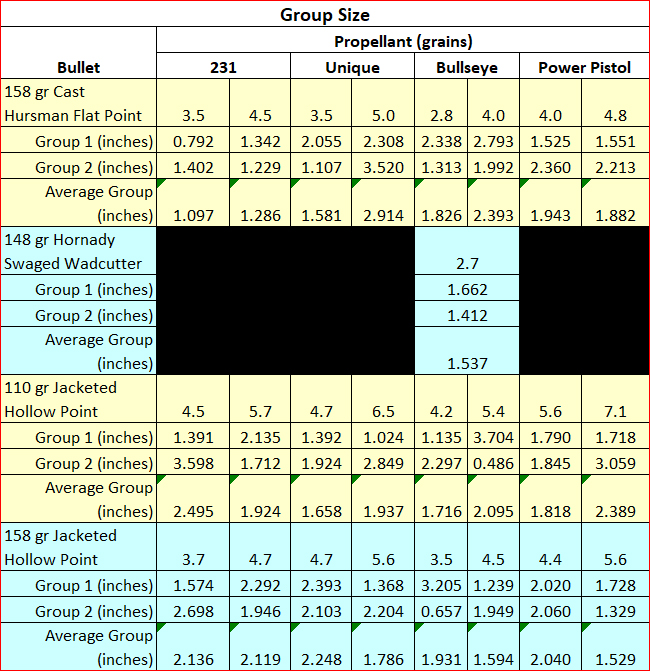
The propellants were Bullseye, Unique, 231, and Power Pistol.  As I mentioned above, all groups were 3-shot groups, and I fired each from a bench at 50 feet.  I tested for group size and for deviation from the aim point, and I used the standard NRA 50-ft slow fire bullseye target.  Point of aim was at 6:00 for all loads.

A few of the NRA 50-foot slow fire targets. I fired several groups on each target, marking my shots as I progressed. I took about 3 hours to test fire all loads included in this test.

The group size/accuracy results follow.

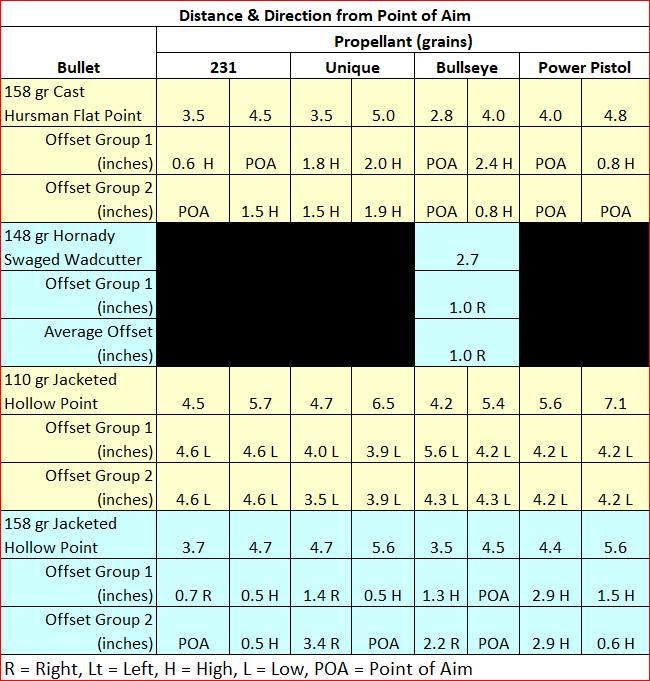
In addition to recording group sizes, I was also interested in where the groups printed with respect to my point of aim.  I held my aim at 6:00 on the bullseye.  Here’s what I found.

With regard to the group size testing, some of the loads were consistent, and others had some variability I think was mostly due to me. Many of the groups that went above, say, 2.3 inches or so in group size had two of the three shots right next to each other and then one was a flyer that opened the group up.  I attribute that to pilot error.  Yeah, I know, if I used a machine rest I could have eliminated that, but I don’t have a machine rest.  You get what you get with this test, and that’s me.

The 110 gr Hornady JHP shot significantly low with all loads, and its accuracy was okay but not great. It was close enough, I think, for a defense round, but this bullet shot 4 to 6 inches low pretty consistently. That’s because the lightweight bullet squirts out of the barrel before the muzzle has a chance to rise much in recoil (so it hits lower).  You might think that these 110 grain bullets would offer a significant recoil reduction, but if that occurred, I couldn’t feel it (the recoil felt about the same as the 158-grain loads).  My conclusion is that, for me, 110-grain bullets are a nonstarter for the Model 60.

My standard target load (2.7 gr Bullseye and wadcutter bullets) grouped relatively well, although for me it shot about an inch to the right in the Model 60.  That’s probably close enough for government work.  It’s good to know this load works, because that’s the load my Star reloader is set up to make (and I make a lot of them).

The 158-grain bullets are obviously what the Model 60 is set up to shoot, and of the two tested, the best accuracy occurred with the 158-grain cast bullet and Winchester’s 231 propellant.  It’s a sweet load at either the high or low propellant level, and it shoots essentially to point of aim at 50 feet.

I can also load the 158-grain cast bullet with Bullseye on the Star reloader, and that load did okay at 2.8 grains of Bullseye.  The Star reloader has a small amount of adjustment in it for powder throw, but I would leave it at 2.7 grains (the same as the wadcutter load) if I loaded the 158-grain cast flatpoint bullets on it.  That’s close enough.

Overall, I was surprised at how accurate a little snubnose can be. It’s not dramatically different than larger target handguns. Some of this is undoubtedly due to TJ going through the gun and making sure everything is perfect. And some of it is due to the Altamont grips.  I sure enjoy shooting this handgun.


Help keep us in components:  Please click on those popup ads!


More Tales of the Gun.


Never miss an ExNotes blog…get a free subscription here:

Zed Plays Dead: 1975 Kawasaki Z1 Woes

To really understand the cloud of confusion surrounding my brain you’ll have to go back to the very beginning. Back when Zed was left for dead. We don’t have time for that now so I’ll cut to the chase: Zed ran fine for 3000 miles and then the carbs started puking gas from the overflow tubes. The bike was running rich and fluffy as hell. Idle was hit and miss.

My natural assumption was that the old float needles had worn a groove into the sealing surface preventing the cone-shaped needle tip from seating. I purchased a cheap but shoddy set of needles/seats on eBay and with my deft touch soon had them fitted into Zed’s 4 carburetors.

And one of the carbs still puked fuel. If you’ve followed this saga online you’ll know that the brass seat was punched with some tiny, elfin numbers. This punching deformed the seat so that the fuel kept leaking into the float bowl and then overflowed onto the ground. I replaced the new seat with the best looking seat out of the old batch.

This cured the fuel leaking issue. I could leave the petcock in the “on” position and the bike stayed nice and dry.

Yet Zed was still running poorly, cylinders would cut out randomly and the idle was inconsistent. Further investigation revealed that the rubber, year-old vacuum port plugs had dry rotted allowing air to seep past and upsetting the tenuous air/fuel ratio. I ordered new vacuum plugs and was sure the running problems would go away.

They didn’t. In fact, fixing the air leak seemed to make things worse. The bike would run on 3 cylinders and then 4 as your road speed increased. It seemed the longer it ran the worse it ran. I checked the ignition points. They were the original points that came with Zed and had served me well but now they were pitted badly. I filed the points back to good smooth contacts and now the filed points were so thin I couldn’t rotate the mounting plate enough to set the timing correctly.

And so it continued. I ordered new points and reset everything. I had fat, blue spark. The Kawasaki ran terrible. I checked battery voltage, changed fuel filters and nothing worked. In my befuddled state I hit on the float level as a potential cause of the problem and ordered the cool little bowl drain fitting and clear tube tool used to set the float levels.

The float levels were all high. I reset the float levels to spec and now I was truly sure I had the bike problems licked. It ran worse each test ride. I could go about 10 miles before the bike would start missing. It seemed like cylinder 1 was the most likely culprit as removing the plug wire on #1 had no effect on the engine. Pulling the #1 sparkplug revealed a flooded cylinder. Cylinder #4 was also sort of weak, not exactly shouldering the load if you know what I mean and I think you do.

I checked coil resistance and coil 1&4 were exactly the same as coil 2&3. Must be the condensers, I told myself. Condensers are typically replaced along with points: they come as a set. I didn’t buy them that way because in my entire life I’ve only found one bad condenser. Anyway, the way reproduction parts are made you want to keep the original stuff if it still works.

My frustration was growing. Instead of nickel and diming my way through the ignition system I bought new coils and an entire ignition backing plate with new points, condensers and fresh screws the heads of which were not stripped out. It was a whole new ignition system. I was sure something was heating up and fouling the plugs.

My $114 dollar ignition system bought me nothing but clarity. But it was a glorious clarity. The bike ran worse than ever. I didn’t get out of the shed before the #1 cylinder fouled. I was smiling; the odds were narrowing rapidly and in my favor. What are the chances of two completely different ignition systems having the exact same fault? Nearly zero, my brothers. You’ll not hear me complaining about blowing $114 on an ignition system I didn’t need because I was sure then that the problem was carburation. I re-checked the float level in the #1 carburetor. It was fine but I knew now that the only thing I had changed in that carburetor was that damn needle and seat.

I picked through the old needles and seats and selected the best looking set. I removed the eBay needle and seat and reinstalled the old ones. That was it. Zed ran on all four cylinders. I took the bike out for a test ride keeping my fingers crossed at the dreaded 10-mile mark but the bike kept running. I lugged the motor in high gear. The motor pulled cleanly without missing.

I know better than to assume anything was fixed without putting a few miles on the bike so I did a loop to Capitan, out to Roswell and then through Ruidoso to home, a trip right at 300 miles. At my first gas stop in Capitan I was astounded at the fuel mileage. Previously Zed was a steady 40 miles per gallon bike. That first fill-up netted 50 miles per gallon.

From Capitan to Roswell was a nice, winding, 4000 rpm tootle enjoying the breeze and the smooth running Kawasaki. I filled up again and the old Z1 returned 59 miles per gallon. Almost a 50% increase in fuel mileage.

In Roswell’s hot, stop-and-go road construction traffic Zed started to stumble. Crap, I was 100 miles from home and the problem had returned. One cylinder started dropping out and then another. The bike was dying in the middle of the road. Out of instinct I reached down and found the fuel petcock in the off position. Zed ran all the way home on 4 cylinders.

I can’t explain why it took so long to figure out the problem. There were so many distractions on the way to that moment of clarity. I’ll be looking for some OEM Mikuni needles and seats. They say the cheap man pays the most but I’ve found that value is very subjective. For example, what would I be writing about if I bought the correct parts the first time around?


Hey, you need to read the complete Kawasaki Z1 resurrection story!


Need more Joe Gresh?


Never miss an ExNotes blog:   Sign up here!

A New BajaBound Atlas

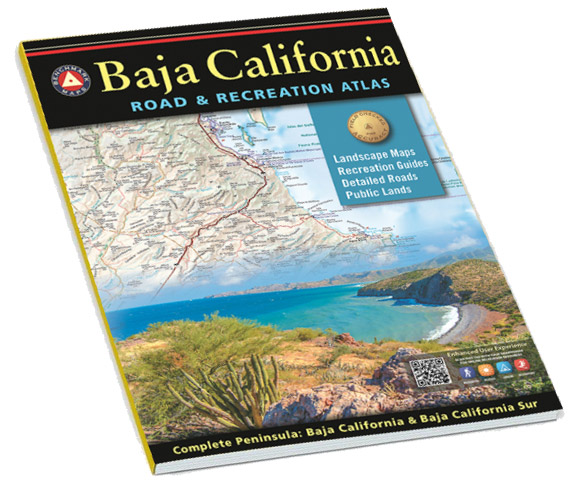
Wow, check this out…a new Baja road and recreation atlas brought to us by the folks who know Baja best:  BajaBound Insurance!

I ordered mine already and I’m looking forward to getting it.   You can be sure I’ll put it to good use.  If you want to order yours, you can do so here!

If you’re headed into Baja, make sure you have your BajaBound motorcycle insurance!
img


Check our adventures in Baja!


Never miss an ExNotes blog.  Sign up here for free!