Why think small?

By Joe Berk

Half a lifetime ago I was a yuppie, and the symbols of being a successful yuppie included an MBA and a Rolex.  The Rolex was easy (the only requirement was having more money than brains).  The MBA was more difficult.  It required going back to school, which I did.  Getting the MBA definitely gave me a boost.  My career at the munitions company was on fast forward; at one point I was the youngest vice president in the Aerojet corporation (then I got fired, but that’s a story for another time).  I loved being in the bomb business (business was booming, so to speak), and being a former Army guy, I was in my element.

That could have been me in the ’80s and ’90s. I wore a jacket and tie to work every day.  I had the big glasses, too.

Anyway, while I was going to night school for the MBA, one of my classes was titled Human Behavior or something like that.   The guy who taught it was a Ph.D in one of the soft sciences, and I knew pretty quickly that he leaned way left.  That’s okay; in my book you can lean however you want as long as you don’t expect me to agree with you on every issue.

The first night of class the prof had everyone tell the rest of their class their name and what they did.   We were all yuppies, we were all young, and we all had good jobs. It made for good entertainment, but I had a feel for how things were going from the first several yuppies who told us what they did and the prof’s reactions and questions.  Yep, the guy was a definite leftie.  I started to wonder what his reaction would be to me…a guy firmly entrenched in the military industrial complex working for a munitions company.

“So what do you do, Joe?” Dr. WhatsHisName asked.

“Uh, I’m an engineer,” I said, hoping he would leave it at that, but knowing he wouldn’t.

“What kind of an engineer are you, and who do you work for?”

“Uh, I’m a mechanical engineer,” I said.   No sense in oversharing, I figured.  Maybe he wouldn’t notice I didn’t name my company.

“Who do you work for?”

“I work for an aerospace company.”

“What company, and what do you engineer?”  This guy wasn’t going to give up.  I liked my job and I liked what I did, but I wasn’t about to tell Jerry Rubin here I supported the Vietnam War.

“I work for Aerojet, and we make a variety of products.”  It had become a contest, and I was losing.

“What are your products?”  He had me.   Time to ‘fess up.

“I do cluster bombs.”   There.  It was out.  I knew the guy was going to call whoever it is you call when you find someone violating the Geneva Convention.  The good doctor stared at me for several seconds.  The other 30 or so yuppies in the class were dead silent.  It was a pregnant pause if ever there was one and we were pretty close to the 9-month mark.  Somebody’s water was about to break.

“Does your family know what you do?” he softly asked, speaking almost in a whisper.

“My wife does,” I said, mirroring his subdued tone.

“And how does she feel about how you earn a living?”

At this point, I knew I had to come clean.  “Truth be told, Professor, she’s disappointed in me.”  I had hoped that would end the discussion, but the guy would not let up.  He was a dog and I was the bone.  Then I sensed a way out, anticipating what his next question would be.

“What does she say to you?” he asked.

“Well, Doc, like I said, she’s disappointed, and she’s made that known on several occasions.”  The good Professor was nodding knowingly.  He was hearing my confession.   I don’t recall specifically, but I’m pretty sure he was smiling.  I was on a roll and I continued. “You see, Professor, my wife works for TRW’s Ballistic Missiles Division.  They do nuclear intercontinental missiles and she’s always asking me why I’m wasting my time screwing around with conventional weapons.  If you’re going to go, she always says, go big.  Go nuclear.”

My yuppie classmates started laughing.  Me, I was scared.  I was running a perfect 4.00 grade point average in the MBA program up to that point, and I thought I had just blown any chance of aceing this course.  The professor nodded without expression, made a note on his pad, and went on to the next yuppie.  My being a wiseass had earned a good laugh, but that note he made couldn’t have been a good thing and I was afraid it would cost me.

So how did it turn out?  I busted my chops in that course and I got my A.  But I was sweating bullets for the rest of the term.  Little, non-nuclear bullets, but bullets nonetheless.   More importantly, the cluster bombs I helped engineer won the Gulf War a few years later in 1991.   Most of Saddam Hussein’s Republican Guard tanks were taken out with CBU-87/B cluster bombs and GAU-8/A 30mm ammo (and my company, Aerojet Ordnance, also made the ammo for those A-10 Gatlings).  Sometimes when studying human behavior, the guys who know (I mean, really know) reach the only conclusion and solution possible:  An adequate quantity of high explosives delivered on target.  I’m not at all embarrassed about having had a hand in that.  Fact is, I’m proud of it.


Never miss an ExNotes blog:

Three Steps to Ease into Moto Camping

By Mike Huber

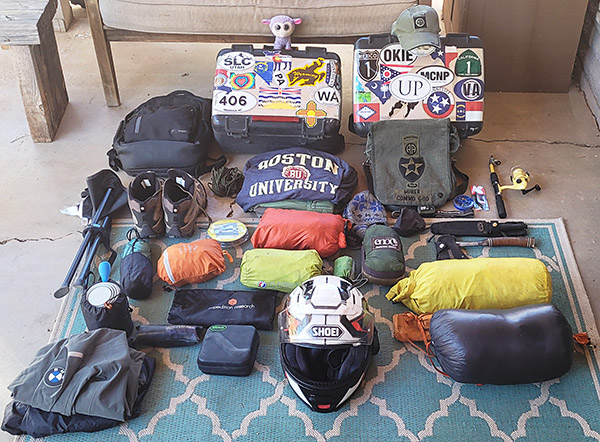
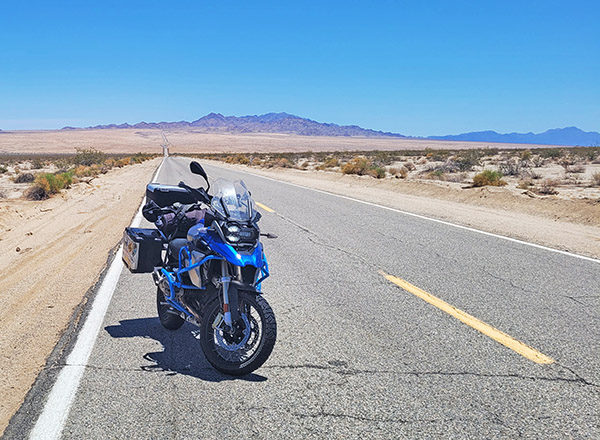
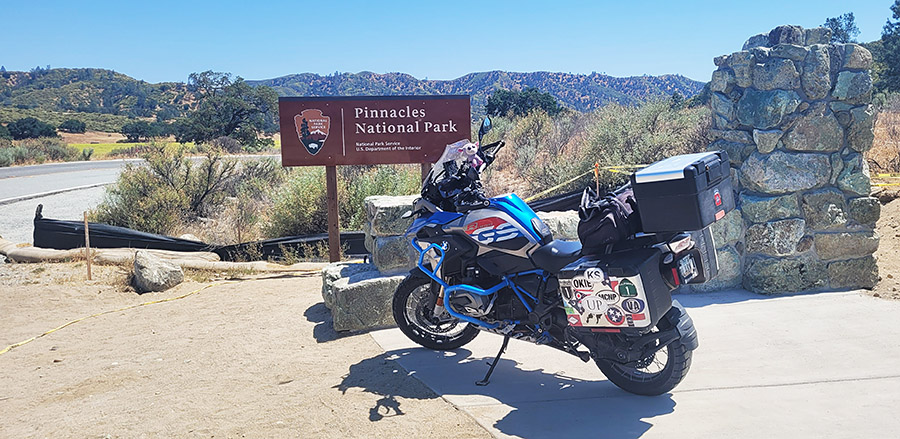
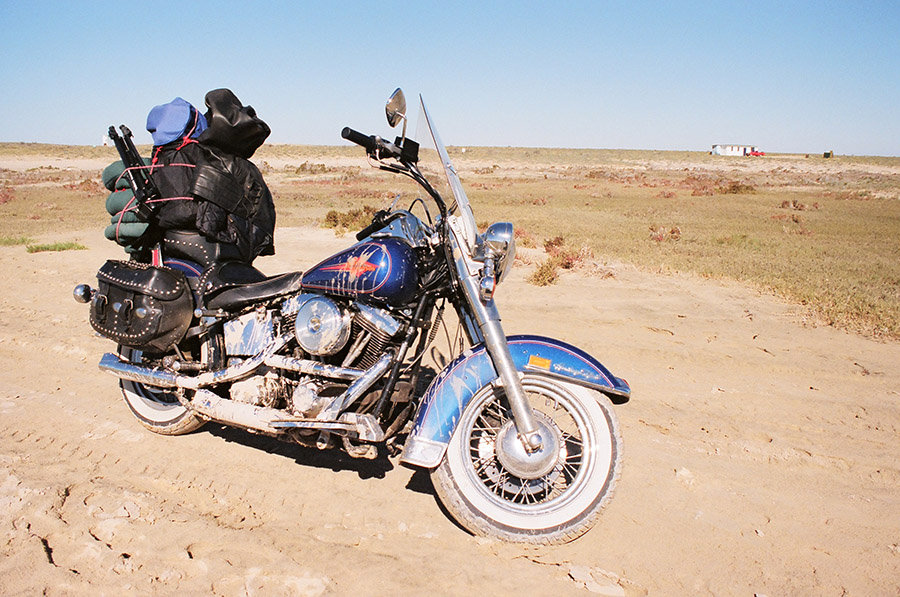
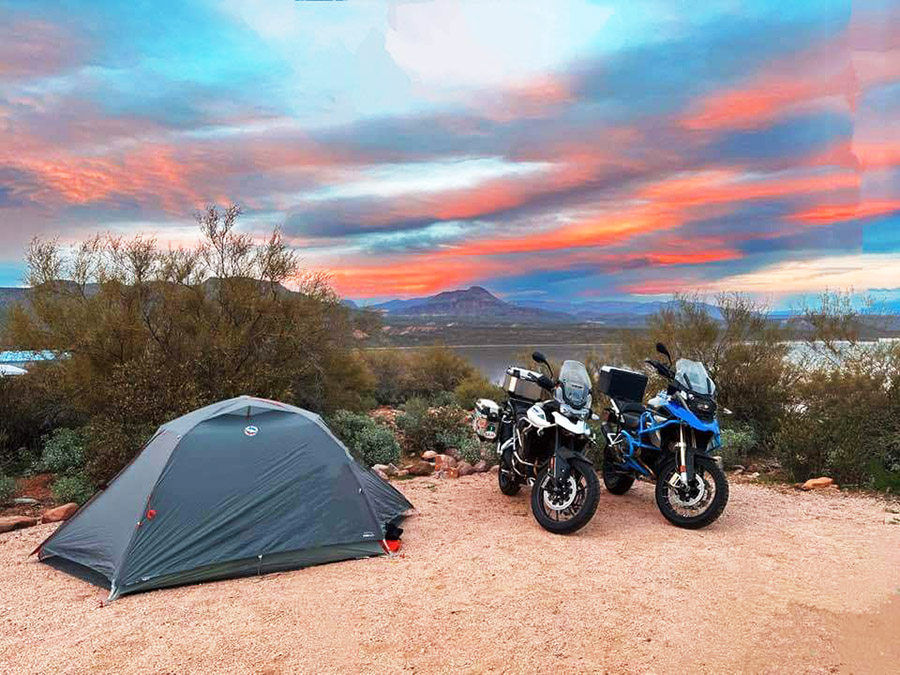
I know many people on this page camp and ride, but some have yet to dive into mixing these two great passions.  My objective in this article is to help you bridge riding and camping, alleviate any concerns on this topic, and build a foundation of knowledge for those new to motorcycle camping. In doing so you will discover a deeper level of motorcycling that many riders experience.


Help us bring more to you…please click on the popup ads!


Start with Less

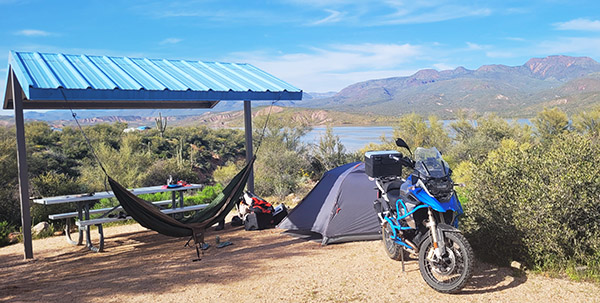
With all the social media posts of riders from around the world sharing their epic adventures and providing reviews of the gear they use can cause anxiety.  Intimidation from the expense and amount of equipment people use for moto camping can become overwhelming when starting this hobby.  I’m not saying any of these riders are wrong in the gear (or the amount) they use, but my philosophy while motorcycle camping is less gear is much more efficient and cheaper. My first time moto camping I had nothing other than a one-person Kelty tent (which I still use), a sleeping bag, and a small personal hygiene kit.  I planned to give moto camping a shot and figured I could survive one night out on Washington’s Olympic peninsula even if I was a bit uncomfortable.

I wasn’t uncomfortable at all.  In fact, other than adding a 6-pack of beer and a crushed Subway sandwich my gear didn’t grow or change for the next 8 more years (even after “maturing” from a Ducati Monster M1100 to a BMW GS1200).  Would I have been more comfortable with a sleeping pad, cooking set up, and maybe even a chair?  Yes, but that came years later after learning from others (I am a bit set in my ways even if they force me to be uncomfortable). Starting from such a minimalist perspective and adding gear slowly allowed me to tailor my equipment perfectly.  You will find everyone has a “better” way of doing things; you might want to learn what works best for you and expand slowly.

Start in a Familiar Location

Roaring through the dense rainforest of the Olympic Peninsula on my Ducati Monster I was excited to be camping with my motorcycle for the first time.  In hindsight this choice was probably a further and more isolated location than I should have started with, but it worked for the most part. I had ridden the road several times, I was comfortable with the distance, and I was aware of the ever-changing weather conditions.  Being new to this I didn’t pack rain gear and of course it rained heavily that night (I was forced into my tent by the weather by 7:00 p.m.).  You must pack raingear if you want to ensure it never rains on your moto camping trip.   But even with the weather not cooperating it was a fun first night and it was enough to get me hooked on the lifestyle.

Looking back, a more comfortable way to experience my first moto camping adventure would have been a more controlled environment.  Even for those well-seasoned campers, testing new gear in your home or backyard to learn how to set up, adjust, and break down the equipment makes for a less stressful time in a real-world environment. Purchasing lots of expensive gear, not testing it, and going on a multi-state tour can be a painful way to learn the gear isn’t right for you or the climate.  Another way to learn your equipment and build experience is at a state park close to your home or a KOA.  Even if you have to retreat to the KOA store or end up back inside your house, don’t be discouraged.   That’s what this step is for.  Take notes on what worked and what didn’t, and build off that until you are comfortable with the next step, which can be dispersed camping or a longer distance ride.  It is better to learn in this semi-controlled environment than to have a horrific night with improper gear in poor weather and become completely deterred from ever moto camping again.

Learn From Experience

Having completed a successful test runs with your gear it is now time to begin learning how to increase your confidence in harsher and more remote environments. This point in your experience level is also the perfect time to make gear adjustments based on your notes.  With a few nights camping under your belt you can seek advice and learn from others, including their set up tricks and in what type of climate they moto camp.  In doing so you will fine tune your camping outfit so that it is perfect for you, your motorcycle, and the climate.

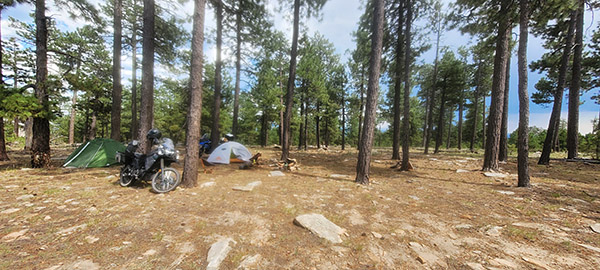
During this phase it is important to remain open minded.  Everyone has a method that works best for them.  For some it is a half shelter at a roadside pullout, for others it can be as elaborate as a 6-man tent with copious gear that requires 2 hours to pack.  Normally when I travel and moto camp it isn’t for just one night.   I’m on the road for two to three months at a time with Airbnbs or hotels as resting points or for working.  Even though I am comfortable with my moto camping equipment it’s always fun to chat up other motorcyclists. In most cases, even if their set up is completely different there is usually one or two takeaways I learn from conversing with them.

Conclusions

Moto camping is an easy and inexpensive way to escape the rat race with less effort than many would think.  These experiences and the people I meet along the journey are some of the most best I have had.  Being so removed from everything as you sit relaxing in the glow of a warm campfire reflecting off your moto is a fulfilling feeling that few venture to achieve.


Never miss an ExNotes blog:

ExNotes Stock Car Racing Review: Vado Park Speedway, New Mexico

Sometimes the story you set out to write doesn’t want to be written. Something is wrong, there’s no ju-ju, there’s no vibe, or in this particular case, there are no decent photos. I have an expensive Canon 5D that takes beautiful racing photos and I have a pretty good 300mm zoom lens with selectable, 2-axis stabilization. It’s not a professional lens by any means but it can do a fairly good job if you’re steady enough and don’t shoot at nighttime. The problem with the 5D and 300mm lens combo is that it weighs a ton and I don’t like carrying the thing around.

Anyway, it’s foolish pride on my part to try and capture the moment because as soon as I stop to think about a camera it’s not a moment any more. It becomes staged. It seems phony and something like grasping for the shot that will make the story. I don’t want to be a photojournalist and I never was. I learned the basic operation of a camera only because photos were a necessary evil in order to sell a story to magazines.

Oh, how I envy Cameron and Egan. Man, those guys have it made. They write their columns propped up on six pillows in an overstuffed bed between 1000-count Egyptian cotton sheets while green-skinned slave girls serve wine and grapes as they type each 600-word, 10,000-dollar column. And they do it without photos. Sometimes the magazine’s art director will tack on a few squiggly line drawings for the folks that need a picture. When I read their stuff I don’t miss the photos one bit.


Keep us going…please click on the popup ads!


Since I’ve pretty much given up on cranking out content for paper magazines, I find myself wanting to enjoy the story in real time. I want to live the story, absorb all the sounds, sights and smells, and then write about it later. Events may not be recorded exactly as they happened but they record what happened to me. At least I imagine it happened to me. Memories are funny things; each of us views the world looking out from different eyes.

Still, websites are a visual medium and photos do make the page look better. They also attract readers. For the Vado races I brought along the little Canon S100, a higher-end point and shoot camera not much bigger than a cell phone. I thought I could get a few photos good enough to use for this story but the shutter lag was hard to plan for. I’d press the release and a second later the camera would take the photo. In racing things move a long way in a second. Annoyingly, the auto focus kept locking on the barrier fence instead of the cars behind the fence. I have a bunch of really sharp shots of the fence

My first attempts were a mess. The S100 needed the shutter sped up and to do that it needed a higher ISO setting. And then the auto focus had to be disabled in the menu. All these settings required scrolling through the various menu pages or pushing buttons and turning dials, which I had forgotten how to do. Switching the S100 from regular stabilization to panning stabilization took twenty-three keystrokes to accomplish. For the same task on the Canon 5D you just flip a switch.

A man’s got to know his camera and the seductive lure of the cell phone has caused my camera skills to atrophy. While I was staring down into the S100’s tiny screen life was happening all around me. I turned off the camera, put it in my pocket and decided to watch the races.

The whole reason we were at the races in the first place was because of the Sylings. The Sylings are friends of ours who live in Alamogordo. They are forever going on fun outings then putting cheerful, Team Syling posts on Facebook. CT and I decided it would be a good thing to be more like Team Syling so we are making an effort to do fun things around New Mexico. The trip to Vado Speedway was CT’s birthday present/Team Syling adventure. I don’t want you to get the idea I’m not romantic; I also bought her a 12-gauge Mossberg pump shotgun.

Vado Speedway is a fairly new track about 15 miles south of Las Cruces, New Mexico. You can see it from Interstate 10. The track looks small but they claim it’s 3/8th of a mile. Maybe the outside is 3/8 mile. It’s a dirt track, like God intended us to race on, and the corners are banked. The straights are short but the track is wide enough to allow plenty of passing. There are two lines at Vado: the high line and the low line. Both have their advantages but late in the evening the low line became very bumpy at the apex of the corner. Cars were bouncing up on two wheels in the rough. Most of the fast guys stayed up high where it was smooth, only dropping down to block a rival. As the evening wore on cars started to use the outside wall as a contact point like a slot car dragging the rails.

Stock car racing has changed a lot since the seemingly unlimited supply of Chevelles dried up. The night we went all the classes looked like Super Modified. There were no stock bodied cars. The lowest class cars are beat up sheet metal concoctions that look like something a child of three would draw when asked to draw a car. They resemble station wagons with large panels of metal aft to act as air dams. Think of the last outlaw sprint car race you went to with those giant billboard wings on top. It’s the same idea. The front wheels ran exposed on some of the cars. I don’t remember what they were named but in my day this class would be called the Sportsman class except for the homemade bodies.

The next step up from the flapping, crashing station wagon class was more station wagons. For all I could tell it was the same class, maybe “A” to the previous “B.” This class would have been called Late Models when I was going to stock car races back in the days when the planet Mars could still support life. These cars looked like the ratty-class cars but were built much better. The sheet metal was straighter and it didn’t flap around or fall off. The paint jobs and lettering were nicer and they crashed less. Besides being uglier than old style stock cars the Late Models’ engines sounded crisper and revved faster than the other, looser station wagons.

The top-tier division, known to me as Super Modifieds, were really nice cars. You could tell the owners had a ton of money in them, probably as much or more than a NASCAR stock car. They were fast and didn’t crash very often. The Super Modified cars didn’t look like station wagons but they still had acres of sheet metal on the side to assist with corners. All the wheels were covered by bodywork. NASCAR driver Kyle Larson was racing in the Super Modifieds with a Hendricks car and he did fairly well. He got a Main Event second place finish against drivers that spend their entire career in this specialized form of competition.

The racing was very close and heats were frequent. All the classes had several heat races to determine which cars made the main event and the grids were well populated. Driver/teams from Kansas, Wyoming, Illinois, California and other states attended. The stands were another story. When CT bought our tickets she was told they were sold out of general admission so she bought reserved seats. After everyone was seated the grandstands looked about 60% full. Maybe the cold, night air kept spectators away.

When the racing was over the announcers thanked the track owner for keeping stock car racing alive. Whenever you hear that sort of talk it’s not a good sign. South-Central New Mexico used to have a stock car track in Tularosa, another a few miles away near Alamogordo, one on Highway 9 west of Sunland Park near the border with Mexico, and I think Deming might still have a track and maybe El Paso.

Stock car tracks used to be everywhere. Where I grew up there was a track in Medly and one just across the Miami River in Hialeah. Those tracks are gone now. I wonder if dirt oval tracks are disappearing all over America. I believe part of the reason for grass roots oval racing’s decline is that none of the cars racing are related in any way to the cars found in the parking lot. That is if you can find a car in the parking lot.   Today everyone drives bloated SUVs or pickup trucks.

Then there’s the high bar of entry into the sport.  Even those ratty station wagons require a lot of work to build. Maybe the demise of cheap, rear-wheel drive sedans is part of the problem. The class structure never adapted to new realities in the marketplace. Look how NASCAR’s rigid rules have created a situation where you can buy a box stock Dodge, Chevy or Ford off the showroom floor with more horsepower than a NASCAR contender. I know the old time stock cars shared few common parts with the cars they resembled but at least they resembled them and had engines you could check off on the dealer’s option page.

Finally, the “Car of Tomorrow” eliminated the last tentacles connecting the cars on the track and the car you drove to the track. Now all the bodywork is the same and only paint creates the illusion of several brands. The situation is probably not as bad as I’m making it sound. I’ve gotten grumpy as I got old. I liked it when stock car racing was the most exciting thing happening on a Saturday night.

I’ll be back to Vado Park Speedway. Later in the year they are hosting USRA Modifieds, which look a lot like old style stock cars. Then there are the winged and un-winged Sprint cars along with Super Trucks. We all need to do our part to keep this uniquely American form of racing alive. Hopefully a new generation will get interested in stock cars and start racing cheap, two liter, front-wheel drive sedans around those well groomed dirt ovals. I know a couple unused tracks nearb.  Just add drivers.


Never miss an ExNotes blog:

The Wayback Machine: Marking Time

By Joe Berk

I’ve always been a watch guy. It probably started when my parents surprised me with a Timex when I was a kid. The thought of having my own wristwatch was heady stuff for a boy back on the east coast (or anywhere else, I imagine). To make a long story short, I’ve been a watch collector ever since. I don’t specialize, and many times I won’t keep a watch forever. If I like the way a watch looks and it’s not crazy expensive, I’ll wear it for a while, with the duration of “a while” usually determined by the time it takes for the next interesting thing to catch my eye.

The real deal: Apollo 15 Astronaut Dave Scott’s Bulova, which sold for a cool $1.625 million at auction.

I make no excuses: I like watches, and I always wonder about guys who don’t wear them. Not wearing a watch is a common thing with young guys today. When I taught in Cal Poly’s College of Engineering, one of my topics focused on how to do well in an interview. My guidance was simple. Dress sharply, be early, look the interviewer right in the eye, speak up, don’t use the word “like” incessantly when you speak, and wear a watch. A lot of kids today don’t wear watches. If they have any interest in knowing what time it is, they look at their iPhone. That’s a no go, I’d tell my students. If you don’t wear a watch, the person interviewing you will conclude you have no sense of time-based urgency. It’s what I always concluded when someone showed up not wearing a watch.

Anyway, to get to the subject of this blog, I want to tell you about the Bulova Lunar Pilot. It’s a cool piece with an interesting story that goes like this: With the advent of the Apollo lunar exploration program (the NASA endeavor to put men on the moon), the US government decided we needed an official space watch. Omega won the competition with their Speedmaster watch, and for the next 14 missions, that’s what astronauts wore.

Here’s where it gets complicated and where the story gets Internet-fuzzy. Depending on which source you believe, Astronaut Dave Scott wore a Bulova watch on the Apollo 15 mission for one of the following reasons:

He wore the Bulova watch because his Omega broke.
He wore the Bulova watch because he felt like it.
He wore the Bulova watch because Bulova was trying to replace Omega as the official NASA watch.
He wore the watch because the US government, Bulova, or other parties wanted the official watch to be something made in America.

Whatever the reason (and you can find stories supporting each of the above floating around in that most authoritative of all sources, the Internet), Dave Scott wore the Bulova on the Apollo 15 mission, and Omega went from being “the only watch worn on the moon” to “the first watch worn on the moon.” It could not have gone over well at the Omega factory.

Dave Scott’s original Bulova, the one he wore on the moon, sold at auction a few years ago. The predicted auction price was $50,000. As predictions go, it wasn’t a very good one. When the gavel came down and the dust cleared, Scott’s Bulova sold for a cool $1.3 million. Throw in the auction commission and other fees, and you’re talking about a $1.625-million wristwatch. Wowee!

Bulova, today no longer an American watch company (they were bought by Citizen a few years ago) recognized a marketing opportunity when it fell into their laps, and they re-issued an internally updated version of Scott’s watch as the Bulova Lunar Pilot, complete with a 262 kHz Accutron movement. I have no idea what a 262 kHz movement is, except that the Bulova marketing hype tells me it means it’s super accurate.

The not-so-real deal, but a hell of a deal nonetheless: The Bulova Lunar Pilot, purchased for just under $300.  Yep, as I type this, I’m wearing my Bulova.

The increased accuracy really didn’t matter to me when I saw the watch (I’m retired now and I seldom need 262 kHz accuracy when I decide I feel like going somewhere), so that’s not what prompted me to pull the trigger. I just like the way it looks, I like the swirl of stories around the original Bulova moon watch, and my Dad wore a Bulova when I was a kid.

Oh, one other thing helped…a trick that has prompted me to pull the trigger on other discretionary purposes.  You know how the Internet spies on us, right?  I mean, folks complain all the time about looking at something on Amazon or whatever and then it starts showing up in their Facebook feed.   That’s not always a bad thing.  When I first looked at the Bulova Lunar Pilot it was a $600 bauble.   I wasn’t going to pay that kind of money, and I guess the spymasters/Internet marketeers figured that one out.  They and I knew it was a waiting game to see who would blink first.  Because I had looked for the watch on Amazon, I started getting emails from different retailers to buy the watch for less, and I let those roll in.  Delete, delete, delete, and then one day, an offer floated into my inbox for $299.  Hmmm.  Delete.  And sure enough, a day or two later and that $299 offer came with a coupon for $20 off and free shipping on my first order.  Ka ching!


Help us bring you these stories:  Please click on the popup ads!


More watch and other reviews are here!

Charles Darwin, Alive and Well

You know those signs that tell you not to drive into flooded areas?

Every time I’d see one, I always wondered about the target audience.  I mean, who would be stupid enough to drive into a flooded area?  And if they were that stupid…well, maybe ol’ Darwin had the right idea.


Help us help you…click on the popups!


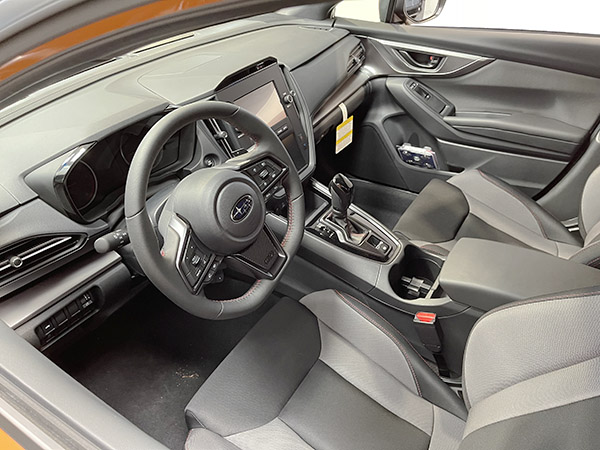
Based on the cover photo, you may have already guessed where this story is going.  I don’t have to look very far to find someone stupid enough to “enter when flooded.”  I see that guy in the mirror every morning when I shave.

You see, there’s a creek that flows across the dirt road out to the West End Gun Club.   I’ve been driving across it for close to 40 years now.  Most of the year, it’s a dry creek bed. After a rainy spell, we’ve had times when it was so obviously flooded I wouldn’t attempt to cross it.  Most of the time.  But other times when the water was flowing, it didn’t look bad enough or deep enough to keep me from taking a chance.  I mean, what could go wrong?

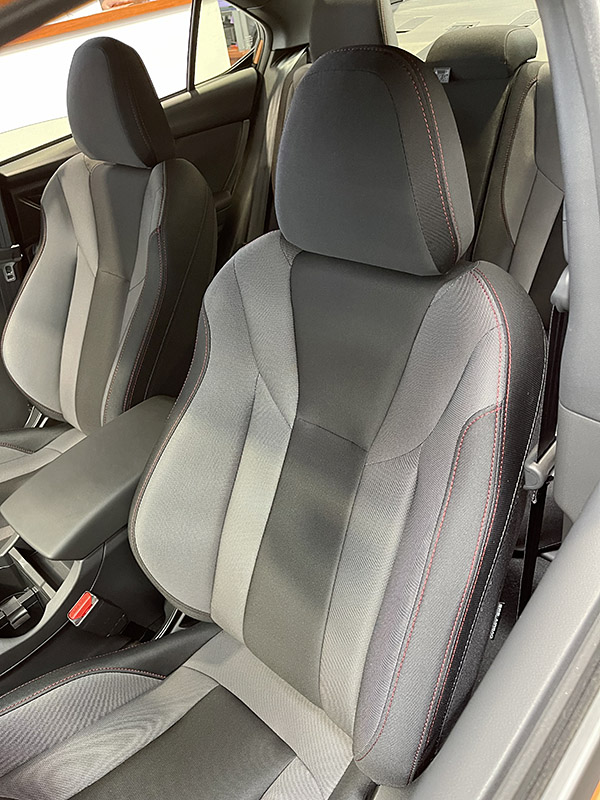
I guess I’m one of those guys who has to urinate on the electric fence to see for himself.  Yep, I finally got stuck, and stuck good.  I always figured with my all wheel drive Subie I could get out of anything.  But you know, AWD ain’t the same as 4WD.    Something I learned today.

When I heard the underside of the Subie hit the ground on the ledge (that was now more of a bank than a ledge), it hit hard.  I felt it as much as heard it.  I was in trouble.  I tried to back out, but I knew from the downward facing hood the Subie’s butt was in the air and I could feel the front wheels spinning in the water.  I was balanced on the bank, and I could feel the car rocking and pivoting slightly to the right.  It was like being in a formulaic movie or a bad dream when a car has gone out of control and is hanging over a cliff.  I opened the door and the bank was directly under the opening, and as I looked at the ground, the bank was eroding.  In the wrong direction.  Water started coming over the door sill and into the car.

I beat a hasty exit out the passenger door.   Other folks going to the range, wondering if they could cross, had stopped and were watching me.   I had set the example.  The spectators tried to help by pulling down on the rear bumper.   It did no good.  I was high sided, and if anything, the car was moving more toward the stream, which was starting to look like Niagara Falls.  Yikes.

I called the Auto Club, but they put me on hold.  The bank continued to give way under my Subie, so I called 911.  They took my info and I never heard from them again, nor did anybody show.  You know the old saying…when seconds count, the cops are only minutes away.  The other spectators drifted away.  I was on my own.

Then a miracle occurred.  Good buddy Lee, who I met for the first time this morning, came by in a Jeep.  A real Jeep.  With a winch.  We connected (literally and figuratively), but it was no good.  As the winch did its thing, it dragged the Jeep toward the Subie.  Lee and I looked at my  situation.  Lee put boulders in front of the Jeep’s wheels, and the winch dragged them along, too.  “If I could hook up to another vehicle,” Lee said, “we could make this work.”

Then the second miracle occurred.  Another newly-met good buddy named Aaron rolled up in a big Dodge pickup.  He hooked up to Lee’s Jeep, Lee hit the winch button, and just like that (with some God-awful undercarriage scraping and grinding), I was free.   For a few seconds, I thought my future held a commission as a U-boat commander, but no more.  Lee and Aaron, wherever you are, thanks much!


Never miss an ExNotes blog:

Setting Up Lee’s Classic Turret Press

By Joe Berk

This blog outlines the first steps in setting up the Lee Classic Turret Press Kit. Although it’s easy, there are a lot of steps and it’s more than you or I want to cover in a single blog.  I’ll present additional blogs covering this topic in the coming days.

The Lee Classic Turret Press includes good instructions. The kit includes the turrent press, the handle, a spent primer catch tube, primer arms, and hardware.

After the turret press has been secured to your reloading bench (you can view the Lee bench plate installation blog here), attach the primer catch tube to the barb fitting beneath the ram.

This barbed fitting on the ram underside captures ejected primers.
The primer catch tube attaches to the barb.
The primer catch tube installed. It’s nice not having primers falling out. This is a well-thought-through design.

Lee provides a clear plastic bag containing the hardware items you see below.

The handle bolt and fittings, the lock ring wrench, and two primer arms (one for small primers, the other for large primers).
The handle attaching hardware.

You can install the press handle to operate the press from either the left side or the right side.  I installed mine on the right side.  To do this, install the bolt from the left side and the two fittings (one goes inside the other) on the right side of the ram linkage.

Intallation of the handle’s half-inch bolt and the fittings in the ram attach point.

Insert the press handle on through the fitting, and then tighten the bolt.

The handle installed on the Lee turret press.

After installing the press handle, you can operate the press to cycle the ram. Each time you do so by raising and the lowering the ram, the turret head will advance a quarter turn (or 90 degrees) counterclockwise.  At this point, it’s a good idea to oil the ram, the ram linkage, and the turret.  I used gun oil on my press.  Lee states in their instructions that any gun oil will do.

The lower arrow points to the ram. The upper arrow points to the twisted 1/4-inch-square bar that cams the turret 90 degrees counterclockwise with each ram cycle. It’s a very clever design.

I’m going to initially reload 9mm ammo on my Lee turret press, so the next step involved installing the Lee Deluxe 4-die set in the turret.    We’ve previously written about Lee’s Deluxe 4-die sets for other cartridges here on the ExhaustNotes blog (we’ll include a set of links below).   In my opinion, they are the best dies available from any reloading equipment supplier.

Lee’s Deluxe 4-Die Set in 9mm.
Lee’s Deluxe 4-Die Set includes a powder dipper, a shellholder, a resizing/decapping die, a powder through-hole expanding die, a bullet seating die, and the factory crimp die. Lee dies are the best dies I’ve ever used.  They are also the least expensive.

I started by installing the 9mm shell holder in the ram. After installing the shell holder in the ram, I raised the ram all the way up.

The 9mm shellholder in the turret press ram.

I next installed the the decapper and resizing die in the turret head.  With the ram fully raised, I screwed the sizing die into the ram until it contacted the shell holder, and then locked it in place with the locking ring.

The resizing die in the turret, locked in place by the locking ring.
I raised the ram fully, and screwed the sizing die all the way down so that the bottom of the die contacted the shellholder. Then I locked it in place with the locking ring.

After doing the above, I lowered the ram and inserted a 9mm case in the shell holder.   I then partially raised and lowered the ram halfway four times.  That rotated the turret to position the sizing die directly above the ram again.  You can also turn the ram manually.  With the sizing die directly over the ram, I raised the ram fully.   The sizing die resized the 9mm case, the old primer was pushed out of the case, and the primer was captured by the tube hanging beneath the ram.

A 9mm case in the turret press.
Raising the ram to resize the case and push the spend primer out (the decapping operation).
When the ram is lowered, the turret is cammed a quarter turn counterclockwise.

The next die, installed one position to the left of the sizing die, was the expander die.   After raising the ram, I screwed it all the way into the turret such that it touched the shell holder, and I locked it in position with its locking ring.  I then repeated what I had done earlier.  I raised and lowered the ram halfway four times to bring the expander die back over the ram.  I put the 9mm case into the shellholder and ran the ram up fully.  It flared the case mouth perfectly, just enough to allow starting a 9mm bullet.

The expander die locked in place with its locking collar. This die is installed in the threaded turret hole one position to the left of the resizing die.
A 9mm, 124-grain plated copper bullet being fit checked in the flared case mouth. I’m not going to seat the bullet yet (we’ll discuss that in a subsequent blog); here, it’s only being fit checked after the case mouth flaring operation.

I then installed were the last two dies.  I installed the bullet seating die by partially screwing it into the turret’s third threaded hole, and then I installed the factory crimp die by partially installing it into the turret’s fourth threaded hole.  I didn’t attempt to adjust the bullet seating die or the factory crimp die yet; that will come later and we’ll discuss this in subsequent blogs.

The bullet seating die is the third die installed in the Lee turret.
The factory crimp die is the fourth die installed in the Lee turret.

Lee includes two priming arms and a lock ring wrench in the clear plastic bag containing the turret press hardware.  You may have noticed that the four dies are right next to each in the turret.  The lock ring is a clever tool that makes it a bit easier to tighten the four dies’ lock rings.

The Lee lock ring wrench (top view).
The Lee lock ring wrench (bottom view).

Two days from now, I’ll cover installing and adjusting Lee’s auto-drum powder measure, and then after that I’ll have a blog on installing Lee’s safety primer feed.  Stay tuned, there’s more coming on this awesome reloader.


Never miss an ExNotes blog:


More reloading and more gun stories?  You bet!


Here are links to our earlier blogs on Lee reloading equipment:

Lee Bench Plate
Lee’s Modern Reloading Manual
Lee Safety Powder Scale
Lee Classic Turret Kit Unpacking
Lee .44 Magnum Dies 1
Lee .44 Magnum Dies 2
Lee .44 Magnum Dies 3
Lee .357 Magnum Dies

Lee’s Bench Plate

By Joe Berk

Our story on the Lee Classic Turret Press Kit continues.  There’s a lot in the kit, and we’re presenting articles on each item (links for our earlier Classic Turret Press Kit, its contents, and other Lee-related blogs are included at the end of this blog).   Today’s blog focuses on the Lee bench plate.  The bench plate allows quick installation and removal of any Lee press, and its price is $39.  The bench plate idea is a good one.  I own a couple of Lee progressive reloaders and I don’t have extensive real estate on my loading bench.  The Lee bench plate is the answer.

Here’s what you get in the Lee bench plate kit.

The Lee bench plate includes the lower plate, two Z-bars, four Phillips head screws, three panhead bolts with washers and nuts, and the upper plate.

The smaller upper plate bolts to the press base (the red casting that forms the base of any Lee reloading press).  The larger lower plate bolts to your reloading bench.  The two zinc plated pieces are Z-bars that screw into the lower plate and capture the upper plate bolted to the press.   The upper plate has several holes that allow it to be attched to any Lee press.  You can buy extra upper plates if you have other presses. It makes it easier to change presses on your bench.

The Lee bench plate includes everything you’ll need except the bolts required to attach the lower plate to your reloading bench (that makes sense because Lee doesn’t know the thickness of your reloading bench).  You have to drill four holes through your bench to attach the lower plate.  Here’s what the lower plate looks like installed on my reloading bench.

The lower plate attached bo my reloading bench.

After attaching the lower plate to your reloading bench, the next step is to attach the upper plate to the reloading press.  I installed the upper plate on my Lee Classic Turret Press using the three panhead bolts, nuts, and washers Lee includes.  Note that the press is inverted in the photo immediately below.

The upper plate attached to the press. The red arrow indicates the nub that prevents the press and upper plate from backing out. The press is upside down in this photo.

It’s not immediately apparent in the Lee instructions how to orient the upper plate (i.e., which side faces up).  It should be installed such that the flat base of the plate is at the bottom, and the two lips on either side extend up.  This will be more clear in the photos below.

Once the upper plate is attached to the press, the press and plate are set on the lower plate and the Z-bars can be secured to the lower plate with the four Phllips head screws Lee provides.  The Z-bars capture the upper plate, securing the press to the lower plate and the reloading bench.

There are nubs at the end of the upper plate lips that catch the end of the Z-clamps (denoted by the red arrow), so then the Z-clamps are tightened, the little nub prevents the whole affair (upper plate and reloading press) from backing out.
A macro shot showing the upper plate nub captured by the Z-bar.

Here’s the press mounted on the bench with the Lee bench plate.  It’s a clever approach.

Lee turret press attached to the reloading bench with the Lee bench plate kit (right side).
Lee turret press attached to the reloading bench with the Lee bench plate kit (left side).

If you have other Lee presses or reloading gear, you can purchase additional upper plates (Lee calls this part the steel base block) directly from Lee.  Lee includes the mounting hardware (the panhead bolts, nuts, and washers) with each additional upper plate.  Lee lists the other equipment items compatible with the bench plate in their instructions:

    • Classic Turret Press
    • Load-Master
    • Breech Lock Reloader Press
    • Breech Lock Challenger
    • Classic Cast
    • Breech Lock Classic Cast
    • Pro 6000 Six Pack Progressive
    • Red Base Pro 1000
    • Red Base 4 Hole Value Turret Press
    • Year 2018+ Pro 1000 Press
    • Year 2018+ 4 Hole Value Turret Press
    • Auto Breech Lock Pro Press
    • Automatic Processing Press & Automatic Case Primer
    • Auto Bench Prime

If you don’t want to purchase additional upper plates, you can make your own upper plate from 3/4-inch plywood.   Lee includes a drawing in their instructions showing the dimensions of a plywood upper plate.  That’s a nice touch.  Lee also offers information on plywood bases for, as they describe it, “other color” presses.  That’s a nice touch, too.

The key question in all of this is:  Do you need the Lee bench plate?  If you use one press only, the answer may be no. You could just mount your press directly to the bench and not use the plate at all.  But if you own other Lee reloading gear (or another “other color” press), you might want to consider the Lee bench plate.  Or, if you want to get your press out of the way to use your bench for other purposes (such as cleaning a gun), it makes sense.  The bench plate greatly eases removing the Lee press for installing other equipment or to clear the bench.   It’s a good idea and good value for the money.  It makes sense for me.


Help us out, folks:  Hit those popup ads!


Never miss an ExNotes blog:


Check out our other Lee reloading equipment blog posts:

Lee Modern Reloading Manual
Lee Safety Powder Scale
Lee Classic Turret Kit Unpacking
Lee .44 Magnum Dies 1
Lee .44 Magnum Dies 2
Lee .44 Magnum Dies 3
Lee .357 Magnum Dies

Chinese Diesel Heat: Part 2

By Joe Gresh

There are a couple styles of these Chinese heaters. I bought the all-in-one, suitcase version. My Chinese heater came mostly assembled and all I had to do was rig up the included exhaust pipe, air intake, output duct, and connect a 12-volt battery. If you’re going to install the heater in a van I think the version broken into separate parts would be a better choice. In fact, maybe it’s the better choice regardless.

My suitcase Chinese heater works okay but you can smell diesel fuel even when it’s not operating because the fuel tank cap is vented. It’s not a strong smell and my shed is pretty drafty. If my shed was sealed tighter the fumes would be more noticeable. The heat output has no diesel smell but it has some sort of odor I can’t quite place, maybe it’s the plastic housing covering the heater cooking off or it could be the smell of air on hot aluminum. Anyway, it’s not an objectionable smell and I remain fully conscious when the heater is running.

Installation was a breeze and only took about 30 minutes. I mounted the unit on two recycled pieces of 2×6 form wood to get the exhaust pipe high enough to go over the shed sill and punched a 1-inch hole in the shed wall for the combustion gas exhaust.

For the combustion air intake I simply strapped the air filter to the side of the heater with a tie wrap. I was kind of excited to see if the Chinese heater would actually heat so I hung the output pipe in mid-air and connected a 12-volt lawn mower battery for power.

My unit came with the cheapest controller available and maybe that’s because I bought the cheapest available heater. I can’t say. The poorly written installation manual gave a “5-push on the unit’s start-stop button while holding the remote control button down” type of pairing instruction. After a few tries I was surprised that the remote control linked up with the heater and could turn the machine on and off. In Chinese Heater: Part 1 I mused about replacing the control with a fancier unit but after seeing the el cheapo in action I’ll just stay with it until it breaks.

These Chinese heaters follow an automated start up process. First the blower comes on at slow speed, then the glow plug (or igniter) starts heating a small metal screen in the combustion chamber. Next, the fuel pump starts pulsing to supply fuel to the combustion chamber. A few minutes after pushing the on button you’ll hear the fuel ignite with a muffled roar and the blower will pick up speed. In the final step the glow plug turns off and the unit burns the diesel fuel from the red hot metal screen. If anything goes wrong with the startup the heater will try again. You really get an amazing amount of technology for 120 bucks.

Of the ten times I’ve started it my machine failed to launch once, but on the next try it was ok. The heater puts out a fairly good stream of heat and in a smaller space it would work well. Unfortunately, my large, steel shed has zero insulation and gaping holes everywhere so the unit had to be run flat out to effect any change in the shed temperature.

It took about 30 minutes to raise the shed temp from 42 degrees to 48 degrees and that was about as warm as it got. That’s still better than no heat at all. I think if I had three more Chinese heaters I could get it nice and warm inside.

Shutting down the Chinese heater takes about 5 minutes as the blower keeps running until the combustion chamber cools down. Shutdown is also fully automated and all you have to do is press the power button until the remote displays off and then wait. It’s probably not a good idea to cut 12-volt power to the unit during shutdown, as the plastic heater housing would probably not like that.

One of the reasons I recommend the break-down version is that you are free to mount the fuel tank outside. In fact, you could mount the entire unit outside and poke two holes for a return air and hot air registers. Mount the control panel on the wall and you don’t even have to go outside to turn the little beast on. Outside installation would eliminate any diesel odors, as you would have only warm air pumping into your shed. The entire combustion cycle would be on the other side of the wall, free to stink up the planet.

Noise is another concern that favors outside installation. My Chinese heater made a bit of noise. You hear the burning process, it sounds like a furnace kicking in but quieter and the blower makes normal blower noises depending on what power level the machine is operating. The fuel pump has a slight ticking noise that isn’t noticeable at high power/high blower speed. As you turn down the heat output the blower gets much quieter and the pump ticking becomes more noticeable. None of this matters in my situation because it’s a shed and I run the heater at full power all the time. The heater isn’t so loud that you can’t carry on a conversation standing next to it.

Once I was sure I was going to keep the little heater I bent a piece of sheet metal to hold the ductwork. Without a brace the hose kind of wiggled around, describing a figure eight in space.

As a test, I marked the fuel level of the see through tank and added 1 quart of diesel fuel. The heater ran over two hours at full power on that quart. Of course if you turned it down like you would in a van or RV it would burn even less fuel. 1.7hz was the lowest power setting, meaning the fuel pump cycled 1.7 times per second. 5.5hz was the highest setting. I’m not sure it works like this but if 5.5hz burns a quart every two hours then a setting somewhere south of 3hz should double your fuel mileage and halve your heat output.

Since the shed is off-grid and runs on solar power I have tons of 12-volt DC power available. There are 12 deep cycle batteries on a rack outside the building and a 12-volt breaker panel but I don’t have any conduit to where the heater is located. These heater units use a good bit of DC power when first starting, maybe 8 amps or so. Once the glow plug shuts off the unit runs on the red-hot screen that surrounds the glow plug, kind of like an old Cox .049 model airplane engine. With only the blower running my 2-amp trickle charger kept up with the demand. If you are using the heater in a van make sure you don’t drain your battery running the heater.

I’ve ordered a temporary, 15-amp, 12-volt power supply to run the heater off 120VAC. Eventually I will get around to connecting the heater to my battery bank. There is a drop of around 1-volt between what the remote display says is available at the heater and the actual battery voltage measured at the battery terminals. I might run some heavier wires to the heater control board. Most likely I won’t worry about the voltage drop because I just like saying voltage drop.

From my online research the only parts that go wrong with these Chinese heaters are glow plug failures and blower motor bearings. These problems don’t seem to crop up until a few years have passed. Parts are available and cheap for the heater so it should last a good long time with regular service. After a few years of running dirty fuel oil the combustion chamber may soot up requiring a clean out. Again, the gasket kits needed for this procedure are easy to find online. There’s a vibrant Chinese heater community on the Internet. It’s like owning a CSC RX3 adventure motorcycle.

The heater works and it produces heat, which is all it promised to do. My unit is rated at 8kw, which works out to 27,000 BTUs. I’ll still need to wear a jacket in the winter. Future modifications may be to relocate the combustion air intake to the outside so I don’t suck my hard-earned, heated shed-air into the combustion chamber and out the exhaust. Maybe I’ll move the whole magilla outside. A carbon monoxide alarm in the shed wouldn’t hurt either. I think if your shed is maybe 20 X 20 feet and well insulated the Chinese heater would work well. If you are into the Van Life thing a Chinese heater could be just the ticket to stay warm without running the van engine.

In the future I’m going to try recycling my used motor oil at 25% used oil to 75% diesel. I have a lot of old motor oil and I might as well use it to heat instead of pouring it into the Autolube tank on my Yamaha like my buddy Hunter does. If you decide to get one of these heaters let us know how it works for you.


Help us bring more stories to you…please click on the popup ads!


Part 1 of  the Chinese heater saga!


Never miss an ExNotes blog:

Lee’s Modern Reloading Manual

By Joe Berk

Lee’s Classic Turret Press Kit includes their Modern Reloading manual.   It’s written by the late Richard Lee (the founder of Lee Precision), it’s the second edition, and Lee’s retail price is $40.98.   By way of comparison, on Hornady’s site their reloading manual is $59.99, on Sierra’s site their reloading manual is $39.99, on the Lyman site their reloading manual is $34.98, and on the Speer site you get the load data for free (it’s published on their site).   You can also purchase the Lee manual on Amazon; oddly, the price on Amazon is higher than it is on the Lee website.

The Lee reloading manual is comparable in heft and contents to other big reloading manuals.  It’s a hardcover book with 692 pages and several chapters on various reloading topics, including basic instructions and more in-depth discussions of advanced reloading topics.  Richard Lee wrote the first parts covering various topics including the company’s history, Lee’s reloading equipment, primers and primer sensitivity (this was extremely interesting), how to reload, reloading for best accuracy, rifle reloading, handgun relaoding, measuring powder, powder safety, pressure issues, matching bullet metal to chamber pressure, hardness testing, bullet casting and sizing, shotgun reloading, and muzzle loading.  I thoroughly enjoyed reading Lee’s articles.  They are written in a folksy, technical, and easy to follow manner. It’s like having a conversation with one of my shooting buddies.  That, all by itself, is a good reason to buy the Lee reloading manual.

A load table inside the Lee reloading manual showing some of the date it contains that other reloading manuals do not. This includes the starting charge volume, the Lee dipper number, the Lee Auto-Disk number, and the 1 Grain Factors.

The load data tables start on Page 161 and continue to Page 686 (the load tables comprise most of the book).  These are interesting and they include several bits of data not found in other reloading manuals.  There’s the usual dimensioned cartridge drawings, starting load and max loads, the pressure, and the velocities, and then there’s more.  These additional pieces of information not usually found in other reloading manuals are:

    • Useful Case Capacity.  On each of the load table cartridge drawings, Lee includes the useful case volume in cubic centimeters.  Why this is useful will be apparent when you read the next bulleted statement.
    • Volume cc.  This table entry, immediately to the right of the starting load, shows the volume occupied by the starting charge.  You can compare this to the useful case capacity info (see above) included in the cartridge drawing to get an idea of how full the cartridge case will be at the starting charge.  Usually, a cartridge will perform better if the case is full or nearly full.  I’ve not seen this information in other reloading manuals.  I think it’s a good thing to know when selecting which powder to use.
    • Lee Dipper.  Lee manufactures different size powder dippers.  The powder dipper is basically a yellow plastic spoon used to scoop a known volume of powder.  Some reloaders use this approach rather than using a powder dispenser or a scale, but others do.  Dippers are included with Lee dies, and you can also buy a set of different sized dippers separately. It’s not the powder measurement and dispensing approach I used, but I found the data interesting.  I’ve never seen this data in other load manuals.
    • Auto-Disk.   Lee makes an Auto-Disk Powder Measure.  It’s a device that uses a sliding disk with different volume chambers (or cavities) in it to control the volume of powder dispensed by their Auto-Disk Powder Measure.  These cavities are denoted by decimal numbers.  The Lee reloading manual tables identify the appropriate Auto-Disk to use with charges included in the table.  I’ve never seen this data in other manuals.
    • 1 Grain Factor.  This is another bit of data not included in any other reloading manual I’ve ever seen.   The 1 Grain Factor can be used to show velocity reduction if the maximum powder charge is decreased by one grain.  You take the maximum velocity, multiply it by the 1 Grain Factor, and it will show the decrease in velocity that will be realized by reducing the powder charge 1 grain.  There’s a similar 1 Grain Factor included that can be used to calculate pressure reduction for a 1 grain powder reduction   The 1 Grain Factors are not included for every cartridge (they are included for the hotter magnum cartridges such as .44 Magnum and 7mm Remington Magnum).
A Lee dipper included with a set of Lee reloading dies. The dipper is a powder scoop. You can also buy the dippers separately.
An earlier Lee Auto-Disk Powder dispenser. This powder dispensing approach used disks (see lower arrow) installed in the dispenser (see upper arrow). The disks contained different cavities that dispensed different powder volumes.
A Lee Auto-Disk powder disk, as seen from below. The cylindrical openings collect different volumes of powder from the Auto-Disk hopper. Selecting different openings will dispense different charges.
Lee Auto-Disk powder disk as seen from above. The volume designator for each cavity is identified on the disk top. The Lee reloading manual shows which opening to use for a selected powder charge. No other reloading manual contains this information.

The Lee manual breaks with typical reloading manuals on the order in which loads are shown.  In other manuals, the cartridge sequence is organized by bullet diameter, and then within each bullet diameter category, by cartridge maximum velocity. There is a table of contents in the Lee manual (it’s on Pages 159-160) showing all the cartridges included in the Lee manual and where their load data appears.

If you are a reloader who enjoys getting into the more technical aspects of load development (and what reloader isn’t?) I believe you will thoroughly enjoy Lee’s Modern Reloading.  I think it’s a first-class work as good as or better than the manuals from Lyman, Sierra, Hornady, and other reloading manual publishers.  It’s money well spent, and when you purchase Lee’s Classic Turret Press Kit, you basically get it for free.


Keep us going…please click on the popup ads!

Never miss an ExNotes blog:


Read our blogs on other Lee reloading gear:

Chinese Diesel Heat: Part 1

By Joe Gresh 

It’s starting to get a little cold here at Tinfiny Ranch. Our nights drop to the mid 20’s and the sunny days top out somewhere in the mid 50’s. That’s not very cold compared to the northern states but it’s still cold enough to make working in the shed less than comfortable. Part of the problem is the shed itself: Made of thin sheet metal with zero insulation, the inside of the shed tends to mirror the outside temperature within a few degrees. Before you tell me to insulate the shed know that it costs nearly as much as the shed to insulate the thing and that I am thrifty.

I suffer in the cold of winter and in the heat of summer. Summer isn’t as bad because I can open the four big roll-up doors and get some air moving through the building. Winter is harder to deal with so I bought one of those Chinese diesel heaters that you’ve read about in all the larger heater-centric publications like “Chinese Heater Digest” or “Hot Asians!” magazines. I took the plunge into oil burning and am here to tell you about it.

Chinese diesel heaters have a huge YouTube community.  There are hundreds of videos describing installation, modification, how to burn waste oil, hydraulic oil and any other type of oil. The phrase “Chinese heater” encompasses dozens of factories producing hundreds of Webasco and Espar clones. The price difference is incredible: A real Webasco 2000-watt diesel heater will cost around $1300 while I picked up the 8kw Vevor clone version for $119 with shipping included. You have to really dislike China to pay $1200 more for essentially the same item. The build quality is slightly better on the brand name units but functionally they are the same. You can find comparison videos on YouTube if you are interested in the minor differences.

Normally I buy a lot of junk from Amazon. I know I shouldn’t because Bezos has all the money and maybe it would be better if we spread it around a bit. For the Chinese heater purchase I decided to try EBay and give a different multi-billionaire my money. Unfortunately, the ultra low price I paid blinded me to some important control module downgrades. Anyway, Bezos gave Dolly Parton 100 million dollars for her charity work so he’s back in my good graces.

My EBay heater came securely packed with only minor damage to one of the mounting flanges. Everything you need for installation was included except for two triple A batteries for the remote control and diesel fuel for the tank.

The instruction manual’s translation was in the style of a 1960’s Japanese motorcycle owner’s manual and if anything was even more cryptic. I found it easier to watch several YouTube videos as the manual was nearly useless.

The cheaper, cheap Vevor Chinese version I bought came with the simplest control. A large push button turned the heater on and off. A remote control allows for changing power output by speeding up or slowing down the fuel pump (measured in pump-cycle hz). The startup and shutdown sequence is fully automated and several steps long. This is where I wish I had the better control panel as it shows each step of the process. I am kind of in the dark with the controller supplied. I’m never sure what the thing is doing or where in the sequence we are. It costs $30 for the good controller, negating any money I saved getting the cheaper, cheap Chinese model. I should have bitten the bullet and bought this one from Amazon.

Like the good chair at your house, the good controller does everything better. It shows fan speed in RPM, glow plug status, combustion cycle, and displays any error codes in alphanumeric format instead of blinking lights. You can also prime the fuel pump a little easier with the good controller. The heater works exactly the same but you feel better about it.

You get a couple feet of exhaust tubing and a little muffler for the combustion gas exhaust. If you are installing the heater in a van or RV you’ll probably need a longer pipe.

For combustion air intake you get a coarse, plastic air filter that will stop large animals from climbing inside the air intake pipe. Also included are a duct pipe, a register, and a bunch of clamps, screws and small parts.

In Chinese Diesel Heat Part 2 we will assemble and install the diesel heater and see how it performs. Internet reviews on these heaters are all over the map. Some people say they are junk, some say they are equal to the expensive units. With the variations of quality coming out of various Chinese factories, both camps may be right. I’ve found any product that requires installation or mechanical ability to use seems to garner more negative reviews. I suspect some of those bad reviews are installer created problems.


Please keep clicking on the popup ads!

Never miss an ExNotes blog: