Coming Your Way…

By Joe Berk

Boy oh boy, do we have cool stuff coming up on the ExNotes blog!  Here are just a few of the things coming your way…

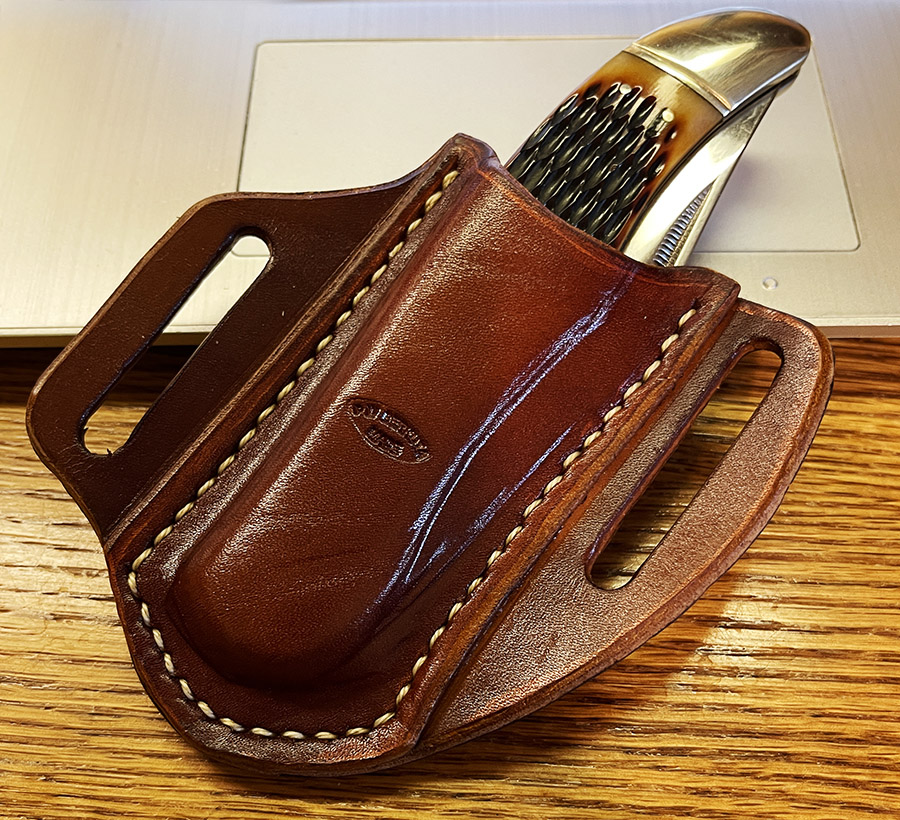
The Rough Rider Knife and Custom Holster

Wow, a super cool Rough Rider large folding knife, so big it actually makes a Buck 110 look small, along with something that makes it even better:  A custom-made holster, stitched together by good buddy Paulie B!  It’s the one you see at the top of this blog, and it sure is sweet!
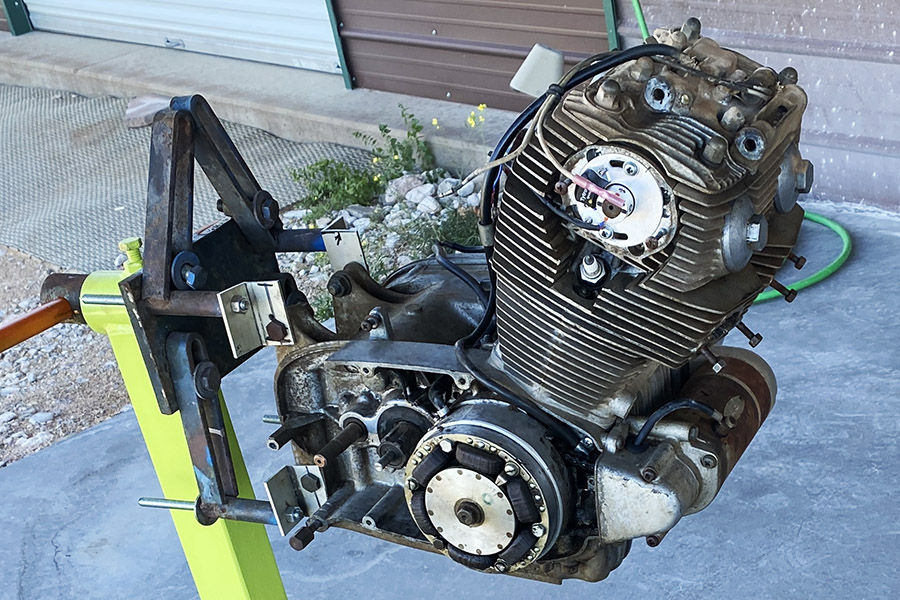
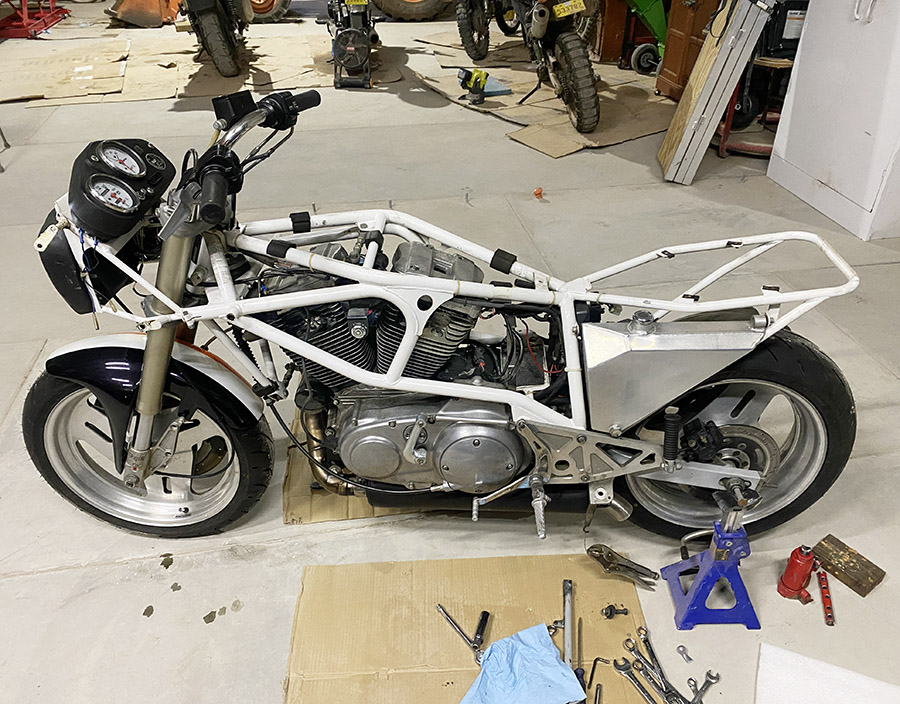
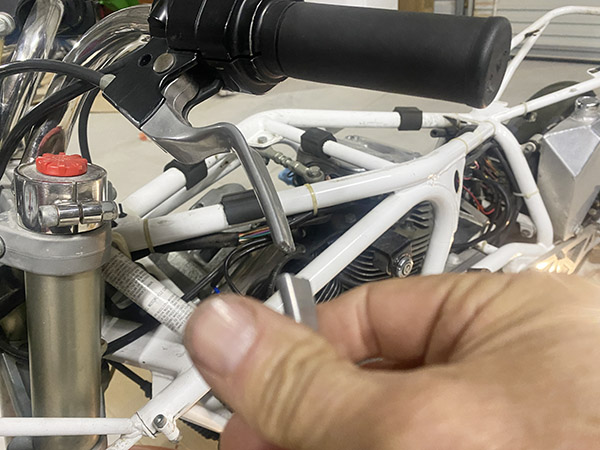
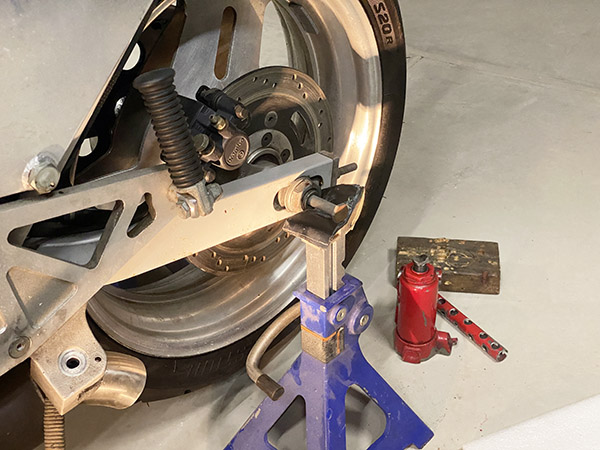
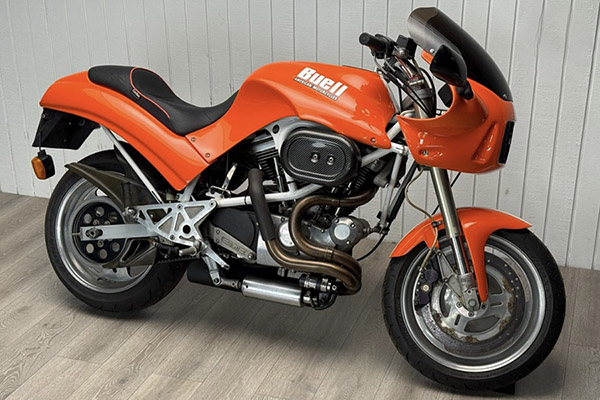
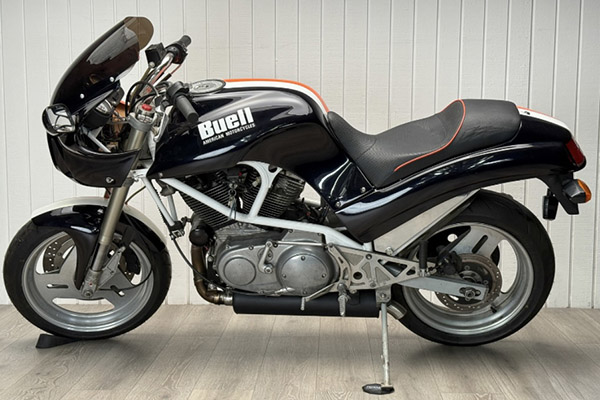
More Buell

Joe Gresh is going great guns with his new Buell.  I am so jealous.  You can expect more on Joe’s bringing the Buell up to Tinfiny moto standards, and maybe even get a chance to listen to the awesome potato potato potato aural splendor that is the essence of all things Harley.

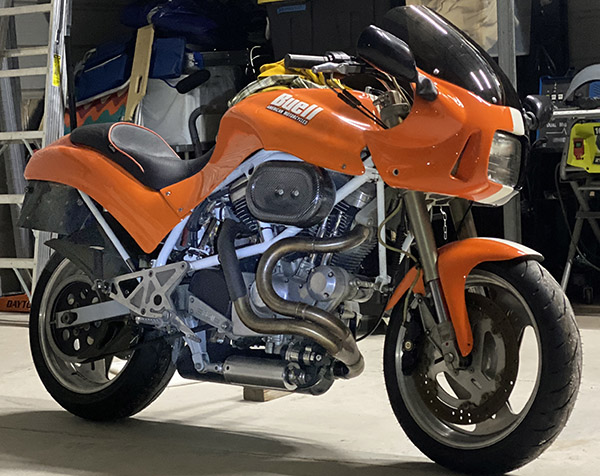
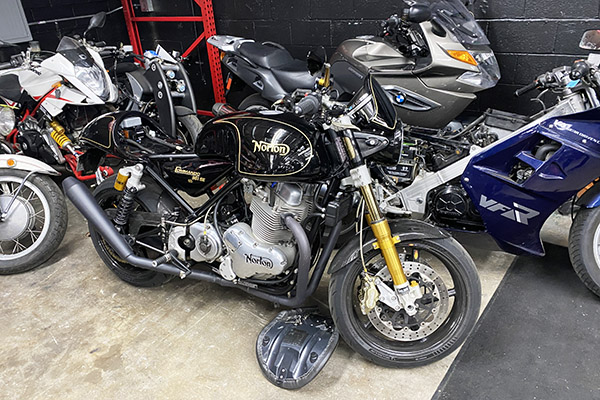
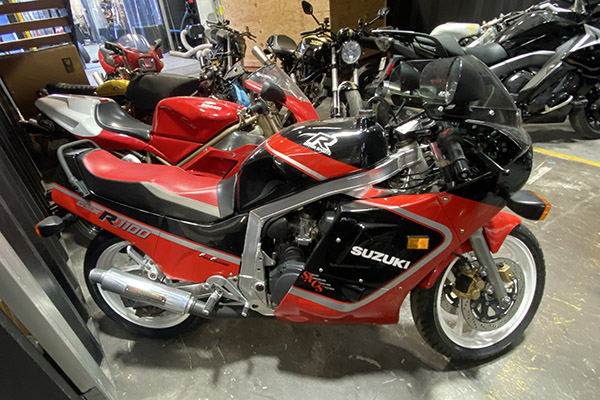
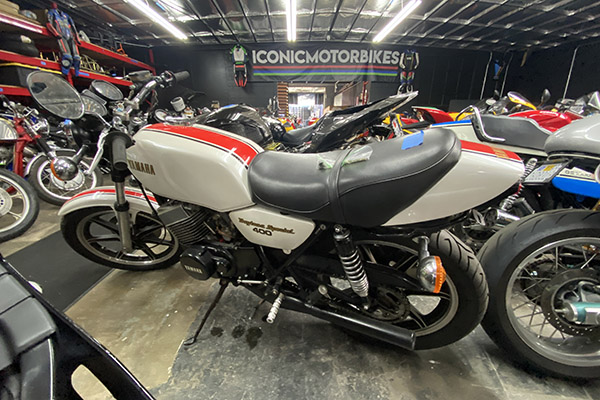
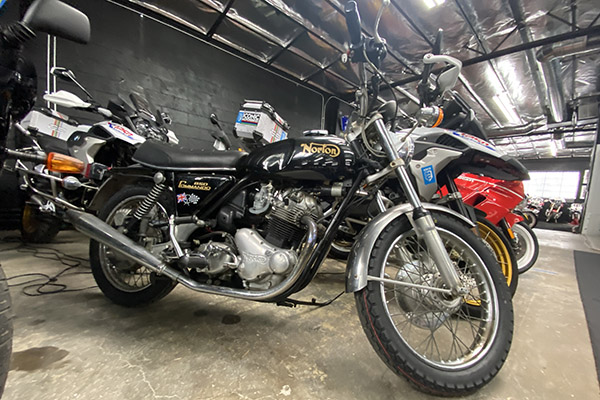
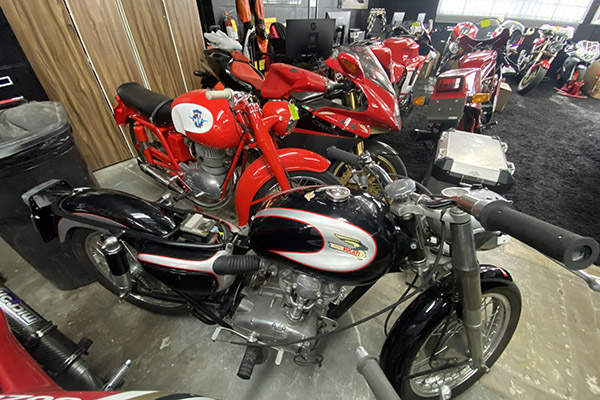
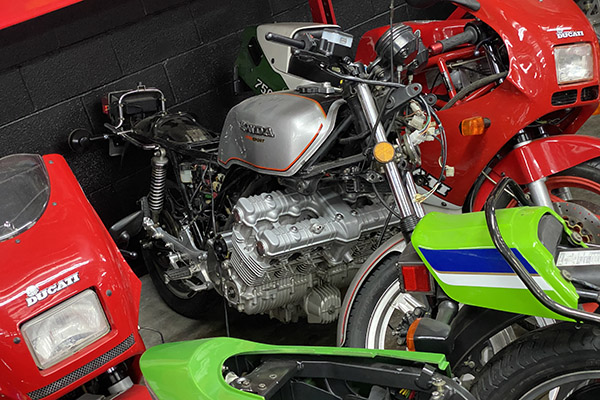
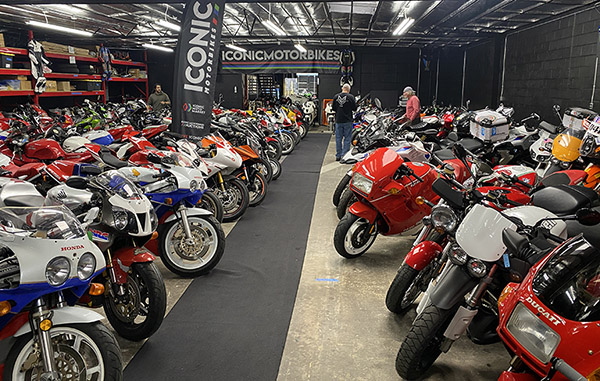
Good times and good stories coming up on this one, boys and girls, including more on the Iconic Motorbikes auction process.  Gresh greatness inbound, folks!

Good Morning, Vietnam!

We are digging Mike Huber’s Tales of the Open Road from Vietnam, and his stories have spiked a significant uptick in donations to the ExNotes site.  Being the inveterate veteran that he is, there’s more TOTOR (Tales of The Open Road) revelry from Mike in work.

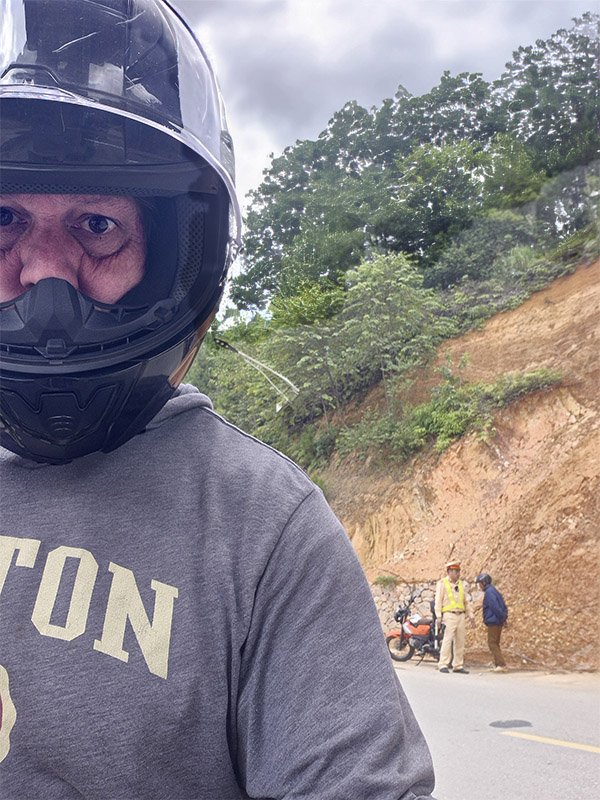
After Vietnam, it’s going to be Japan TOTOR, and then Colombia.  I’ve been to both spots, and like you, I’m looking forward to Mike’s keyboard kraziness.  Bring it on!

An Update on the How To Series

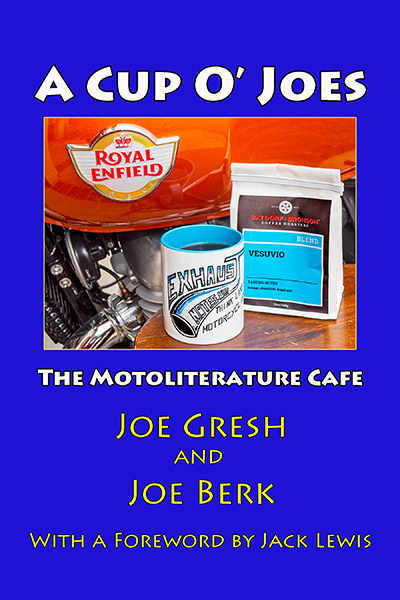
I’m doing a lot of How To articles for my favorite moto mag (one that should be yours, too), and that, of course, is Motorcycle Classics.  I’m back in the saddle as you read this headed toward Indio and Cycle Garden, home to all that is classic Guzzi.

In addition to the Guzzi goodness, good buddy and ace tech Steve roasts his own coffee beans, and I am already jonesing for that first cup of Joe.  The How To articles are running in Motorcycle Classics magazine, and if you don’t have a subscription to Motorcycle Classics…well, you should.  Stay tuned!

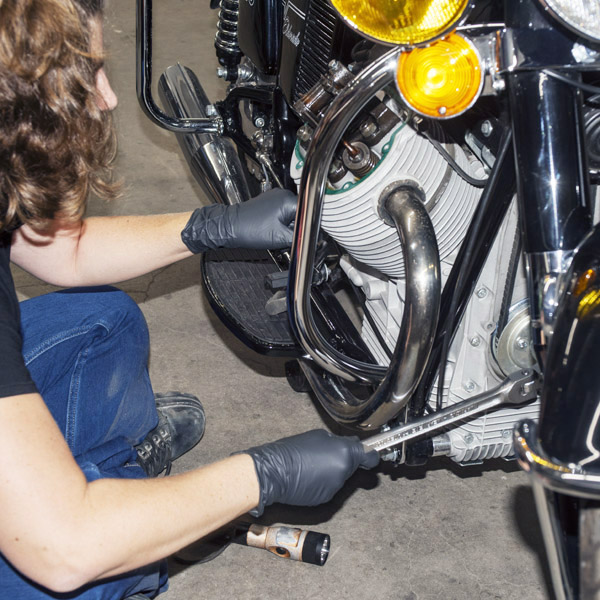
Dirty Harry Rides On!

We haven’t forgotten our gun stuff.  Want to read about a great .44 Magnum load in a superior sixgun?  It’s on the way, my friends.

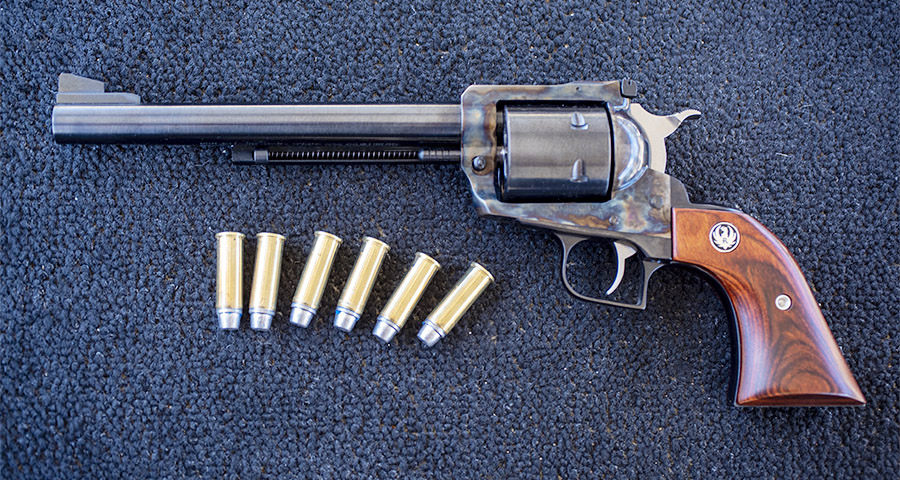
This is good stuff.  So much so that Baja John and yours truly are talking about using the .44 Mag sixguns on our next Arizona pig soiree!  Sooey!  Clint Eastwood, eat your heart out!

Pizza Pizza Pizza!

It’s no secret…I like to cook.  We’ve done a few recipes here on ExNotes before, and we’re going to be adding a lot more.  If you can cook, oh, how can I say this?  I learned from good buddy Texas John that the easiest way to meet beautiful women was to invite them over for a home-cooked meal.  I’m an old married guy now, but prior to that, I put John’s advice to good use!

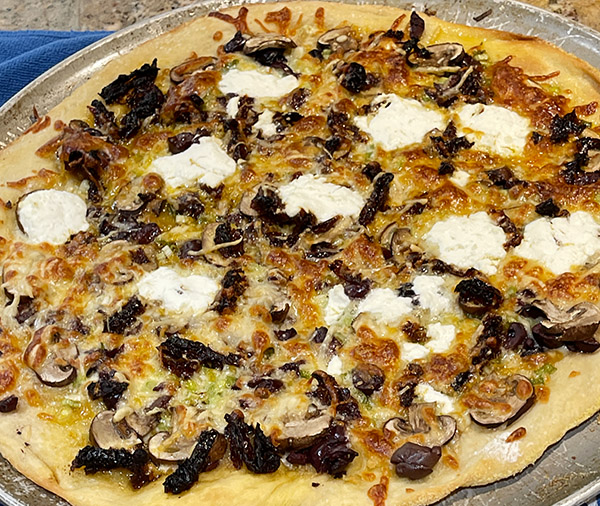
That’s a story for another blog, and I’ll get to it, but in the meantime, I’ll share my favorite pizza recipe with you in a near term blog.  And yeah, that pizza above was as good as it looks!


Stay tuned, folks, keep clicking on those pop-up ads, and work that Donate button you see here and at the bottom of every blog.  It’s what keeps us going!

Help us keep the lights on:


More Gresh and Berk?   It’s right here:


More Huber? Check out A Trip Into The Moment.


Join our Facebook ExNotes page!


Help us keep the lights on:

ExNotes Auction House Review Part 1: Buying From Iconic Motorbikes

By Joe Gresh

I have an interest in old or unusual motorcycles, to put it mildly. So it was strange that I never heard of Iconic Motorbikes out of Panorama City, California. My recent Buell Fever led me from online search to online search to Iconic’s website.

Rare, updated Norton still using the old bottom end. Norton has gone through some owners.
An un-wrecked, oil-air cooled slabby GSXR.
Yamaha Daytona 400. The last of the air-cooled RDs.
Super condition Norton. The real deal before the owner shuffle began.
MV grocery getters!
A cannibalized CBX. Probably with a fortune as is.

It’s a good thing I didn’t find their site earlier or I’d be homeless, living in the streets surrounded by my collection of fantastic motorcycles. Iconic has a lot of cool bikes.

And for Buell’s, they got ’em. Plenty to choose from, and all at reasonable prices. The process works like this: you register to bid on the Iconic website and in no time you’re blowing money on cool motorcycles.

Even MV’s crates are beautiful. I wonder what swag is inside?

The site is set up for auto-bid: you put in your highest offer and Iconic bids for you as your chosen motorcycle’s price rises. This releases you from having to watch the bidding and gives you more time to pour concrete.

In my case all the Buells I bid on went over my budget. Don’t despair if you don’t get your dream bike: Iconic’s website has a section just for you called Buy It Now.

The odd rat-rod at Iconic’s Panorama City location.

Iconic’s Buy It Now section is full of bikes that didn’t make their reserve price on the auction side of the site. That’s where I found my VR1000-esque Buell. You can still make offers in Buy It Now, Iconic will contact the seller with your offer. Or, like me, you pay the asking price and the bike is yours. Most of the bikes in Buy It Now are not outrageously over-valued. There are a few kite-flyers, but you never know. Not all the motorcycles for sale are in Panorama City; some bikes are at other locations around the US.

Once the deal is made you pay Iconic for the bike and go pick it up (at Iconic or the owner’s location), and you’re done. It’s a pretty easy process. Iconic will also ship the motorcycle to wherever you want for an additional cost.

Wall to wall and two stories high. If you can’t find your dream bike in this lot you’re having a nightmare.

I liked Iconic for the huge selection and their extremely detailed reports on the condition of the motorcycles on auction. It’s like having a trusted friend go check on a bike for you like my buddy Deet did when I bought the RD350.

I wasn’t buying a piglet in a poke when I bought the Buell and I am using their list of recommended repairs as a check list while working on getting the ’95 Buell Thunderbolt back on the road.

Iconic’s huge location in a warehouse district of Panorama City, California, is a candyland of motorcycles.  There are at least 300 motorcycles stuffed cheek-by-jowl and two floors up, all of them cool. Leave your wallet at home if you visit Iconic or you’ll leave with a bike you didn’t know you wanted.

I give the buying process at Iconic high marks. It’s almost too easy to blow money on motorcycles there, so use their site wisely, my brothers.


Join our Facebook ExNotes page!


More Joe Gresh?   It’s right here:


Help us keep the lights on:

Buell Fever Part 3: An Own Goal

By Joe Gresh

I’ve been ordering parts for the Buell as I dismantle the beast for service. I really like the way Erik Buell wrapped his tube frame around the 1200cc V-twin Harley lump. The bike is all engine and actually looks even better with the bodywork removed.

A new carb for $44! Tariffs? Never heard of her.

I’ve got the carb off and apart.  It looks pretty clean inside, and the bike probably would have run fine, except for the rubber tip on the float needle. It has a pronounced ridge that may or may not have caused a flooding issue.

The kickstand culprit. This worn area was the locking boss. It’s wiped out so no locking. I may weld it up and relocate the pivot to allow for over-centering (eliminating the lock system).

The Buell has a strange kickstand (another bike with a goofy kick stand; see the Husqvarna kickstand story here on ExhaustNotes). The stand has an elongated mounting hole that allows the stand arm to pivot up and down in addition to the normal fore-aft motion.  This extra motion was designed to allow the square pivot end of the stand to drop into a notch cast in the frame mounted, aluminum foot peg/kickstand boss. That’s a mouthful but when you see it it’s easy to grasp the concept. When new this setup made for a locking stand when deployed with the bike’s weight bearing on the stand.

The operative words here are “when new.” On my Buell the notch area inside the kickstand boss is worn out and the stand no longer locks. As built the stand doesn’t over-center and naturally stay in place like normal kickstands. You know where this is going. Fixing the kickstand was on my Buell to-do list. I should have made it job one.

Kickstands break levers. Ask me how I know.

As I was removing the carb (standing on the right side of the bike) the Buell started rolling forward. As it fell left I held onto the frame as best I could but the bike hit the ground hard breaking the clutch lever. The right mirror, which is also a faring mount, took a hard hit and things look a bit off from the cockpit. I have the bike on jackstands now and it’s stabilized.

Jack stands after the horse has left the barn. At least I stopped dropping the bike.

Luckily, I had most of the bodywork removed and the only bits left, the front fender and fairing, are unscathed. $20 will get me two new levers (Harley parts are cheap!) but I think I’ll just weld the broken tip back on. You know, to keep it original.

Back to the carb. The Buell motor is a stock 1995 Sportster mill and there is a huge parts aftermarket serving the Sportster. The carb kit was $13! I can get a complete, clone carburetor with new spark plugs, fuel filter and jet cleaning tool for $44! I know, I know, it’s Chinese but who’s to say the original isn’t Chinese? The Amazon clone carb reviews are positive: just bolt it up and the bike runs great. I bought the kit but that new carb was tempting.

This 1995 Sportster is quite a bit different than my old 1968 Sportster. The bottom end looks similar but everything else is different. What I thought was a pressure feed for oiling the top end seems to be a vent as the hose ends under the battery with the hose end left open to the breeze.

There’s also a rubber grommet with an open hole in the filtered side of the air cleaner. I suspect a crankcase vent hose went there but I’m not sure. As is, the hole allows unfiltered air into the carburetor so that’s not good. I’ll plug the hole or figure out what goes in it.

Plugs look a little sooty. I’ll clean them up and flog the bike to blow out the soot.

I don’t know how long the Buell sat so I pulled the iridium spark plugs (sooty) and squirted some motor oil in the cylinders so the rings don’t have to scrape on dry bores. When I get a battery, I’ll give the motor a spin with the plugs removed to blow out any excess lube.

Apparently, the White Power front forks on the 1995 S2 are different from the following years. I’m having trouble finding fork seals and have emailed White Power directly. No response yet. If I had a 1996 S3 fork seals are everywhere for the damn things.

For me, the rear tire was a little too close to the Buell’s underslung muffler. Like a 1/8″ gap. It looks like the muffler slid back a bit from the header pipe. I loosened the pipe clamp and mounting bolts then beat the muffler forward with a rubber mallet.

Does this tire gap make me look crashed? Not much clearance, Clarence.
Hammers and jacks gained quite a bit of clearance. I have no faith in this fix.
Buell tools. Anvil and forge not shown.
I think the permanent fix is to make these brackets a bit longer so the muffler fits the header better. Then weld the brackets on the muffler side to prevent the parallelogram effect when the bolt clamping inevitably loosens.

A jack under the header pipes pushed the header into a more agreeable position and I tightened the bolts. This beating gained about 3/4″ but I’m sure it won’t hold. The muffler looks like a new one or freshly painted. The angle of the header pipe isn’t quite right.  The tail of the muffler needs to drop about 1/4″ which means slightly longer muffler brackets. Once the bike is operational, I may do some exhaust re-engineering.

$30 seems cheap but then I’m approaching the end so I’m risking less.

The rear brake Brembo master cylinder is stuck and will need to come apart along with the rear caliper. Seals for the rear brake components are another hard to find item. I did find a Brembo clone master cylinder/caliper/brake line set up that may fit for $30 so I bought that. Watch for the ExNotes Brembo-clone brake system review.

Wiring straight out of 1960. I love it.

Except for the damage I’m causing by dropping the Buell, it looks to be in good shape. I probably could have poured gas in the thing, popped a battery in and gone for a ride. Who needs a rear brake anyway? I’ll be dismantling the front end soon to measure the fork seals and to give the steering head bearings a shot of grease.

That 6-mile Cyclone (the one I didn’t win) is looking more and more like a steal!


Buell Part 2:  The Reckoning
Buell Part 1:  More Cowbell


Join our Facebook ExNotes page!


More Joe Gresh?   It’s right here:


Help us keep the lights on:

Buell Fever Part 2: The Reckoning

By Joe Gresh

The 1995 Buell Thunderbolt is home safe and dry. It was good to meet up with Berk out in California. He really pulled out the stops: I had my own room, he bought me a bunch of food, took me on a tour of the San Gabriel mountains and helped pick up the Buell from Iconic Motorbikes. I really don’t deserve this much kindness. But I’m not turning it down.

The trip back to New Mexico was uneventful except for a steady rain that fell from Phoenix all the way to Las Cruces, New Mexico. It was nice to be snug and warm in the Toyota. I see why people drive cars.

The Buell in Bay 2 of the shed. CT recently cleaned this area so I’ll have room to work on the bike.

Driving in the rain gives you time to think and I thought about how much longer I’ll be strong enough to suffer the elements on a motorcycle. It was a grey, melancholy ride. The bright orange and black Buell cheered me up whenever I looked in the rear view mirror. I got back home at dark. It started to rain. I left the Buell in the truck.

The rain was drizzling the next day when we unloaded the Buell. It was a slick, wet plastic Toyota bed liner that the front tire slid out of and down the ramp. Luckily CT was there to back me up if the Buell started to tumble. We managed to park the bike in the shed, I dried off the Buell and started examining my prize.

Both Bridgestone Battleaxe tires are unused and still have printing on the tread surface. The date code is from 2015 so 10 years old and never been warmed up. Before you tell me they are dangerous let me cut you off and say I’m running them. There are no cracks or check marks, they have been out of the sunlight, the rubber feels soft. I’m going to risk it.
I’ll need to do a little adjusting as the handlebars hit the frame-mount faring. The faring has cut outs for low bars but these higher bars don’t align with the openings.
The kickstand leans the bike way over. The stand is worn in the aluminum holder. I’ll need to shim this a bit or possibly put a slight bend in the stand to make the bike sit more upright.
Performance Machine spun aluminum wheels are two halves joined at the hub and (I’m guessing) welded inside. A lick of polish should have them looking new.
The under-slung muffler is uncomfortably close to the rear tire. Maybe the new drive belt will move the wheel back a bit. If not, I’ll have to make a bit of clearance.
The Buell came with a Corbin seat. I don’t understand why this seat is so heavy. It’s like it’s made of lead. My brief time in the saddle seemed ok. Longer road tests to come.
The Corbin seat fits the Buell well but the rear, locking latch doesn’t line up. The lever hits the seat too soon. It looks like someone tried to grind a bit of clearance but didn’t do enough. I’ll see what I can do, I’m just glad the seat didn’t blow off on the way home.
The rear suspension is pretty stiff. I’m going to take out a bit of preload assuming this is where you adjust preload. With a Buell you can’t be too sure.

Now to start buying stuff for the Buell starting with a battery, seals for the stuck rear brake, fork seals and a fresh drive belt followed by a carb cleaning and a gas tank flush. Hopefully I’ll have a video of the bike running for Buell Fever Part 3.


Join our Facebook ExNotes page!


More Joe Gresh?   It’s right here:


Help us keep the lights on:


Don’t forget: Visit our advertisers!


Buell Fever Part 1: Give Me More Cowbell!

By Joe Gresh

As my age keeps creeping up and I slowly fall apart like Jeff Goldblum in the movie, The Fly, there is an urgency, a panic lying just below my normally placid exterior. Time is running short for all of us and if you have unfulfilled dreams, it’s best to get a move on.

The ill -fated VR1000, inspiration for my Buell’s paint.

Owning a tube frame Buell has been on my wish list since the S2 model came out in the mid 90’s. The combination of modern sport bike and 1957 lawnmower engine had a strange appeal to me and let’s face it: everyone should own a Sportster.

The dawn of 2026 found me frantically searching the internet for a 2000+ Buell Cyclone and I found a few. Several were pretty beat up all were reasonably priced but far away.

The deal I missed due to my inherent thriftiness.

I happened upon Iconic Motorbike Auctions and they had a pile of Buells from a private collection. The crown jewel was a Cyclone with only 6 total miles. It was a brand new, 25-year-old motorcycle.  I bid on the bike and it made reserve at $4,000. What a deal! $4K was out of my self-imposed Buell budget so I stopped bidding. Someone got a hell of a deal.

Next up at Iconic was a clean, Buell Ulysses complete with Buell saddle bags. It was a gas-in-frame model. I prefer a tube-framed Buell but bid on the Ulysses anyway. It sold for $3,250! I didn’t bid anymore on it because it just wasn’t the bike I wanted. Although if I got it for $2K I would have learned to love it.  After that, Iconic had an S3 with saddlebags that went for over $5,000. Now I was starting to freak out. I had Buell Fever bad-like. What if I was witnessing a Buell market correction in real time?

It’s like getting two bikes in one! Orange on the right.
And black on the left.

Iconic has a buy-it-now section for motorcycles that don’t make their auction reserve. I plundered around in buy-it-now and found a beautiful 1995 Thunderbolt with only 13,000 miles for $3,000. It has a few minor issues to sort out like any 30-year-old motorcycle but what really got to me was the Harley VR1000-tribute paint scheme . It looked cool as hell. I loved the paint job. I pushed the button.

It’s not an actual Cyclone, but it mostly is a Cyclone. The main cosmetic difference is the front forks and faring. Also the 1995 Thunderbolt used a bone-stock Sportster engine that Cycle World dynoed at 65-ish horsepower. Later Buell’s were pumped up a lot with Buell-specific heads and other parts churning out 100 horsepower.

While I wouldn’t mind another 35 horsepower, the truth is I just putt around on bikes. My go-fast days are behind me much like the strange growth I had cut out of my back a few months ago (see The Fly with Jeff Goldblum).

One advantage to the Sportster engine is that parts availability should be excellent for the remainder of my life and beyond. If I truly need more oomph there are tons of Sportster hop-up parts and 60 years of institutional knowledge on the Internet. 75 horsepower is a pipe and cams away.

But I probably won’t do anything to the Thunderbolt except ride it and look at it. I’ll be fixing the minor issues right here on ExhaustNotes so you’ll be able to follow along with this Buellishness.

Got to go. Driving out to Panorama City in California to pick up my dream bike from Iconic motorbikes.


Want more Joe Gresh?


Join our Facebook ExNotes page!


Help us keep the lights on:


Don’t forget: Visit our advertisers!


ExhaustNotes Review: Kemimoto Heated Grips

By Joe Gresh

Old Man Winter is taking his sweet time here in New Mexico. It is late December, 70 degrees and the frozen old git still hasn’t made much of a dent. But he will arrive and I’ll be ready with my new Kemimoto heated grips.

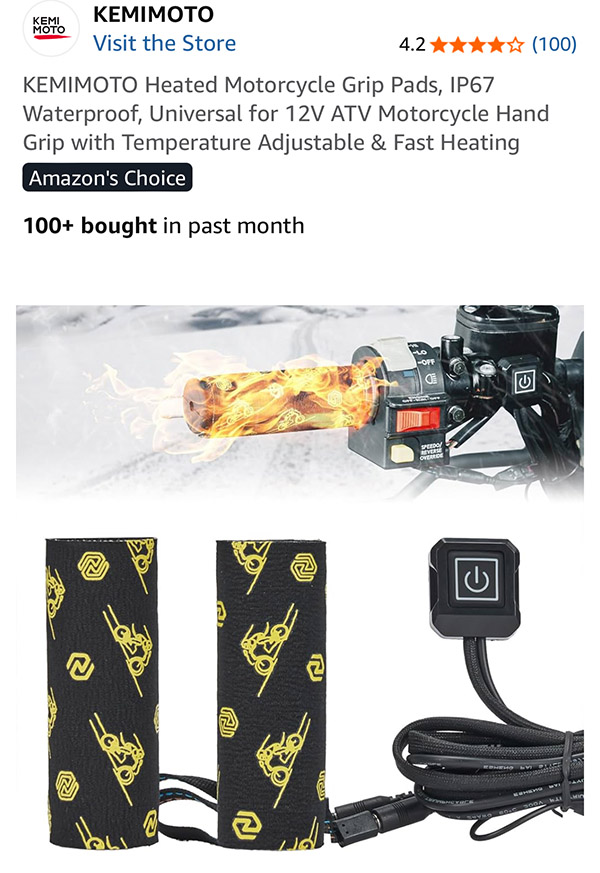
I’ve set up the Kawasaki ZRX as my cold weather bike with a 12-volt receptacle for an Aerostitch heated vest and these grips will complete my preparations for the cold. If it ever gets here.

Installation would normally be simple as the wiring connects directly to the host bike’s battery. The main problem with this setup is if you accidentally leave the grips on and drain your battery. In the cold.

I couldn’t find an unused, switched power connection on the factory harness so I rigged a cube-type relay under the headlight faring that energizes from the instrument light circuit. This ensures the grips are off when the key is off. Power for the grips comes from the Areostitch vest power lead and runs up to the relay.

The heating elements just wrap around your existing grips and a 3-power level switch needs to go somewhere. I used a fairing mount bolt to secure the included switch bracket on the right side of the gauge cluster. It’s not a great location but it was easy.

Heat-wise these grips crank it out. On high you can feel the burn. This setting would be good for freezing weather. Low was still too hot during my 60-degree test ride so it should be good for average New Mexico winter conditions.

That wrap around heating element never really gets very tight on the grips so you’ll need to reset its position as it slowly creeps around the throttle. Or squeeze tighter.

The on-off switch is dimly lit so in sunlight it’s hard to tell what power level the thing is set at (red=high, blue=medium, green=low) I had to stop and cup my hand over the switch to see the illumination.

While I haven’t tested the grips in truly cold weather I’m sure they will help. It’s nice to pop the switch on when the elevation climbs over 7000 feet. Cuddly and warm best describes the feeling.

How long the grips will last is anyone’s guess but they’re easily unwrapped, unplugged and stored for the 10 months a year they are unnecessary in sunny, warm New Mexico. The harness, relay and switch remain on the bike full time.

I’m satisfied with the Kemimoto heated grips and give them a solid 3-star rating, a rating that could be improved if they fit the grips tighter and the switch was brighter. Maybe a section of elastic would help hold the grips better but what do I know. Now if Old Man Winter would get off his butt I could try them out in proper conditions.


Join our Facebook ExNotes page!


More Joe Gresh?   It’s right here:


Help us keep the lights on:


Don’t forget: Visit our advertisers!


ExNotes Battery Teardown: What’s Inside a Lithium Battery?

By Joe Gresh

You’ve probably read the story of my new, solar, mondo lithium battery bank. It consists of 16, 12-volt, 100ah lithium batteries and so far is working well. What you don’t know is I actually have 17 lithium batteries.

This one was dead on arrival. Before tossing it, I decided to see what’s in the box.

When I ordered the batteries one of them was dead on arrival. Like zero volts. This is a huge red flag because the LiFePo battery is know for its ability to hold a charge for long periods of time. I tried connecting a battery charger to the thing but all I got were sparks.

CT contacted the seller and they said it’s normal and to jump the battery with another (good) battery. I tried that and got even bigger sparks. The thing was shorted internally. CT went back and forth with them, and they wouldn’t send another battery. They did give us a refund, though, so it was all good and I bought another battery of a different brand.

Once the new bank was online and operating well, I broke down all the shed-filling, cardboard packaging for 17 batteries and hauled it off to the La Luz dump (a very fine dump). This left me with a lone, dead lithium battery. I was going to toss it out anyway, so I decided to open it up and see what a lithium battery looks like inside.

The top part of the battery box snaps into the bottom but I didn’t know that, so I set the circular saw to about 1/16″ depth and (after taking the battery outside in case it burst into flames) cut the top off.

The top part was still attached.  I didn’t want to cut any deeper because I had no idea what was inside. Wedging a flat-head screwdriver under the saw-cut lip and working it around the perimeter of box released the lid. Turns out I didn’t need the circular saw. After removing the lid, the internal parts easily slid out of the box, all in a nice, neat tray.

Once the thing was apart the problem was obvious. Both the positive and negative wiring to the output posts were shorted out on the big, metal plate.  The shorted metal plate covers the battery monitor circuit board.

This is where the battery was shorted.
Insulation chafing on the positive side.
Another shorted area.

The negative switch is how the battery monitor connects the internal bits with the external world. Over charge the battery? The battery monitor switch switches it off. Short out the battery? The battery monitor switch switches it off. Drain the battery too low? The battery monitor switch switches it off. For all I know there’s a high/low temperature cut off in the thing.

The heart and soul of the battery are these four big 3+volt, 100ah cells wired in series by those welded jumpers.

It turns out whoever built the battery put the terminals to the output posts on upside down. This moved the barrel/crimp part of the wire connection that much closer to the metal plate.

Under the metal plate sits the battery monitor system board. It connects to each individual cell and also saved the battery from bursting into flame from the short circuit.

All things considered, if you’re going to screw up the battery this was the least damaging way to do it. Since the + and – were directly shorted before it got to them, the electronics and lithium cells weren’t involved the short circuit. The battery monitor system kept the thing from burning up due to the short.

I added a bit of insulation to the burned areas that were shorted.

Once the lid was off and the source of the short removed, the battery showed voltage again. Pretty cool. I gave the battery a charge and all seemed normal. I load tested the thing at 100 amps and it held voltage fine. You know what this means.

The fix was as easy as flipping these connections 180 degrees. Photo shows the connection already flipped. The other way they contacted metal.

The fix was as simple as flipping the wire terminals over allowing that extra 3/16″ clearance. I reassembled the guts into the battery and snapped the lid back on and now I have an extra, good lithium battery. While technically it’s a free battery I have some time in the repair. Now I know what’s inside the black box. I’ll probably run some gorilla tape around the box so the iffy lid attachment stays put and call it a win.


Join our Facebook ExNotes page!


Never miss an ExNotes blog:


Help us keep the lights on:


Don’t forget: Visit our advertisers!


ExNotes Solar Series: Lithium Batteries

By Joe Gresh

I finally made the leap. My solar system went online in 2018 and except for a few snow days has produced reliable power in all that time. We’ve had around 30 power outages at the grid-tied Carriage House (some 5 minutes, some 5 hours) during the same time span.

The old, lead-acid bank gave great service but it is time to step into the future. I’ll be keeping the best of the old ones for a power source in the green house.

Initially we went with plain old lead-acid batteries because they were a third the cost of lithium batteries. The lead-acids worked well and since they’ve been around hundreds of years it was easy to predict performance and longevity.

The jumper cables are messy but effective.
The old bank was four boxes on two shelves. I never did get around to filling the last box.

The battery bank started small with just 4 batteries and grew with our budget to 12 total. There are two of the original 2018 batteries still functioning and I’ve replaced three batteries that failed. It’s easy to tell a bad lead-acid in a battery bank: it’s the hot one.

I haven’t been religious about topping up the electrolyte so some of the batteries might have failed due to misuse. Regardless, I’m happy with their performance and the lead-acids did me right.

Last year I noticed lithium batteries dropping in price. They ended up costing the same as the cheap Walmart lead-acids I was using. With new tariffs looming I decided to make the switch. I bought one batch in January and another batch in March, depending on whatever sale was on. My cost averaged around $119 per 12-volt, 100-ah battery. I wasn’t brand loyal, whatever was cheapest was fine by me.

With winter approaching and long cold nights of pipe heaters draining storage I built an insulated box to hold the new batteries. Advantages with the lithium are 16 batteries fit on one shelf, weight is half of lead acid, and there’s no need for a sealed battery box as there’s no acid to leak.

Most of this was replaced by copper bars.
Lots of copper buss bars took a couple days to make. Foam on top to prevent shorts in case a chunk of metal lands on the bank.

I also took the opportunity to clean up the installation, getting rid of messy-looking jumper cables and replacing them with solid copper buss bars. With everything on one shelf I eliminated several feet of cabling which can only be good.

Lithium batteries need a bit more charging voltage so I cranked up the solar regulator a 1/2 volt or so. I also reset the inverter charger setting to one more like lithium.

The batteries have sat on the shed floor for 6-8 months so when I connected them up to the solar they sucked a steady diet of 55 amps from the sun.

Theoretically I have 19,000 watts of storage now, more than double the 7200 watts of the old, lead-acid battery bank. In actuality it’s probably 80% of 19,000 watts because you don’t want to drain the batteries flat.

The new box is 1-inch foam skinned with sheet metal. Hopefully it will slow a fire.
All the batteries on one shelf cuts down on cabling. Buss bars make a tidier installation. With no acid fumes connections should stay cleaner. What’s not to like?

Some disadvantages to lithium batteries are they are more affected by cold temperatures (hence the insulated battery box), they are limited to 100-amp output per battery (not a problem as my inverter draws 250-amp max), and I can’t really think of any others.

Time will tell if the lithium batteries last the 10-year claimed life span. I’ve pre-tested each battery’s load capacity and marked the results on top of the battery. I should be able to compare results in the future to see if individual battery performance degrades. All in, I’m happy with the new batteries. Hopefully I’ll have about a 3-day reserve for those snow days.

Oh, and those tariffs? They don’t seem to apply to lithium batteries as you can still get 12-v, 100-ah lithiums for $119 on Amazon.


Join our Facebook ExNotes page!


Never miss an ExNotes blog:


Help us keep the lights on:


Don’t forget: Visit our advertisers!


Where Were You In ’62: Part 5

By Joe Gresh

The Dream is perched on the new Harbor Freight lift and slowly coming apart. I’ve been busy with other projects so don’t freak out if it seems like progress is slow. It’s not me. It’s the environment I work in.

This installment involves a bit of inventory control. I need a decent front rim but all the ones online look just as bad as the rim I have. The parts bike front rim is bad too. They are sturdy and run true but lots of surface rust makes them look bad. I can get new rims on eBay, sold in pairs for around $200 delivered, but I only need one rim. Anyone want to form a syndicate and go halvies on some 305 Dream rims?

$20 kickstand. Sometimes I do it the easy way.

Both of the Dreams were missing their side stands and I debated making one from scratch. Just for kicks I went on eBay and some hero had a side stand for $20 so I bought it. It’s kind of like cheating but It would take me two days to make a stand.

Hopefully these seals will work, keeping the oil inside where it belongs.

I’ve also ordered a set of engine seals. I’ll have the engine side covers off to free up the clutch plates and clean the centrifugal oil filter can. Also I need to remove the alternator to gain access to the starter clutch as it’s hit and miss. I figure it’s a good time to replace the seals. The only one leaking at the moment is the shift-shaft seal but you know how it goes with old rubber. Twenty miles down the road another seal will start leaking. Then another.

Deez Nuts were tight as hell. It took me two days to get them loose.

Getting the Dream’s steering stem apart was an Ossa. The top lock nut was knitted to the cone nut and the thing was tight as hell. Much hammering, heat and penetrating oil was used over the course of two days. The steering stem nuts finally unwed and spun off by hand. All the bearings and races look good with no divots or flat spots to cause erratic steering. There was even soft grease still inside! Impressive for a 63-year-old motorcycle.

The Dream on the maiden lift.

I’ve got the frame off the engine now. It’s a fairly lightweight sheet metal construction. Kind of like a monocoque Norton but with a separate fuel tank. Honda copied a lot of ideas from German and British sheet metal frame manufacturers.

The Dream frame is light. Easy to lift off the engine for an old man.

The frame has a few dings to fix and the Dream is made from pretty thick metal. The dents are hard to get behind to push out. I’ll try the painless/paintless dent remover but I don’t hold out much hope as the frame is twice as thick as gas tank metal. If that doesn’t work I’ll get a stud welder and pull the dents with a slide hammer.

Kind of Kawasaki green for the new paint on the stand. Almost safety vest green. I had a can in stock.

Since I have a new, shiny lift I decided to clean up the old, rusty engine stand to match. I’ve had this stand since the late 1970’s and it’s had everything from a 4-Cylinder Volvo marine engine, many Chevy small blocks and a big, heavy, Ford 427-inch OMC inboard strapped to the thing. The big Ford was pretty bouncy. With the cast iron, water-cooled exhaust manifolds the thing probably exceeded the stand’s weight rating by 300 pounds. I used a 2×4 in the front to help stabilize the engine.

A few aluminum tabs and the Dream engine bolted right up. I’m going to do this method on the next MC engine I work on.

In all those years this will be the first motorcycle engine I’ve had on the stand. It makes everything easy with the mill at hip level. You can rotate the engine 360 degrees by spinning the T-handle. Which begs the question: why didn’t I think of this before?

I’m thinking heavy metallic with candy-copper followed by 2K clear. What are the odds it won’t bubble?

I hear you: not much progress but I’m a bit lame right now and taking it easy for a week or so. What about a 3-part metallic orange for a color? Too much? Atomic Green? Black, red or white is boring.


More Joe Gresh motorcycle resurrections are here.


Join our Facebook ExNotes page!


Never miss an ExNotes blog:


Help us keep the lights on:


Don’t forget: Visit our advertisers!


ExNotes Architectural Review: Taliesin West, Arizona

By Joe Gresh

East of Scottsdale, Arizona, is a Frank Lloyd Wright house he named Taliesin West. The word “house” is being kind; it’s a mashup of tent and stone. The place is built using local rock and concrete, so you know I’m predisposed to like Taliesin.

Front view from the visitors entrance. The rocks blend in because they are from the site. We didn’t get to see the borrow pit.

I’m usually not a fan of Wright’s designs. They pointlessly stretch the function of materials and the idea of space in directions I dislike. Wright pushed the boundary of possibilities: A structure didn’t have to provide structure, it could exist simply as an idea. Take Falling Water.  It barges in on the environment lording itself over the river and unnecessarily cantilevering all over the place. It’s a rude work. Not to mention his stuff leaks.

Door into the Kiva room. Kivas in my neck of the woods are round inside and partially underground. Wright got the feel with a square room.
Detail of a plywood embellishment in the Kiva.

Taliesin West follows Wright’s usual distain for practicality and water tightness. Many roofs are canvas. Shutters open backwards so rain can blow in instead of shielding the windows. Painted plywood, probably the miracle material of the 1940s, is used extensively and today lends a cheap feel to the building. Not to mention the constant painting and replacement plywood requires. Odd little squares line the eaves requiring constant upkeep. Shallow reflecting pools breed slime and need cleaning frequently.

The entertainment room. Its low, heavy ceiling gives a crypt-like feel. Lots of windows to let dust and air inside.
Interior wall lamps. Painted wood. Taliesin uses cheap materials, easy to replace.

Over the entertainment area the roof is a series of angled concrete and stone boxes that look like ideal water traps. Ceilings are low most everywhere and typically large Americans had to duck to get inside rooms. There’s a reason we all live in boxes.  Boxes work.

Wright liked Chinese ceramics and design. Taliesin West looks sort of Oriental.

Having said all that, I loved Taliesin. Wandering around, my inability to think outside the box kept me shocked at the unsuitable designs Wright employed. I’ll never be as free as him. Things like moving a window because he didn’t want to move a vase amaze me. My values always default to sensible. I’m going to move the vase no matter how much I like it there. Wright doesn’t do sensible.

Sitting in the Garden Room, looking out the low, western wall, gave a feeling of it being a special place. None of the boxes I build feel special. The density of the walls with their large rocks strangled in concrete felt safe. My dry-stack rock walls can tumble down at any moment. Corrugated metal buildings feel anything but safe.

Water pump and surge tank. I’m not sure if this is for the house or the landscaping.

Taliesin started out as a 500-ace campsite and when Wright left for the summer the canvas roofs were removed and the buildings were left to the elements. Returning for winter the place would be reassembled and a crowd of designers worked there. Taliesin has a magical, Disney-theme-park feel. You expect a gnome to pop out and spin a hex around every corner.

My takeaway is this: I’m never going to build something that is doomed to fail, but I might be able to loosen up a bit and do some dumb things just because I want to. At least I’m going to try and stretch my thinking. Wright showed us that we don’t always have to follow the rules.


Join our Facebook ExNotes page!


Never miss an ExNotes blog:


Help us keep the lights on:


Don’t forget: Visit our advertisers!