Towards the end of last year’s heating season the Vevor 12-volt, 5kw diesel heater started shutting down and giving an error code. The big blue, start/stop button on the front of the machine blinks the code number between pauses. I counted an error No. 8, which the owner’s manual said was a problem with the temperature sensor. This was a little disappointing because I had only run 10 gallons of diesel through the heater. (It runs a long time on a gallon, like 8 hours) I didn’t mess with it at the time as it was warming up and I was busy doing other vital, yet unimportant tasks.
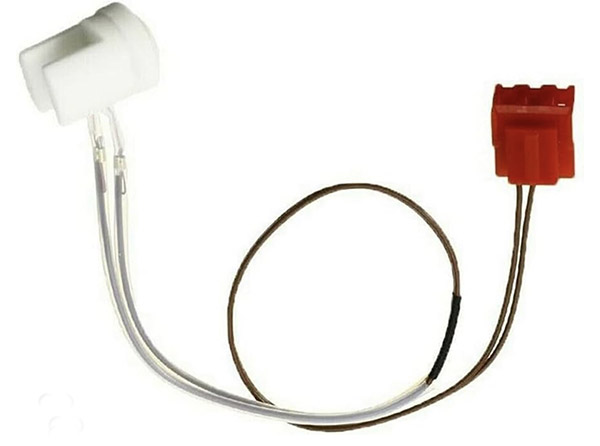
Fast-forward to winter, 2024 and it’s cold again so I figured I’d better fix the heater. I looked up a new temperature sensor for $4 on Amazon and after waiting a few weeks the thing came all the way from China. Installing the new temperature sensor changed nothing. The heater kept shutting down with an error code No. 8.
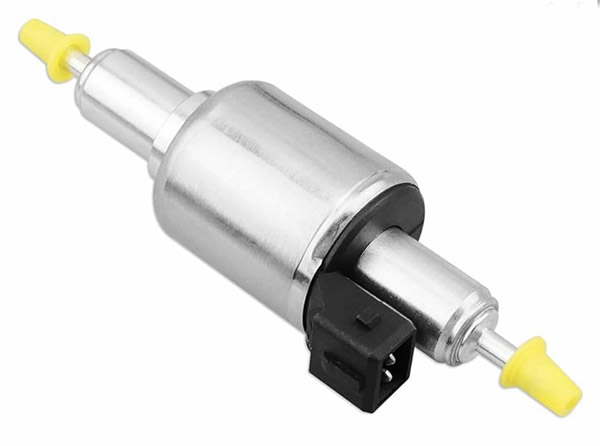
Utube Academy provided some more ideas, one of which was the fuel pump was not functioning good enough to keep the fire going. I bought a new fuel pump on Amazon for $18 and installed it. After bleeding the air out of the pump the heater turned on for a few minutes and then shut down showing error code No. 8 again.
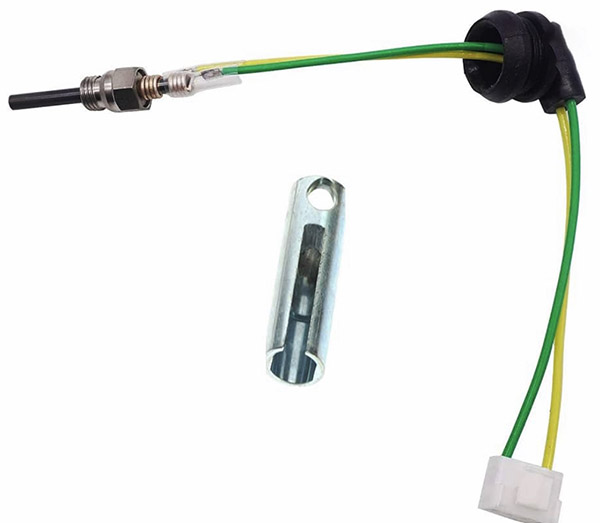
Another Utube suggestion was that the glow plug was bad, failing to ignite the diesel fuel. While looking up the glow plug @ $19 I found a complete new heater for $90 with free delivery. I stuck the new heater in the shopping cart and it showed up a few days later.
The new heater was almost an exact duplicate of the Vevor unit and in fact it had a more advanced keypad display instead of a blue button. The replacement unit swapped out easily and in no time I had heat in the shed.
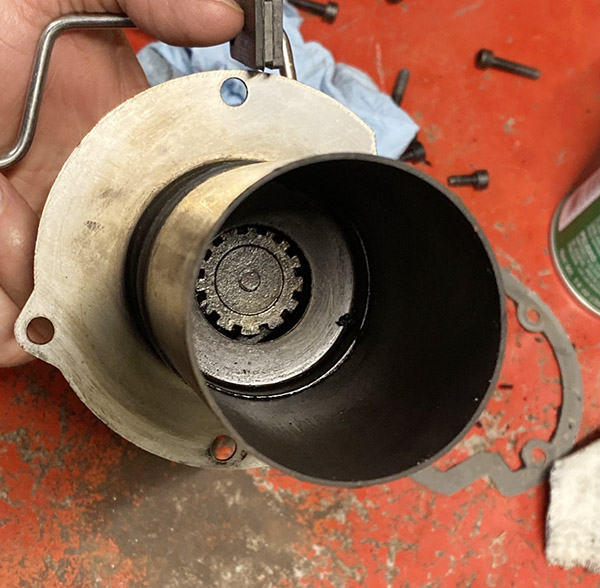
A few more weeks passed and the new glow plug showed up. Taking the unit apart to gain access to the plug was easy and I pulled the wires off of the glow plug so I could put a socket on the thing. That wasn’t a good idea. Turns out the wires are non-removable and you need a special 12mm slotted deep socket to unscrew the plug. When I pulled the wires off I actually broke the glow plug ceramic. The special socket for the plug was helpfully included in the box with the new glow plug. Unfortunately, I didn’t realize this before destroying the old glow plug. That’s just how I roll.
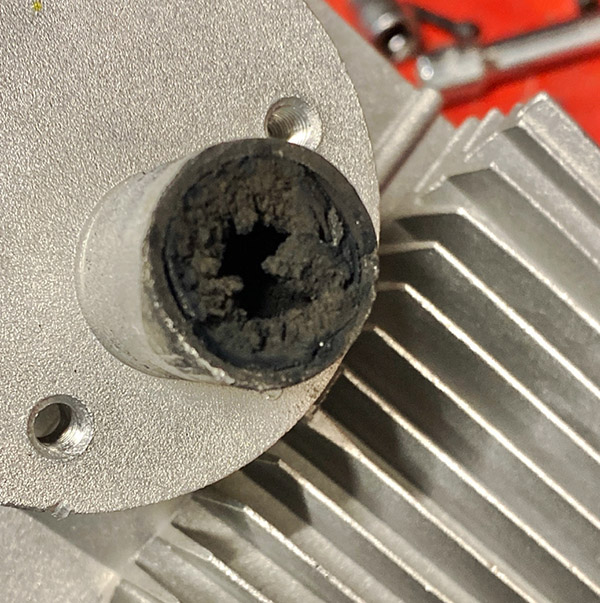
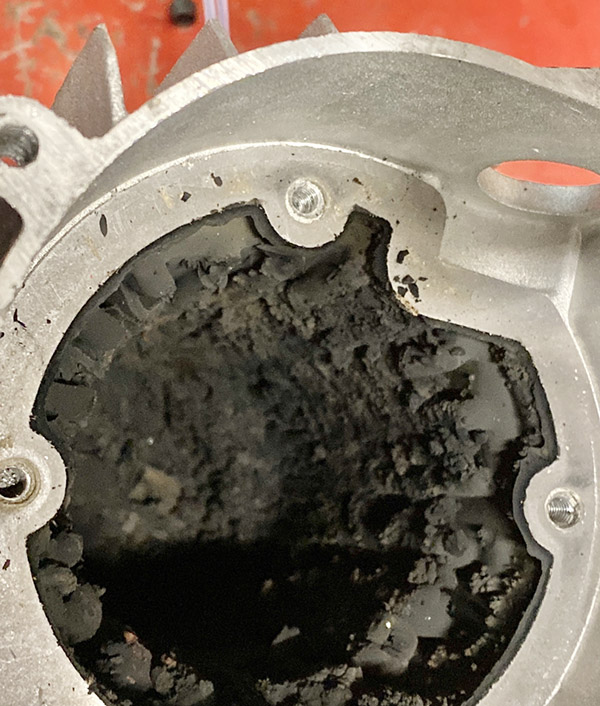
None of this mattered because once I started taking the heater apart I noticed the exhaust port was almost plugged with diesel soot.
It was so clogged I had to take the fuel feed pipe and the combustion chamber apart to clean out all the soot.
The gaskets tore when I dismantled the fuel feed and the combustion chamber so I had to order new gaskets from Amazon @$16. If you’re keeping count I now had almost as much in parts as a heater costs.
These Chinese diesel heaters are pretty simple to work on and after cleaning the combustion chamber and exhaust pipe it was only a few minutes to put the whole thing back together. I rigged it up for a test run and the heater put out plenty of hot air and ran for as long as I wanted to hear it run. It seems to be fixed but I don’t understand why it sooted up so soon. Maybe there was another issue that I have inadvertently fixed while swapping out parts? Maybe not. Keep clicking on ExhaustNotes and I’ll report on this situation as it develops.
Ok, so throughout my life I have tended to do a LOT of dumb stuff. Almost daily anyone around me is questioning how I am still alive. This is no exaggeration, but there is one activity I partook in that is by far the most reckless. That is riding on the Fung Wah Bus. Recently I was in a bar in Boston (yes, imagine that) and I was telling the story of the Fung Wah bus, which entertained the entire bar for close to an hour. My stories of this legendary form of transit must have been quite epic as when cashing out I was told my entire tab had been paid. So I thought a write up on my experiences around this hazardous mode of transportation would make for a fun read.
The Fung Wah Bus isn’t in service anymore for reasons described below. It was a $10 bus ride from South Station in Boston to Chinatown in New York City. I was 27 years old, living just north of Boston. A close friend was in New York City. The bus always arrived on time, there was no hassle with airports, and it was just easy.
I was alerted to the dangers of this bus when I arrived to work on Monday. My manager asked what I had done that weekend. I replied I had gone to Manhattan to hang out with a friend. He asked how the flight was. “Flight?” I asked. “I didn’t fly. I took the Fung Wah Bus.” He doubled over laughing and said he paid me enough to do better, which was followed by several explicit adjectives. I still heard him ranting about it an hour or so later. I was a bit taken aback.
It didn’t take long for me to realize the history of this bus and the numerous safety violations and failed inspections that made taking this bus not only risky, but in hindsight, downright dangerous. Massachusetts had even shut the service down a few times over the years. These busses were flipping over, catching on fire, and wheels were falling off. Outside that, though, the busses ran on time, no matter the amount of traffic or weather conditions. They had this trip down to an art. It was so honed that once when I was stuck in traffic on the Cross Bronx Expressway, a few cars in front of me I spotted a Fung Wah bus. Here’s my chance! I followed it off the expressway as it zigged and zagged through the narrow surface streets until it returned to the now less-congested expressway. I felt like a running back following a lineman as a blocker until I could see the end zone. What a rush!
With it being a 4-hour ride, the driver would always stop at a Roy Rodgers Restaurant for a few minutes to allow you to stretch, grab a bite to eat, and pray to the God of your choice for a safe remainder of the trip. To this day having driven that stretch hundreds of times in my car I never saw that restaurant unless I was on the Fung Wah. Wherever the bus exited the highway, we all went into Narnia.
At the end of the day the Fung Wah never disappointed and although the bus was decommissioned like Old Ironsides, it provided some great stories and an economical way to get to New York City. As I sat in a Boston bar finishing my Sam Adams, I was thankful to the mysterious patron who got my tab. I am fortunate that this experience (riding the Legendary Fung Wah Bus) crossed my path.
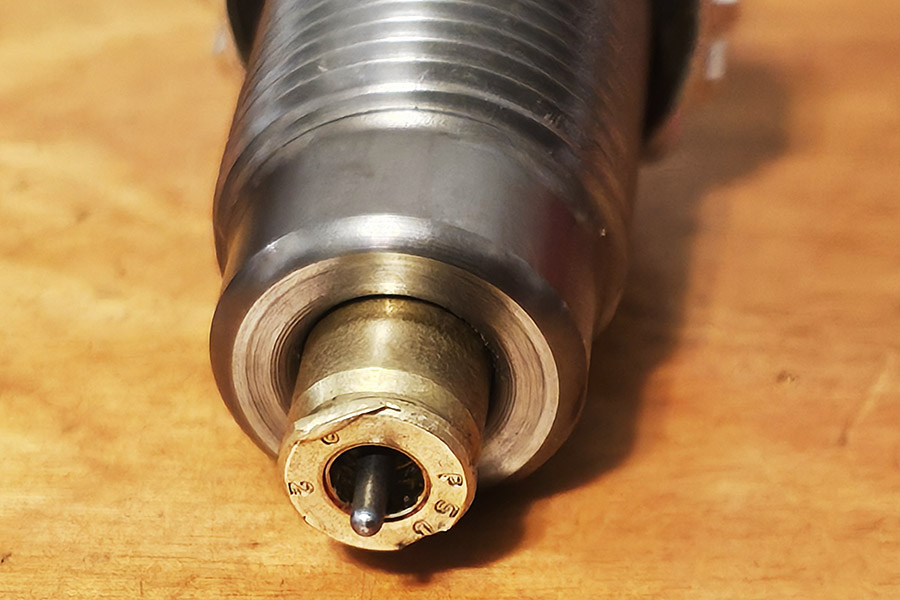
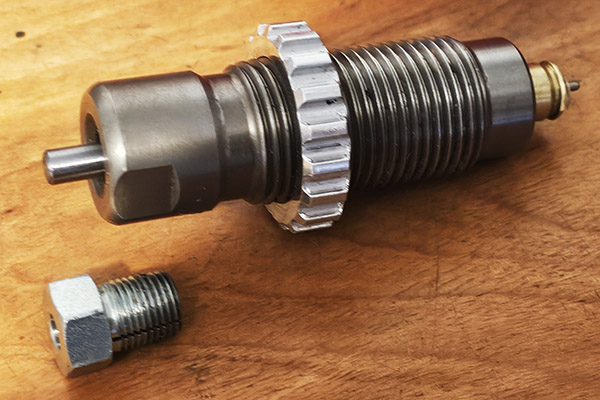
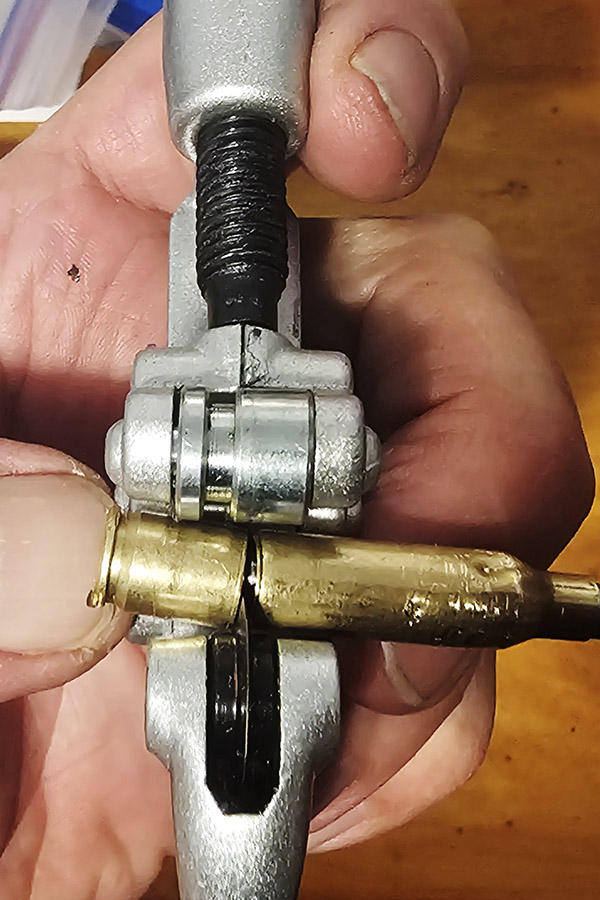
A problem that sometimes occurs when we reload is that a case gets stuck in the decapper/expander die (also known as the resizing die). This can result from not adequately lubricating the case prior to running it into die, or not cleaning a new die prior to use. The case gets stuck in the die, and when you attempt to extract it on the reloading press down stroke, the shell holder deforms the case’s rim and it pulls free of the shellholder. Getting the stuck case out can be problematic.
A friend just bought a new set of Lee .223 dies and forgot to clean out the decapper/expander die. The result was a stuck case (as you can see in the photo above). Here’s the easy way to remove stuck cases using tools that can all be bought at your local hardware store.
1. Remove the die and take off the pin retainer using the proper 1/2″ box and 3/4″ open wrenches. No crescent wrenches, pliers or vice grips!
2. Put the die in a well-padded vise and knock the pin down with a brass or hard plastic mallet. The brass mallet or brass punch works best.
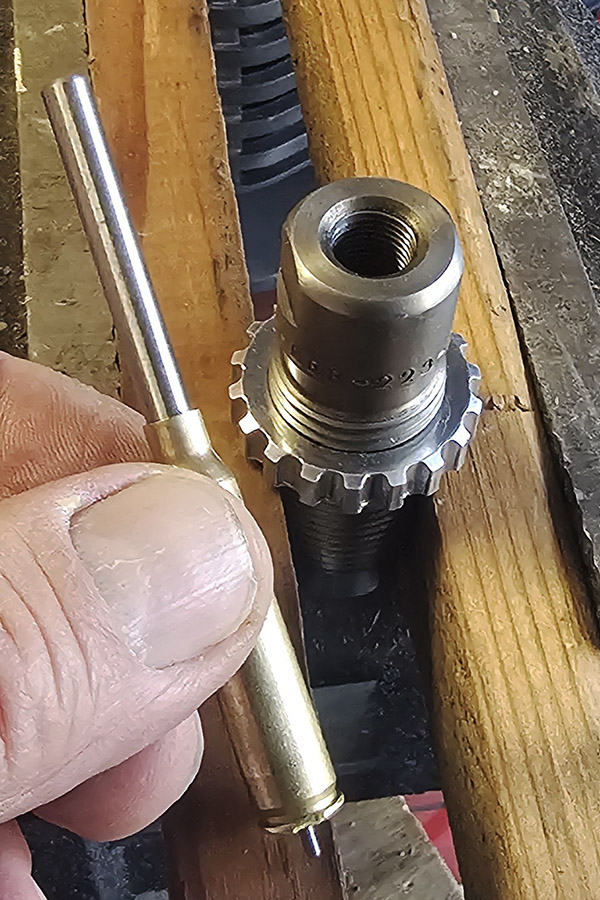
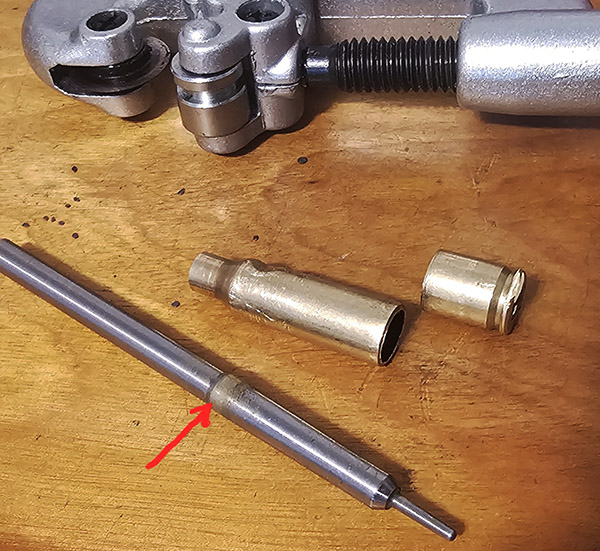
3. The expander pin will remain in the case. It will be loose and rattle around a bit, but still trapped inside the case.
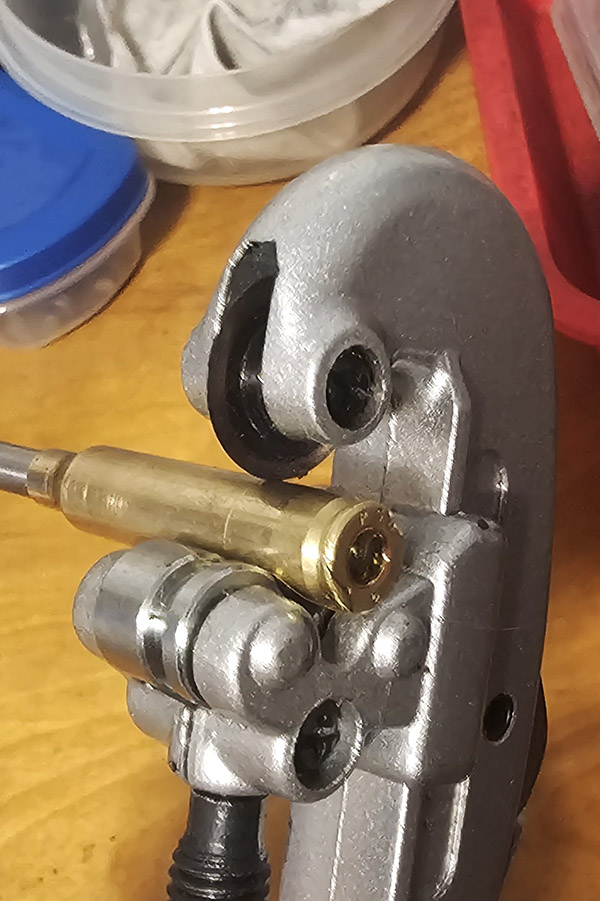
4. Use a small tubing cutter to remove the base of the case.
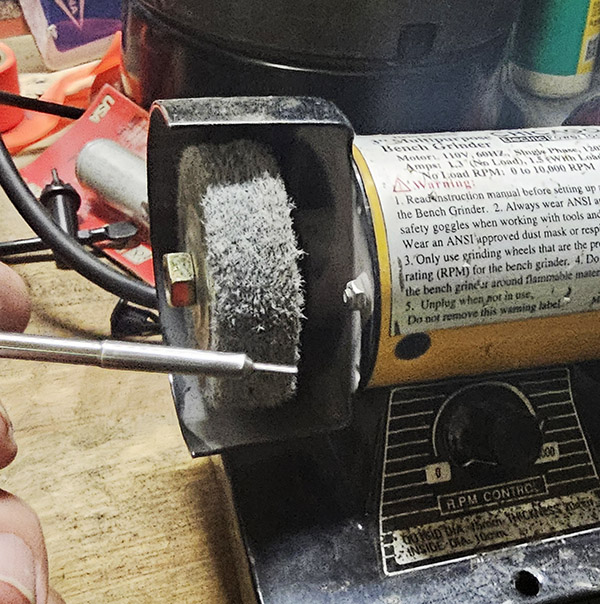
5. Clean up and polish the expander pin using a non-abrasive wheel or a Scotch Brite pad with soap and water. Get all that factory gunk out of the sizing die body too. I use brake cleaner, but WD 40 will also loosen the factory crud.
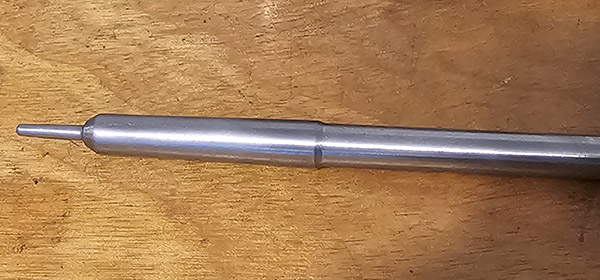
6. Reassemble everything with the pin lining up with the top of the retaining nut. Secure VERY tightly again using the proper wrenches.
Your die will now be better than new because the factory gunk is gone and the expander pin has been polished.
Make sure to use a good case lube on all bottle necked rifle calibers. I’m not a huge fan of the white Lee water soluble case lube but it works. I prefer to use spray lubes such as Lyman or Hornady One Shot.
Joe frequently posts of the magical experiences in Baja and one he focuses on heavily (for good reason) are the tours in Guerrero Negro to see the gray whales and their babies. Having experienced that twice I concur with Joe’s description of this fabulous encounter, however, the tour operators for the gray whales won’t let you disembark the panga to swim with these giant mammals. I know this because I have asked to jump overboard to swim with the whales during both tours I was on. This to me (with my ever-questionable judgment) seemed like the next logical step in being able to enhance the experience.
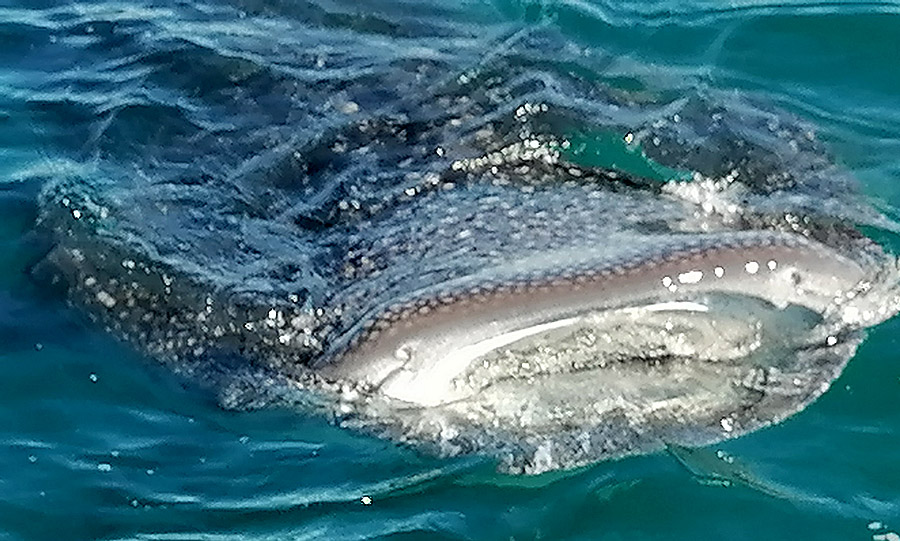
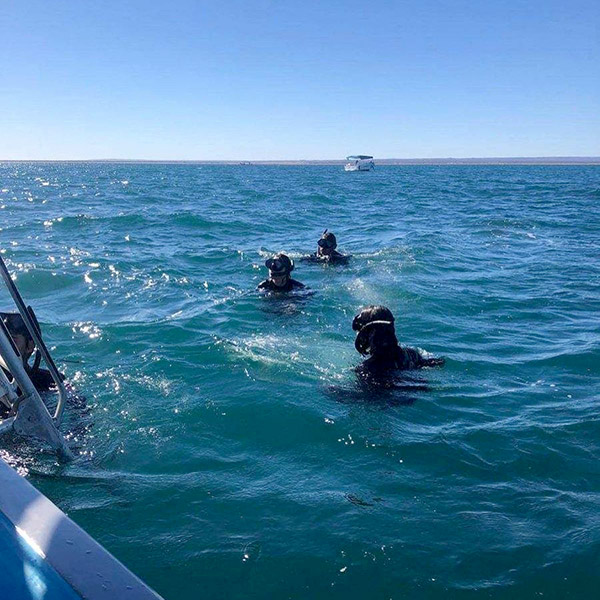
Two weeks ago, as I entered La Paz I instantly was drawn to the many advertisements for tour companies offering opportunities to SWIM WITH WHALE SHARKS! This was what I was yearning for! A tour boat will bring you out to a marine preserve, provide you with a safety briefing, a wet suit, flippers, a mask, and snorkel and you are ready to swim with whale sharks. The boat will approach these fish (they are the largest fish in the world growing to upwards of 40 ft). We were ready to go with legs hanging over the panga as it slowed down near a whale shark and one by one we jumped off the boat into the warm waters of the Sea of Cortez. It was very much like exiting an aircraft as a paratrooper.
Once in the water the guide, who is also in the water with you will point out the whale sharks (in case you cannot spot a 40-ft fish). You can see these magnificent sharks swimming and grazing on krill. We were fortunate enough to have several around us, which got a bit harrowing as they were almost vertical in the water spinning like some type of aquatic ballerina while drawing in water filled with krill. As we began to close in on them we can feel ourselves being pulled into their mouth like a whirlpool. I instantly became aware of their size and power.
It was at this moment I am certain the people topside heard some colorful Bostonian language being funneled up through my snorkel when I was too close for my own comfort. The whale sharks are peaceful and aware you are there and not a threat to them, but they are also aware they are bigger, better swimmers, and you are in THEIR habitat. One thing to keep in mind is that they will not move for you and if you get in their path, they may push you or run you over. This was an incident we all clearly wanted to avoid.
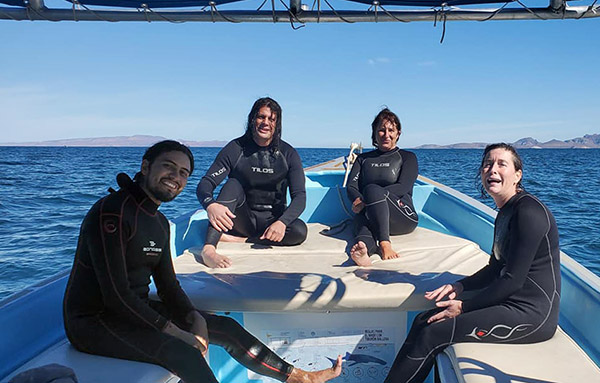
There were only four of us on the tour and we performed four dives over about 2 hours. Their overwhelming size and our proximity to the whale sharks never got old, and our adrenaline never died down. We used Red Travel Tours out of La Paz. Our guides Siyad and Mario were well informed and they had a passion for ensuring we had a once-in-a-lifetime experience while respecting nature. They were both genuinely as excited as we were when swimming with the whale sharks and educating us on the ocean they live in. For anyone traveling in Baja this is an experience and a tour company you want to go with to see whale sharks.
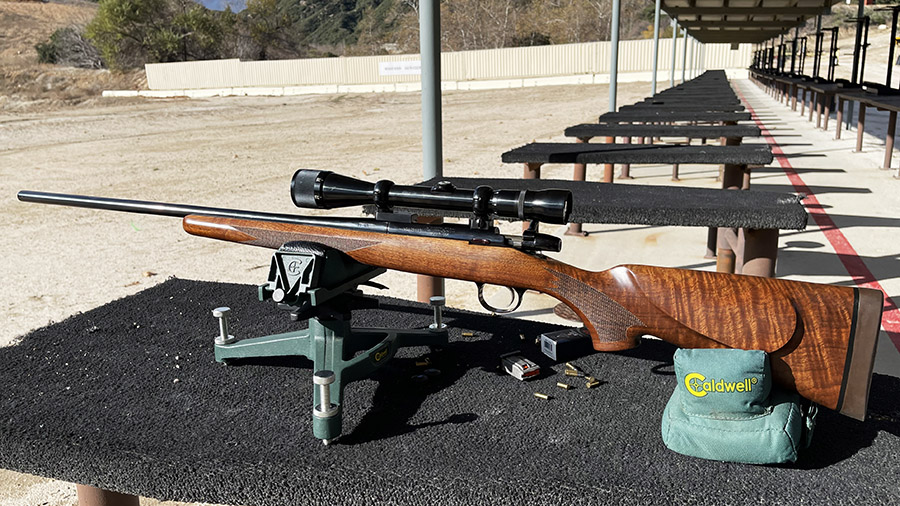
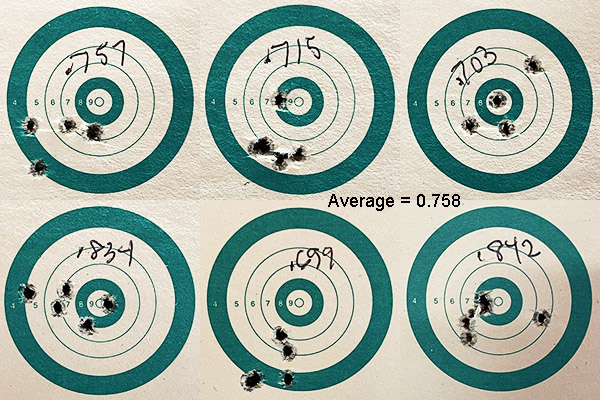
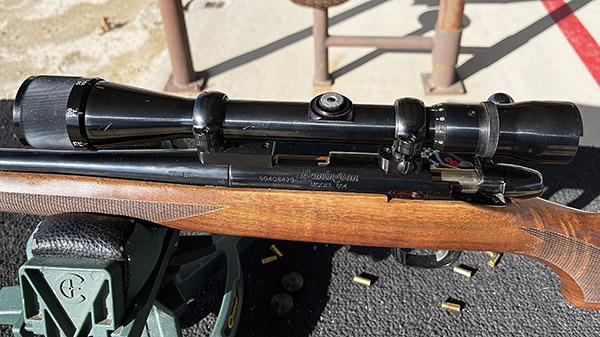
The good news is when I was recently on the range with my Remington Custom Shop Model 504 the air was dead still and I had the range to myself. The bad news is the 5-shot 50-yard groups were just so-so, and I didn’t have anything to blame that on but myself. Well, maybe. I only tried two kinds of ammo (an old box of Remington Target 22 and a new box of CCI standard velocity ammo). You have to play around trying different makes (just like you would experiment with different reloads) to find ammo that a rimfire rifle really responds to. I’m not there yet. But I’m having fun along the way.
Representative 5-shot, 50-yards groups from the Custom Shop Model 504. I’m expecting to see groups in the .250-.300 range from this rifle (I’m not done yet).
Sue and I were in Rapid City, South Dakota, several years ago exploring Mt. Rushmore and the Black Hills. We took a lot out of that trip…we saw Mt. Rushmore during the day and in the evening, we saw bunch of stuff in the Black Hills area, we went out to a little-known Minuteman Missile National Park, we saw the Badlands, we stopped in Wahl Drug, we went to Devil’s Tower, and of course, I had to check out what I now know to be one of the best gunshops in the country: Rapid City’s First Stop Gun and Coin. I could have spent the entire day there, but we had other things to see and do. After our visit, I started checking out what First Stop had listed on Gunbroker.com, and it wasn’t too long after that that I saw a Remington Custom Shop Model 504.
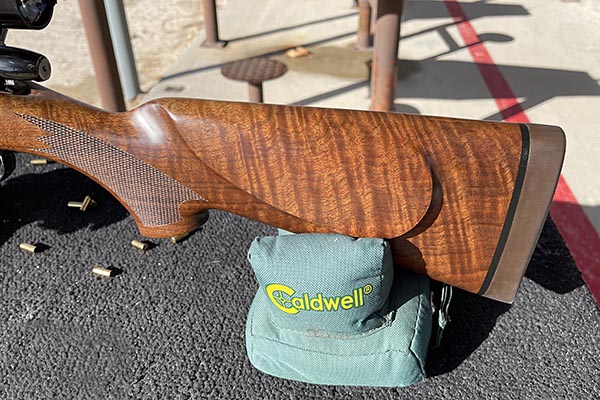
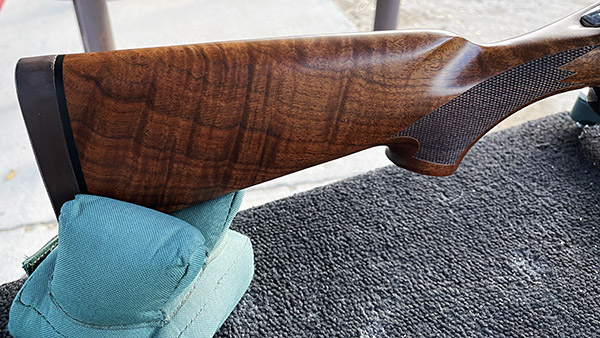
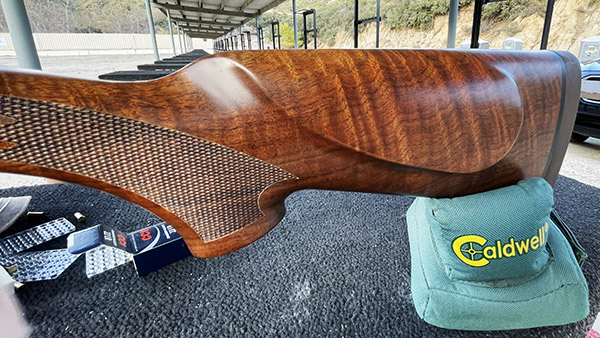
High end walnut, as is appropriate on a Custom Shop Remington rifle. The recoil pad might be more appropriate on a .416 Rigby, but it looks great on this rifle.
I didn’t even know what a Model 504 was, I’d never handled or shot one, but I knew what the Remington Custom shop was all about. The rifle had my interest. It was not cheap, but that was maybe a dozen years ago and when you see a Custom Shop Model 504 come up for sale today (which hardly ever happens), the ask is about three times what I paid. I’ve never seen another Custom Shop 504 in person; I’ve only seen them on the rare occasions one appears on Gunbroker and in a couple of Internet reviews.
Remington wanted a high end .22 bolt rifle in the early 2000s to compete with the offerings from Kimber, Browning, Ruger, CZ, and others, and the Model 504 was the result. Remington had three versions: A Sporter model, a heavy barreled Varmint version, and the Custom Shop 504 you see here. Remington built the 504 from 2004 to 2007. The Custom Shop Model 504 was the flagship and it had it all: A machined steel receiver, a highly polished deep blue finish, a free-floated barrel and glass-bedded action, highly figured walnut, a subtle forearm tip, a super smooth action, cut checkering, a recoil pad that might be more at home on a .300 Weatherby, and a barrel from the super-exotic Remington Model 40 target rifle. I didn’t know any of this at the time I hit the “buy now” button, but I knew any Remington Custom Shop rifle is a collectible item.
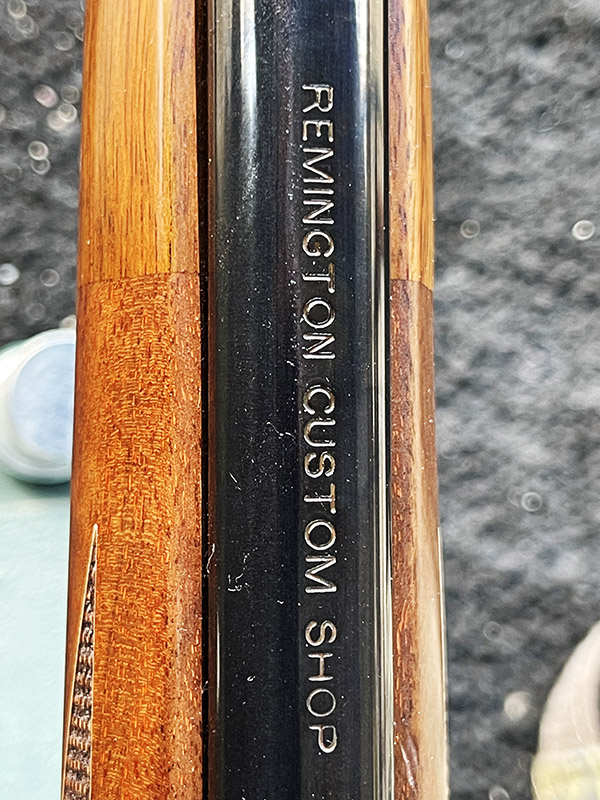
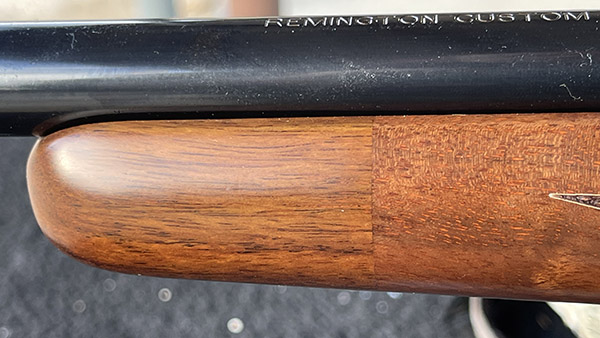
The Model 504 receiver is glass bedded.The Custom Shop markings on the 504 barrel.A very subtle forearm tip.
My rifle came with the rings of unknown origin and Bausch and Lomb mounts. I first mounted Bushnell scope, a scope set up to be parallax free at 100 yards. But I typically shoot a .22 at 50 yards. I next put an old Weaver 4×12 variable scope (adjustable for parallax) on the rifle, and when I adjusted for 50 yards it had no parallax. I don’t know how repeatable that old scope is (and as you’ll notice from the photo above, the groups seem to move around a bit), so one thing I’m going to do in the future is put another scope on the rifle, mostly likely Mueller’s 4×12. I have a Mueller scope on another rimfire rifle and I know it is good. I like the looks of the old Weaver the 504 is wearing now, but when I tried adjusting it, there didn’t seem to be much correlation between the adjustments I was making and where the bullets were going.
The Weaver scope mounted on the Model 504.
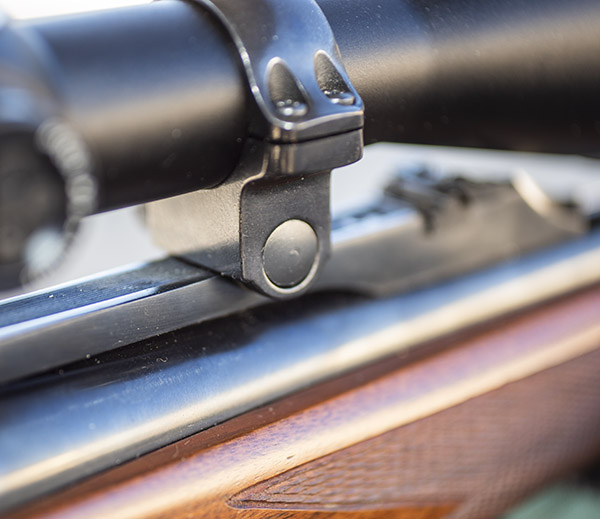
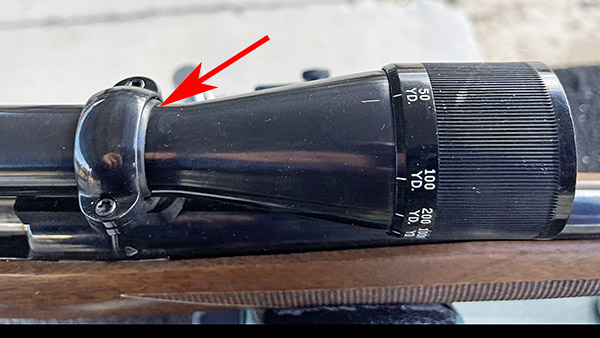
Something that had me scratching my head are the plastic inserts on the scope rings between the scope body and the rings. I’ve never seen this on any other rifle, but from what I’ve read on the internet, they work well for other shooters (even on heavily recoiling rifles, which a .22 is not). The scope appears to be secure.
The plastic scope ring inserts. I had never encountered this before.
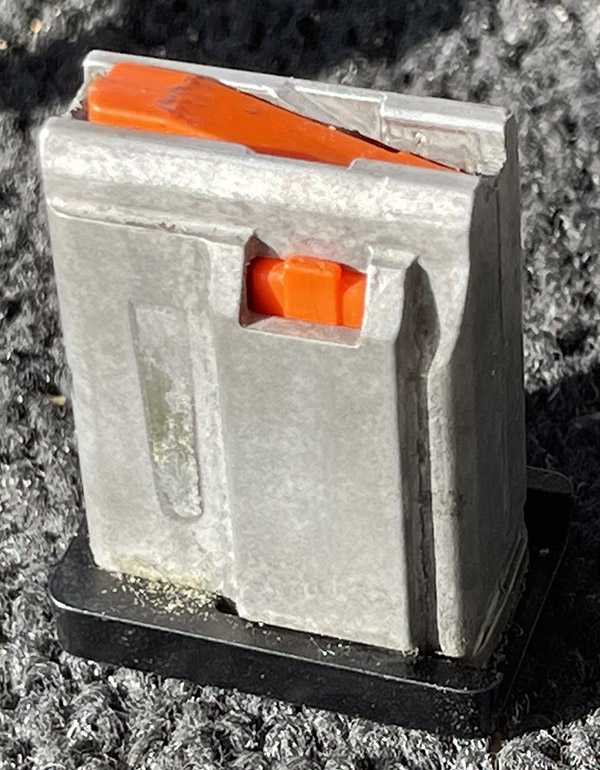
The Model 504 magazine is apparently scarcer than an honest politician. Only one magazine was included with my rifle. Now that I am shooting it more (it’s no longer a safe queen), I thought it might be a good idea to pick up a couple of spare mags until I saw their price. When you can find one on Ebay or Gunbroker, they go for around $200. I think I’ll be careful with my one magazine and keep looking; maybe I’ll get lucky and find one in a gunstore’s discounted junkbox (most old line gunshops have these).
The difficult to find and very expensive Model 504 magazine.High end walnut, starboard side.High end walnut, port side.
It may be that the Model 504 is just not that accurate. My findings are consistent with what other 504 reviewers have published (in fact, my gun is turning in tighter groups than what others have previously published). Recognizing that the Custom Shop model used the same barrel blanks Remington used for the Model 40 .22 rifle, I would have expected more. Maybe it’s there and I just haven’t found it yet. At least that’s my hope.
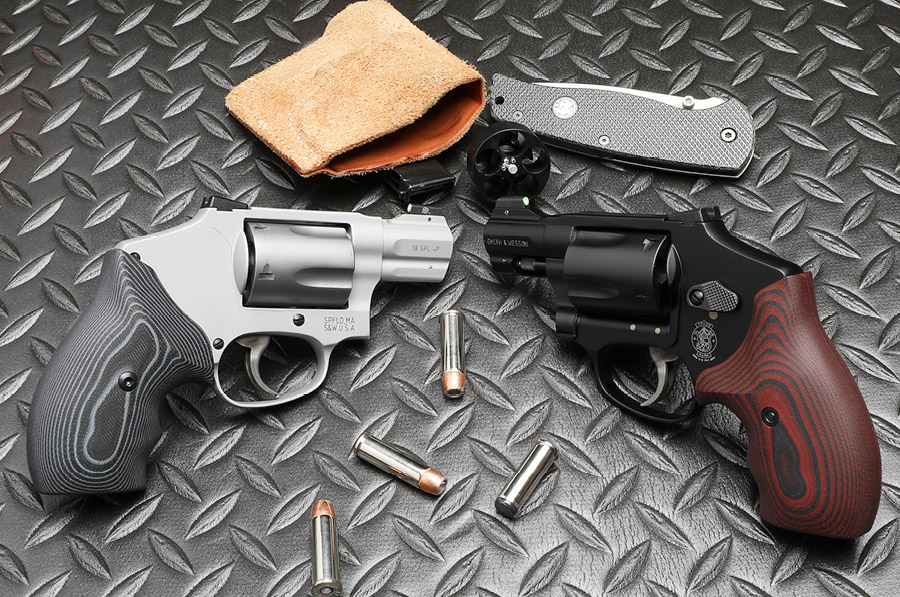
Good buddy Paul sent this very recently released video from Lipsey’s to me last night:
The video is just under 10 minutes long and it’s worth watching. To me, this new J-frame Smith addresses most of the shortcomings I’ve noticed with my concealed carry J-frame revolver. Here are my thoughts:
I like it.
The ideal of a .30 caliber 6-shot is intriguing (in addition to the 5-shot .38 Special version Lipsey’s is also offering). I know most concealed carry handgun encounters are settled in less than two shots, but having an extra round (one over the standard 5 shots) makes sense to me.
I notice the grips don’t go below the bottom of the grip frame, which would be a problem for me. Getting my little finger caught under the grip frame is what makes shooting a J-frame revolver uncomfortable (in fact, it’s downright painful after a shot or two). I do like the G10 material grips, though. I have those on my Sig Scorpion 226 and it is the best grip material ever, in my opinion. I would like a set of G10 grips that extend lower than the bottom of the grip frame, like the Altamont grips I put on my J-frame. These would be very comfortable.
The sights are a much-needed upgrade. The stock Model 60 and other J-frame sights are a joke.
The aluminum frame means light weight, which I guess is good for carrying the gun all day, but those little J-frames can have fierce recoil. My stainless steel Model 60 packs a punch; the aluminum version recoil will be worse. I suppose the assumption for most is that the gun will be carried more than it is shot, and that makes sense. But, still, that’s going to be a lot of recoil.
The J-frame endurance package is sorely needed. I shot the hell out of my Model 60 doing rapid fire at 7 yards and it quickly went seriously out of time. That was an expensive fix. Mine also had excessive headshake. I was able to address it with a shim kit, but it should not have been necessary.
It will be interesting to see what this new Lipsey’s/Smith and Wesson J-frame revolver costs and if it gets approved in California. My prediction is that Lipsey’s will later release a .357 Magnum version (not that anyone would need it, but it would probably sell well). I also predict a 9mm version. 9mm is the most popular centerfire handgun cartridge in the world, and I believe a 9mm version would sell well, too.
Arson investigation is a highly technical field, so I was naturally interested when a friend (a retired arson investigator) told me about what he used to do. He described what’s involved in determining if a fire occurred as a result of arson and he lent two books to me (Torchered Minds and The Arsonist Profiles). I couldn’t put either down. They are fascinating reading.
Ed Nordskog wrote Torchered Minds first; The Arsonist Profiles followed. Although initially intended for arson investigators, Nordskog’s writing makes them fascinating reading for anyone. A few of the concepts Nordskog develops in his books include:
Many fires are not recognized as arson. Police often do not investigate smaller fires, dismissing them as either accidental or inconsequential vandalism.
Fire departments are not good choices for investigating arson; that task is more appropriately assigned to police agencies.
Surprisingly (or perhaps not surprisingly), in more than a few cases firefighters are arsonists. The same things that attract firefighters to their profession are the things that sometimes cause people to become arsonists.
Serial arson is a much more prevalent crime than most people realize (including most police departments).
By the time serial arsonists are convicted, they have most likely set hundreds of other fires.
Physical abnormalities and having been the victim of child abuse are often present in the backgrounds of serial arsonists.
Revenge is frequently an arson motive. Arson for profit (with the arsonist committing insurance fraud or being paid by others to do so) is another common motive.
The Hollywood portrayal of arsonists being sexually excited by fire is bunk; Nordskog never encountered this as a motivation in any of his investigations.
Both books have descriptions of the arson events, the investigations, the outcomes, and Nordskog’s evaluation of the arsonists and their motivations. Nordskog did much of his work while a member of the Los Angeles County Sheriff’s Department; many of the events he describes in his books are crime sprees I saw in our local news as they were occurring (for me, that made the books even more interesting). Arson investigation may not seem like an interesting topic, but Nordskog’s ability to tell the tale and characterize arsons by initiation method, arsonist motivation, and other factors makes for great reading. Trust me on this: Torchered Minds and The Arsonist Profiles are fascinating books.
I like that title. Geezy Rider. It kind of says it all. A close runner up was “You might be a geezer if…”
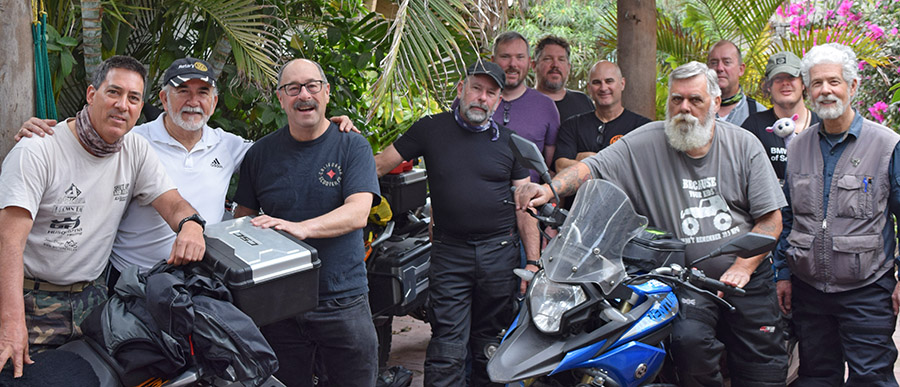
We haven’t blogged a listicle in a while and I thought it was time. Sue and I like to entertain and we had three couples over for dinner recently. Everyone was our age (which is a nice way of saying we are all geezers), we all came from similar backgrounds, we all have grandkids, and we all travel. Those commonalities notwithstanding, the conversation centered on the same topic it always seems to center on these days when I’m with my geezer buddies: Getting old. Some of you might be thinking that you don’t want to read about old people, but you might already be one. So how do you know? Well, here we go. You might be a geezer if:
You get senior discounts without asking. When you do ask for the senior discount, no one asks to see your ID. You sometimes find yourself thinking that 55 is too young to be considered a senior citizen.
A good night’s sleep is based on how many times you had to get up to take a leak, you wonder how in the world taking a leak on the side of the road ever became a sex crime, or you plan rides at least partly based on restroom locations.
You know more doctors than motorcycle dealers, and you have a different doctor for each organ in your body. Sometimes you realize you can’t make a planned ride because you have a doctor’s appointment that day.
You look at other people at a motorcycle event and think they’re really old, and then you realize you’re the same age as they are.
You’re on a first name basis with the Costco people who give out free samples.
You can identify pills without seeing the bottle, a day on the bike is routinely preceded by a couple of Ibuprofens, and you have a pill container organized by day. Forget penicillin; you know that Sildenafil and Tamsulosin are the true wonder drugs.
You no longer use a tail pack or have a sissy bar because it’s easier to get on and off your motorcycle. You may have pondered where to attach a cane on your motorcycle.
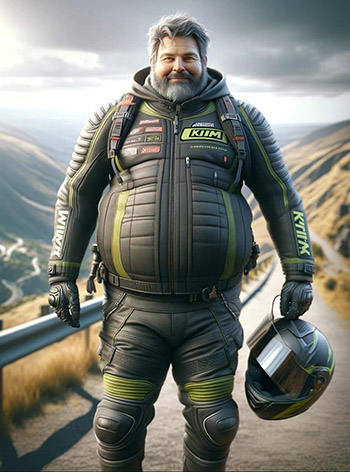
You buy motorcycle clothes a couple of sizes larger because the damn manufacturers are making them smaller these days. You buy riding gear with pockets big enough to hold baby wipes. You substituted food for sex years ago and now you’re so fat you can’t get into your own pants.
You stopped worrying about helmet hair decades ago and when you get a haircut you find yourself thinking about the cost in terms of dollars per hair. You haven’t carried a comb in decades.
You watch news shows based mostly on which ones you don’t shout at.
A motorcycle’s weight is more important to you than 0-to-60 or quarter-mile times. You and your buddies talk about cholesterol, A1C, PSA levels, and medications instead of motorcycle performance specs.
When it’s time to change your oil, you think about where it’s going to hurt the next day because you have to get down on the floor to reach the drain plug. Ibuprofen is a normal part of your oil change equipment.
You don’t think there’s anything particularly wrong with a motorcycle in a handicap parking spot.
You don’t like to ride after dark and going to bed by 9:00 p.m. seems like a perfectly normal thing to do.
Easy Riders or The Great Escape is on TV, and you don’t even need to think about it. You’re going to watch it again.
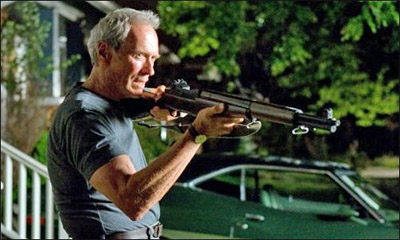
A new movie stars Clint Eastwood, you know you’re going to see it, and you don’t need to know what it is about to make that decision.
So there you have it: My take on how to assess if you are a geezer.
We were a swarm of 250cc bees bound for Medicine Bow, Wyoming. I didn’t know why that excited me and I didn’t know what to expect, but the place sounded romantic. Not romantic in the sense of female companionship; it was instead the romance of the Old West. Medicine Bow, Wyoming, and we were headed there on our single-cylinder Zongshen motorcycles. We had been on the road for a week, showing the American West to our Chinese and Colombian visitors. It all started on the other side of the world in Chongqing when Zongshen asked if I could take them on a ride though America.
Wow, could I ever.
Susie took this photo as I was showing the Zongshen execs where we might ride in America. The guy on my immediate right is good buddy Fan, who follows the ExNotes blog.
Medicine Bow. It had a nice ring to it. I was thinking maybe they had a McDonald’s and we could have lunch there. I think the reason Medicine Bow sounded so intriguing is I had heard it maybe dozens of times in western movies and television shows. Medicine Bow was one of the major destinations for cattle drives in the 1800s, where cows boarded trains for their one-way trip east, where they would stop being cows and become steaks. An average of 2,000 cows shipped out of Medicine Bow every day back then. That would keep McDonald’s going for a day or two (except there were no McDonald’s in the 1800s).
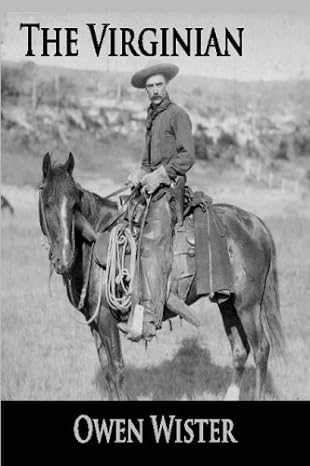
The very first western novel.
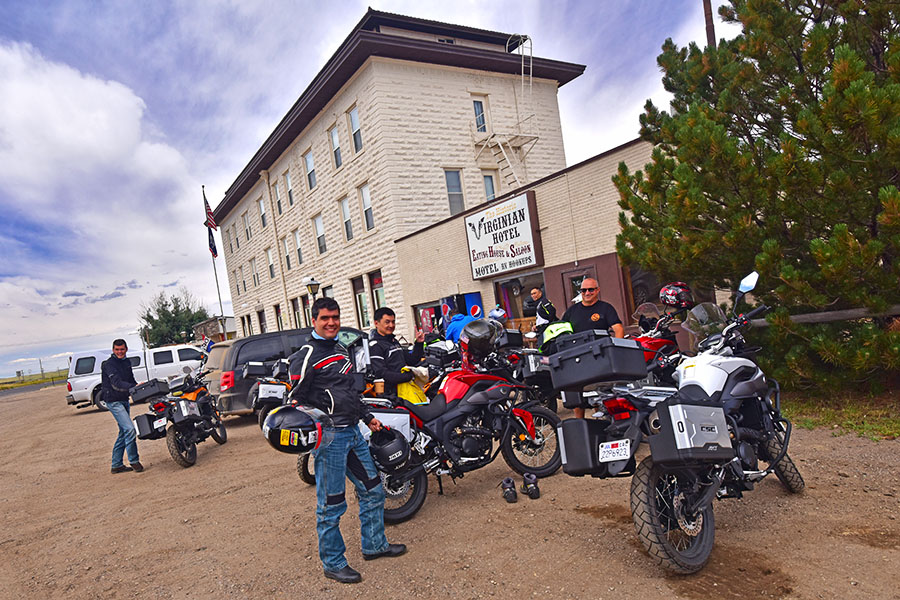
I was surprised when we buzzed in. Medicine Bow is about five buildings, total, none of them was a McDonald’s, but one was the Virginian Hotel. It’s the hotel you see in the photo at the top of this blog and as you might imagine there’s a story to it. You see, back in the day, the first western novel ever was written by a dude named Owen Wister, and the title of his book was The Virginian. It was later made into a movie. The story is about a young female schoolteacher who settled in Medicine Bow and two cowboys who vied for her attention. When the historic hotel was later built in Medicine Bow, what other name could be more appropriate than The Virginian? And about the name of the town, Medicine Bow? Legend has it that Native Americans found the best mahogany for making bows (as in bows and arrows) in a bend (a bow) along the Medicine River, which runs through the area. I can’t make up stuff this good.
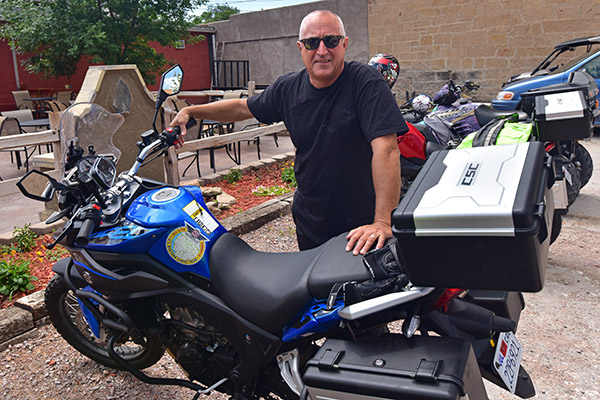
I was the designated leader of the Zongshen swarm on this ride. My job was easy. All the mental heavy lifting and deep thinking fell to good buddy and long-time riding compañero Baja John, who planned our entire 5,000-mile journey through the American West. John did a hell of a job. The roads he selected were magnificent and the destinations superb. It’s also when I first met Joe Gresh, who was on assignment from Motorcyclist magazine to cover our story (more on that in a bit).
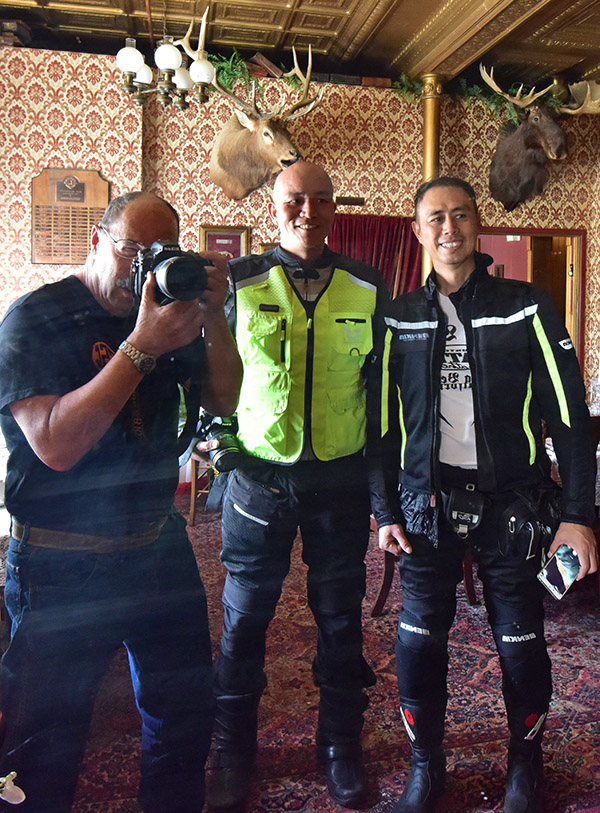
Big Joe Gresh, or “Arjiu” as the Chinese called him, on our 5000-mile ride through the American West.
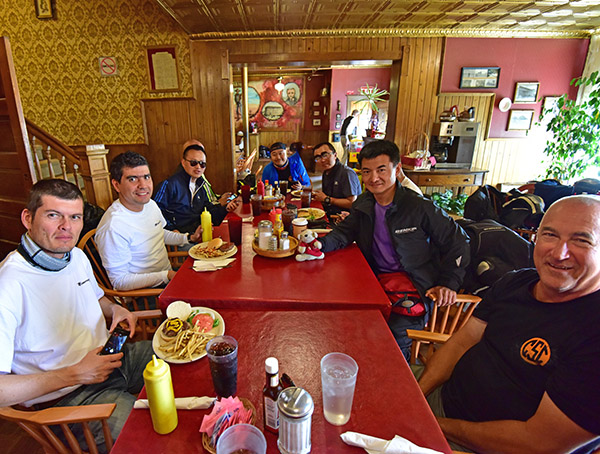
Back to Medicine Bow, the Virginian Hotel, and a few of the photos I grabbed on that ride. The place is awesome, and the Virginian is where we had lunch.
Lunch at the Virginian. That’s Gresh on the right, and Juan and Gabe (two dudes from AKT Motos in Colombia) on the left. A few months later I rode with Juan in Colombia, another grand adventure.
After lunch, we wandered around the hotel for a bit. It would be fun to spend the night in Medicine Bow, I thought. Dinner at the hotel and drinks in the bar (as I type this, I can almost hear someone on the piano belting out Buffalo Gal). I will return some day to check that box.
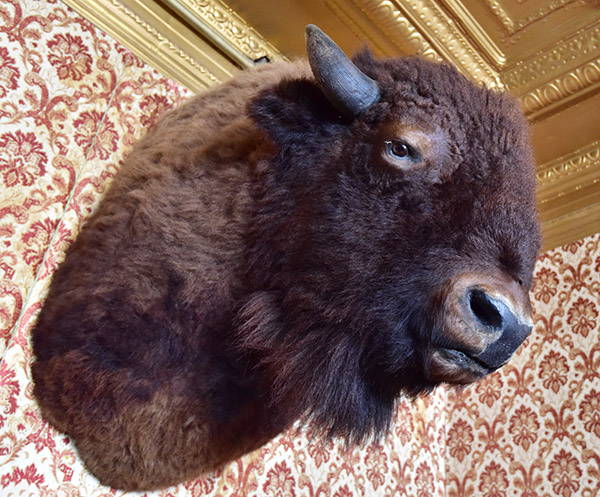
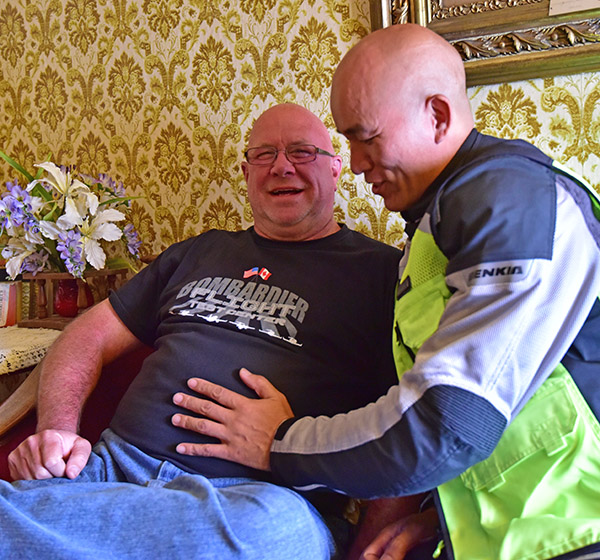
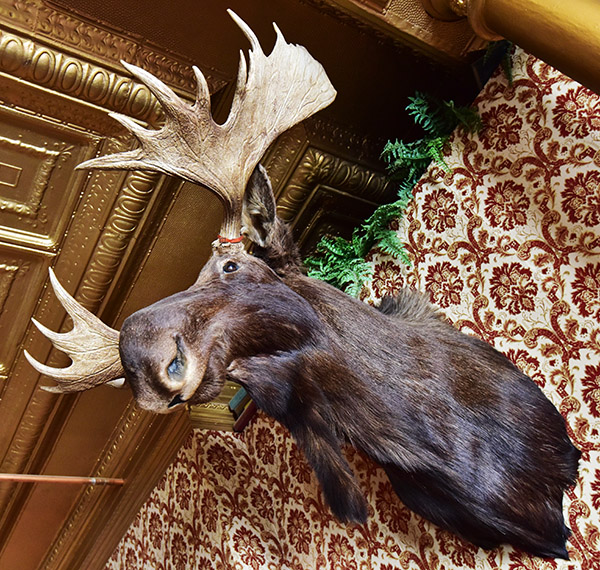
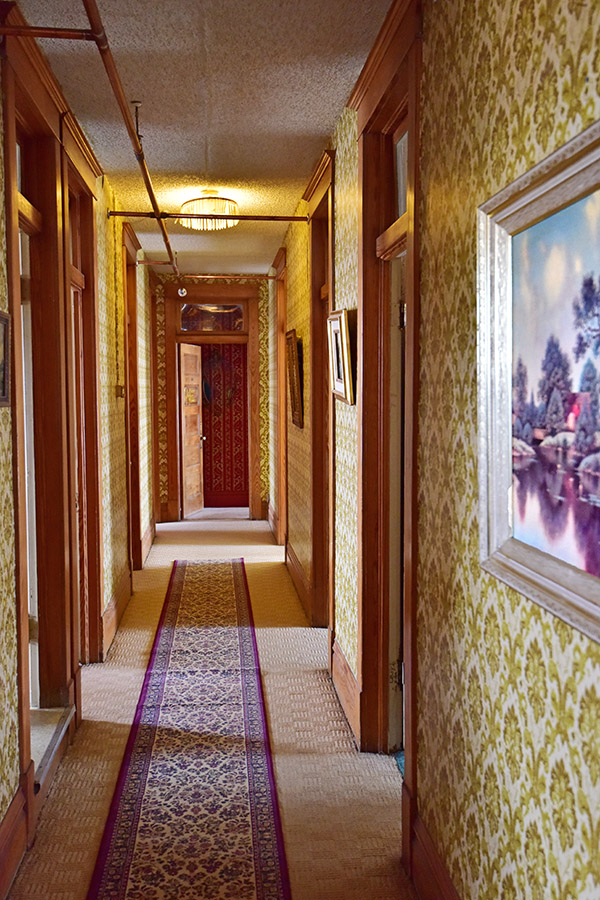
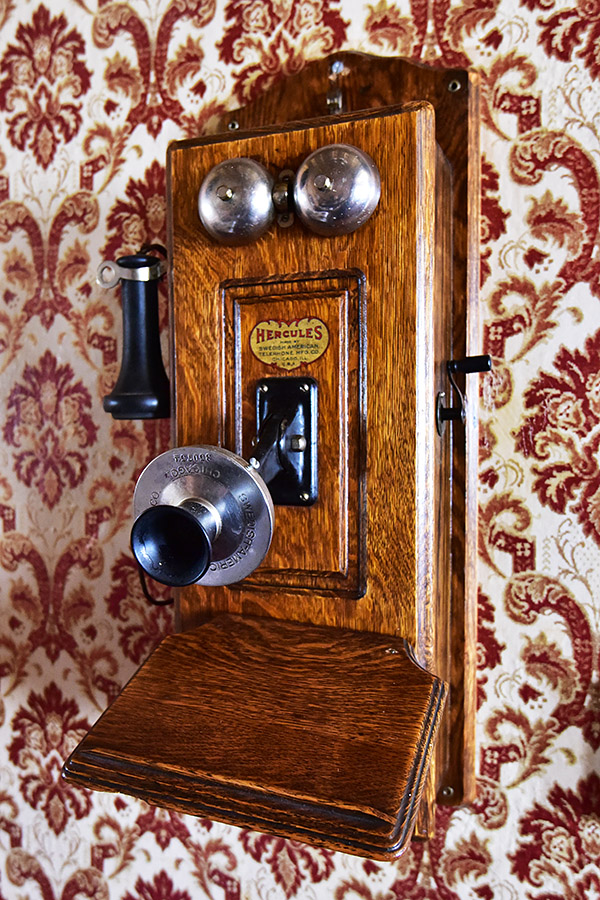
The lighting isn’t great in this selfie (of sorts). Yours truly on the old D200, Lester, and Mr. Zuo. Lester is a teacher in China. Mr. Zuo owns a motorcycle jacket company in China.Bison. We saw a few live ones in the next couple of days.Who’s a good boy? That’s Baja John and Lester, taking a break after a great lunch at the Virginian Hotel. Lester came to America as a vegetarian. That lasted about two days. He sure enjoyed his hamburger at the Virginian. He told us he wants to be like Baja John when he grows up.Yes, there are moose in Medicine Bow, along with mountain lion, bear, elk, deer, and a host of other animals. Theodore Roosevelt hunted this part of the world.A Virginian Hotel hallway. I think you can still stay here overnight.Hotel hallway art.Even a public telephone.
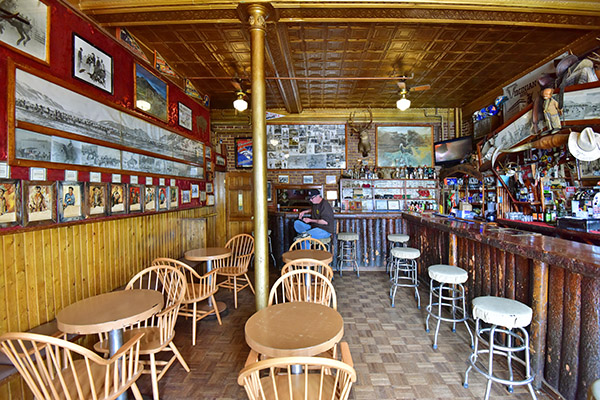
The Virginian Hotel bar was indeed inviting and I could have spent more time there, but we were on the bikes and my rule is always no booze on the bikes. I grabbed a few photos. We had more miles to make that afternoon and more of Wyoming awaited.
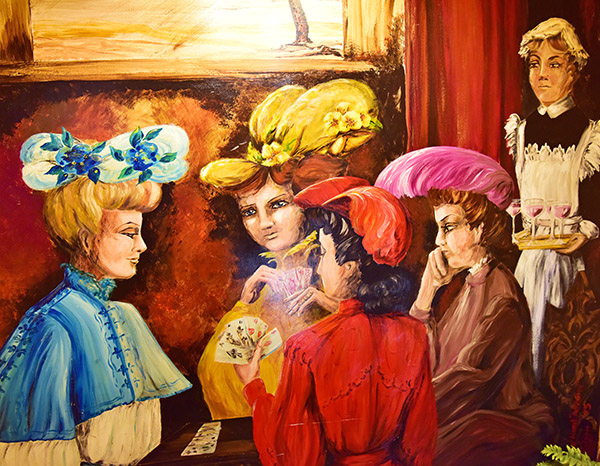
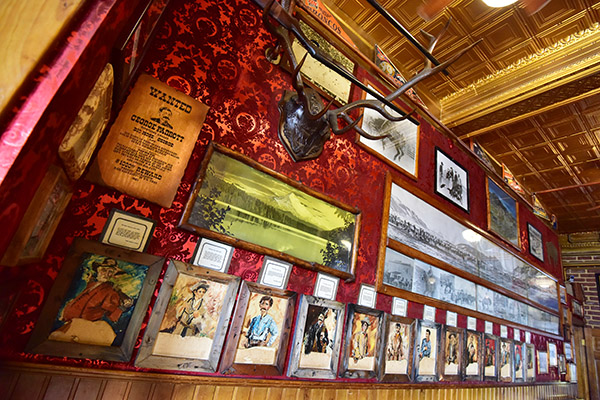
The Virginian Hotel bar. It looks like it would be a fun spot to have a beer or three at the end of the day.Photos and artifacts on one of the Virginian Bar walls.A mural in the Virginian Hotel bar
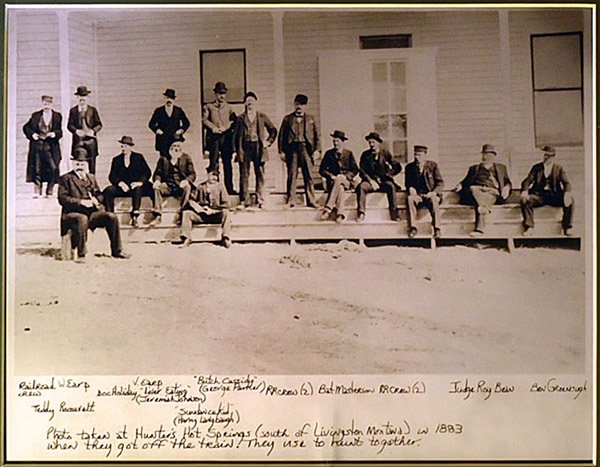
The Virginian Hotel owner (who looked like he could have been someone right out of Central Casting) saw our interest in photography and showed us this photograph. He told me only six or seven copies of it exist. Spend a minute reading the writing…it is amazing.
There are more than a few interesting characters depicted in this photo.
Medicine Bow was a fun visit, it is a place I would like to see again, and it has a palpable feel of the Old West. It was a place where we could have stayed longer, but after lunch it was time for Happy Trails and we were on the road again. I felt like a cowboy, I suppose, swinging my leg over my motorcycle. Instead of “giddy up” it was a twist of the key and a touch on the starter button; the result was the same as we continued our trek west with Frankie Lane’s Rawhide on repeat in my mind: Keep rollin’, rollin’ rollin’, keep those motos rollin’…
In a few hours, we’d be riding into the sunset. Lord, this was a fantastic ride.
Here are a couple of videos you might like. The first is about Medicine Bow, the second is Joe Gresh’s video covering the ride. And one more thing…don’t miss Joe Gresh’s magnificent story about our ride in Motorcyclist magazine.
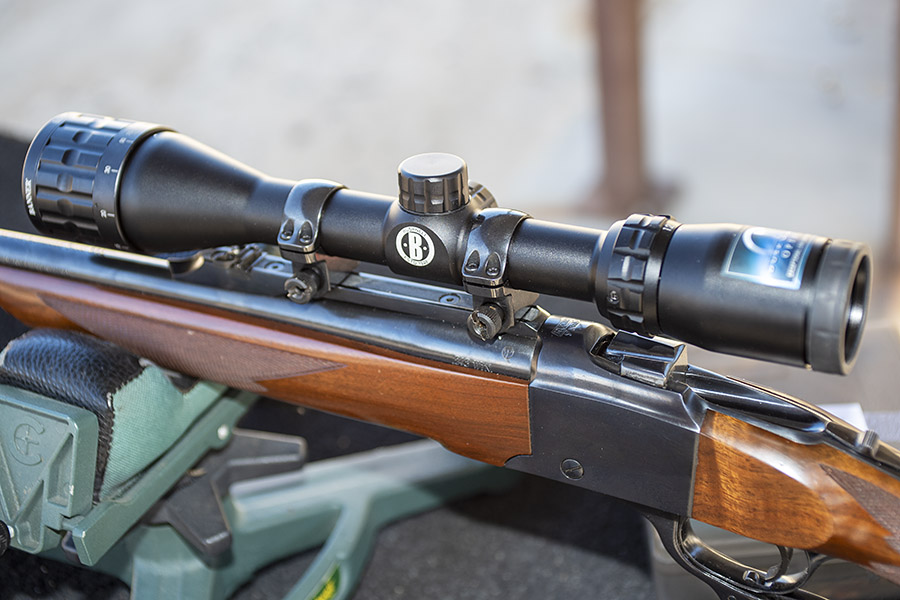
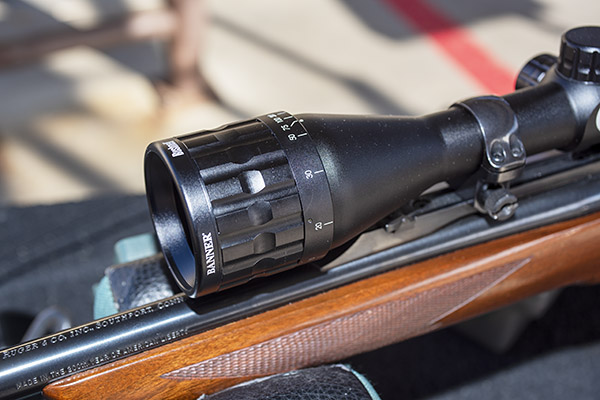
Bushnell scopes have been around forever and they are kind of a generic scope…just as effective as the name brand medication but at a fraction of the cost. I’ve had several that came with rifles I bought, but I never bought a new one until recently. I’m glad I did. I bought the Bushnell Banner 4×12 and it’s a great scope.
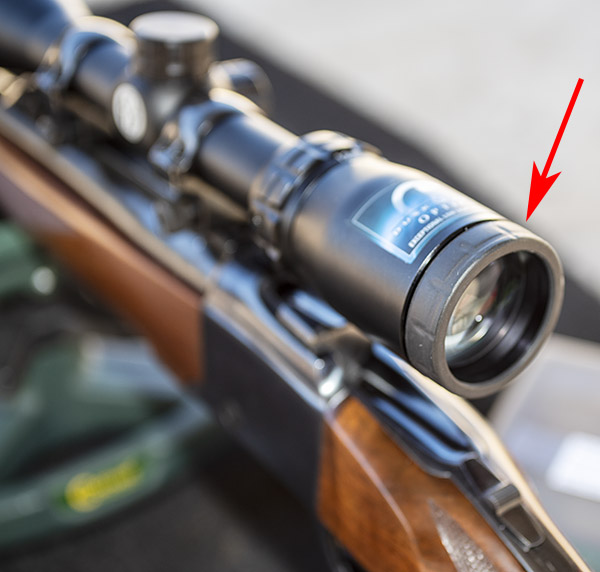
The 4×12 Bushnell Banner scope. It’s a surprisingly good scope for well under $100.
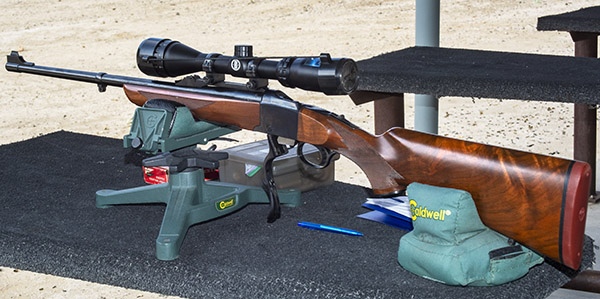
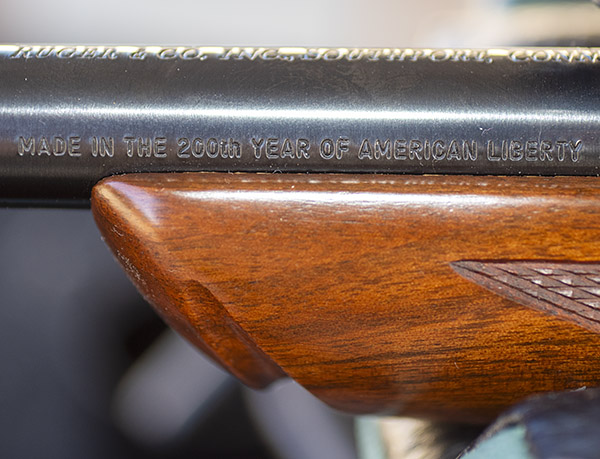
The story goes like this: I won a Ruger No. 1 in 243 Winchester in an online auction about 15 years ago. The rifle was a 200th year Liberty model, it looked good, and I stashed it in the safe. I shot it for the first time a month ago, and that’s when I learned I had an accuracy issue. The Ruger came with a period-correct 4×12 Weaver (long since discontinued), which provided plenty of magnification but my groups were embarrassing.
The .243 Ruger No. 1 on the range. The rifle is wearing the new Bushnell Banner 4×12 scope in this photo.
Let’s go tangential for a second or two: The “4×12” I use above refers to the scope’s variable magnification, which ranges from 4 times actual size to 12 times actual size. With a good scope (one offering optical clarity), you can see the bullet holes in the target at 100 yards when the scope is zoomed up to 12 times actual size.
The Ruger American Bicentennial inscription. It’s on all Rugers made in 1976.
For hunting, I always prefer a straight 4-power scope (i.e., a nonvariable) because of its wider field of view and the fact that I can still hold a pretty tight group with a 4-power scope. Magnifying the target four times is good enough for hunting. That’s especially true on a deer-sized target, but it’s good enough even on rabbits. I’ve sent a lot of Texas jacks to the promised land with a simple 4-power Redfield on my .30 06 Ruger No. 1.
The scope companies pretty much all say that you should keep a variable scope at low magnification to acquire the target, and then zoom it up for a more precise aim. But I’ll tell you that’s just marketing hype, it’s laughable, and it’s a lot of baloney. When I’m hunting and I see a game animal, the adrenal glands go into overdrive. It’s all I can do to remember to take the safety off, and I can remember a few times when I forgot to do that. The thought of seeing a target, acquiring it in the scope at low magnification, taking the safety off, lowering the rifle, increasing the zoom, raising the rifle again, reacquiring the target, and then squeezing the trigger is ludicrous. Nope, for hunting purposes, a straight 4-power scope is the way to go for me. On the other hand, when I’m on the range, I just leave the variable scopes at their highest magnification. In short, I don’t need a zoomable scope. But the marketing guys know better, I guess, and that means they weather vane to variable scopes. That’s pretty much all you see these days.
But I digress. Let’s get back to the main attraction, and that’s the new Bushnell Banner 4×12 scope on my .243 No. 1 rifle. This all started when I loaded some brass good buddy Johnnie G sent my way. The rifle would not consistently hold a zero, and even when it did, it shot grapefruit-sized groups. My thought was that the old 4×12 Weaver scope that came with the rifle had conked out, so I replaced it with another inexpensive scope I had laying around (an older Bushnell Banner 3×9 scope that is probably 50 years old). While mounting the older 3×9 Bushnell, I checked both Ruger rings (front and rear) to make sure they were secure. They seemed to be, but they were not (more on that below). I took the No. 1 (now wearing the older model Bushnell Banner) to the range. The accuracy situation did not improve.
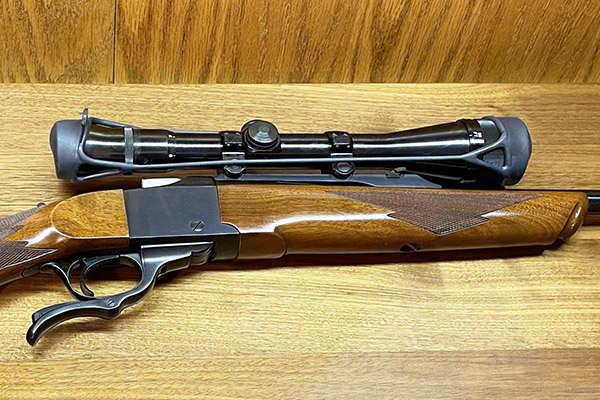
The 4-12X Weaver scope that came with the 200th year .243 Ruger No. 1. That scope may still be good; I’ll have to mount it on another rifle to confirm that.
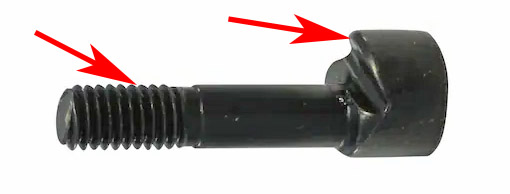
So I removed the older 3×9 Bushnell and the Ruger rings. That’s when I discovered that the front ring was not secure. It had felt like it was, but it fooled me (which is not too hard to do). Ruger provides rings with their centerfire rifles and they are good, but the rings on this rifle were muey screwed up. The clamp (the bolt with the angled head) on the front ring was mangled, and both the nut and the clamp were gunked up with some sort of adhesive (probably Loctite, but who knows). I think what had happened was the clamp could be tightened on the mangled part of the clamp’s angled surface. The buggered-up clamp was not properly positioned in the mounting surface and the caked-on adhesive compounded the felony. Under recoil, the forward ring was moving around.
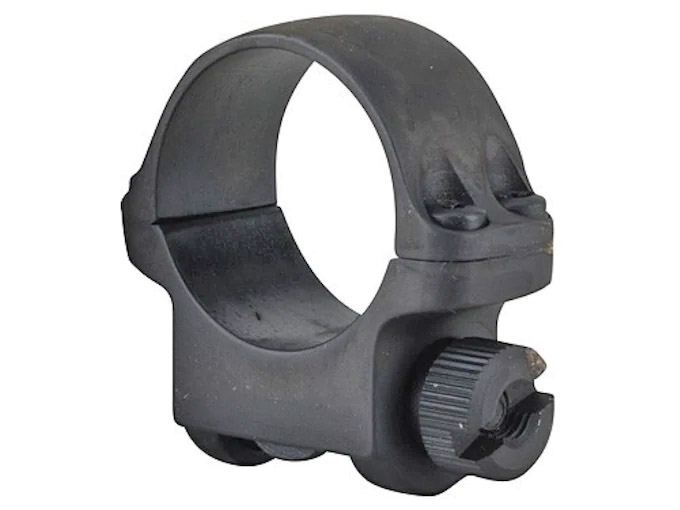
A Ruger scope ring. Ruger provides two of these with each of their centerfire rifles.The Ruger scope ring clamp. It’s a bolt with an angled surface (denoted by the right arrow) that clamps onto a machined crescent on the rifle’s scope mounting surface. The threads on mine were caked with an adhesive.The Ruger scope ring nut. It’s what threads on to the clamp shaft in the photo above.
The Ruger No. 1’s forward scope ring. This was not firmly mounted because the clamp had been damaged by Bubba gunsmithing. God must love Bubbas; He sure made a lot of them.
I recut the clamp ‘s angled surface with a file to eliminate the mangled portion and reblued the clamp using Birchwood Casey Cold Blue, and I wire-brushed as much of the adhesive as I could from the clamp’s threaded shaft with a bore brush. I then worked the clamp into the nut until I cleaned out the remaining adhesive on the nut. I reinstalled the ring and satisfied myself that this time it was secure.
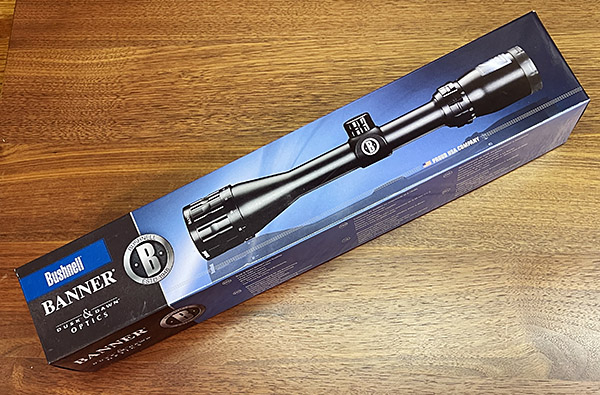
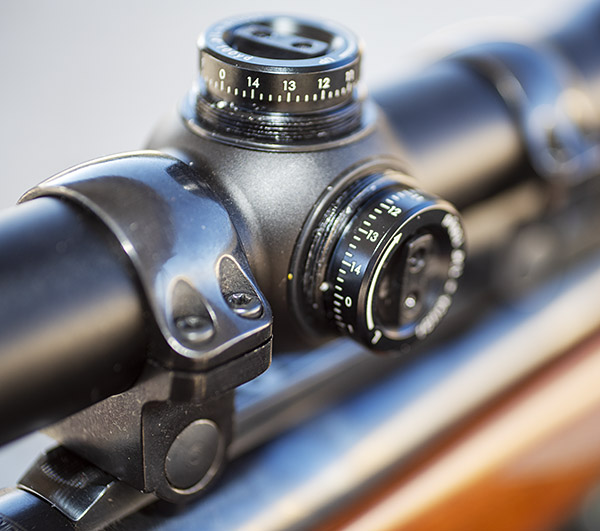
The Bushnell Banner box. The scope was nicely packaged.The Bushnell Banner’s parallax adjustment ring. These really work.The Bushnell Banner’s quick adjust focusing rear ring. It’s a nice feature.The Bushnell Banner’s adjustment knobs after their covers had been removed. These have a nice feel, with a distinct tactile click for each 1/4-inch adjustment. You don’t need any tools to make these adjustments. It’s first class.
When my new 4×12 Bushnell Banner scope arrived a few days after I ordered it on Amazon, I was impressed with its appearance. I even liked the box. I looked through the scope and was impressed with its optical clarity. These inexpensive Banner scopes have continued to improve over the years, and this one looks great.
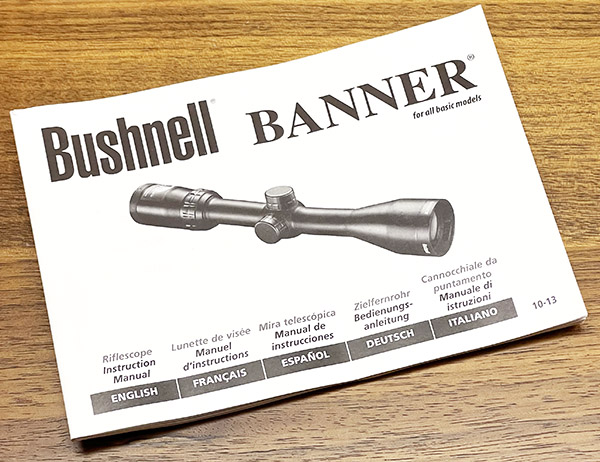
The Bushnell Banner’s operator’s manual. It contains basic information about mounting and boresighting the scope.
The Bushnell scope has a lifetime warranty and it came with what I thought was an impressively thick operating manual. The manual is printed in five languages (English, French, German, Italian, and Spanish), so it was only one fifth as thick as it first appeared to be. But it was still a good manual. The scope also came with lens covers, which is a nice touch.
The Bushnell has other features that are important to me. It has a quick focus ring at the rear to focus the reticle, and it has a parallax adjustment feature on the objective end (the front of the scope). Parallax adjustment has become increasingly important to me; it minimizes the scope’s susceptibility to slightly different eye positions. You adjust for parallax by moving your eye around and making sure the reticle stays centered on the target.
The Bushnell has removable windage and elevation adjustment dial covers, and windage and elevation adjustment can be made by hand (no special tools are required). Each click represents 1/4-inch of movement on a 100-yard target, which is pretty much the standard on scopes.
The Bushnell has a 40mm objective lens, which I think is about right. It looks right and still allows the scope to be mounted low on the rifle. Some scopes go bigger with 50mm objectives, but I think they look silly. These bugeye scopes have to sit higher on the rifle (which makes sighting through them difficult). Nope, for me a 40mm objective is as big as I care or need to go.
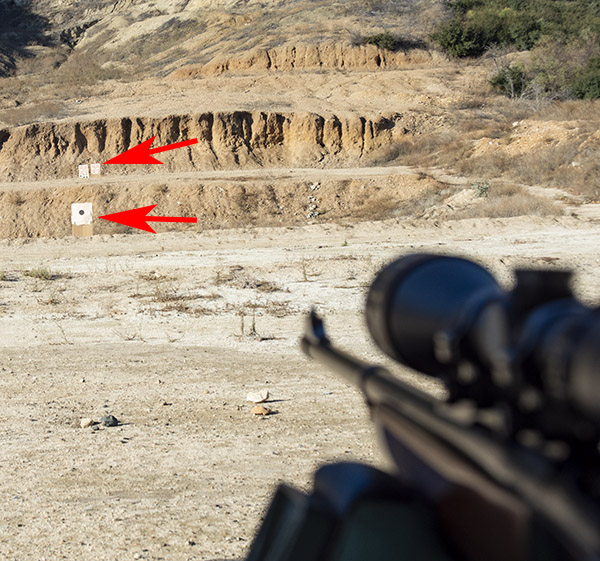
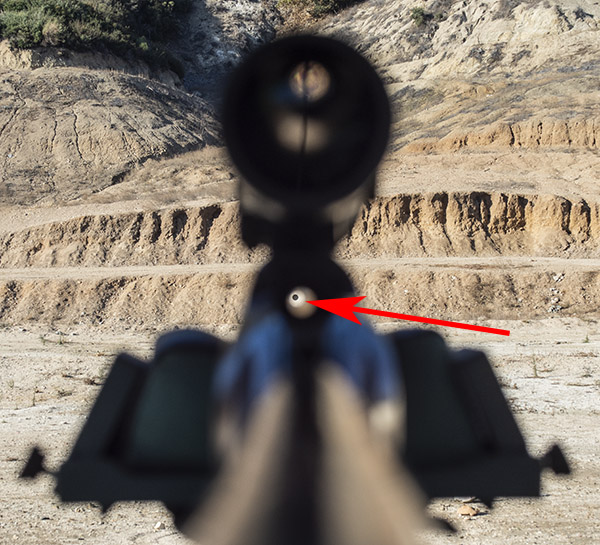
Although I own a boresigting device that mounts on the barrel, I prefer not to use it. The thought of potentially damaging a rifle’s crown, which a boresighting device can do, is not something I want to entertain. I boresight the old-fashioned way: I’ll set the rifle up in a rest, look through the bore (from the breech end) and move the rifle around until a 50-yard target is centered in the bore. Then, without moving the rifle, I’ll adjust the scope’s windage and elevation until the reticle is approximately centered on the target. Once I’ve done that, I’ll fire one shot and see where it hits. I’ve actually done this and had the impact be on the target with that first shot, but it took four shots this time. After each shot, I adjusted the windage and elevation to get the next shot two inches below my point of aim at 50 yards, and then switch to a target at 100 yards to finalize the adjustment.
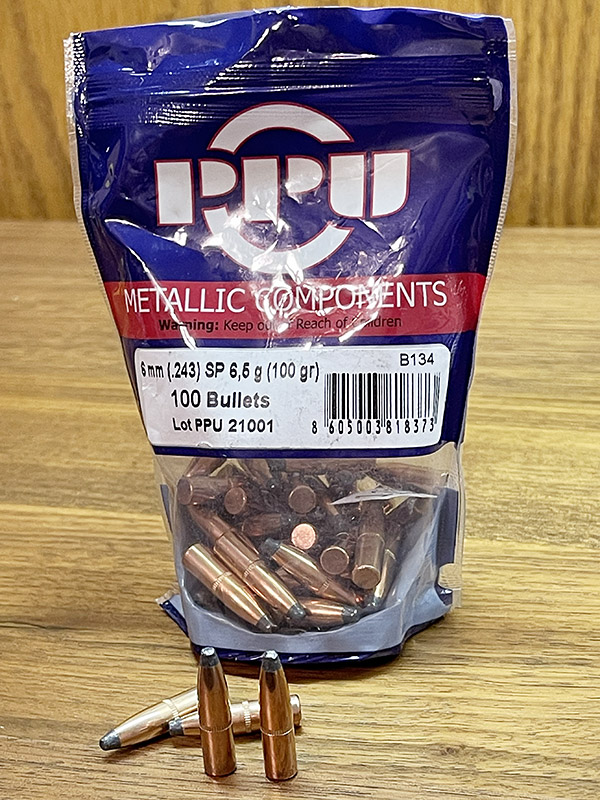
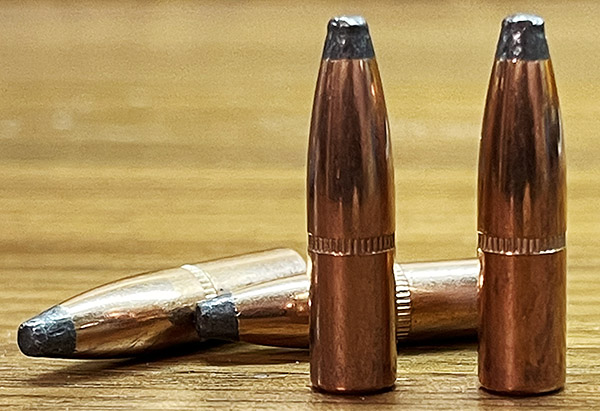
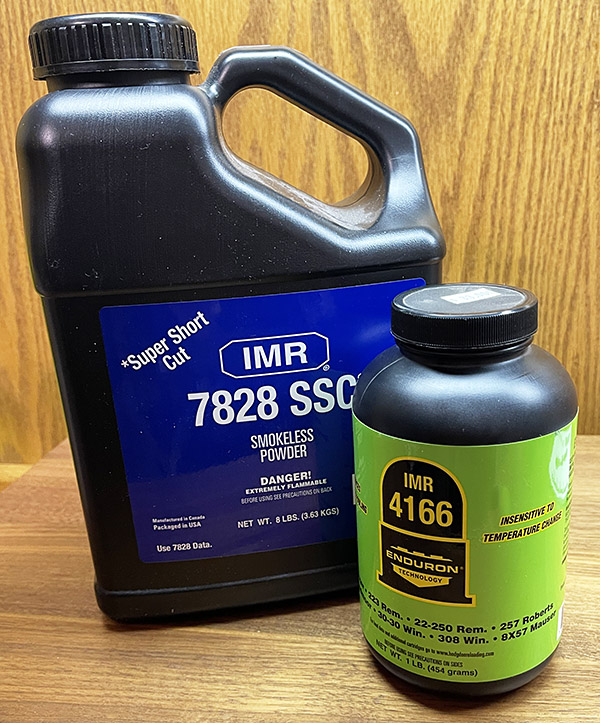
On the range at the West End Gun Club. The first target is at 50 yards; the second set of targets is at 100 yards. I used the first target for boresighting and initial scope adjustment.To boresight the scope, you look for the target through the rifle’s bore. It appears to be a little offset in this photo because it was difficult to get the camera aligned with the bore, but you get the idea. You want the target centered when looking through the barrel.I used PPU (PRVI Partizan) 100-grain jacketed soft point bullets for this round of load development. The Ruger has a 1 twist in 10 inches rate. A 100-grain bullet is right at the edge of stability with this twist rate; lighter bullets should be more accurate.Another shot of the PPU 100-grain bullets. There’s a long bearing area on that bullet.I used two propellants for this test series: IMR 7828 and IMR 4166. The IMR 4166 performed better than the IMR 7828 load and it reduced the copper fouling in the bore.
For this outing, I had loaded two groups of .243 ammo, both using PRVI Partizan 100-grain jacketed soft point bullets. One load had 43.0 grains of IMR 7828 propellant; the other group had 34.5 grains of IMR 4166 propellant. I used the IMR 4166 ammo last. IMR 4166 was one of those new powders that is supposed to not leave copper deposited in the rifling (I’ll explain why I used the past tense in a second). I wanted to use it to minimize the cleaning after shooting the rifle.
So how did it all work? The IMR 7828 load didn’t perform well as the IMR 4166 load. The IMR 7828 load was shooting 2 1/2 to 4-inch groups. Part of that was due to the Ruger’s twist rate (1 in 10), which is marginal for a heavy (for the .243) 100-grain bullet. But I was surprised with the last group of the day, which was with IMR 4166 powder.
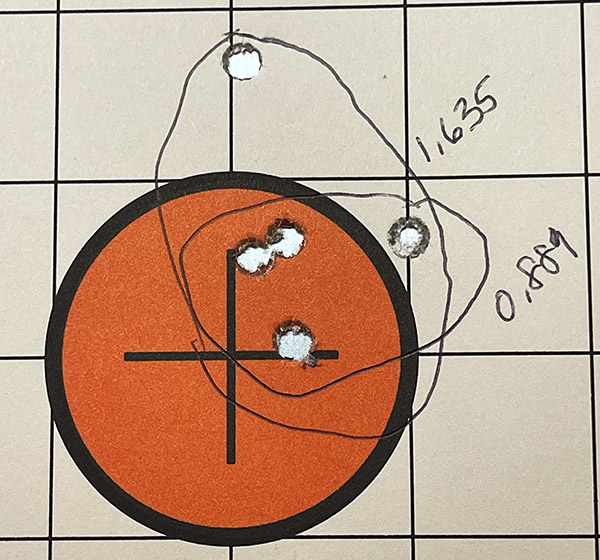
The last shots of the day, and the last of the loads with IMR 4166 propellant.
Four of the five shots went into 0.889 inch; the fifth shot opened the group up to 1.635 inches. That fact that the IMR 4166 grouped much better might be due to the fact the propellant may have removed some of the copper fouling (it appeared to have a lot less copper fouling when I cleaned the rifle later), it might be due to the fact that IMR 4166 is a faster powder compared to IMR 7828, it might have been me, or it might be a statistical fluke. You might think this would push me to develop a load with IMR 4166, but unfortunately the powder has been discontinued (I’m on my last bottle). Future load development work for this rifle will be with lighter bullets and other powders with burn rates similar to IMR 4166. Varget comes to mind. I’ll keep you posted.
I know, I’m digressing again. I started out with the intent to do a product review on the Bushnell Banner 4×12 scope, which I think I did, but I morphed into a bit of load development work for the .243 Ruger No. 1. On my intended topic: The Bushnell Banner is a great scope, and it performs way beyond what it’s sub-$100 price would indicate (I paid $72 for mine on Amazon). If you’re looking for a good low-priced scope, the Bushnell is hard to beat. I like it so much I’m going to by another one for another Ruger, but that’s a story for another time.


 2. Put the die in a well-padded vise and knock the pin down with a brass or hard plastic mallet. The brass mallet or brass punch works best.
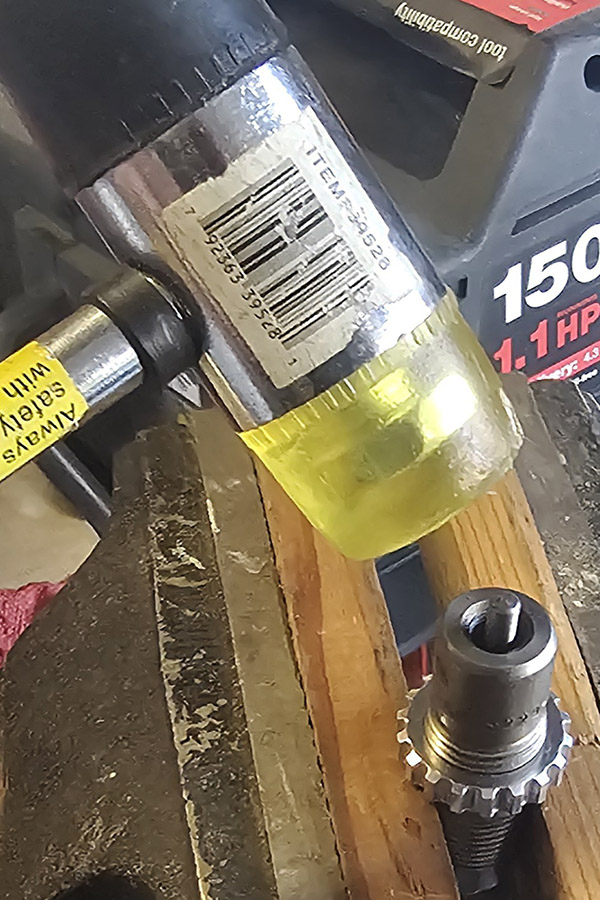


 You stopped worrying about helmet hair decades ago and when you get a haircut you find yourself thinking about the cost in terms of dollars per hair. You haven’t carried a comb in decades.