I promised you a few blogs ago that I found something with less power and more weight than a Harley. As a guy who’s owned a couple of the potato-potato bikes and more than a few dealer-emblazoned t-shirts (and being a firm admirer of The Motor Company), I give myself license to poke fun on occasion.
What might this discovery be, you wonder?
How’s this sound? It has exactly 1 horsepower, and it weighs 1200 lbs.
Take a look…
A descendant of the original W.K. Kellogg Arabians…
Yep, it’s an Arabian stallion. At least I think it’s a stallion. I’m sure of this, though: It’s an Arabian, and they sure are magnificent.
It seems old Will Kellogg (yep, that Kellogg…think Corn Flakes and Special K) owned all the land currently occupied by Cal Poly Pomona. He bequeathed the land to California with two caveats (that’s Latin, of which I am discovering myself to be one): California had to create an Ag College on the Kellogg estate, and the Ag College had to care for Kellog’s Arabians in perpetuity.
What a deal! The People’s Republik couldn’t say yes fast enough. That was, I think, back in the ’20s or so, and the Arabians have been running free on the Cal Poly campus ever since. Along the way, they’ve starred in a bunch of western movies and a few Disney features (the Magic Kingdom is just a few miles down the 57 from the Cal Poly campus, and Hollywood is just a few miles west on the 10). The best part, though, is that the Arabians are accessible to us, the public. And they are beautiful. Magnificent. Stunning. You really need to see these wonderful creatures.
One of the 15 or so colts born every year to the Cal Poly Arabians.
Cal Poly has a show every month, and Susie and I went this past weekend. It was awesome. Cal Poly students take care of the herd, and it is a sight to see. The show is open to the public, it’s only an hour long, and it’s grand and inexpensive entertainment. I get to go free because I’m an Emeritus (I didn’t even know I was a Roman, let alone one with a Latin title). I told one of the students I was an Emeritus (I guess I was trying to impress her), and she asked if that meant I was an old professor. It’s something like that, I told her. Anyway, that title got me in the door for free. For the rest of you Plebeians, it’s only $3. Trust me on this: It’s well worth it.
Good times, folks.
A saddle that would look right at home on any cruiser.
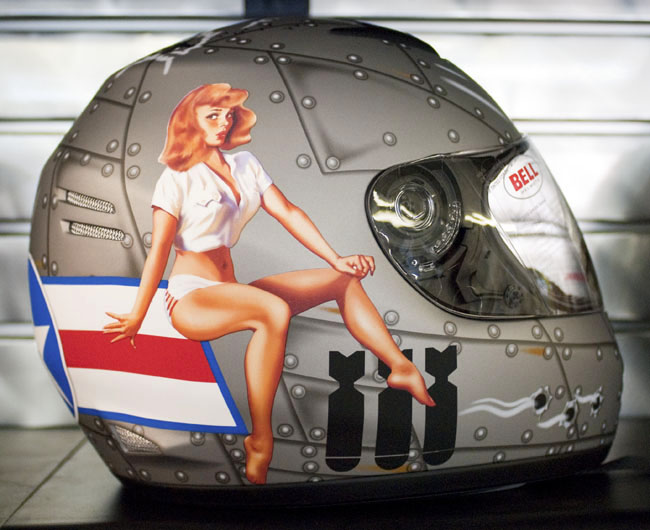
Like everyone else who read the “Back in the Day” Bell Star piece, I greatly enjoyed Gresh’s blog. I never owned a Star, but I bought one of the modern Bell helmets Joe referenced about 10 years ago from my good buddy Mike over at NoHo Scooters in Hollywood. It was a lightweight, inexpensive full-face deal with artwork that made it an instant “I want” item. The Boss was with me and she gave the nod, and Mike gave me a good price, so I bought it.
Not politically correct. But cool. I liked it. Bombs Away!
The helmet had a World War II aviation motif. It’s not politically correct, so if you’re going to get your shorts in a knot over the artwork, my advice is this: You’re young. Go to your safe space and take a nap. You’ll probably get over it.
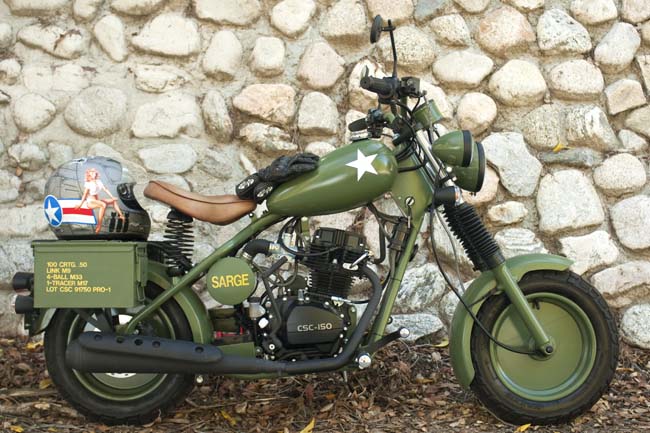
The military theme worked perfectly, I think, with a CSC motorcycle Steve Seidner (CSC’s CEO) built. He called it “The Sarge” and it was his personal bike. I liked both the motorcycle and the helmet so much that as soon as Steve’s bike came together (and he wasn’t around) I raced off to a spot I knew would make for a good photo…
The Sarge and my Bell helmet. The motif worked. For me, anyway. Cue in the music from “Off We Go, Into the Wild Blue Yonder…”
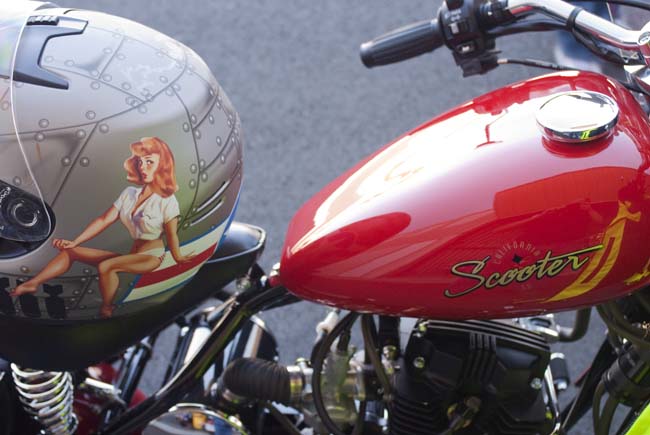
I wore that helmet all the way down to Cabo and back on the CSC 150 Baja run. It was a nice hat. I really liked it. It made me taller, thinner, and faster. Better looking, too, if I kept the visor down.
The Bell on my CSC 150. I called my bike the Baja Blaster.
They say you are supposed to replace a motorcycle helmet every three years (“they” are the guys who make helmets, of course). I don’t know if that’s really necessary, but it’s what I do. After three years the insides of my helmets get pretty funky, and in my case aromatic reasons drive the need for a new lid.
But the three-year rule wasn’t what ended my relationship with the Bell you see here. It was a different reason: The outside surface got tacky. Not in the good taste or politically correct sense (if that’s what you’re thinking), but tacky in an adhesive sense. It got sticky to the touch, like flypaper. I think it was because the adhesive bonding the wrap (the thin layer of artwork) to the helmet’s shell seeped through to the outside. Whatever. It would stick to my hands when I picked it up and I don’t like a clingy thingy. A Bell guy told me he knew of the problem and it had been fixed, but they no longer offered the helmet I had come to love.
I sure wish Bell still made that helmet. I would buy a new one and it’s what I’d be wearing today.
Progress has slowed on Zed. I really wanted to start the beast up. The problem is I haven’t figured out the ignition advancer issue yet. My E-buddy Skip sent me two of the things but neither one will work on the 1975 Z1 crankshaft end. I feel bad that Skip is trying to do me a favor and that the poor guy has to keep digging around in his parts stash. It goes to show you: no good deed goes unpunished. I am going to suck it up and buy a new, $159 advancer from Z1 Enterprises. Hopefully it will be the correct one and fit the crankshaft.
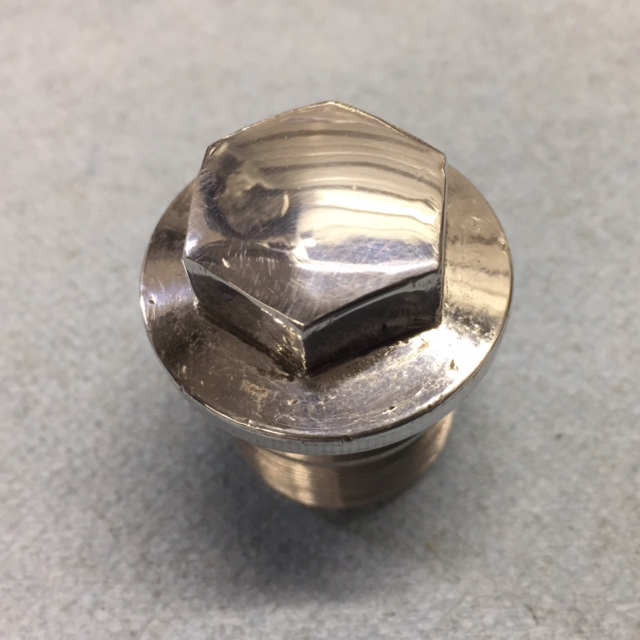
Meanwhile, I’m not ignoring the rest of the bike. Let’s face it, even if the engine is shot I have to get this bike running. The front forks were leaking and contained about 3 ounces of oil between both fork legs. This is down a bit from the 5.7 ounces per leg suggested in my shop manual. I know I said this was not going to be a show bike restoration but I couldn’t bear a future staring at this gouged fork cap bolt so I sanded the thing smooth and gave it a lick of polish. Of course this means that I have to do the other side also.
The internals of the forks were covered in sticky black goo, which required a ton of solvent and liberal doses of carb cleaner to cut loose. Then came rags stuffed down the tubes and pushed back and forth using a drill bit extension. The sliders came polished from the factory and since they were preserved under a coat of oil it took no time at all to spiff them up without crossing over to the dreaded Show Bike threshold.
All the fork parts look usable if not perfect. The upper section of the fork tubes that were covered by the headlight brackets is pretty rusty. I’ve polished it off a bit and will lube the rusty areas to prevent further rust. None of the rust will show on the assembled forks but I’ll have to deduct points when the bike is in the Pebble Beach show.
The fork sliders are held to the damping rod via this Allen-head bolt. There was a fiber washer to seal in the fork oil but I don’t have any fiber washers. I ended up grinding a copper washer to fit and I only have one of those. Looks like a trip to Harbor Freight is in order to buy their 5090 Copper Washer Warehouse kit.
The clutch actuator was in good shape but dirty and dry. Most of the ones I bought for my old Yamaha had the helix cracked. I suffered along with the cracked helix until Hunter found a new, re-pop part and sent it to me, asking if he could have some of the ones I’d stolen from him in exchange. I have no idea what the old man is on about. This Kawasaki part is much sturdier than the Yamaha part and crack free so that’s one point to Kawasaki in the red-hot clutch actuator wars.
I gave the sprocket/clutch actuator cover a quick polish. The aluminum on Zed is in great shape. It took about 5 minutes to shine this cover because it was smooth to start with. I’ll let the cover oxidize naturally after the bike is built. I can’t be expected to clean a motorcycle more than once.
I’m placing another big order with Z1 Enterprises today. They stock a lot of hard-to-find Z1 parts. It’s easier for me to order from one place and if your order is over $200 shipping is free. Who doesn’t blow $200 on bike parts? I don’t like filling out the credit card fields twenty times from a bunch of fly-by-night vendors and Z1E’s prices are in line with eBay sellers and other vintage parts sellers.
Want to catch up on the rest of the Z1 resurrection? Just click here!
Different versions of the Bell Star. As the design evolved, the window grew and the helmet added a flip-up visor. They were the ultimate in cool.
In the early 1970’s I worked at The Art Colony, an art supply and picture-framing store on Westward Drive. Back then I fancied myself a sort of artist and I got discounts on oil paints, brushes, and different sizes of the pre-stretched canvas we made on site. The place smelled great. They had clay and water color supplies but I never messed with that stuff because I felt those materials were inferior to oil painting. Oils were good enough for the Old Masters so they were good enough for me. Even at 15 years old I didn’t like anything new.
Motorcycle vandalism was a problem at our school. Any nice-looking bike would be attacked in the school’s parking area. You’d get your seat cut or a bunch of rocks in your gas tank if the vandals were in a good mood. If they were in a bad mood your chain might be welded solid (the motorcycle parking area was next to the metal shop, a tactical error on the school administration’s part) or sugar poured in your tank. At the time I was riding a sweet, red Honda SL70, fully street legal and had a learner’s permit to ride in the daylight hours. I never took the bike to school. I’d ride to Carlson’s house, leave the SL70 there and walk to school.
After school I’d ride to The Art Colony and work a few hours until they closed. I earned fifteen or eighteen dollars a week, which was plenty to keep the SL70 in gas and tires. At least until Wilson got a Bell Star helmet. Damn, that helmet was cool. The rest of us had open face, jet-style lids that either slid back on our head and tried to choke us or pushed down onto our nose blocking most of the road. It was probably a fitment issue but we used whatever helmet no one else wanted. Buying a helmet was an unknown concept.
Wilson’s Bell Star fit his head and had a flip down visor that was great for riding in the rain. It rained a lot in Florida. Naturally, everyone started getting Bell Star helmets and whoever bought one became instantly cool. I had to have one. Murray Auto, in Hialeah had the best price on Bell Helmets: Fifty-one dollars out the door. This was a huge sum of money back when you could buy a running Japanese motorcycle for thirty-five bucks. Regardless, I had to have one. I wanted to be cool, too.
I beavered away at The Art Colony making frames, stretching canvas and skimped on everything I could. It took about two months before I saved enough to buy a Bell. Since I was working and couldn’t get to Murray’s during business hours I handed the money to Wilson for the helmet (he had an XL70 which was nearly the same motorcycle as an SL70) and he went to Murray’s to get the lid.
He brought the helmet back to the Art shop and when we opened the box the thing positively glowed. The paint was flawless, the interior was made of an exotic brushed rayon material. It was so clean. It was like the Playboy Mansion inside. Sliding the Bell onto my head was like entering another world. The intimate view from the Star’s porthole framed a world that had changed. I felt invincible wearing that helmet. I could batter down doors, go into space or ride through the worst rainstorm safe and dry inside. If you didn’t count the rest of my body.
Bell Helmets as I knew them went out of business. I don’t know what happened. I heard lawsuits killed them off. Another company bought the name and started making all sorts of Bell-branded stuff. Mostly for bicycles. You can still buy Bell-branded helmets, they even have a cool Star Classic model.
As for me, I’m back to wearing hand me downs or freebie helmets. I got a good deal on a twenty-five dollar no-brand helmet at Pep Boys. I feel my head is worth less and less with each passing day. Back when I was 15 I had my whole life ahead of me, a quality helmet was a good investment. Now, even with inflation-adjusted money I’ll probably never spend what that old Bell Star cost on another helmet.
Wow, we sure are generating a lot of interest, a lot of hits, and a lot of comments here on the ExNotes website and blog. We appreciate the comments, folks, so please keep them coming.
I need more form-generated junk emails like I need a summer cold, and I’m willing to bet you feel the same way. That said, please consider adding your email address to the list of folks we auto-notify every time we post a new blog. We try to post every day, and I know many of you probably just check in when it’s convenient. Getting on our email list, though, will add one advantage you won’t otherwise get. On a quarterly basis, provided we get at least another 200 folks sign up each quarter, we’ll give away a copy of either Moto Colombia, Riding China, or 5000 Miles at 8000 RPM to a name drawn at random from our email database. The first winner will be announced sometime around Christmas this year. Please encourage your friends to sign up, too. If you’re already on the list, you’re eligible for the first drawing. We don’t give or sell our email list to anyone, so your address is safe with us.
More news: The next Long Beach Moto Show is just around the corner. I’ll be there, and I’ll have lots of photos of Bold New Graphics from the Big 4, and interesting new models from everyone else. And yeah, I’ll get a few photos of the young ladies in the Ducati, Harley, and Indian booths, too.
Make sure you check the newsstands for the latest offering from Motorcycle Classics magazine. It’s titled Tales from the Road, and it’s a dynamite collection of great travel stories that MC, one of the greatest motorcycle magazines ever, has run in the past. Two of my stories are in there, and I know you’ll enjoy them.
We’re going to be adding a couple more index pages to the ExhaustNotes site, as we have already done for the Resurrections, Baja, Dream Bikes, YouTube, Tales of the Gun, and Books pages. We’re thinking the next index pages will be on e-bikes, and another one for the CSC RX4. Those areas are getting a lot of attention and a lot of hits on the blogs we’ve done, and the idea is to make it easy for you to find all of our blogs on a particular topic. And speaking of resurrections, Joe Gresh tells me we may not be too far from hearing Zed, the star of the Resurrections page, fire up. I’m excited about that. Joe’s work on that barn-find Kawasaki Z1 sure is interesting. And there’s more good stuff in the works…a feature on an old Ruger rifle in 7mm Remington Magnum for which I finally found the secret sauce (a load delivering less than 1-inch groups at 100 yards), and a special feature on something that weighs more and has less power than a full-dress potato-potato-potato cruiser (I know you didn’t think that was possible, but I have the photos to prove it).
It’s getting dark what with the time change being in effect, and my keepers are telling me I have to take my pills and get ready for bed. Stay tuned; there’s more good stuff coming your way.
As you’ll recall from our last installment of the CSC Mustang Baja saga, we left Ciudad Constitucion the next morning and we continued south. We wanted to make Cabo San Lucas that evening. That would be the turnaround point for our journey from southern California to the tip of the Baja peninsula, and we rode the entire distance on our little single-cylinder, 150cc, hardtail Mustang replicas.
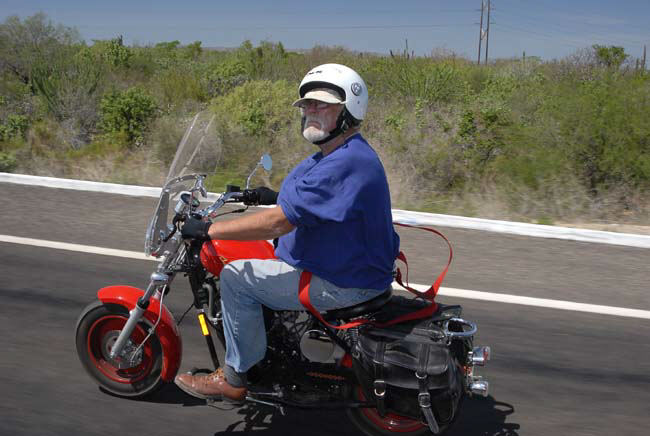
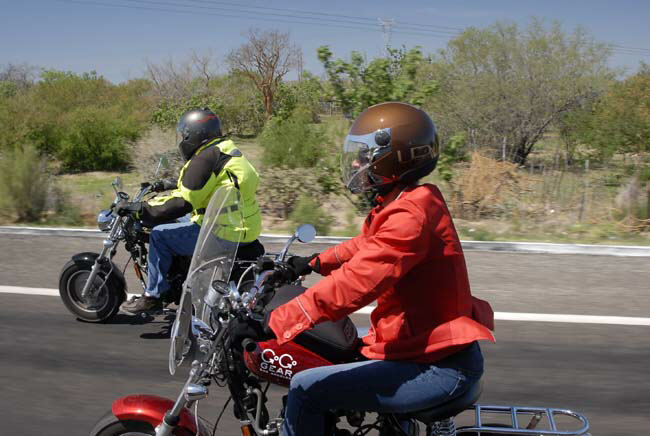
Our intent was to bypass La Paz, as it is a large city and we didn’t want to get bogged down getting through it. The map showed a bypass road, and that’s what we intended to grab. But, our plans meant nothing. We missed the bypass road, and we found ourselves in downtown La Paz. Like I said, it’s a big town, and the temperature was over 100 degrees again. We were getting goofy from the heat. It’s almost hard to describe how oppressive the heat was. We were literally in the tropics, having descended past the Tropic of Cancer. High heat, high humidity, the hottest month of the year in Baja, fully suited in our riding gear…it was tough sledding. Simon had the best idea…he started shedding the heavy riding gear.
Simon, with red suspenders flying…all the gear, all the time!John and Arlene, suited up and sweating.
Simon wrote an entry on his blog that said it all…
La Paz is a hot sweaty city on the Sea of Cortez. We are hot and sweaty (other than J. who travels in air-conditioned splendour). We miss the bypass and are lost. I ask a lady for directions. She begins describing the route. I understand individual words, even entire sentences. The whole becomes a jumble. My eyes betray a fatalistic acceptance of inadequacy. The woman halts her instructions. Her smile is familiar. It is the generous female’s smile of understanding when faced by male incompetence. Men are men. They have their uses. However, rational thought is not the male’s strong point (expect even vaguely mature thought and you will be disappointed). Humour them. Lead them by the hand. Such is the Latin way…
In brief, she stops giving directions and says, “It will be best if you follow me…”
A very patient woman and her daughter in La Paz, who guided us out of downtown…
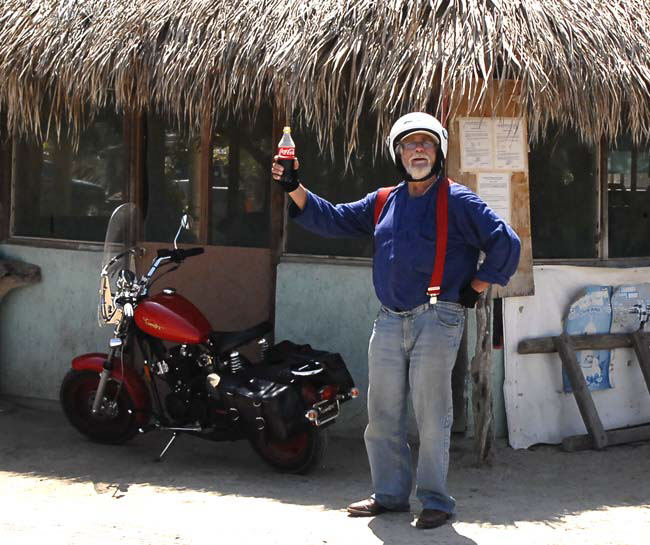
Once we were out of La Paz, we were on the open road again and it was much better. Even when it’s hot, you can still stay cool on a motorcycle if you are moving. When you stop, though, it gets warm and it does so immediately. So, we kept moving. We were approaching the Pacific Ocean on the other side of Baja, and the temperature dropped a couple of degrees.
After La Paz on the eastern side of Baja, it was about 70 miles directly across the peninsula to Todos Santos on the Pacific side. It was a nice ride.
We stopped in Todos Santos for lunch. I grabbed this shot of my bike and I want you to notice the BajaBound.com decal.
Taking a lunch break in Todos Santos. BajaBound!
BajaBound was one of our sponsors on the CSC 150 run, and they are one of our advertisers now. We were very grateful to Geoff and the good folks at BajaBound for their help on this adventure.
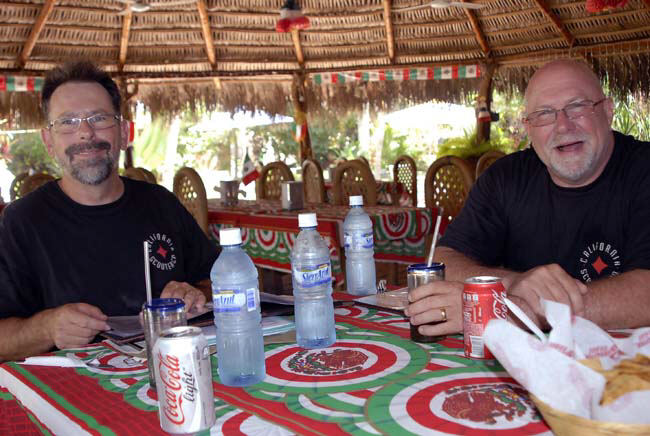
I wish I could remember the name of the place we had lunch in when we stopped in Todos Santos. It was great.
John and J enjoying lunch in Todos Santos.Our Todos Santos waitress, Erica.
After lunch, we were on the road again…headed to our next stop and our destination for the evening, Cabo San Lucas!
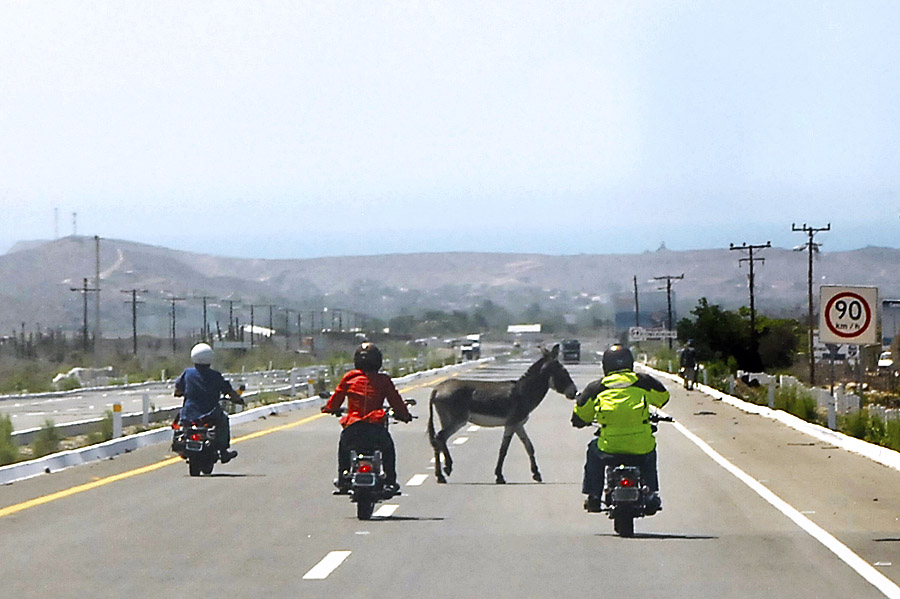
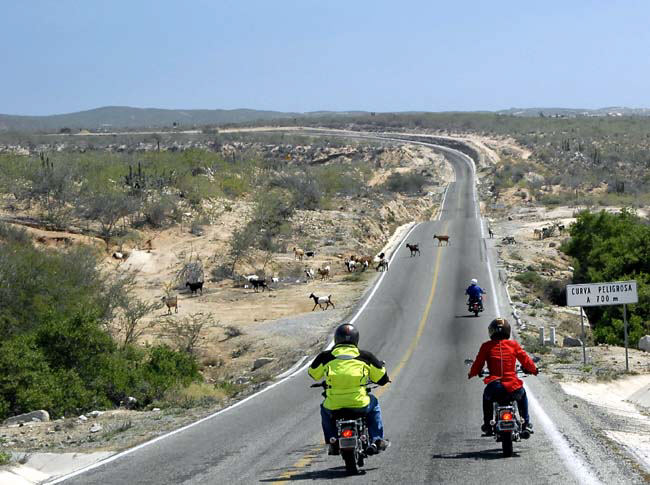
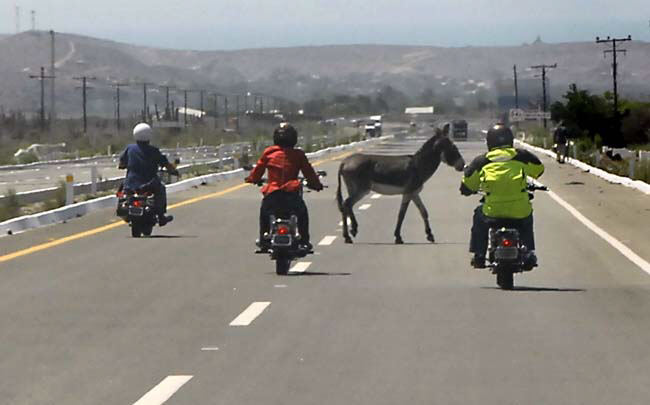
Simon taking a break just north of Cabo San Lucas. He was 77 years old when I took that photo. I really admire him.Curva Peligrosa means “dangerous curve.” I don’t know how you say “watch out for the goats.”Just north of Cabo. This guy pulled out right in front of us…anybody who would do this has to be a real ass…
We encountered a lot of construction during our trip, which gave the CSC Mustangs a real workout. I would guess that we probably did about 50 miles or so on dirt roads where the main highway was under repair.
We didn’t intend to do any dirt riding on this trip, but we sure rolled through a lot of dirt. One of the things that surprised me was how well the little Mustangs handled in the dirt, and in particular, in soft sand. Soft sand has always scared me on a motorcycle. At the time, I also owned a KLR 650 and a monstrous 955cc Triumph Tiger. With their narrow tires, these bikes would just sink into soft sand and do their best to toss me. The Mustangs didn’t do that. They had wide tires (almost balloon tires) and they were very light. They handled the soft stuff just fine. I’m not advocating using a CSC 150 as a dirt bike, but if you find yourself on a dirt road with soft sand, these bikes handled it with grace.
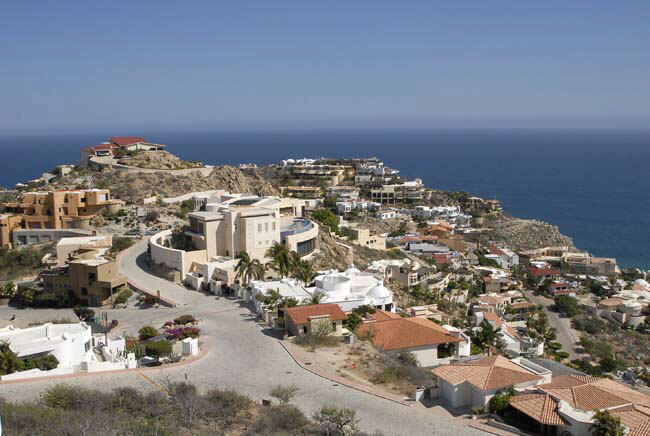
And finally, the California Scooter contingent arrived in Cabo after 1100 tortuous, hot, and beautiful miles through Baja! This was the perspective from our guest villa.
Cabo San Lucas! That’s the Sea of Cortez on the left, and the Pacific Ocean on the right.
Yep, some of the toughest riding in the world…and we did it! We ran the entire length of the Baja peninsula! I will tell you that I was absolutely beat when we finally made it to Cabo. The heat was bothering all of us, my leg was giving me a lot of grief from a prior injury, and we were all feeling the burn of a long ride. But we made it.
More good Baja trips on all different kinds of motorcycles…check out the ExhaustNotes Baja page!
If you would like to get up to speed on the prior installments of our CSC 150 Mustang replica ride to Cabo San Lucas, you can do so at this link: The CSC 150 Cabo Run
Never miss an ExNotes ride report…sign up here:
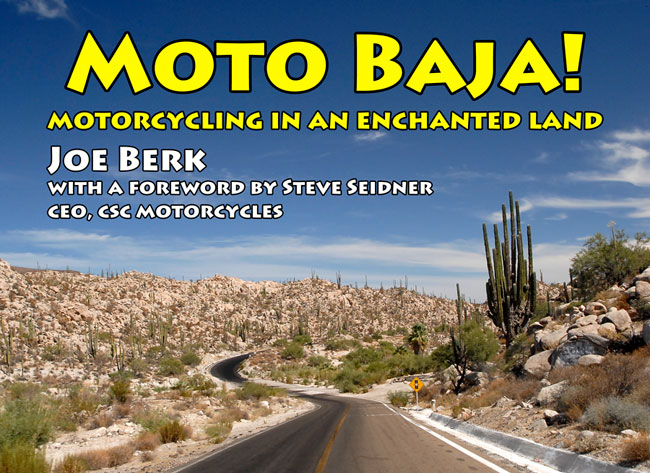
Learn more about motorcycling through paradise in Moto Baja!
I saw the advertisement for The Bomber in our local Holloman Bookoo website. Holloman Bookoo is like Craigslist but more local. There may be other BooKoo sites but I haven’t searched for them because the stuff for sale is too far away. This story gets a bit complicated but I was searching for a drive train to scavenge for Brumby, my Jeep YJ.
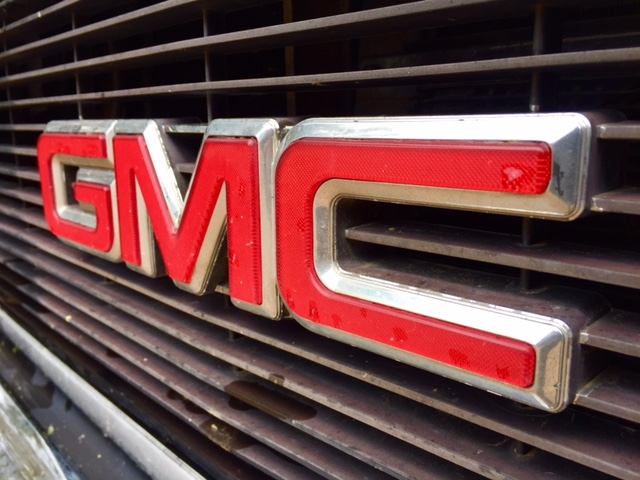
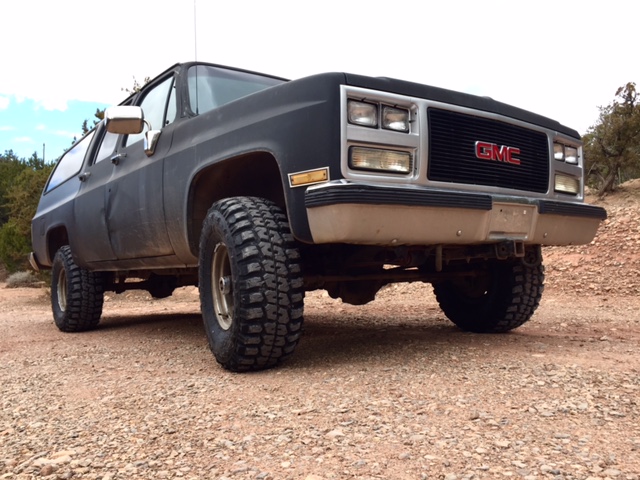
The Bomber, a half-ton 1990 4X4 GMC Suburban, had 3:73 axles, a running throttle-body fuel-injected small-block engine and was the last year of the solid front axle Suburbans. 1989 and 1990 were odd years for Suburbans because the rest of GM’s truck line changed body styles in 1988. For some reason the Suburban didn’t make the cut and soldiered on with the classic Square Body until joining the rest of the gang in 1991. Except for logos, the Chevy and GMC versions are pretty much exactly alike.
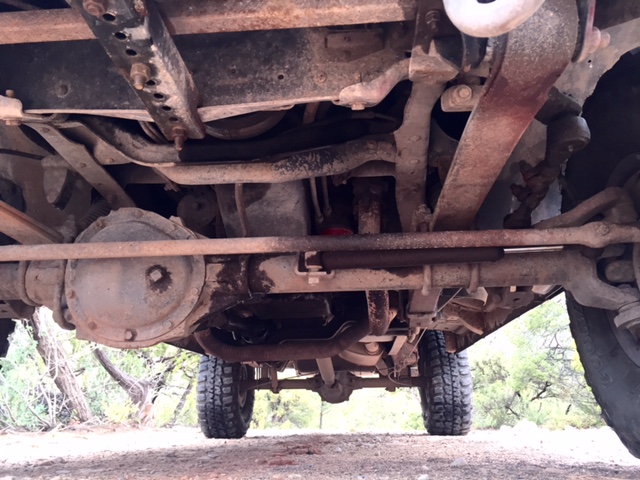
The Bomber’s half-ton, six-lug front axle is GM’s take on a Dana 44. I watched a Dirt Every Day video that said 1989/1990 models received axle shaft upgrades and were maybe a bit better than the D44. All this was good news for Brumby because the transmission had lost a gear and the little YJ desperately needed more power.
The Bomber’s owner wanted $1800. I drove the big beast around and offered him $1500. It was too easy; did I leave money on the table? CT (my wife) was a little unsure about my plan to strip out the Bomber for a pie-in-the-sky plan to boost the Jeep’s power. The worst time to plan an engine-axle swap is when you have no place to work and are trying to find a house to live in so I put the ménage on the back burner and busied myself with the mundane tasks of life.
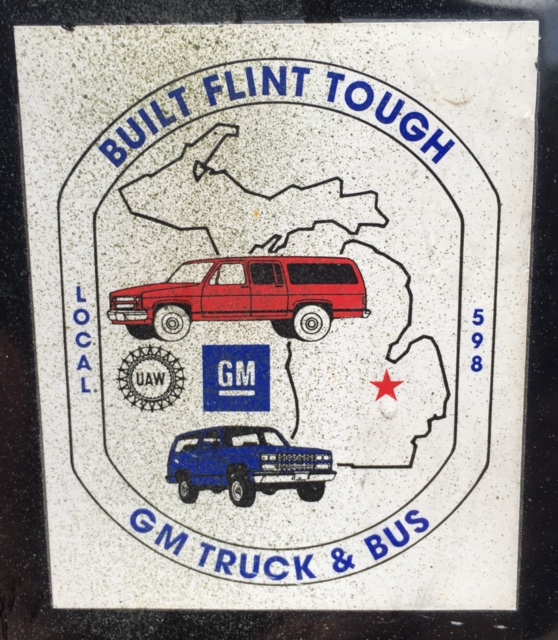
The old GMC ran well and I started using it to haul materials. The thing had crazy stiff springs on the rear axle: I could load 2 tons without the axle bottoming out. The 350 small-block, while no powerhouse, could pull the grade to my house without exploding into bits. The door sticker says “Built Flint Tough” and they mean it. The added advantage of a low-range transfer case and four-wheel drive meant I could haul a 10,00 pound, concrete mixer with a yard and a half of mud up Tinfiny’s steep, slippery driveway.
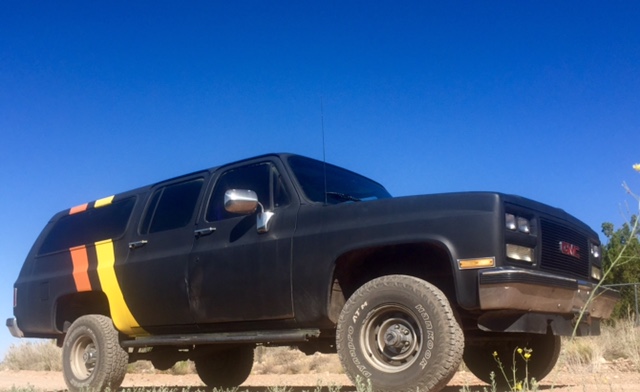
The Bomber came with a custom paint job that could not have been more out of place. It was shocking. CT recommended I cover over the Starsky & Hutch themed wagon if I ever wanted her to ride in the thing. It took less than a quart of BBQ black to roll over the offending stripes. Not that it looks good now, but at least people run away slower.
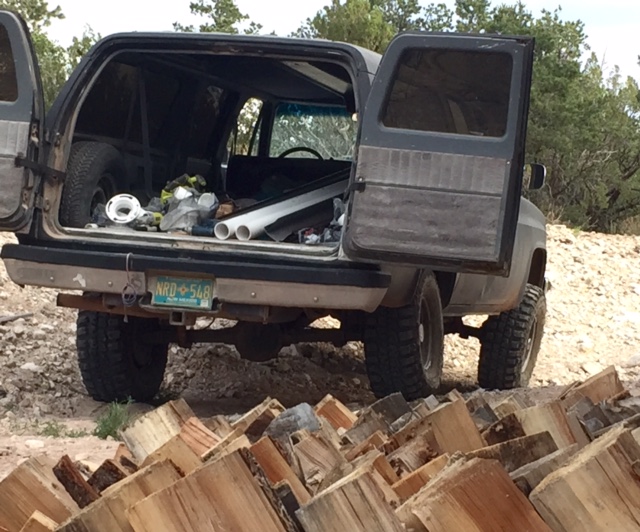
Shod with smallish but almost new 31” tires, the bomber looked a little cheesy in the tire division. Bigger, 33” tires that would fill the wheel wells were ordered from Wal-Mart. Just like that the Bomber’s value doubled. I put the 31” tires on Brumby the Jeep. Remember the Jeep? The reason I bought the Bomber?
The thing is, a Suburban is handy as hell to have around. I can load it up with bags of concrete or building materials and everything stays dry. We went camping in the beast; there’s over 8 feet of room for bedding if you fold the seats down. The body is dented but rust free. I use the ‘Burb for garbage dump runs and to scare people.
I’ve grown attached to the Bomber. You’ll hear no more talk of swapping drive trains. In fact a whole new list of projects has been created. I need to remove all the interior plastic and rugs from the passenger doors rearward because it’s too hard to keep clean. I want the cargo area bare metal so I can hose it out. The stupid wooden overhead console has to go because I keep hitting my head on the edge. Then the automatic transmission needs to be swapped out for a 4-speed manual. I can’t stand automatics. It’ll need a decent paint job at some point and a roof rack with one of those tents on top.
Worst of all I’m still on the lookout for a V-8 drive train to swap into the Jeep.
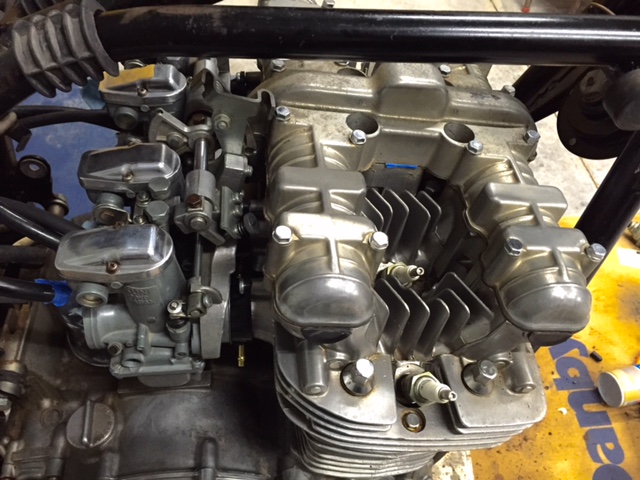
I finally got Zeds’ carburetors reassembled onto the rack. I’ve synchronized the 4 carbs as close as I can. The Z1 repair book I have gives a down wind, throttle-slide gap to strive for and after I got that adjustment close I moved over to the upwind side and used a small drill bit as a standard to fine tune the gap. For me, it’s easier to work that side. I use a drag/feel type of measurement. You slide the bit back and forth to sense the tension between the slide and the lower carb venturi and then try to get them all the same. You’ve got it close when the next bit under is loose and the next bit over won’t go.
After trimming some rubber flashing where the brass manifold vacuum ports enter the new rubber manifolds I managed to get them installed without stripping any more 6mm screws. The manifold clamps are soaking in Evapo-rust as we type.
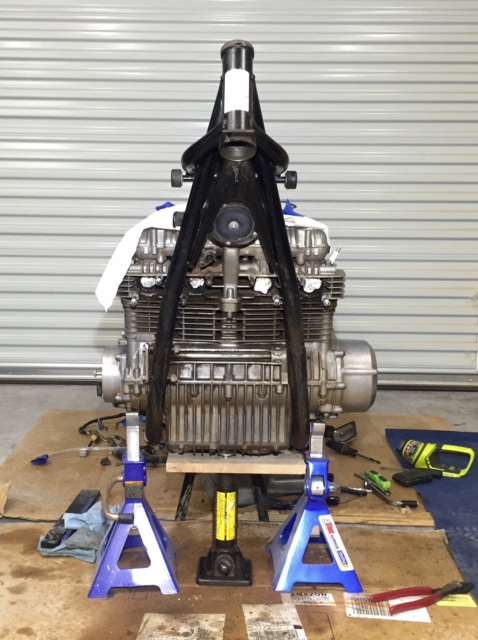
The Z1 uses a fancy-for-the-time crankcase vent system. Mounted on the rear of the top crankcase is a plenum to catch oil mist and condense it back into the engine. I took this apart because the hose leading from the vent to the air cleaner box was missing and I wanted to be sure some sort of oil loving spider did not take up residence inside. Luckily it was clean inside so I gave the can a quick polish and reassembled the thing.
Next I checked the valve adjustment because I’ll be starting the beast soon and I don’t want to fight the system if the valves are way out of adjustment. Before removing the valve cover I marked the front in case it matters.
The cams and valve shims look unworn. This bike shows 41,000 miles on the odometer! If this were a Honda the cam lobes would be galled. I know this because almost every Honda I’ve owned galled its cam lobes.
The valves are close enough to start the engine, two are on the tight side and two are on the loose side. Four valves are within spec. I’ll recheck everything after starting the engine in case a chunk of carbon or a mouse paw is affecting these readings.
Zed’s clutch cable is in bad shape so I removed the clutch actuator housing/sprocket cover for replacement and cleaning/lube/adjustment. Inside I found the neutral light indicator switch broken off. I don’t think a ton of oil would have spewed out as the hole is not pressurized but it most likely would have leaked.
Zed appears to be going backwards but trust me she’s making progress. With the front of the bike jacked up you couldn’t miss the loose steering head bearings. Rather than just tighten them I took the forks apart to re-grease them. Much like removing the sprocket cover it’s a good thing I did. The top bearing looks fine but the bottom is pretty rusty. I’ve cleaned this mess up and in a pinch the bottom bearing, while pitted, could be used again but I’ll order new bearings. I’m in no mood to take the front apart again.
Zed’s fork seals were leaking. Another stroke of luck as the oil kept the lower section of the fork tubes from rusting. Under the headlamp ears the rust is worse. I’ll clean it off and coat that section with grease when I reassemble the forks. You’ll never see it. I’ve started cleaning the fork legs in preparation for disassembly. You probably already know this but remember to loosen the big bolt on top of the fork tube before removing the tubes and loosen the allen-head bolt on the bottom of the fork sliders (under the axle boss) before removing that big top bolt.
My buddy Skip sent what we hope is the correct spark advancer unit so Zed should have everything it needs to start soon. I’m a little concerned that I can only find first gear and neutral in the transmission. Hopefully, once the engine starts and oil is slung around the gearbox will shift.
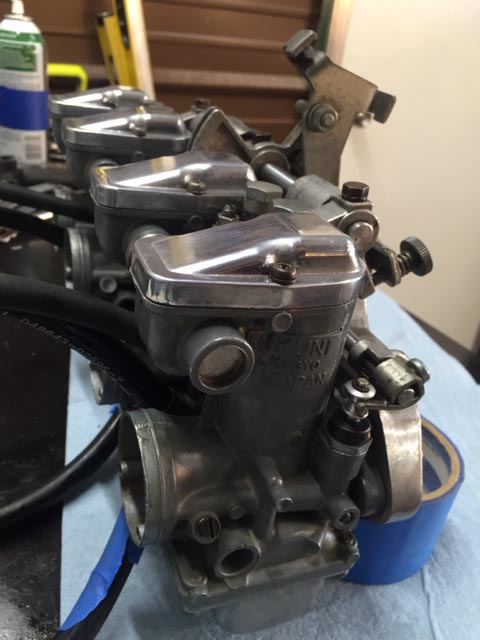
I’ve been spending some time with Zed’s carburetors, working on details that required home-brewed engineering. The Mikuni carbs on Zed don’t have a traditional choke (a flap that blocks air going into the carb causing a rich mixture) but we still call it a choke. Instead, Zed’s carbs employ an enrichener circuit, which is more like a tiny, completely separate carburetor grafted onto the main body of the carb. Sort of like the brain inside Krang’s stomach on the Teenage Mutant Ninja Turtles cartoon. The enrichener has its own air intake on the upwind side of the throttle slide. This fuel circuit is fixed; no adjustment needed and is controlled by a plunger on the downwind side of the throttle slide. Lifting the plunger allows air to flow through the tiny carburetor at a pre-set fuel/air mixture and if everything else is right, helps a cold Kawasaki engine start better.
One of Zed’s four carbs was missing the little plastic bobbin that slides over the enrichener plunger shaft and is held onto the shaft by a tiny Jesus Clip. Two small fingers connected to the choke rail act on this bobbin and without it the plunger won’t lift. I Googled for a bit but could not find the bobbin part so I attempted to make one. I drilled a plunger-rod sized hole through a small piece of nylon and chucked the nylon into a Ryobi drill. Using a flat file I machined the nylon as the drill motor spun: a New Mexican hand-lathe. It worked great until the center of the bobbin got too thin and the whole mess spun out of control leaving me with a distorted pile of junk.
Back to square one. I noticed how the bobbin was nearly the same size as the pop rivets I’d been using to assemble parts of Tinfiny’s generator room. I have about 500 of these rivets in stock so I could afford to lose a few. Knocking the pin out of the pop rivet revealed a bore just a wee bit small for the plunger shaft but it was not a problem to run a drill bit through making the bore an exact fit for the plunger. A pop rivet only has one flanged side so I repeated the process on a second rivet, cut the two rivets to equal the length of a factory bobbin and assembled the mess. I cannot wait for a hard-core Z1 enthusiast to happen upon the aluminum bobbin. It’ll probably cause a heart attack as most Z1 fans are around 75 years old.
Between the throttle linkage pivots on each set of two carbs there are little dust covers made from a treated black paper. Or maybe the dust covers are rubber, I can’t tell. Three of the four covers were broken on Zed. The covers go over the springs and ball joints on the linkage. They don’t seal all that well but might keep a larger bug from crawling in there.
This is a part I didn’t bother looking for because I can make new ones in less time than it takes to look them up and order them. I used the thin plastic lid from a box of self-tapping sheet metal screws. Without a lid you know the screws are going to end up scattered across the shed floor. The dust covers didn’t come out as nice as I would have liked. Luckily, once installed you can’t see the things.
On the Z1 900cc, each set of two carbs share a fuel inlet pipe. The pipe goes between the carbs and is a metal Tee fitting with thick rubber o-rings cast onto the straight section of the Tee. This rubber hardens and shrinks resulting in a loose, leaky fit. You can buy new ones for 34 dollars but if you’ve read Zed’s Not Dead this far you know what is going to happen next.
I cut the rubber away from the fuel pipe and polished the exposed metal to ensure a smooth sealing surface. Then I drilled a small hole near the end of the pipe in order to install a pin (made from the drill bit). The pin is the same length as the width of the fuel inlet bore so once it is installed in the carb body the pin can’t fall out.
Now I used a ¼-inch length of rubber fuel hose (be sure to use the non-reinforced hose as cloth reinforcing strands will wick fuel, causing a leak) and slid this hose onto the fuel Tee. Next came washers and finally the pin. The assembly fits snugly into the carburetors. It helps to put the fuel feed hose on before you slide the carbs together. Hopefully it won’t leak.
I’ve got the carbs assembled onto the rack and everything seems to work smoothly. I’ll be testing the float levels on the bench and will sync the throttle slides as close as I can get them. The idea being all four slides move the same distance in unison. Even if they’re not perfect the bike should run reasonably well. Later, manifold vacuum gauges can be used to adjust the carbs for any slight differences between cylinders.
I get four motorcycle magazines: Motorcycle Classics, RoadRUNNER, American Iron, and Motorcyclist. Every once in a while, a story comes along that goes way beyond simply being good. The current issue of Motorcycle Classics has such a story: Tempting Fate: Around the World on Ducati 175 Tourismos. Landon Hall is the Motorcycle Classics Managing Editor, and he (along with Richard Backus, the head honcho) have a winning formula: A great team of writers and photographers, an eye for a great story, a focus on vintage bikes, and the ability to pull it all together in every issue. I once told Landon that each time I get the latest copy of Motorcycle Classics, I get concerned because it is so good I don’t know how they’ll be able to do better in the next issue. And then they do. Every time.
World travelers from the 1950s…two well-worn Ducati 175s.
The story, Tempting Fate: Around the World on Ducati 175 Tourismos , is about two young Italians (Leopoldo Tartarini and Giorgio Monetti) who went around the world on Ducati 175cc motorcycles in the early 1950s. The tale appealed to me immediately because it involved a long journey on small displacement motorcycles, and the writing and the photography sealed the deal (Hamish Cooper penned the story and Phil Aynsley did the photography). The details made it come alive, like this one: Ducati actually issued these guys handguns as part of their kit (Steve Seidner, are you getting my drift here?). And more. Lots more. Trust me on this: You’ll enjoy this article.
More good info…the index page for our ExhaustNotes gun stories is up, and you can get to it here:


 Progress has slowed on Zed. I really wanted to start the beast up. The problem is I haven’t figured out the ignition advancer issue yet. My E-buddy Skip sent me two of the things but neither one will work on the 1975 Z1 crankshaft end. I feel bad that Skip is trying to do me a favor and that the poor guy has to keep digging around in his parts stash. It goes to show you: no good deed goes unpunished. I am going to suck it up and buy a new, $159 advancer from
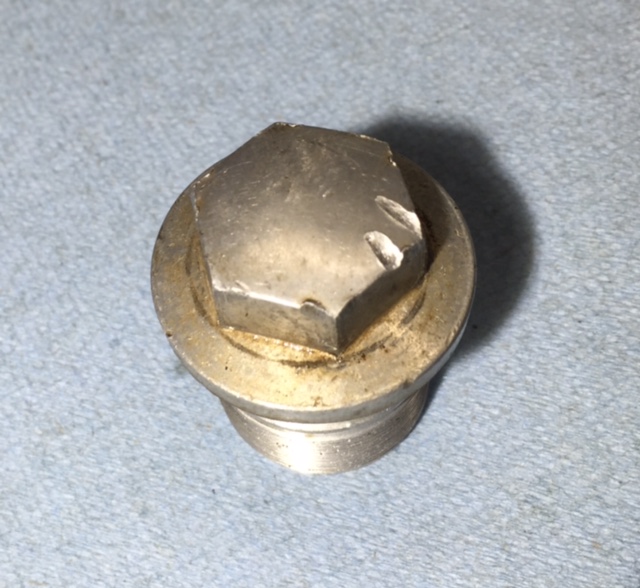
 Meanwhile, I’m not ignoring the rest of the bike. Let’s face it, even if the engine is shot I have to get this bike running. The front forks were leaking and contained about 3 ounces of oil between both fork legs. This is down a bit from the 5.7 ounces per leg suggested in my shop manual. I know I said this was not going to be a show bike restoration but I couldn’t bear a future staring at this gouged fork cap bolt so I sanded the thing smooth and gave it a lick of polish. Of course this means that I have to do the other side also.
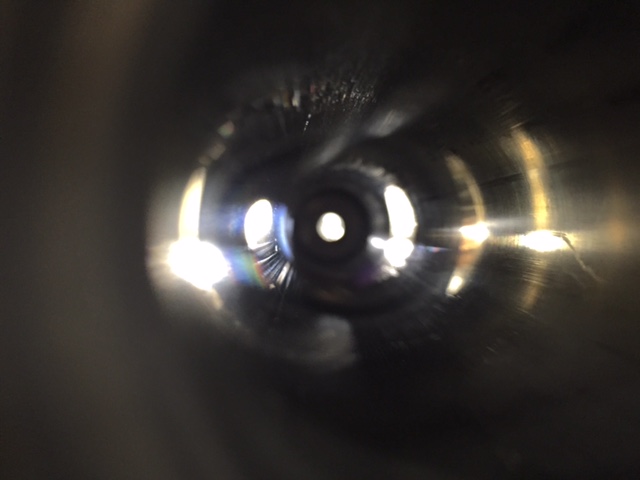 The internals of the forks were covered in sticky black goo, which required a ton of solvent and liberal doses of carb cleaner to cut loose. Then came rags stuffed down the tubes and pushed back and forth using a drill bit extension. The sliders came polished from the factory and since they were preserved under a coat of oil it took no time at all to spiff them up without crossing over to the dreaded Show Bike threshold.
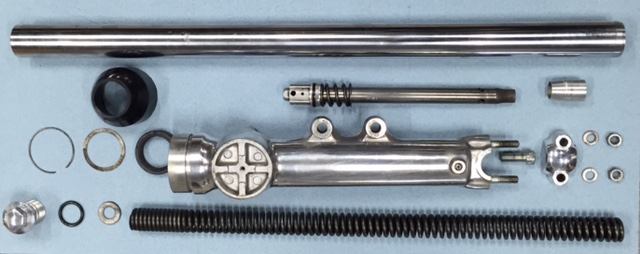 All the fork parts look usable if not perfect. The upper section of the fork tubes that were covered by the headlight brackets is pretty rusty. I’ve polished it off a bit and will lube the rusty areas to prevent further rust. None of the rust will show on the assembled forks but I’ll have to deduct points when the bike is in the Pebble Beach show.
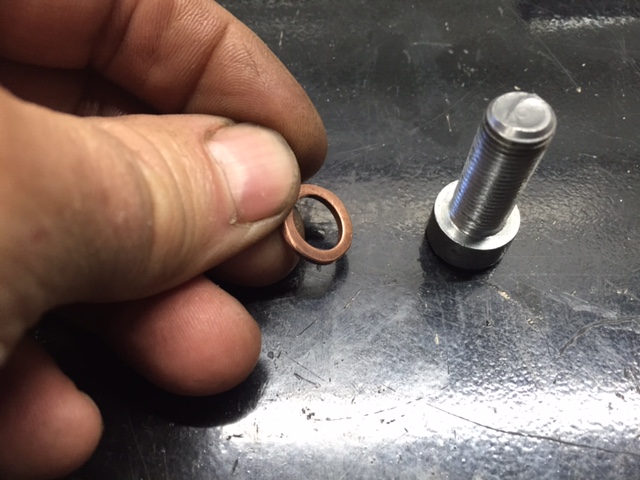 The fork sliders are held to the damping rod via this Allen-head bolt. There was a fiber washer to seal in the fork oil but I don’t have any fiber washers. I ended up grinding a copper washer to fit and I only have one of those. Looks like a trip to Harbor Freight is in order to buy their 5090 Copper Washer Warehouse kit.
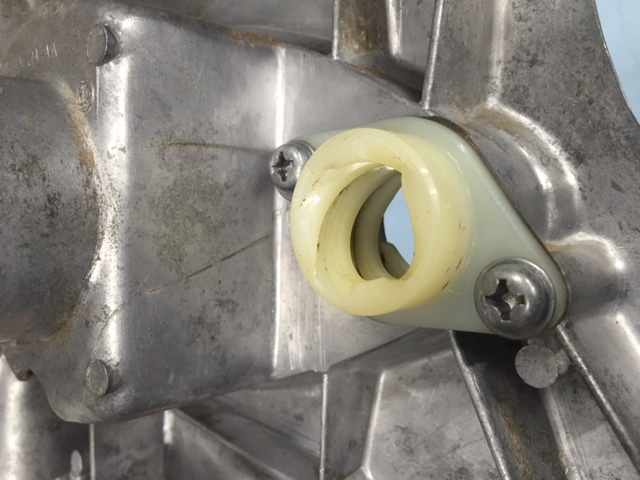 The clutch actuator was in good shape but dirty and dry. Most of the ones I bought for my old Yamaha had the helix cracked. I suffered along with the cracked helix until Hunter found a new, re-pop part and sent it to me, asking if he could have some of the ones I’d stolen from him in exchange. I have no idea what the old man is on about. This Kawasaki part is much sturdier than the Yamaha part and crack free so that’s one point to Kawasaki in the red-hot clutch actuator wars.
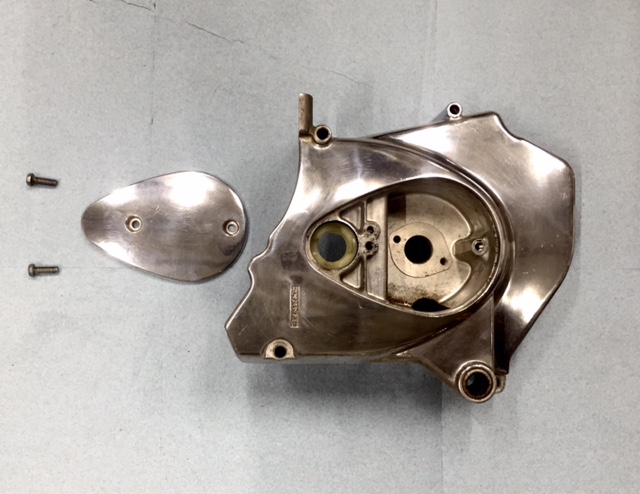 I’m placing another big order with


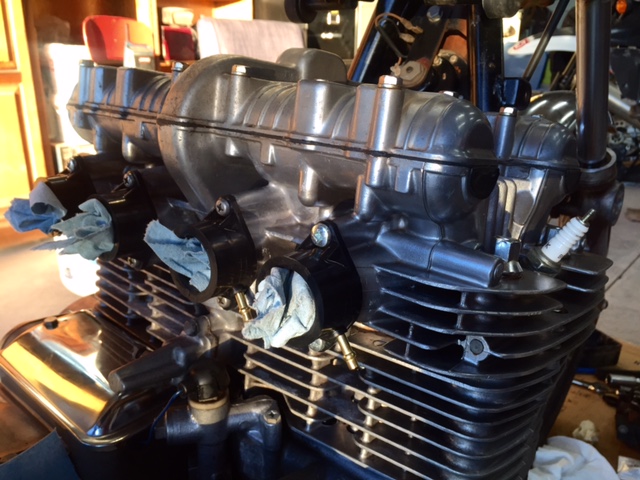 After trimming some rubber flashing where the brass manifold vacuum ports enter the new rubber manifolds I managed to get them installed without stripping any more 6mm screws. The manifold clamps are soaking in Evapo-rust as we type.
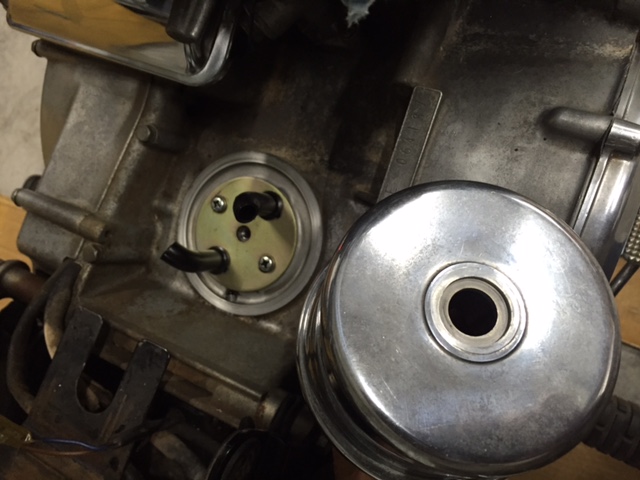 Next I checked the valve adjustment because I’ll be starting the beast soon and I don’t want to fight the system if the valves are way out of adjustment. Before removing the valve cover I marked the front in case it matters.
 The cams and valve shims look unworn. This bike shows 41,000 miles on the odometer! If this were a Honda the cam lobes would be galled. I know this because almost every Honda I’ve owned galled its cam lobes.
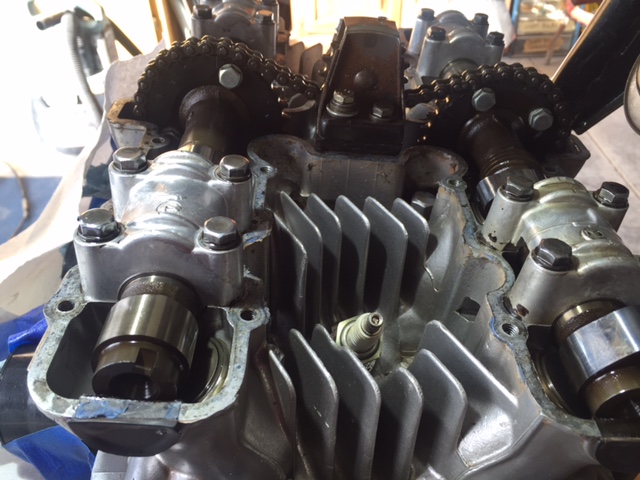 The valves are close enough to start the engine, two are on the tight side and two are on the loose side. Four valves are within spec. I’ll recheck everything after starting the engine in case a chunk of carbon or a mouse paw is affecting these readings.
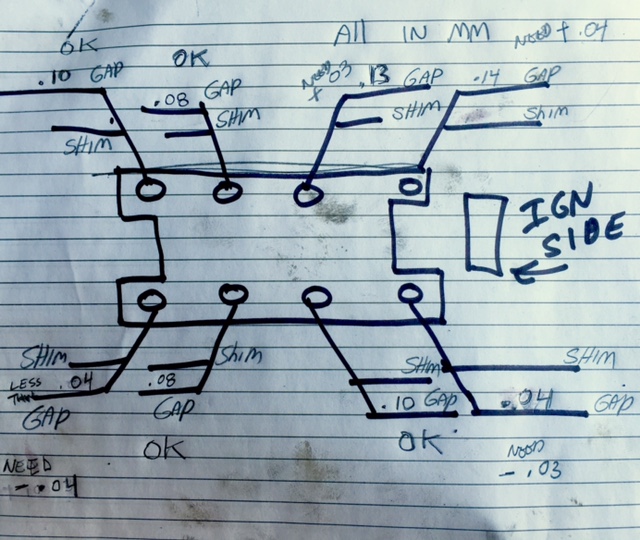 Zed’s clutch cable is in bad shape so I removed the clutch actuator housing/sprocket cover for replacement and cleaning/lube/adjustment. Inside I found the neutral light indicator switch broken off. I don’t think a ton of oil would have spewed out as the hole is not pressurized but it most likely would have leaked.
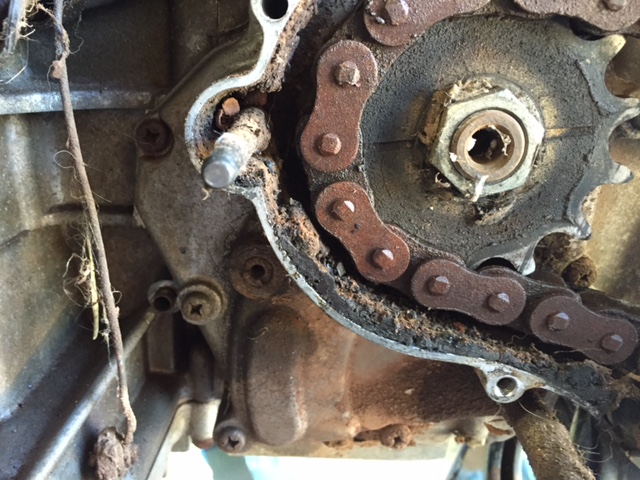 Zed appears to be going backwards but trust me she’s making progress. With the front of the bike jacked up you couldn’t miss the loose steering head bearings. Rather than just tighten them I took the forks apart to re-grease them. Much like removing the sprocket cover it’s a good thing I did. The top bearing looks fine but the bottom is pretty rusty. I’ve cleaned this mess up and in a pinch the bottom bearing, while pitted, could be used again but I’ll order new bearings. I’m in no mood to take the front apart again.
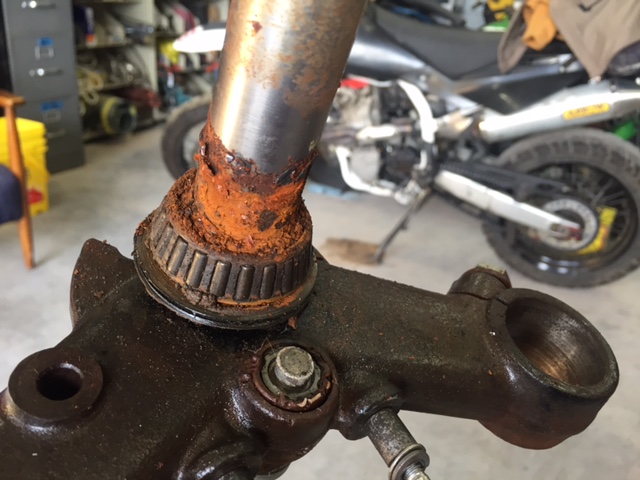 Zed’s fork seals were leaking. Another stroke of luck as the oil kept the lower section of the fork tubes from rusting. Under the headlamp ears the rust is worse. I’ll clean it off and coat that section with grease when I reassemble the forks. You’ll never see it. I’ve started cleaning the fork legs in preparation for disassembly. You probably already know this but remember to loosen the big bolt on top of the fork tube before removing the tubes and loosen the allen-head bolt on the bottom of the fork sliders (under the axle boss) before removing that big top bolt.
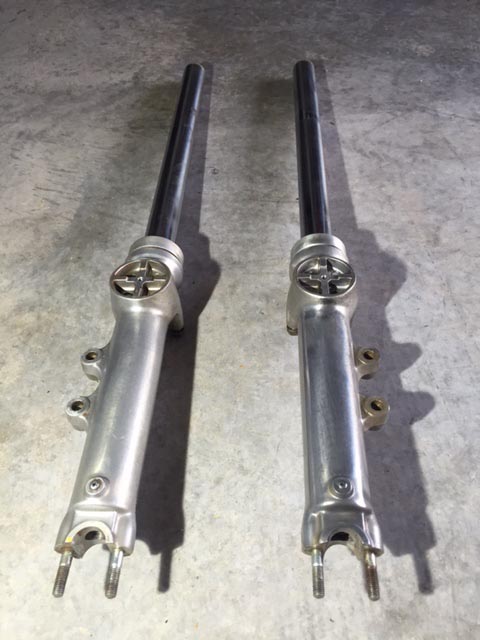 My buddy Skip sent what we hope is the correct spark advancer unit so Zed should have everything it needs to start soon. I’m a little concerned that I can only find first gear and neutral in the transmission. Hopefully, once the engine starts and oil is slung around the gearbox will shift.
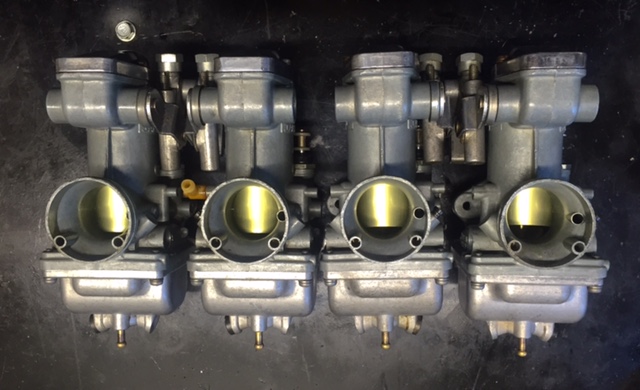 I’ve been spending some time with Zed’s carburetors, working on details that required home-brewed engineering. The Mikuni carbs on Zed don’t have a traditional choke (a flap that blocks air going into the carb causing a rich mixture) but we still call it a choke. Instead, Zed’s carbs employ an enrichener circuit, which is more like a tiny, completely separate carburetor grafted onto the main body of the carb. Sort of like the brain inside Krang’s stomach on the Teenage Mutant Ninja Turtles cartoon. The enrichener has its own air intake on the upwind side of the throttle slide. This fuel circuit is fixed; no adjustment needed and is controlled by a plunger on the downwind side of the throttle slide. Lifting the plunger allows air to flow through the tiny carburetor at a pre-set fuel/air mixture and if everything else is right, helps a cold Kawasaki engine start better.
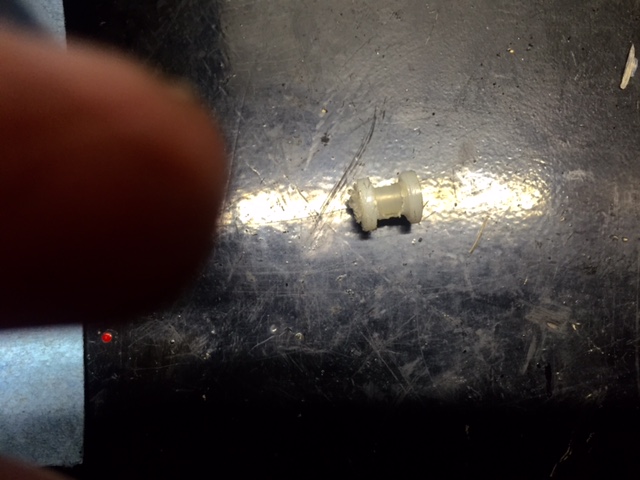 Back to square one. I noticed how the bobbin was nearly the same size as the pop rivets I’d been using to assemble parts of Tinfiny’s generator room. I have about 500 of these rivets in stock so I could afford to lose a few. Knocking the pin out of the pop rivet revealed a bore just a wee bit small for the plunger shaft but it was not a problem to run a drill bit through making the bore an exact fit for the plunger. A pop rivet only has one flanged side so I repeated the process on a second rivet, cut the two rivets to equal the length of a factory bobbin and assembled the mess. I cannot wait for a hard-core Z1 enthusiast to happen upon the aluminum bobbin. It’ll probably cause a heart attack as most Z1 fans are around 75 years old.
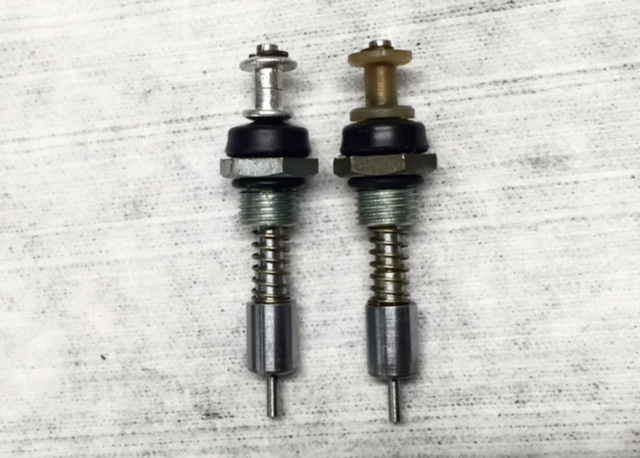 Between the throttle linkage pivots on each set of two carbs there are little dust covers made from a treated black paper. Or maybe the dust covers are rubber, I can’t tell. Three of the four covers were broken on Zed. The covers go over the springs and ball joints on the linkage. They don’t seal all that well but might keep a larger bug from crawling in there.
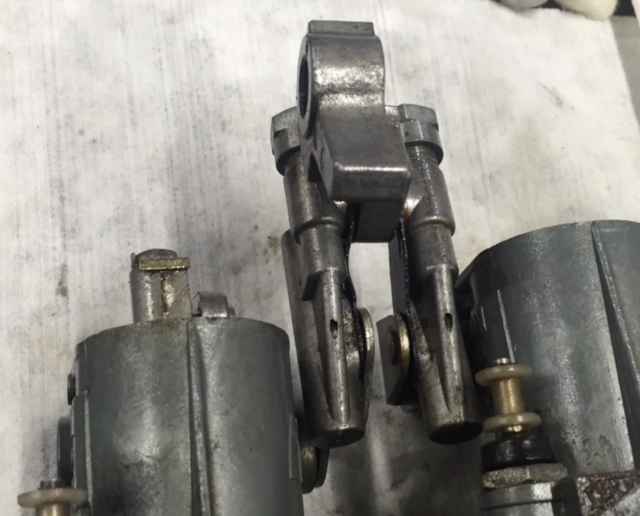 This is a part I didn’t bother looking for because I can make new ones in less time than it takes to look them up and order them. I used the thin plastic lid from a box of self-tapping sheet metal screws. Without a lid you know the screws are going to end up scattered across the shed floor. The dust covers didn’t come out as nice as I would have liked. Luckily, once installed you can’t see the things.
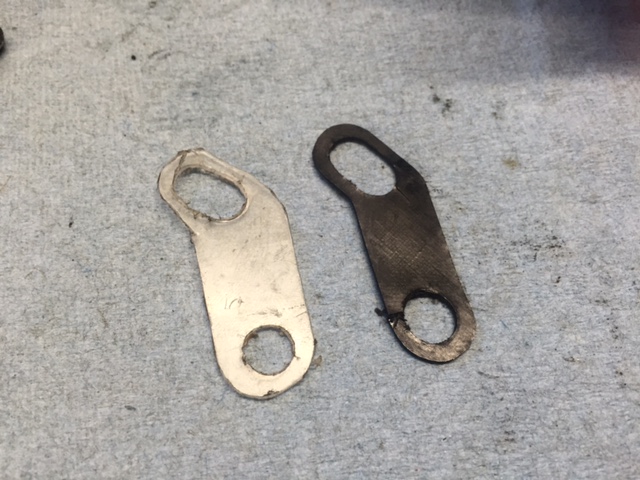 On the Z1 900cc, each set of two carbs share a fuel inlet pipe. The pipe goes between the carbs and is a metal Tee fitting with thick rubber o-rings cast onto the straight section of the Tee. This rubber hardens and shrinks resulting in a loose, leaky fit. You can buy new ones for 34 dollars but if you’ve read Zed’s Not Dead this far you know what is going to happen next.
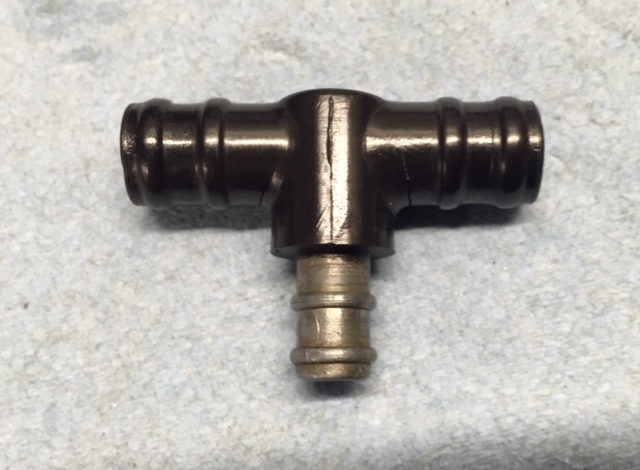 I cut the rubber away from the fuel pipe and polished the exposed metal to ensure a smooth sealing surface. Then I drilled a small hole near the end of the pipe in order to install a pin (made from the drill bit). The pin is the same length as the width of the fuel inlet bore so once it is installed in the carb body the pin can’t fall out.
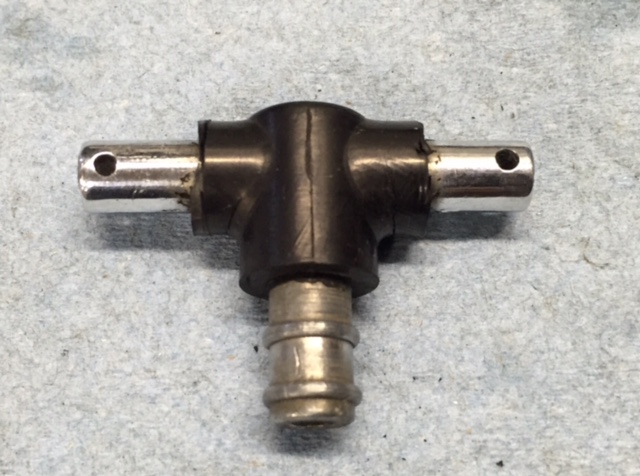 Now I used a ¼-inch length of rubber fuel hose (be sure to use the non-reinforced hose as cloth reinforcing strands will wick fuel, causing a leak) and slid this hose onto the fuel Tee. Next came washers and finally the pin. The assembly fits snugly into the carburetors. It helps to put the fuel feed hose on before you slide the carbs together. Hopefully it won’t leak.
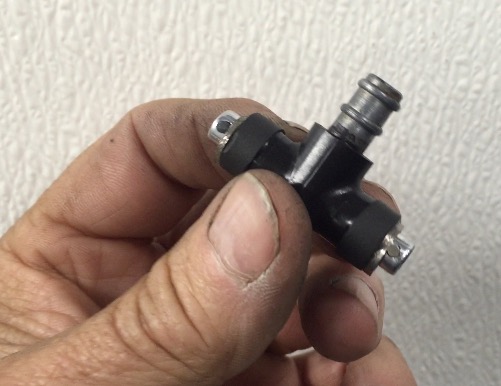 I’ve got the carbs assembled onto the rack and everything seems to work smoothly. I’ll be testing the float levels on the bench and will sync the throttle slides as close as I can get them. The idea being all four slides move the same distance in unison. Even if they’re not perfect the bike should run reasonably well. Later, manifold vacuum gauges can be used to adjust the carbs for any slight differences between cylinders.
