It’s good to have friends, and it’s even better to have friends that go back to your earlier childhood. I have a few of those, and the one I’ve known the longest is good buddy Paul. We were next door neighbors back there in rural New Jersey from the time we were babies. Our dads hunted, fished, and shot trap and skeet together when we were little. They were friends and it was natural that Paul and I were friends. We fished, explored the area’s woodlands, lakes, streams, and ponds, and generally got into all kinds of trouble together. In other words, we had fun, and that continues to this day.
That’s me on the left, and Paul on the right during a recent visit.
You have read some of my posts on my latest obsession: Pocket knives. Paul is what you’d call an enabler. He has an extensive collection of both pocket knives and fixed blade knives, including some that are absolute masterpieces. Paul is a craftsman, and he’s fabricated several fixed blade knives. He recently made one for me, and it’s become the touchstone piece of my modest knife collection.
Bowie Knife History
First, a bit of background on what a Bowie knife is. The term has come to denote a large fixed-blade knife with a handle, a guard (the piece between the handle and the blade), and the blade. Jim Bowie is the stuff of legends, a frontiersman in the early 19th century, a hero of the Texas Revolution, and a fighter who died at the Alamo. Although we don’t know with certainty, the Bowie knife design is generally credited to Jim Bowie, his brother, Rezin Bowie, and blacksmith Jesse Clifft. Legend has it that Rezin designed the a knife, with inputs from Jim, and Clifft crafted it from an old file (custom/hobby knifemakers sometimes similarly make knives from old files today).
Jim Bowie and the knife that bears his name.
Jim Bowie used the knife in the 1827 Sandbar Duel, where he used the knife to injure an enemy in a fight. The Bowie knife concept spread, and the term planted itself in our national lexicon. The knife became a frontier tool, equally adept in combat, in skinning and butchering animals, and as a general cutting and chopping tool. It has been carried and used by soldiers to this day; indeed, one could argue that the famed Marine Corps KaBar knife is a direct descendant of the Bowie. Numerous custom knifemakers offer various interpretations and takes on the Bowie concept, including famed knifemaker Randall Knives. William Westmoreland, whom I met once when I was in the Army, carried a Randall. Paul owns several Randalls and he’s trying to convince me I need one. So far, I’ve been able to resist taking that plunge.
My Custom Bowie Knife
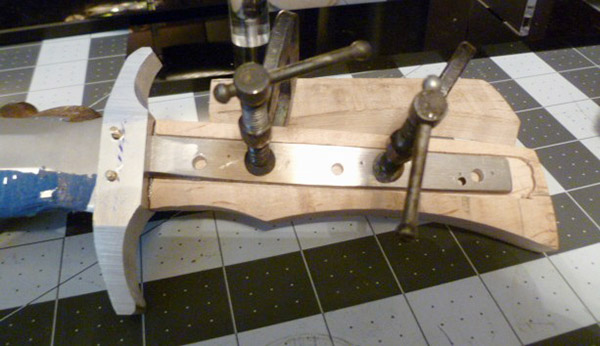
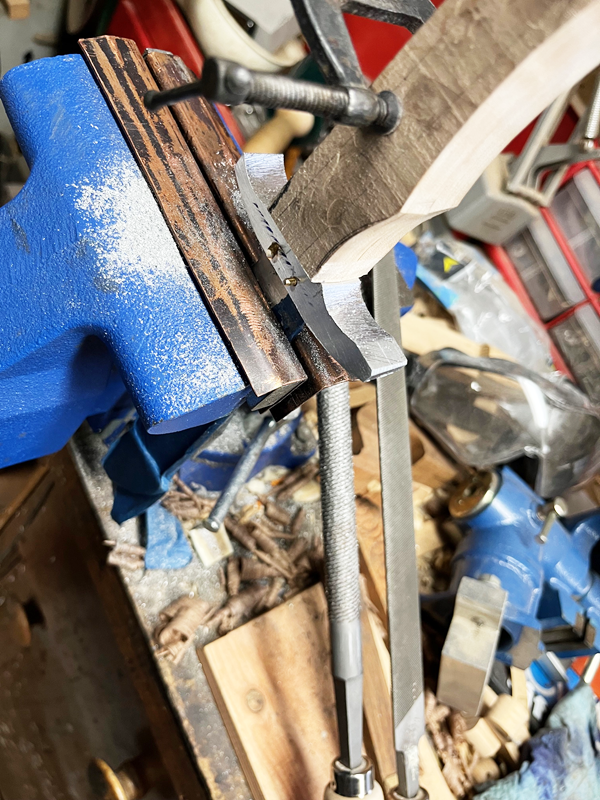
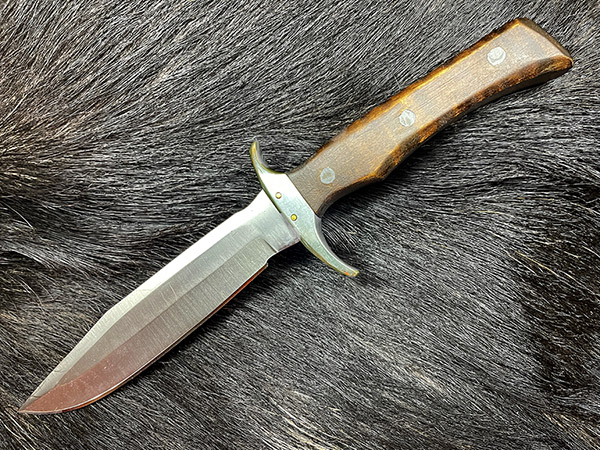
During a recent phone conversation with Paul, he mentioned that we was working on a new project. When I asked what it was, Paul told me I’d find out soon enough. And I did, when a package arrived at my front door with the Bowie knife you see in the photo on the top of this blog. It’s awesome. Paul also sent along photos showing a few of the steps involved with his making this knife.
Fixing the curly maple handles in place.The guard and its brass rivets. Paul hand filed the guard to its final shape and polished it.
The knife’s handle is curly maple finished with nitric acid and one coat of TruOil. Paul has built a number of custom black powder rifles with curly maple, using nitric acid as the finishing agent. It’s not something for amateurs, as it requires special handling. Nitric acid causes the wood to darken, which brings out the figure in a piece of curly maple (as it did on my Bowie knife).
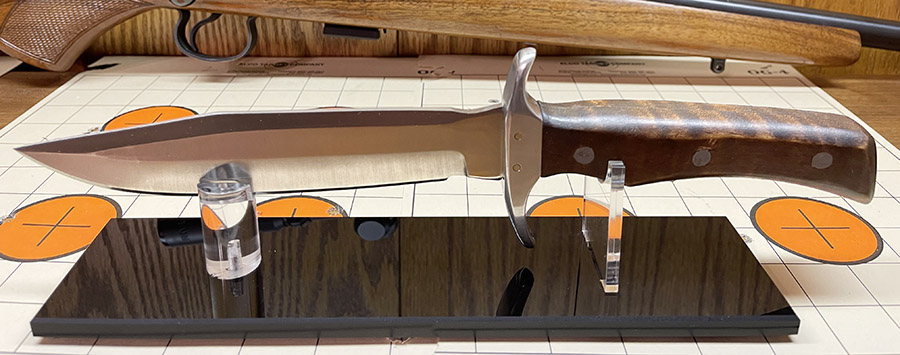
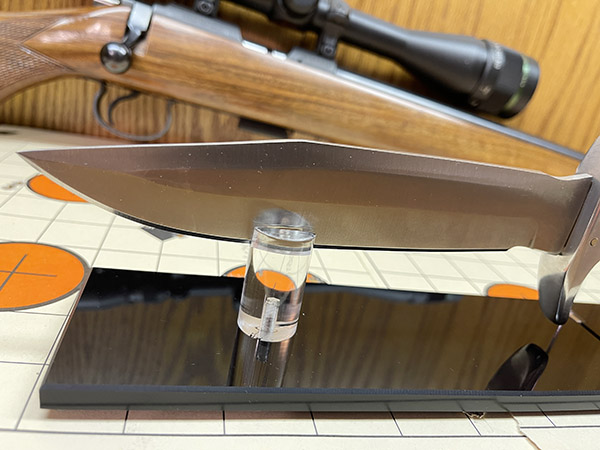
Here’s close up of Bowie’s blade:
My Bowie has a 7 1/2-inch blade.
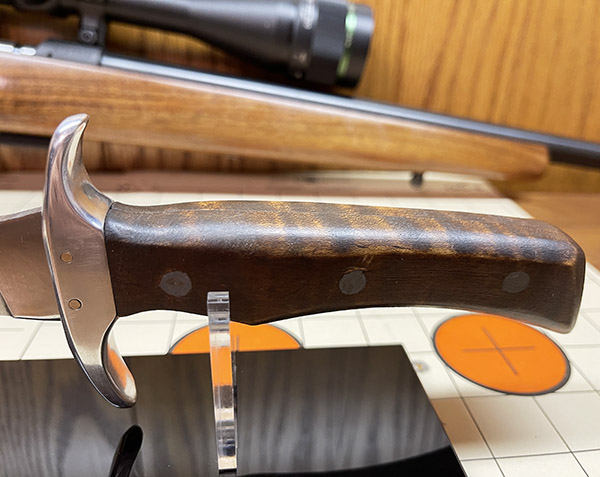
Here’s a photo of the guard and the handle. Check out the figure in the curly maple.
The hand fitted and polished guard, and the nitric acid finished curly maple handles.
Here’s the finished knife, on top of a background I’ve used for many photos appearing here on ExhaustNotes.
My Bowie on top of a wild boar skin. I shot the boar on a hunt with Paul about 8 years ago.
This Bowie knife is a cool gift and a prized possession. Thanks much, Paul!
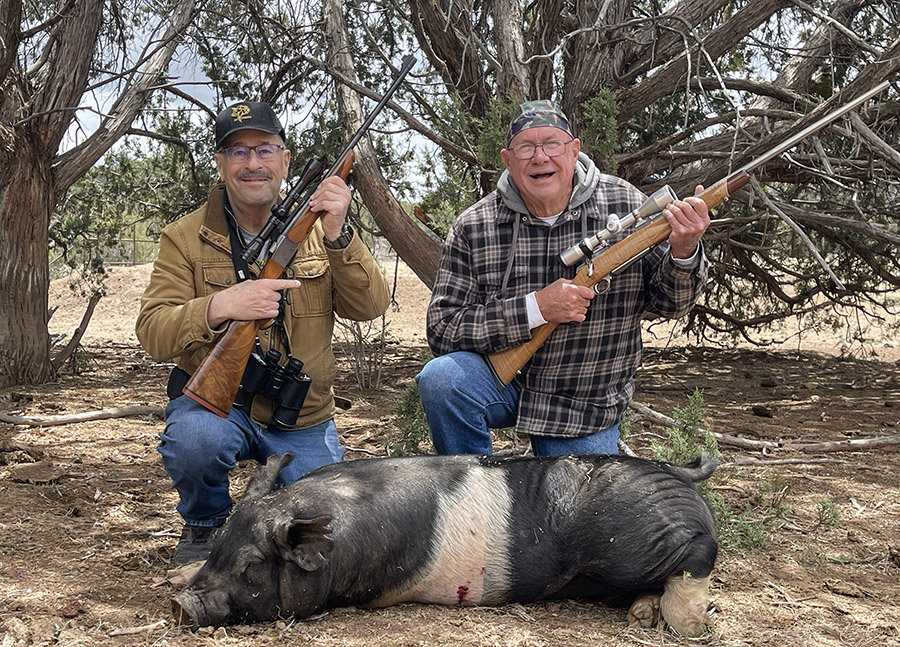
It had been way too long since I hunted pig, and that was a character flaw I aimed to correct. Baja John immediately said “Hell, yeah” when I asked if he wanted to join me on an Arizona pig hunt, and it was game on. I’ve known John for half my life, and that means I’ve known him for a long time. We’ve done a lot of trips through Mexico and elsewhere on our motorcycles. We know how to have fun.
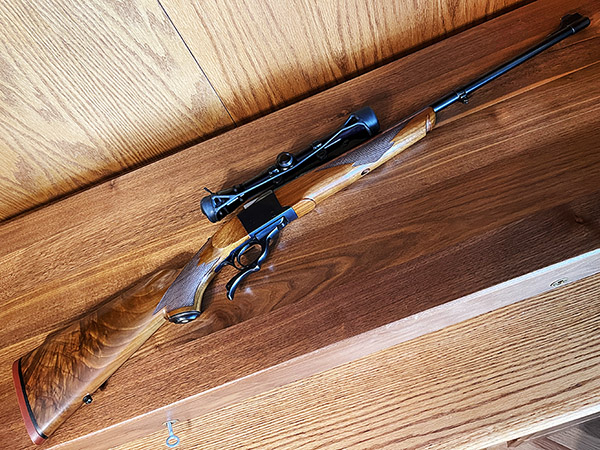
My Ruger No. 1 in .30 06. It’s a long time favorite. I mounted a 4X Redfield the year I bought the Ruger, and it’s never left the rifle.
Getting ready for the hunt was nearly as much fun as the hunt itself. I knew I’d be bringing my 200th Year .30 06 Ruger No. 1A with me. It’s a rifle I’ve owned and hunted with for 50 years. You’ve read about it before here on the ExhaustNotes blog. On a previous hunt, I used Hornady’s 150 grain jacketed softpoint bullet in my Model 70 Winchester and it worked well. I had not developed a load with that bullet for the Ruger, though, so I set about doing that. The secret sauce was 51.0 grains of IMR 4064, which gave an average velocity of 2869.3 feet per second (with a tiny 14.1 feet per second standard deviation) and great accuracy. The load was surprisingly fast for the Ruger’s 22-inch barrel; the No. 1 shot this load at the same velocity as my Weatherby’s 26-inch barrel.
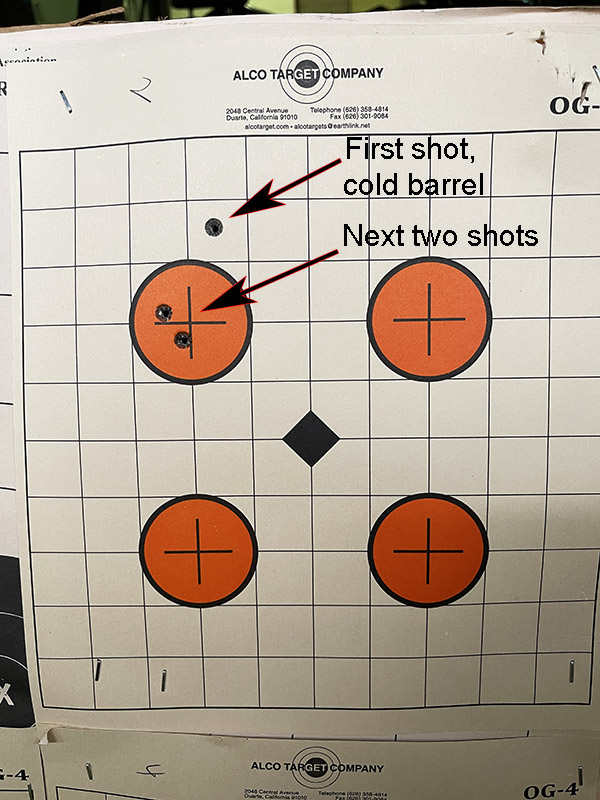
A week before the hunt, I checked the Ruger No. 1’s zero at 100 yards. The first shot from a cold and oiled barrel was a scosh high; the next two were right on the money. The rifle was ready.
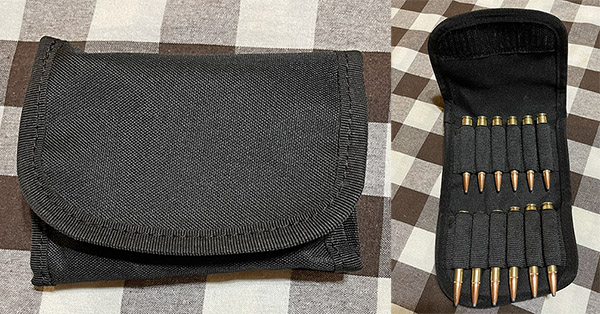
I knew I needed binoculars, which I already had, and a way to carry ammo (which I didn’t have). I found a cool belt-mounted ammo pouch on Amazon; the next day it was delivered to my home.
A cool little belt-mounted ammo pouch. It costs $8 on Amazon.
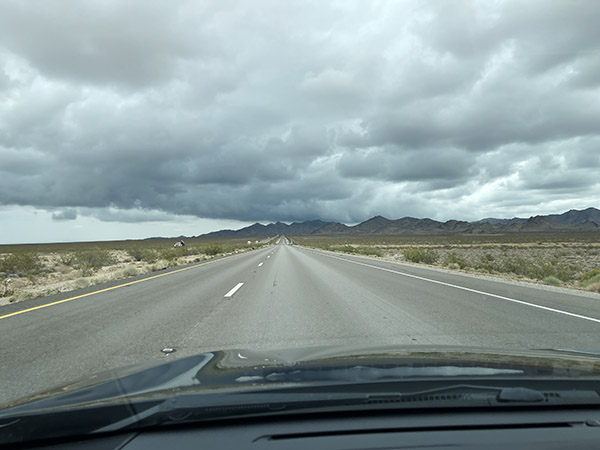
I had everything I needed; I loaded the Subie and pointed it east. We would hunt on the Dunton Ranch, about 325 miles away in Arizona. The weather was going to be a crapshoot. Everyone was predicting rain, and they were right. We would be lucky, though. It would be overcast and rain a lot, but not while we were in the field.
My six-hour ride under gray skies to Kingman was pleasant. It rained a bit, but it stopped just before I reached Kingman. Sirius XM blasted ’50s hits the entire way.
On the road to the Dunton ranch. I had a travel mug full of coffee Sue had prepared for me. I enjoyed the drive.
When I arrived at the Ranch, Tom (our guide) met me. John wouldn’t be getting in until later that evening. Tom asked if I wanted to hunt that afternoon, before Baja John arrived. You bet, I said, and we were off.
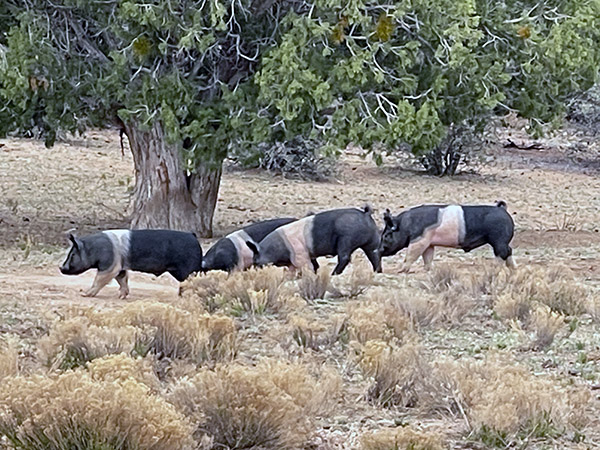
Ossabaw hogs in Arizona. They are an even-tempered pig. They are what Tom calls “meat pigs.”
Scott Dunton keeps his ranch stocked with at least three flavors of hog, including Russians and Ossabaw pigs. I had not seen a Russian boar on my last hunt, and I would not see one on this hunt, but that’s okay. It’s good to set goals in life, and one of my goals is to someday get a Russian boar. It didn’t happen on my Dunton Ranch pig hunt a decade ago, and it wouldn’t happen on this trip, but we started seeing Ossabaws almost immediately. Wikipedia tells us that the Ossabaw pigs are descendants of feral hogs on Ossabaw Island, Georgia. The Ossabaws were originally released on that island by Spanish explorers in the 16th century. Imagine that.
Tom and I set out and like I said above, we saw Ossabaws fairly quickly. I told Tom that I really wanted to get a Russian. “They’re smaller, they’re harder to find, they’re nocturnal, and they’re mean,” Tom said. “Some boys out here last week got a nice one.” He told me he could set me up in a blind, but the odds of seeing a Russian were low.
A while later, we came upon a group of Ossabaws. Tom had a rangefinder and he scoped the distance at 117 yards. “What do you think?” he asked.
My mind was racing. I started thinking about Mike Wolfe on American Pickers. He often says the time to buy something is when you see it. You don’t know if you’ll ever see it again. I thought it would be cool to have John there when I shot a pig, but I didn’t know if we would see any later. I wanted a Russian; these were Ossabaws. But they were there. I could hear Mike Wolfe: The time to shoot a pig is when you see one. “Can I shoot one of these and then take a Russian if we see one later?” I asked.
“You can do whatever you want,” Tom said.
Tom set up his tripod, which is a cool field version of a rifle rest. I had never used one before (I’d never even seen one before). I looked at the Ossabaw 117 yards away through the 4-power Redfield. The hog was standing broadside to me. Fifty years ago, I used to shoot metallic silhouette pigs that were a third that size at three times the distance (385 meters, to be precise), with no rest, shooting offhand. But that was 50 years ago. My eyesight isn’t what it used to be, my ability to shoot a rifle offhand isn’t what it used to be, and hell, I’m not what I used to be.
It was time. I rested the Ruger in the tripod rest and held on the hog’s shoulder. I watched the reticle sashay around against the hog’s dark form and started applying pressure to the Ruger’s trigger. Things felt right. I was in the zone. I didn’t hear the shot, and I didn’t feel the recoil, as is always the case for me when hunting. The hog fell over, away from me, just as a metallic silhouette javelina would do.
“That was a nice shot,” Tom said. I don’t think he said it because I was the client. He probably sees a lot of misses out here from other clients. The hog’s rear legs twitched in the air.
“Should I put another round in him?” I asked Tom.
“No, he’s gone,” Tom answered. “It would just destroy more meat.” I looked again and the hog was still.
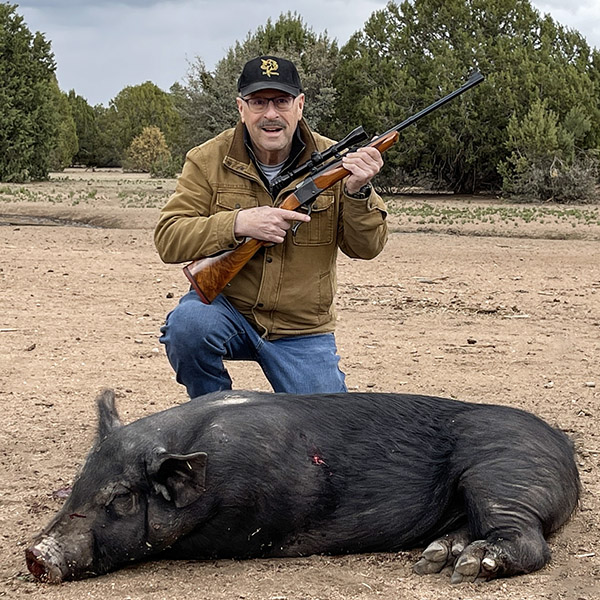
Success: 117 yards, my Ruger No. 1, and an Ossabaw hog.
We walked up to the hog. I could see where the bullet entered (satisfyingly just about where I had aimed). I was surprised; I could not find an exit wound. When I .30 06’d a hog at the Dunton Ranch on my last visit, the bullet sailed right through. Not this time, though. More on that later.
I posed with my Ossabaw for the obligatory Bwana photo. Tom and I struggled to roll El Puerco over. We tried to lift it onto the back of the truck and could not. Tom told me he needed to get the trailer (which had a winch), and he told me he would drop me off at a blind. “You might see a Russian come by,” he said. That was enough for me. “I’ll come back out here later with John to pick you up.”
I got comfortable in the blind, which overlooked a watering hole about a hundred yards away. I scoped everything I could through my binoculars, imagining every rock and bush in my field of view might be a Russian. I felt like a Democrat looking for the imaginary Russians (I really wanted to see one, but they just weren’t there). A small group of Ossabaws showed up at the watering hole. I watched them through my binoculars. They did what pigs do, and then they started meandering around a bit. Towards me.
An Ossabaw hog just outside the blind’s window. Were they coming for payback?
Golly, I thought. The Ossabaw hogs were getting close. Then, they literally walked right up to the blind. I could feel it rock around as the pigs rubbed up against the walls. They know, I thought. I had shot Porky (or maybe it was Petunia?) and it was payback time. They had come for me.
I could hear the pigs grunting just below the blind’s window. I remembered my iPhone. I took a picture, holding the phone just outside the window. I don’t mind sharing with you that I was more than a little bit afraid. My Smith and Wesson Shield and its nine rounds of hot 9mm ammo were back in the Subie. The sportsman-like snob appeal of hunting with a single-shot rifle suddenly didn’t seem like such a good idea. I had my one round I could put in the chamber, but I wouldn’t be able to reload quickly enough if the pigs wanted to exact their revenge on me. One shot. I was the Barney Fife of pig hunters.
Nah, I thought, these are just pigs being pigs. Or were they?
If you crank up your computer’s volume all the way up and listen, you can hear their grunts.
After the pigs had their fill of terrorizing this septuagenarian New Jersey refugee, they wandered off. My heart rate returned to its normal bradycardic 50 bpm or so. I went back to glassing the surrounding vista. Nobody’s going to believe this, I thought.
An hour or so later, Tom and Baja John were back in the truck. No Russians had wandered by. I was glad John had made it okay but I was disappointed I had seen no Russians. I imagined I knew what Adam Schiff must have felt like when Robert Mueller testified before Congress. Where the hell are these Russians?
The pocketknife craze continues unabated, and I am finding that in my collecting I am stabilizing around the idea of the large folding hunter style knife. These are commonly referred to as a Buck knife, even though many similar available knives are not manufactured by Buck.
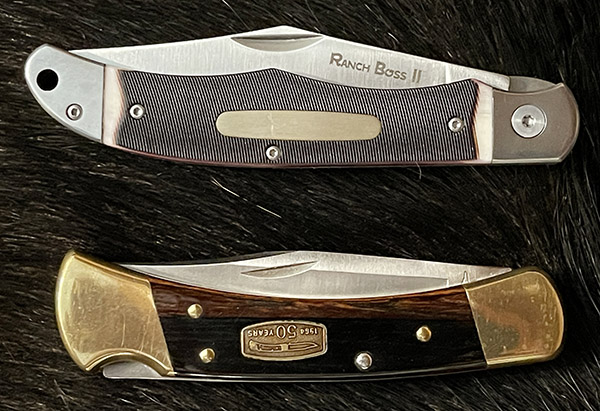
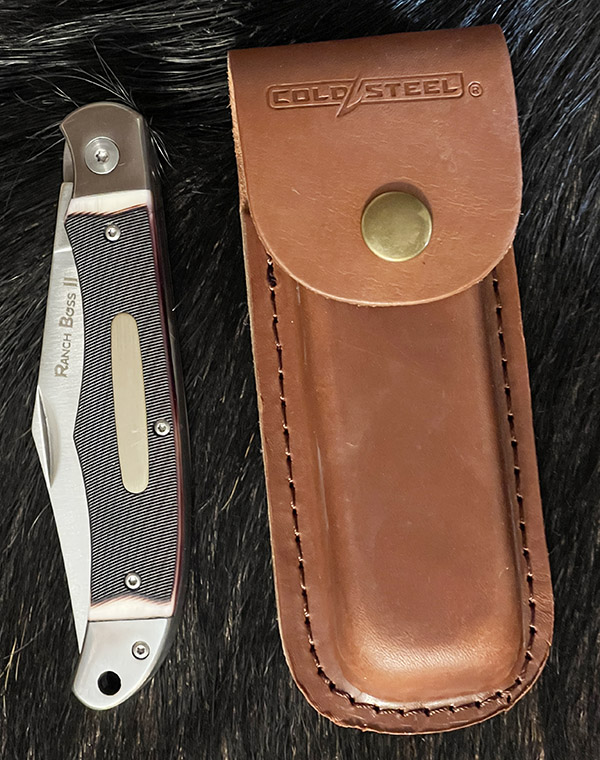
A Cold Steel Ranch Boss II (top) and a Buck 110 (bottom). The Cold Steel is a big knife.
Don’t get the word Buck confused with deer hunting, as if someone armed with a Buck knife is going to chase down Bambi for a knife fight. The “Buck” in Buck Knife is actually the name of the man who founded the company, and that company is in Post Falls, Idaho (a stone’s throw from the Canadian border). I know that because I recently chatted with a guy there.
What most of us think of when we think of a Buck knife is the Buck 110, the classic folding hunter knife style. The idea Buck had back in the early 1960s was to create a folding knife (like a pocketknife) that could do the same thing as a fixed blade hunting knife. Buck envisioned a folder with a thicker 3.75-inch-long blade that locked securely in place when opened. The concept was that it would be able to do things a hunting knife could do (like skin and dress game animals). The Buck 110 style (the large folding hunter) has been widely copied and the term “Buck knife” is often used describe any large folding knife (like Kleenex is used for tissues and Xerox means making a copy).
I like the Buck 110 a lot and I’ve written about my custom Buck before, so when I recently saw an ad for an “automatic” Buck 110, I was hooked. An automatic knife is what we used to call a switchblade. You know, like in West Side Story. That would be cool. I liked that movie and I always wanted a switchblade. The automatic Buck 110 would scratch that itch. When I received an email from Chicago Knife Works offering the Buck 110 automatic for a measly $153, I was in.
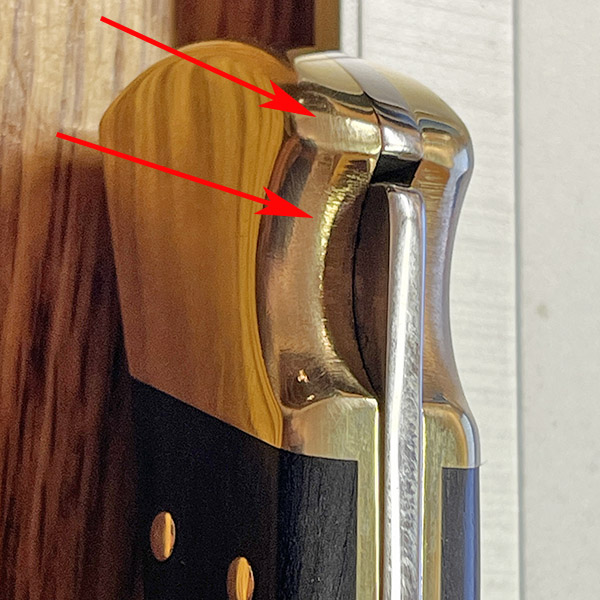
A week later my switchblade arrived. I wasn’t happy with it. The bolster cutouts around the blade lock had tool marks. They weren’t mirror polished like they are on my other Bucks. It bothered me, so I called Buck Knife’s customer service.
Tool marks on the Buck 110 automatic. You might expect this on a cheap knife, but not on a Buck.
The guy I spoke to at Buck knew exactly what I was talking about. Buck changed their manufacturing process to remove cost and that’s why the tool marks were there (evidently, I wasn’t the first guy to call with this concern). I get it. I’m a guy who spent a career finding ways to reduce manufacturing costs in products ranging from bombs to biomedical devices, so I understood. But there was still this nagging problem: I spent $153 on the Buck and I wasn’t happy. The Buck guy understood that completely without my being a dick about it. “Send it back in to us,” he said, “and I’ll get it polished out.” They’re going to engrave my initials on the blade, too. That’s cool. A personalized switchblade. I felt even better when I went on the Chicago Knife website later that day and learned they had bumped the price of the knife I just bought from $153 to $199. Wow. It’s those Idaho tariffs, I guess.
The fact that I like pocketknives is out there now. Siri has been listening and I’ve been on a lot of knife websites. I get emails every day from companies selling knives.
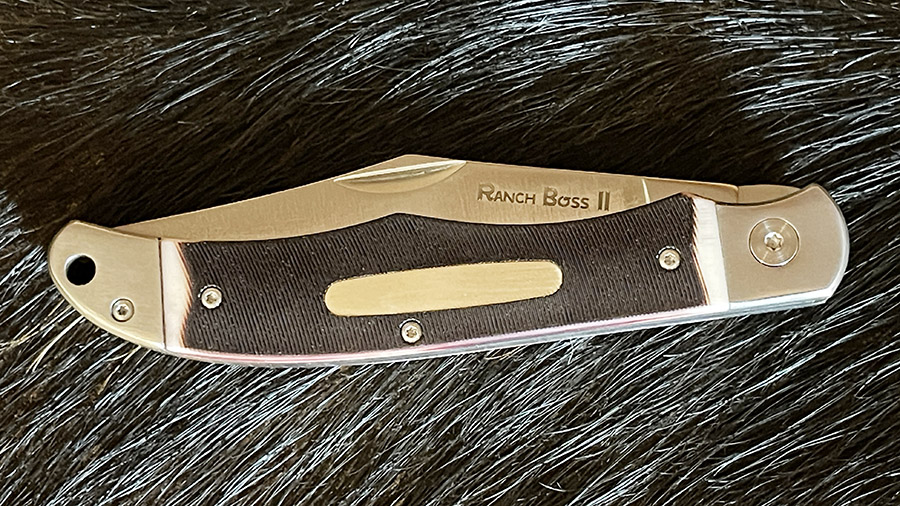
The Ranch Boss II knife. It has a nice look and feel. I like it.
One of the emails that caught my attention was from good buddy Jeff Bezos. It was for a Cold Steel Ranch Boss II that looked a lot like a Buck. I guess I missed the Ranch Boss I (I came to the pocketknife craze late in life). The Ranch Boss. I like the name. I especially like the price: $39. Cold Steel. I like that name, too. There is a unit in the US Army (Charlie Company, 1st Battalion, 6th Infantry Regiment) called Cold Steel Charlie, so named for their heroism and lethality. The marketing guys at Cold Steel ought to get a raise for that bit of branding genius. It sure worked its magic on me.
Amazon didn’t try to hide that the Cold Steel Ranch Boss II is manufactured in China. That didn’t bother me. I know from my CSC days and my many visits to Zongshen, Zebra, and other Chinese companies that there are companies in China making good products. The Ranch Boss. It has a John Wayne vibe. I could be a Ranch Boss. The Marlboro Man theme song played in my head. Ranch Boss. Yep, that’s me.
In the email and on Amazon, the Ranch Boss looked like a big, heavy folding hunter. $39. Complete with holster. Man, $39. That’s a sandwich with a beer these days. Buy now, and I could have it the next day. Yeah, it’s Chinese, and a real Buck is made in Idaho, but hey: $39. Buy now, Baby!
The Ranch Boss II knife is sold with and without the case. When I bought mine, the price with the case was a few bucks cheaper than the one without the case.
My Cold Steel Ranch Boss folding hunter was on my doorstep when Susie and I returned after our Jameson Motorcycle Museum 800-mile weekend. That’s one the porch pirates missed.
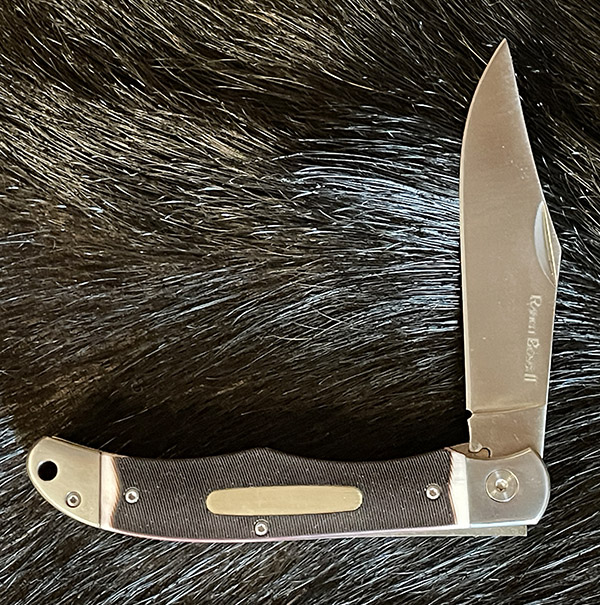
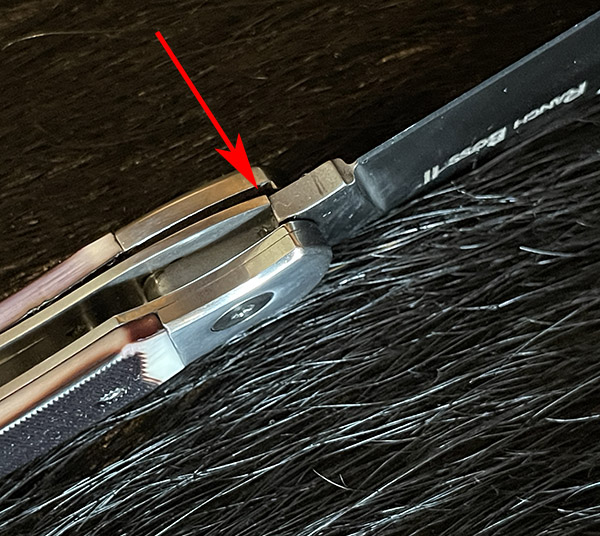
The spring-loaded liner lock. When the blade is opened, the liner lock moves over to prevent it from closing. To close the knife, the liner lock is pushed out of the blade’s way. You need to be careful when doing this.
You know, the Ranch Boss is a nice knife. It looks and feels good. It’s actually slightly larger than the Buck 110. It uses a liner lock instead of the Buck 110 lock design. The thing is sharp, as in razor sharp. I like the looks of it.
The finish on both the Buck and the Ranch Boss is brushed stainless steel. I like that look. The Buck has polished brass bolsters; the Ranch Boss bolsters are the same brushed stainless steel as the rest of the knife.
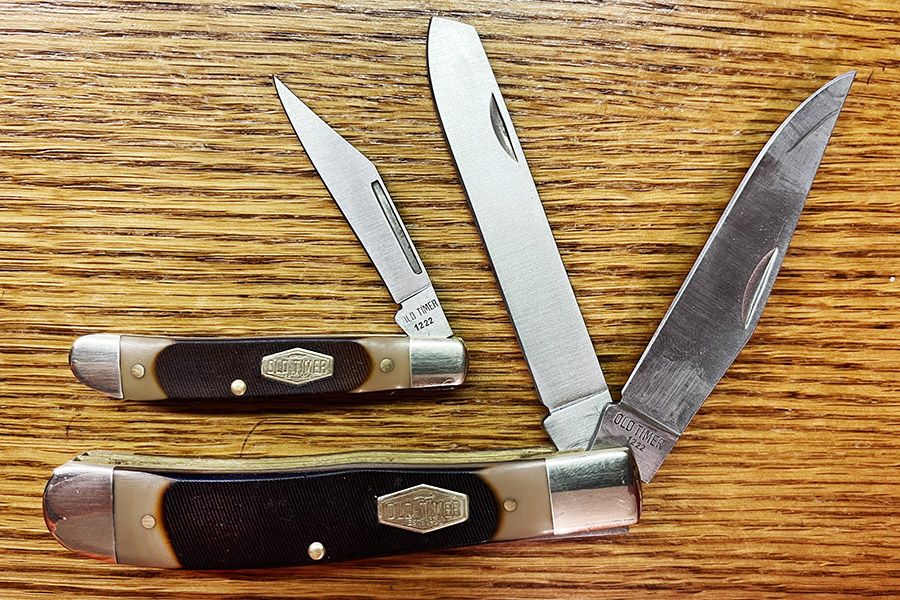
The Buck 110 scales are real ebony wood. They are riveted in place with brass rivets. The Ranch Boss scales are fake sawn bone. I imagine there’s a single supplier providing this material to several knife makers. I recently picked up an ultra-inexpensive pair of Old Timer Chinese-manufactured pocketknives at (where else?) Walmart. They were only $25, and the scales on those two knives look identical to those on the Ranch Boss.
Walmart Old Timer pocketknives, sold as a set for around $25. That little one is in my pocket all the time now. The scales are identical to the Ranch Boss.
I like that the Ranch Boss scales are secured with little Allen bolts instead of rivets. If I want to craft a set of custom scales of maple or walnut to match one of my six shooters, it will be easier to do than on the Buck. A real Ranch Boss has to be properly attired, you know.
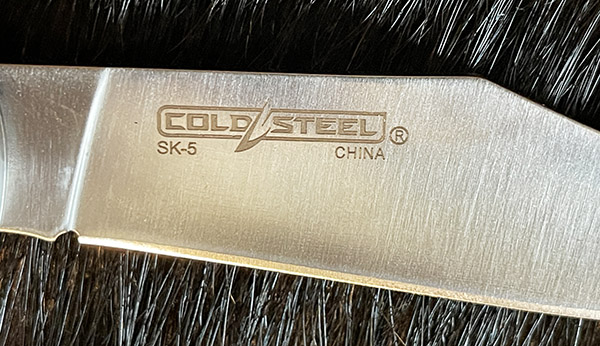
Cold Steel’s SK-5 blade material. The steel is Japanese; the knife is Chinese.
Buck’s standard blade material is 420HC, a tough, corrosion resistant steel that takes a good edge and is easy to sharpen. The Ranch Boss knife blade is SK-5 steel, a Japanese steel that is well suited (or so I’ve read) for knife blades. It has good durability and abrasion resistance, and is generally corrosion resistant. The SK in the designation stands for steel kougu, which translates from the Japanese to “tool steel.” For my purposes, the differences in steels between the Ranch Boss and the Buck are moot. I just like looking at the things.
Both the Buck 110 and the Ranch Boss are big knives, with the Ranch Boss being a bit larger than the Buck. These are not really knives you carry around in your pocket. They’re cool.
The bottom line here is that I like both knives. The Cold Steel Ranch Boss II, at $39, is a lot of knife for not a lot of money. The quality of the Ranch Boss is better, in my opinion, than the Buck. But Buck is standing behind their product. I’m eager to see what my Buck 110 Automatic looks like when it is returned from the factory. I’ll let you know.
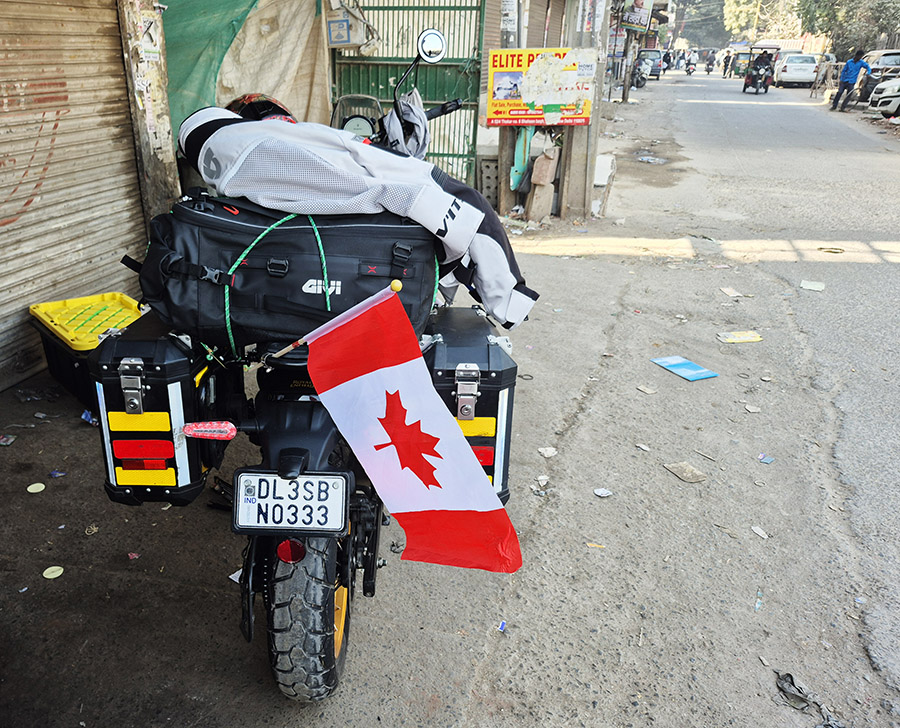
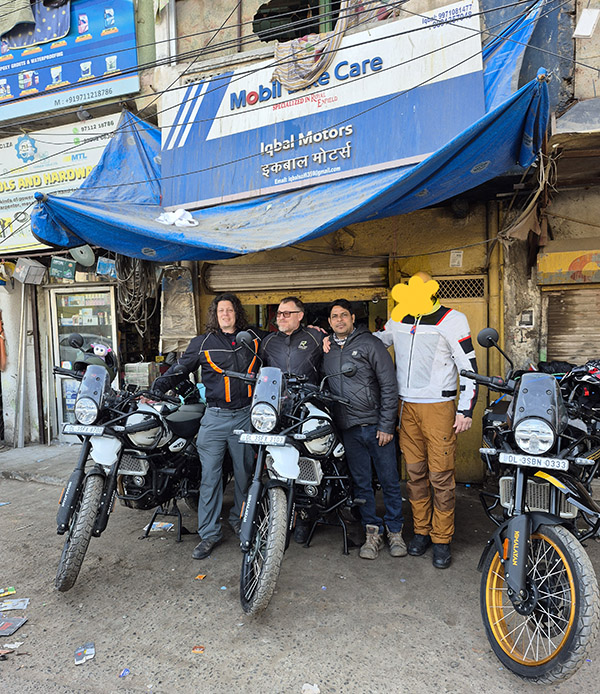
The next day was the day we would pick up the Royal Enfield Himalayans. I was excited to show my new riding partners the bikes, having taken them out a couple days prior. We all met at Iqbal’s motorcycle shop bright and early. As we unpacked our gear and transferred it from boxes and backpacks into the panniers and saddlebags I noticed one thing: They had a LOT of gear. This wasn’t a bad thing as I was missing a lot of necessities such as tire repair kits, jump starters, and tool bags. As I looked over at my moto and the gear I had, I realized it was pretty limited, which at first glance had me concerned but then after thinking it through I thought: How many tire repair kits do you really need?
After wrapping up the final paperwork with Iqbal, we suited up and were off. It would be a short day with just a little over four hours of riding. This was perfect, as it took an hour just to navigate through Delhi, whiz through the suburbs, and eventually find our way into the country where we could relax while riding a bit. For me, the relaxation didn’t really happen as I had no communication between the others and my phone seemed to constantly go in and out of cell coverage. This meant that I had to keep eyes on at least one of the other two to avoid drifting off and getting lost. If nothing else, it was a motivator and solid excuse for my aggressive riding. At least that’s what I told myself.
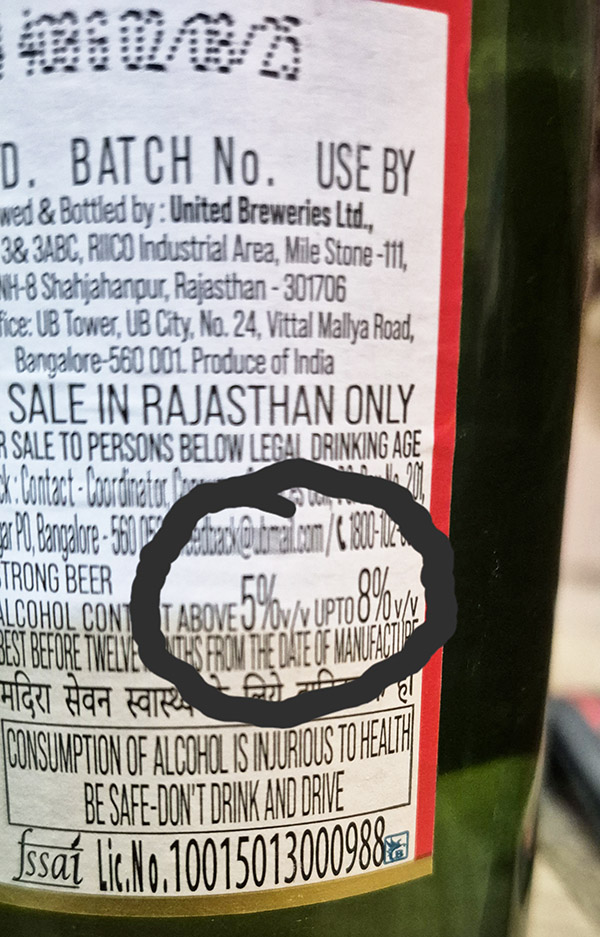
Around 1500 hours (Ed Note: That’s 3:00 p.m. for you non-Airborne guys) we decided to call it a day, get a hotel, some food, and a couple beers in a tiny town called Alawar. I say a couple of beers because the local beers (called Kingfisher) were a crapshoot with regard to how strong they were. They fluctuated between 5% and 8% ABV (alcohol by volume), so until you had one you really didn’t know which end of the spectrum you would end up on. This was a nightly roulette game where we would play “who got the 8% beer?” Over the next few weeks we all had our time with the 8% beers at one point or another. This added yet another unknown into our travel equation (as if we needed any more unknowns), but it was fun nonetheless at the end of a long riding day.
Another interesting nightly game was “which switch controls the lights?” It seemed that every room had at least two panels with a minimum of six switches per panel. This made turning the lights out each evening about as doable as solving a Rubik’s Cube (especially if you were the guy who had the 8% Kingfishers that evening).
After dinner, the Kingfishers, and solving the light switch Rubik’s Cube, I was pretty wiped out and it was time for a peaceful night’s sleep. The next day would be our first full day of riding. Although my confidence was high after Delhi’s chaotic roads, there surely would be more surprises. This would prove to be especially true as we went further into northern India’s countryside.
My collecting bug has taken a turn. Instead of guns, motorcycles, bicycles, or watches, the latest craze is pocketknives. I’m not sure what drives the collecting bug (that is to say, what the underlying psychology is); that’s a topic for further research and when I feel like I can explain it, maybe a future blog.
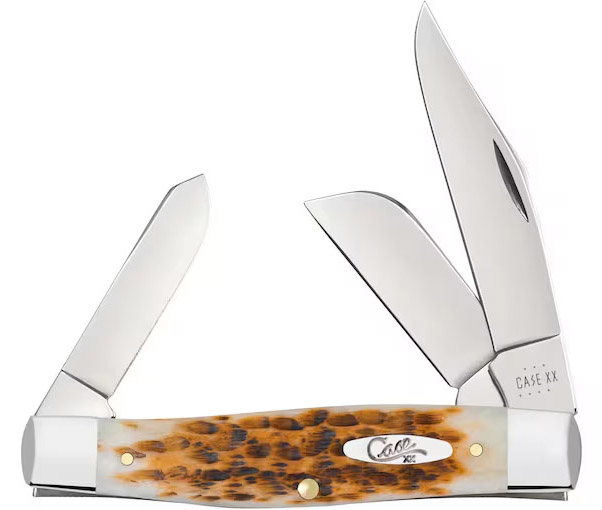
I’ve been using pocketknives and inexpensive hunting knives as a filler/fulfiller on the reloading sites. I buy a lot of reloading components online from the big reloading supply stores (Natchez Shooters Supply, Midsouth, Midway, Powder Vally, and one or two others), and they all run frequent sales where shipping is free if the order crosses a $100 or $150 threshold. There are times when I’m under that threshold (sometimes by a lot) and that bothers me. I can’t pass up a bargain and I want that free shipping. I’ll use a knife to get me over the magic number. Most lately it was a Case large Stockman pocketknife.
The Case large Stockman with polished stainless steel blades. The blade on the left is the Spey blade. The other two are for whittling, cutting twine, or whatever suits your fancy.
I’m not sure why I wanted the Case, but as I started poking around on the Midway site for things to get me over $100, the Stockman popped up. And then it kept popping up. If I look at something once, I’ll start getting all kinds of emails offering it. Sometimes, I swear I can just talk about something and I’ll start getting emails with deals on that item. Siri is a nasty and nosy bitch who seems to hear everything.
The Stockman knife looked interesting. I knew I didn’t want plastic handles (they’re called “scales” by the knife people), and the Case knife had jigged bone. I didn’t even know what jigged bone was (other than that it was bone of some sort). I thought I wanted something made in America (Hack has influenced my thinking on such things, I suppose, unless something that’s made in China is a really good deal, and I’ll get to one a little lower in this blog). The Case Stockman is American made, and they offer it in two sizes. I didn’t know what a Stockman was, either, but the name sounded kind of John Waynish and I used to live in Texas. I saw that the knife was available in either a satin or high polish finish. I opted for the large Stockman with a high polish finish. It was $82, which took my $45 reloading supplies order handily over the $100 free shipping hurdle. Yep, they got me again with that free shipping gimmick.
The Stockman knife arrived a few days later along with the $45 of cartridge case corn cob polishing media (I like my ammo shiny). The knife is beautiful.
All the above got me to wondering: What is exactly is Stockman, and what is its history?
The story goes like this: Pocketknives are thought to have originally been invented five or six hundred years before the Christian era (that’s mind boggling, but I read it on the Internet, so it must be true). The Stockman style of pocketknife is thought to have originated around 1880 in the American West as a cowboy tool. I watched a lot of Westerns as a kid, so I feel pretty good about that. The Stockman has three blades, with one (the large one) having its own spring and two sharing a spring (the spring is the leaf spring thingamabobber that assists the blade going into its closed position and then holds it there). The long Stockman blade is for whittling. I’m an old guy with a penchant for the American West, so maybe I’ll take up whittling after I finish leaning how to play “Buffalo Gal” on the harmonica. One of the other two blades is a backup to the long one, and from what I’ve read it is the preferred blade for cutting twine. (I’ll pick up some twine on the next Walmart visit to check this out). And finally, the third blade, the so called “Spey” blade (spelled here as they spell it in the knife community) is for castrating young male bull calves. You know, spaying them. Ouch. I read this on the Internet, too (see above regarding veracity). I’m not going to touch this intended use. If you’re a rancher who needs help in this area, don’t call me.
I like my Case Stockman. I haven’t done anything other than look at it so far, but maybe I’ll whittle something later. As mentioned above, the Stockman is made in America, although truth be told, other made-in-China knives I’ve seen look just as good (Hack, that’s your cue for a comment or two). That brings me to the second pocketknife I recently purchased.
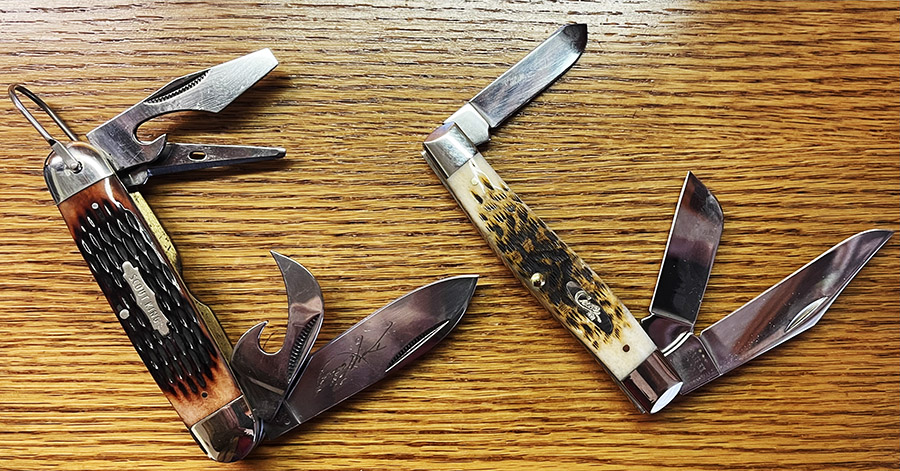
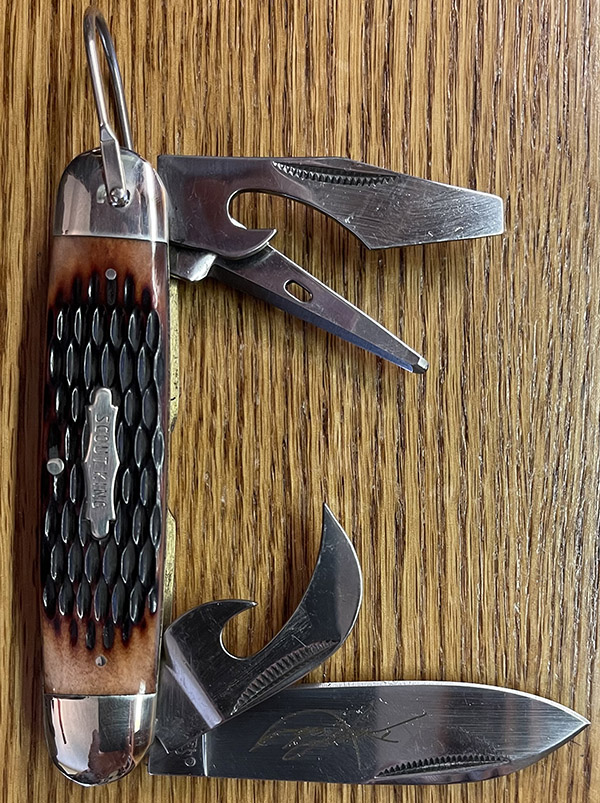
My new Marbles Scout King knife. I think it’s bigger than what I had when I was a Cub Scout. The uppermost blade is a screwdriver and bottle opener. The next one down is an all-purpose awl. The blade one up from the bottom is a can opener (think P38, and if you’re old enough to remember what that is, my compliments and thanks for your service to you). The bottom blade is for carving, cutting, and any of the other things you can do with a knife. It is a handsome knife.
It’s the Marbles (no, I haven’t lost mine) Scout King, and I came across it while I was reminiscing about the first pocketknife I ever owned. That knife was a Cub Scout knife. I have no idea who made it or where it went after I left the Cub Scouts, but I know I liked it. I played with it constantly. The first time I ever cut myself badly, it was with that knife despite all the admonitions from Mom and Dad (yes, I’m the guy who has to urinate on the electric fence…you know, just to see). While writing this blog, I looked for the scar from my Cub Scout knife (I thought it might add context), but the years have obliterated it.
When looking for a replacement Cub Scout knife, I found that I could buy an original on Ebay, but they all looked pretty rough and they were all expensive. Then I found there are a few companies out there still offering Scout knives. The Marbles knife was the only one offering polished stainless steel (I like shiny things) and genuine jigged bone scales (instead of plastic), and it had the added advantages of a stunningly low price ($15 and change) and free shipping. The decision was easy: Add to cart, buy now, and it was on its way from Chicago (by way of China). It arrived a few days later, and it’s beautiful. I’m a happy camper.
I was going to do a bunch of stories on my solar power system that powers my shed. I may still do that but this is more of an update on the batteries I use to store the solar power.
Small footprint means more energy density and hotter, more localized fires…
With solar, unless you plan on only having power in the daytime, you’ll need a way to store energy. The traditional way to accomplish this is with lead-acid batteries. I’m a lead-acid fan boy because they are so much cheaper than lithium batteries or a molten salt battery.
I should say, were cheaper…as of late lithium batteries have been dropping in price so much you can now get a 12-volt 100ah lithium battery for the same price as the cheapest Walmart lead-acid, deep cycle battery.
My solar system has been online since 2018 and in those years I’ve had to replace three Walmart batteries. The others are getting a bit long in the tooth, you know? Six years is a good service life for a lead-acid battery. Walking by the battery bank a few days ago I smelled the telltale odor of sulphur. This meant another battery had given up the ghost. It’s usually easy to find the bad battery in a bank. It will be hot to the touch, or in this case the filler caps had blown off. Kind of obvious.
The lithium batteries seem fairly even voltage wise at 100-amp load.
Looking at the average age of my battery bank I decided to bite the bullet and buy a new lithium set up. Getting in just under the tariff wire, so to speak.
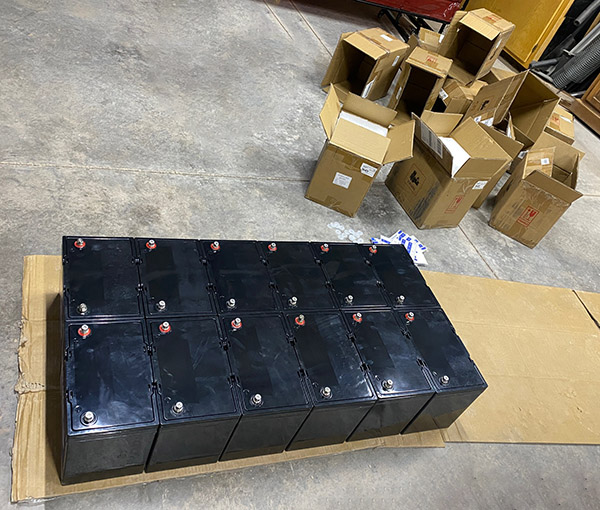
My new bank will be 12, 12-volt, 100ah lithiums. Wired in series/parallel to produce a 24-volt, 600 amp hour storage capacity. That’s theoretically 14,400 watts of storage if you could squeeze every bit of juice out of the batteries.
By contrast, the existing 12, 12-volt 100ah battery bank only has 7200 watts of usable storage capacity due to lead -acid batteries dropping voltage below 50% capacity. The same total amount of juice is in the lead-acids but it’s at a voltage too low to operate equipment.
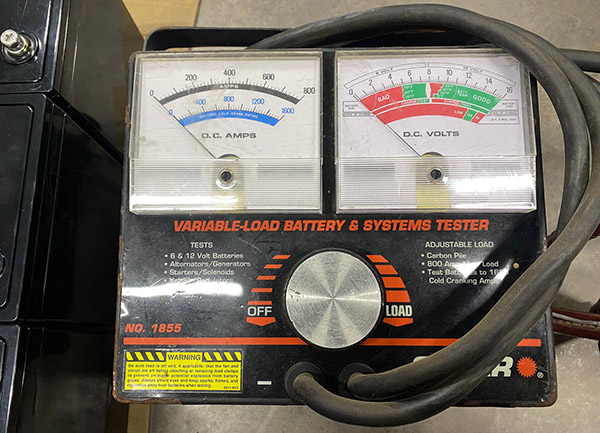
I use an old, analogue battery load tester to establish baseline numbers for future troubleshooting.
In addition, the lithium batteries have a smaller footprint so I’ll be able to rig the new bank on a single shelf instead of two shelves like the set up is now. This will cut down in battery cable length and by extension, voltage drop. Less cable is always good with electricity.
All in, I’ll nearly double my solar storage capacity in less square footage for less money than the old style lead-acids. This seems like a win-win.
Lots of important information that I will ignore is printed on the battery.
Now for the downside. These generic lithium batteries claim a 10-year life span but since the Chinese manufacturer’s keep changing brand names like I change underwear the likelihood of the same battery company being around a decade is slim. And then there’s that small detail of the fires.
Lithium batteries don’t like cold weather so that could be an issue. We do get some 20-degree nights at the ranch. I run pipe heaters at night so maybe that bit of drain will keep the batteries snug and warm.
Ah well, it’s not like lead-acid batteries don’t catch fire or explode occasionally.
I’ve had good luck with my Walmart lead-acids, no complaints, and I’m hoping these lithium replacements hold up at least 6 years. 10 years will be great and if they last look for an exhaustnotes long term review in 2035.
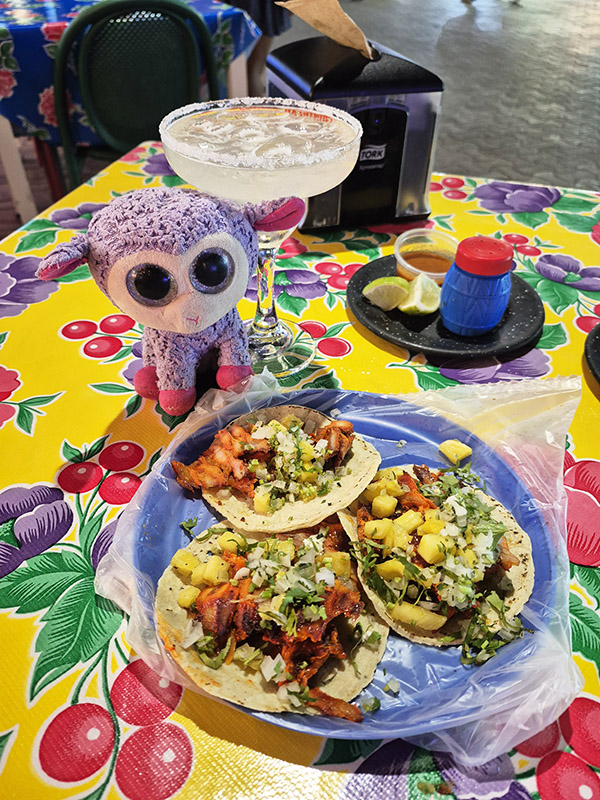
Introductory Disclaimer: So as I have been writing these blogs the last few years it’s quite enjoyable and therapeutic to literally vomit out the stories without having pressure to place any bullshit spin or embellishments (they really don’t need any embellishing). I take pride in highlighting my successes, but also annotating my shortcomings and owning them through my writings. Enjoy!
My main purpose of traveling to Mexico was tacos, but diving was a close runner up as a reason to visit this incredible country again. Diving over the past six months has almost replaced my addiction to motorcycling, making it yet another bad decision as a hobby choice. For those of you that have read my previous diving adventures will fully understand this.
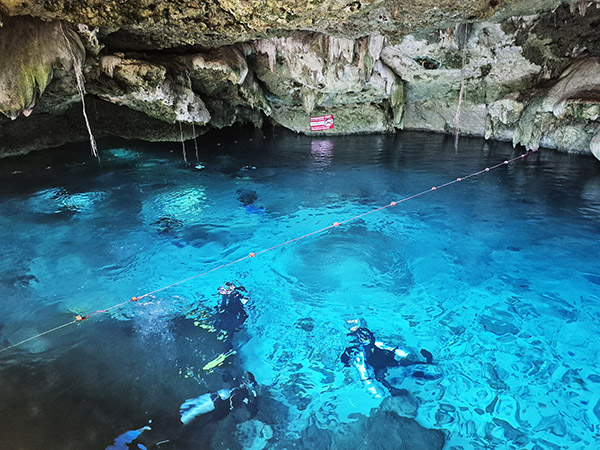
I am currently on the Yucatan Peninsula in Mexico and much of this land was created from a giant asteroid. That would be THE giant asteroid that created the Ice Age and killed off the dinosaurs. With this massive disruption in this area, the ocean floor was lifted in a strange way that created cenotes. These essentially are old caves that are now flooded with fresh water. There are about 5,000 of these cenotes throughout the Yucatan Peninsula and they are quite magical. Having to mark my checklist off (I’m making this list up as I go, by the way, as a month ago I couldn’t tell you what a cenote was) scuba diving in one of these seemed like it would be incredible, and it was. Sorta.
In Thailand I had done a few swim throughs. Not even caves or caverns, but about 20 meters. It wasn’t something I ever enjoyed but it wasn’t the worst experience, either, so I wasn’t quite sure how I would feel during a 52-minute, ¼-mile dive through my first cenote. Upon arriving and seeing the other divers in the crystal clear water with the sunlight mysteriously peering through the overgrowth of old forest above the cave, I instantly was put into a state of awe based on how beautiful it was. After donning our scuba gear and jumping into the cenote, the cool water was quite refreshing from the heat and humidity in the jungle above us. After a few minutes of joking around and performing a buoyancy test, the five of us were ready to begin exploring this cenote underwater.
It didn’t take long before the beautiful glowing natural light was absorbed by darkness. We had nothing but our small flashlights and a string along the bottom to guide us for the next hour. As we swam along there were stalagmites and stalactites on either side of us. Some were so old they had formed natural columns in the still crystal clear and dark water we were slowly navigating through.
We were about 30 minutes or so into the dive when I noticed my heart began beating quite rapidly. It was beating at a rather uncomfortable rate. I tried to shake it off as mentally I felt great, but it seemed to be getting worse. With my heart now beating faster, my breathing also began to increase. I knew I had plenty of air as I am religious on checking my oxygen levels (see my previous diving blogs) so I did what I could to dismiss it, but my mind wouldn’t allow me to shake it off.
With all this going on I began to float to the surface. Normally this would just be frustrating and I would have to close my eyes, exhale and I would sink back to the level I wanted. The issue now, though, is there was no surface. There was only the cavern ceiling. If I hit the cavern roof, I would probably hit my head and it would possibly be a “lights out” situation. I did not want this. We were in a semi-single-file line (although I was a bit more elevated than the others, in several ways now that I think about it). There really was nothing or no one I could reach out to for help. What were they going to do? Give me a hug? I was on my own here and as with previous situations, I had the rest of my life to determine how to resolve this mess and get my head (and more importantly, my body) under control.
It took a couple of minutes to do just that, and a short while later I was enjoying the cave, being super calm and relaxed. It felt like coming out of an intense psychedelic trip and realizing that you are on the other side of it (and a stronger person for having undergone the experience). Then, it happened again. Not quite as intense but enough for me to mentally note that this sort of diving wasn’t for me, or at least it wasn’t for me at this particular time.
As we neared the entrance of the cavern where we started from the shimmering neon green light of the sun causing the water to glow and seeing the other divers floating gently above me was a beautiful sight. My first cavern dive had been logged and as I surfaced I looked to me new friends around me and simply said “Well, that was quite a trip.” I chose not to do the second cavern dive that day (for obvious reasons) but I am looking forward to my next dive in a few days. That dive will include close encounters with bull sharks. Until then I am long overdue for a couple of cold Tecates and some much-needed tacos.
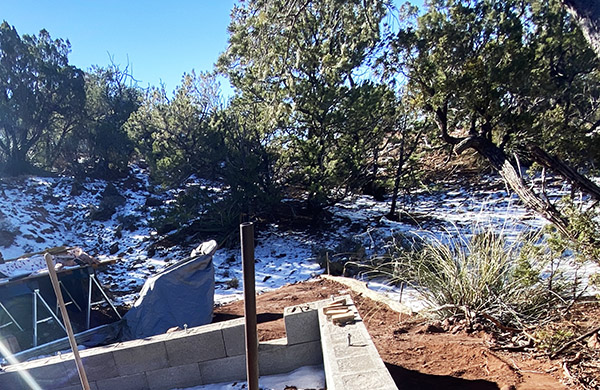
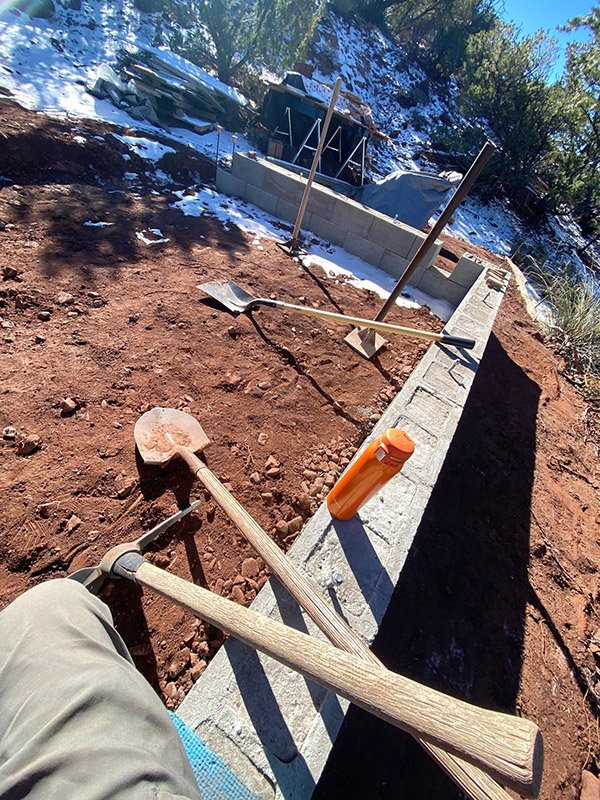
I’m filling the area beyond the wall. It was a steep rocky place and now you can walk around without stumbling like an old man…which I am.
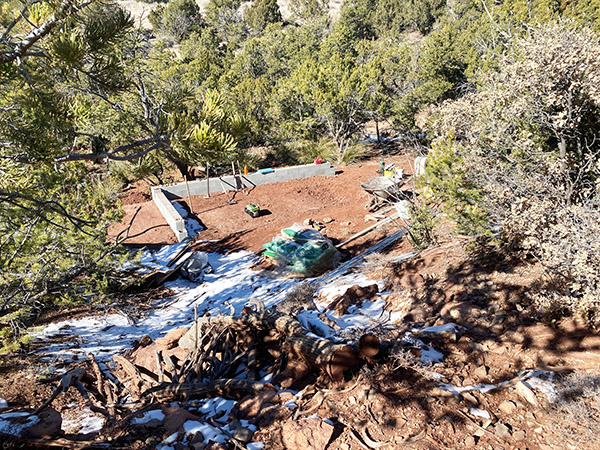
Terracing is much easier than removing the mountain so that’s what we’ve been doing. The little cabin we live in is on a terraced spot down by the arroyo. The shed is higher up on another terraced spot.
There’s a great location for a greenhouse behind our shack and down closer to the arroyo. The spot gets plenty of winter sun and it’s protected in most directions from wind. It’s so low I suspect it may flood in heavy rains.
It’s a little hard to get to but the location will be better when the high winds kick up.
Unfortunately, the location is hard to get to. A while back I made a set of stairs to access the location but there’s no way to get the Kubota tractor down the stairs. I actually could get it in position via another route but it would require cutting a bunch of trees. I don’t want to cut trees.
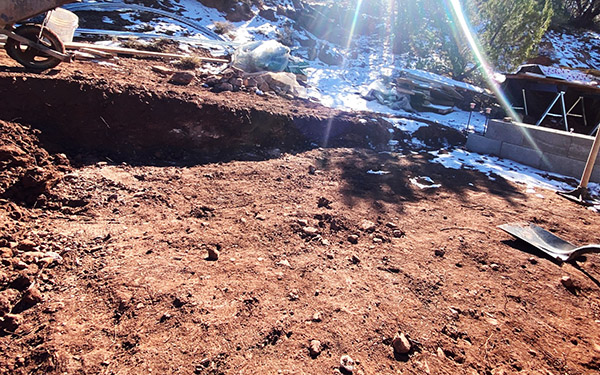
That leaves hand digging. The ground is not too bad to dig. It’s much easier than the front of the house where I put a driveway. Down in the arroyo the ground is a combination of hard topsoil, mid-sized rocks and some whitish, proto-rock stuff that crumbles with a sharp blow from a 2-pound sledgehammer.
The land tapers from level. At the highest about three feet must be removed.
The process is: I break up the top layer with an electric, 35-pound jackhammer (powered by the Harbor Freight Tailgator generator), then I use a round point shovel to move the loosened soil into a wheel-buggy. A little work with a pick dislodges the larger rocks. Aside from a few tree roots, it’s the best digging I’ve encountered on the property.
Since the area is so steep I’m bulkheading off lower regions with some old roll-up garage doors and using the removed earth to level a larger pad. It’s like getting free land. I plan to fill about two feet deep of as large an area as I have dirt for.
This sounds like a lot of work and it is. I take it slow and steady. It’s really no worse than going to a gym to work out and you get the added benefit of a flat spot on your ranch.
The greenhouse is a cheap Vevor 10-foot x 20-foot hoop style. The hoops are 1-inch tubing that are assembled like tent posts. A through bolt holds the pieces together. The cover is a greenish plastic material reinforced with what looks like thread. I think the cover will last a couple years if we don’t get a hailstorm. It’s not a heavy-duty unit.
It’s a happy worksite. I take frequent breaks and enjoy the smell of freshly turned earth.
The foundation will be heavy duty. I’m building a two-block high pony wall to set the greenhouse on. The blocks are dry stacked, poured solid, and they sit on a 4-inch-thick footer. The footer has rebar to keep it together when it cracks. I’ve set some 1/2-inch j-bolts into the block cavities to secure the wood sill that I will screw the greenhouse tubing into.
The foundation is overkill because I’m assuming the Vevor won’t last long and I’ll be scratch building anothergreen house one day. In the meantime, I’ll practice my green thumb.
As the project progresses, I’ll post updates. There will be solar power and a water catchment system making the greenhouse off-grid. For those of you wanting to build your own greenhouse my advice is to start with level ground.
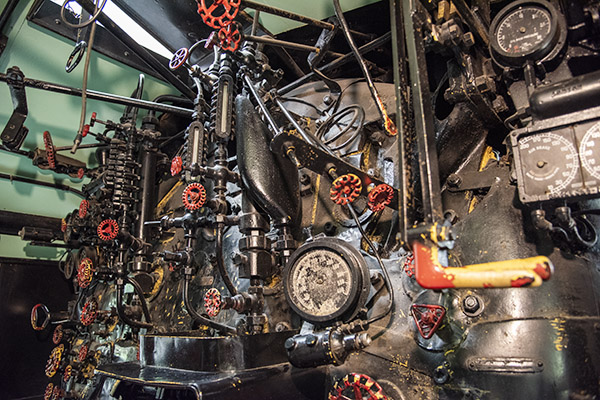
That picture above? It’s a Big Boy steam locomotive cockpit! Look at all those valves!
Green Bay, Wisconsin. Say that name, and most people think of Vince Lombardi and the Green Bay Packers. And why not? It’s what the town is known for. But I’ll let you in on a secret: Green Bay has one of the best rail museums I’ve ever visited. I like rail museums, and if there’s one anywhere near where I’m traveling, I’ll stop. Susie and I wrapped up a trip to Georgia, Wisconsin, and Michigan, and the National Rail Museum made our list. It’s easy to find, and Green Bay is a fun little town.
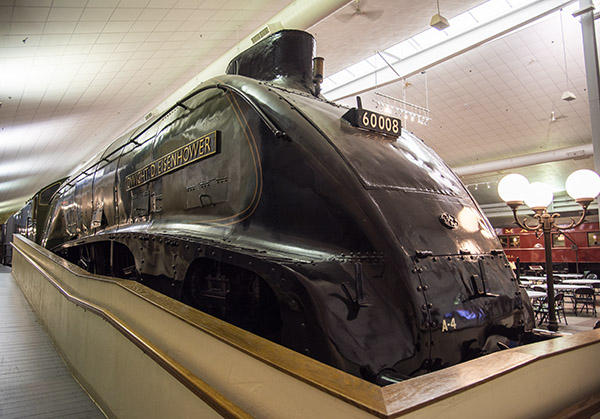
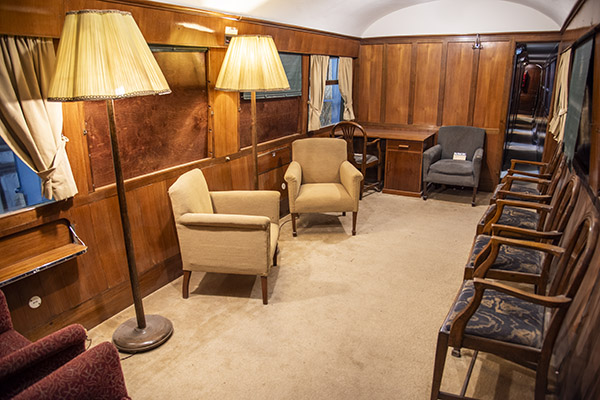
The National Rail Museum has a bunch of small items on display after entering the first building (track maintenance hand tools and the like). Then it’s on to a hall where the big stuff is kept. One of the first trains is General Dwight D. Eisenhower’s European train, the one he used as the Supreme Allied Commander during World War II. It’s big, it’s impressive, and it’s fit for a 5-star general.
The Dwight D. Eisenhower train. It’s dark green and it’s imposing.
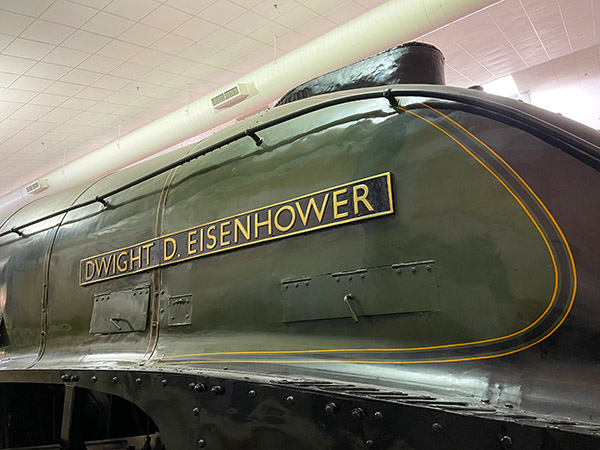
The Eisenhower train was built by the British with a number of features to keep it low key (or so some of the signage said). The name on the locomotive and the exotic paint theme indicated otherwise.
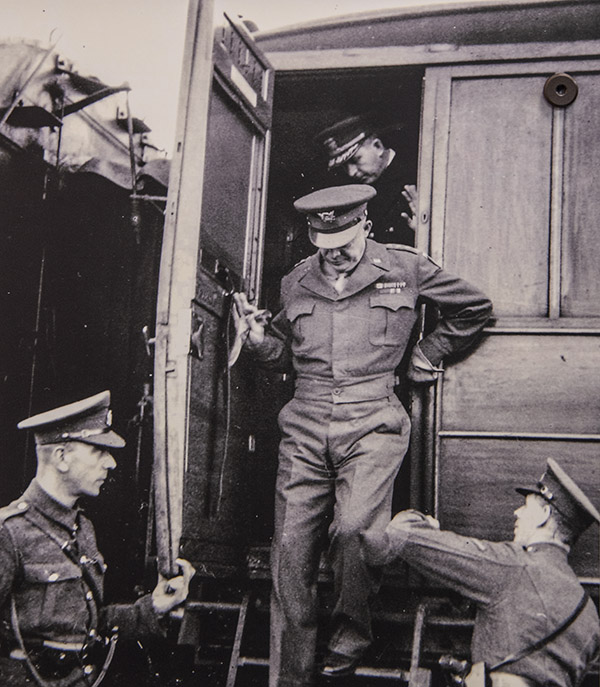
Not very subtle, I would say. General Eisenhower used this train for getting around the European Theatre of Operations.The Eisenhower train was built by British Railways. That, my friends, is a cool logo.A photo of General Eisenhower leaving his train.A meeting room on the Eisenhower train.
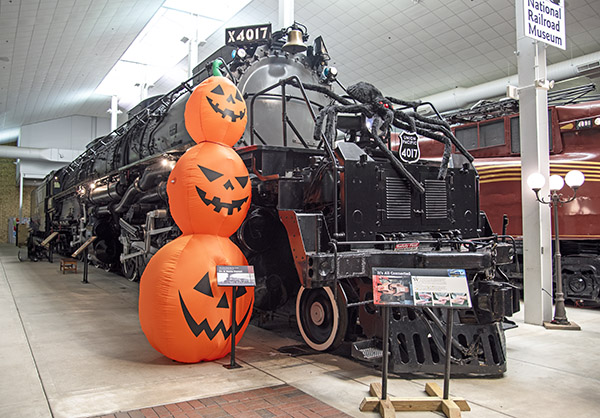
The National Rail Museum has one of the very few surviving Big Boy locomotives. I’ve seen three (well, actually two, but I saw one of them twice). One was at the National Steam Locomotive Museum in Scranton, and another was parked at the Pomona Fairgrounds (it’s that one I saw twice). The first time was when it went from Ogden, Utah, to Pomona under its own power. It stopped in Pomona, and it was an amazing thing to see.
Big Boy No. 4017. I wish that Halloween decoration wasn’t there. I didn’t want to risk moving it.
It’s hard to put into words just how big a Big Boy is. Photos don’t really do its size justice.
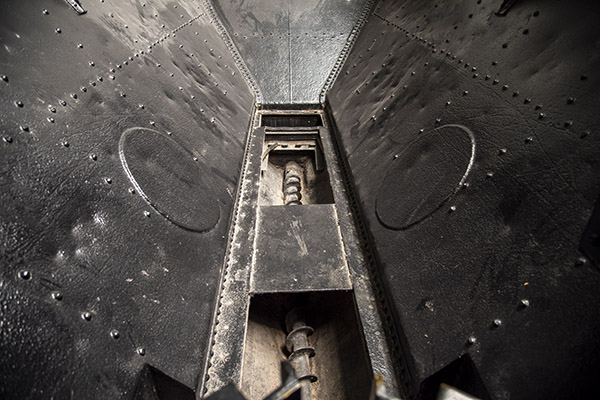
Signs at the museum told us the temperature in the engineer’s compartment was typically 93 degrees even with the windows open.A peek into the coal tender. Big Boy locomotives consumed so much coal that a man couldn’t keep up with it, so instead of shoveling coal into the engine, the tender had a worm gear that drove it in.
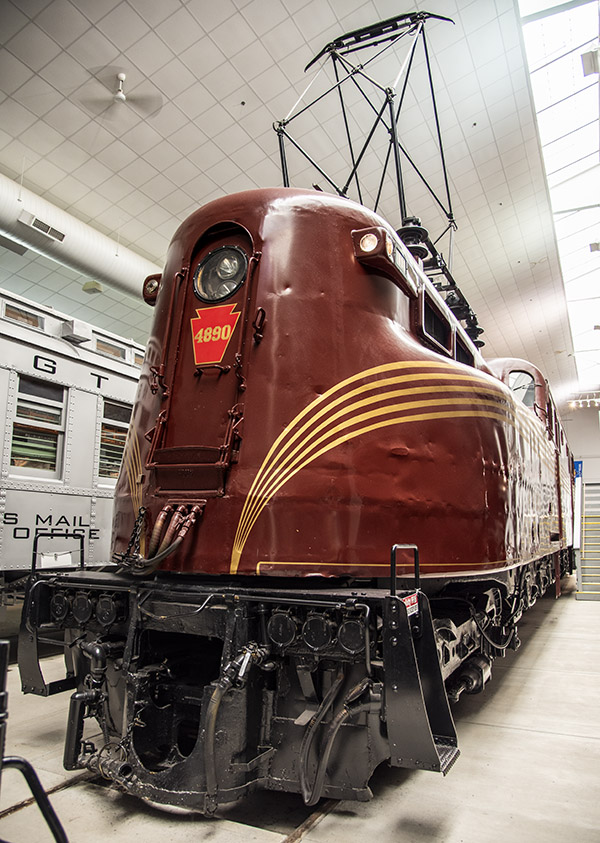
A locomotive that caught my attention was the Pennsylvania Railroad’s GG-1 electric locomotive. When I was a kid growing up in New Jersey, the Pennsylvania Railroad’s main tracks were only a half mile from my home. We loved watching those trains scream by, always pulled by a GG-1. They are gorgeous locomotives.
A magnificent Pennsylvania Railroad GG-1 locomotive. These are beautiful machines. The GG-1 was entirely electric. They drew power from high voltage overhead wires with their pantograph.
From the engineer’s position, the view forward is through one small window. You really can’t see much of what’s ahead. That would make me nervous.
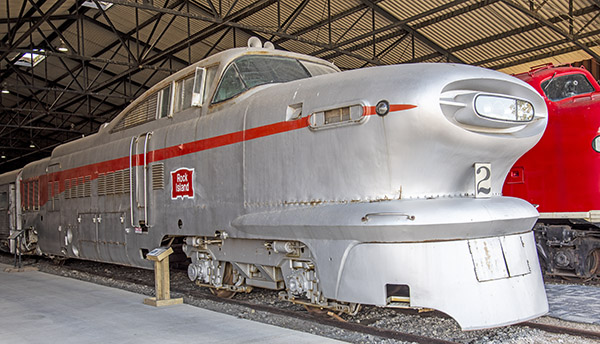
By the 1950s, passenger rail travel was losing favor with the American public. Airplanes were faster, and with the advent of the Interstate Highway System, most people drove. The railroads wanted to turn that around. One attempt involved General Motors designing an aerodynamic locomotive and less expensive rail cars. GM designed the “Aerotrain” drawing on their styling talents, but the effort flopped. I’d seen pictures of that locomotive (there were only ever two made), but I’d never seen one in person until this visit.
The General Motors Aerotrain locomotive. It was a beautiful design but a commercial flop.
The Aerotrain story is a fascinating one. This video explains it.
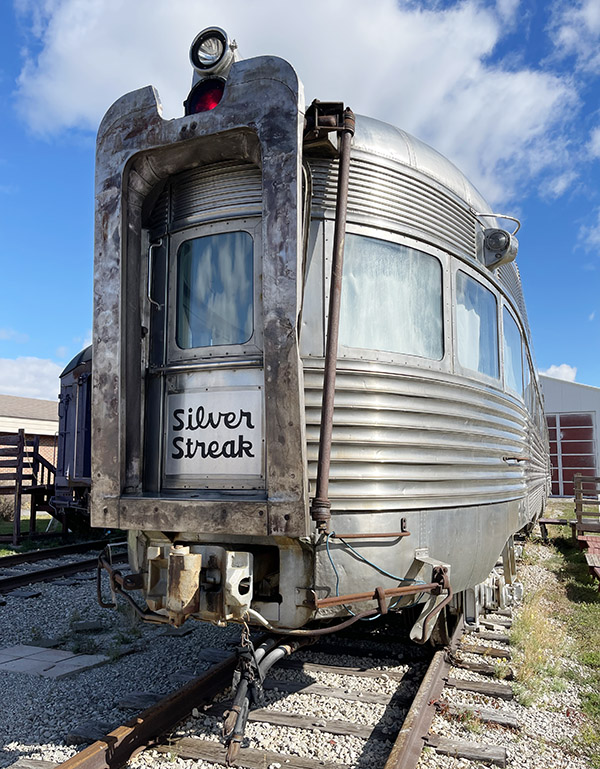
There are plenty of great railroad stories and more than a few great movies. You might remember the Gene Wilder/Richard Pryor hit from the 1970s, Silver Streak. It you ever wondered where the last car of that famed train came to rest, wonder no more.
If you haven’t seen the Richard Pryor/Gene Wilder movie of the same name, you need to. You can thank me later.
If you’ve been keeping up with us here at ExhaustNotes you’ll know I had a lot of trouble getting Zed, my 1975 Kawasaki Z1 900, running correctly.
In between rebuilding the carbs and tinkering with most everything I could think of it dawned on me that maybe the engine was just tired. After all, it wouldn’t be unusual for a 50-year-old, air-cooled engine to wear out after 46,000 miles.
I used to have a nice compression tester that was at least 40 years old. In the big move west I can’t seem to find it. Maybe it got tossed after one of the many floods that inundated our house in the Florida Keys. I forget the brand but it had a flex hose and several adaptors for different size spark plugs.
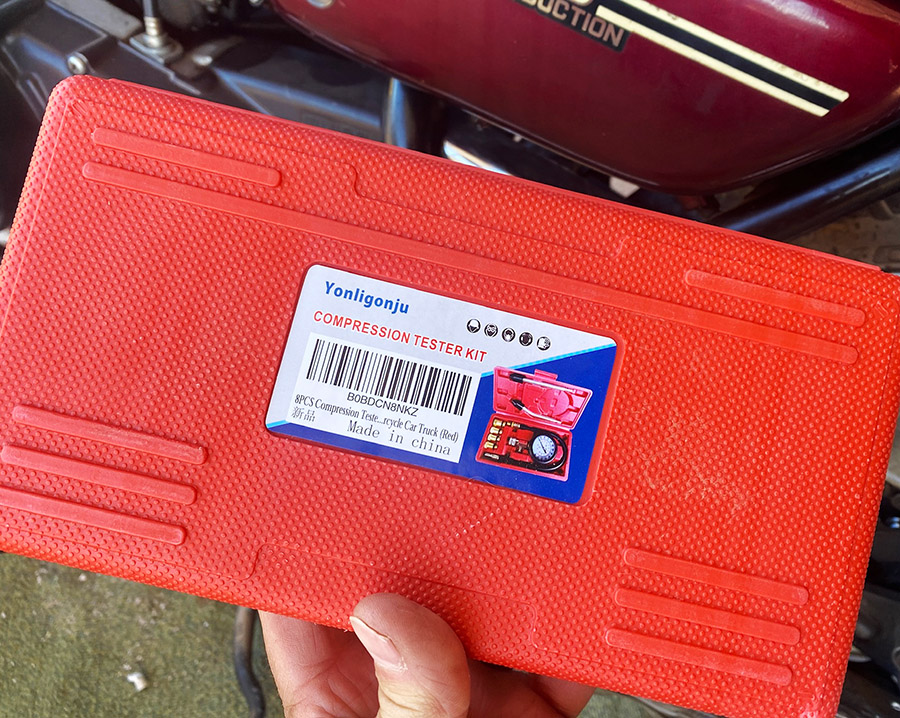
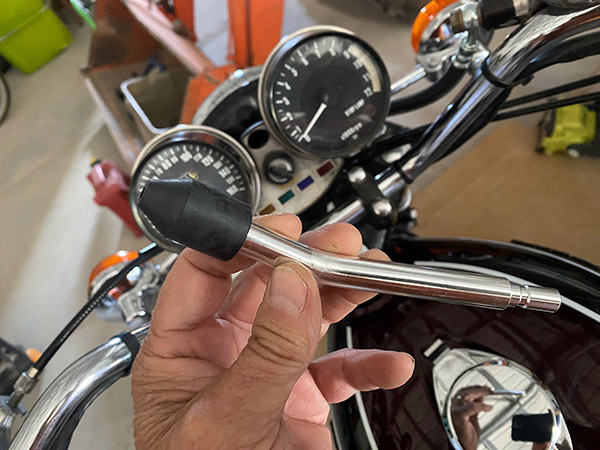
I don’t need a pro-level compression tester as I’m not in the mechanical business anymore. This cheap, cheerful Yonligonju (say it three times fast!) Chinese kit on Amazon looked like the goods for less than 20 dollars.
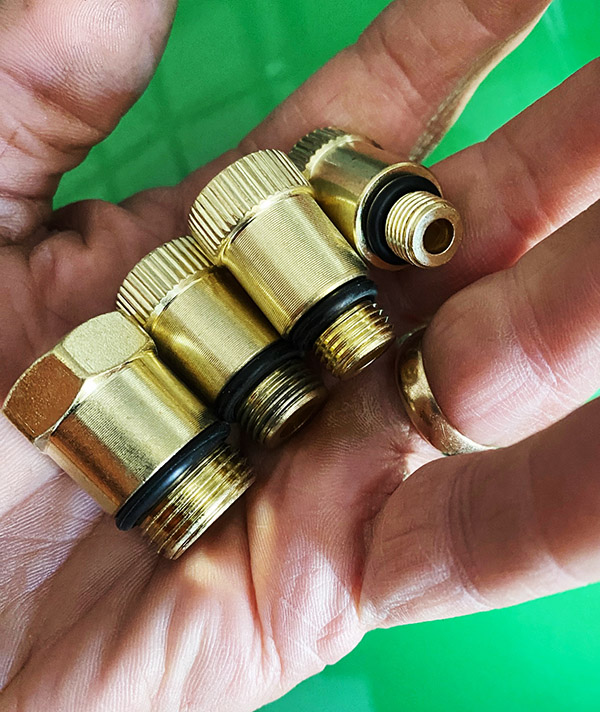
The Yonligonju comes with a nice, blow molded plastic case that keeps all the little bits in order.
It amazes me how China can build such a nice kit for so little money. Including the quick release flex hose, this kit comes with adaptors to fit 5 different spark plug sizes.
In addition, the set came with two of the rubber bung type connectors. To use these, you just hold the compression tester tightly in the spark plug hole. It speeds things up on a multi cylinder engine. This works well enough if you’ve got enough hands for the job.
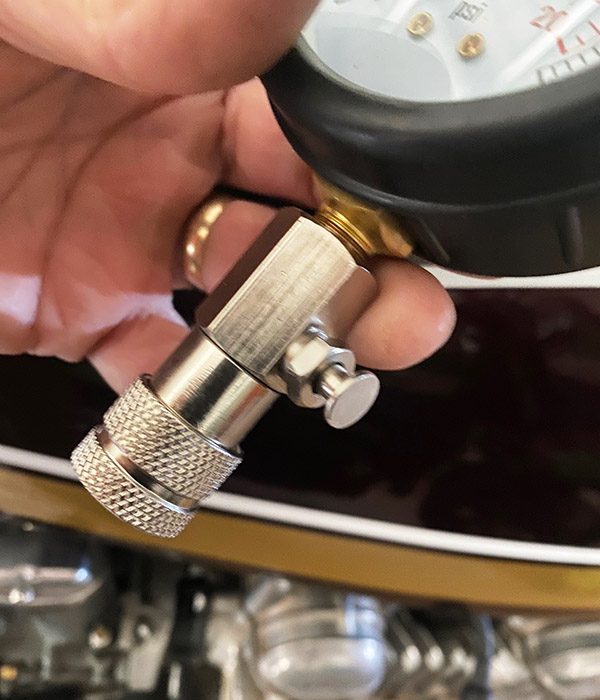
My Yonligonju worked well, showing 80-ish psi on all four Kawasaki cylinders. This isn’t great compression but the cylinder pressures were nearly even and Zed might have done better if the engine wasn’t cold. My Kawasaki manual claims 85 psi as the lower limit and Zed may get there warm. What do you want after 46,000 miles?
Besides compression, what you’re looking for with a compression tester is one cylinder being much lower than the others. This indicates a problem in the cylinder. The actual psi number is less important. Unless they are all really low…
Anyway, the Yonligonju gauge proved compression wasn’t the reason my Kawasaki was fouling plugs. See the latest Zed update for the full story.
The compression gauge held the reading without bleeding off for the few minutes it took me to look at it. There’s a pressure release valve on the side of the gauge that also worked as it should.
This isn’t a kit that will see a lot of usage. If you’re like me, a home-shop tinkerer, the thing will do the job for not much money. Hell, just taking your bike to a motorcycle shop once to test the compression would cost five times what the tool cost.
I think people rebuild old motorcycle engines more than is needed. Two-strokes especially get the piston, ring and bore because it’s so easy to do. Most likely the bike would have run fine the way it was.
For classic bikes that don’t see everyday use it’s enough that the engine runs well. There’s no need for a ton of compression with today’s crappy fuel anyway. I’m guessing the Yonligonju will last a while sitting in my toolbox waiting for another engine to test.


 I am currently on the Yucatan Peninsula in Mexico and much of this land was created from a giant asteroid. That would be THE giant asteroid that created the Ice Age and killed off the dinosaurs. With this massive disruption in this area, the ocean floor was lifted in a strange way that created cenotes. These essentially are old caves that are now flooded with fresh water. There are about 5,000 of these cenotes throughout the Yucatan Peninsula and they are quite magical. Having to mark my checklist off (I’m making this list up as I go, by the way, as a month ago I couldn’t tell you what a cenote was) scuba diving in one of these seemed like it would be incredible, and it was. Sorta.