Lee Classic Turret Press Kit Part 2: The Lee Safety Powder Scale

By Joe Berk

This is the next installment of our Lee Classic Turret Press Kit series, and this article focuses on Lee’s Safety Powder Scale.  It’s the scale you see in the above photo and in the photos that follow.  I haven’t assembled the turret press yet (that’s coming).  Before I get to that, I’m doing this blog on the Lee scale, and then others on the Lee reloading manual and the Lee bench plate.  These will be followed by blogs on the Lee turret press, the powder dispenser, the priming tool, and the 9mm dies I’ll use with this equipment.

My new Lee Safety Powder Scale. I used a .223 caliber 62-grain Hornady full metal jacket bullet to check my zero and the scale’s accuracy.  Yep.  It’s good.
Packaging

The box you see below was inside the Classic Turret Press Kit, and the Turret Press Kit’s box was inside a bigger box.   It’s a box in a box (you know, Russian doll packaging, like I mentioned in the first blog on the Turret Press Kit). The Lee packaging is good.  Everything arrived undamaged.

The Lee Safety Powder Scale box. It’s well packaged.
What’s inside the Lee Safety Powder Scale box. You get the scale base, the balance beam, and the pan.
Lee Safety Scale Components

As mentioned in the photo above, there are three components in the Lee Safety Scale.  These are the scale base (that’s the cast red frame in the photo below), the beam (I call it a balance beam; it’s the black subassembly in the photo below), and the pan (that’s where the material to be weighed is placed).  The pan has an attached hook on it (it’s the bar extending up in the photo below) that hooks onto the right end of the beam.

The Lee base, balance beam, and pan.

The red base has a machined groove on the piece that extends up on the right side.  The beam is placed over this, and it balances on a knife edge in this groove. There are magnets in the base to dampen the beam’s movement as it balances.   The photo below shows the scale with everything in place.

The assembled Lee Safety Powder scale.  The left arrow points to the index mark (the beam should point to it when weighing), the bottom arrow points to the 10-grain poise (more on it below), the center top arrow points to the 10-grain increments and markings on the balance beam, and the right arrow points to the 1-grain/.01-grain poise.

The magnetic beam dampers in the scale base work.  When weighing powder charges with the Lee scale, the beam balanced in just a couple of oscillations.

The Lee balance beam is a molded phenolic subassembly with two poises.  “Poise” an engineering term for the movable weights that balance the beam.  It’s a term Lee uses in their documentation.

When I was Director of Engineering at Aerojet (we designed and manufactured munitions…big stuff, 2000-pound bombs, anti-armor munitions, and other things I can’t tell you about), we used plastic on as many parts as possible (rather than metal) because plastic was less expensive, it does not not corrode, it can be molded to exact dimensions, and moving parts are less likely to jam.  Lee makes some of these same points in their literature.  My point here is this: Don’t dismiss the Lee balance beam because it is a phenolic part.  From an engineering perspective, it is the right choice.  As Richard Lee (Lee Precision Products founder) stated in his excellent reloading manual, Modern Reloading:

Lee Safety Scale has a phenolic beam.  Like a glass thermometer, if it is not broken it is still accurate.

Incidentally, the next blog in this series will be on Lee’s Modern Reloading book.  I’m reading it now and it’s good.

The Lee pan is a one-piece subassembly that consists of an arm (the pan hangs from it on the right side of the beam) and the pan.  The pan can be a bit difficult to get under a powder dispenser because the arm gets in the way.   That’s not a big deal, and when I was weighing .357 Magnum charges with the Lee scale (so I could adjust my powder dispenser to drop the correct charge), it didn’t affect my ability to catch and weigh the powder.

The arm on the Lee pan interfered with getting the pan directly underneath the powder dispenser, but it was a minor inconvenience.  That’s 8.0 grains of Unique you see above.
Measurement Range

The Lee scale can measure up to 110 grains.  That’s good news and bad news.  Most of us use powder scales for measuring powder, and if that’s your purpose, the Lee scale is the right tool.  The 110-grain measurement range gives superior sensitivity for detecting slight weight differences.  Other balance beam reloading scales can weigh up to 510 grains, but they do so with the same range of motion as the Lee scale, and that means they don’t provide the same sensitivity.

Sometimes we wish to weigh bullets (competitive bench rest shooters and cast bullet shooters might want to sort bullets by weight).  On the Lee scale, you can only weigh bullets that are 110 grains or less.  I’m what I would call a serious reloader, and in the last 50 years, I might have weighed bullets maybe a half dozen times.  I’m happy to lose the ability to weigh bullets in exhange for the increased sensitivity I’ll get when weighing powder charges with the Lee scale.  Your mileage may vary.

The bottom line is this:  For weighing powder, the Lee scale does a superior job within its measurement range, and that range is adequate for any thing I shoot (that includes .22 Hornet, .416 Rigby, .458 Win Mag, and many handgun and rifle cartridges in between).  For weighing bullets over 110 grains, you would be better served with scales offering a greater range than the Lee scale, but you give up accuracy with those scales.  Do you really need the increased weight range?  Most of us do not.

Zeroing the Scale

Like all scales, the Lee Safety Scale requires zeroing before use.  Lee incorporates a threaded brass  weight (in the form of a wheel) in the balance beam to move the beam up or down on its pivot in the base.

The Lee balance beam.  The black arrow on the right is used for zeroing the scale, which is explained below.  The red arrow points to the 10-grain poise.

The idea is you set the both poises to zero (see below).  To set the 10-grain poise to zero, you roll it all the way to the right, and it comes to rest on the zero marker.  The balance beam has ridges that will position the 10-grain poise ball bearing in 10-grain increments, starting at 0 and going up to 100 grains.  To set the 1-grain poise to zero, you slide it all the way to the right, and lock the poise in the zero position with a little locking button on the bottom of the poise.

The 1-grain poise in the 0 position. The lower left red arrow points to the poise locking button (you push it in to lock the poise in place). The lower right arrow points to the 0 grains reading. The upper red arrow points to a protuberance that can be used as a little handle to move the poise. The “.1 grain” marking denotes the Vernier lines and windows used for reading tenths of a grain.

When the two poises are set to zero (as explained above), the brass wheel in the balance beam can be rotated to zero the scale.  As the brass wheel is rotated, it moves to either the left or right along its threaded shaft depending on which way the wheel is turned.  The idea is to turn the wheel until the balance beam is aligned with the index mark on the scale base as shown below.

The balance beam’s brass wheel. It’s used for zeroing the scale.
The lower black arrow points to the 10-grain poise. It’s a captured ball bearing that can be moved in 10-grain increments. In this photo, it’s in the 0 grains position. The right arrow points to the 1-grain poise.   The left black arrow points to the balance beam aligned with the base index mark.
Using the Lee Safety Scale

Using the scale after it has been zeroed when setting up a powder dispenser involves setting the desired powder charge with the 10-grain and 1-grain poises, and then adjusting the dispenser to provide an amount of powder that matches the scale adjustment.  It’s fairly straightforward, although using the 1-grain poise with its Vernier tenth-grain readings may be new to some people.

Or, you may have an item you wish to weigh.   Reading the scale is the same in either case.  It involves setting the 10-grain poise in the appropriate notch, and then moving the 1-grain poise to the appropriate place.

After I had zeroed the scale, I wanted to check its accuracy.  I weighed a .224-inch diameter, 62-grain Hornady jacketed boattail bullet to do this.  I put the bullet in the pan, moved the 10-grain poise to the 60-grain position, and then moved the 1-grain poise laterally along the balance beam until the beam was aligned with the base index mark.

A 62-grain Hornady bullet in the Lee scale pan.
The balance beam is balanced, with the pointed aligned to the base index marrk. The 10-grain poise is in the 60-grain notch.

Using the 1-grain poise is a bit tricky.  In the photo below you can see that the poise shows 2 grains in the lower window.  The Vernier windows on top of the 1-grain poise show that the 0 and .9 grain windows are aligned with visible lines, and a window is just a bit aligned with the .1 grain windows above and below the 0 and 9 windows.   Like I said, interpreting the Vernier approach is a bit complicated, but the Lee instructions contain several photos explaining how to do it.  What you see below for this measurement is interpreted to mean that the weight in tenths of a grain around the 2 grains in the lower window is somewhere between 1.9, 2.0, and 2.1 grains, and I interpolated that as 0.0 grains away from 2.0 grains.   Stated differently, the measured bullet weight is 62.0 grains, which is exactly what it is supposed to be.

The Lee 1-grain poise.  This sliding weight (or poise) is used for reading grains and tenths of a grain. Grains are read in the window denoted by the right arrow. Tenths of a grain are interpolated with a Vernier-based set of lines and windows denoted by the left arrow.

As a check, I also measured the bullet’s weight with the RCBS scale I’ve been using for the last 50 years, and it returned the same weight:  62.0 grains.

Cost

Lee did their usual outstanding job here:  The Lee Safety Scale price is significantly lower than the competition.  The Lee scale lists for $46.98 on the Lee website (interestingly, they also list factory second scales for $31.32).   You can also purchase the Lee scale from Amazon and other retail outlets, and Lee tells you on their website that their retailers typically have lower prices than Lee advertises.

The nearest competitor to the Lee scale is the RCBS M500 mechanical scale, and that lists for $125.99 on the RCBS website.  From a cost perspective, Lee is the clear winner here.

Documentation

The Lee scale includes a single-sheet, two-page instruction sheet.  It’s good, and it provides all the information you need to set up and use the Lee scale.  As mentioned above, the Lee instructions include information on using the Vernier feature on the 1-grain poise.

The Bottom Line

The Lee Safety Scale is accurate, inexpensive (less than half the cost of competitor products), and well built.  Reading the Vernier scale to get tenths of a grain takes a little bit of study and practice, but once you get it, you’ll find it quick and easy to use.  This is a good scale, it will serve any reloader well, and it should last a lifetime (and then some).


Help us out!  Please click on the popup ads!  And check out what else is available from Lee Precision.

Never miss an ExNotes blog:


Read our blogs on unveiling the Lee Classic Turret Kit and the Lee Deluxe 4-die sets:

Seiko and Honda: A Match Made In Takamanohara

By Joe Berk

The Honda Cub is the most-produced motor vehicle of any kind in the history of the world.  Not just motorcycles, but motor vehicles.  Honda passed the 100 million Cub mark years ago; today they still offer a Cub in the form of the 125cc Super Cub.  That 100 million figure doesn’t count all the knockoffs by Yamaha and the Chinese marques.  It’s a staggering number for a staggering vehicular concept.  So, if you’re a watch company and you want to produce a watch honoring a motorcycle…well, you know where this is going.

Seiko is the company, and this year they introduced a limited edition of the Honda Super Cub watch.  These watches have been nearly impossible to get, so I was astounded when on Christmas photog duty at the mall I wandered into a watch store and what do you know, there it was.  It was the only Seiko Super Cub watch I’ve seen and I knew I had to have it.   It’s self-winding and to watch weirdos like me it doesn’t get any better than a mechanical self-winding watch.  The ticket in was $400, I asked if there was any room in the price, the store manager said no, and I pulled the trigger anyway.  I bought it for list price and that was still a good deal.

Seiko is offering a limited run of the Super Cub watch in two colors.  I’ve not seen the black one in person, but that’s okay.  I like the green and white one better.

The Seiko Honda Super Cub watch has several cool details, including a NATO band, a rear cover intended to evoke a tail light, and a stem that looks like a Cub fuel gage.

Two of your blog boys (that would be Gresh and yours truly) both owned Honda Cubs back in the day (Huber didn’t, but he has an excuse…he wasn’t born yet).  I guess that made Gresh and I two of the nicest people you’d ever meet.

To my great surprise, I found a couple of photos of my Honda Cub buried in an old photo album.  The image quality is not up to my current standards, but hey, I took these photos with a Minolta C110 camera in the 1960s.  With those little 110 film cassettes, these 60-year-old pics ain’t half bad.

I bought the Cub for $50 (a dollar per cubic centimeter) from Zeb Moser (a buddy in New Jersey; RIP, Zeb), rode around on it a little bit, and then sold it for $70 thinking I’d done well.  There’s no need to say it, but I will anyway: I wish I still had my Cub.


Help us bring more to you:  Please click on the popup ads!

Never miss an ExNotes blog:
Nose Job: 1971 Yamaha RT1-B Front End Refresh

By Joe Gresh

The Yamaha RT1-B 360cc that I call Godzilla has been my long haul dirt bike choice for years. The old Yamaha has criss-crossed the country on dirt and on pavement and I had it set up to carry a lot of gasoline and a lot of gear. Up front, I removed the non-functional speedometer/tachometer cluster and replaced it with a luggage rack. The rack worked great, it redistributed the weight of my travel gear and made the bike handle less worse than if everything was strapped to the back rack.

I crashed in Beaver, Utah a few years ago and mangled the front rack so I removed it for future repairs. While I was at it I got rid of the cheesy GPS mount that fit a GPS I no longer owned. Truthfully, I don’t need that stuff because haven’t been doing any long distance dirt rides lately. It seems like all my rowdy friends have settled down. Anyway, with that junk out of the way the view from the saddle was kind of sparse. I decided to freshen up Godzilla’s front end.

I rode Godzilla for many years with the stock handlebars (bottom bars) and they were fine. The last couple rides my wrists started hurting a bit and I think the sweep back angle was causing too much stress on my decrepit body. The bars on the Husky are almost flat across and very comfortable so I bought a new, lower, flatter bar (top bar). The new bar has no cross brace and is made of powder-coated aluminum; I’m hoping they flex a bit more to smooth out the really rough trails where I tend to crash.

After replacing the handlebars my horn quit working. I figured that the process of removing and replacing the switch must have disturbed the rust inside so I dismantled and cleaned out the three switches in the control module. The horn button was really rusty and the other switches looked none too good, either.

After all that work on the switches the horn still didn’t beep. The Yamaha wiring supplies the horn with power and the horn button grounds the circuit through the handlebars, triple clamps, and steering head bearings then on to the frame, which is grounded. This convoluted electrical path makes the horn go beep. I took the headlight apart and grounded the horn wire inside the headlight housing. It worked. Then I grounded the horn to the new handlebars: nothing. Turns out, powder coat is an effective electrical isolator. Instead of scraping the powder coat off to make a connection I ran an extra ground wire to the switch pod. Now I had a horn.

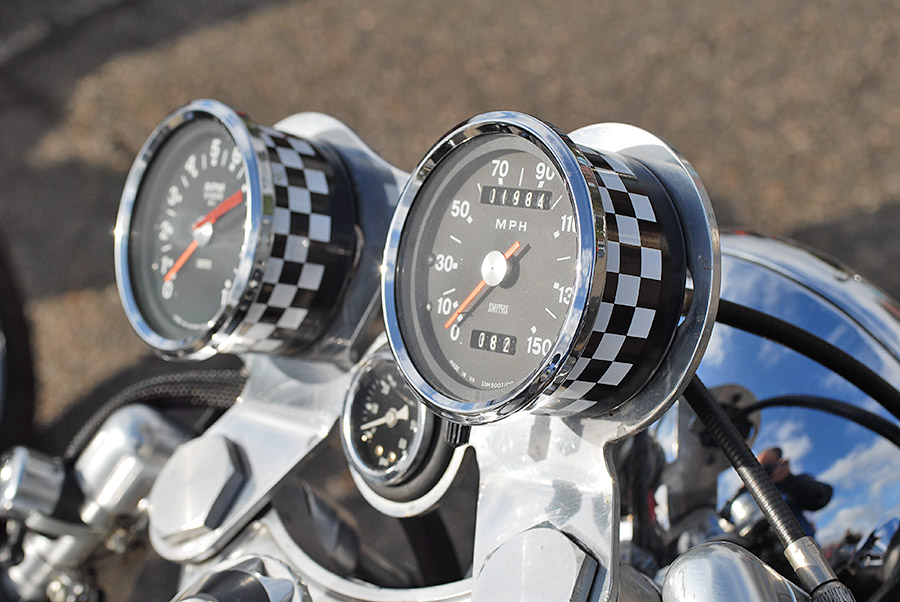
For a speedometer I decided to try one of those cableless, GPS, analog types from Amazon. The voltage input on the speedo is 9 to 32 volts and the thing powered up fine on Godzilla’s 6-volt battery. Since this fancy electronic wizardry was all new to me I also bought a 6-volt to 12-volt converter to make sure the speedo had plenty of voltage. All this junk needed to go somewhere so I made a LeCrox template and chopped the side out of a storage cabinet for sheet metal.

After bending and welding the gauge console I gave it a lick of spot putty and some black paint to hide the sins of my welding. Next all the pieces went into the housing and I pre-wired the speedometer so that it would plug into an unused, key-switched, 6-volt power wire inside the headlight.

I used the existing Yamaha speedo/tach mounting base by adding a couple rubber lord mounts and assembled the whole mess onto the motorcycle. It powered up fine and was ready for a test ride.

The test ride was a failure. Not because of the speedo (it worked great), but the cantilevered gauge console flexed the rubber mounts so much the gauge was dancing up and down like a set of those humorous, wind up chattering teeth. It was back to the shop for a quick brace on the front of the console.

I used the high beam indicator hole on the headlight shell and ran a short brace to another lord mount that steadied the gauge nicely. Now I can bang around in the dirt without the speedometer trying to slap me upside the head. Hopefully it won’t push the headlight aim down.

To finish off the front-end facelift I bought a new mirror to replace the crappy bar-end mirror. The old bar-end mirror was a bicycle part and never worked very well. It was there for legal, not visual reasons. The new mirror gives me a fairly clear view of what is going on behind me.

The GPS speedometer is smooth. You have to wait a few seconds while it acquires a satellite fix but from then on it seems just like a regular speedometer except it is accurate and the needle is steady. With no reception it won’t work indoors but I don’t ride far indoors. I zipped the RT1-B up to 75 miles per hour and all was well.

There are several functions you can access like different color backlights, Trip 1, Trip 2, odometer and compass. Trip 1 is sort of useless because it resets each time you turn the key off. Trip 2 supposedly saves the data and you have to hold a button for 3 seconds to clear it. The compass is a 360-degree type so you get a numerical reading instead of north, south, east and west. I’ll have to mess with the thing a little more to see how all this flimflammery works.

One thing I don’t like is that the mode and set buttons are on the back of the speedo. This is not a problem for a motorcycle because you can reach behind and push them. If the speedo was mounted in a car or boat dash this would be a deal killer. If I had it to do over I would try to find a unit with the buttons on the face. Also, it would be nice if the antenna could be incorporated into the gauge, eliminating the external antenna but that probably wouldn’t work in a car.

For a prototype my dash console works good enough. If the speedo holds up I may re-work the design a bit. If I flipped the mounting flange 180 degrees the mounting bolts would be hidden inside the console and it would move the speedo back a bit which I think would look better. As it is the gauge console has a clunky, AMF-era, Harley-Davidson look to the thing. I may remake the console using aluminum as the sheet metal one, while thin, is not very light. Godzilla is a high society motorcycle now with its modern, space age speedometer; I guess there’s nothing more for me to do but to join my peers down at the local Starbucks.


Help us continue to bring exciting content to you:  Please click on the popup ads!

Never miss an ExNotes blog:
Fighting Mud With Mud

By Joe Gresh 

ExhaustNotes readers may think I pour a lot of concrete but that’s not really true. I do pour concrete frequently but only a little at a time. My limiting factor is how much total work I can get done in one day. That number dwindles as I grow older. I pour 30 to 40 60-pound bags of 4000 psi concrete on average. Any more and I start to have problems keeping up the finish work and any less is not worth getting the tools dirty. Cleanup takes a lot of time and if you don’t wash everything each time your tools become encrusted with dried concrete. It’s never fun to work with heavy, dirty tools.

Take my latest project, the driveway in front of the little shack we call The Carriage House.  In an attempt to class up the place I am removing the existing driveway, which consisted of remnants of old rugs thrown over dirt. We acquired the rugs from a Physical Therapy training center. The PT rugs were in great condition and very sturdily constructed. Best of all they were free. The rugs served us well for many years by adding a semi-pervious layer between our feet and the dirt below. Engineered earth is the technical term, I think, for fabric-supported fill.

Of course, old rugs aren’t the most perfect solution for driveways or everyone would be using them. You’d see them in Beverly Hills or New York City, not just in poverty stricken rural areas. After several years the rugs become impregnated with dirt and are impossible to vacuum, much less shampoo. Being semi-pervious you still get mud underneath the rug although you don’t sink in as far as you would if going bare earth.

For this driveway I’m using a decorative finishing method called No Need To Square.  No Need To Square means just that: the concrete is formed and finished in a random pattern giving the illusion of being made from many individual pavers. No Need To Square frees the concrete from The Man’s rigid, conformist hierarchy. It allows the finisher to follow the jagged contours found in the crystalline structure of cast Iron like you see in those electron-microscope photographs. The only constant is the slope that steers water runoff towards the drainage ditch running alongside The Carriage House.

Just as a cubist must master fine arts before experimenting with abstract art, the concrete finisher must master the square before leaving it far behind. Unfortunately, I am neither an artist nor a concrete finisher so things can go pear shaped quickly if you don’t mind your grades.

I’ve purchased a new tool for this driveway project: a belt-mounted tie wire spool. Tie wire is used to tie rebar together so that it doesn’t shift position when the concrete pours into the form or clumsy finishers kick it around when striking off. I owned a spool many years ago when I was a construction worker. My old one was more open, like a cage. You could see the wire in the spool, unlike this new one. I don’t know what happened to that old spool.

You’d think as often as I do little concrete pours I would have bought a wire spool sooner and I would have except for the price. The things are like $47 at Home Depot for an off-brand spool. I found a Klein brand spool on Amazon for only a dollar more than the clone version at HD. I’ve seen cheaper, plastic versions and they probably work fine.

There are basically two types of ties for re-bar: the saddle for tying re-bars that cross at right angles and the plain old loop for tying straight pieces together. I like to make up a bunch of each type before starting to tie. Real iron workers make up saddles and loops as they go so because it’s faster and they don’t have to carry a bunch of little, pre-made bits.  I’m never in a hurry. Sitting in a chair with New Mexico’s warm, winter sun shining down on me gives the pre-tying process a sort of Zen-like quality. Sometimes I fall into a trance and end up making 600 of the things.

If you’ve tied much wire you know how easily an unspooled roll of wire can unwind and get tangled up. Pulling wire from the center results in a pig’s tail that you need to straighten out before using. I always double up my wires, as a single strand is easy to break when twisting the rebar tight. The doubling method uses twice as much wire but it makes for a secure grid of rebar. It’s also easy to get stabbed with tie wire and the spool allows you to wind it back inside for the safety of everyone involved on the project.

I’m going to tackle the driveway in two parts: the southern and northern wings. I’ll do the southern (higher) side first. That will give CT somewhere to park while I work on the northern (lower) section. I expect to be working on the southern section for a month or so before the weather gets too cold and I take a break and go back to tying up loose ends on motorcycles.


Help us help you:  Please click on the popup links!

Lee Classic Turret Press Kit 1: Unpacking

By Joe Berk

We’re writing a series of blogs on the Lee Precision Classic Turret Press Kit, and this first one focuses on unpacking and taking an initial look at the kit. I think the YouTube kids call this a “reveal.”  I’ll just call it unboxing and seeing what’s in the box.  I thought I could do a single blog on the Classic Turret Press Kit, but there’s too much included in the kit and too much that’s new to me to handle in one blog.  We’re going to instead do a series of blogs:  One on each item that’s included with the kit, a blog on setting the press and dies up, a blog on reloading with the Lee equipment, and a blog on how the ammo reloaded with the Classic Turret Press Kit performs.   There’s a lot here.  You’ll get a feel for just how much in this initial blog on the Classic Turret Press Kit.

Here’s the picture on Lee’s website for the kit, which Lee advertises for $380.

The photo above shows everything set up, but the photo doesn’t do justice to the excitement associated with getting this kit, taking everything out of the box, and opening it.  Nor does it convey what I expect to be the satisfaction I’ll experience with using the Lee equipment.  That will be the subject of future blogs.  Think of this first blog as Christmas morning. That’s what opening and unpacking the Lee kit felt like to me.

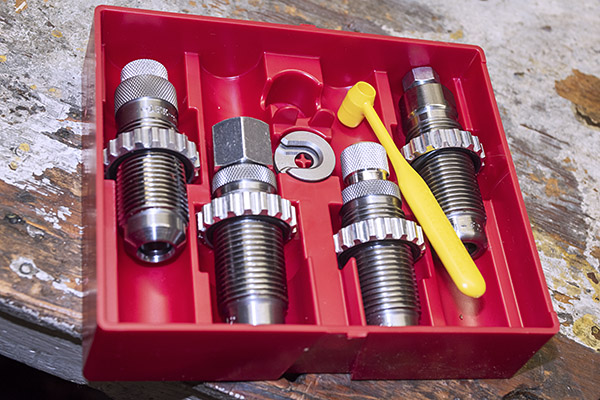
ExNotes blog readers will recall that good buddy Jose left a comment on one of our Lee Deluxe 4-die set blogs.   Jose told us about his Lee turret press.  He wrote a guest blog or two for us here on ExNotes and he is a Ruger No. 1 aficionado, which means he stands tall with me.  After reading Jose’s comments, I had to check out the Lee Classic Turret Press Kit myself, and after poking around on Lee’s site a bit and seeing what the Lee kit included, I knew I wanted one.  I specifically wanted to set it up for 9mm using Lee’s Deluxe 4-die set.  I’ve been using older 9mm dies from various die makers, and my reloads would sometimes jam.  With my old dies, the crimps were inconsistent, and I knew from my experience with Lee’s .357 and .44 Magnum Deluxe dies I wouldn’t have that problem with Lee equipment.  I have the Lee Deluxe handgun die sets in 38 Special/357 Magnum, 44 Special/44 Magnum, .45 Colt, and .30 Carbine, and the ammo I reload with those dies is exceptional (better than anything I loaded with other manufacturers’ dies).  I use Lee dies for several rifle cartridges, and I have more than a few other bits of Lee equipment.  I’ve been pleased with all of it.

Lee advertises that their Classic Turret Press Kit includes everything needed to start making ammo, except for the dies and, of course, the components (brass, powder, primers, and bullets).   I have plenty of components, and the thought of wringing out the Lee gear, writing about it, and testing the ammo in a couple of my favorite 9mm handguns checked all the boxes for me.  This will be a fun project and I want to share the excitement with you.

I placed my order with Lee for the Classic Turret Press Kit, the Bench Plate Kit (something I saw on their website that appealed to me), and the 9mm dies.  It all arrived a few days later, well packed in a single box.  I was impressed with how fast it arrived (it shipped during the holiday season) and the packaging.  The Lee folks have done this before; it’s first class customer service.

This is the right time of year to open a box full of goodies and examine the contents.  I was a kid on Christmas morning.  This was fun!

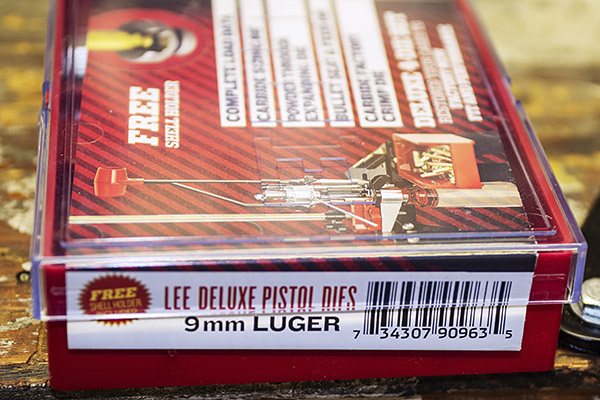
When I opened the outer container, I saw my 9mm Deluxe 4-die set and the Lee bench plate.

As I mentioned above, I’m a firm believer in Lee’s Deluxe dies.  I can’t wait to put these to work making 9mm ammunition for my SIG P226 Scorpion and Springfield Armory 1911.

The idea behind the Lee Bench Plate is that it’s a quick detach/attach mount for a Lee press. It’s not included with the Classic Turret Press Kit (it’s priced at $39 on Lee’s website), but I like the idea of being able to quickly remove the press from my reloading bench.  You’ll get a complete report on setting up and using the Bench Plate in a future ExNotes blog.

After unpacking the 9mm dies and the bench plate, I pulled out the Lee Classic Turret Press Kit.  This was like one of those Russian dolls.  I was peeling the onion and enjoying it.

When I opened the Lee Classic Turret Press Kit, I found the Lee Safety Primer Feed, a tube of Lee Resizing Lube, and the Lee Case Conditioning Kit.

The Lee Safety Primer Feed (shown in the two photos below) is a device I have not used before.  I’ll explain how it works in a future blog.  I have three other Lee priming devices and I’ve been using them for decades with no problems.  The Lee Safety Primer Feed sells for $30.

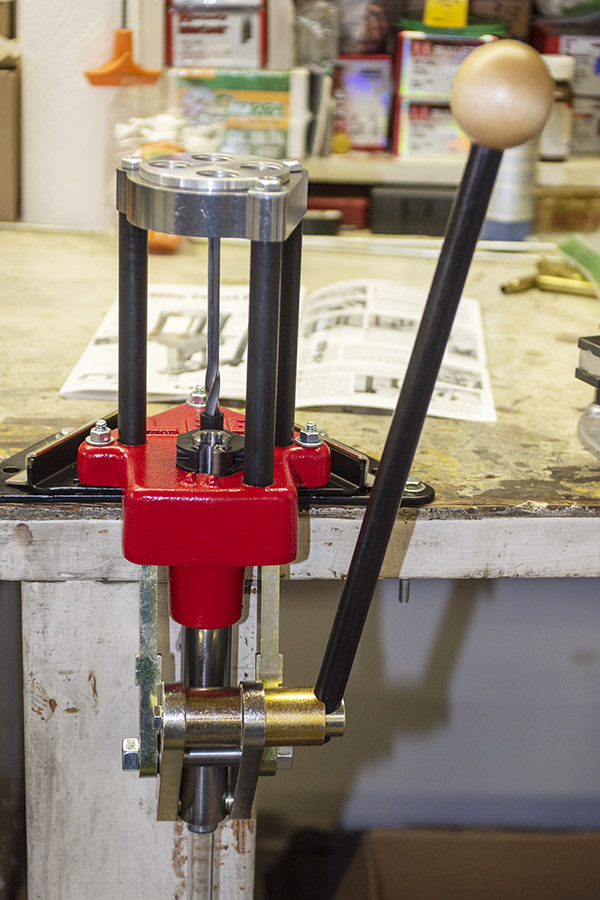
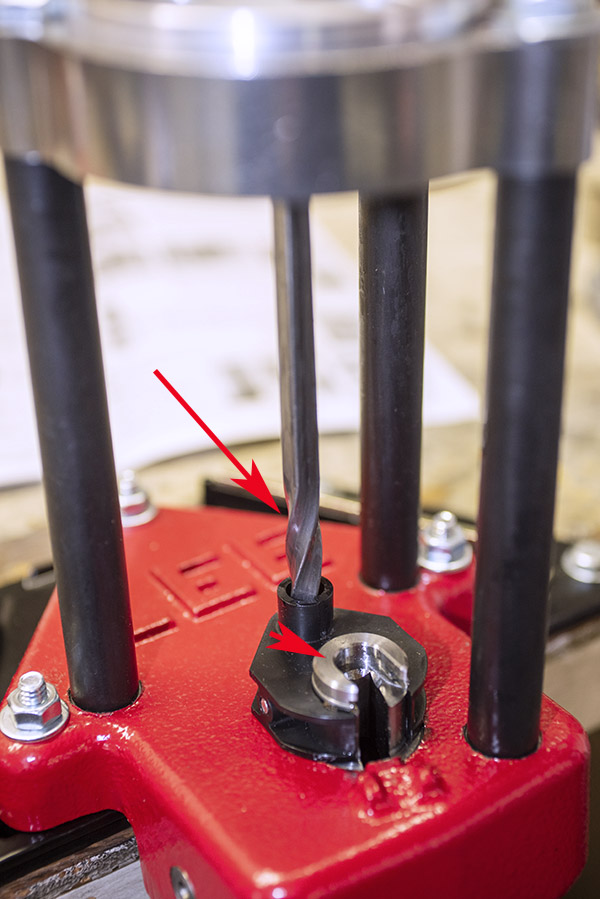
Lee includes their Case Conditioning Kit (see the photo below) with the Classic Turret Press Kit.  The Case Conditioning Kit consists of a primer pocket cleaner, a case cutter and locking stud, and a chamfer to bevel the case mouth after it has been trimmed.  I have not used these tools from Lee before; it will be interesting to see how they perform.  I have other equipment that performs these tasks, but I had to buy those items separately.  With the Lee Classic Turret Press Kit, it’s all included. The Case Conditioning Kit lists for $12.98 on the Lee site.

I won’t need the Lee Resizing Lube shown below because my new Lee 9mm dies include a carbide resizer (which negates the need for case lubrication).  Not having to lube the cases is a good thing.  On rifle cases, though, lube is necessary, so I’ll put the lube to good use on those.   The price for Lee’s Resizing Lube is $5.98.

The Lee Classic Turret Press Kit includes Lee’s Modern Reloading manual (a sizeable book, comparable to the manuals from Hornady, Speer, Sierra, and other reloading component companies), and a Hodgdon reloading pamphlet.  I’m looking forward to reviewing the Lee manual.  I’ve been reloading a long time, but I still learn something new every time I pick up a reloading manual.  If you were to buy the Lee Modern Reloading manual separately, it sells for $40.98.  Lee also includes the Hodgdon Data Manual with the Classic Turret Press Kit.  I’ve seen the pamphlets from Hodgdon before; I’ll take a look at this one and share my impressions in a subsequent blog.

Next out of the box was Lee’s Auto-Drum Powder Measure.  I’ve used an older Lee version of this device.  I’m not familiar with how the new one works, but I’m looking forward to finding out.  The Auto-Drum Powder Measure is infinitely adjustable.  That’s a good thing.  The older version used a charging plate with discrete increments; infinite adjustment is a much better way to go.  The Auto-Drum Powder Measure automatically charges the case with with each stroke of the press.  If purchased separately, the Auto-Drum Powder Measure sells for $55.00.

Lee includes a Powder Measure Riser in the Classic Turret Press Kit (see the photo below).  This is used with the Auto-Drum Powder Measure to position the powder dispenser above the priming mechanism (it allows adequate clearance).   The Powder Measure Riser sells for $9.98 on the Lee site.

There’s a balance beam scale (the Lee Safety Powder Scale) in the Classic Turret Kit.   This is a standard reloading scale.  The Safety Powder Scale is $46.98 on the Lee site.  You might wonder:  Why use a simple mechanical scale when there are digital scales and digital powder dispensers?  The reasons are simplicity, reliability, and cost.  I have friends that use digital scales, and they report inaccuracies induced by nearby metal objects (have any of those on your reloading bench?), slow operation, and of course, much greater expense.  For me a simple balance beam scale works best; it’s what I’ve been using for 50 years.   The Lee Safety Powder Scale is new to me, and I’ll report how it works.

At this point, I had one more box to open, and it contained the Classic Turret Press.  Lee lists the Classic Turret Press at $220.  Like everything else in the Lee Classic Turret Press Kit, the Classic Turret Press was well packaged.

The Classic Turret Press is massive.   It’s beefy, it’s heavy, and it looks to be well built. What you see below is the press, along with the operating handle, a spent primer catch tube (a nice touch), the four position turret head, and the hardware required to assemble it.

So there you have it:  The Lee Classic Turret Press Kit.  You might have noticed that I listed the cost for each item above separately, along with a link to the appropriate Lee page.  I thought it would be interesting to sum the prices and compare the total to Lee’s Classic Turret Press Kit price:

At Lee’s price of $380 for the Classic Turret Press Kit, it’s a good deal compared to buying the items separately.  But Lee goes a step further.  They recognize that retailers often sell the individual items and the Classic Turret Press Kit at lower prices, and Lee states on their site that you can find lower prices by visiting a Lee retailer.  One of the best places to find lower prices is Amazon.  I encourage you to explore Lee’s website, and to take a look at Lee gear on Amazon.

This project is going to be fun, folks.  Keep an eye on the ExhaustNotes blog as we put the Lee Classic Turret Press Kit through its paces.


Like what you see here? Don’t forget to help us by clicking on the popup ads!


There are many more shooting and reloading stories on Tales of the Gun.  Hope on over and take a look.


In the spirit of complete disclosure:  Lee liked our blogs on the .357 Magnum and .44 Magnum Deluxe 4-die sets and they asked us to similarly review the Classic Turret Press Kit.  Lee provided the kit to us at no charge.  But rest assured: That won’t color our judgment or what we report.  You will get the complete story, warts and all.

Acid Reflux: Yamaha RD350 Battery Box

I’ve been putting miles on the 1974 RD350 in the last few months, almost doubling the 4100 miles that showed on the bike’s odometer when I first got it. As my confidence in the bike increases so do the miles racked up in a single ride. This increase in running time has led to a problem with the battery that was installed in the RD350.

The battery seemed to work okay; it held a charge and didn’t use too much electrolyte but the fill plugs located on top were seeping a bit of acid. The caps felt snug and the battery vent was not clogged yet after a long ride the acid-damp lay heavy on the battery and even started dripping down the sides. I sort of let it slide for a while. Riding the RD is too much fun and stopping the bike for maintenance seemed like a waste of good weather.

Now that it’s a bit cooler I tackled the battery situation. The acid had dripped down onto the swing arm and corroded the battery box along with the small coil spring that keeps the oil tank vent from kinking. My laziness always comes back to haunt me.

I took the battery box, along with the attached rectifier and voltage regulator out of the frame and washed everything down with a mix of baking soda and water. The affected paint fell off in large chunks. I dismantled the electrical components and soaked the battery box in Evap-Rust then wire brushed any loose paint.

It was a nippy week at The Ranch so painting the box in 50-degree weather was a challenge. I heated the rattle can and the battery box to within 2.8 degrees of each other (measured via a recently calibrated fingertip) then shot the box with primer and two coats of Krylon satin black. I used a brush to apply paint to the bare spots on the swing arm.

It all came out good enough and anyway, I’m riding this bike, not showing it.  The electrical bits, being directly under the battery did not suffer any acid corrosion. I cleaned them up and reassembled the mess into the motorcycle.

Many older motorcycles do not regulate their voltage as precisely as you would like and my Yamaha RD350 is one of the many. With the headlights on and engine revving I measured 14/14.1 volts at the battery. This is ideal. With the headlights off 15 volts were going into the battery. 15 volts is a little too high for comfort but I decided that since I leave the headlights on all the time the original regulator would be okay.

My good buddy Deet told me about using sealed, AGM type, alarm-system/UPS batteries in old bikes. I have had one of them in Godzilla, the 1971 RT1-B for a couple years and it has been working great. These type batteries hold a charge much longer than flooded lead acid batteries. The new one I bought on Amazon has a high tolerance for high voltage; it can handle up to 15-volts charging. These AGM standby batteries can withstand constant trickle charging and long periods of inactivity, which describes vintage motorcycle riding to a tee. The small spade terminals on these batteries are not made for large current loads like an electric starter or lighting up the strip in Las Vegas but they can handle motorcycle lighting and ignition circuits without complaint.

At 4AH the new battery has a bit less capacity than the leaky old 5.5AH unit I took out but I think it will work okay. Close enough counts in hand grenades, horseshoes and motorcycle batteries.

The new battery is a skosh smaller than the old battery so I used some closed-cell packing foam to keep the thing from rattling around inside the battery box. The RD350 is once again ready to rumble. From my experience with the RT1-B, I’m not anticipating any problems with the RD350 but I’ll be sure to let ExhaustNotes readers know if I have any issues with the new AGM set up.


Do a friend a favor or ten:  Click on those popup ads!


Never miss an ExNotes blog:
The 2022 ExNotes Gift Guide

Most gift guides are hokey.  Not this one.  In keeping with our theme of shooting, motorcycles, and other interesting things, here are our recommended gifts and associated links.  It’s good stuff.  Purchase the things we recommend through the links we include here and you’ll ride faster, you’ll shoot straighter, you’ll weigh less, you’ll be better looking, and you’ll be one of the cool kids. (I took an advertising class and that’s the essence of what good advertising is supposed to do.)  Without further ado (I have no idea what “ado” means, but if you say it during a wedding ceremony, you’re married), here you go.

Motorcycle Bungee Pack

Few things in our lives are as useful as a bungee cord, and it you want a nice gift for a motorcyclist, this Motorcycle Bungee Pack answers the mail.  It includes an assortment of bungees and a cargo net, and it’s a sure thing whoever receives a gift like this will put it to good use.

A New BMW R 1250 GS

Well, sort of, although if any of our readers want to buy us a new BMW GS, that would be nice, too.  Nope, what we’re referring to here are Maisto motorcycle models.  They’re pretty cool, they’re high quality, and at approximately $20, they won’t break the bank.   Maisto offers several other models, too, like the S1000RR you see at the top of this blog.

A Case of Mobil 1 Moto Oil

It doesn’t get any better than Mobil 1 4T synthetic oil for motorcycles.  If you want to really impress someone, give them a case of Mobil 1 4T for their motorcycle.  It’s only $79.00 and trust me on this, they will remember you every time they shift or blip the throttle.

Portable Jump Starter

We carried and used a portable jump starter on the Enfield Baja ride, and trust me, it was worth its weight in gold.  There are several models available, and they start around $52.  This Litake portable jump starter is small enough to carry on a motorcycle and it makes a great gift.

Lee Precision Reloading Gear

If you’re not reloading, your missing out on half the fun in the shooting sports.  Making the decision to become a reloader can be a bit initimidating, but the major equipment manufacturers make it easy for anyone to start.   If you want to start with a simple single-stage press, our advice is to go with Lee’s Challenger Kit for $229.

A single stage reloader is a good way to start, and the Lee Anniversary kit shown above is a good one.   You can buy it directly from Lee or from Amazon.

If the person you are giving the reloading kit to (which can be you, by the way) wants to reload at higher rates,  you might consider the Lee Classic Turret kit for $380:

You can buy the Lee Classic Turret kit directly from Lee or from Amazon.

With either kit, the person receiving the gift will need a set of dies specific to the cartridge to be reloaded.  We think Lee Precision makes the the best dies at any price (these are $78.00).

You can buy the above dies directly from Lee, or you can purchase them from Amazon.

Cool Watches

There are three or four you might consider.  We’ve recently written about Casio’s G-Shock GD400 series.  These are reasonably priced, they are incredibly accurate, they offer a world-time quick change capability, and a bunch of other features (illuminated dial, stopwatch, countdown timer, and more).   Casio offers these for both men (at $89.95) and women ($53.95).  I wear a G-Shock and so does Susie.

If you want something more formal, our recommendation is to get an automatic watch.  There’s something elegant about a selfwinding mechanical watch, and Orient is one of most exclusive brands out there at a very reasonable price.  Two personal favorites are the Moonphase (from $274.95 to $374.95, depending on color) and the Mako dive watches (at $147.95).  I wear an Orient rose gold Moonphase when I’m trying to impress Gresh, and it’s a classy timepiece.

Toolkits

We very recently posted about a Wohngeist toolkit retailing for $2,895 (we’re not advising buying it, unless you feel a need to flush money down the toilet).  A far better choice is any of several toolkits available at much more reasonable prices, like this one for $49.95.  These make great gifts, and they won’t break the bank.

Buck Knives

Give someone a Buck knife, and you’ll have a friend for life.  That’s how long the Buck will last, too.  Buck makes a bunch of different knives, you can have them customized, you can have them engraved, or you can buy one off the shelf, so to speak.  My personal favorite is the Buck 110 folder (shown in the photo below), but any Buck knife makes a wonderful gift.  Buck 110 folders start at around $60.

Trickle Me Elmo Battery Tenders

There are few things as useful to a motorcyclist than a Battery Tender.  I’ve been using these for decades.  A motorcycle with a topped-off battery runs better, and I’m coinvinced routinely plugging your bike into a Battery Tender extends the battery’s life.  I regularly get between 4 and 6 years out of a motorcycle battery, and the Battery Tender is the reason why.  These things are inexpensive ($39.95), and if they wear out, that would be news to me.  I’ve been using mine for about 15 years and it’s still going strong.

Stop and Go Mini Compressors

Get a flat on your motorcycle out in the middle of nowhere and you’ll wish you had one of these, and so will all of your motorcycle friends.  It happened to me more than a few times (on the Three Flags Rally, in China, and out in the boonies exploring the Mojave Desert).  The Stop and Go Mini Compressor will pay for itself the next time you need to inflate a tire out there, and if you’re one of those folks who drops the air pressure when you see a dirt road, this will get you back up to street pressures quickly.

Our Motorcycle Books

Hey, what can I say.   If you’re going to buy a motorcycle book, why not buy one I wrote?  They’re inexpensive and folks say they’re pretty good.  If you’re one of those folks tempted to wait for the movie instead of reading the book, don’t hold your breath.  There were some preliminary discussions for a movie series, but when I suggested Leonardo di Caprio play me, the studio responded with Danny De Vito and talks broke down (so don’t wait for the movies).

Take a look at this selection of outstanding moto stories, pick the ones you’d like, and Mr. Bezos will have them in the mail to you muey pronto!

Haix Boots

The problem with motorcycle boots is they’re uncomfortable when you get off the motorcycle, especially if you have to walk anywhere.  About 20 years ago I picked up a pair of Haix boots (a favorite of police, firemen, and other first responders) and I never look back.  They are the only boots I wear when I ride a motorcycle.  A pair of Haix boots lasts about 10 years, and they are extremely comfortable.  They’re a bit more than most combat boots at $259.99, but they last a long time and the increase in comfort makes them well worth the price of admission.

Bianchi Belts

I bought my Bianchi belt years ago and I think it is one of the best purchases I ever made.  I wear it any time I need to wear a belt unless I have to dress up for a deposition or a formal event.  The Bianchi is just plain comfortable, it doesn’t wear out, and for its intended purpose (supporting a holster) it is superb.  You’d be surprised how much of a difference a good belt makes if you’re carrying a firearm (unless you already have a Bianchi belt, in which case you wouldn’t be surprised at all).  But you don’t need to carry a gun to appreciate this belt.  Like I said, I wear mine all the time.  The Bianchi belt retails on Amazon for $66.02 (why they add the $0.02 is beyond me), and it’s worth every penny (even those extra two pennies Bezos tacks on).

Batdorf and Bronson Coffee

Batdorf and Bronson coffee is the best coffee in the world.  Yeah, that’s my opinion, but try it and you’ll agree.  Buy a selection of Batdorf and Bronson coffee for a holiday gift and you’ll make a friend for life.


So there you have it:  Our 2022 gift recommendations.  And don’t forget:

The best gift you can give to us is to continue clicking on those popup ads!


Never miss an ExNotes blog:
Water Security

As mentioned in a previous ExhaustNotes story titled “Guilt Trip,” our water well at the ranch has become unreliable. In order to quickly bring some stability to the situation we decided to install a storage tank and re-shuffle the way water is delivered to our shack.

After pouring a slab to support the new, 3000-gallon water tank we had the local Tank Guy deliver Big ‘Mo to the ranch. Big ‘Mo cost $2800 delivered to our door and that’s a bit expensive but it seems like everything costs more since the Covid crisis eased up. Home Depot has a 2500-gallon tank that is slightly lighter construction for $2300 plus $80 delivery plus tax so the per gallon price is comparable. Buying local means the Tank Guy will spend his money locally. Anyway, I don’t like the way our local Home Depot stores their tank inventory. They put the tanks on their sides instead of the bottom. This makes it easier to move the tanks with a forklift but I suspect it does the tank no good having all the weight where it’s not designed to go.

The Tank Guy stores his tanks upright, just north of Tularosa in a big field across from the railroad overpass. Our tank showed up securely strapped to a trailer…on its side. But only for the time it took to arrive at the ranch. These tanks look huge but they are rotocast plastic and are not that heavy. The 3000-gallon tank weighs 500 pounds. It took the Tank Guy, the Tank Guy’s wife and me to slide the tank up a ramp I handily screwed together earlier for pouring the tank slab.

I installed two ball valves in the bottom of the tank, one ¾-inch for the output and one ½-inch to fill the tank. Tank filling can be done three ways: by water delivery truck, gravity fed from the upper level shed storage tank, or by pumping well water into the tank. A jumble of shut-off valves can be juggled to pressure feed the house from the well, from Big ‘Mo via a centrifugal pump or by gravity from the upper level storage. I’m into redundancy when it comes to water.

If you live in areas that freeze you’ll want to add a pipe heater and insulate any exposed pipe. The black tank helps keep the water from freezing and when the sun comes out we rarely get days under 40 degrees so water freezing in the tank has not been an issue so far.

I took this re-plumbing opportunity to eliminate the water softener and reduce the size of the very old well pump expansion tank. The water softener periodically runs a flush cycle and being on a fixed water supply we can’t waste water like that. The bladder inside the big expansion tank became porous over the years and water had migrated to the dry side causing rust. Plus it was too damn big. I’m thinking it will make a great stand alone fireplace or smoker.

From Big ‘Mo water is piped through a mesh screen filter, a one-way check valve and into a centrifugal pump that provides 40psi of pressure to a large 5-micron filter and on to the house plumbing. The pump has its own small expansion tank that seems to keep a fairly steady flow of water to the fixtures. You can see the flow increase a bit when the pump cycles but nothing a rough, tough, couple of pioneers like CT and I can’t handle.

Since we’ve moved from hot, humid Florida to a colder climate I’ve learned that PVC plumbing is not ideal in freezing conditions. Going forward I’m trying to use PEX plumbing in all my projects and I’ve been happy with the results so far. PEX uses a more flexible pipe that is crimped onto brass PEX fittings with brass/copper-ish crimp rings. You’ll need a special PEX crimp tool to compress the rings onto the PEX fittings. Once crimped, you can spin PEX pipe on its brass fitting (within reason) without causing a leak. I haven’t had one PEX-related leak yet, even when tight working conditions result in a less than optimal crimp. I wish I could say the same for the PEX-to-threaded-pipe connections. One thing to keep in mind is that PEX pipe is not UV resistant so cover any pipes that will see sunlight.

Like most plumbing systems PEX has to be cut and pipes replaced if you need to change anything. You’ll need a PEX removal tool if you want to reuse the brass PEX fittings and why wouldn’t you want to reuse them? The ability to reuse PEX fittings is a big deal. When is the last time you were able to reuse a glued PVC fitting or soldered copper fitting? The removal tool cuts the crimp ring without cutting into the PEX barb. Once the ring is out of the way you can crimp V-shaped depressions around the bit of PEX stuck on the barb. Crimping the Vee’s causes the PEX pipe circumference to expand and the pipe will slide right of the barb without causing undue stress.

It’s a bad feeling when your well runs dry. All of a sudden your shack becomes unlivable. But by building in a little extra infrastructure we have water security even if it means buying water from our local water delivery service. And I have plans on the table for catching much more rain during the next monsoon season that will nearly eliminate our reliance on bought water.


Do us a solid and click on the popup ads!


Never miss an ExNotes blog:
Tools Do Not A Carpenter Make

I spotted the tool kit you see above in a Wall Street Journal list of suggested gifts.  It’s made by an outfit in Switzerland and the price (as quoted by the Wall Street Journal) is an astonishing $2,850.  Yes, you read that right:  $2,850.  Thinking it had to be a mistake (even Snap-On tools are not that expensive), I got on the Internet.  Yep.  $2,850.  I’m thinking that kit above is maybe $50 worth of tools.   So I looked around a little and saw the same Wohngeist tool kit from another retailer for $3,000.  And then another for $2,800.  I imagine the people who picked it up for $2,800 felt they scored quite the bargain.

Want another shocker?  All three of the online retailers, quoting the prices you see above, are sold out.  Gresh and Huber, we are in the wrong business.

Here’s another Wohngeist tool kit for those of you who don’t want to spend $2,895.  This one is only $1,895.  Like my people say:  Such a deal!

If you’re thinking of something more down to earth, you can always pick up a basic tool kit from Amazon.  This one was $49.  It looks pretty good to me and it’s more in line with what I’m used to spending.  I’m an Amazon kind of guy.

I think the Amazon version has more screwdrivers and it has a ratchet and sockets.  The Wohngeist kit does not.  What were you expecting for $2,895?  I know, I know, the Amazon kit doesn’t have that nifty fold-out ruler.  But I already own a tape measure.  So I’m covered.

Not content with that find, I checked to see if Amazon had a motorcycle tool kit.  Here’s one that looks like it came right out of my 1965 Honda Super 90, and it’s only $12.95.

I don’t still have the Super 90, but I do still have the tools.  Somewhere.


We’ve written other blogs about motorcycle tool kits.  This one explains my approach for identifying and carrying the tools I may need.  It contains links to Gresh’s and Huber’s blogs on the same topic, too.


Watch for our 2022 Christmas, Hanukkah, and Festivus gift guide.  It’s coming up soon.


Never miss an ExNotes blog:

Help us keep the stories coming:  Click on those popup ads!

The White Sands Missile Range

I first visited White Sands Missile Range in the mid-1970s when I was in the Army stationed at Fort Bliss, Texas.  I visited two places that day 50 years ago:  The White Sands Missile Range, and White Sands National Park.  I did the same most recently (i.e., hitting both spots on the same day) with Joe Gresh and Susie.  We recently posted about White Sands National Park.  Today, the focus is on the WSMR Missile Park, a display of military equipment just inside the White Sands Missile Range main gate.
WSMR is a place with history.   It doesn’t go back that far…it was created in July 1945, right at the end of World War II, when we grabbed all those Nazis for our space program (the Russians were doing the same). A lot of them were sent to White Sands, along with a hundred German V2 rockets.  We cut our space program teeth on them, launching two thirds of our V2 stash and studying the rest before we started building and testing American versions.  Our first atomic bomb was tested on the northern edge of White Sands Missile Range.  When I was based at nearby Fort Bliss to the south, we heard stories about missiles launched from White Sands that went a bit wide of their mark and landed in Mexico (as in Old Mexico, not New Mexico).  Like I said, there’s a lot of history here.

It used to be that you could just drive onto White Sands Missile Range and visit the missile park.  In those days, they had a German V2 on display along with perhaps a dozen or so other US missiles.  But that was then, and thanks to Osama Bin Laden, this is now.  Now, you have to park outside the main gate, show ID to the minders, fill out a form saying you’re not evil, and get permission to walk onto the base.  From the main gate, it’s maybe a couple hundred yards to get to the missile park.  The indoor stuff (including that old V2) was locked up when we visited, so all we could see was the stuff on display outside.  But that was good enough, at least until the skies opened up and the rains came down.

The photo ops were fantastic…military missiles, gun systems, and aircraft against the bright blue New Mexico sky, with a bit of cloud cover to soften the shadows.  We had a blast.  Figuratively speaking, of course.

Joe Gresh, asking what would happen if he pushed that button.
The Fat Man (I am referring to the atomic bomb).  Gresh has been dieting, and doing pretty well at it.
The mulitple launch rocket system, or MLRS.
There are all kinds of cool missiles on display here. It’s free, too.  We used to build plastic models of these things when I was a kid.
A US Navy 5-inch gun. Gresh climbed inside the turret when it started to rain.
A Nike Hercules anti-aircraft missile, successor to the Nike Ajax. The Nike Hercules could carry a nuke. Although designed as an anti-aircraft weapon, the nuclear-armed Hercules could be used against ground as well as airborne targets. Don’t ask me how I know.
When it started to rain, Susie and I jumped beneath the wing of an F-4 Phantom.

We only stayed about an hour at the White Sands Missile Range, our visit shortened by the rain and the fact that the indoor displays were closed.  But that’s okay.  We’ll hit this place again on the next visit to New Mexico.


Keep us going!  Here’s why you should click on those popup ads!


Become a paid ExNotes writer!


Never miss an ExNotes blog: