Colt Walker: The Official Handgun of Texas

Governor Greg Abbott of the great state of Texas is a leader who gets it…he understands what “common sense” gun laws should be.  Need proof?

Good buddy Paul alerted me to Governor Abbott’s proclamation, and I like it.  I used to live in Texas, you know.  Sometimes I wonder why I moved.

In case you were wondering, here’s what the Resolution for such an act looks like:


SENATE CONCURRENT RESOLUTION

WHEREAS, The original 1847 Colt Walker pistol was
historically crucial to the early survival of the great State of Texas; and
WHEREAS, The original 1847 Colt Walker pistol was an essential tool in the defeat of the Mexican army during the Mexican-American War to reclaim Texas, the 28th state of the Union; and
WHEREAS, The co-inventor of the original 1847 Colt Walker pistol, Samuel Walker, was a captain in the Texas Rangers, the first state police agency in the country; and
WHEREAS, The original 1847 Colt Walker pistol was America’s first pistol to hold six rounds, otherwise known as a “six-shooter”; and
WHEREAS, The original 1847 Colt Walker pistol is still the most powerful black powder pistol in existence; now, therefore, be it
RESOLVED, That the 87th Legislature of the State of Texas hereby recognize the original 1847 Colt Walker pistol as the official handgun of the State of Texas.


That’s pretty cool.

We’ve written about the Walker Colt, its history, and the Uberti replica of that great gun before.  I haven’t shot mine yet, but that’s a character flaw I aim to correct in the near future.  When I do you’ll read about it here on the ExNotes blog.  At the risk of being redundant, here are a few excerpts from our previous Colt Walker blogs:

And one more…a photo I like a lot. It’s my Uberti duo…the Colt Walker and a Single Action Army.


There’s more good gun stuff here, folks.


Never miss an ExNotes blog…guns, motorcycles, bicycles, reloading, Baja, the Compleat Concreat comrade, and more!

Marlin Cowboy Front Sight Replacement

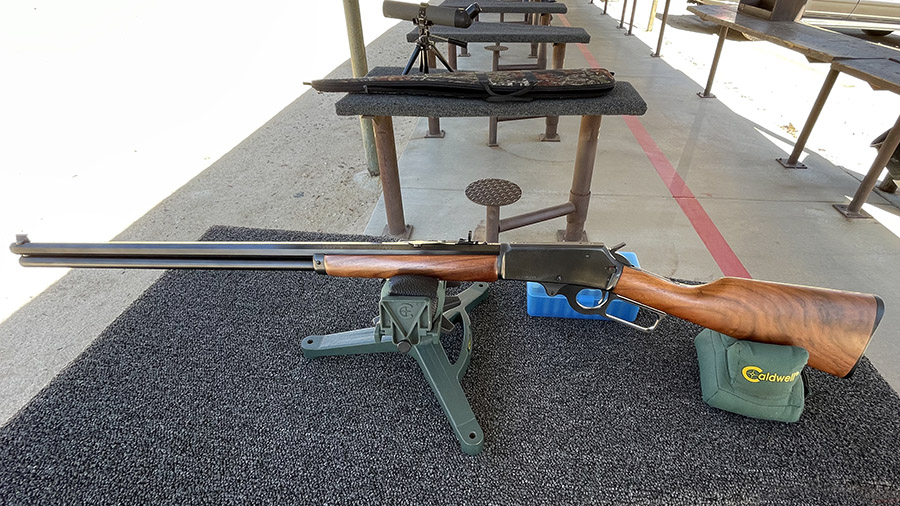
About a dozen years ago I bought an impressive Marlin 336 Octagonal in 30 30, but that’s not the rifle you see in the photo up top.  I didn’t realize it at the time, but that 30 30 Marlin was a collectible rifle and I got a hell of a deal on it.  I’ll give you a link to that story at the end of this one.

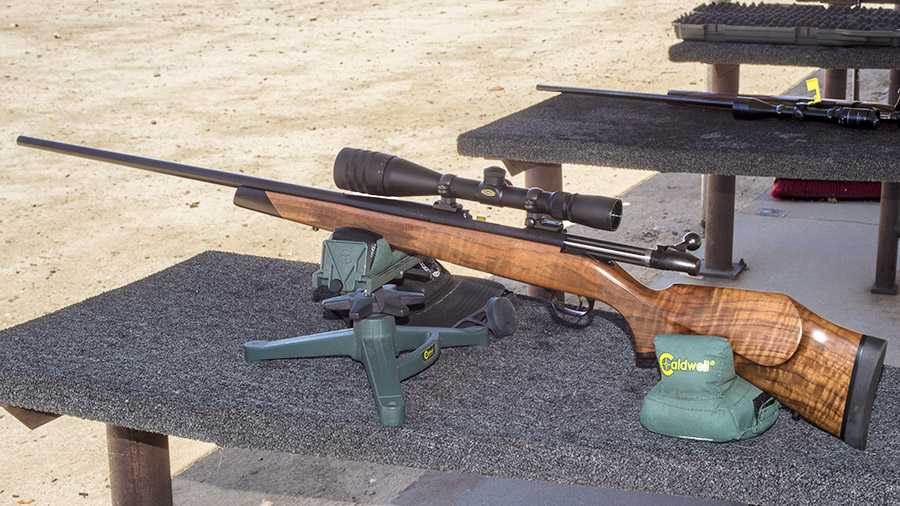
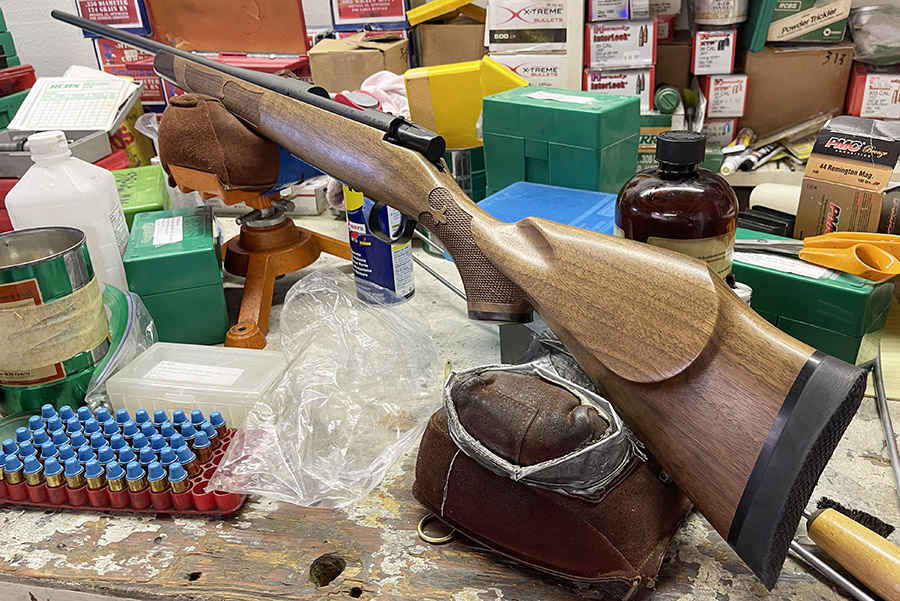
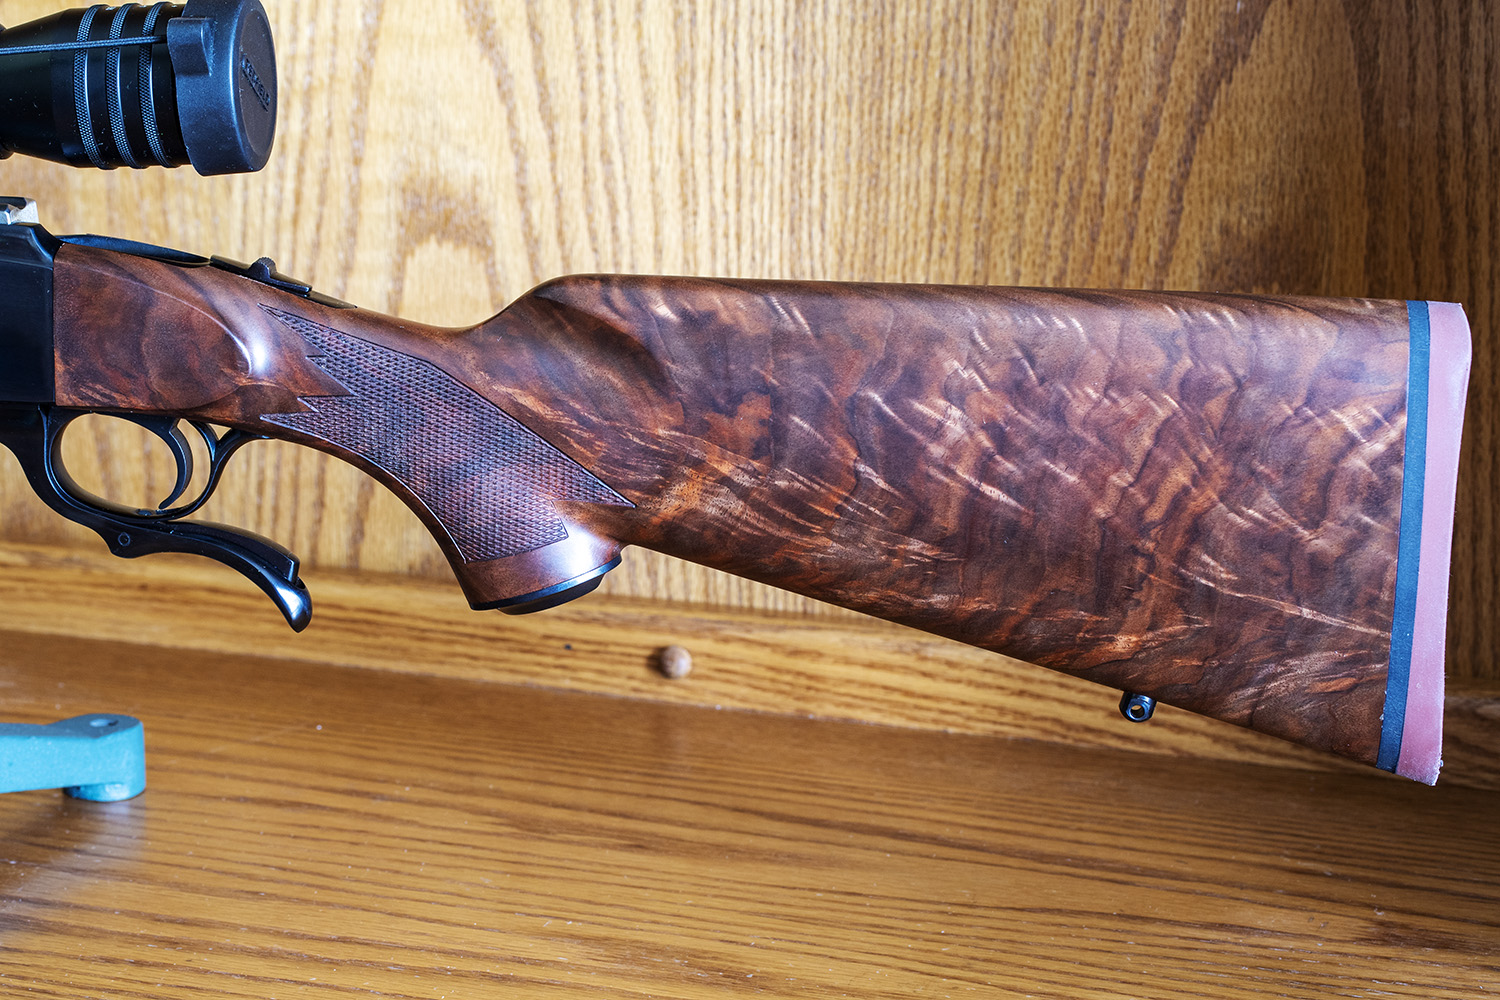
When I started the Peoples Republik of Kalifornia paperwork on the 336 Octagonal, I saw a brand new 1895 Cowboy Marlin at the same gunstore with the John Marlin proof and exceptional walnut.  And that, my friends, is the rifle you see in the photos here.  I’m not in the habit of buying two rifles at the same time (in fact, you can’t even do that here in Nuttyland any more), but wow, that 1895 was pretty and I bought both the 336 and the 1895.  That Marlin rang all the bells for me…an octagonal 26-inch barrel, the .45 70 chambering, and killer wood.  The time to buy a lever gun with superior wood is when you see it, and that’s what I did.

Wowee! A Marlin Cowboy in .45 70 with super walnut and a John Marlin proof mark!

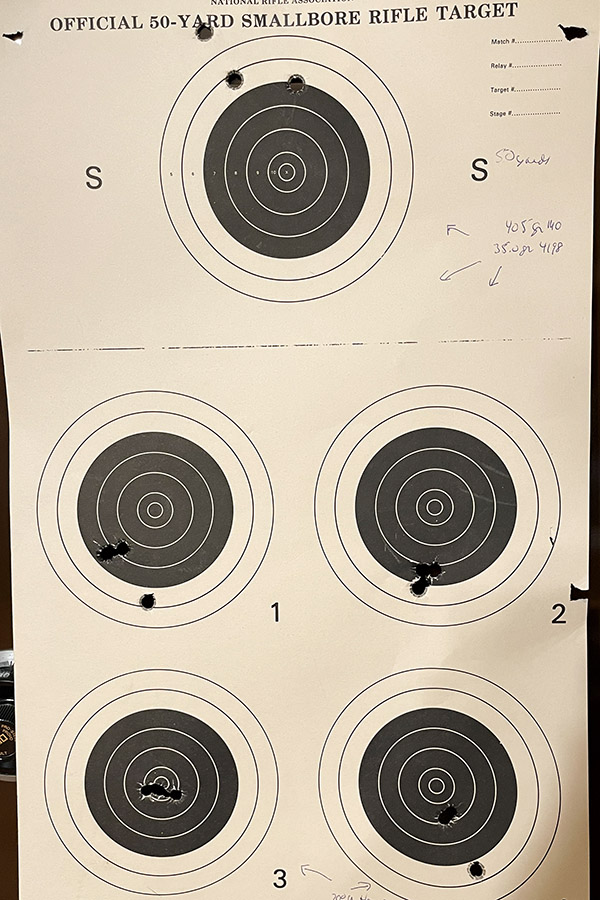
Over the last dozen years, I only had the Cowboy on the range a couple of times, and that was enough for me to know the sights were way off.    A couple of weeks ago, I decided to find out exactly where it was printing with my favorite .45 70 load (more on that in a bit).  The Cowboy grouped superbly well (it coverleafed rounds at 50 yards), but I had to go to the very top of the adjustment range on the rear sight to finally get the bullets to hit at the point of aim at 50 yards. In the rear sight’s middle elevation setting, the point of impact was 10 inches low at 50 yards. I couldn’t adjust the rear sight any higher, so I knew I needed a lower front sight.

I tried to call Marlin to ask for a shorter front sight, but all I got was a message telling me to go to their website.  I struck out there, too.  The website said that Ruger (Marlin’s latest and current owner) isn’t in a position to service Marlins or provide parts yet and they don’t know when they will be.  Hey, at least they were honest, and that counts for something.

The lollipop front sight as the rifle was delivered from Marlin. It was way too high, which caused the bullets to hit way too low.
I gently tapped the front sight out with a brass drift and a hammer.
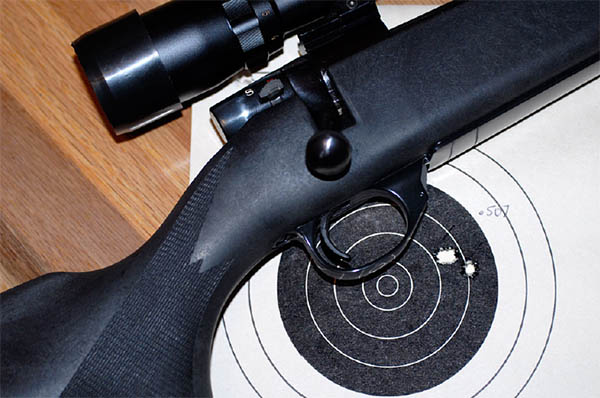
The front sight that came with the rifle was 0.505 inches tall. That’s too tall for my loads.

Okay, I reasoned, this should be no problem.   I called Williams, the experts on iron sights, and I hit paydirt.  The Williams guy told me that in recent years Marlin put whatever front sights they had in stock on their rifles with no thought given to where the guns would print.  That’s what happened on my rifle.

Getting the correct front sight once you know where the rifle is printing is simple.  The height of the front sight that came with the rifle was about 0.500 inches, and it was printing 10 inches too low with the rear sight as high as it would go.  It’s an a/b=c/d calculation.  If you know the sight radius, the front sight height, the distance to the target, and how low or high the point of impact is, you can calculate the required change in front sight height to move the point of impact the amount you want.  I’d like to say it’s advanced engineering, but the truth is it’s a 7th grade algebra problem (and I made it through the 7th grade successfully, aside from a ton of time in detention).  The calculation goes like this:

Required change in front sight height =
(desired shift on target/(50*36))(sight radius)

where

        • 50*36 is the distance to the target in inches (50 yards * 36 inches/yard)
        • The sight radius is 23 inches
        • The desired point of impact on the target is 10 inches up (the rifle was grouping 10 inches below point of aim).

I did the math, and the required change in front sight height was a drop of (10/(50*36))(23) = 0.128 inches.  That meant I needed a front sight about 0.372 inches tall.

What you see above is what Marlin should have done when they selected the correct front sight for this rifle, but they didn’t and I did.  I bought two new front sights.  One would raise the point of impact about 13 inches at 50 yards, and the other that would raise it about 5 inches at 50 yards. I knew that one of the two should work.  The cost for both was only $35, and in the grand scheme of things, I always figured I can’t have too many gun parts to play with.
Williams had .341 and a .410 front sight.  You can’t get the exact height you want but that’s okay…that’s why the rear sight is adjustable.  So I bought both rear sights. The rear sight height adjustment would give me the room to dial either in. The .341 front sight would give me more than I needed; the .410 would give me a little less than I needed, but either one should get me into the adjustment range.

The two Williams replacement front sights on the left, and the original Marlin front sight on the right.

The front sight mounts in a dovetail on the barrel, and it has to be fitted.  It’s an interference fit, but it has too much interference as delivered.  You have to gently sand material off the bottom of the replacement sight so it goes into the dovetail with just a little interference.  Easy does it is the mantra here (you can take material off, but you can’t put it back on).  You want enough interference so the front sight has to be tapped in with a brass drift and it won’t move around due to recoil or normal hunting knocking about.

Sanding the front sight base down, a thousandth or two at a time.
The Williams 0.341 inch front sight ready for installation.
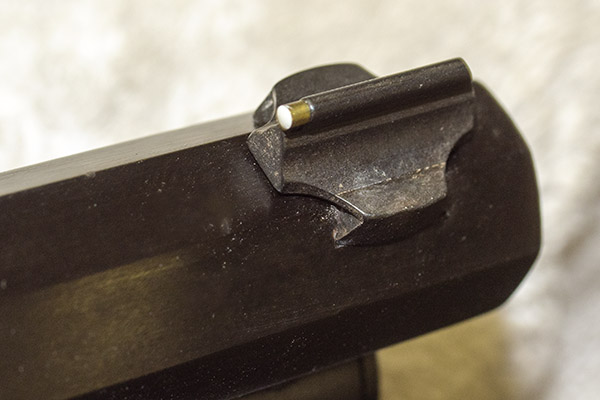
A white dot (which I greatly prefer over the brass dot) front sight, on station and ready for duty.

So how’s it all going to work?  I’ll let you know after I get to the range.  Oh, and my favorite .45 70 load?  It’s the 405-grain Missouri Bullet Company cast bullet, crimped in the cannelure, with 35.0 grains of IMR 4198.


One more thing…that 336 Marlin Octagonal I told you about?  It’s right here, along with a bunch of other cool lever gun stuff!  You’ll want to go there…the 336 Octagonal is an interesting firearm.


Sign up here!


The rest of the story with the new front sight installed!

Youberty? You bet!

That would be my tuned Taylor Uberti in .45 Colt, the Italian Stallion Single Action Army revolver that has graced these pages in a few earlier blogs.  It was a good day…a couple of my good buddies stopped by with brass they didn’t want (including the ultra-tough-to-get-these-days .45 Colt), and I was hard at it on the reloading bench shortly thereafter.  My go to fun load in .45 Colt is 6.4 grains of Trail Boss, a 200-grain cast bullet (in this case the truncated roundnose thrown by the Lee mold, although just about any 200-grain semi-wadcutter works equally as well), and a crimp for an overall cartridge length of 1.595 inches.   It was 5 shots at 50 feet, and I was putting them pretty much into one ragged hole just about exactly at my point of aim.  You just gotta love a good Single Action Army revolver…I sure do!

Keep us in components…please click on the popup ads!

About the only thing I don’t like about Trail Boss powder is that it doesn’t obturate well, although you wouldn’t know it from the accuracy this load delivers.  Trail Boss soils the cases and they take longer to come clean in the tumbler, but it’s a small price to pay for this kind of accuracy.

The nice thing about the Trail Boss load mentioned here is that it shoots just about to point of aim for me at 50 feet.  Another nice thing is there’s almost no recoil…this load in a Single Action Army is a real powder puff.   Yeah, I could go hotter, but what would be the point?

More Uberti blogs?  Hey, take a look…

Colonel Colt and Captain Walker

Men of a Certain Age

And of course, there’s all the other Tales of the Gun stories!


Motorcycle stuff?  Right here, folks!


Never miss an ExNotes blog:

Seven Mini 14 Accuracy Tips

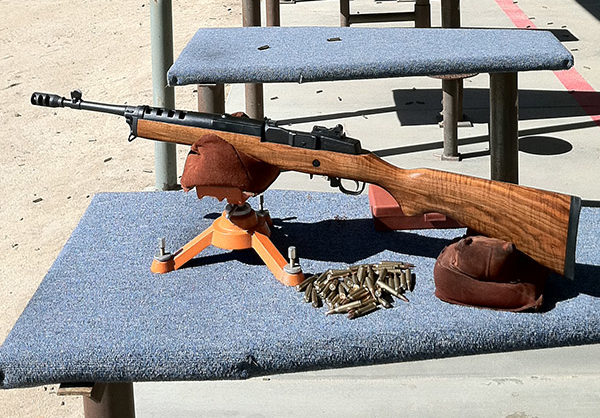
I love shooting and writing about the Mini 14.  Having said that, let’s get to today’s main attraction, and that’s how to get the best accuracy out of a Ruger Mini 14.

Tip 1:  Refine Your Shooting Techique

There’s a lot to say here.  I won’t spell it all out, as we’ve covered this topic before.  Focus on the basics and refer to our earlier post on Mini 14 Marksmanship.

Tip 2:  Reload Your Own Ammo

Ah, this statement will light up the trolls:  There is no great factory ammo for the Mini 14 and bulk ammo is generally inaccurate.  That said, mark my words:  Some troll will post that he shoots 200-yard half-inch 10-shot groups offhand using iron sights with (fill in the blank) bulk ammo.  Why such individuals aren’t competing at the international level instead of wasting their time posting comments on Facebook I can’t say.  Trust me when I delicately suggest they are not honest information brokers.

You might consider my experience and that of many others when I state that you really need to reload your own ammo to attain optimal accuracy.  For starters, there’s the issue of the chamber size.  With the exception of the short-lived Mini 14 Target Model, all .223 Mini 14 rifles are actually chambered for the 5.56 mm NATO round, and that chamber is actually slightly larger than .223 Remington ammo.   For this reason, neck sizing brass that has been fired in your Mini 14 will assure a much better chamber fit and accuracy will improve significantly.  You can read more about that here.

Regarding the specifics, I’ve had great luck with Hornady boattail full metal jacket bullets of either the 55-grain or 62-grain persuasion crimped in the cannelure with the Lee factory crimp die.  I’ve also found that the more expensive Hornady V-Max bullets are quite accurate.  As for powders, my best results are with IMR 4320 (no longer available unless you have a stash), ARComp (a superb powder), IMR 4198, and Winchester’s 748.  Other folks report good results with Varget (I have that powder, but I haven’t tested it in my Mini 14).  My most accurate Mini 14 loads are with charges near the upper end of the charge spectrum.  As always, start low and work your way up watching carefully for pressure signs as you increase the charge.  I never go above the max charges listed in my load manuals (and neither should you).

To get the best reloading results, you might also consider:

    • Sorting your brass by manufacturer.
    • Trimming the brass.
    • Cleaning the primer pockets.
    • Cleaning the brass.

As you read this part of today’s blog you might be thinking “but I don’t reload.”  If that’s the case, I have but one word:  Start.  You can get a good handle on the reloading process and the equipment you’ll need in our prior posts on this topic.

Tip 3:  Let the Barrel Cool

This might have been listed under Tip 1 (Refine Your Techniques), but I see so many Rambo wannabees on the range I want to include it as a separate point.   You know the kind of inbred I’m talking about:  The guy (it’s always a guy, and typically a younger guy) who wears camo gear (but has never been in the military).   He’s the guy who loads 20 or 30-round magazines and rapid fires all of them as if the ability to shoot 30 rounds in under 3 seconds somehow equates to shooting skill.

I think that guy’s name is most likely Richard Rambo, and you don’t want to be like him.  Don’t be a Dick.

I only shoot 5-round magazines, and I let the barrel cool between shots and between magazines.  The Mini 14 has an assymetrically-contacted, relatively thin barrel.   Heat that barrel up via rapid fire and your rifle will string its shots.  If you’re shooting for accuracy, let the barrel cool.

Tip 4:  Install A Tech-Sights Rear Sight

There’s an after market rear sight manufacturer, Tech-Sights, who offers a dramatically better rear aperture sight than the stock Mini 14 setup.   Get a set.  They are more easily adjusted and they will make your rifle easier to shoot accurately.  Make sure you LocTite them in place during the installation; if you don’t, they will shoot loose.

You could put a scope on your Mini 14, but I’ve never had good luck with a scope on a Mini.  Even with LocTite, the scope mounts always loosened after surprisingly few rounds, and before they did so, the group sizes really weren’t any smaller.  Tech-Sights is the way to go.

Tip 5:  Clean the Rifle

The good news about the Mini 14 is that it seems to run forever without cleaning, and the bad news about the Mini 14 is that it seems to run forever without cleaning.  I say that because accuracy will degrade long before reliability does, and if you’re fundamentally lazy like me, you’ll shoot hundreds (and sometimes a thousand or more) rounds before you clean your rifle.  Yeah, it will keep shooting, but the accuracy won’t be there.  Clean your rifle (including the bolt’s innards, the action, and the bore) after every range session.

Some folks will tell you the bore needs to be fouled before the rifle will attain its best accuracy.   They suggest you shoot a couple of magazines through a clean bore before testing for accuracy.  I haven’t found that to be the case; my Mini 14 is accurate with a freshly-cleaned bore.  In fact, my rifle doesn’t even display the typical first-shot-through-a-clean-bore flyer that other rifles exhibit.

When you clean your Mini 14, take care not to let the cleaning rod drag at the muzzle’s edges while doing so.  Give it a good soaking with Hoppes No 9 using a cleaning patch, let it soak for an hour, and repeat that until all the black powder residue is out.  Then let it soak for a few hours with Hoppes No 9, run a patch through the bore, and repeat that over the next two days to get the copper traces out.  I know I’m done when there’s no green or turquoise on the patch.

For the bolt, I spray the hell out of it with carb cleaner.  Taking the bolt apart is a nonstarter for me (you need special tools to do so), so I just spray it well (outdoors, of course).  Then I go to work on the other action components, using a brass brush on the piston and its surrounding areas to get all the carbon residue gone.  When everything is squeaky clean, I’ll lightly oil it all as I’m reassembling the rifle, except for the firing pin in the bolt.  I leave that dry.

Tip 6:  Glass Bed the Action

After seeing the positive accuracy impact on my M1A from a glass bedding job, I did the same on my Mini 14.  I use AcraGlas from Brownell’s when I bed a rifle.  Other folks have had good luck with Marine-Tex.

Bedding a Mini 14 is different than bedding a bolt action rifle.  The Mini 14 action beds along inside edges of the stock, and along the top edge of the stock where it contacts the bottom edge of the upper receiver.  It doesn’t take a lot of bedding material, and you don’t want to slop it all over.   You just want capture some at the rear of the receiver where it interfaces with the top of the stop, and under the receiver interior rails where they interface with the stock’s interior near the magazine well.

You’ll feel movement between the receiver and the stock of a Mini 14 that hasn’t been glass bedded; once you glass bed the action that movement disappears (if you’ve done the bedding job well).   That’s what you want.  This is one of the more significant tips in this article; a good bedding job will improve accuracy significantly.

Tip 7:  Practice (A Lot!)

You want realize your rifle’s accuracy if you are an occasional shooter.  I find if I don’t shoot my Mini 14 for a few weeks, my edge disappears and I need a couple of range sessions to get back in the groove.  When I take my Mini 14 out every week, the groups get smaller and they stay small.  It’s funny how that works.

Parting Shots

Some folks like to use a barrel brace under the Mini 14 barrel just forward of the stock.  It’s the thing that resembles an M1A gas chamber and makes the Mini look like an M14.  I’ve never tried those, so I can’t say if they work or not. It seems gimmicky to me.  Folks (including yours truly) have tried shimming the receiver where it mates with the stock, with the idea that this will remove any play between the stock and the barreled action.  I’ve tried that (before I went with glass bedding) and I found that the shimming approach made no difference in accuracy.  If you want to get rid of the play between the barreled action and the stock, glass bedding is the way to go.  I’ve also played around with smaller gas plugs.  More testing showed that while these did reduce how far the Mini 14 tosses spent brass, accuracy stayed the same while reliability decreased, so I went back to the stock Ruger gas port.

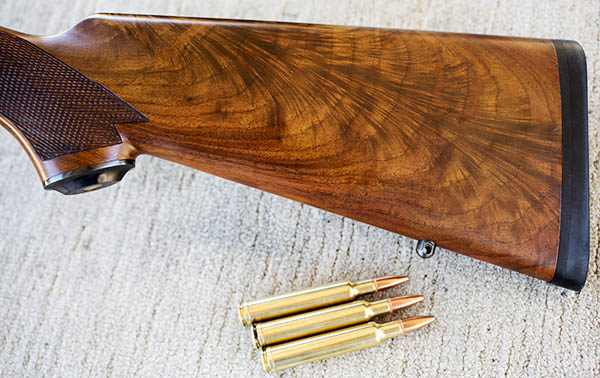
A lot of folks ask about my Mini 14 and its Circassian stock.  A dozen years ago Davidson’s (a large Ruger distributor) commissioned a run of Mini 14s with Circassian walnut.  Most had plain, straight-grained lumber, but a very small number were superbly figured.  I watched Gunbroker.com for several months and when the one you see here appeared, I pounced.  I bought it new for $699.  My attitude has always been you can’t pay too much for a gun; you can only buy it too early.  And no, this one is not for sale.


More Tales of the Gun!


Never miss an ExNotes blog.  Subscribe for free!

The Rodolfo Fierro Revolver

By any reasonable measure, Rodolfo Fierro was a world class SOB.  I know it’s not nice to speak ill of the dead, but old Rodolfo shucked this mortal coil more than a hundred years ago and I’m going to take a chance.  Bear with me.

I am a big fan of the Colt and Smith and Wesson 1917 .45 ACP revolvers and all their modern derivations.  You’ve read my scribblings (or tappings?) here on the ExNotes blog about the virtually new 1917 Colt I scored a couple of years ago, and you know I’m not above bragging about a group or two I’ve shot with my Model 625 Smith.  You can read all about that sort of thing on our Tales of the Gun page.


Keep us going…click on the popup ads!


Anyway, to get back to the main attraction (which is the beautiful nickel-plated and engraved 1917 you see here), a few years ago I bought a very cool Marlin from Collectors Firearms in Houston, Texas.  They are good people and as luck would have it, I had a secret mission in Houston a week ago.  Hmmm, I thought.  As long as I was headed to the Lone Star state it might be a good idea to stop in at Collectors, and before we left the Peoples Republik of Kalifornia I went online to see what Collectors had in stock.  That’s when the revolver in these photos appeared.

Wow!  My life suddenly somehow felt incomplete.  I needed that revolver.  Nickel plating.  Engraving.  Ivory grips.  .45 ACP.  An Army 1917.  Want.  Need.  Gotta have.  I was a dog in heat.

I studied the photos, of which there were many, and I noticed the following on the revolver’s frame:

General Rodolfo Fierro.  Who the hell was he?  So I Googled the name, and wow, what a mean bastard he was.  Turns out old Rodolfo was Pancho Villa’s darker side, and he was the one who handled the dirty work for Villa.  I won’t belabor all his dastardly deeds (you can Google the name yourself), but as dastardly bastards go, this guy was as bad as it gets.

But wow, the gun was a 1917 Colt (a favorite), it was highly engraved, it was advertised as being in good shape, and I wanted it. At $4950, the price was way out of my range.  But the provenance…the provenance of this Colt was incredible.   And the photos…take a look:

Collectors Firearms had a brief description on their website that was even more enticing:

Colt 1917 .45 ACP caliber revolver. Beautifully engraved and chiseled Colt .45 ACP revolver. This revolver is extensively engraved with traditional Colt style scroll work. The right-side of the frame has a relief chiseled figure of the Mexican Seal of an eagle and snake with cactus in the foreground. The left-side of frame is a relief chiseled figure of a puma braced on a rock. Bore is excellent. Action works perfectly. Barrel length is 5½”. The grips are of old mellow ivory. The backstrap is engraved “Gral Rodolfo Fierro” AKA “The Butcher.” Fierro was a known associate of Pancho Villa. Revolver has 100% of its nickel finish. Barrel has a relief chiseled figure of a longhorn steer. Very handsome and striking revolver!

So I was about 80% of the way there, thinking I could probably Presbyterian these guys down (it’s an inside joke shared by Members of the Tribe), sell a bunch of other stuff, and I would ride with Rodolfo.  Visiting Collectors Firearms became an imperative and after finishing my secret mission stuff, Sue and I rolled in to that magnificent firearms emporium on that fine Texas morning.

Collectors Firearms is huge, possibly the largest high-end gun store I’ve ever visited.   Folks, trust me on this…if you’re ever in Houston and you want to see some really cool stuff, you absotively have to see this place.

It took the kid who attended to us a few minutes to locate the Rodolfo Fierro revolver, and when he did, I was stunned.  The nickel plating and engraving were absolutely magnificently executed, far more so than revealed by the website photos above.  Somehow, the nickel finish and engraving made the revolver seem even larger than it actually is (and it’s a big gun).  I shot a few photos with my iPhone, and I’ll share one with you here:

So I thought about that revolver the rest of the time I was in Texas and then I thought about it more when I returned home, the gears turning with what I might have to sell to get it.

And then it hit me.  In researching old Rodolfo and all the evil he brought to those in his orbit, I found out that while there is some uncertainty about his date of birth, there’s none whatsoever about when he died.  That was in 1915 when he drowned in quicksand after being thrown from his horse, weighed down by gold he had presumably stolen.

1915.  Got it?  That’s the year old Rodolfo had to stand before his Maker and answer for all his sins.  You see, 1915 was two years before Colt introduced the 1917 Army .45 ACP revolver, and that tells me there’s no way this gun was carried by that bloodthirsty SonuvaYouKnowWhat. Whew! Just saved myself $4950 on that one.


More gun stuff?  It’s right here!


Sign up here, folks, and you’ll get the latest and greatest delivered to your inbox!

The 2021 MacManus 1911 Award

Earlier this month we had a quick trip back to New Jersey for the 2021 MacManus Award.  You’ve read about the MacManus Award earlier on these pages.  It’s the presentation of a 1911 .45 Auto to the outstanding Rutgers University Reserve Officers Training Corps graduating cadet.

US Army Captain Colin D. MacManus, Rutgers University ’63.

The award honors Captain Colin D. MacManus, a US Army Airborne Ranger who was killed in action in Vietnam in 1967.  Good buddies Dennis, Tim, Javier, and I revived the MacManus Award, and it’s a tradition we will keep alive.

The 2021 MacManus Award, a Colt 1911 presented to Cadet Joseph Hom.
The 1973 Colin D. MacManus 1911 and a couple of 5-shot, 25-yard hand held groups I fired with it.

You know, I sometimes hear people my age talk about younger folks in a disparaging manner and lament a notion that young people today are somehow less motivated than we were.  When I meet people like Joe Hom and his classmates, I know that’s not true.  It’s reassuring and invigorating to meet these folks and when I do, I know our future is in good hands.


You can read more about the MacManus award and other Tales of the Gun here.


Never miss a thing…sign up here for free!

The Mini 14 and Lee’s Factory Crimp Die

I love the Ruger Mini 14 and I’ve written several blogs on it (I’ll give you a link at the end of this blog).  The Mini 14 is not the most accurate rifle I’ve ever shot, but there’s something about it that just makes it fun.  I think if Ruger had introduced the Mini 14 a few years earlier it might have been the next US service rifle instead of Mattel’s M-16.  That statement might get a few trolls’ shorts in a knot, but hey, they’re young.  They’ll get over it.

Photos from the original GunBroker.com ad for my Mini 14. It was a limited production item with a Circassian walnut stock. Very few had wood this highly figured.

I took my Mini to the West End Gun Club a couple of weeks ago to see what impact (if any) a new Lee factory crimp die had on accuracy.  Usually when I reload rifle cartridges with jacketed bullets I don’t crimp.  Part of this is because it’s a bit difficult to get a consistent crimp if the brass is not trimmed to exactly the same length, and part of it is I often find I don’t need to trim my brass to get good accuracy.  That’s not to say case neck tension isn’t critical (it is; lube a couple of bullets before seating them and see how far out of the group they print).  But it you don’t crimp, you rely on friction between the case neck and the bullet to control the case’s grip, and friction is a tough thing to control.  Crimping should make the grip on the bullet more consistent (or so the theory goes).  Crimping is also thought to provide more complete combustion, reducing pressure variability and the inaccuracies associated with it.

Conventional reloading dies rely on a reduced diameter in the bullet seating die, which rolls the case mouth into the bullet to achieve a crimp (such a crimp is called a roll crimp).   Lee’s factory crimp die uses a different approach.  It has four collets (each forms a quadrant) that work at 90 degrees to the case to crimp the brass.  The collets are activated by the die’s base during the reloading press upstroke.

A .223 Lee factory crimp die. This is the last step in the reloading process. The die is screwed into the press after the bullet has been seated to the desired depth (left photo); the amount the die is screwed into the press controls the interface between the shell holder and the die (center photo). When the ram is fully raised, the die has collets that compress the brass horizontally around the case mouth (right photo), thereby crimping the bullet in place in the same manner as factory ammunition.
The view from above. The collets squeeze the brass around the bullet to crimp it in the case.
A 7.65x53mm Belgian Mauser round with a cast bullet roll crimped in place (left), and a .223 Remington/5.56mm NATO cartridge crimped with the Lee factory crimp die. The difference is subtle, but you can see it if you look closely.

I loaded 15 rounds crimped in the Lee factory crimp die, and I used another 15 rounds without the crimp.  I shot two targets at 100 yards from a rest using iron sights, with 15 rounds for each target. The target on the left is with no crimp, the one on the right is with the Lee factory crimp die (and I used a heavy crimp). The brass was fireformed in this rifle and neck sized only to get a good fit in the Mini 14’s 5.56 NATO chamber, which (as you know) is slightly larger than the .223 Remington cartridge.  In prior load development work, I found that neck sized only brass is much more accurate in the Mini 14.

15 uncrimped .223 rounds at 100 yards (left target) and 15 rounds crimped with the Lee factory crimp die (right target).

The first five shots using uncrimped reloads all went into the left target’s 10-ring, so I thought I was doing pretty well. Then I switched to the Lee factory crimp die ammo on the right target. The first shot felt weird, and it did not fully extract. I think it was the one that went way low. The next four all went into the 10 ring. On the next five rounds (again, using the Lee die ammo on the right target), the first one did the same thing (it failed to extract and it went low).  I fired one more magazine of Lee crimped ammo and all five worked okay.

Somewhere in those first two magazines of the Lee crimped ammo, I had two light primer strikes that did not fire. I extracted and chambered them again and they fired on the second attempt.  I didn’t know why those two rounds had light primer strikes.  Maybe the round had not fully chambered? Maybe because the Lee factory crimp die distorted the case mouth or something and it didn’t fully chamber?  Or maybe something was interfering with the firing pin’s travel?  I didn’t know and I wouldn’t find out until I disassembled rifle.

Then I fired 10 more uncrimped rounds at the target on the left and I had one failure to eject. My Mini 14 sometimes acts funny like that with the neck sized brass. It’s not a duty gun, so I thought I could live with an occasional failure to eject.  But I don’t like it.

So back to those misfires.  In the past, I’ve had to clean debris from around the firing pin, and it looked to me like it might be time to do that again. That could account for the two light firing pin strikes I had.

One other thing…I had painted the front sight with red nail polish, and that actually made the front sight’s top edge harder to see.  I want to go back to the plain blued front sight.

I also want to adjust the Lee factory crimp for less of a crimp. These first rounds used a max crimp. I didn’t trim the brass for this test because it was only fired once, but I don’t know how even (in length) it was. I used bulk Remington loaded ammo to get the brass (having fired it previously in the Mini 14) because a couple of years ago that stuff actually cost less than unprimed brass.  But inexpensive bulk ammo is not precision made and I suspect the case length had some variation (my suspicions were later confirmed, as you’ll read below).

A Lyman case trimmer I’ve been using for nearly 50 years. The Lee factory crimp die does not require case trimming, but the cases had enough length variability that I decided to trim them anyway. Cases that are too long can interfere with the bolt fully closing and raise chamber pressures.

When I reloaded the rounds fired in this test, I checked a few case lengths after neck sizing. The “trim to” length (per the Hornady manual) is supposed to be 1.750 inches, with a max case length of 1.760 inches. These cases (after two firings and neck sizing) were all over the map.  They ranged from 1.752 to 1.780. That alone could account for some of the anomalies described above.  I ran them all through the trimmer and reloaded a hundred for the next range visit. I backed off a bit on the Lee factory crimp die, too, as my good buddy Robby suggested.

I gave the Mini 14 a good cleaning and I was surprised at how filthy it was. This is not a rifle that I clean religiously…I’ll shoot it on several outings before cleaning (heresy, I know, but hey…it is what it is).  I wanted to grab a few photos of what a funky Mini 14 can look like, but my hands were so dirty and greasy I didn’t want to handle my Nikon camera.  After the most recent range visit, I Hoppes No 9’ed the Mini 14 bore for a couple days to get all the copper out (you know, until the patches came out with no green).

There were bits of what appeared to be very thin sheet brass in the bolt around the firing pin as well as a whole bunch of greasy carbon residue in the bolt. That could account for the couple of misfires. Removing the firing pin is not an easy job (it takes a special tool I don’t have or want); the drill here was to shpritz the hell out of the bolt with carb cleaner and work the firing pin back and forth to push the nasty stuff out. The thin brass bits might have been primer cup material.  Or they might have been chips from the extraction operation that found their way into the bolt and were peened flat. There’s no way of telling, as some of that ejected brass ends up in the next county (a trait Mini 14s are famous for).  By the way, when you’re working with that carb cleaner, you need to do it outdoors where there’s plenty of fresh air.  It’s highly flammable and if I use that stuff indoors, I get lightheaded and nauseated pretty quickly.

There was a lot of carbon gunk in the stock channel clear back into the action.  There was also a lot of carbon in and on the guide rod, as well as around the extractor. This could account for the occasional failures to eject. I blew it all out with WD 40 (in the stock) and carb cleaner (for the metal pieces).  There was so much carbon residue in the stock’s barrel channel that I thought I might have a leak around the gas port, but I didn’t see any carbon residue around the gas port and I’ve got the Allen bolts around that part tightened as tight as I dare go. I tried the smaller diameter aftermarket gas ports last year, but every one of them gave me unreliable function, so I went back to the stock port.

I’ve got a little more than a pound of ARComp, and that has been my “go to” Mini 14 powder for several years. When things started to get tight last year, my reloading outlet had an 8-pound bottle of XBR 8208 (it was the last bottle of anything he had). I had never heard of that powder before but I figured it would work in something, and in poking around on the Internet I found that 8208 gets the nod as a great powder for the .223 cartridge. The hundred rounds I just loaded are with ARComp, but I think I will do another 100 or so with different 8208 charges to see how they do. I’ve still got several hundred 62-grain Hornady full metal jacket bullets and I have another 500 55-grain bullets that just arrived from Midway. And I have small rifle primers and a potful of .223 brass. Unlike a lot of folks, I’m in good shape for .223 for a while (and no, I don’t want to sell or trade any components).

What’s the bottom line to all this?  Did the Lee factory crimp die improve accuracy?  The short answer is: I don’t know yet. I think it does, but I had too many other things going on with the rifle and the brass to be sure. If you ignore the first two rounds that went low, I think the accuracy edge goes to the Lee crimped ammo. Bear in mind that I was shooting with iron sights at 100 yards, so the differences may be more due to me than anything else. There were only four rounds outside the 10 ring with the Lee ammo; the uncrimped ammo had six rounds outside the 10-ring. But again, it’s iron sights at 100 yards, so who knows?

I’m going to share this post on Facebook, and you can bet some yahoo will tell me that he shoots 1/2-inch groups at 200 yards with open sights on his Mini 14 all day long.  Hey, it’s the Internet.  You have to ignore those buttheads.  As far as the Lee factory crimp die’s accuracy edge goes, I think it’s real.  I’ll find out for sure (maybe) the next time I go to the range.  Everything in the Mini is clean, lightly oiled, and ready for action. We’ll see what happens on the next outing, and you’ll read about here on the ExNotes blog.


Those other Mini 14 blogs I mentioned above?  You can find them here!


Never miss an ExNotes blog…sign up here for free!

TJ’s Urban Camo Process

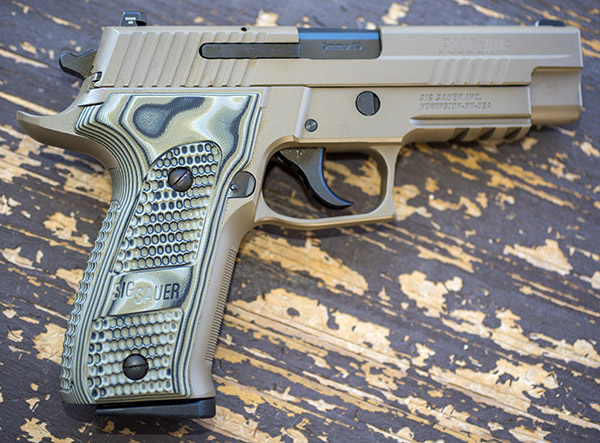
A couple of months ago I shared a photo of a very cool SIG 239 that good buddy TJ had finished in Urban Camo (it’s the one you see in the photo above).  I was intrigued by the finish, and as TJ walked me through the steps, I started to get an appreciation for how much work is involved.  Here’s the process as TJ explained it to me:

Step 1:  Disassemble, clean and inspect the firearm.
Step 2:  Sand blast or other surface preparation.
Step 3:  Apply base coat (black Duracoat for the gun you see above).
Step 4:  Add camo stickers to create pattern.
Step 5:  Spray light grey Duracoat.
Step 6:  Add more camo stickers to create pattern.
Step 7:  Spray dark grey Duracoat to create pattern.
Step 8:  Add more camo stickers to create pattern.
Step 9:  Spray base coat again (black Duracoat for the gun you see above).
Step 10:  Remove all camouflage stickers and inspect gun.
Step 11:   Overspray muting stripes (netted flat black).
Step 12:  Spray clear coat.
Step 13:  Clean excess Duracoat from holes, rails, etc.
Step 14:  Reassemble and oil firearm.

Here’s what it looks like as the gun proceeds through the urban camo application process:

The above makes for a good-looking gun and a durable finish.  After it’s fully cured, it’s relatively impervious to solvents or gun oils.

TJ can do other finishes as well, including a soft camouflage done without the tape described above (freehand spots or stripes).

TJ can also do speckling (like you see below), which is a good finish for hiding pitting and other surface imperfections.

If you would like to get a feel for a few of the other finishes TJ offers, you might take a look at his website at www.TJsCustomGunworks.com.

I’ve had six handguns and a rifle customized by TJ, and every one of them is a stellar example of his craftsmanship.  These include my Model 59, a bright stainless Colt 1911, my MacManus Colt 1911, the Rock Island Compact, a Model 60 Smith and Wesson snubbie, a Ruger Mini 14, and my new Colt Python.  TJ’s emphasis is on reliability and perfection and he’s met both of those objectives in every case.  It’s been money well spent.  When it comes to custom firearms, TJ is in a class by himself.


A Model 625 load…

When I first posted about the Model 60 load development plan and the Altamont grips I bought from good buddy Paul, the cover photo showed my recently-acquired Model 60 snubbie and a Smith and Wesson Performance Center Model 625 I’ve owned for years.

The Model 625 and the Model 60.

I like that photo because the two stainless steel Smiths look great on the wild boar skin.  That skin is from a pig hunt Paul and I did in Arizona a few years ago.

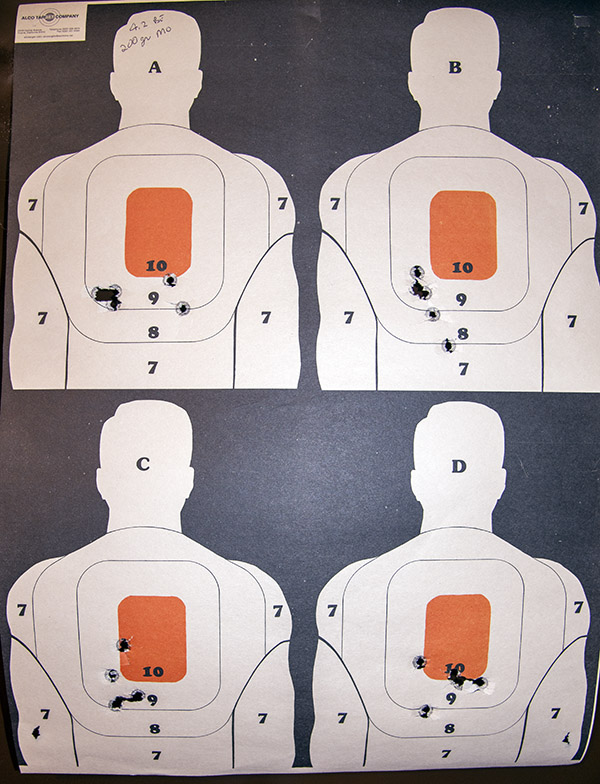
The earlier blog was about finding an accuracy load for the Model 60, but a few people wrote to ask if I had a favorite load for the Model 625.  I do: My usual accuracy load for the 625 is a cast 200-grain cast semiwadcutter bullet (sized to .452 inches) over 4.2 grains of Bullseye.

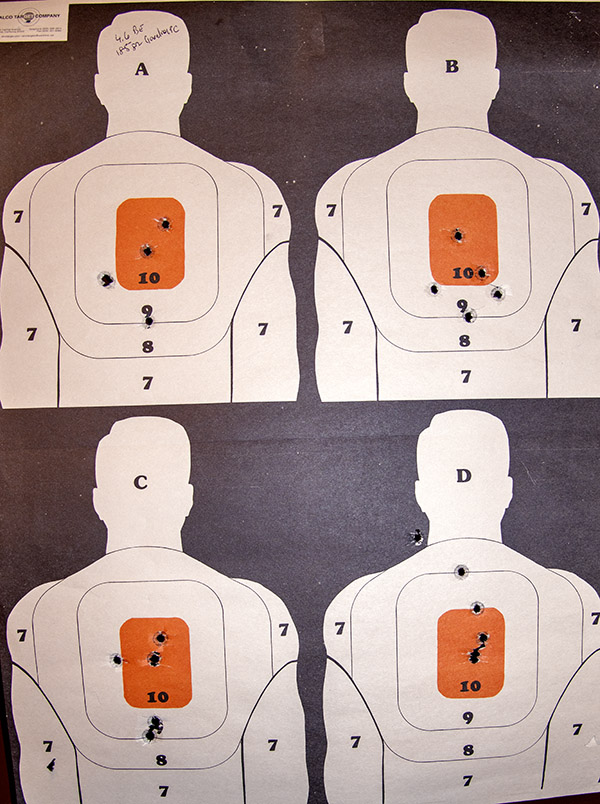
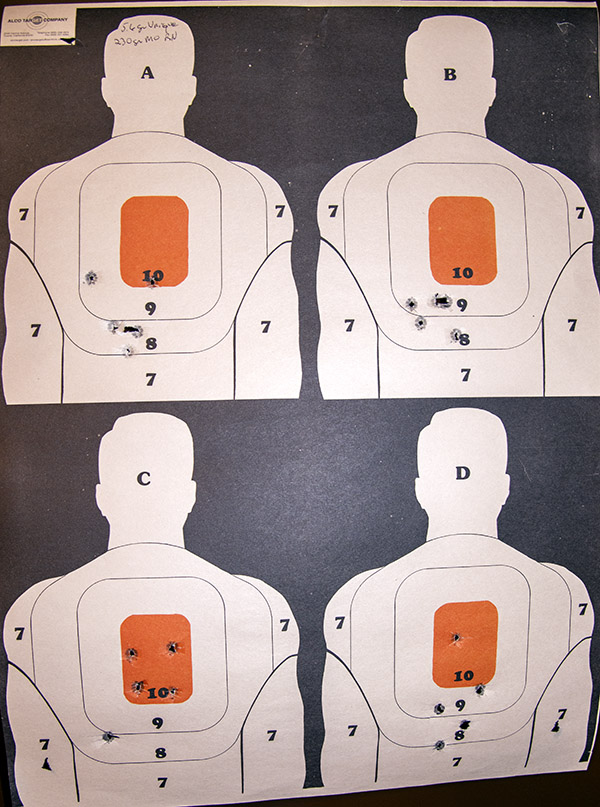
When I went to the range to run a few rounds through the 625 I picked a box of ammo I had reloaded in 2014.  It was different than my usual accuracy load.  I used the same bullet (a 200-grain cast semi-wadcutter), but instead of Bullseye I had loaded these over 6.0 grains of Unique.  And instead of .45 ACP brass in star clips, I used AutoRim brass.  This is the load I fired that 6-shot group you see in the cover photo above for this blog, and it’s a honey.  The group, that is…not the photo (it’s hard to get true colors when using an iPhone in the shade).  I shot at 50 feet while standing…there’s no rest for the Model 625 or the weary.

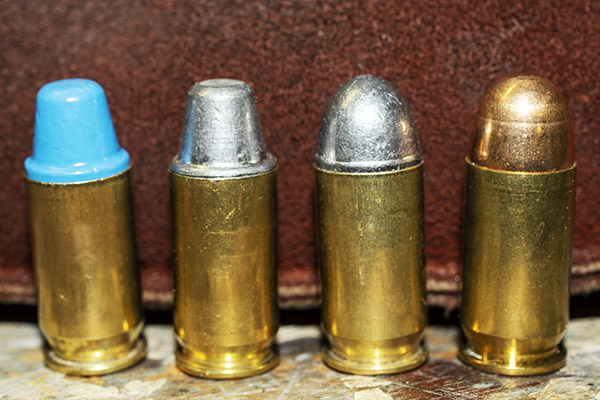
.45 ACP cartridges in star clips for the Model 625. These are loaded with 230-grain cast roundnose Missouri bullets.
The .45 ACP cartridge (left) and the .45 AutoRim cartridge (right). The AutoRim cartridge is designed for use in the Model 625 without star clips. The ACP cartridge has a 230-grain roundnose Xtreme bullet; the AutoRim cartridge has Missouri’s 200-grain semi-wadcutter.

The AutoRim brass is in the tumbler as I write this and when I reload it I’m going to go with the same load: The 200-grain cast semi-wadcutter over 6.0 grains of Unique.  It seems to be working for me.


Help keep us afloat:  Please click on the popup ads!

Never miss an ExNotes blog:  Sign up here for free!


More Tales of the Gun stories are here:

Model 60 S&W Load Test Results

A week or so ago I posted a load development plan for my .38 Special Smith and Wesson Model 60, and I recently finished the Model 60 load testing.  The Model 60 with its new Altamont grips and the custom work good buddy TJ did for me is surprisingly accurate.

Altamont grips on the Model 60. They improved accuracy significantly.

I tested four bullets and four different propellants at two different levels, and I fired two 3-shot groups with each load combination.  The one exception was the Hornady 148-grain swaged hollow base wadcutter bullet, which I tested with one propellant (Bullseye) at one level (2.7 grains).  I did that because the wadcutter load is my standard target load (and it’s what my Star progressive reloader is set up to produce).  The other bullets were the Hornady 110-grain jacketed hollow point, the Hornady 158-grain jacketed hollow point, and a cast 158-grain flatpoint bullet a local caster produces.

The four bullets used for this test: The 158-grain cast flatpoint, the 158-grain Hornady jacketed hollow point, the 110-grain jacketed hollow point, and the Hornady 148 grain hollow base wadcutter.
Four propellants used for this test: Unique, Power Pistol, Bullseye, and Winchester 231.

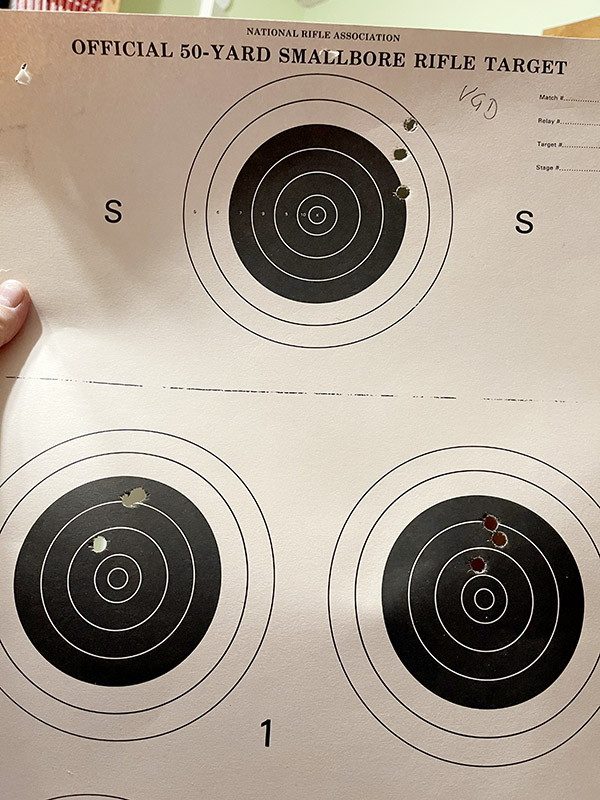
The propellants were Bullseye, Unique, 231, and Power Pistol.  As I mentioned above, all groups were 3-shot groups, and I fired each from a bench at 50 feet.  I tested for group size and for deviation from the aim point, and I used the standard NRA 50-ft slow fire bullseye target.  Point of aim was at 6:00 for all loads.

A few of the NRA 50-foot slow fire targets. I fired several groups on each target, marking my shots as I progressed. I took about 3 hours to test fire all loads included in this test.

The group size/accuracy results follow.

In addition to recording group sizes, I was also interested in where the groups printed with respect to my point of aim.  I held my aim at 6:00 on the bullseye.  Here’s what I found.

With regard to the group size testing, some of the loads were consistent, and others had some variability I think was mostly due to me. Many of the groups that went above, say, 2.3 inches or so in group size had two of the three shots right next to each other and then one was a flyer that opened the group up.  I attribute that to pilot error.  Yeah, I know, if I used a machine rest I could have eliminated that, but I don’t have a machine rest.  You get what you get with this test, and that’s me.

The 110 gr Hornady JHP shot significantly low with all loads, and its accuracy was okay but not great. It was close enough, I think, for a defense round, but this bullet shot 4 to 6 inches low pretty consistently. That’s because the lightweight bullet squirts out of the barrel before the muzzle has a chance to rise much in recoil (so it hits lower).  You might think that these 110 grain bullets would offer a significant recoil reduction, but if that occurred, I couldn’t feel it (the recoil felt about the same as the 158-grain loads).  My conclusion is that, for me, 110-grain bullets are a nonstarter for the Model 60.

My standard target load (2.7 gr Bullseye and wadcutter bullets) grouped relatively well, although for me it shot about an inch to the right in the Model 60.  That’s probably close enough for government work.  It’s good to know this load works, because that’s the load my Star reloader is set up to make (and I make a lot of them).

The 158-grain bullets are obviously what the Model 60 is set up to shoot, and of the two tested, the best accuracy occurred with the 158-grain cast bullet and Winchester’s 231 propellant.  It’s a sweet load at either the high or low propellant level, and it shoots essentially to point of aim at 50 feet.

I can also load the 158-grain cast bullet with Bullseye on the Star reloader, and that load did okay at 2.8 grains of Bullseye.  The Star reloader has a small amount of adjustment in it for powder throw, but I would leave it at 2.7 grains (the same as the wadcutter load) if I loaded the 158-grain cast flatpoint bullets on it.  That’s close enough.

Overall, I was surprised at how accurate a little snubnose can be. It’s not dramatically different than larger target handguns. Some of this is undoubtedly due to TJ going through the gun and making sure everything is perfect. And some of it is due to the Altamont grips.  I sure enjoy shooting this handgun.


Help keep us in components:  Please click on those popup ads!


More Tales of the Gun.


Never miss an ExNotes blog…get a free subscription here: