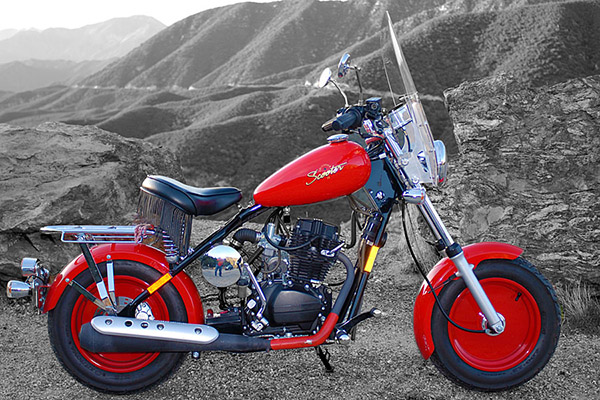
Everybody has their preferred riding schtick and for me it’s international motorcycle travel. Anyone can ride their cruiser to a local hangout for a beer or their GS to Starbuck’s for a $6 cup of coffee. My riding is all about crossing international borders and collecting cool photos in places most two-legged mammals only dream about. Just to make a point, I once rode a 150cc scooter (my CSC Mustang) to Cabo San Lucas and back. The day after we returned, I needed something at Costco and I rode the little CSC there. When I parked it, a beer-bellied dude in a gigondo 4×4 pickup told me, “that’s a little cute bike.” He didn’t intend it to be a compliment.
“Thanks,” I said.
“I ride a (brand name deleted to protect the guilty),” he announced, his chest swelling with Made in ‘Merica pride to the point it almost equalled his waistline. “We ride all over.” He emphasized the “all” to make sure I got the point.
“Cool,” I said. “Where do you go?”
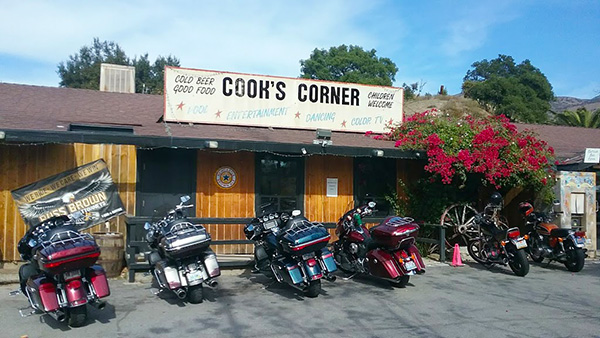
Cook’s Corner, the ultimate So Cal burger/biker stand.
“Last week,” he told me, “we rode to Cook’s Corner!”
Cook’s Corner is a southern California burger joint about 40 miles from where we were talking.
“Where do you all go on that little thang?” He actually said “you all” and “thang,” but he didn’t have the accent to match the colloquialisms. Okay, I had the guy dialed.
“Well, we rode to Cabo San Lucas and back last week.” I said.
Mr. 4×4’s jaw dropped. Literally. He looked at me, speechless, dumbfoundedly breathing through his open mouth. Without another word he climbed into his big truck and rode off. Our conversation was over. So much for the biker brotherhood, I guess.
My 150cc CSC Baja Blaster. I had a lot of fun and covered a lot of miles on that little Mustang.
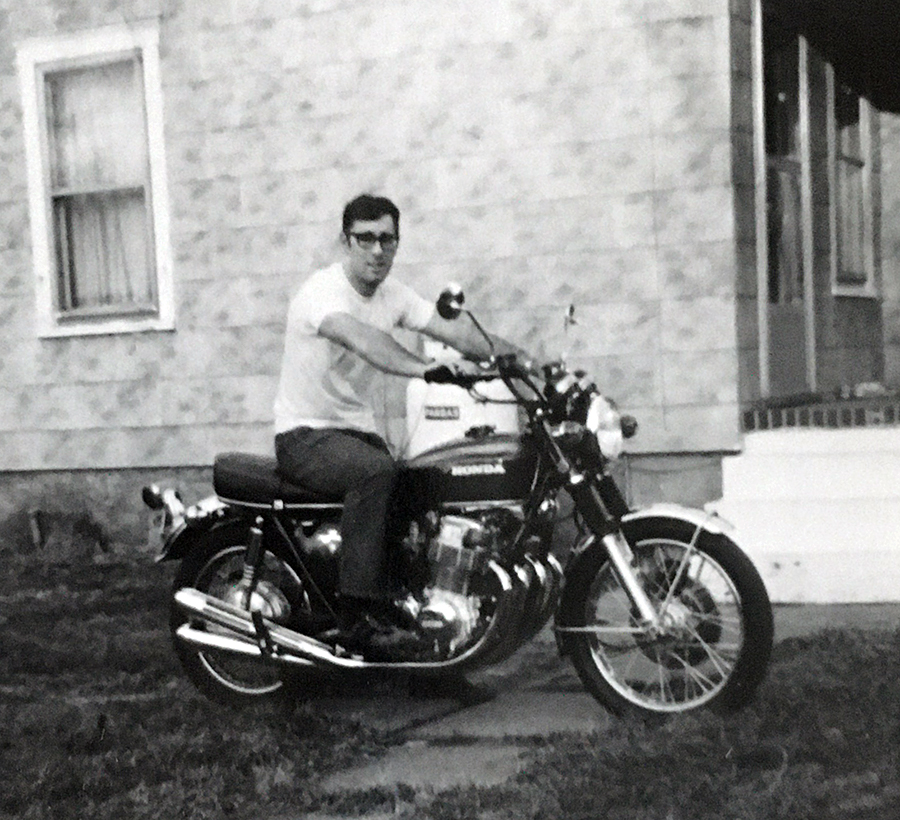
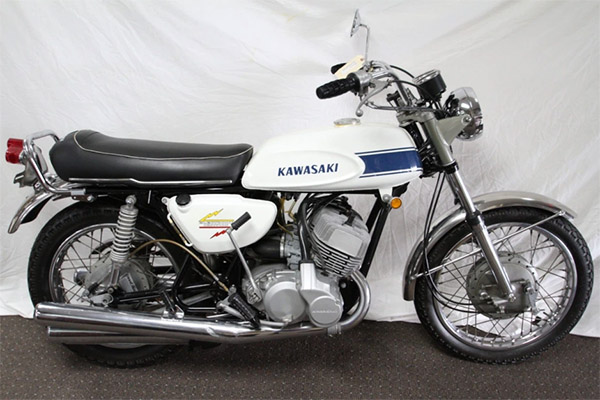
The international motorcycle travel bug bit me when I was still in school. I had a ’71 Honda 750 Four back in the day (that’s me 50 years ago in the big photo up top). One of my Army ROTC buddies had the first-year Kawasaki 500cc triple. It was a hellaciously-fast two stroke with a white gas tank and blue competition stripes. We were in New Jersey and we wanted to do something different, so we dialed in Canada as our destination. They say it’s almost like going to another country.
And so we left. Our gear consisted of jeans, tennis shoes, windbreaker jackets, and in a nod toward safety, cheap helmets (ATGATT hadn’t been invented yet). We carried whatever else we needed in small gym bags bungied to our seats. Unfortunately, in those days “whatever else we needed” did not include cameras so I don’t have any photos from that trip. That’s okay, because all they would have shown was rain.
A 1969 Kawasaki 500cc, two-stroke triple. Widowmakers, they were called, in a nod to their often unpredictable handling.
As two Army guys about to become Second Louies, we joked about being draft dodgers in reverse. We were looking forward to active duty (me in Artillery and Keith in Infantry). We were going to Canada not to duck the draft, but as a fling before wearing fatigues full time. We didn’t really know what we were doing, so we took freeways all the way up to the border. It rained nearly the entire time. All the way up and all the way back. We bought sleeping bags because they looked cool on the bikes (it was a Then Came Bronson thing), but we stayed in hotels. It was raining too hard to camp, and besides, the sleeping bags were soaked through and we didn’t think to bring a tent. We got as far as Montreal, which seemed far enough to give us Canada bragging rights. We spent that single Montreal night in a cheap dive and pointed the bikes south the next day.
These days, I know to check the weather, bring rain gear (even if none is forecast), and study a map to find the most interesting roads (rather than the fastest). But hey, we were young and dumb, it was an adventure ride, it crossed an internationational border, and riding four days in a steady cold rain was a lot of fun. I didn’t think so at the time, but that’s how I remember it today. In fact, I remember that ride like it was last month. And it got me hooked on international motorcycle adventures. Canada was to be the first of many.
Never miss an ExNotes blog. Sign up here for free, unless you have a .ru in your email address!
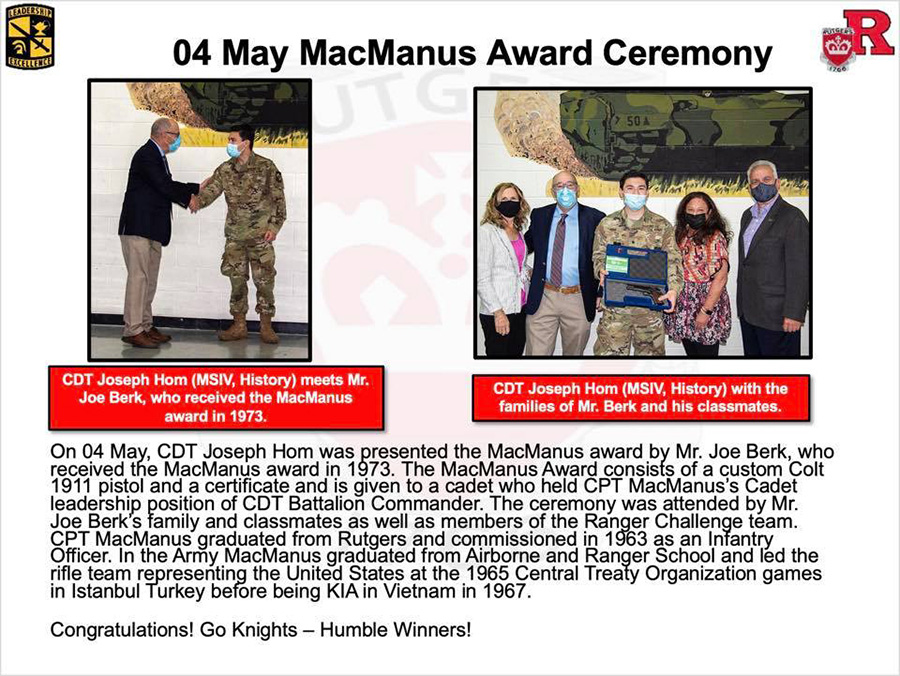
Earlier this month we had a quick trip back to New Jersey for the 2021 MacManus Award. You’ve read about the MacManus Award earlier on these pages. It’s the presentation of a 1911 .45 Auto to the outstanding Rutgers University Reserve Officers Training Corps graduating cadet.
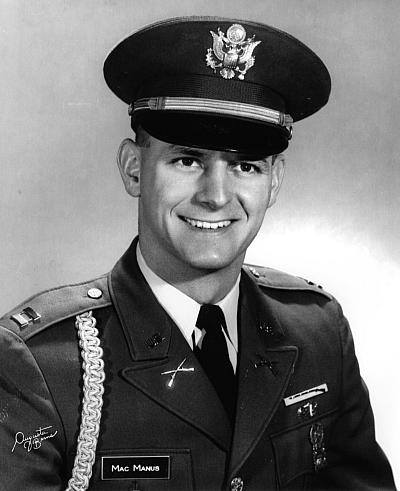
US Army Captain Colin D. MacManus, Rutgers University ’63.
The award honors Captain Colin D. MacManus, a US Army Airborne Ranger who was killed in action in Vietnam in 1967. Good buddies Dennis, Tim, Javier, and I revived the MacManus Award, and it’s a tradition we will keep alive.
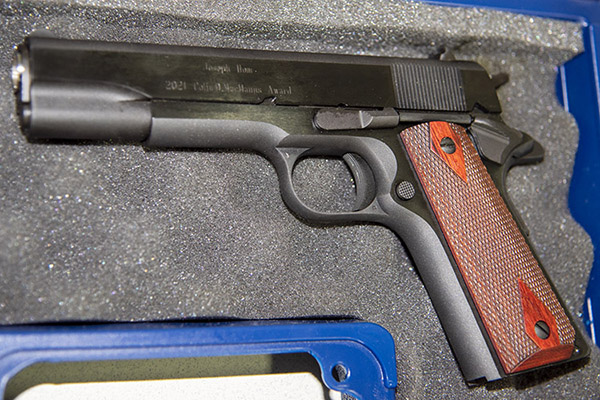
The 2021 MacManus Award, a Colt 1911 presented to Cadet Joseph Hom.The 1973 Colin D. MacManus 1911 and a couple of 5-shot, 25-yard hand held groups I fired with it.
You know, I sometimes hear people my age talk about younger folks in a disparaging manner and lament a notion that young people today are somehow less motivated than we were. When I meet people like Joe Hom and his classmates, I know that’s not true. It’s reassuring and invigorating to meet these folks and when I do, I know our future is in good hands.
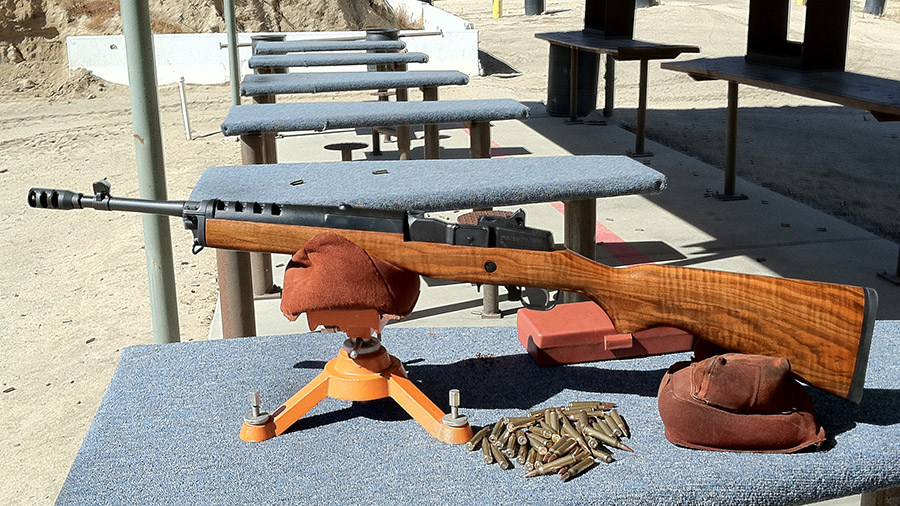
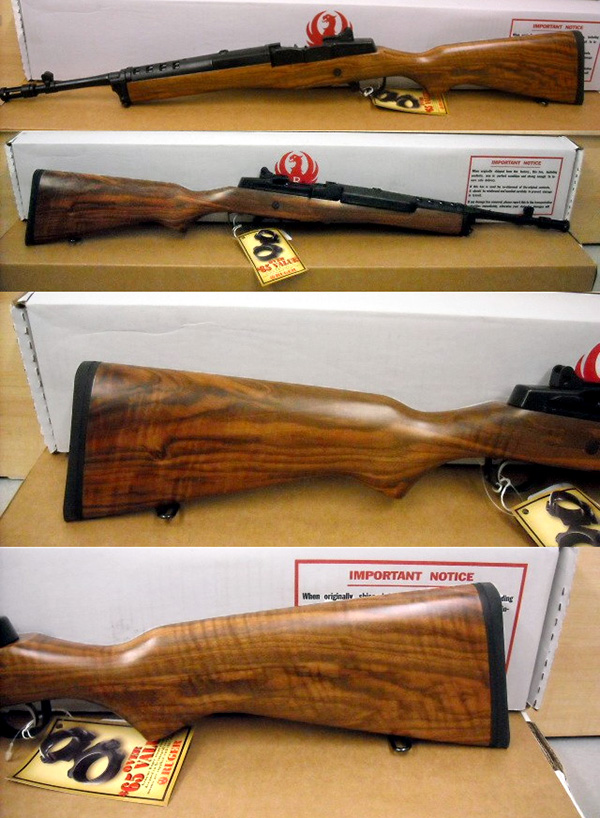
I love the Ruger Mini 14 and I’ve written several blogs on it (I’ll give you a link at the end of this blog). The Mini 14 is not the most accurate rifle I’ve ever shot, but there’s something about it that just makes it fun. I think if Ruger had introduced the Mini 14 a few years earlier it might have been the next US service rifle instead of Mattel’s M-16. That statement might get a few trolls’ shorts in a knot, but hey, they’re young. They’ll get over it.
Photos from the original GunBroker.com ad for my Mini 14. It was a limited production item with a Circassian walnut stock. Very few had wood this highly figured.
I took my Mini to the West End Gun Club a couple of weeks ago to see what impact (if any) a new Lee factory crimp die had on accuracy. Usually when I reload rifle cartridges with jacketed bullets I don’t crimp. Part of this is because it’s a bit difficult to get a consistent crimp if the brass is not trimmed to exactly the same length, and part of it is I often find I don’t need to trim my brass to get good accuracy. That’s not to say case neck tension isn’t critical (it is; lube a couple of bullets before seating them and see how far out of the group they print). But it you don’t crimp, you rely on friction between the case neck and the bullet to control the case’s grip, and friction is a tough thing to control. Crimping should make the grip on the bullet more consistent (or so the theory goes). Crimping is also thought to provide more complete combustion, reducing pressure variability and the inaccuracies associated with it.
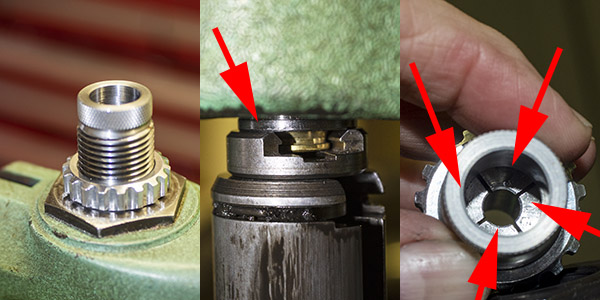
Conventional reloading dies rely on a reduced diameter in the bullet seating die, which rolls the case mouth into the bullet to achieve a crimp (such a crimp is called a roll crimp). Lee’s factory crimp die uses a different approach. It has four collets (each forms a quadrant) that work at 90 degrees to the case to crimp the brass. The collets are activated by the die’s base during the reloading press upstroke.
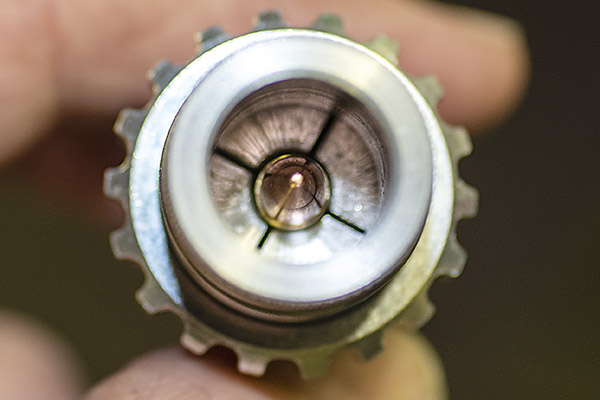
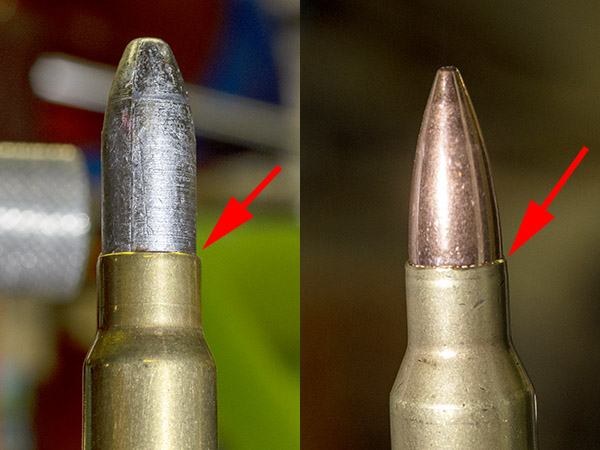
A .223 Lee factory crimp die. This is the last step in the reloading process. The die is screwed into the press after the bullet has been seated to the desired depth (left photo); the amount the die is screwed into the press controls the interface between the shell holder and the die (center photo). When the ram is fully raised, the die has collets that compress the brass horizontally around the case mouth (right photo), thereby crimping the bullet in place in the same manner as factory ammunition.The view from above. The collets squeeze the brass around the bullet to crimp it in the case.A 7.65x53mm Belgian Mauser round with a cast bullet roll crimped in place (left), and a .223 Remington/5.56mm NATO cartridge crimped with the Lee factory crimp die. The difference is subtle, but you can see it if you look closely.
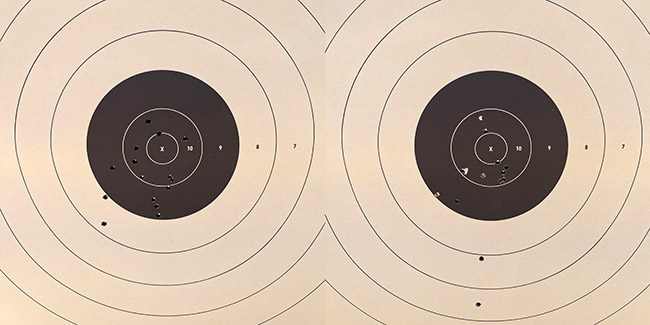
I loaded 15 rounds crimped in the Lee factory crimp die, and I used another 15 rounds without the crimp. I shot two targets at 100 yards from a rest using iron sights, with 15 rounds for each target. The target on the left is with no crimp, the one on the right is with the Lee factory crimp die (and I used a heavy crimp). The brass was fireformed in this rifle and neck sized only to get a good fit in the Mini 14’s 5.56 NATO chamber, which (as you know) is slightly larger than the .223 Remington cartridge. In prior load development work, I found that neck sized only brass is much more accurate in the Mini 14.
15 uncrimped .223 rounds at 100 yards (left target) and 15 rounds crimped with the Lee factory crimp die (right target).
The first five shots using uncrimped reloads all went into the left target’s 10-ring, so I thought I was doing pretty well. Then I switched to the Lee factory crimp die ammo on the right target. The first shot felt weird, and it did not fully extract. I think it was the one that went way low. The next four all went into the 10 ring. On the next five rounds (again, using the Lee die ammo on the right target), the first one did the same thing (it failed to extract and it went low). I fired one more magazine of Lee crimped ammo and all five worked okay.
Somewhere in those first two magazines of the Lee crimped ammo, I had two light primer strikes that did not fire. I extracted and chambered them again and they fired on the second attempt. I didn’t know why those two rounds had light primer strikes. Maybe the round had not fully chambered? Maybe because the Lee factory crimp die distorted the case mouth or something and it didn’t fully chamber? Or maybe something was interfering with the firing pin’s travel? I didn’t know and I wouldn’t find out until I disassembled rifle.
Then I fired 10 more uncrimped rounds at the target on the left and I had one failure to eject. My Mini 14 sometimes acts funny like that with the neck sized brass. It’s not a duty gun, so I thought I could live with an occasional failure to eject. But I don’t like it.
So back to those misfires. In the past, I’ve had to clean debris from around the firing pin, and it looked to me like it might be time to do that again. That could account for the two light firing pin strikes I had.
One other thing…I had painted the front sight with red nail polish, and that actually made the front sight’s top edge harder to see. I want to go back to the plain blued front sight.
I also want to adjust the Lee factory crimp for less of a crimp. These first rounds used a max crimp. I didn’t trim the brass for this test because it was only fired once, but I don’t know how even (in length) it was. I used bulk Remington loaded ammo to get the brass (having fired it previously in the Mini 14) because a couple of years ago that stuff actually cost less than unprimed brass. But inexpensive bulk ammo is not precision made and I suspect the case length had some variation (my suspicions were later confirmed, as you’ll read below).
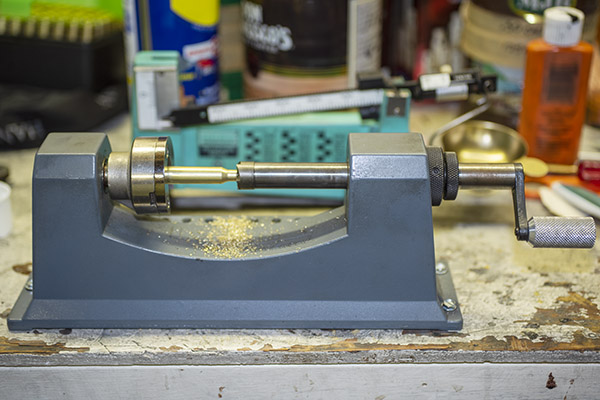
A Lyman case trimmer I’ve been using for nearly 50 years. The Lee factory crimp die does not require case trimming, but the cases had enough length variability that I decided to trim them anyway. Cases that are too long can interfere with the bolt fully closing and raise chamber pressures.
When I reloaded the rounds fired in this test, I checked a few case lengths after neck sizing. The “trim to” length (per the Hornady manual) is supposed to be 1.750 inches, with a max case length of 1.760 inches. These cases (after two firings and neck sizing) were all over the map. They ranged from 1.752 to 1.780. That alone could account for some of the anomalies described above. I ran them all through the trimmer and reloaded a hundred for the next range visit. I backed off a bit on the Lee factory crimp die, too, as my good buddy Robby suggested.
I gave the Mini 14 a good cleaning and I was surprised at how filthy it was. This is not a rifle that I clean religiously…I’ll shoot it on several outings before cleaning (heresy, I know, but hey…it is what it is). I wanted to grab a few photos of what a funky Mini 14 can look like, but my hands were so dirty and greasy I didn’t want to handle my Nikon camera. After the most recent range visit, I Hoppes No 9’ed the Mini 14 bore for a couple days to get all the copper out (you know, until the patches came out with no green).
There were bits of what appeared to be very thin sheet brass in the bolt around the firing pin as well as a whole bunch of greasy carbon residue in the bolt. That could account for the couple of misfires. Removing the firing pin is not an easy job (it takes a special tool I don’t have or want); the drill here was to shpritz the hell out of the bolt with carb cleaner and work the firing pin back and forth to push the nasty stuff out. The thin brass bits might have been primer cup material. Or they might have been chips from the extraction operation that found their way into the bolt and were peened flat. There’s no way of telling, as some of that ejected brass ends up in the next county (a trait Mini 14s are famous for). By the way, when you’re working with that carb cleaner, you need to do it outdoors where there’s plenty of fresh air. It’s highly flammable and if I use that stuff indoors, I get lightheaded and nauseated pretty quickly.
There was a lot of carbon gunk in the stock channel clear back into the action. There was also a lot of carbon in and on the guide rod, as well as around the extractor. This could account for the occasional failures to eject. I blew it all out with WD 40 (in the stock) and carb cleaner (for the metal pieces). There was so much carbon residue in the stock’s barrel channel that I thought I might have a leak around the gas port, but I didn’t see any carbon residue around the gas port and I’ve got the Allen bolts around that part tightened as tight as I dare go. I tried the smaller diameter aftermarket gas ports last year, but every one of them gave me unreliable function, so I went back to the stock port.
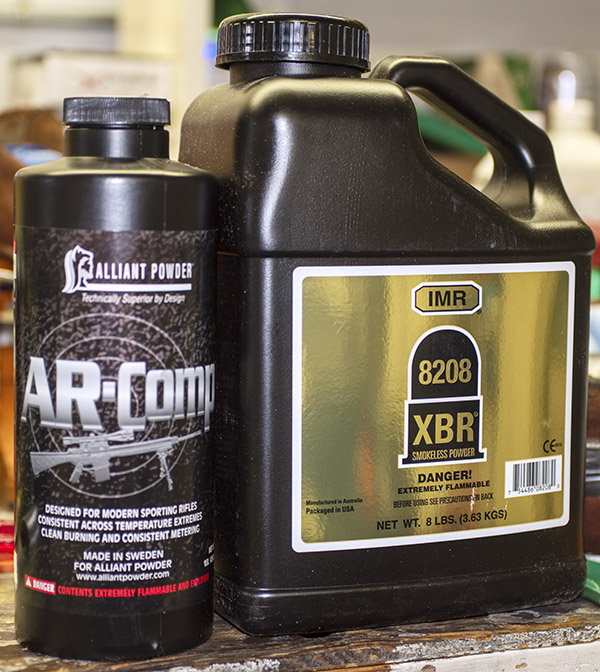
I’ve got a little more than a pound of ARComp, and that has been my “go to” Mini 14 powder for several years. When things started to get tight last year, my reloading outlet had an 8-pound bottle of XBR 8208 (it was the last bottle of anything he had). I had never heard of that powder before but I figured it would work in something, and in poking around on the Internet I found that 8208 gets the nod as a great powder for the .223 cartridge. The hundred rounds I just loaded are with ARComp, but I think I will do another 100 or so with different 8208 charges to see how they do. I’ve still got several hundred 62-grain Hornady full metal jacket bullets and I have another 500 55-grain bullets that just arrived from Midway. And I have small rifle primers and a potful of .223 brass. Unlike a lot of folks, I’m in good shape for .223 for a while (and no, I don’t want to sell or trade any components).
What’s the bottom line to all this? Did the Lee factory crimp die improve accuracy? The short answer is: I don’t know yet. I think it does, but I had too many other things going on with the rifle and the brass to be sure. If you ignore the first two rounds that went low, I think the accuracy edge goes to the Lee crimped ammo. Bear in mind that I was shooting with iron sights at 100 yards, so the differences may be more due to me than anything else. There were only four rounds outside the 10 ring with the Lee ammo; the uncrimped ammo had six rounds outside the 10-ring. But again, it’s iron sights at 100 yards, so who knows?
I’m going to share this post on Facebook, and you can bet some yahoo will tell me that he shoots 1/2-inch groups at 200 yards with open sights on his Mini 14 all day long. Hey, it’s the Internet. You have to ignore those buttheads. As far as the Lee factory crimp die’s accuracy edge goes, I think it’s real. I’ll find out for sure (maybe) the next time I go to the range. Everything in the Mini is clean, lightly oiled, and ready for action. We’ll see what happens on the next outing, and you’ll read about here on the ExNotes blog.
I was a 14-year-old kid in the 8th grade and I had just discovered motorcycles. A senior in our combined junior high and high school named Walt had a brand new 1964 Triumph Tiger back in the day when the Tiger was Triumph’s 500cc twin. It was the most beautiful thing I’d ever seen (with the possible exception of Raquel Welch and one or two young ladies in my class). But Raquel was beyond my reach, and come to think of, so were those other young ladies. The Tiger? It was right there. I could stare at it anytime I could get out in the parking and it wouldn’t care or complain. And stare I did; so much so I’m surprised I didn’t wear the paint off. White and gold with a cool parcel grid on the gas tank and perfect proportions, I knew that some day I’d own one. Ultimately I did, but I’m saving that one for another blog.
We didn’t have the Internet in those days. Come to think of it, we didn’t have cell phones or computers, either. We actually talked to people, and if we took pictures, we used this stuff called film that had to be sent off to be developed, but that’s a story for another blog, too.
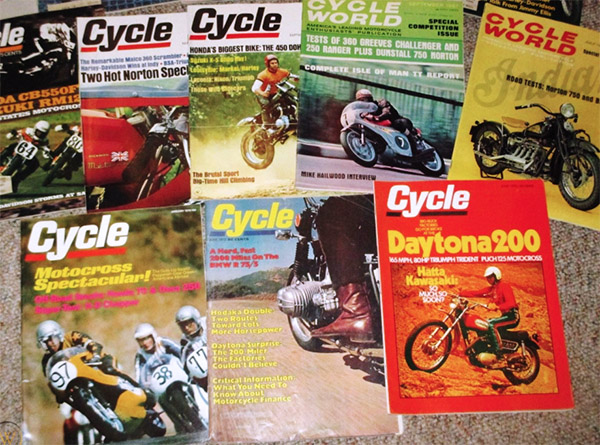
My world revolved around glorious motorcycle magazines in the 1960s. Actual print magazines. It was a wonderful era.
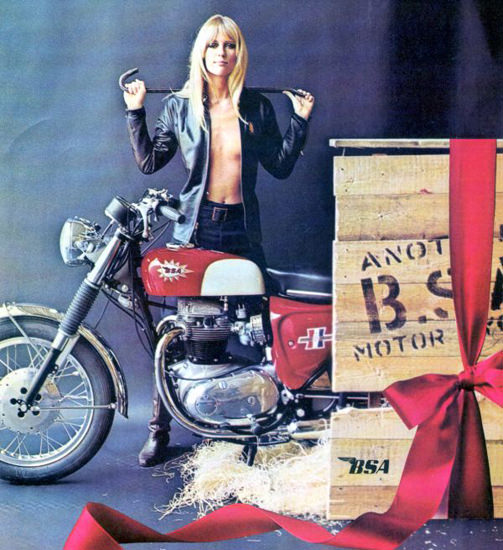
What we did have were glorious motorcycle magazines with even more glorious ads. The BSA ads were the best, with scantily-clad women in an era when the term sexism implied a pervert of some sort and the phrase “politically correct” was decades into the future.
A BSA ad from around 1967. Life was good.
Their awesome ads notwithstanding, I didn’t want a BSA. I wanted a Triumph. It had to be like Walt’s, with those extravagant big chrome exhausts and Triumph’s perfectly-pinstriped paint. The magazine ads all had a snail mail address (that’s the only kind of address there was back then) and an invitation to write for more info, and write I did. It wasn’t long before I had amassed an impressive collection of colorful brochures from the likes of Triumph, BSA, Norton, Harley, Honda, and more.
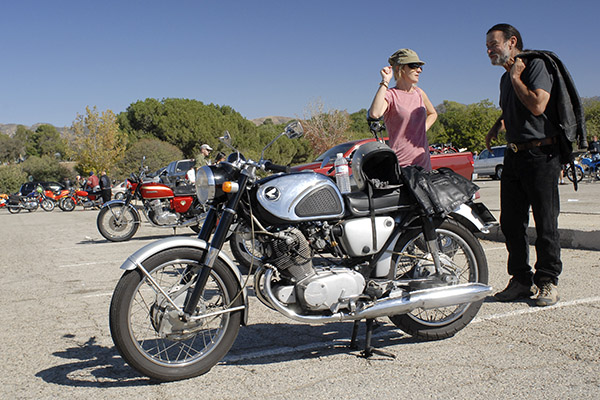
The planets came into alignment for me as several things happened. Dad started reading the brochures and that piqued his interest. He wasn’t a motorcycle guy, but the ads worked their magic. It was an era where advertising worked, I guess. Then one of Dad’s buddies, another trapshooter named Cliff, stopped by with a new Honda Super Hawk. In those days, the Super Hawk was an electric-start, twin-carbed, 305cc twin. Cliff let Dad ride it in the field behind our house and praise the Lord, Dad was hooked. Between my enthusiasm and the motorcycle industry’s advertising experts, he never had a chance.
A restored mid-60s Honda 305cc Super Hawk. Twin carbs, electric start, twin leading shoe front brake, flawless paint, no oil leaks, and all for just over $600. Did I mention life was good?
Dad was a little intimidated by the idea of starting his motorcycling career with a monstrous 305cc machine (remember all those nicest people you met on a 50cc Honda Cub?). He found an ad for a slightly used 160cc baby Super Hawk and that was his first motorcycle. It lasted all of two months. Dad took it for a service to Sherm Cooper’s Cycle Ranch and he came home with a new Super Hawk. Wow. I thought that would last for a while, but between the brochures, my inputs about Triumph Bonnevilles, and apparently a bit of salesmanship by old Sherm, a year after that Dad traded the Super Hawk for a new ’66 Bonneville. Wow again!
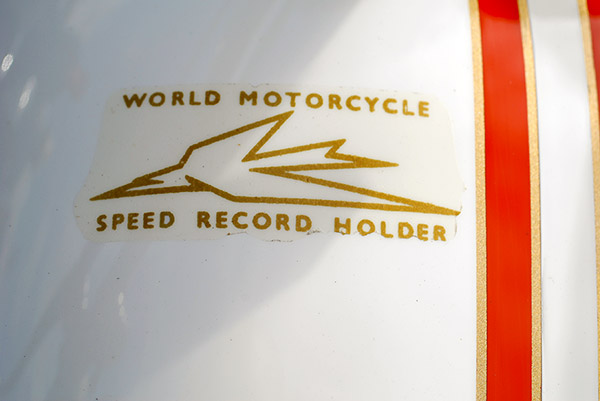
That’s what they were back in the day, and every new Triumph had a decal to remind you (and others) of that fact.
The Bonneville was stunning. Triumph went to 12-volt electrics in ’66, a smaller gas tank in ivory white with a cool orange competition stripe, and stainless steel fenders. And, of course, that World Motorcycle Speed Record Holder decal that adorned the tank of every new Triumph (Triumph held the record in those days, prompting the decal and the name of their flagship motorcycle). I was too young to drive but not too young to ride, and on more than a few occasions if Dad noticed the Bonneville odometer showing more miles than when he last rode it, he didn’t say anything.
Dad was a craftsman and a perfectionist. An upholsterer by profession and a tinkerer by nature, he added custom touches to the Bonneville that took it from awesome to amazing. He had a polishing machine in the basement and after what seemed like days of buffing (and several cloth polishing wheels) the fenders went from brushed stainless to a mirrored glaze that completely transformed the Triumph. And the seat…he outdid himself on that one. Remember that orange competition stripe I mentioned above? Dad’s seat continued it. The stock seat went from gray and black to a tank-matching ivory white, pleated with a perfectly-matched orange stripe that ran the length of the seat. The tank’s stripes were bordered with gold pinstriping; Dad incorporated matching gold piping on the seat’s pleats. The overall effect just flat worked. It looked like the Triumph had gone under a set of sprayers with ivory white, orange, and gold paint. Between the seat and the polished fenders, the bike had a jewel-like finished appearance that made it look like Triumph’s stylists had finished what they started. It was stunning.
This was not Dad’s actual Bonneville nor is it mine (I can only wish), but it is a near perfect 1966 Triumph Bonneville photographed at the Hansen Dam Britbike meet. Dad’s had a seat that continued the tank colors. The bike above has the stock brushed stainless steel fenders; Dad’s were mirror polished. I don’t have a photo of Dad’s Bonneville; all this happened before my interest in photography.
Sherm Cooper saw the seat Dad had recovered and he was floored by it. “Where did you get that?” he asked, and when he learned that Dad stitched it himself (after all, he was an upholsterer), Dad’s business suddenly included Triumph and Honda seats in all manner of colors, including lots of metalflake naugahyde. Dad was making “glitter sitters” before they became well known back in the ’60s.
The Triumph was in many ways less sophisticated than the Honda, but it was infinitely cooler. The styling was way better in my 14-year-old mind. It didn’t have an electric starter, but that made it better to me. You had to tickle each of the Amal carbs with this little button on each of their float bowls until gasoline flowed out around the button, and then give it a kick. It usually started on the first kick. It was a form of intimacy with the machine, something the Honda neither needed nor wanted. The Triumph, though…it needed you. Marlon Brando, move over (Johny rode a Triumph in Rebel Without A Cause, you know). The sound of a Triumph Bonneville was beyond awesome. It was the perfect motorcycle, but alas, it was not to last. Dad lost interest in riding and sold the Bonneville. A few years later (when I was finally legal with an actual motorcycle driver’s license) I bought a 90cc Honda and then a CB 750 Four. It wouldn’t be until 1979 that I bought a new Triumph Bonneville, but that’s a story for another blog, too. Stay tuned, and you’ll get to read it here.
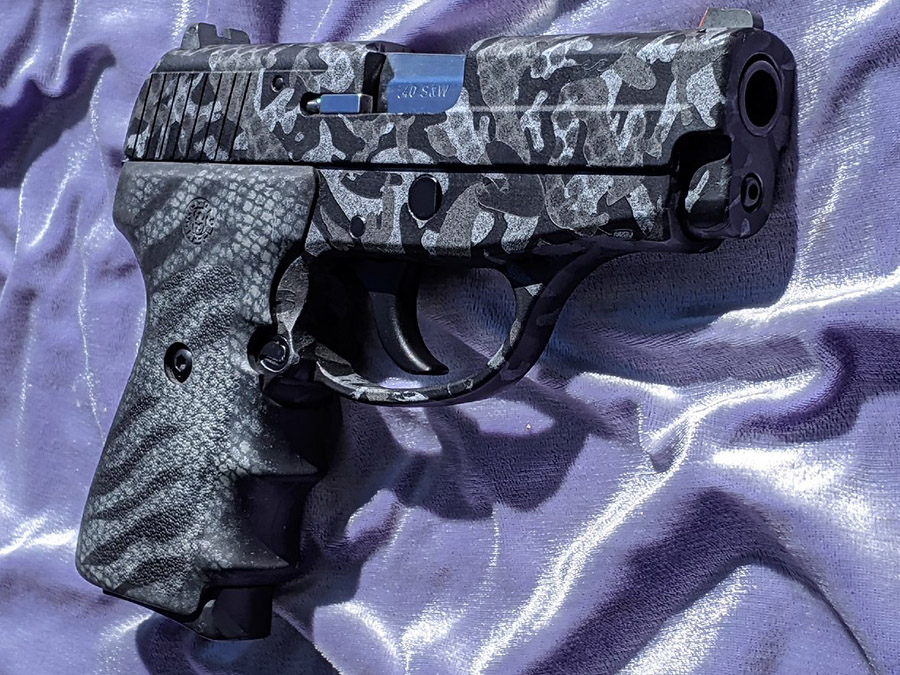
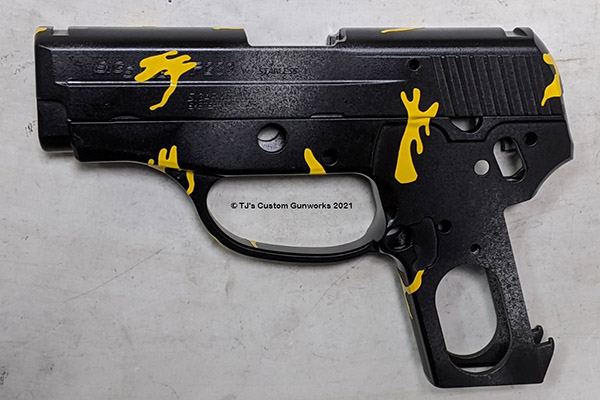
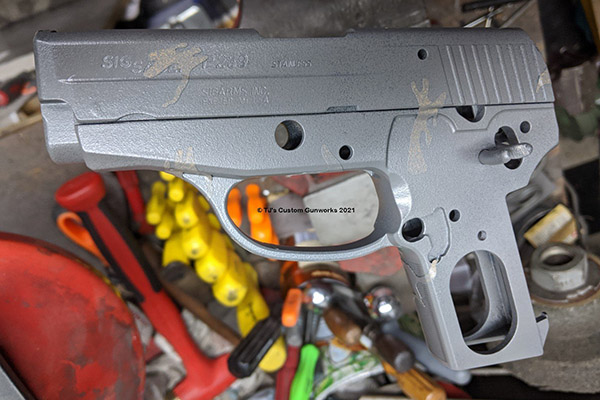
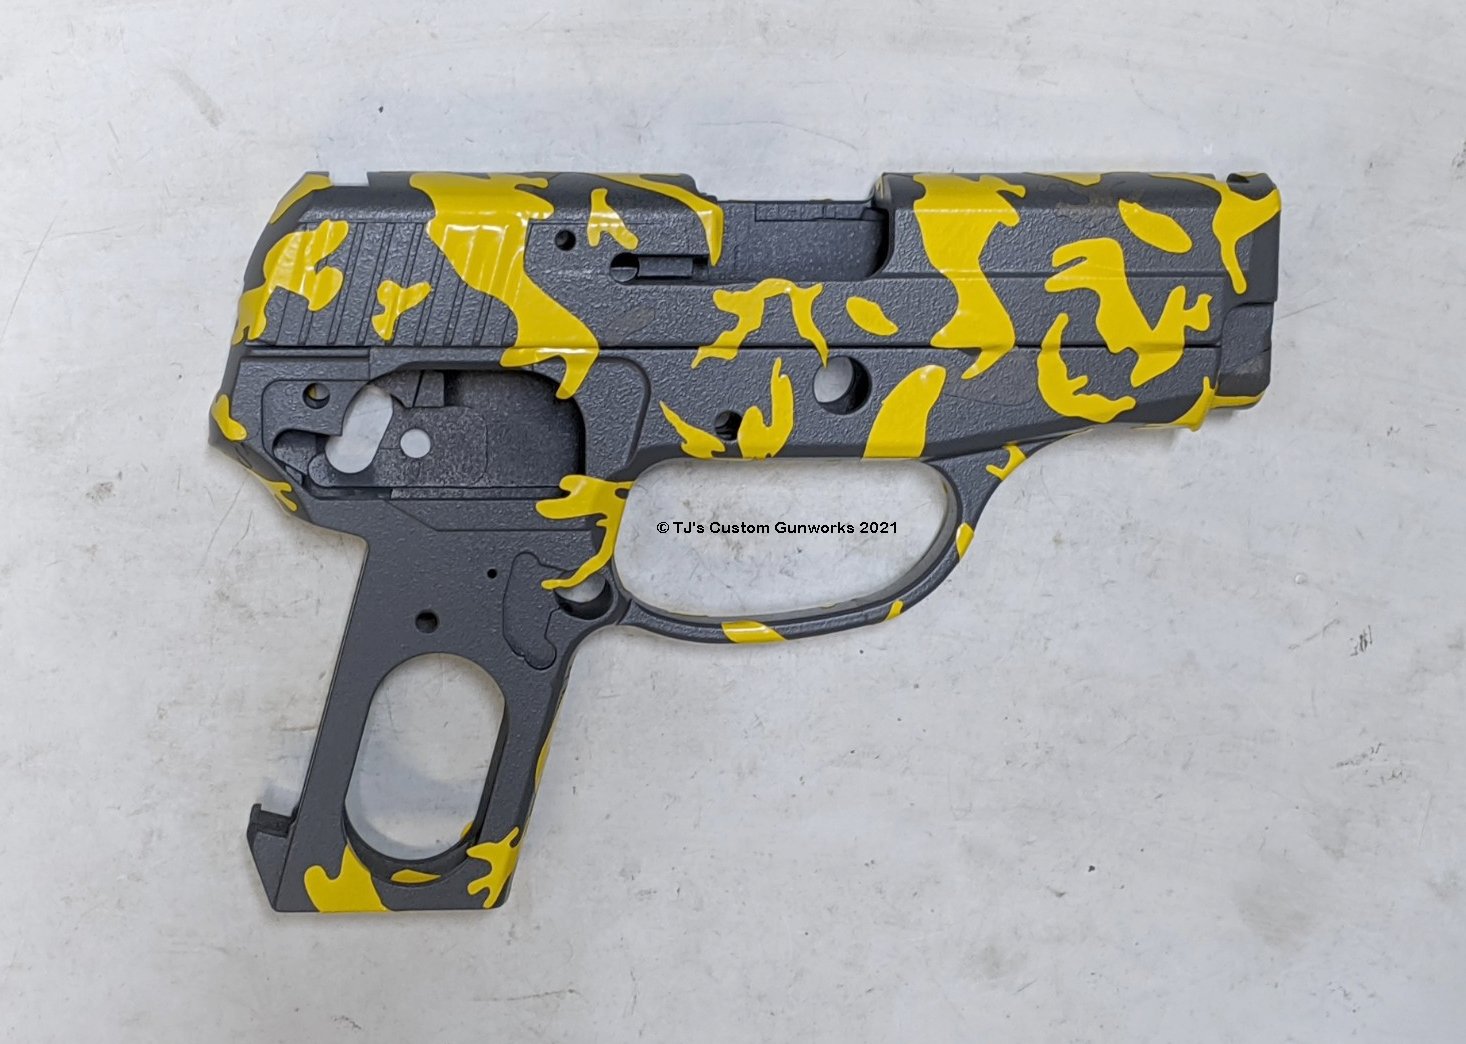
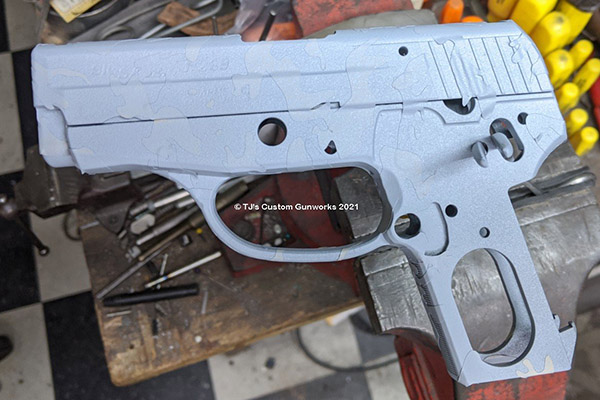
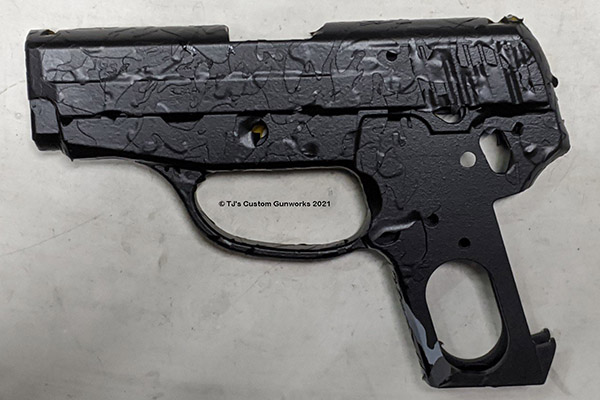
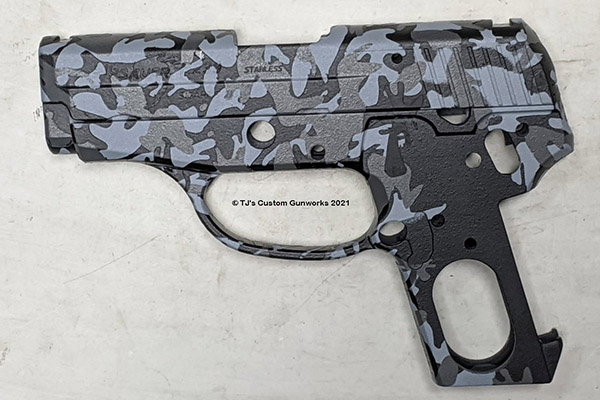
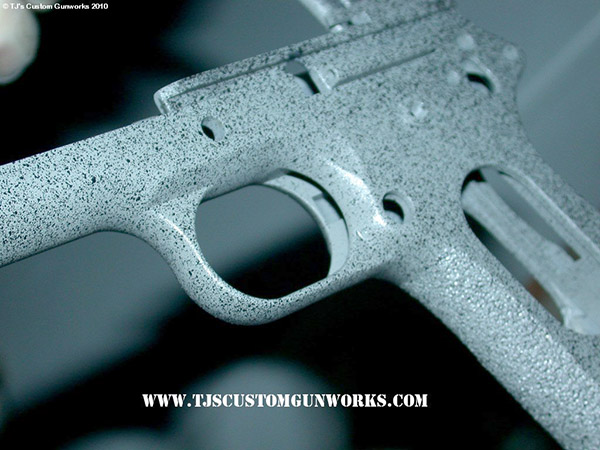
A couple of months ago I shared a photo of a very cool SIG 239 that good buddy TJ had finished in Urban Camo (it’s the one you see in the photo above). I was intrigued by the finish, and as TJ walked me through the steps, I started to get an appreciation for how much work is involved. Here’s the process as TJ explained it to me:
Step 1: Disassemble, clean and inspect the firearm. Step 2: Sand blast or other surface preparation. Step 3: Apply base coat (black Duracoat for the gun you see above). Step 4: Add camo stickers to create pattern. Step 5: Spray light grey Duracoat. Step 6: Add more camo stickers to create pattern. Step 7: Spray dark grey Duracoat to create pattern. Step 8: Add more camo stickers to create pattern. Step 9: Spray base coat again (black Duracoat for the gun you see above). Step 10: Remove all camouflage stickers and inspect gun. Step 11: Overspray muting stripes (netted flat black). Step 12: Spray clear coat. Step 13: Clean excess Duracoat from holes, rails, etc. Step 14: Reassemble and oil firearm.
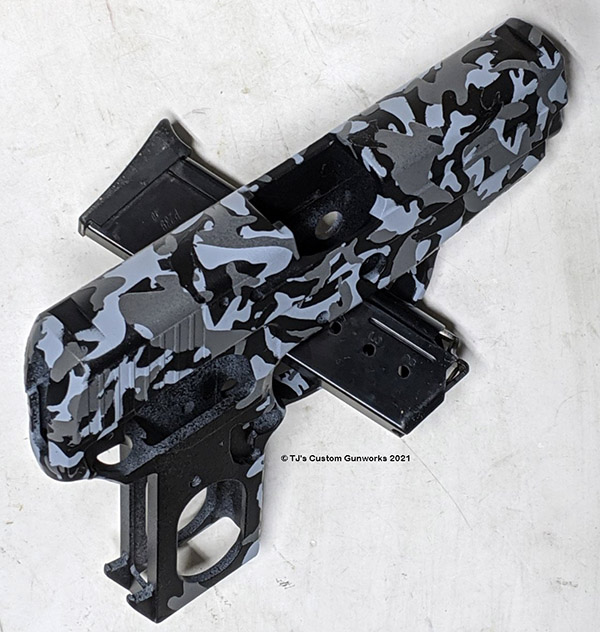
Here’s what it looks like as the gun proceeds through the urban camo application process:
The above makes for a good-looking gun and a durable finish. After it’s fully cured, it’s relatively impervious to solvents or gun oils.
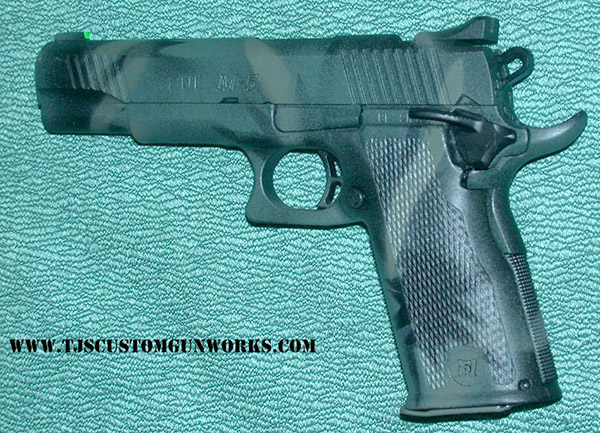
TJ can do other finishes as well, including a soft camouflage done without the tape described above (freehand spots or stripes).
TJ can also do speckling (like you see below), which is a good finish for hiding pitting and other surface imperfections.
If you would like to get a feel for a few of the other finishes TJ offers, you might take a look at his website at www.TJsCustomGunworks.com.
When I was a kid growing up in rural New Jersey, we convinced ourselves that the local lakes and streams were inhabited by water moccasins. All the books said cottonmouths didn’t live that far north, but we had seen them (or so we thought). I even caught one in a pond on a fishing lure…I saw it sitting on a rock, I dangled the lure in front of it, and the snake went for it. That scared the hell out of me: I was the classic case of the dog that finally caught the bus he always chased. What do I do now? I ended up cutting the line to let the snake (and my lure) get away. It was, after all, a water moccasin (or so I thought).
And then, of course, many years later there was that rather unsettling scene in my favorite movie, Lonesome Dove:
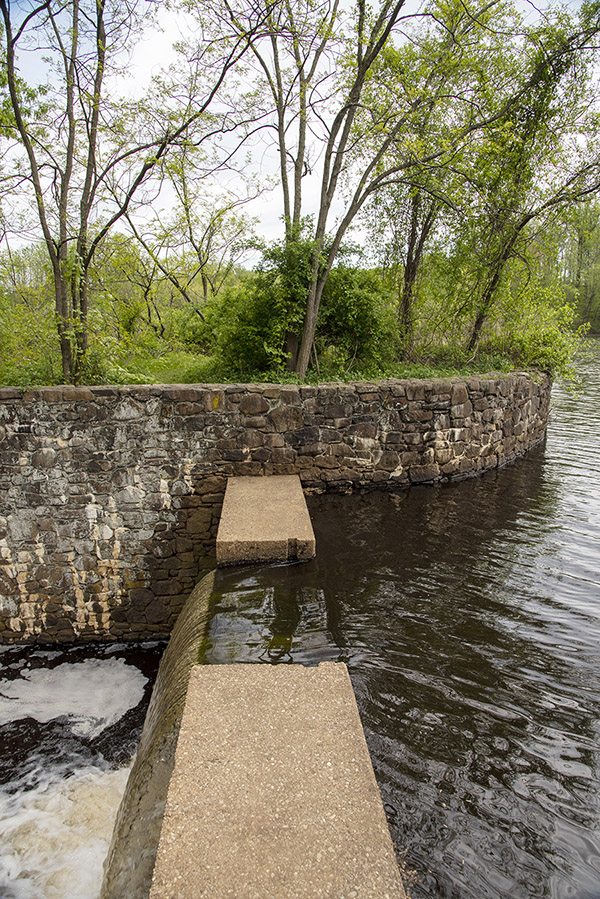
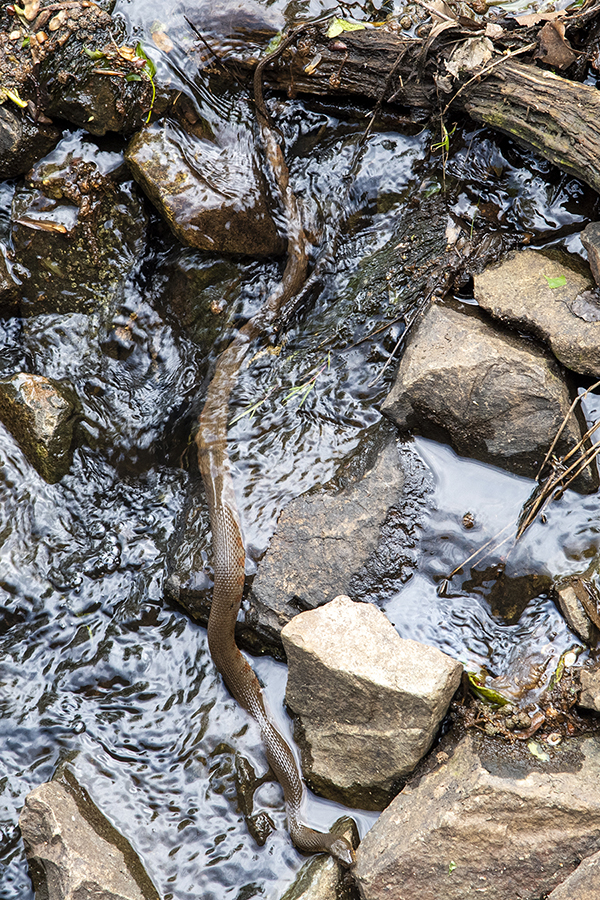
Last week Sue and I were back in Sopranoland for a wedding, and the next day we rode around so I could show her my old haunts. One was the Old Mill in Deans (not to be confused with the Old Mill Hotel in Baja). It was behind where my grandma lived and it was basically a dam that created a huge lake where we used to play back in the day. So we’re walking around and I snapped a photo or two when this woman said “there’s a snake down there!”
A panorama of the lake at the Old Mill…five photos stitched together in PhotoShop.
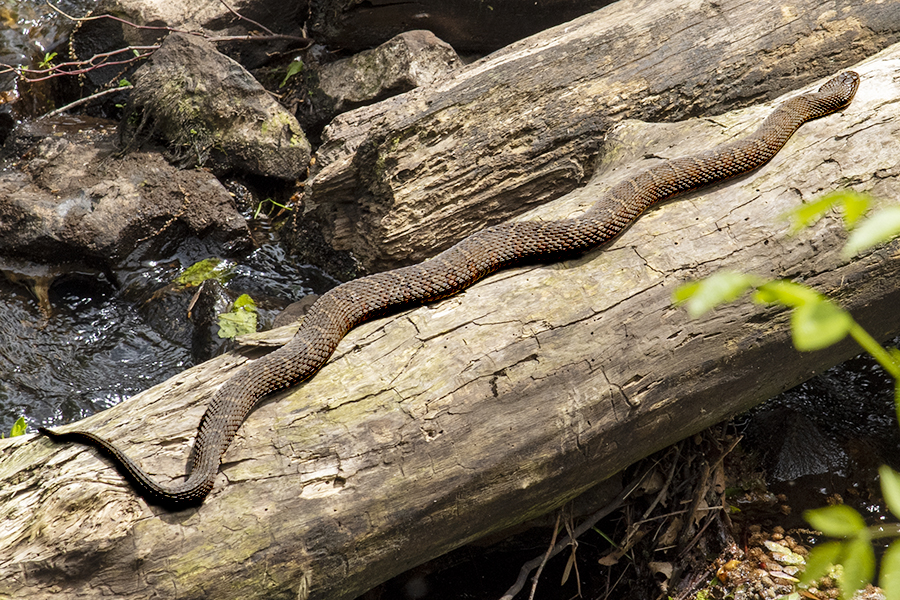
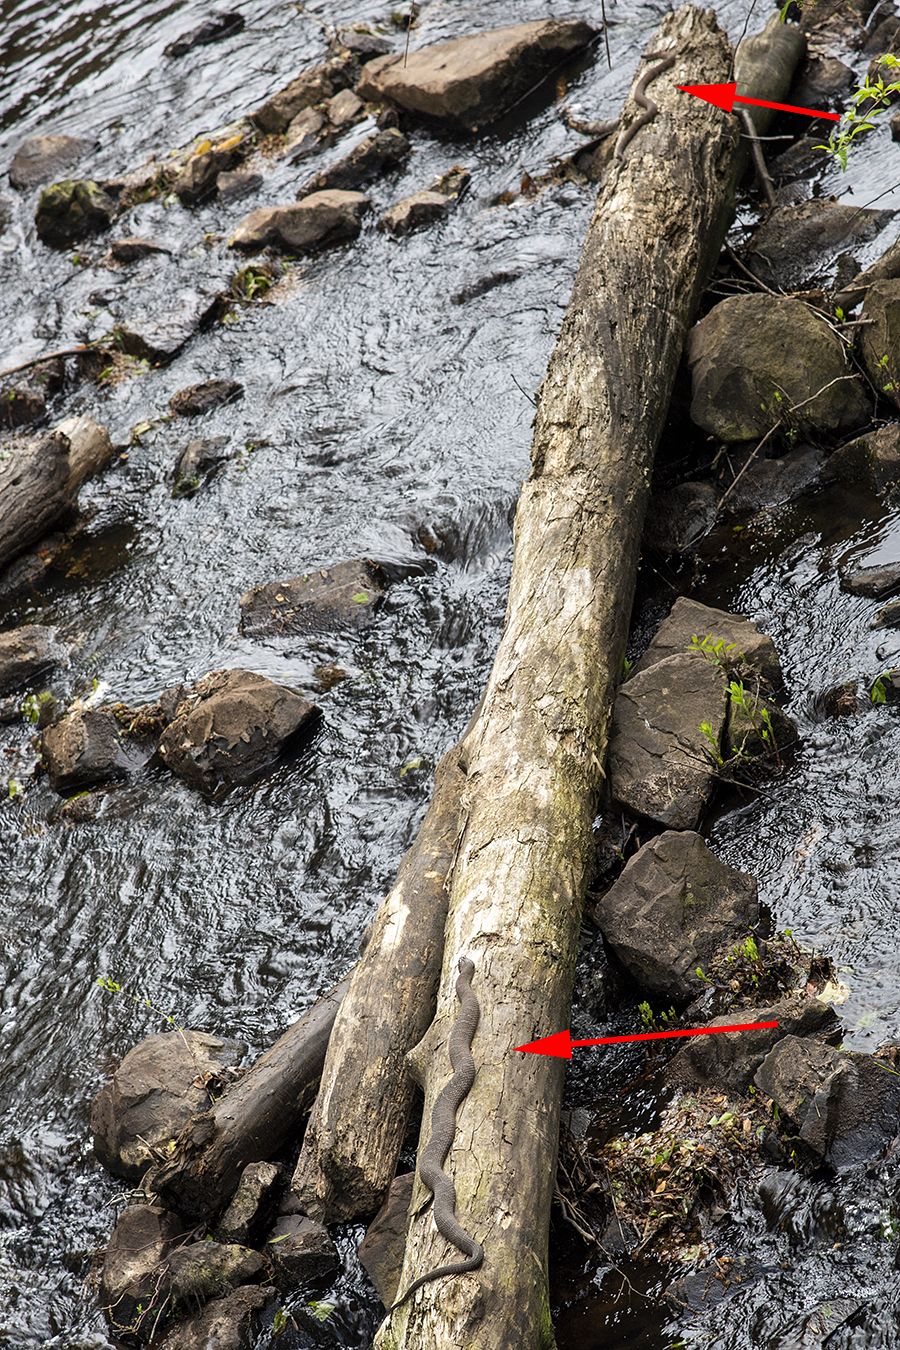
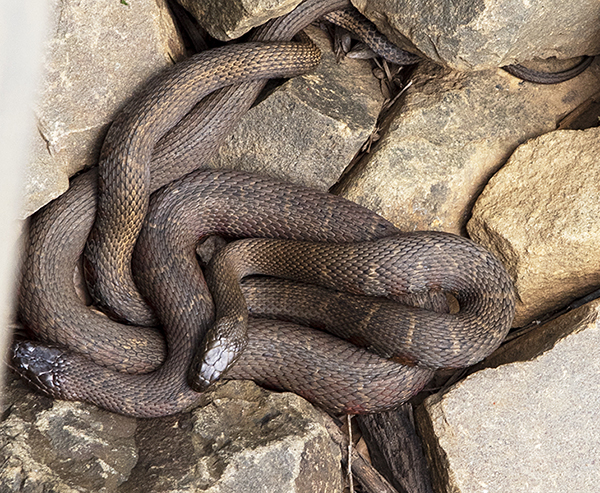
I checked and what do you know, she was right. The snake was on a log downstream of the dam where a bridge carried traffic over the spillway. The snake was almost directly beneath the bridge. As usual, I didn’t have the perfect lens on my Nikon (that would have been the 70-300 Nikkor), but what I had on the camera (Old Faithful, my 24-120 Nikon lens) worked a lot better than a cell phone. I zoomed all the way and grabbed some awesome photos. Then I looked around and I saw another snake on the same log. And then another slithering through the water. And then two more that might have been making even more snakes. Snakes alive, I was in the middle of a moccasin orgy!
This spot is at least a couple of hundred years ago. There used to be a mill located here, powered by the water held behind this dam. We played here as kids. It was a good time and a good place to grow up.And another!. The lower snake is the same one you see in the big photo above. Then I spotted the one you see at the top of this photo!This guy was next to the log, slithering around in the water.I saw these two looking straight down from my vantage point on the bridge above the stream. I leaned waaaay over the bridge railing to get this shot. Water moccasins making whoopee?
I was so intrigued by the above photos that I Googled “water moccasin” to get photos of the real McCoy. After spending decades believing there were indeed moccasins in New Jersey, I convinced myself that what I was seeing in my photos were common New Jersey water snakes. Moccasins have a more triangular head and a slightly different pattern. Still, these snakes are pretty big (the big one on the log in the photo above was about 5 feet long) and I would not want to tangle with any of them. You never know…I might be wrong and maybe they are moccasins.
Creeped out by this blog, or were you intrigued by it and other similar war stories? Never miss an ExNotes blog: Sign up here for a free subscription!
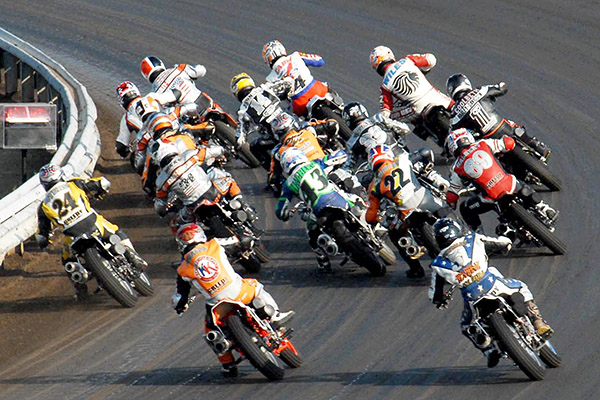
That photo above? It’s the Springfield mile, with riders exiting Turn 4 at over 100 mph on their way up to 140 or so. These boys are really flying. It is an incredible thing to see.
But I’m getting ahead of myself. Two blogs back I wrote about the East Windsor half-mile dirt track, which has gone the way of the dodo bird. The Springfield Mile is bigger and better and last I checked it’s still with us. A dozen years ago I made the trek out to Illinois watch the big boys (and a lady or two) mix it up and it was awesome. I don’t know if this is accurate or if it’s more biker bullshit, but the guys claim the bikes hit 140 mph in the straights and maintain a cool 100 in the turns. And “straights” is a relative term. The track is basically a big oval, with the straights being less of a curve. What’s nice about oval track racing, though, is you usually can see all the action all the time. When you go to a grand prix type event, you get to see the bikes or the cars for just an instant when they scream past wherever you are. Oval tracks are a better deal, I think.
We planned to ride to Springfield from So Cal, but just before it was wheels-in-the-wells time my good buddy Larry passed and I stayed for his funeral. We flew instead and because that gave us a little bit more of our most precious commodity (time), we bopped around Springfield a bit more. We visited Springfield’s Lincoln Museum and had a lot of fun getting there. I drove our rental car and we promptly got lost (it was in the pre-GPS era). We pulled alongside a police officer and he gave us directions. As soon as I pulled away, I asked my buds which way to go. “I don’t know,” they answered, “we weren’t listening…” Neither was I. We all had a good laugh over that one.
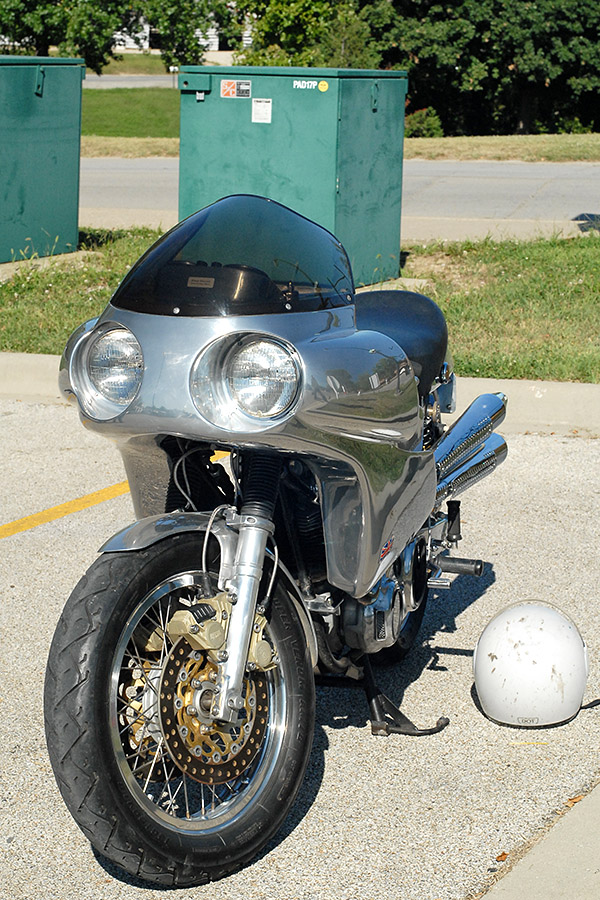
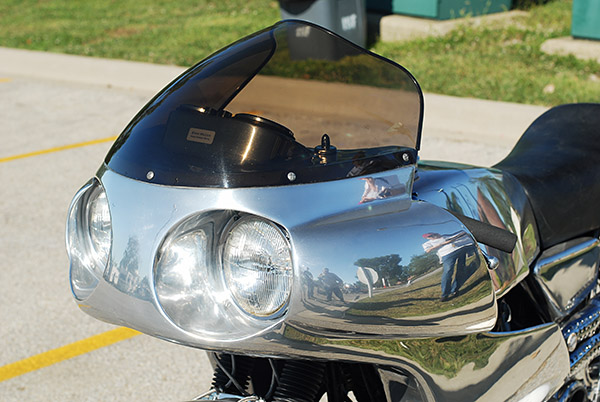
An interesting Norton in the fairgrounds parking lot.Another shot of the Norton.
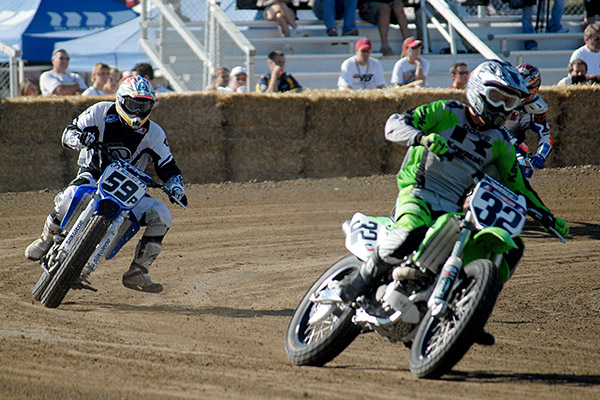
The Illinois State Fairgrounds has two tracks, on a quarter-mile dirt oval and the other the big mile. The quarter-mile races were awesome. This racing, all by itself, would have been worth the trip out there. I love watching the flat trackers.
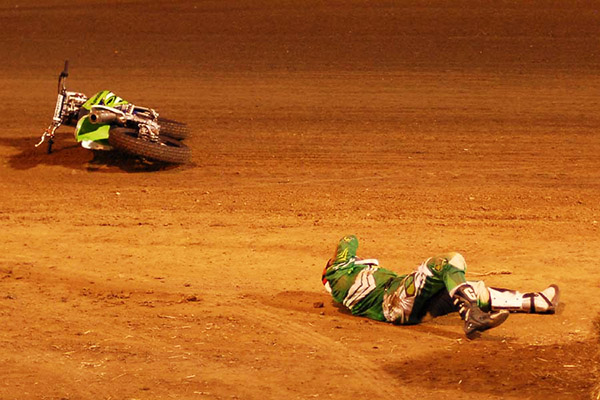
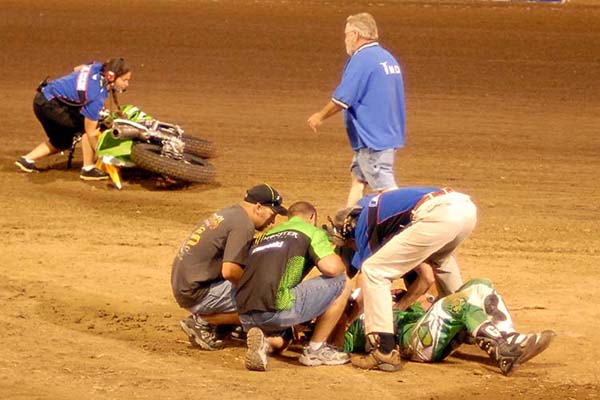
These boys are kicking up some dirt coming out of Turn 4 on the Illinois State Fairgrounds quarter-mile track.One of the riders lost it coming our of Turn 4 and he crashed hard directly in front of us.I didn’t think he was going to get up, but he did. The next day, this guy won a heat on the 1-mile track. The announcer said he was “tougher than a $2 steak.” I believe it.
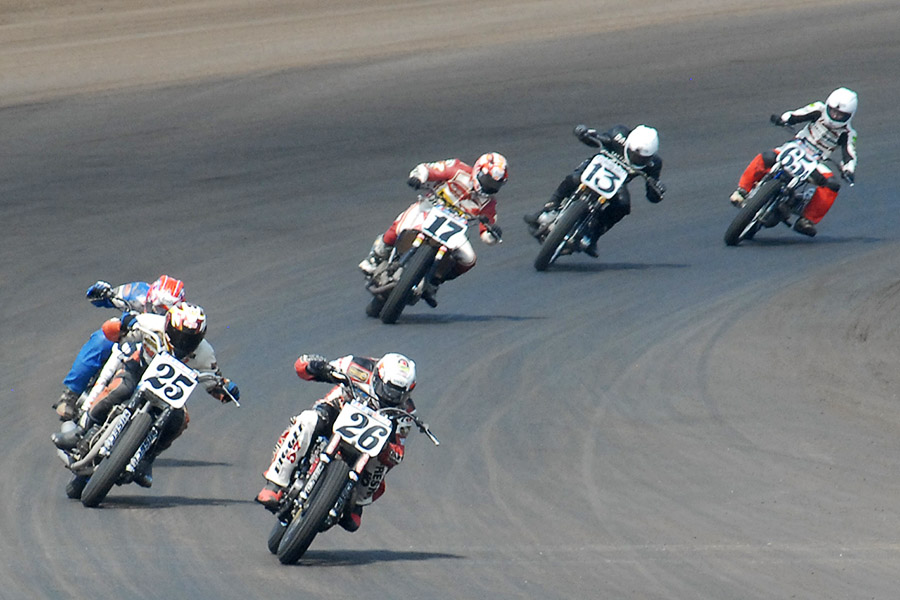
The next day, we went to the 1-mile track on the other side of the State Fairgrounds.
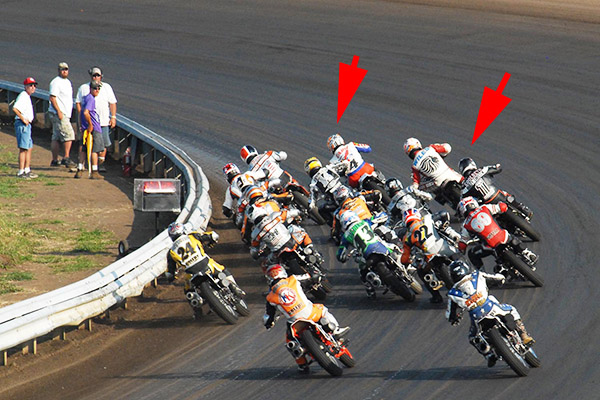
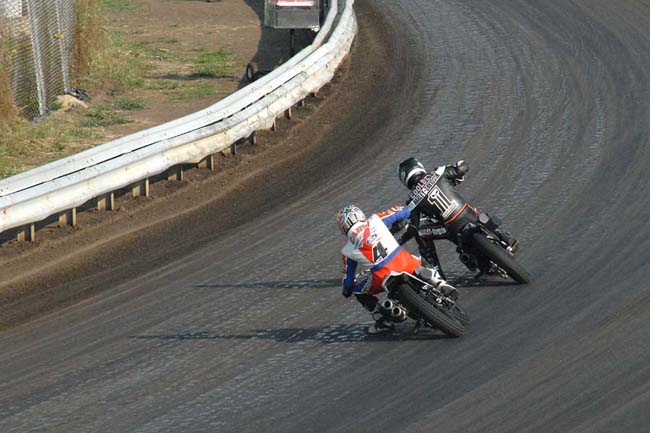
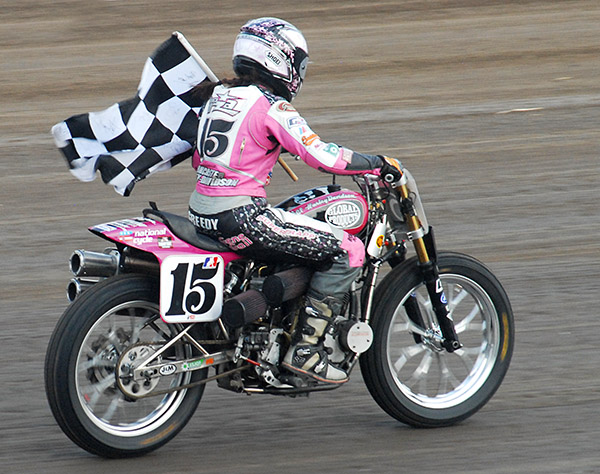
The field entering Turn 2 at over 100 mph on the Springfield 1-mile track. The noise is incredible and there’s nothing like it. These guys are drifting sideways at 100 mph, just a few inches apart!The same shot as above, but with the two fastest riders at the Springfield Mile identified. The arrows point to Chris Carr (National No. 4 in the white and orange leathers) and Kenny Coolbeth (National No. 1 in the black leathers). Coolbeth won on Sunday and Carr won on Monday. This photo was just after the start.One lap later: Coolbeth and Carr are riding as a closely-matched pair well ahead of the group.
I was really happy with these shots. I had my old Nikon D200 and a cheap lens (a 10-year old, mostly plastic, $139 Sigma 70-300). I zoomed out to 300 mm, set the ISO to 1000 for a very high shutter speed (even though it was a bright day), and the lens at f5.6 (the fastest the inexpensive Sigma would go at 300mm). The camera’s autofocus wouldn’t keep up with the motorcycles at this speed, so I manually focused on Turn 2 and waited (but not for long) for the motorcycles to enter the viewfinder. It was close enough for government work, freezing the 100 mph action for the photos you see above.
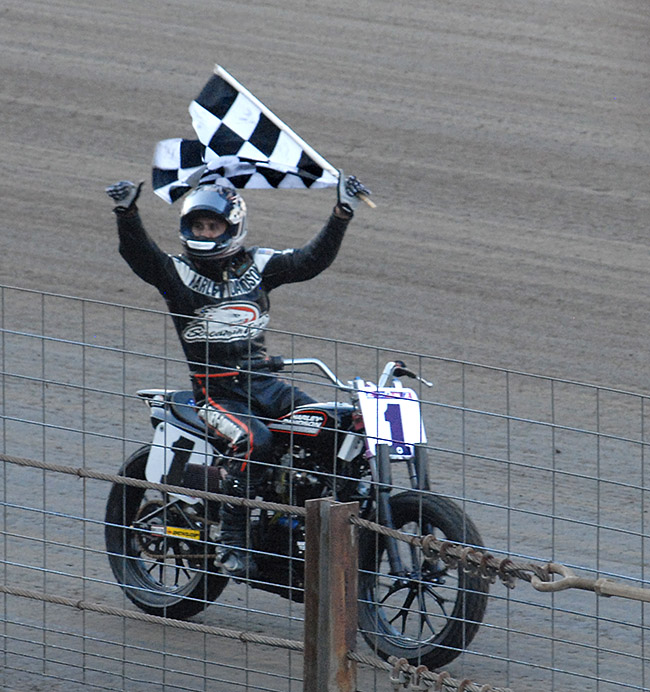
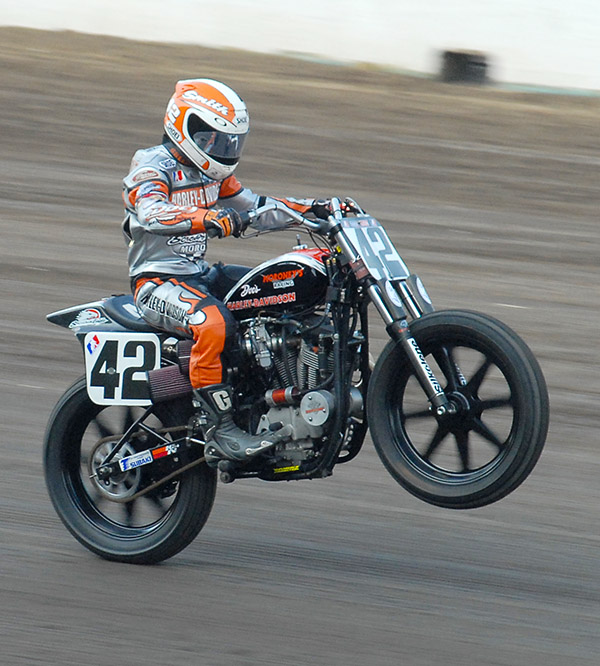
Kenny Coolbeth, after winning the Springfield Mile.Nicole Cheza, a very fast rider. She won the “Dash for Cash” and the crowd loved it.A Harley XR-750 rider having fun.
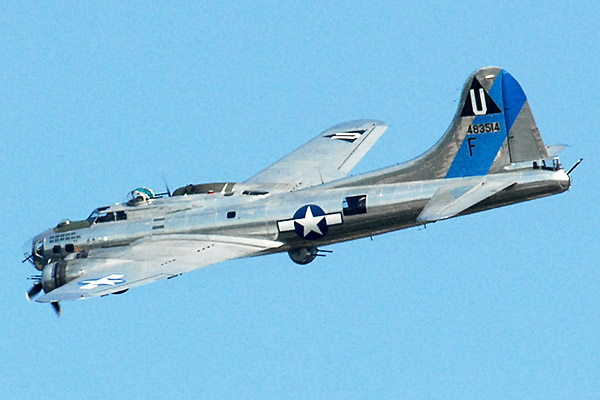
As you might expect, there were quite a few things happening off the track, too. Johnsonville Brats had a huge tractor trailer onsite equipped with grills, and they were serving free grilled brat sandwiches. It was a first for me, and it worked…I’ve been buying Johnsonville brats ever since. There were hundreds of interesting motorcycles on display and a vintage World War II bomber orbiting the area.
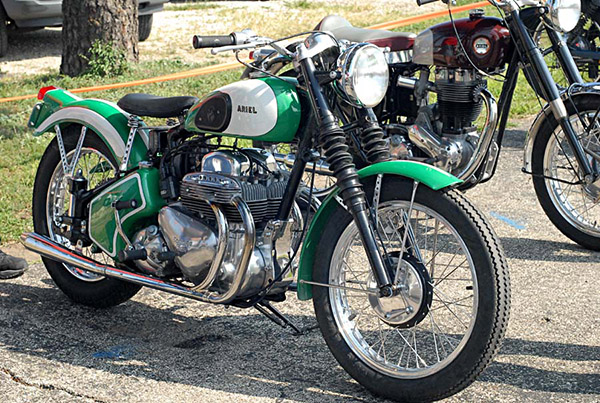
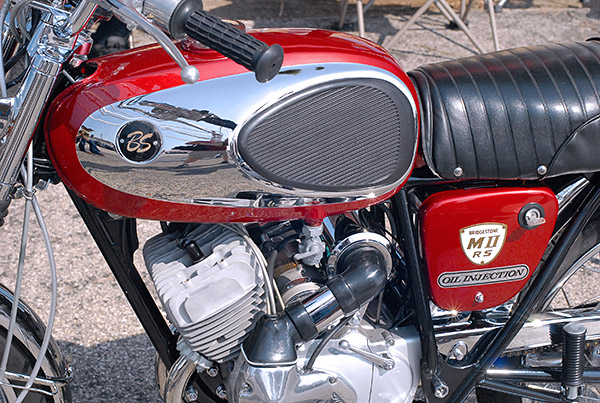
An old B-17 flying above the track…it made several appearances that weekend.An old Ariel Square Four. The owner started it and it sounded like two Triumph 650s.An old two-stroke Bridgestone, a marque that never quite made it in the US. Imagine the marketing discussions in Japan: “Let’s logo it the BS…that will work!”
So there you have it, along with a bit of advice from yours truly: If you ever have an opportunity to see the Springfield Mile, go for it. I had a great time and I would do it again in a heartbeat.
More epic rides are here!
We want you! Sign up here for a free subscription!
Sixty-one miles north of my place in La Luz, New Mexico lies the town of Carrizozo. The seat of Lincoln County, Carrizozo’s streets are laid out at an angle to the intersection of Carrizozo’s two main highways, 380 and 54. There are colorful donkey statues stationed around, a junkyard church on the outskirts of town and the Carrizozo Mud Chuckers motorcycle club.
The Mud Chuckers MC, founded by my riding buddy, Mike, is primarily a dirt-based riding club. The area around Carrizozo has hundreds of graded farm roads and tight mountain trails. It’s an ideal spot for racking up miles on the dirt. I recently joined them on one of their frequent moto-camping rides. The Chuckers shun traditional campgrounds preferring instead to camp anywhere they can find a spot with no people around.
Like all the ‘Chuckers rides I’ve been on the pace was downright leisurely with frequent stops to look at old mine sites, hunt for geodes, gold deposits and old metal objects or just sit in the shade to discuss unimportant things. The ‘Chuckers are in no hurry to get anywhere and that suits me just fine.
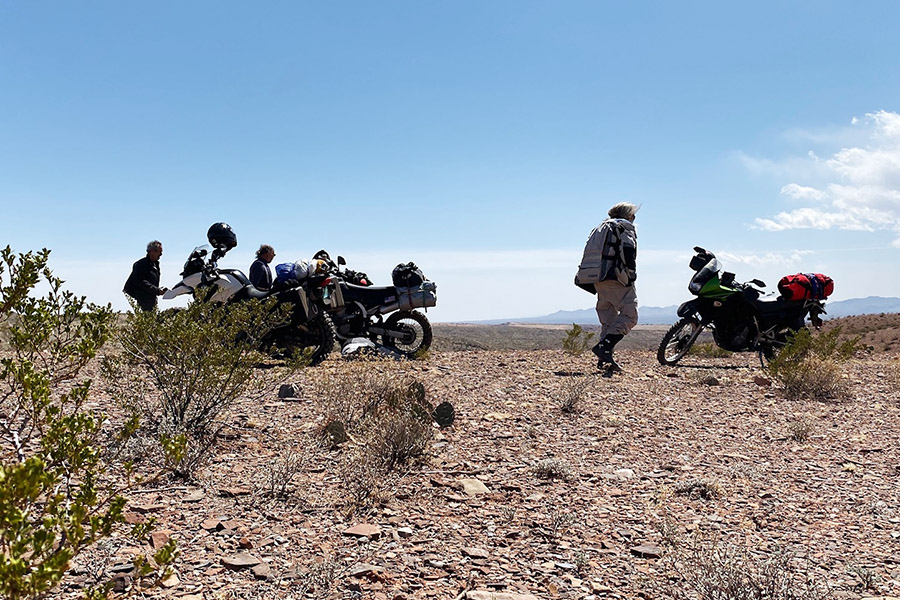
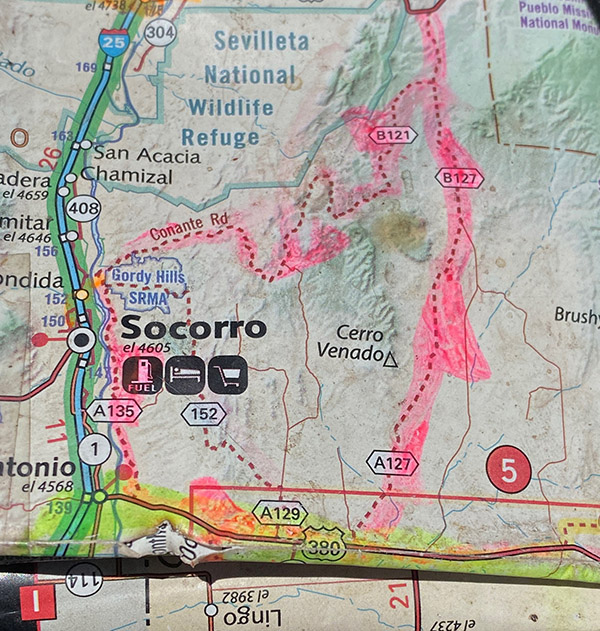
On this day we rode west to Socorro, NM and took the Escondida Lake exit to the Back Country Byway. The Byway meanders generally east-west then south with the terrain ranging from desert scrub to medium-high trees. At the speed we operate it’s best to look for a campsite early because ‘Chuckers don’t like stress. We checked out several places but nothing looked appealing. There was either no shade or no firewood or a stinky dead cow rotting nearby so we pushed on.
Eddie dropped his KLR 650 in a sand wash and bent his clutch hand so that it didn’t want to work right. He was doing 45mph so the impact, while soft, still hurt. The ‘Chuckers are not spring chickens. In perfect tune we can hardly swing a leg over the motorcycle. Eddie called it a day. Since we never leave a man behind we short cut the Byway and followed him back to his house in Carrizozo where we had begun this adventure.
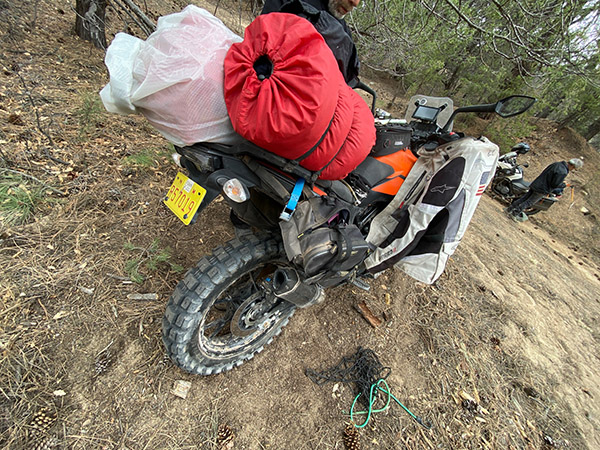
With Eddie’s DNF, that left me, Dan and Mike still on the lead lap. By now it was getting late so we abandoned our plan to camp on the Back Country Byway and decided the higher mountains behind White Oaks would be the best option. It was late and we still had a 30-mile ride to the forest.
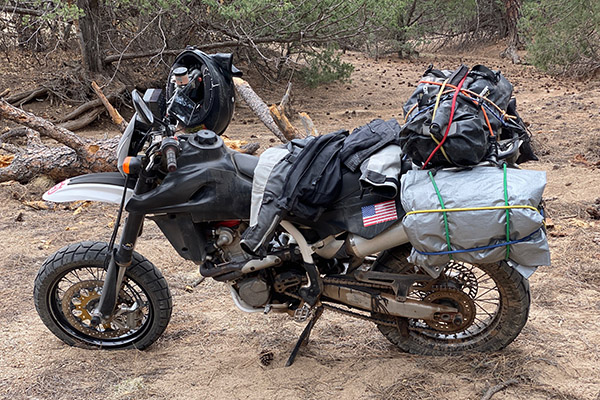
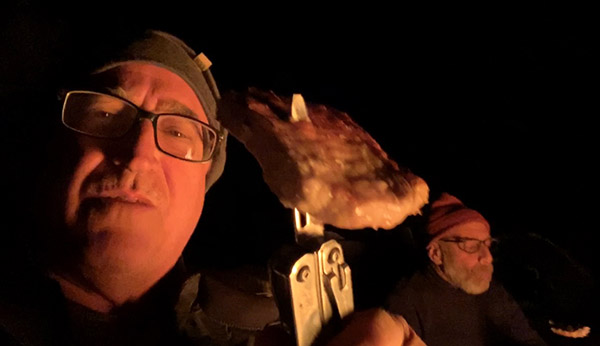
We found a spot with plenty of firewood and soft ground. We managed to get camp set up just before dark, which is always a good idea. Once they find a place to roost the Carrizozo Mud Chuckers really come on the pipe. The fire was roaring, Mike brought along pork chops and a metal grill to cook with. I don’t know where he stores all that junk on his 390 KTM. Sizzling pork chops, boiling coffee, cookies, beef jerky, Wheat Thins: man, things were hopping at camp this evening. The altitude we were camping was around 7000 feet, it got pretty cold, probably in the 30’s but around the fire it was 75 degrees.
Campfire nights last longer than regular ones and I turned in at midnight. Mike and Dan sat up longer. Flickering lights and murmured shadow conversation played across the inside of my tent. I felt safe knowing the bear would go after them before me. The next morning The Mud Chucker’s were in no hurry to leave. We restarted the fire and had coffee with whatever scraps of food we had left over from last night’s feast. The Mud Chuckers always leave their campsites cleaner than they found them and the way they put out a campfire borders on obsessive.
When I got back home it felt like I had been away a month instead of only two days. Camping on a motorcycle seems to distort time and distance. Changing your observation point really does have a profound effect.
Mike and Eddie want to start a motorcycle tour business. Their plan is to buy a few TW200 Yamahas and run all inclusive, guided camping tours around New Mexico. It sounds like a pain in the butt to me. Why ruin a nice motorcycle ride with business?
I’ll let you know if the tour company idea works out. Maybe a full ExhaustNotes.us tour review or something. Get the ‘Chuckers to kick in a free tour as an ExhaustNotes subscriber gimmick?
Like what you read? Sign up for a free subscription, leave a comment, and share the hell out of this blog!
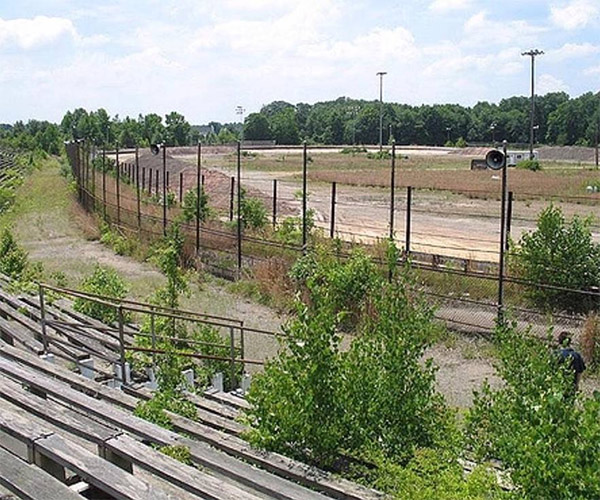
It was the summer of 1966, I was a skinny little 15-year-old kid, my Dad owned a new Triumph Bonneville, and I was in hog heaven. We were going to the motorcycle races. A big night out in those days was the East Windsor Speedway, a half-mile dirt track oval where they raced everything. Stock cars, two-strokes, and the big bikes. Not just locals, either. Harley’s Bart Markel (National No. 1), Triumph’s Gary Nixon (National No. 9), and more. It was the 4th of July weekend and it was 55 years ago. I remember it like it was last week.
East Windsor Speedway put on quite a show. Dad and I rode there on the Bonneville. I fancied myself a motorcycle guy and it just didn’t get any better than the half-mile dirt oval at East Windsor. The fun started right in the parking lot with hundreds of fans’ motorcycles. Fins and twins (everything was an air-cooled twin in those days), carbs, chrome, custom paint, custom seats, and more. It was all England and America and a little bit of Japan: Triumph, BSA, Honda, Harley, Suzuki, Yamaha…you get the idea. Italy and Ducati were yet to be discovered, only weirdos rode BMWs (remember those strange sideways kick starters?), and weirdos definitely didn’t go to the races. A new Bonneville was $1320 and a Honda Super Hawk (electric start, no less) was only about $600. It all seemed so attainable.
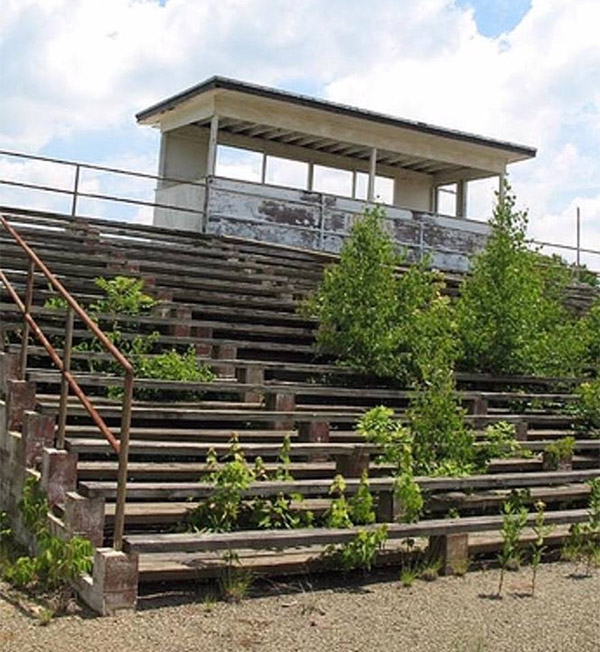
The East Windsor Speedway’s stands, abandoned and overgrown several years ago, are no more.The infield, now covered with tract homes.
The East Windsor Speedway is long gone now, shut down by noise complaints from the encroaching ‘burbs and then plowed over for more cookie cutter homes. It’s a pity, really.
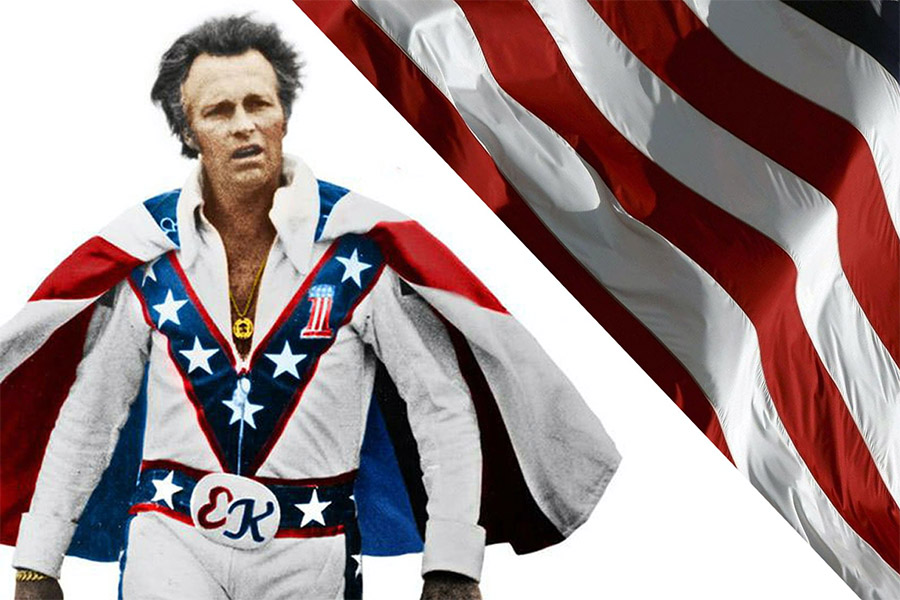
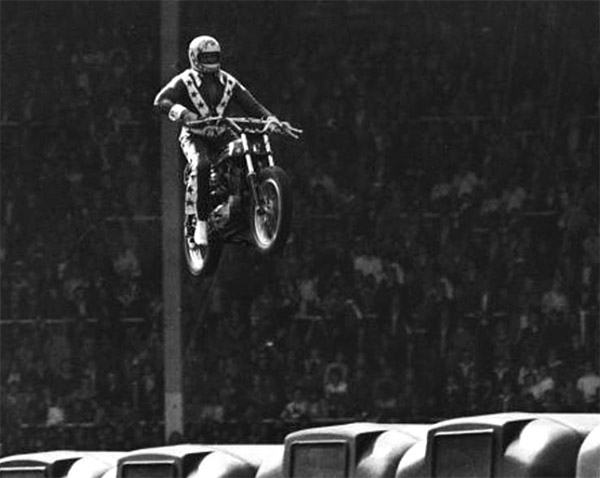
East Windsor always put on quite a show, but that 4th of July evening was a six sigma outlier on the right side of the bell curve. Stock car racing was first, then the 250cc class (love that smell!), then the big boys (including Nixon and Markel), then the main event (Evel Knievel!)…and it was all washed down with a 4th of July fireworks display that was as good as I had ever seen. That warm New Jersey night out started before the sun went down and finished around midnight. I think the cost to get in was something like $2.50.
Evel Knievel was the highlight for me and I think for everyone else, too. Evel was just starting to get famous, and here he was in person. White leathers and a cape trimmed in red and blue on the 4th of July. (Gresh and I always wanted capes, but we had to wait 50 years and go to China to get ours.) A Harley V-twin, with monstrous ramps set up on the infield (one for liftoff and one for landing), with a couple of Greyhounds in between (buses, that is…not the dogs).
The Evel show…multiple passes and then he was up in the air.
The crowd fell silent as Evel revved the 750 Harley and then accelerated. But it wasn’t up the ramp. Nope, Evel (ever the showman) accelerated alongside the ramps and the buses when we all expected him to jump. Faked us out, he did. Then he looped around to start again. Ah, I get it, we all thought. That was just to gage his acceleration before hitting the ramps for real. The anticipation built. Thousands held their breath as Evel accelerated again, but he faked us out with another run alongside the ramps. Okay, all part of the show. A third time….maybe this would be it…but no, it was yet another tease. Back to the start point, more revving, and by now we were wise to the ways of Evel. We all thought it would be another feint. But nope, this was the real deal…up the ramp rapidly and suddenly there he was: Airborne Evel, sailing up and over the buses, suspended high in the evening air, and then back down on the landing ramp. He hit the brakes hard, struggling to stop before running out of room, the Harley’s rear end sashaying around like an exotic dancer in a room full of big tippers.
The crowd went nuts. A seismic cheer drowned out the mighty Milwaukee sound machine. We had seen Evel, the man and the motorcycle. Airborne and in person, flying over the buses that would have you leave the driving to them. It was awesome.
It all happened 55 years ago. Evel, my Dad, and the East Windsor Speedway have gone on to their reward and I’m officially a geezer drawing Social Security. But that evening? It will live in my memory forever.
Never miss an ExNotes blog…sign up for a free subscription here!
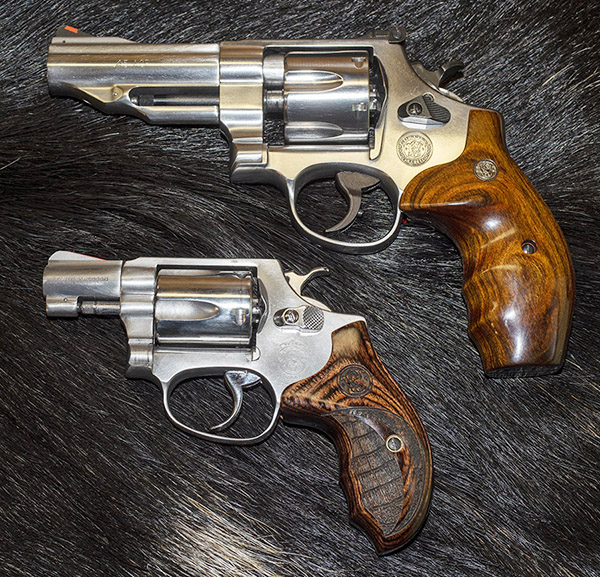
When I first posted about the Model 60 load development plan and the Altamont grips I bought from good buddy Paul, the cover photo showed my recently-acquired Model 60 snubbie and a Smith and Wesson Performance Center Model 625 I’ve owned for years.
The Model 625 and the Model 60.
I like that photo because the two stainless steel Smiths look great on the wild boar skin. That skin is from a pig hunt Paul and I did in Arizona a few years ago.
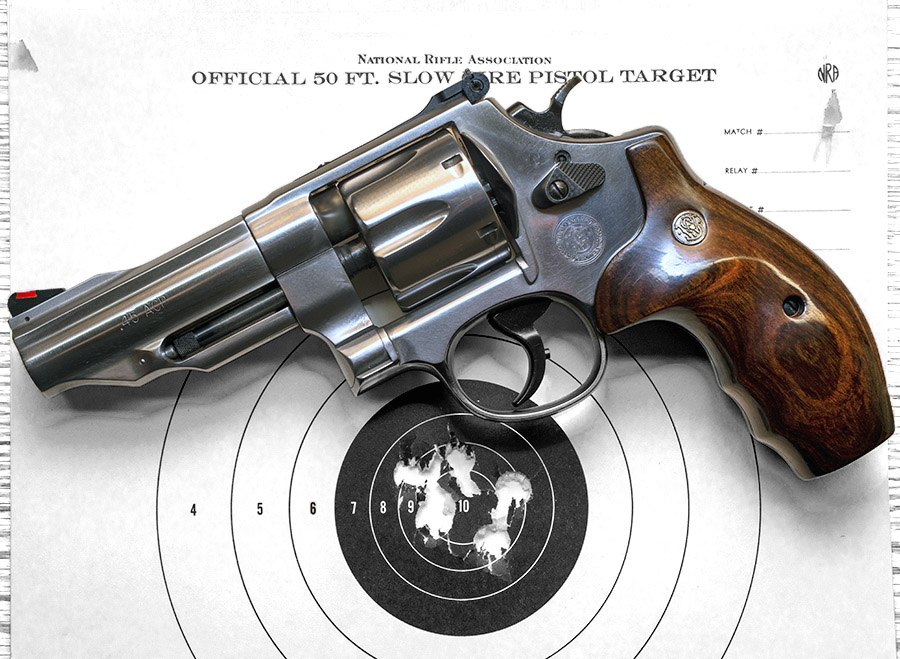
The earlier blog was about finding an accuracy load for the Model 60, but a few people wrote to ask if I had a favorite load for the Model 625. I do: My usual accuracy load for the 625 is a cast 200-grain cast semiwadcutter bullet (sized to .452 inches) over 4.2 grains of Bullseye.
When I went to the range to run a few rounds through the 625 I picked a box of ammo I had reloaded in 2014. It was different than my usual accuracy load. I used the same bullet (a 200-grain cast semi-wadcutter), but instead of Bullseye I had loaded these over 6.0 grains of Unique. And instead of .45 ACP brass in star clips, I used AutoRim brass. This is the load I fired that 6-shot group you see in the cover photo above for this blog, and it’s a honey. The group, that is…not the photo (it’s hard to get true colors when using an iPhone in the shade). I shot at 50 feet while standing…there’s no rest for the Model 625 or the weary.
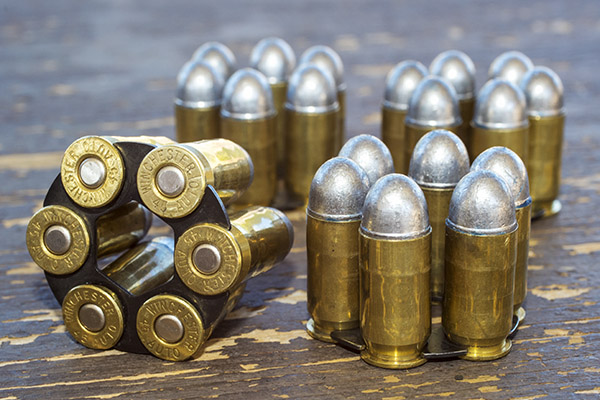
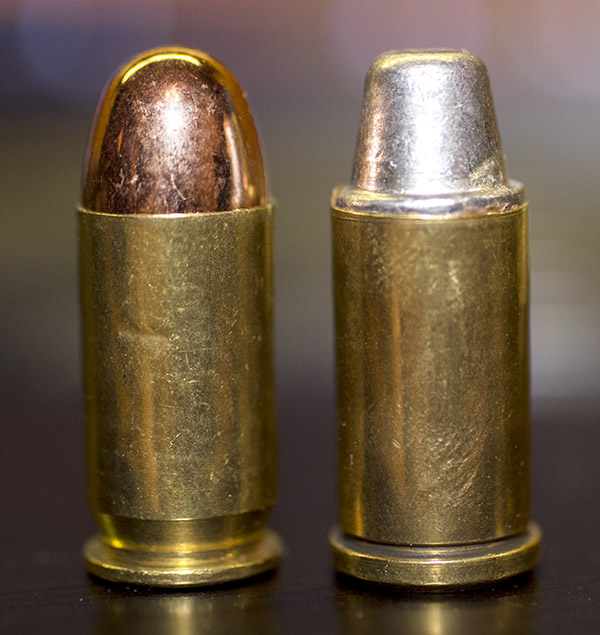
.45 ACP cartridges in star clips for the Model 625. These are loaded with 230-grain cast roundnose Missouri bullets.The .45 ACP cartridge (left) and the .45 AutoRim cartridge (right). The AutoRim cartridge is designed for use in the Model 625 without star clips. The ACP cartridge has a 230-grain roundnose Xtreme bullet; the AutoRim cartridge has Missouri’s 200-grain semi-wadcutter.
The AutoRim brass is in the tumbler as I write this and when I reload it I’m going to go with the same load: The 200-grain cast semi-wadcutter over 6.0 grains of Unique. It seems to be working for me.
Help keep us afloat: Please click on the popup ads!
Never miss an ExNotes blog: Sign up here for free!