2022 KLR 650 Video

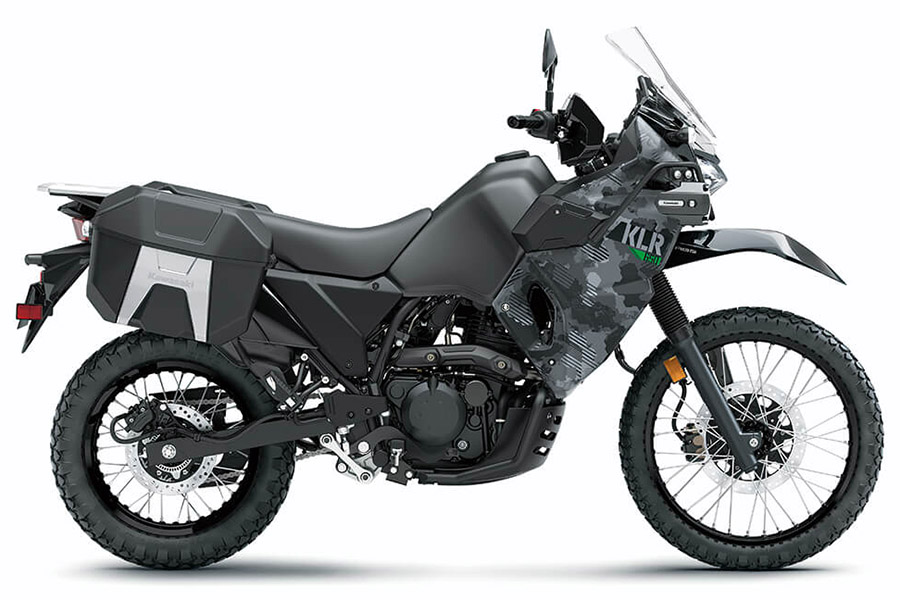
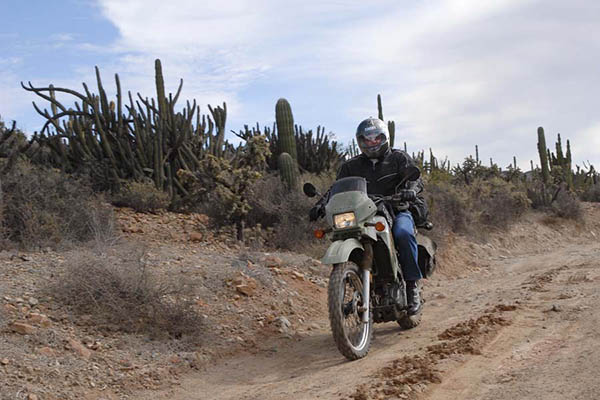
This flew into my mailbox last week from Kawasaki.  I’m still on their mailing list (I purchased a new KLR 650 in 2006).  I’ll let the video do the talking.

I had good times on my KLR. I don’t see another KLR in my future, but if the new model is as good as my 2006 KLR was, I think Kawasaki will do well with this motorcycle.   Both Gresh and I had thoughts about what the new model might feature; you can read those blogs here.

If I were going to buy a new KLR (I’m not, but if I were), I would probably wait until the 2023 models were out.  When Kawasaki introduced the Gen II KLR back in 2008, the 2008 bikes had oil consumption issues.  Kawasaki had a recall (if I recall correctly) and they fixed the problem in the 2009 model.  I think it’s best to let others work through the new model teething issues.

I’m guessing the full-freight new KLRs (luggage, ABS, etc.) will push $10K, which is roughly twice what a new CSC RX4 costs, and for me, selecting the RX4 over the Kawasaki would be a no-brainer.  For that kind of money, you could almost buy a new Sportster.


Never miss an ExNotes blog:  Subscribe here for free!


Want to see our predictions on what the new KLR would be?  Just click here.

The Six Best Motorcycles for Baja

This is a blog that is sure to be controversial and elicit a few comments. It attempts to answer a very specific question: Which motorcycles are best for Baja?

As a qualifier, let me mention a few things up front:

    • Most of my Baja riding is on asphalt, and that necessarily colors my opinions. Yeah, there’s a lot of great dirt riding in Baja, but I am a streetster at heart. Your mileage may vary.
    • You don’t need to spend $30K on a Baja blaster.  What good is driveway jewelry if you are afraid to get it dirty and if you’re constantly worried about where you parked?  In Baja, a big, heavy motorcycle (ADV-styled or otherwise) puts you at a disadvantage.  I am not a fan of huge displacement, tall, expensive motorcycles.  For real world riding (especially in Baja), monster motorcycles are more of a liability than an asset.  Even that new one that’s 20 years late to the party.
    • What I think you need in Baja is a comfortable bike with range. There are places where you can go more than a hundred miles between fuel stops, and you need a bike that can go the distance. That means good fuel economy and a good-sized fuel tank.
    • Luggage capacity is a good thing, but if your bike doesn’t have bags, you can make do with soft luggage. In fact, I’d argue that soft luggage is better, because it’s usually easier to detach and bring in with you at night.

With that said, here goes:

CSC’s RX3

Say what you want about Chinese bikes, and say what you want about smallbore bikes, I’m convinced my 250cc CSC RX3 was the best bike ever for Baja.

The RX3 tops out at about 80 mph and that’s more than enough for Baja’s Transpeninsular Highway (the road that runs from the US border all the way down to Cabo San Lucas). The bike is comfortable and it gets 70 mpg. The fuel tank holds over 4 gallons. I could carry everything I needed (including a laptop, a big Nikon and a couple of lenses, and clothes) in the bike’s standard panniers and topcase. I also carried tools and spare parts, but I never needed them. It was superbly well suited for Baja exploration, as I and more than a few others know.   One more thought…before you pummel me with the inevitable “Ah need at least a thousand cc” comments, take a look at our earlier blog, Why a 250?

Kawasaki’s KLR 650

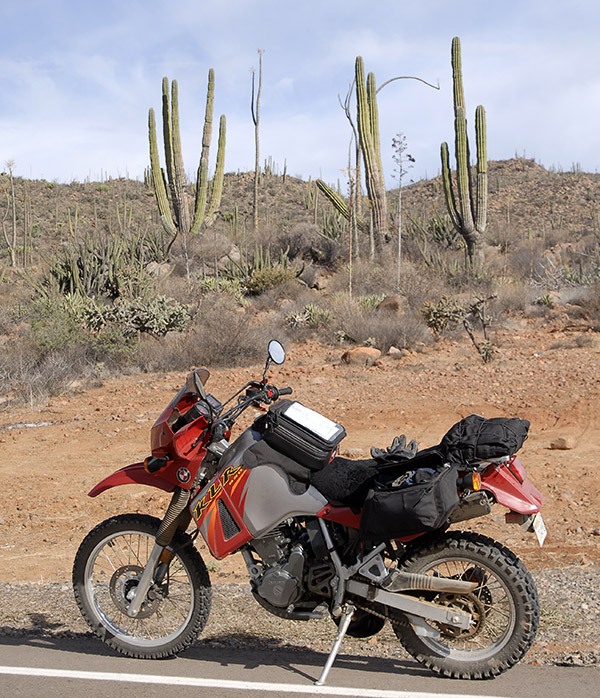
I owned a 2006 KLR 650 Kawasaki for about 10 years. I bought it new and I loved the thing.  I think it is one of the best bikes I’ve ever ridden in Baja.  Yeah, it was a little tall, but once in the saddle I had no problem touching the ground.

The Kawi didn’t come with luggage, but I bought the cheap Kawasaki soft luggage panniers and a Nelson Rigg tankbag and I was good to go (I didn’t need the obligatory KLR milk crate). Although the KLR was heavy, it did surprisingly well off road (especially running at higher speeds over the rough stuff), and I did more offroad riding with the KLR than I have with any of the other motorcycles I brought into Baja. It averaged 56 mpg, and with its 6-gallon gas tank, I could make the trek between El Rosario and that first Pemex 200 miles further south without stopping for fuel.

CSC’s RX4

I’ve never owned an RX4, but I’ve ridden one a fair amount and I’ve done detailed comparisons between the RX4, the RX3, and the KLR.

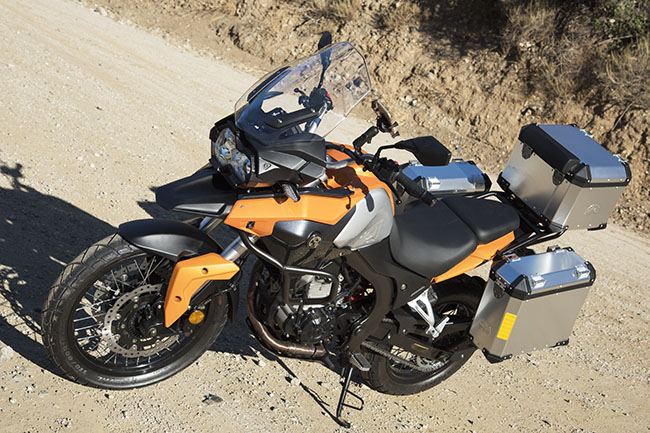
I’ve never taken an RX4 into Baja, but I’ve ridden both (the RX4 and Baja) enough to know that it would do well down there. Think of the RX4 as an RX3 with more top end, more acceleration, and a bit more weight. It’s got the luggage and the ground clearance for extended travels with some offroad thrown in, and it also gets about the same fuel economy as the RX3. Fit and finish on the RX4 is superior (it’s almost too nice to take offroad).  The RX4 is a lot of motorcycle for the money.  The pandemic hit our shores not too long after the RX4 did, or I would have seen more of the RX4 south of the border.

Genuine’s G400c

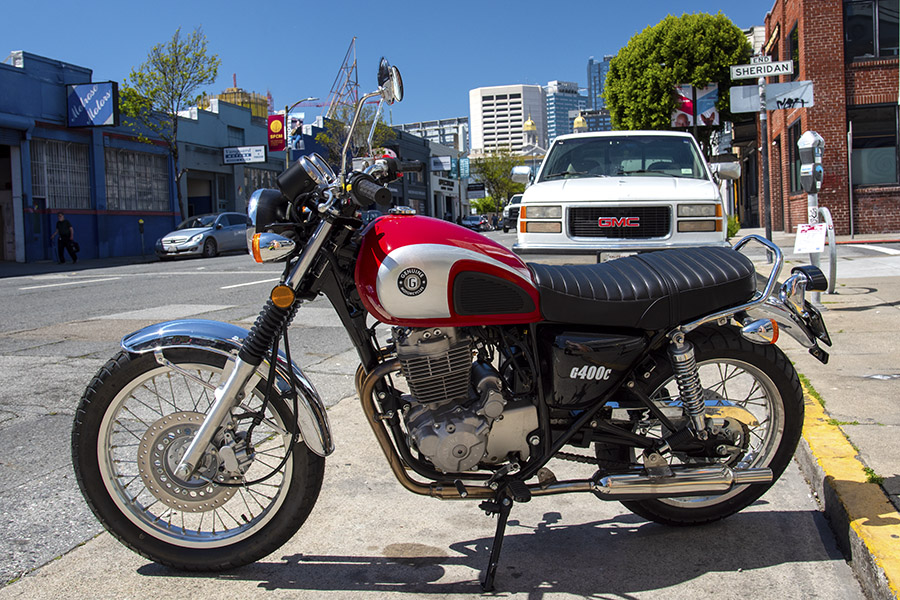
I rode Genuine’s new G400c in San Francisco, courtesy of good buddy Barry Gwin’s San Francisco Scooter Center, and I liked it a lot.  It’s compact, it has adequate power, it has an instrument layout I like, and it’s a fairly simple motorcycle.

I think with soft luggage, the Genuine G400c would make an ideal Baja blaster, and the price is right:  It rings in right around $5K.  With its Honda-clone 400cc motor (one also used in the Chinese Shineray line and others), it has enough power to get up to around 90 mph, and that’s plenty for Baja.  I rode a different motorcycle with this powerplant in China and I was impressed.  I think this would be an ideal bike for exploring Baja.

Royal Enfield’s 650 Interceptor

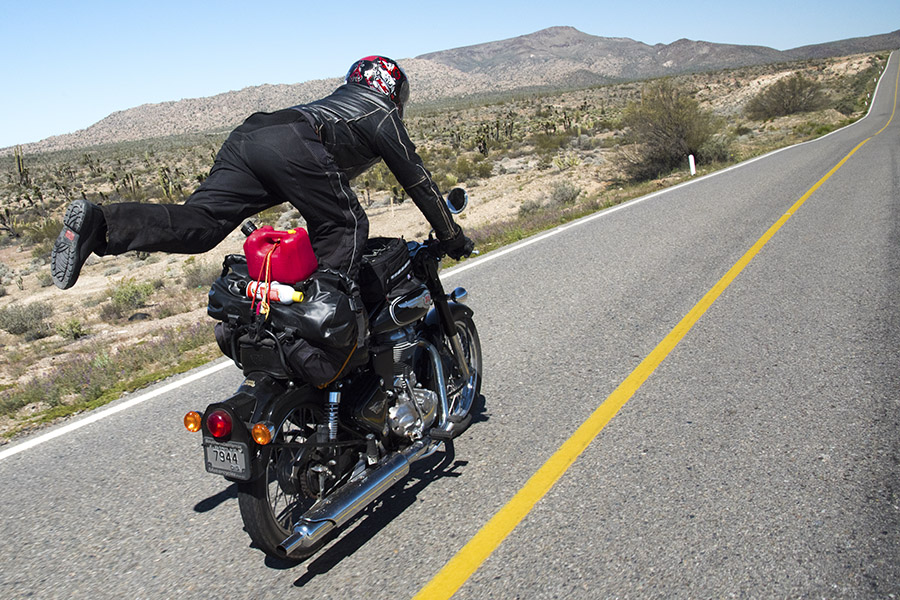
Yeah, I know, the new Enfield Interceptor is a street bike with no luggage. But with a Nelson Rigg tailpak and Wolf soft luggage, the Interceptor was surprisingly in its element in Baja. Gresh will back me up on this.

We had a whale of a time exploring Baja on a loaner 650 Enfield (thanks to Enfield North America and good buddy Bree), and I liked the bike so much I bought one as soon as I could find a dealer that didn’t bend me over a barrel on freight and setup. There’s one parked in my garage now. The bike is happy loping along at 65-70 mph, it’s comfortable (although I’ll be the first to admit it needs a sheepskin cover on that 2×4 of a seat), and it gets 70 miles per gallon. I wouldn’t take it off road (except maybe for that 10-mile stretch to go see the cave paintings in the Sierra San Francisco mountains), but like I said at the beginning of this conversation starter, I’m mostly a street rider.

Royal Enfield’s 400cc Himalayan

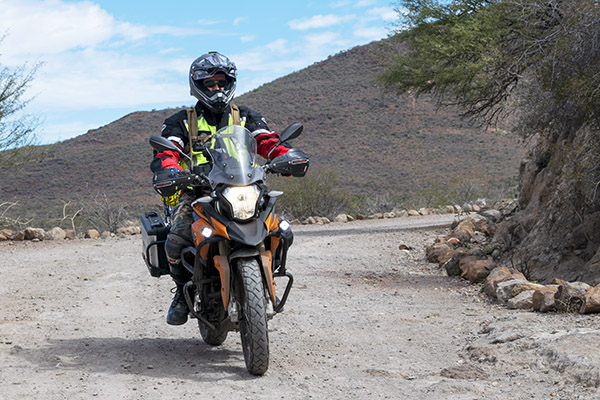
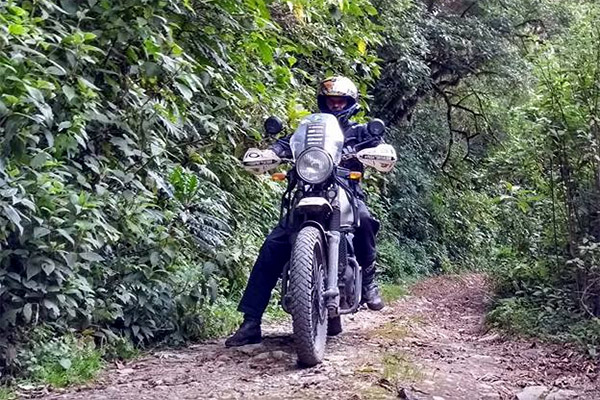
I’ve seen these but not ridden one yet.  Good buddy Juan Carlos, a great guy with whom I rode in Colombia, has gone all over South America on Enfield’s new Himalayan and he loves it (that’s his photo below).  Juan knows more about motorcycles than I ever will, and if Juan says it’s good, it’s good.

I like the look of the Himalayan and I like its single-cylinder simplicity (come to think of it, with the exception of the Enfield Intercepter, every bike on this list is a single).  400cc, I think, is about the right size for Baja. The price is right, too.   Royal Enfield is making fine motorcycles that won’t break the bank.  I think the Enfield Himalayan would be a solid choice for poking around the Baja peninsula, one that probably has the best off-road capabilities of any bike in this list.


I’m sure I’m ruffling a few feathers with this piece, and I’m doing that on purpose.  I’ve been taking pot-stirring lessons from Gresh (that’s him in the photo at the top of this blog).  We’d like to hear your comments if you disagree with any of the above. Do us a favor and leave them here on the ExNotes blog (don’t waste your time posting on Facebook as that stuff will scroll on by and be gone; ExNotes is forever).

All the above notwithstanding, I’ll add one more point:  The best Baja motorcycle for each of us is the one we have.  You can ride Baja on just about anything.  I’ve been to Cabo San Lucas and back on everything from a 150cc California Scooter to a Harley Heritage Softail cruiser.  They’re all good.  Don’t put off a trip because you don’t think you have the perfect motorcycle for a Baja adventure.  Baja is the best riding I’ve ever done.


Please visit our advertisers and click on the ads!


I’ve done a lot of riding on a lot of different motorcycles in Baja.  You can read all about that in Moto Baja!


Heading into Baja?  Make sure you insure with BajaBound, our choice for the best motorcycle insurance in Mexico!


More info on Baja?  It’s right here!


Never miss an ExNotes blog.  We cover an eclectic mix of topics, including motorcycles, travel, bicycles, construction, guns, reloading, all kinds of product reviews, and more.  Subscribe here for free:

The KLR 650 is back!

An new exciting thing is that Kawasaki brought back the KLR 650.  A review of the Kawi info makes it look like the big change is fuel injection, along with a few other things (like digital instrumentation, accessory and USB outlets, higher alternator output, optional integrated locking luggage, and optional ABS).  Per the Kawasaki announcement:

The all-new KLR®650 dual-sport motorcycle is built to empower your passion to escape and explore. Featuring a 652cc engine, new fuel injection system, all-digital instrumentation, disc brakes, and optional ABS, the KLR650 is ready and eager to make new memories. Dual-sport capability allows the journey to go on- and off-road with all three available models, including two special edition models that are equipped with factory-installed Kawasaki Genuine Accessories. With the KLR650, KLR650 Traveler, and KLR650 Adventure motorcycles, your next great expedition awaits.

This is good; Kawasaki is finally catching up to CSC’s RX3 and RX4 series of adventure motorcycles.  Don’t get me wrong; I owned a KLR 650 (first gen) and it was a stellar motorcycle.  One of my good buddies is still riding it.  They were fabulous motorcycles; I hope the new one is as good.  By the way, if you’d like to read our comparison of the KLR 650 to the CSC RX4, you can do so here.

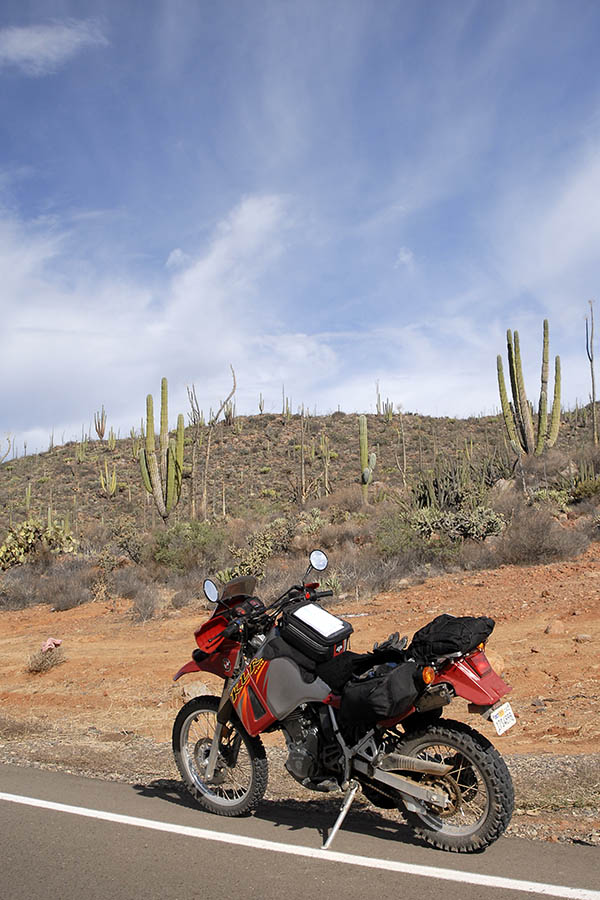
My 2006 KLR 650 in Baja.

Pricing, per Kawasaki, is $6699 for the base model and $7,999 for the fully-loaded model, with a Kawasaki-listed destination charge of $410.   There’s no mention of the setup fee.  But they do mention in the small print that the dealer sets the actual destination charge and your price may vary.  You think?  Mark my words…dealers will throw on a $1500 freight and setup fee on this bike.  When you enter the green room, be forewarned: Having worked in the motorcycle industry, I can tell you that actual freight (what the dealer really pays) is well under $400, and setup on a KLR 650 takes under an hour.  And as point of reference, when I bought my ’06 KLR 650 new, it was $5200 out the door.  Let the good times roll.

Giblets 1

With only two full-time writers here at ExhaustNotes.us, it’s a real challenge to churn out the quantity of content a website demands. Luckily we have Joe Berk on staff. One Berk equals like seven normal writers. Coming up with topics is easy but some of the ideas don’t rise to the level of an actual ExhaustNotes.us story. I’ve swept the floor at the luxurious ExhaustNotes.us office plaza and tossed all the bits into this blog post.

Reaching in through the bottom of the chicken we find that the 1975 Kawasaki Zed has been having a few problems as of late. The far right-side carburetor was spewing gasoline sporadically so I purchased 4, generic carb repair kits online. I really only needed the float needle and seat but at $14 a kit it was cheaper to buy the whole shebang rather than just the seats.

The carburetors sit relatively high off the crankcase on a Kawasaki Z1 so most carb circuits can be accessed from the bottom or top without removing the whole bank of 4 carbs. You can get to the idle jet, the main jet, the needle and seat and even the slide needle and emulsion tube if you’re willing to struggle a bit. When I say access theses parts I don’t mean to imply that it’s easy to do. I have the cuts on my hands to show for it.

After 3000 miles of running I was surprised by the lack of debris in the Kawasaki’s float bowls. If you followed Zed’s resurrection you’ll know how rusty Zed’s tank was. I expected the main-jet sump to be full of fine red dust. Installing the new needles and seats was a fiddly job but I managed to get them in and replaced the pilot jets just because I had them. I left the original main jets in place.

Before turning on the fuel I checked the fuel filter on the petcock and found it clean. I bought new inline filters but seeing how clean everything was I left the old inline filters alone. Don’t fix it if it isn’t broken is a good motto to live by with aging motorcycles.

As soon as I turned the petcock on fuel started pouring out of Carb Number 3 (from the ignition side). Of course this is the hardest one to work on. I pulled the float bowl back off and removed the float and the needle. Everything looked ok. Figuring a piece of dirt must be in there I blew carb cleaner into the seat and reassembled the carb. Back together with the petcock on, the fuel leaked as bad as it ever did.

I took the float bowl back off and removed the float. Holding the needle in place with my finger I turned on the petcock and gas poured down my hand, onto my wrist and up the sleeve of my shirt. This led me to believe there was a problem with Number 3’s new needle/seat.

Upon further examination I found some unexplainable marking on the inside of the seat where the needle valve would normally seal. I’m not sure what is going on. Are the stampings some kind of size identifier? Did the punch that marks the seat miss and stamp the inside of the seat?

It became obvious to me that this particular needle/seat combination was never going to seal so I picked the best looking needle/seat from the old parts and installed them into Carb Number 3. No more leaking.

For the real mechanics: I know I should reset the floats but the bowl drain screws are very tight; removing them may break something I don’t want broken. My rationale is that the replacement needles/seats are the same overall length so the float levels wouldn’t have changed much, if at all. One day I’ll get the drain screws out and set the float levels using the clear tube system.

The upshot is that Zed is running much better. I took a quick, 140-mile, 60-degree-January-day jaunt and stopped several times leaving the fuel petcock on: no leaks. Spinning 5000-5500 RPM in top gear the Zed returned 41 miles per gallon not including the amount of fuel that I spilled while working on the carbs. In addition, I had to turn the airscrews in almost one whole turn after installing the new needles/seats and pilot jets.

Moving on from the carburetor woes, there are a few disappointing rubber-issues with some parts on Zed. The rubber fork wipers have split in just a little over a year. I really expected them to last a bit longer than that. The rubber vacuum plugs that cover the ports used for balancing the carbs have also rotted and split. These were new about the same time as the fork wipers. Not only are the vacuum plugs rotted, but one of the brass nozzles cast into the new rubber intake manifolds came adrift when I tried to push the vacuum plug into position. Luckily it didn’t go all the way into the intake port and I managed to pull it out and get the plug onto the thing.

When I was resurrecting Zed I sourced parts from all over. I’m going to try and dig around to see if I have any receipts that will tell me where I got the various rubber bits. If they are EBay sellers I won’t bother but I’m sure the more reputable companies will work on making it right. One factor that may have caused the rubber failure is the fact that Tinfiny’s shed gets very hot in the summertime. With the doors closed it’s not unusual to hit 130 degrees inside. 130 degrees isn’t that hot for an air-cooled motorcycle engine but New Mexico’s dry air combined with long term exposure might affect the rubber. None of my other bikes stored in the same conditions have had rubber failures.

Well, what do you know, I had more ground to cover but this carb story ended up running on for so long it’ll make a standalone ExhaustNotes.us blog! I’ll post up Giblets 2 soon.


Read all about Zed’s resurrection here!


Whoa!  You’ve won a free subscription to ExhaustNotes!

Not Worth Selling: How I Let The Free Market Determine My Transportation Needs

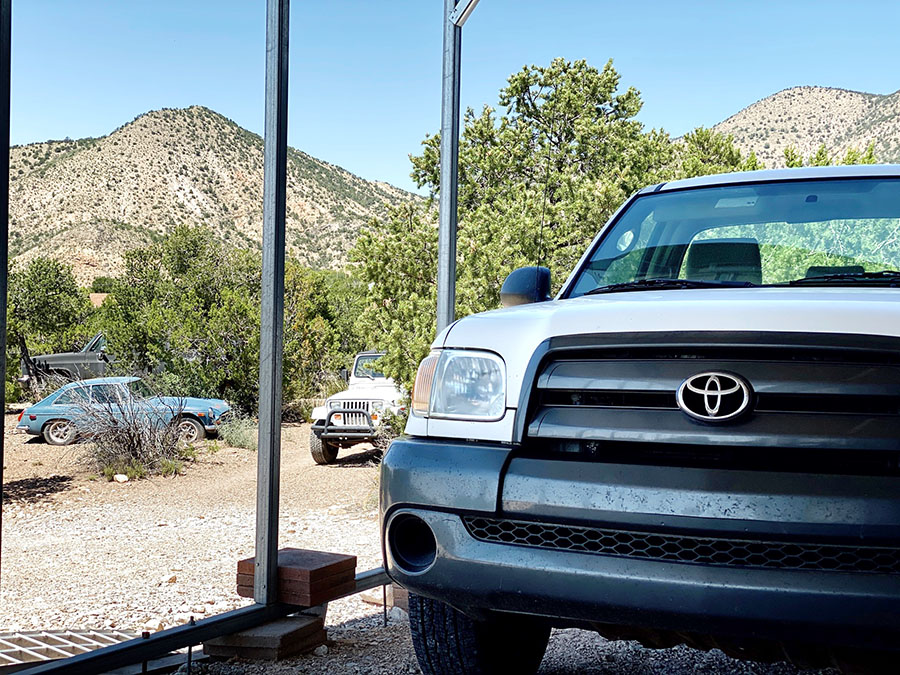
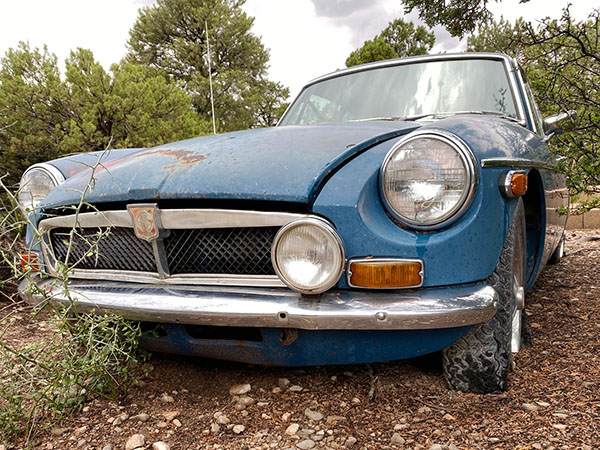
We own a lot of motorcycles and cars. There are two Jeeps, a Toyota truck, a 4×4 Suburban, an MGB GT, three Kawasakis, a golf cart, a Yamaha and a whole bunch of other motorcycles. I can’t afford to insure or repair all these vehicles so many of them sit around and collect dust. You may wonder why I keep all this junk. It’s optically distressing and hints at my unearned, depression-era, scarcity mind-set. But it’s not simple hoarding that litters my view. It goes deeper than that. I don’t want to own all these wrecks. The junk stacks up because of my twisted sense of fair play.

This misfit collection of vehicles didn’t happen accidentally or overnight. They were each bought and mostly used as directed but somewhere along the line their purpose became obsolete and other, more capable or more enjoyable vehicles took their stead. And that’s the spot where the free market fouled everything up.

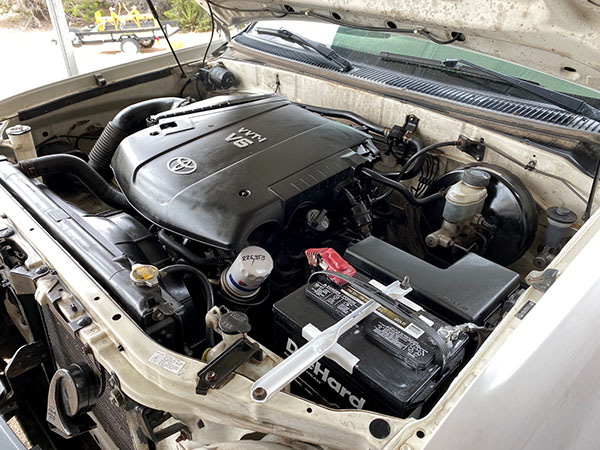
We don’t really need the Toyota pickup truck. It has a couple hundred thousand miles on it but the thing still runs perfectly fine. It’s our go-to vehicle when we want to get somewhere fast. With a 4-liter V-6 pumping out 200 horsepower the lightweight Tundra will cruise at 90 miles per hour all day long. Its soft, car-like suspension coddles the driver and one passenger. And there’s the rub: The Tundra is a standard cab so two people are all you can realistically fit inside, out of the weather. On those long trips your luggage will be wrapped in garbage bags then tossed in the bed. The Tundra was fine when it was my work truck but it’s no longer optimal.

So why don’t we get rid of it? We tried once but it’s worth next to nothing on the free market. The 14-year-old truck has a few minor dings and a manual transmission. We tried to sell it for 3000 dollars but nobody wanted it. We had a few offers under 2000 dollars but I stomped my feet and said, No! I mean, where am I going to get a truck this good for under 2000 bucks? The Toyota stays because it’s not worth selling.

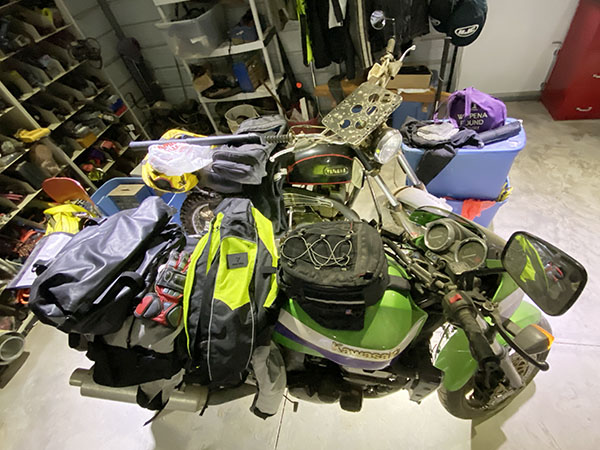
It’s the same with my Kawasaki ZRX1100 or as I like to call it, The Coat Rack. I let the bike sit for a year when we went to Australia. In that year everything hydraulic froze. The front brakes, the rear brakes and the clutch all need repair. The engine still runs ok but the carbs are clogged up from our crappy, alcohol-laden fuel. With only 23,000 miles the ZRX is overdue for a valve adjustment. It needs a new chain, sprockets, a throttle cable and I can never seem to find time for the bike because I’m having so much fun on the 1975 Z1 that I won’t sell.

So why don’t I dump the ZRX1100? I tried to get 2000 dollars for the bike once but no one wanted it. It’s worth even less now. The basic bike is solid but if you took the ZRX to a shop the cost of repairs would exceed the value of the motorcycle. That winnows the pool of eligible buyers down to people who know how to fix motorcycles. Those handy-types traditionally hold out for a super low selling price because they know how a few unknown problems can kill the budget on a project motorcycle. Besides, you can get a showroom condition ZRX1100 for 3500 bucks. Why bother with all the issues on my bike?

When I look at it in the garage, the perfect bodywork, the glossy green paint, and the totally original everything I say to myself, “That’s a great bike, I love the styling. A week’s work would have it running like a champ again. What would I do with 2000 dollars anyway? I’d rather have the non-running Kawasaki!”

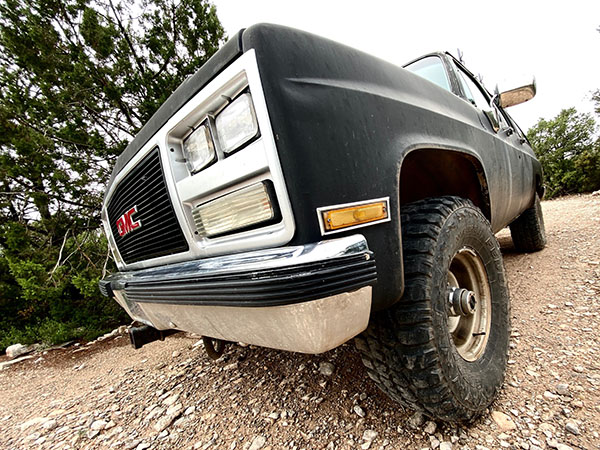
And so it goes. The Suburban was bought for its engine and drivetrain but has proved so much better than the Toyota at hauling heavy loads it has taken the place of the pickup truck that I refuse to sell. If I did unload the Bomber it wouldn’t be worth 1000 dollars on the free market. Why bother?

The MGB GT could be worth a pretty penny if it were restored. I see nice GTs going for over 10,000 dollars but then again it would probably cost 9,999 dollars to restore it. At one time I offered it for 250 dollars but couldn’t get a single taker.

After walking past the little blue sports car for several years I’ve grown to love its classy British/Italian mash-up styling. I’ve spent a couple hundred dollars getting a clear title to the MGB. My buddy Lynn managed to get the hood open and everything looks intact in the engine room. I think I can get it running. Wait, I know I can get it running. You can bet I won’t be selling the MGB; its potential as a prop in my fantasy world far exceeds any real-life street value.

I’ve got a Kawasaki 250 that I only use once a year for Bike Week at Daytona. It’s paid for and in pieces at the moment. The KLR always starts first or second kick after sitting for a year. It’s not bad in the dirt, if a little underpowered. I bought it used with very low miles and the sunk cost has long been absorbed. I’d be lucky to get 700 bucks for it and 700 bucks won’t buy much of anything nowadays. The KLR250 stays at our shack in Florida so that I always have two-wheeled transportation whenever I visit. That feeling of moto-security is worth whatever small amount of money I could get for the bike.

You’re starting to get the picture by now. I don’t really want all this junk; it’s just that The Man and society places so little value on my treasures I keep them out of spite. I’ll go to my grave clutching my outdated ideas on what my things are worth and to whom. Sure, it’s a sick way of approaching life but I can think of much worse things, like accepting Market Value.

Squeeze Me: KLR250 Refresh, Reflash and Rehash Part 3

The KLR250 refurbishment has been going slowly but in addition to that I’m not getting much done otherwise. It’s the heat. Temperatures at Tinfiny Ranch have been hovering around 100 degrees or more and under these conditions it’s all I can do to press paper firebricks.

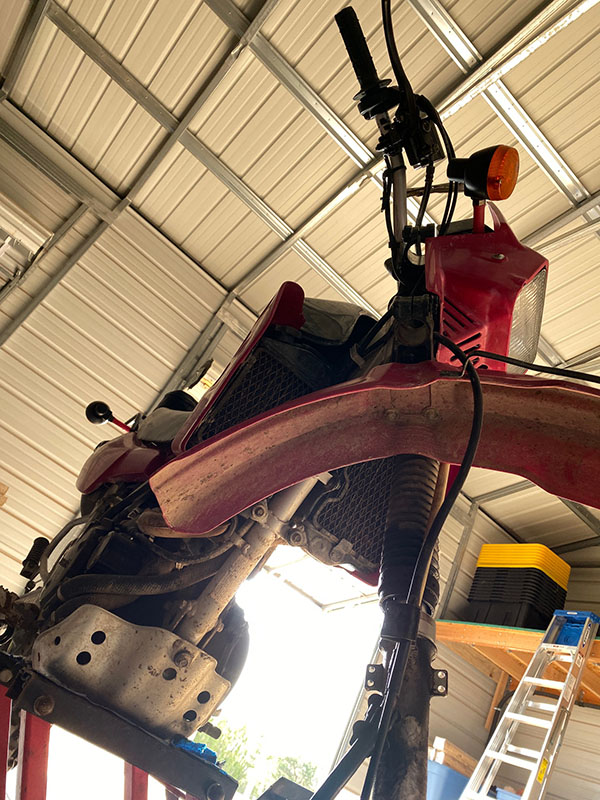
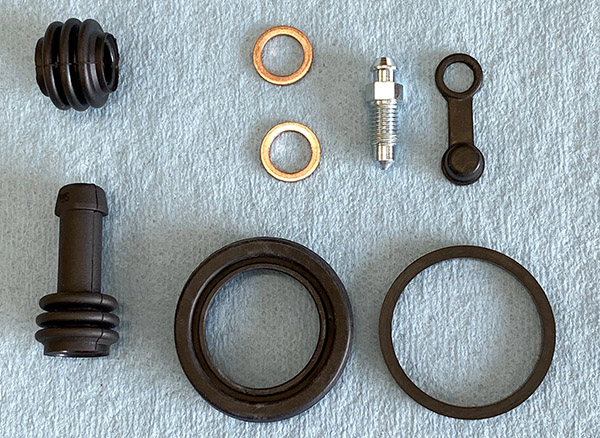
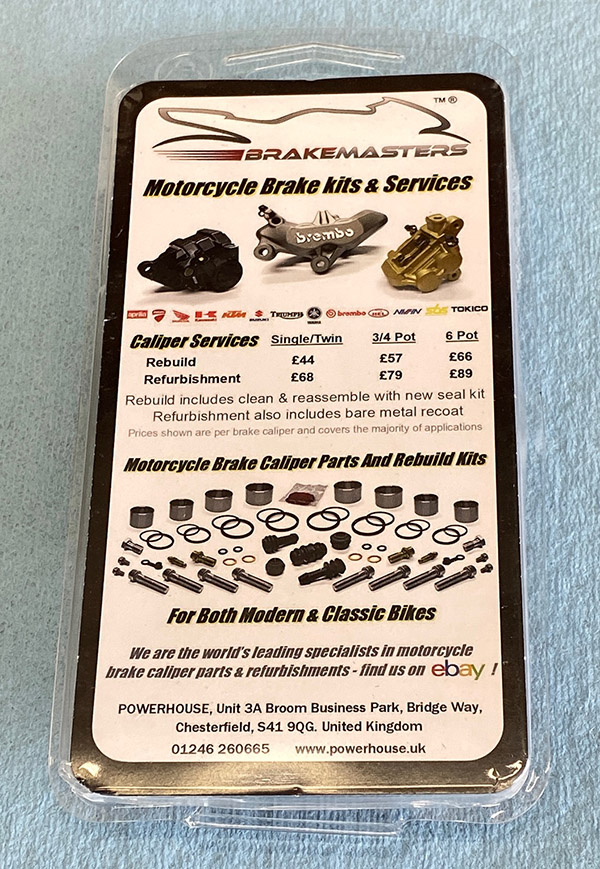
I did manage to order a brake caliper kit from England. The Widow Maker’s front brake gave me lots of problems at Daytona this year. The caliper was mightily stuck and the master cylinder was odd feeling. I managed to get the brake working well enough for Bike Week and replaced the master cylinder in a previous R, R & R episode but I didn’t trust my half-assed Florida Man repairs on the caliper.

The Brakemasters rebuild kit was very complete and was inexpensive to boot. The Widowmaker’s original rubber parts lasted through 20 years of neglect so the new stuff has a steep hill to climb. The only part I didn’t care for was the new bleeder nipple. The replacement nipple did not want to thread in easily. I could have forced it and remolded the aluminum caliper threads but instead used the old nipple, which threaded in by hand.

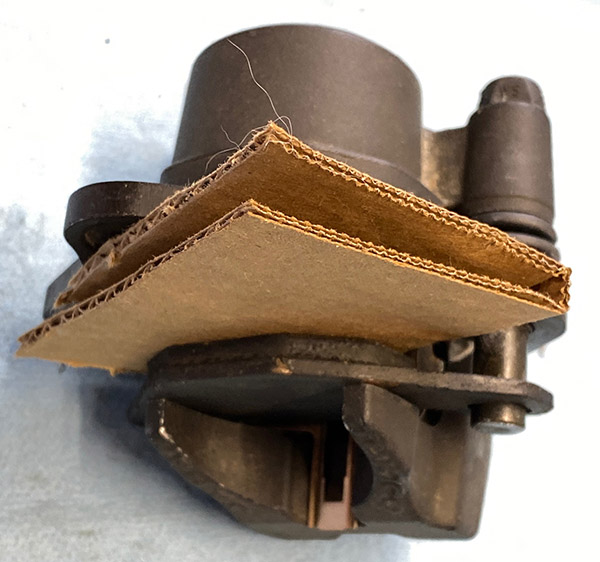
As expected, the caliper job went well. Old motorcycles with single-piston calipers are a breeze to repair. The hardest part was fitting the dust seal into the caliper body and then fitting the piston. I didn’t remember how I did the trick last March and was getting frustrated. Thank goodness for YouTube; I pulled up a quick search on caliper dust boot installation and there was a guy showing me how to do the deal.

I think in March I used a beer can to make an expander sleeve for the piston and then slid the piston into the (already installed in the caliper) boot. It just wasn’t working this time. Maybe fresh rubber is stronger than 20-year-old rubber. YouTube man fitted the boot to the piston first (the opposite of what I was doing) and let a short length of rubber hang off the back. That hanging bit was then pushed and prodded into its groove on the caliper. Once the dust boot is in the groove the piston can be slid into the caliper all the way until the piston groove catches the other end of the boot. With all the talk of grooves this sounds confusing but that’s why YouTube videos are so nice. YouTube Man’s method worked great and the caliper is now ready for reinstallation.

If it cools off a little I’ll tackle the fork seals and re-grease the steering head bearings next. And keep making firebricks, of course.


More on the KLR250 and other moto-resurrection stuff is on the ExNotes Resurrections page!

Repairing Blinkers: KLR250 Refresh, Reflash and Rehash Part 2

Blinkers on a dirt bike are kind of silly but lately I’ve been running The Widowmaker, my 2005 KLR 250, on the street more than is right or just. The KLR250 spends most of its time in Florida and the automobile drivers in that state are legendarily bad. With Nearly-Deads behind the wheel and blind rage as their co-pilot any blinking light that may draw attention is a good thing.

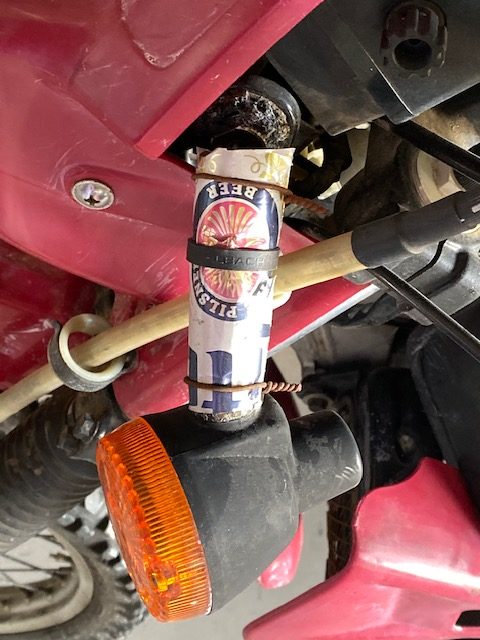
The Widowmaker’s blinkers have had a rough go of it. They worked fine when I bought the bike but several thousand miles of the Trans America Trail managed to put a pronounced sag in the rubber stalks holding the lamp fixtures. The rubber soon cracked and the blinkers hung down swinging on their electrical wires.

At first I managed to keep the original stalks in the game using the KLR rider’s best friend, duct tape. Soon the tape was not enough and I progressed to beer can wraps, bailing wire and spit. The rubber stalks crystallized and began to crumble into small, hard black cubes. It was a metamorphosis: soft, pliable rubber became fragile like chalk. The lamps, now free from their moorings swung in a crazy amber half circle pointing towards the ground. As they filled up with water the light fixtures quit blinking and they became memories of directional indicators slapping the side of the motorcycle.

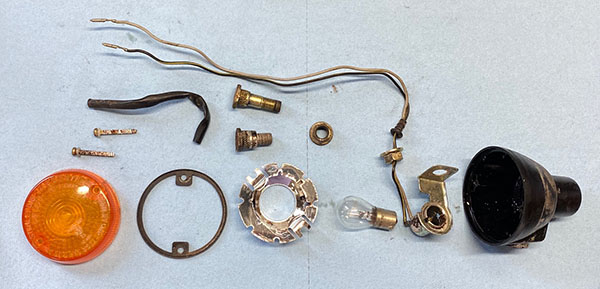
I couldn’t find replacement stalks online. The complete blinker is sold as a unit and when your motorcycle needs as much attention as mine you can’t blow a bunch of money on parts that will break off soon anyway. I dismantled the old blinkers and decided to try to fix them for two reasons: Because I’m cheap like that and KLR riders will always take the hardest path.

Two of the direction lamps weren’t rusty and came apart fairly easy. The rusty ones were more of a challenge. I had to soak them in penetrating oil and break the glass bulbs in order to remove the bulb base from the socket using pliers. After getting them apart I soaked the rusty bits in Evaporust for a few days and then painted the reflector and socket a fetching metallic silver.

Making new stalks was a conundrum: I needed something stiff enough to hold the lamp in position but flexible enough to bend during a crash, preventing destruction of the blinker lens and housing. I toyed with the idea of two thin strips of sheet metal to provide a malleable stem that could be bent back into position. I debated welding a thin tube between the threaded ends but didn’t have any tubing that would serve the purpose.

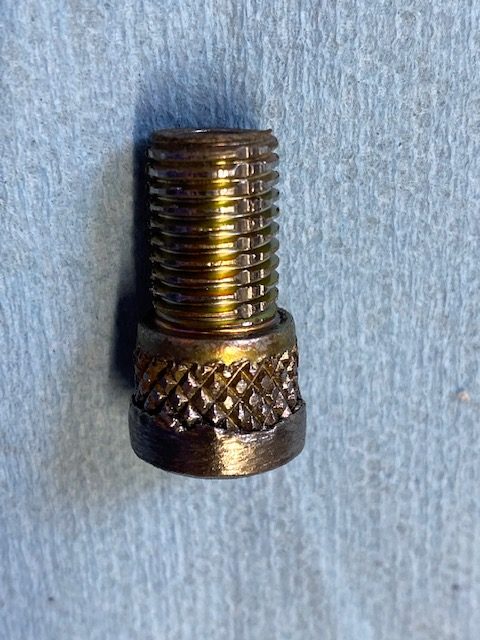
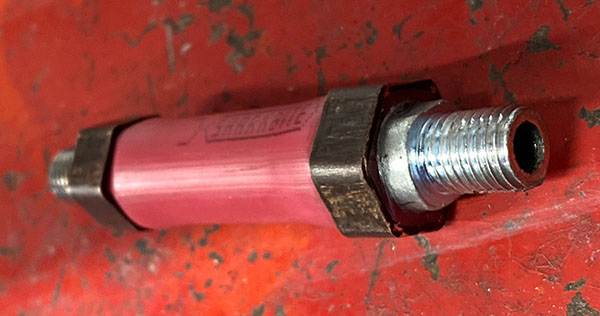
I settled on ½” Pex plastic plumbing tubing mainly because it comes in a red color than neatly matches The Widowmaker’s faded bodywork. The Pex copper crimp rings would make for a neat finished end to the Frankenstalks. The only problem was the threaded ends salvaged from the old rubber parts were a little too big for the Pex pipe.

I really could have used the South Bend lathe to turn down the ends but that project is not completed yet so I had to chuck the parts into a hand drill and grind them to size. Even cut down they were still too large for the Pex but I didn’t want to grind any more and lose the knurling. It’s amazing how a new tool opens up avenues of creativity. It frees your mind, man. My new tubing expander (bought for an air conditioning job) made short work of the Pex inside diameter and the threaded inserts fit perfectly.

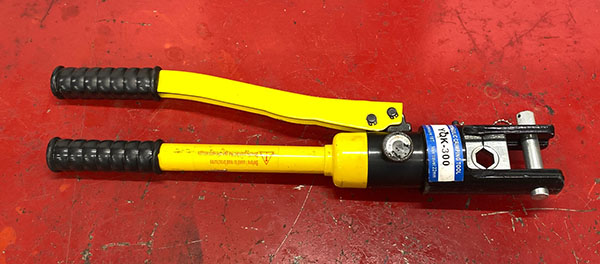
Next I used the tubing expander to resize the copper Pex crimp rings to fit the expanded pipe. Things were going well. After crimping the copper rings with a hydraulic cable crimper the stalks looked like 100 bucks.

The grinding process put a divot in the threaded end so I had to run a 10mm die over the things to straighten out the divots. With 4 new blinker stalks it was only a matter of time before everything was reassembled and back on the motorcycle. I’ll need to put a battery in to see if the blinkers actually work (I’m using the same battery in the Z1, the Husky, and the KLR) but I remain confident they will work at least as good as they used to. Which is not at all.

A few questions remain. Will the crimped ends stay put on a rough trail? I assume they will rip out during a crash and that’s good. My new stalks cost about 67 cents apiece so I can replace them as often as I like. Will the plastic tube droop leaving me with a sad-eyed KLR250? Will the bike require a plumbing inspection now? I don’t know the answers but I’ll report back if these Frankenstalks actually work.


More “Bring ‘Em Back Alive” Gresh Resurrection stories are here!
Stop Me If You’ve Heard This One: KLR250 Refresh, Reflash and Rehash Part 1

I’ve owned a KLR250 for a long time. I bought the thing on highway 40 between Ocala and Ormond Beach from a gator-meat seller named Street. When I bought it the KLR was nearly new and being a 2005 model it is the last in a long line of KLR250 Replicants that started in 1995. In 20 years of building the 250cc enduro-style bike all Kawasaki did was change the paint schemes and the seat colors.

My KLR, named “The Widowmaker” due to its extremely low power output, has done some long distance, cross country traveling but the last 7-8 years it has been stowed at The Love Shack for use in March during Daytona’s bike week. Long periods of inactivity broken up by a week of full throttle action has left The Widowmaker in a sad state so I brought her out to New Mexico for some tender loving care.

In no particular order The Widowmaker needs front brake work, blinker stalk replacement, a new front tire, valves adjusted, carb cleaned, air filter replaced, coolant and coolant hoses replaced (15 years!), back tire replaced, fork seals and a few other things I’m forgetting. It’s not that bad a list for the many years of neglect The Widowmaker has suffered under my care.

Last March The Widowmaker’s front disc brake was giving me trouble. It would not release and the disc got pretty hot from dragging. I could smell brake lining burning as I rode the bike. The Widow maker, never very fast to start with, was pushing the front forks down and struggling to make 40 miles per hour. Cracking open the bleeder on the caliper freed up the front wheel and I managed a few days of riding using only the rear drum brake.

Eventually I had to fix the brake as it was taxing my brain planning stops 300 feet in advance. I took the caliper off and the piston was firmly stuck inside with a crystalline white-ish gunk but I managed to extract the offending part without too much collateral damage. 2005 might as well be 500 years ago when you’re trying to find motorcycle parts. I went to a few brick and mortar motorcycle shops in Daytona but nobody had anything for a 15 year-old KLR. I didn’t have enough time to order online so I cleaned out the bore and stuck the caliper back together.

Bleeding the system was a challenge as the master cylinder seemed to move 2 pico-liters of fluid each stroke. The lever didn’t feel right but I pressed on. The Widowmaker’s brake was better but the caliper was still not releasing well and I determined the master cylinder was the culprit. All around me Florida was closing up due to Covid-19. I had no more time to work on the bike so I loaded The Widow maker into the truck and hauled it out west to New Mexico.

Looking online for a master cylinder rebuild kit I found new, complete, generic master cylinders with lever and all for $20! People complain about the global economy but $20 is $20. My Facebook post about the cheap master cylinder brought mixed reactions. Some said they are garbage and leak others said they use them all the time and that they work great. I went with the generic because I’m old now. If the brakes fail I haven’t lost much time.

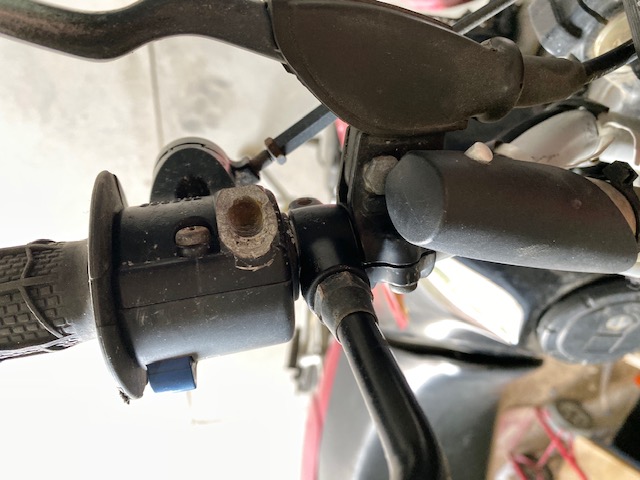
When I say complete I mean even down to the brake light switch. I opened up the unbranded box and the new unbranded lever looked great cosmetically. I could see no flaws in the construction and a side-by-side comparison with the original Nissan master showed there was nothing visual to make the OEM seem better than the generic. A few minor differences: the generic has a larger reservoir and includes a threaded hole for a mirror. The mirror mount was an unexpected bonus because I had broken the left side mirror mount in a violent side-trip through some sagebrush out in Utah. I was trying to follow Hunter at the time. The extra mounting hole allowed me to transfer the old, right side, stand alone mirror mount to the left side where I had wanted a mirror ever since the sagebrush incident .

If you Safety Nazis are wondering where the handlebar kill switch is I can tell you that it broke off years ago in a less memorable crash. The key switch is only a foot away. The new master cylinder installed and bled out easily. The front brake has a firm lever, firmer than it ever was. The caliper releases nicely and all seems rosy. Time will tell if the replacement master cylinder lasts as long as the Nissan.

The left side of the handlebar has the (also broken) light/blinker/horn and all that works well. I had to thin down the mirror mount to fit between the clutch lever (not broken!) and the switch cluster.

I don’t want to give you the wrong impression. Realize it has taken many years to break all these parts. I’m not tossing the bike down the road everyday, you know? The Widowmaker’s features, like a boxer fighting past his prime, are becoming smoother and less distinct from the blows. If I don’t turn back the tide of destruction now The Widowmaker will look as bad as a 2021 Goldwing.


Want more of Gresh’s resurrection projects?  Just click here!
Baja 2009: The KLR Khronicles Part IV

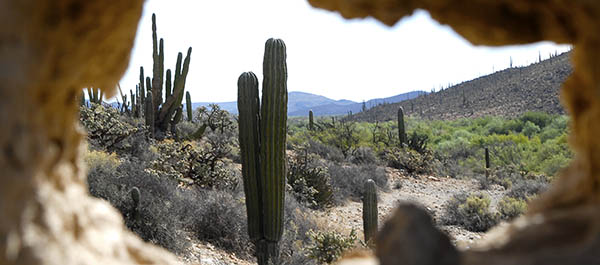
The view, peeking out from the Mission San Velicata de Espana ruins.

Read Parts I, II, and III of the 2009 KLR Baja foray here!

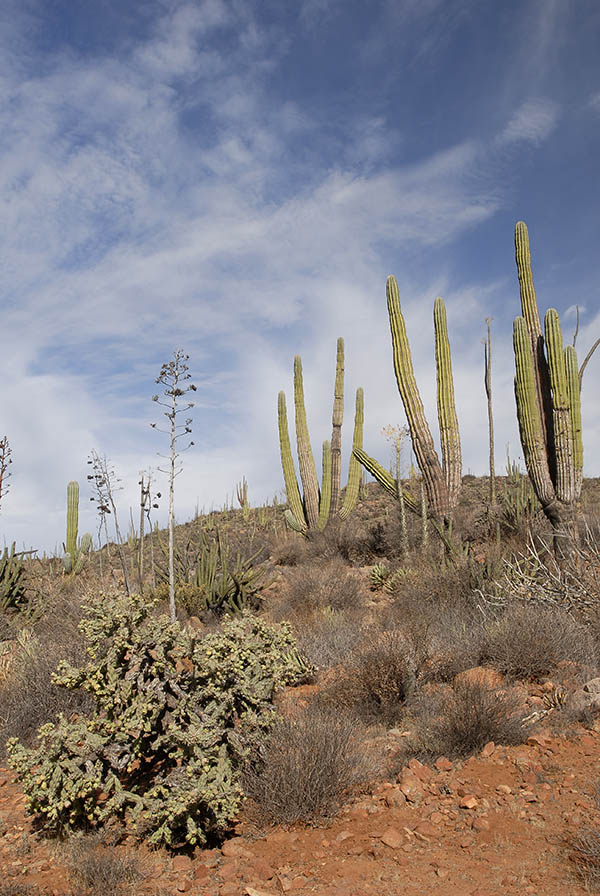
When the Transpeninsular Highway continues south after leaving El Rosario, it crosses a long bridge across the dry Rio El Rosario and then winds into the mountains on the northern edge of the Valle de los Cirios.  The wilderness starts here, and it is awesome.   I love this area. It’s the first place you encounter cardon cactus and the cirios. These things grow only in Baja (you won’t find them anywhere else on the planet). The Cardon are the giant cactus that look something like the saguaro cactus in Arizona, but the cardon are much, much larger. The cirios are the weird-looking thin shoots that grow to heights of around 30 or 40 feet (maybe even more). Someone once wrote that they look like a plant that Dr. Suess would have designed, and I think that’s a good description.  They have this kind of weird, whimsical, goofy look…the kind of thing one might create when under the influence of, well, whatever your preferred mind-altering substance is.

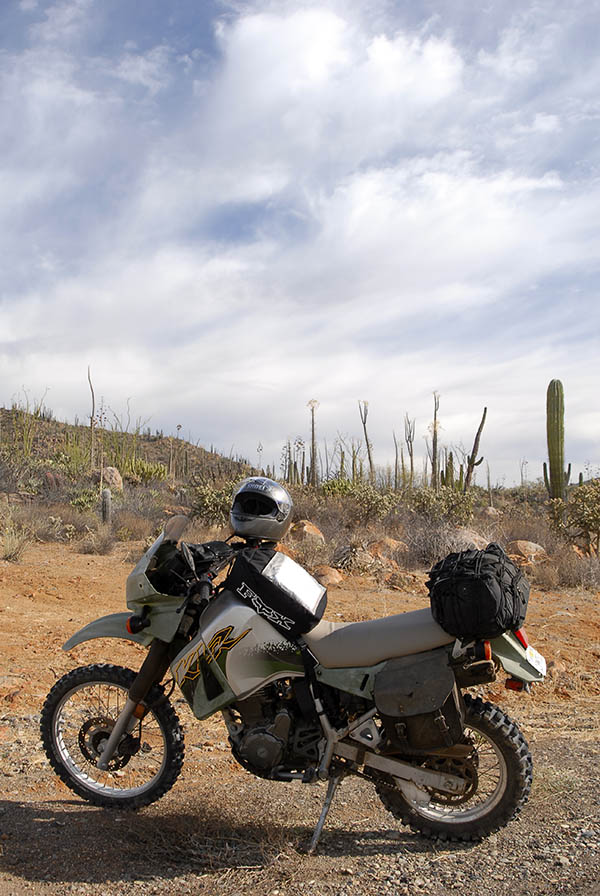
I grabbed a few shots of our KLRs a few miles into the mountains.  You can see the cardon and the cirios in the background.

My KLR 650. I had the Kawi soft luggage on it and a Nelson-Rigg tank bag.
John’s KLR. These bikes just keep going and going. They’re perfect for this kind of ride.
Baja cacti. It’s one photo op after another in Baja.
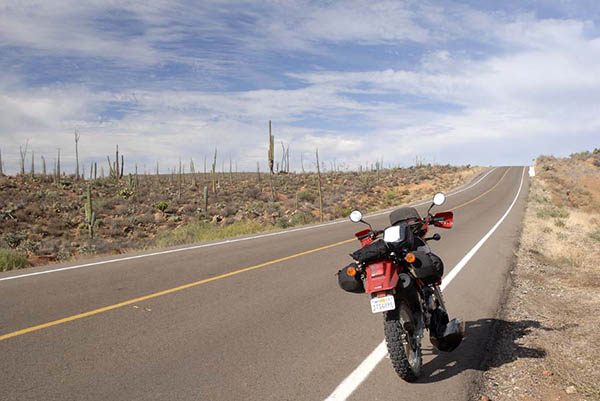
A shot along the Transpeninsular Highway in the Valle de los Cirios.
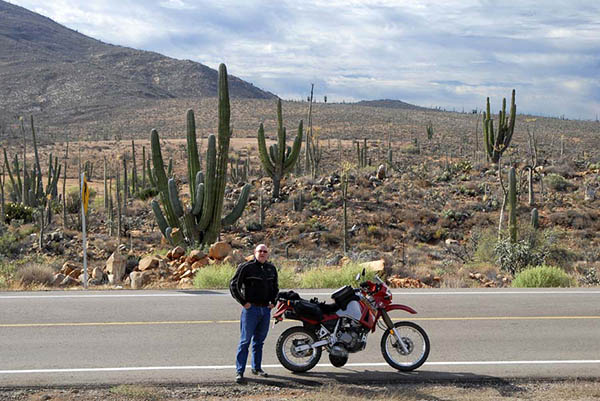
Baja John standing by my KLR. The background almost looks like it’s been painted into this scene.

After rolling along the highway a few more miles, I saw something out of the corner of my eye on the road.  At first I wasn’t sure, and then as I was playing back the image mentally, I decided I needed to turn around and take another look…

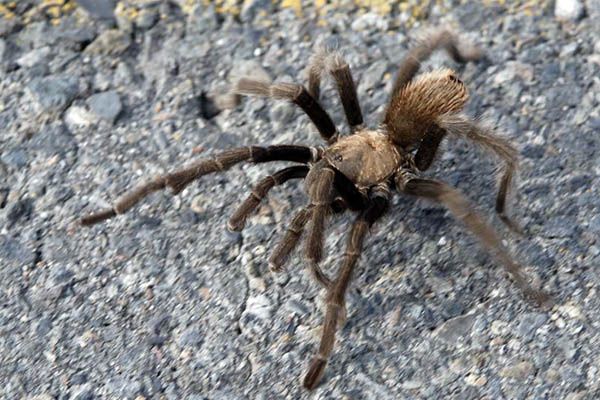
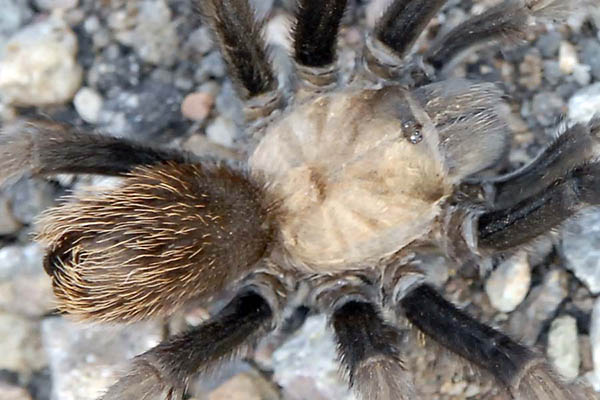
Yep, my eyes weren’t playing tricks.  I had seen what I thought I saw.  Is that correct grammatically?  Whatever.  The spider was huge.

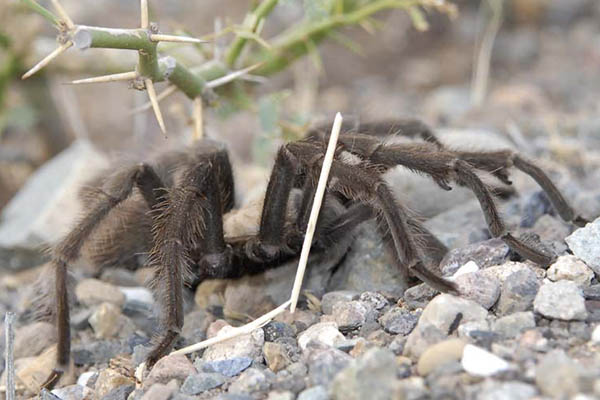
Wow, that was one monstrous tarantula!  We parked the bikes and started taking photos.   This spider was easily double the size of the tarantulas I’ve seen in California.

John got down in front of the tarantula.   He squatted to get a closer look, and then something wild happened. The spider ran straight at John. We were both shocked at its speed. They normally seem very deliberate and slow, but I have to tell you, that one moved terrifyingly fast.

John jumped up, screamed, and propelled himself backwards faster than a Democrat mistakenly wandering into a Trump rally.  John was paddling backward so fast he looked like an old Warner Brothers roadrunner cartoon.

We both laughed after it happened.  Here we were, two guys old enough to know better, screwing around with a ginormous tarantula in the middle of the Baja peninsula, laughing like a couple of kids.  Baja does that to you.

Look at this fellow’s little beady eyes. And his hairy butt. That’s quite a hairdo. It kind of reminds me of Beavis and Butthead. Come to think of it, those might be appropriate names for John and me.
The tarantula crawled under a plant, I took a few more photos, and we were on our way.

I think I already mentioned that I had my Nikon D200 on this trip and an older (non-VR) 24-120 Nikon lens. I mostly shot at f/8 (the 24-120’s sweet spot) in the aperture mode, which is a mode that works well for me. I also had the 12-24 Tokina wide angle lens along for the ride, but I never even mounted it on the camera. The 24-120 is not a macro lens, but it did an acceptable job here.  The Tokina lens does a good job, too, but the 24-120 Nikon was handling everything for me on this ride.

Our next planned stop was the Mission San Fernando Rey de Espana Velicata. We almost didn’t go. I had been spooked by the dogs, and I told John the night before that I wasn’t too keen on rolling through any more little villages with dogs. John waited awhile and casually mentioned that he really wanted to see some of the sights accessible only by dirt roads. I acquiesced and I’m glad I did.   We saw some amazing things…things we wouldn’t have seen if we hadn’t wandered off road.

Further down the Transpeninsular Highway, we saw the sign for the Mission San Fernando Rey de Espana Velicata and a dirt road veering off to the west.   I took the turn first, and son of a gun, a dog materialized out of nowhere and started chasing me.   This time the dog was so small it was funny.  It was a little Chihuahua, and he looked anything but threatening.   The little guy was behind me yapping up a storm and I was enjoying the chase.   Those little legs were pumping for all they were worth and he still couldn’t keep up.  It was me, the Chihuahua, and John (in that order) rolling down this dirt road.  The pup was struggling to keep up, barking all the while and trying his best to be intimidating.  I could hear John laughing behind me.  I should have grabbed a picture.

On the road to the Mission San Fernando Rey de Espana Velicata

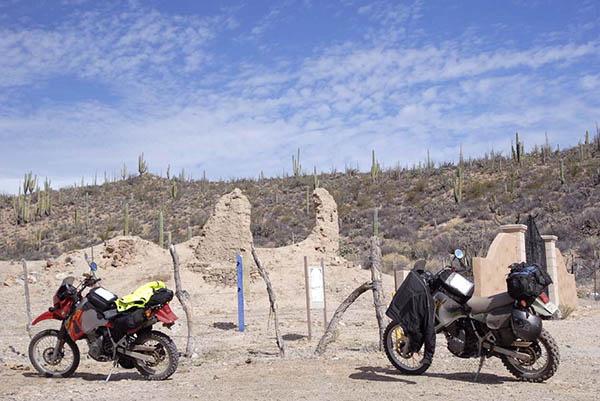
The Mission San Fernando Rey de Espana Velicata was the only one in Baja founded by the Franciscans (the Jesuits did all the others).  It only lasted from 1769 to 1818. It was built to convert the local Cochimi Indians to Catholicism (that was how it was advertised; basically, the missions were labor camps with a touch of that old time religion).  Unfortunately, the Spaniards brought diseases for which the indigenous people had no immunity, and disease soon ravaged the area. The entire mission system in Mexico ended in the early 1800s, when Mexico gained its independence from Spain.  It’s not a pretty story, but there’s a history here and it’s intriguing to visit these ancient places (especially when they are well off the beaten path).

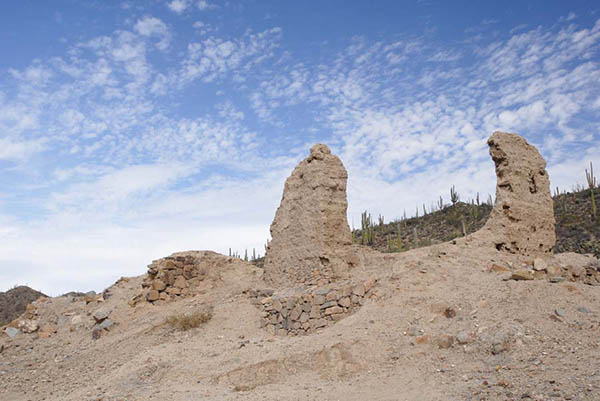
The Mission San Fernando Rey de Espana Velicata. This is all that’s left of it.
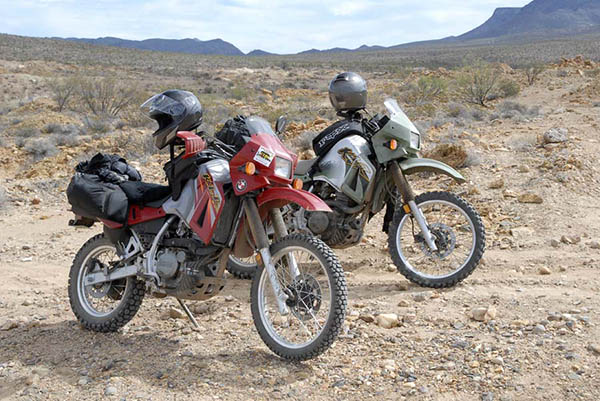
Our KLRs parked in front of the mission ruins.

The place was amazing.  I’d seen the sign and the dirt road to get to the mission on each of my prior Baja visits, but I had never been to see it.  Getting there and taking it all in was fun.

After visiting the Mission San Fernando Rey de Espana Velicata, we rolled south along the Transpeninsular Highway a few more miles and took another dirt road (this time to the east) to see the ruins at El Marmol. El Marmol was a world-famous marble and onyx quarry 50 years ago. Like the mission, we’d seen the signs for it on our earlier travels through Baja, but we had never made the trip out there to see it. I always wanted to see what El Marmol was all about, especially after reading about it in several Baja references.  Carole Lombard had a bathtub made from El Marmol marble, you know.

The ride out to El Marmol was exciting.  The road was rough and had deep sand in several spots. My friend Bob had previously told me that the best way to take this stuff was at high speed, and that’s what we did. It made an enormous difference. I could see the rough road beneath me, but the KLR’s long-travel suspension let me fly over it. It was almost an out-of-body experience.   I enjoyed it.  I was in the zone, and suddenly, we were there.

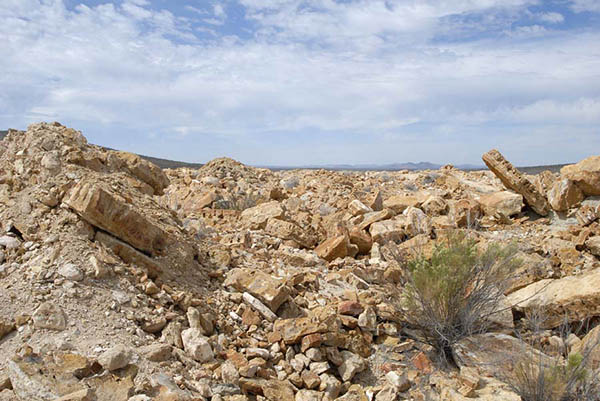
El Marmol. There isn’t much to it, other than a pile of big rocks.  Folks still come out here to get the marble.  We saw a few Mexicans loading some into a tiny pickup truck.
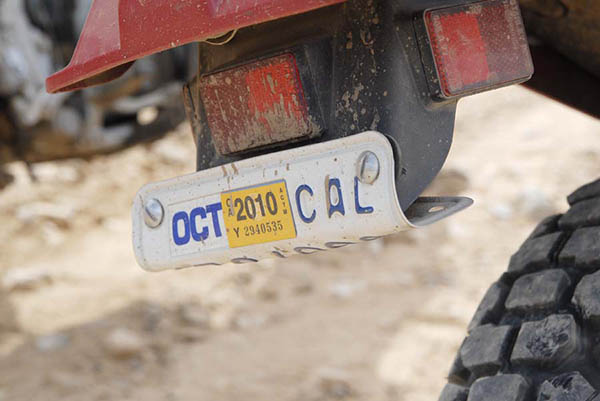
I bottomed the suspension in a few spots on the ride out to El Marmol, and this is what it did to my KLR’s license plate.  Many first-gen KLR owners relocate their license plate up on top of the rear fender. Now I know why.
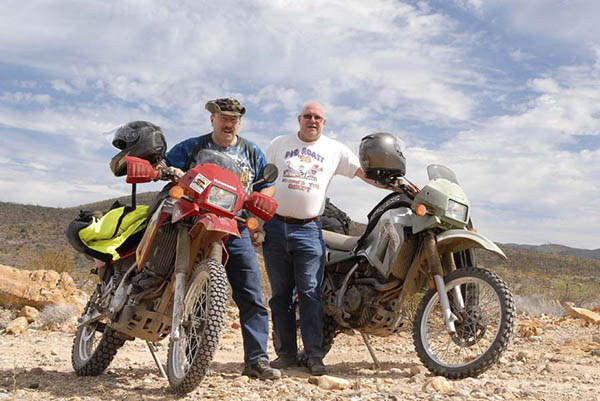
Two KLRistas at El Marmol. That’s my yellow riding jacket on my KLR.  It seemed to aggravate any dog who saw it.
The KLRs at El Marmol.

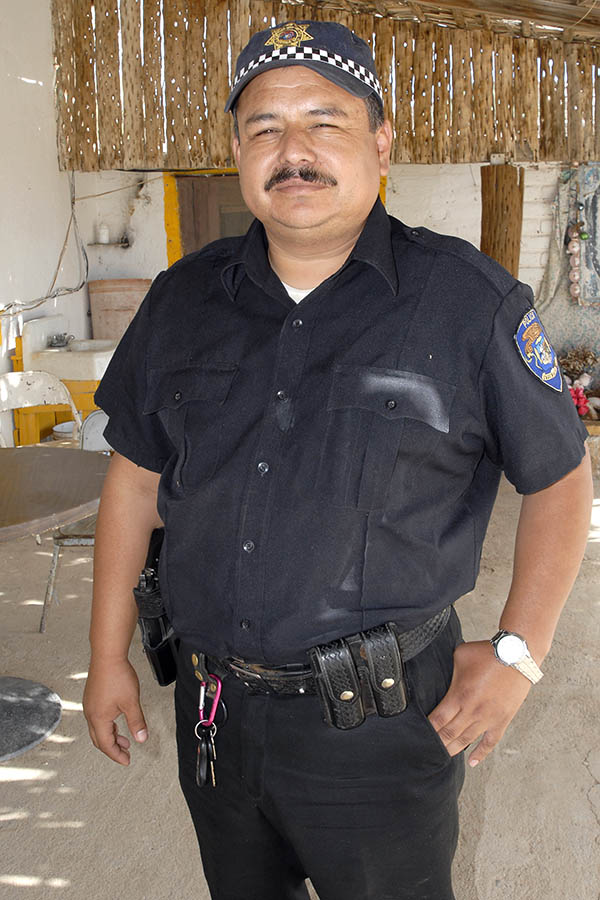
We stopped for a break on the way out of El Marmol where the dirt road rejoined the Transpeninsular Highway.  We had a good conversation with Jose, a police officer from Catavina who consented to a photo.

Good buddy Jose, my tocayo.

There were two dogs hanging around the place watching John, Jose, and me.  They seemed friendly enough when John gave one of them a snack.  Then we got on the motorcycles and it was as if someone had flipped a switch.  The dogs instantly turned mean, snarling and going after John, who was accelerating sharply way (a relative term, to be sure, when you’re on a KLR).  There’s a rule in Mexico, I guess.  If you’re a dog and you see a guy on a motorcycle, you’ve got a reputation to maintain.  This time, though, both dogs went after John and ignored me.   They chased John all the way back to the highway, with me following.   Hey, that’s was okay by me.  I’d already earned my combat pay.

The dogs chasing John, though, didn’t seem to have their hearts in it.  They were chasing John like it was part of their job description and the boss was watching.  Going through the motions.  Phoning it in.  You know the drill.

I thought about that as we continued south.  I reasoned and hoped that as went further into Mexico (and we were about 350 miles into Baja at this point), the dogs might be nicer.  Our next destination was Guerrero Negro, 500 miles south of the border.  We would soon find out.


Check out our other Epic Motorcycle Rides, and watch the ExNotes blog for the next installment of the Baja KLR Khronicles!

Like what you’re reading?  Sign up for our automatic email updates, and you’ll be eligible for our quarterly drawing to win one of our adventure motorcycle books.  Want to read about our other Baja motorcycle adventures?   Order your own copy of Moto Baja here!

Rob’s project bike…

I received an interesting email from my good buddy Rob a couple of nights ago.  Rob is an interesting guy…I rode with him on the 5000-mile Western America Adventure Ride described in 5000 Miles at 8000 RPM, and then again on one of the Baja trips.

Good buddy Rob in Oregon.
Rob’s mascot on a bike he calls “Donkey Hoty.”

Here’s Rob’s note to me, along with some very interesting photos…

Hi Joe,

Hope your living life to the fullest. I really enjoy you and Gresh’s ExhaustNotes and keeping up with you.

Anyways its very cold up here and to kill time I’ve been looking at Ball and Cap pistols and wondered if you had any experience shooting, loading, etc. with them?  Any further plans on an east coast RX3 trip or Alaska?

If your ever up here in the Pacific Northwest area , give me a shout.  Maybe I can meet up with you somewhere.

Not sure this year where all my bikes will take me. My favorite rally in Hells Canyon is done and over with and she’s looking for another venue place to host it.  I may try and get to the beater bike rally in Hood River. I’m working on a Kawasaki KZ440 that I took the motor out of and put in a Harbor Freight 212cc lawn mower motor in it with a cheap torque converter so its an centrifugal clutch auto like a big mini bike. If I can get it to go fast enough (45-55mph) I may try and ride down to rally from Walla Walla.

Hope all is well with you and yours Joe. 

Take care,

Rob

Rob calls his new bike Einstein, and like Donkey Hoty, he has a hood ornament to match.
Rob’s unintentional self-portrait.

Rob, your project bike is fascinating.  Please keep us posted on how it progresses.  The centrifugal clutch concept on a full-figured motorcycle is interesting.   Mustang (i.e., the original California-manufactured Mustang of the 1950s) offered a centrifugal clutch bike in the 1950s they named after their original offering (the Colt), and the one I saw owned by Al Simmons and later Steve Seidner was a real beauty.

A ’56 Mustang Colt. It had a centrifugal clutch. The Mustang Motor Products Corporation positioned this bike as a lower-priced Mustang, but it was a commercial flop.

Mustang’s intent was not to offer a bike with an “automatic” transmission; what they were really after was a value-engineered version of the Mustang.  It had the standard Mustang 322cc flathead engine, but a centrifugal clutch replaced the Berman transmission and the bike had Earles-type forks instead of the Mustang’s telescopic forks.   The factory workers didn’t like it and there was some talk of efforts to sabotage the ones leaving the plant.  The one I saw was beautiful.  It flopped in the market, which was unfortunate.   When I worked at CSC, we’d routinely get calls from folks asking if we had any bikes that had an automatic transmission.  The answer, of course, was no.  But I think this sort of thing could work on a small displacement bike for folks who don’t know how to (or don’t want to) shift.  I know you do and I know you are doing this just to have fun.  But I think you are on to something here.

To answer your other questions….I have zero experience with black powder guns, other than to watch my good buddy Paul build custom black powder rifles and play with them.  I once bought a Uberti .44 Model 1858 sixgun and it looked to be very well built, but a friend of mine wanted one and I sold it to him without ever having fired it.

I don’t have any east coast RX3 or other plans at this time.  I’m too busy planning for the next Baja trip, I guess.

The beater rally you mention sounds pretty cool, and I love the Hood River area of the Columbia River Gorge.  That sounds like it might be fun!