The Wayback Machine: Zed’s Not Dead

Our latest Resurrection story about Joe Gresh’s ZRX is not our first big Kawi resurrection story.  Going back a few years, we previously ran a 20-blog series on a Z1 Kawasaki.  This Wayback Machine piece was the culmination of that story, with a link at the end that will take you to the entire series.  Those big Kawis are cool, and the Z1 is unquestionably the coolest of them all.


By Joe Gresh

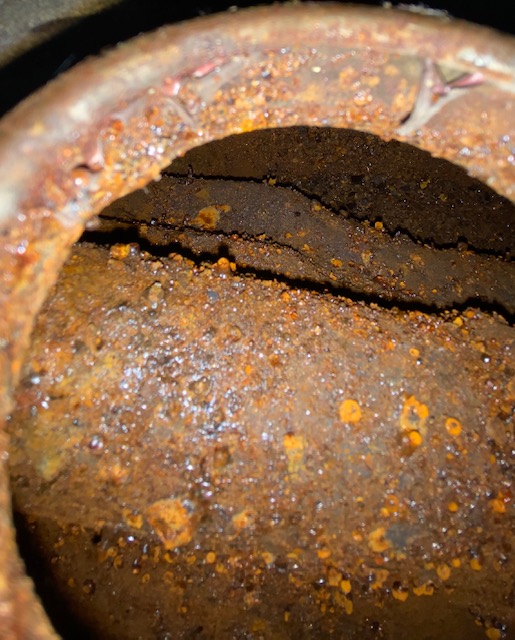
You may recall from Zed 19 I had to re-soak Zed’s gas tank as 10 days were not enough to dissolve the rust. I drained, dried and reloaded the tank with apple cider vinegar and let it sit for 4 more days. This is what it looked like originally:

The second session really knocked most of the rust out. After rinsing I dumped a large box of baking soda into the tank and added clean rainwater sloshing it as I filled to mix thoroughly. I don’t know the chemical reaction that takes place but the baking soda neutralizes the acid, turning the metal a dull grey, almost white color. This treated metal does not flash rust and I’ve been going 3-4 years on another tank I cleaned like this without rust reappearing. It’s like the metal turns passive and stops reacting to oxygen.

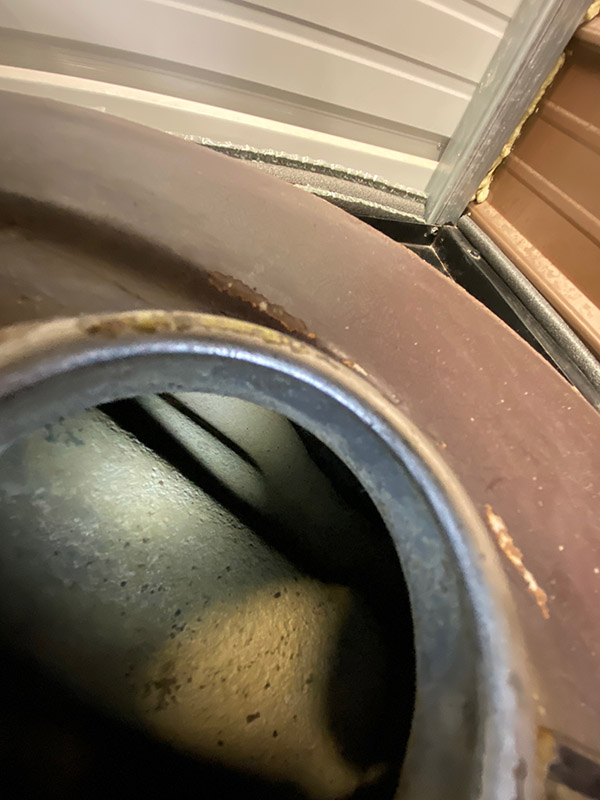
If I wasn’t so hell-bent on riding this bike I think I would flush and cider the tank one more time but it looks good enough and I’ve got to ride! I connected a small hose to my shop vac and played it all over inside the tank. I can hear nothing when I shake the tank so at least there are no big chunks loose inside.

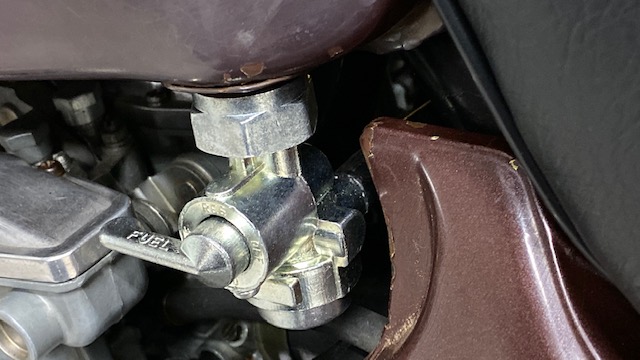
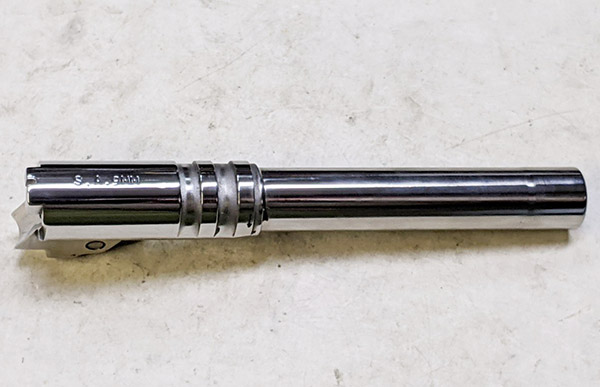
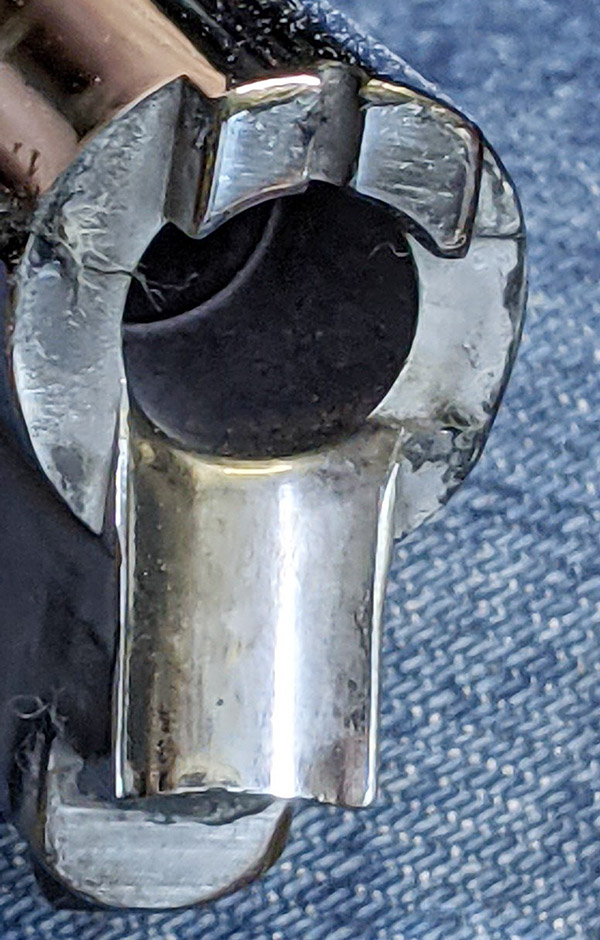
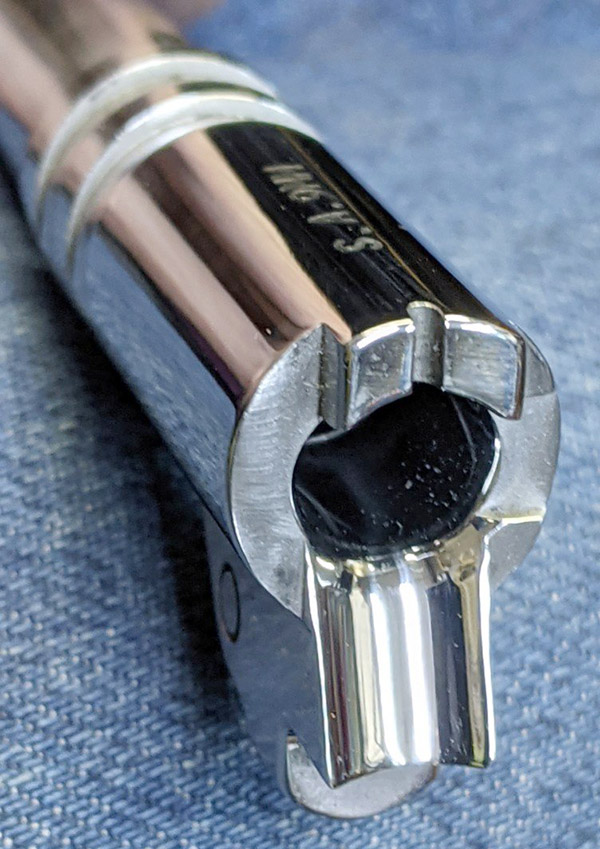
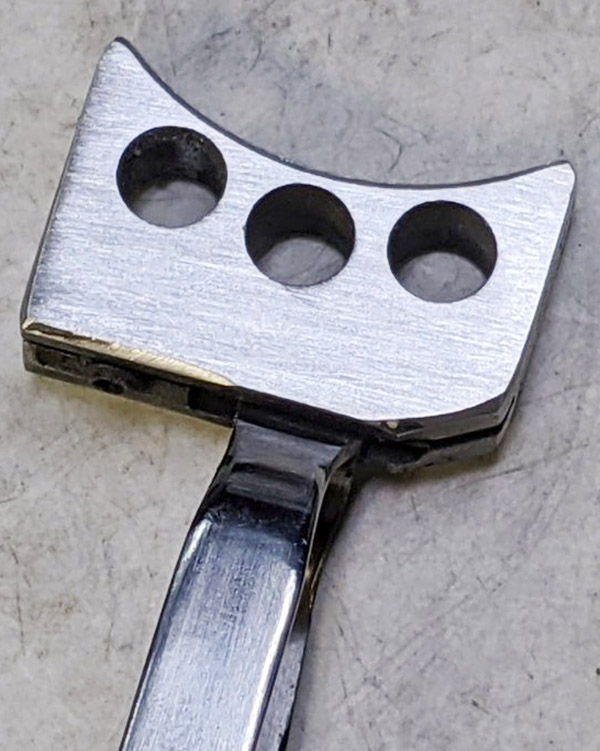
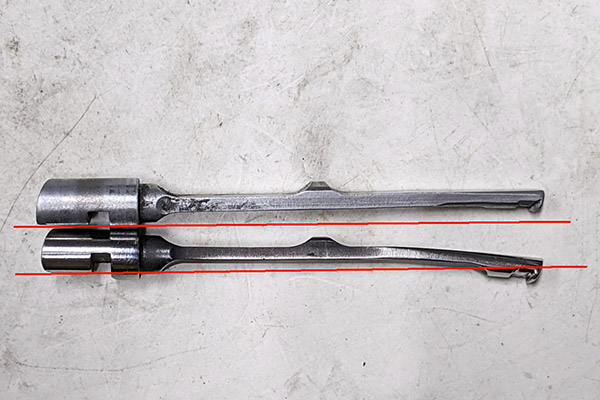
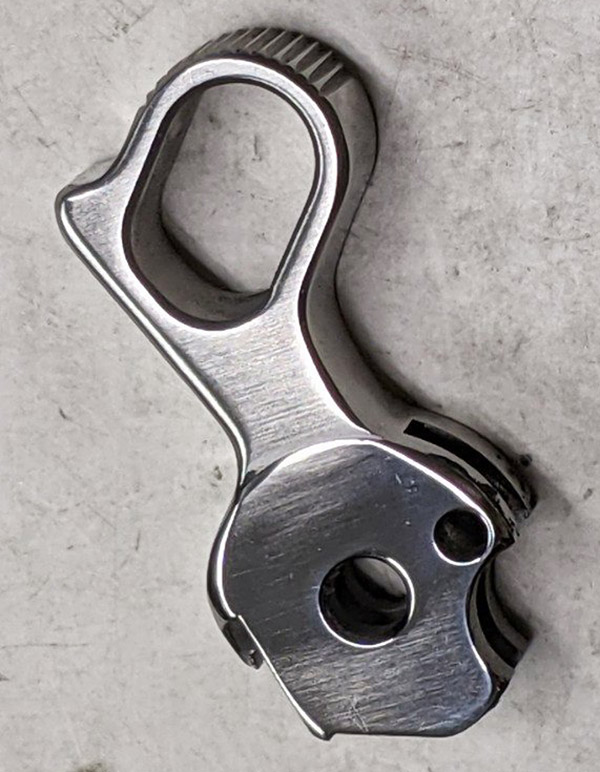
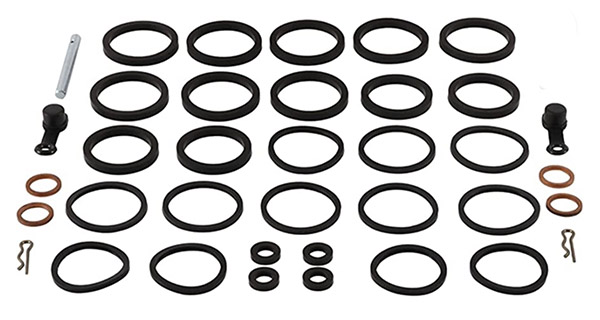
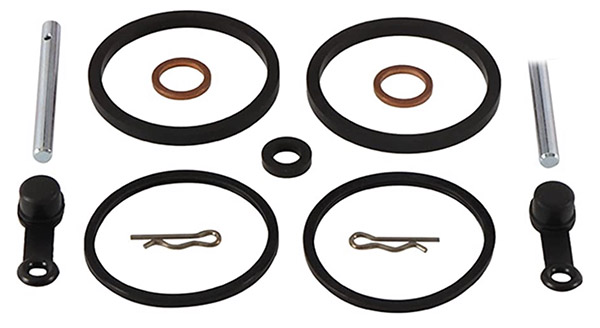
Proving that even the simplest life forms can learn I bought an entire new petcock for $23 rather than the rebuild kit for $8. This is real growth on my part. Usually I buy the kit, mess with it for hours then put it on only to have it leak. Only then will I buy the new one. Kawasaki uses a turnbuckle-type left-hand/right-hand thread on the Z1 petcock. It took about 145 tries to get it to tighten up facing the correct direction.

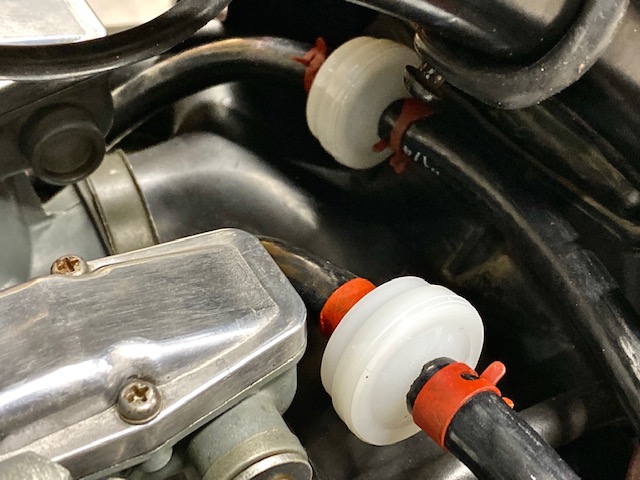
The new petcock has screens inside the tank and a bowl filter but with 40% of Zed’s tank out of my view-field I can only assume the entire tank is as clean as the places I can see. Inline fuel filters, one for each set of two carbs will hopefully catch any debris still in Zed’s tank.

An update on the Z1 Enterprises regulator/rectifier: It works. The battery charges @ 14.8 volts which is still a tad high but much better than the 17 volts Kawasaki’s setup was doing.

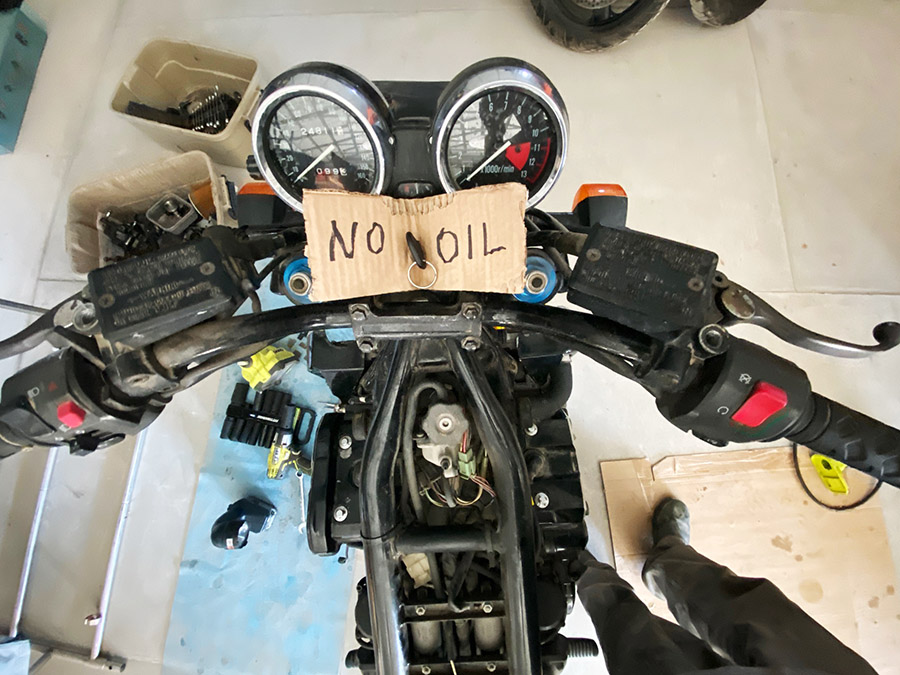
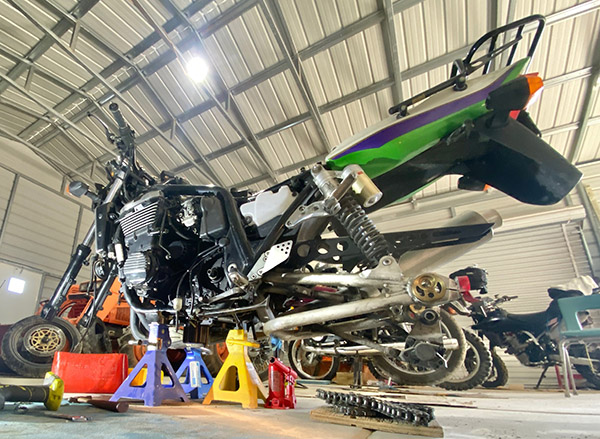
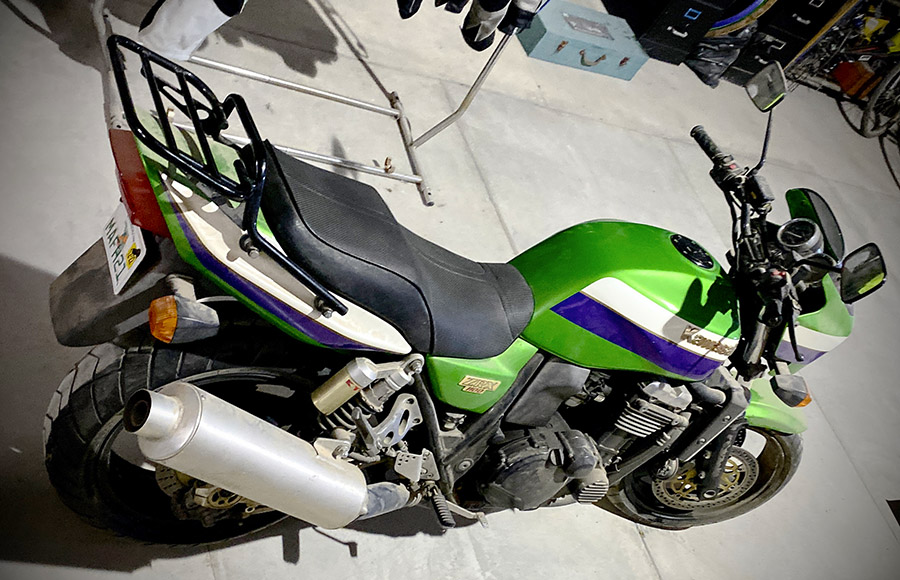
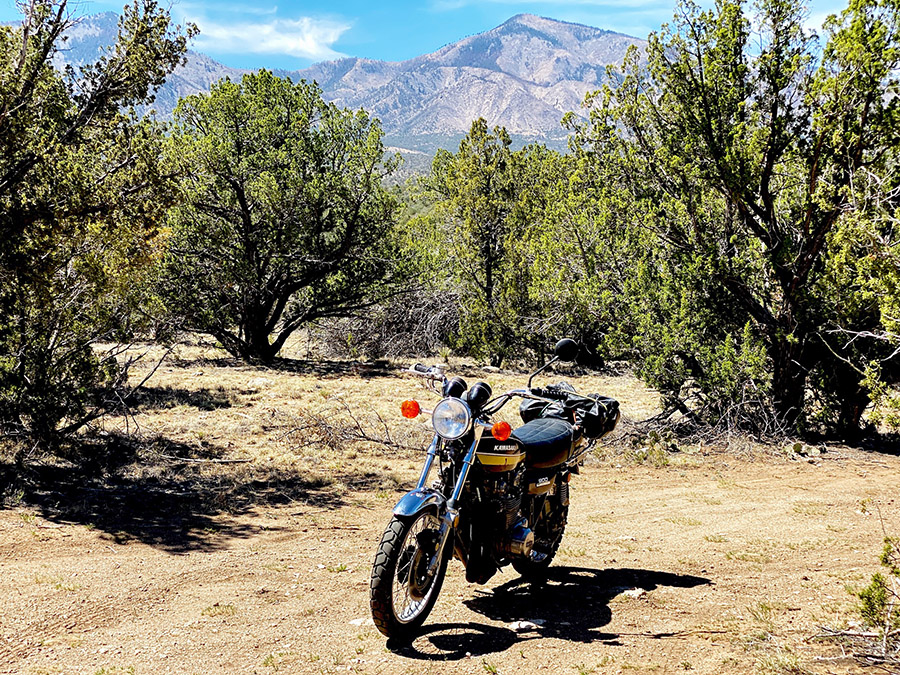
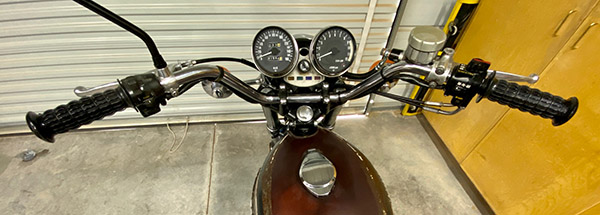
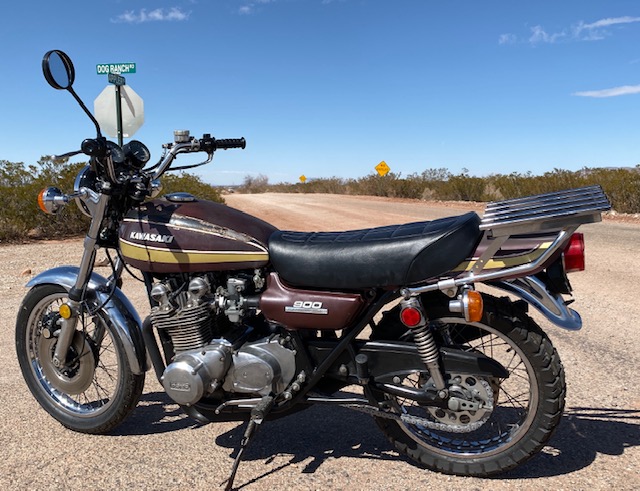
From the top Zed looks pretty well sorted. I took it for a ride and it ran really well for off the bench carb settings. It might be a little rich at idle or it might just be our 6000-foot elevation. I’m not going to tinker with it for now. I’d rather get some miles on the bike.

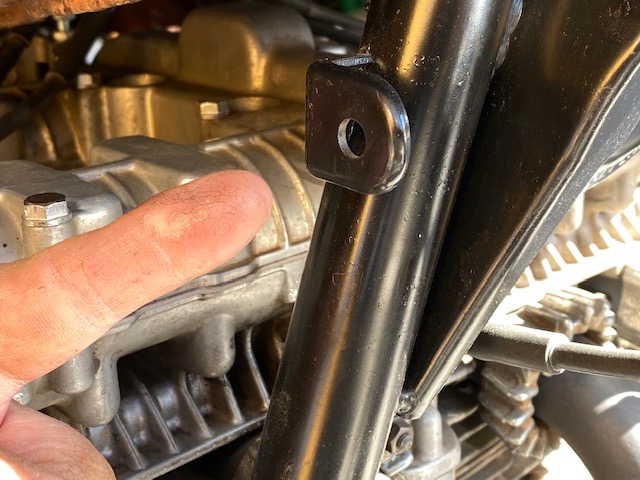
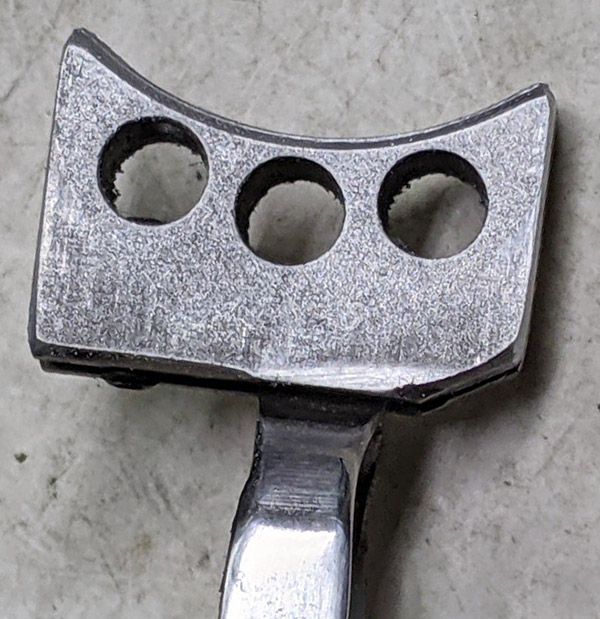
I don’t know what this bracket is for. Located on the right side down tube near the tach drive, it’d too light for a steering damper mount. Anyway, there’s enough stuff on the bike as is so I’m not going to worry about it.

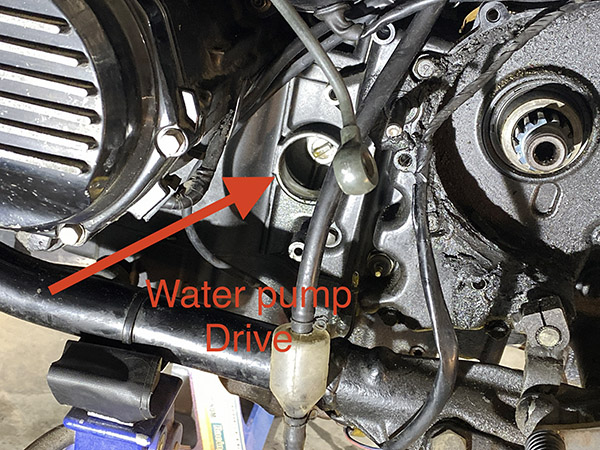
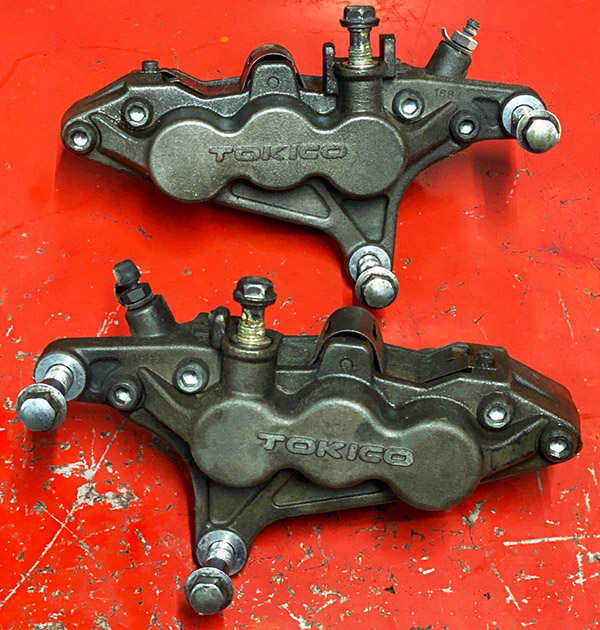
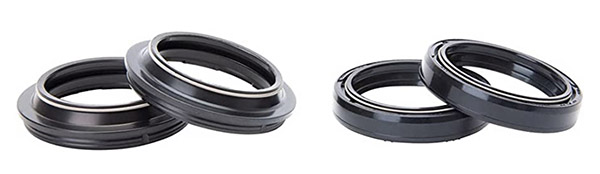
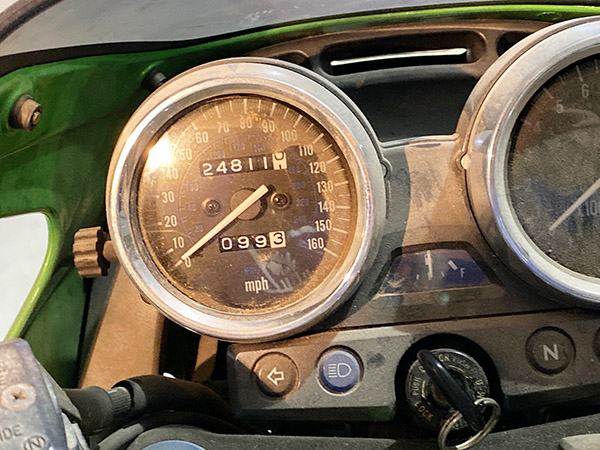
I took Zed to my secret proving grounds and she ran through all 5 gears smoothly. The bike hit 90 MPH without even trying. I’ll need a better front tire to do any high-speed work. The brakes work ok. When you ride a SMR 510 Husqvarna all other motorcycle brakes seem like crap. After 33 miles there are small oil leaks at the tach drive and countershaft area. Maybe the clutch pushrod seal or sprocket seal is the culprit. That stuff is easy to fix.

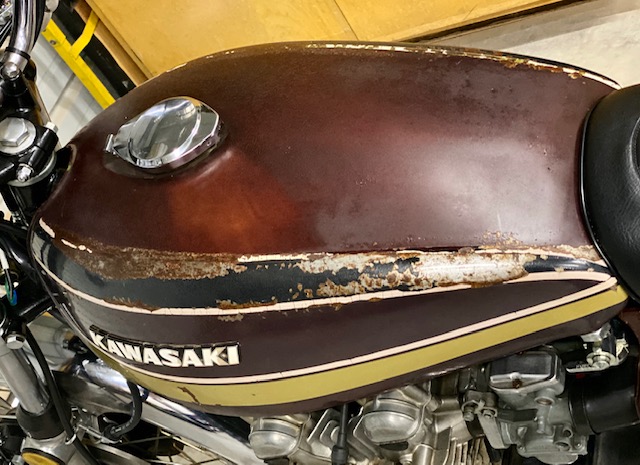
The patina on Zed is excessive, bordering on shabby. The bike sat outside for years and paint wise there’s nothing left to polish or wax. The finish is just not there. The pin striping is cracked and missing sections. I’m not sure what to do about that. On the one hand a ratty bike may be less attractive to thieves and old Z1’s are getting fairly expensive. On the other hand it does look pretty bad. I’ve seen my Enduro buddy Mr. French do some amazing work with rattle cans. Maybe I’ll give it a go. The paint can’t look any worse.


That’s it: from Dead to Zed in 20 easy sessions. Don’t worry, this won’t be the last you’ll hear of Zed. I’ll be doing some long trips on this bike, maybe Mexico, maybe ride to a few flat track races. I’ll update the blog if I do any more major work on the bike. The story of Zed’s resurrection may be ending but the story of Zed is just beginning.


And there you have it.  If you’d like to run through the gears (i.e., the previous 19 installments of Zed’s Not Dead), you can do so here!


Help us continue the content:  Please click on the popup ads!

Life as a Digital Nomad: Part 1 (Testing the Waters)

By Mike Huber

In 2010 the company I worked for gave me my pink slip due to budgetary cuts.  I was feeling distraught and lost because I had been working there for 8 years. Fortunately, I had a great director who helped by transferring me from a management position into a project manager slot that would be fully remote.

Remote positions at the time were called working from home.  It didn’t take long for me to ask myself a question:  What if I didn’t have a home? This mostly was bar talk amongst friends and I didn’t expect the crazy scenarios we discussed to ever become a reality.  Well…it seems planting those seeds in my mind was all it took for them to nurture, and then to grow into 13 years of almost nonstop travel.

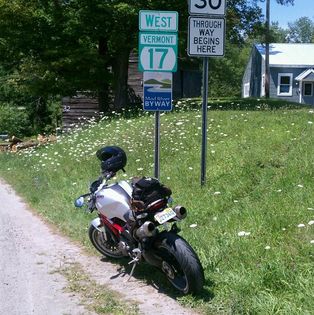
The first two years were mostly spent learning to excel in my new position as a project manager along with clumsily discovering how to adjust my work/life balance in creative ways.  This involved motorcycling throughout New England in between work responsibilities.

Something I learned early is that there are McDonald’s with wi-fi everywhere, and at the time it was one of the better places to stop to respond to emails or for a conference call (this was a life prior to riding a BMW, so I didn’t require Starbucks).  I timed my rides to reach these locations 10 minutes prior to conference calls.  This allowed me time to set up and prepare for them as needed.

The first day as a remote employee I decided to knock out a ride from Boston to Route 17 in northern Vermont.  Route 17 is also known as the “Little Tail of the Dragon.”  It was May and I was literally working off my Ducati Monster M1100 as I tore up Vermont. Since it took so long to reach Route 17 it made sense to ride it twice to ensure the long ride was worth it and regain the curve back in my tires.  It may have been one of the best days I have ever had working and figured this newfound freedom would provide many opportunities to fill in the gaps that I had been missing by going into a regular office day to day.

Riding all the way to Vermont from Boston on your first day in a new position probably was a bit of overkill.  I was missing calls and hadn’t noticed my phone was constantly ringing in my pocket (an easy oversight being so heavily focused on riding).  I was in flight formation and setting the pace for a flock of mallards that happened to be flying down the White River, which ran parallel to Route 100.  Unbeknownst to me the phone continued ringing as the Ducati’s Termignoni exhaust roared through the Green Mountains while I leaned into corners that followed the river.

Shortly after parting ways with the mallards and crossing back into New Hampshire, I saw some lights behind me.  It was a New Hampshire State Trooper.  Dammit! I am sure I was speeding, but the question always is how fast. It was fast. As I began talking to the State Trooper to try to minimize the damage, I could now hear my cell phone ringing.  I picked it up as the Trooper ran my information.  It was my new manager based in Virginia calling to introduce herself and ask if I had noticed that I had missed a call I needed to be on.  I stated I was just out getting a coffee (which was 100% true; it’s just that the coffee was 200 miles away).  This was probably one of my more challenging multitask scenarios (i.e., signing a speeding ticket while on an introductory call with my manager).  To this day I feel I would have been able to get out of that ticket had I not been so distracted by work. Lesson 1 as a remote employee learned.

After that day I knew I should take my work a bit more seriously and slow my pace.  I continued to ride, but always ensured I attended every call (which I did over the next 13 years). My work ethic has always been strong, and I didn’t want to compromise this position and what I could possibly do with it by losing my focus.  Continuing to merge my work responsibilities with riding was something that I honed to an art form.

Once I was comfortable performing my work one or two days a week off the motorcycle, I thought I would step the adventure up a notch: California.  I had relatives in Oakland and there was a Harley rental in San Francisco, a short transit ride away.  It made sense to fly there for two weeks and work remotely in a new environment and time zone to see how I would perform.

The test run couldn’t have gone smoother.  I was on Pacific Time when my team was on Eastern Time.  This ensured that by 1:00 p.m. all my tasks and calls were completed.  Having earlier workdays provided much more time to explore San Francisco and the Bay Area.  A couple of vacation days in the mix allowed time to rent a Harley in San Francisco and take a 3-day trip to Tahoe and Yosemite.  Even though I was on vacation those days I felt obliged to join work calls whenever possible just to stay on top of my projects, while obtaining bonus points from management for doing so on my time off.  I felt this made up for my missed meeting when I had first started this position in New Hampshire.

The California trip had solidified my abilities to work from anywhere.  On the return flight to Boston my thoughts focused on a farfetched mindset:  What if I don’t have a home?  It would take a few months of planning and a solid leap of faith.  As with all leaps of faith you never know where or how it will end, but I felt sure I could make this dream a reality. What I didn’t realize is how far I would take this and the new experiences my decision would deliver.  I turned my life into Ferris Bueller’s Day Off on steroids over the next 13 years.

The Sportster of Seville

By Joe Berk

When I was a kid, I used to watch a weekly television comedy show called The Little Rascals.   In one of the episodes, one of the rascals named Alfalfa sang a song from Gioachino Rossini’s opera, The Barber of Seville.  Until very recently, Alfalfa’s rendition and a Cadillac made in the 1970s (the Seville) were all I knew of Seville.  That changed with our recent trip to Spain.

I found it: The Barber of Seville!

Cards on the table:  I didn’t know anything about Gioachino Rossini’s opera until I Googled the Little Rascals and the Barber of Seville.   In so doing, I found out that Warner Brothers also had a Bugs Bunny cartoon with the same song.  I know…I digress.  Indulge me for 56 seconds more. Here’s Alfalfa belting it out.  Told ya…

You might be wondering:  What’s with the Sportster in the cover photo up top?   I saw it my first afternoon in Seville.   Believe it or not, in Spain, the land that brought us Bultaco (the motorcycle, not the Mexican bullfight snack bar delicacy), Ossa, and Montesa (or, as some might say, Montessa), the ultimate motorcycle status symbol is a used Sportster.  Hence the title of this blog:  The Sportster of Seville.  We’ve had a lot of fun with Sportster blogs here on ExNotes, but let’s get to the main topic of this discussion:  Seville.

One of our first stops in Seville was the Plaza de España, which is a magnificent building and park area built in 1929 when Seville hosted the Ibero-American Exposition World’s Fair.  The Plaza de España is impressive.  Today, the building has been renovated and it is used for Spanish government agencies.  It’s beautiful.

Photo opportunities abound. This shot of the tower through one of the many arches almost took itself.
Any time there’s water or a mirror, I’m there. You can do a lot with reflections when you shoot a photo.

We saw a bunch of touristy chotchkas in the Plaza de España courtyard that made for good photos (I would never buy this sort of stuff…if I need to generate a breeze, I’ll hop on my motorcycle…you know, to get my knees in the breeze).  But it was fun to photograph.

Fans for sale in the Plaza de España courtyard.

My attention then turned to the tilework along the Plaza de España courtyard wall that stretched for half a mile.  Each tile-based mural depicts a Spanish province.  The work was impressive, but what was even more impressive was what happened next.

One of many tile murals in the Plaza de España courtyard.
Another Plaza de España courtyard tile mural.

Two Spanish motor officers rolled into the Plaza de España courtyard on (get this) police motor scooters.  I always thought small motorcycles and motor scooters made a lot of sense in urban areas (I’ll say more on that in a second).   I asked the motor officer in the photo below if I could grab a picture and he was cool with it.

A Seville motor officer. If I was 50 years younger and spoke Spanish, I might try out for a job like this. It looked like a great gig, and I like the colors.

I didn’t realize why the motor officers had appeared out of nowhere.  All those tourist chotchkas like the fans you see in the photo above?  The folks  selling their wares there (I’m told they were Gypsies, if you can even say that anymore) weren’t supposed to be there.  When I looked up after grabbing the photo above, all the chotchkas (and the chotchka merchants) were gone.  They just went poof and vanished. Wiped clean from the face of the Earth (as they said in that Indiana Jones movie).  I guess you don’t want to mess with a Spanish motor officer.

On the motor scooter/small motorcycle thing for police motorcycles:  When Gresh and I were at the Zongshen factory in Chongqing, one of the many very cool things we saw there were RX3 police motorcycles.  Imagine that:  A 250cc police motorcycle.  I talked Zongshen into giving us (“us” being CSC Motorcycles) three or four of the things so we could market them to police departments in America.   Imagine that, too…one short email and poof: Three free motorcycles.

The CSC RX3 250cc police motorcycle. I had a lot of fun on these.
The obligatory blog commercial: The Complete Book of Police and Military Motorcycles. Did I mention these make great gifts?

I thought I knew the police motorcycle market a little bit because I had written a book about police motors.  Man, I tried, but it was a bust.  The Sacramento Fairgrounds Police were interested, but I couldn’t close the deal.  We shipped one to the New York City Police Department (I knew they used Vespas for police work), Andy Sipowicz and crew kept the bike for about two months without ever taking it out of the crate, and then they shipped it back.  I took one to a couple of local police departments, but the only thing to come of that was one of the cops told me I wasn’t allowed to ride it around with the red and blue lights and the siren still attached.  I told him not to worry; I only used that stuff if people wouldn’t get out of my way.  Zongshen, on the other hand, has done fabulously well with their police bikes.  They are selling RX1s, RX3s, RX4s, and other bikes as police motors literally all over the world. Just not in America.  I’ll do a blog about Zongshen police bikes someday.

I know, I’m digressing again.  Back to the main attraction:  Seville.  We walked around quite a bit (I did 17,000 steps one day) and there were tons of photo ops.  Doors, tiles, alleys, and more.

A door in Seville. Spain and Portugal are an artist’s palette. Both were awesome.
A Seville sidewalk. The sidewalks were awesome everywhere we went. Think of the labor that went into this. Joe Gresh, this is your new concrete standard. I’ll take a photo when you finish and put it on the blog.
Decor on a home in Seville.

As we walked around Seville and took in the sights, Jose (our awesome guide) told us we were in the Jewish quarter.  I asked if Jewish people still lived there.  Very few, he said.  You know:  The Spanish Inquisition.  Oh, yeah.  I remember reading about that in James Michener’s The Source (a great story and a great read).

In Seville’s Jewish Quarter. Note the sign on the wall on the right.

Our walk through Seville presented one photo op after another.  I had my old Nikon D3300 (the current version is the Nikon D3500), an entry-level consumer grade digital SLR, and the relatively inexpensive (but vibration-reduction-equipped) 18-55mm zoom lens.  It was great.   The D3300 is a light camera. My other Nikon (the D810) has more capability, but it is much heavier.  For this kind of tourism, the D3300 (or the current D3500) is a better deal.

A fountain in the exterior corner of a Seville structure.
I saw this and had to ask: Is Antonio here? Which one, they answered…we have lots of Antonios. Sometimes, my humor is an acquired taste.

We continued our walking tour, and it was on to the Catedral de Sevilla, a massive cathedral built between 1434 and 1517 over what used to be the city’s main mosque (when the Moors occupied the Iberian peninsula).  It rivals the Vatican’s Saint Peter’s cathedral (it’s that big).

The 18-55mm lens wasn’t wide enough to take in the entire Catedral de Sevilla. It is a massive church, the largest in Spain.
Susie, my traveling buddy for 40 years, with the Catedral de Sevilla in the background.

The Catedral de Sevilla interior is impressive, but it is dimly lit and flash photography is strictly verboten (I wouldn’t have used flash, anyway), so I relied on finding something to brace my camera against and the lens’ vibration reduction technology (which did a great job).  I could do a photobook with just interior shots, including the Catedral de Sevilla’s beyond impressive stained glass windows.

This was but one of many stained glass windows in the Catedral de Sevilla.
Shooting in the camera’s RAW mode and allowing PhotoShop’s Auto adjustment to work its magic brings up features that can’t be captured with jpeg alone.
Incredible sights, incredible detail, and lots of photography fun.

You may not know this (I certainly didn’t) but one of Christopher Columbus’s crypts is in the Catedral de Sevilla (folks apparently spread his remains around a bit).   The photo below shows one of his crypts in the Catedral de Sevilla.   Columbus was an Italian from Genoa, but his expeditions were funded by Spain’s Queen Isabella.

Columbus lies within. Impressive.

So there you have it:  Seville.  There’s more to come from our Spanish adventure, so sign up for your free subscription (don’t forget to tell your email program we’re not spam) or check back often.  Or maybe do both.  And if you have comments, we’d love to hear them.


Help us bring more content to you:  Please click on the popup ads!


Never miss an ExNotes blog:

The 9mm 1911 Resurrection

By Joe Berk

As mentioned in recent blogs on my 9mm Springfield Armory 1911, I took the gun to TJ’s Custom Gunworks to have it repaired and customized.  I have the gun back now and I am very satisfied with the work.

When I took the 1911 to TJ, I asked him to repair the damage I did to my 1911 and to add several custom touches.  That’s what he did, and I’ll describe them below.   Most of the photos in this blog are from TJ.   I took a few, too.

Fortunately, the 1911’s barrel was not damaged (the cartridge blew apart; the barrel and chamber survived).  TJ polished the barrel, the chamber, and the ramp.  The reinvigorated barrel looks great and it adds to the 1911’s appearance.

The polished 1911 barrel.
It looks great, doesn’t it?

TJ polished the 1911’s ramp and chamber.  This helps to prevent feed failures and assists in extraction.  The polished ramp also helps to prevent bullet pushback into the case as the ramp is pushed from the magazine into the chamber.

The feed ramp before polishing.
The feed ramp after polishing.

The trigger was in bad shape after the 9mm cartridge went into its sudden unintended disassembly mode.  TJ cleaned it up, but I’m going to have him fit a new target trigger at some point in the future.

The rigger before TJ cleaned and finished it.
The trigger and its bracket after brushing and polishing.

While TJ was in the gun, he removed and replaced the Springfield Armory firing pin and firing pin spring (which he does on all the Springfield Armory 1911s that come into his shop).   Springfield uses a titanium firing pin and a heavier firing pin spring, which is a bad combination.  I’ve had occasional misfires with my Springfield, and the primers have previously always shown light firing pin strikes.  With the new Wilson firing pin and firing pin spring TJ installed, that problem is in the rear-view mirror (where it belongs).

TJ found that the extractor on my Springfield Armory 1911 was terrible.  I thought that might be due the base of the cartridge bursting, but it was not.  It was just a factory goof up. The photo TJ included shows the extractor about as I remembered it before the event that set all this in motion.  The extractor had been extremely difficult to remove from the slide when I disassembled it for cleaning, but I never thought to check if it was engaging the cartridge (the gun had been ejecting).  You would think an outfit like Springfield would know what they are doing in this area, but apparently they did not.  TJ fit a new extractor to fix that problem.

This photo shows the original extractor not touching the cartridge case at all. It appears that the claw is just too short.
The new extractor TJ installed; note that it now has a firm grip on the case rim.
Another shot of the extractor on the case rim. It’s amazing the cartridges were extracting and ejecting before this fix.  They were flying everywhere.
The old extractor is on top; the new one is on the bottom. Note that the old extractor was not reaching in to engage the case.

Ejection is way better now.  The gun drops all the cases in the same spot just to my right (they don’t go flying all over creation like they used to).  It makes scooping up my brass a lot easier.

Reinstalling the slide release on my Springfield was difficult.  The slide release plunger was too long and the camming surfaces on the underside of the slide release were not cut at the correct angles.  TJ reconfigured both.  The slide release snaps into place in a very slick manner now.  There’s no more worry about scratching the receiver (the so-called idiot scratch) when the gun is reassembled.

The slide release plunger, as delivered by Springfield Armory, was originally too long. It made installing the slide release problematic. TJ shortened and recontoured it.
The slide release has a contoured bevel to push the slide release plunger in when the slide release is installed. As delivered by Springfield Armory, the angles were incorrect. TJ recontoured this area to make installing the slide release much easier.

TJ polished and fit a new hammer, which looks better than the original.  He also lightened the trigger pull.  The new trigger is light and I like it.

A polished hammer and sear.
The new hammer. It looks good.

The Springfield Armory 9mm 1911 came from the factory with a two-piece guide rod, which I hated.  It would constantly unscrew, even after applying blue Loctite after each cleaning.  The stock Springfield guide rod needed an Allen wrench to unscrew and remove it (Springfield provided one with the gun).  The gun required doing this to be able to rotate the barrel bushing after depressing the guide rod plug.  In my opinion, two-piece guide rods are a solution to a problem that doesn’t exist.  I don’t know why manufacturers fit them to new guns and I don’t why anybody would want one. I asked TJ to fit a polished one-piece guide rod to my 1911, and to make it short enough so that I could rotate the barrel bushing for disassembly without having to unscrew the guide rod.  I like the new set up a lot better.

TJ installed a one-piece guide rod. I like it. The original two-piece guide rod was always unscrewing.
The new guide rod in its bushing. TJ modified it so I could disassemble the 1911 without having to unscrew the guide rod. Not the polished end of the new guide rod, and the polished barrel end.

Finally, TJ polished the slide-to-receiver interface points.  You can see this work in the photos below.

The 1911 slide underside.
The 9mm 1911 receiver.

While TJ had the gun, I ordered new grips and a replacement magazine from the Springfield Armory website.  The original crossed-cannon cocobolo Springfield grips were damaged when the cartridge burst, so I bought another set (they were reasonably priced at $32.95).  The Springfield site also advertised a set of double-diamond checkered cocobolo grips (without the Springfield logo) for $15, so I checked that box, too (I like having an extra set of 1911 grips on hand).  The grips and the new magazine arrived a few days after I ordered them.

I picked up the repaired and reinvigorated 1911 from TJ this week. I’ve already been to the range with it and it works well.  Watch the blog; I’ll post a range report in the near term.  I’ve also had a few more thoughts on what might have caused the burst round that started this adventure, and we’ll have another blog on that as well.  Here are links to our prior blogs on this topic:

KABOOM!

Thoughts on the 9mm Double Charge


Help us bring more content to you…please click on the popup ads!


Seeing double? Nope. I liked my 9mm 1911 so much that when I saw the same gun in .45 ACP, I bought it, too. Watch for a report on it in an upcoming ExNotes blog.

Never miss an ExNotes blog:

Home on the range…

The stream crossing to the West End Gun Club has been too deep to cross in my Subie Outback since early January.  I tried it once back then and I wasn’t going to make that mistake again.

My January Meyer Canyon Road mishap. The Subie is not a submarine and I am not a U-boat commander, although we both came close that morning.

I’ve been going to the Magnum Range in Ontario (an indoor pistol range), watching the West End website for updates and occasionally driving out to check the stream.  The Magnum Range is a good place to shoot, but I missed shooting my rifles.  Then a good thing happened earlier this week:  Good buddy Duane offered to pick me up and attempt a stream crossing in his Toyota 4×4.  I was in.

Duane’s Toyota 4×4. It’s an impressive vehicle.

I’ve known Duane for years, going back to my work with CSC Motorcycles in their early days of the replica Mustangs and the RX3 250cc adventure bike. Duane and I both owned the CSC bikes and we traveled extensively on them.

Duane in the commander’s cupola.

The Meyer Canyon Road stream crossing was still deep and the water was moving swiftly, but Duane’s Toyota had no problem crossing it.

Entering the fray…

I knew which rifle I wanted to shoot when I received Duane’s email invitation:  My Mosin-Nagant 91/30.  It’s the one you see at the top of this blog.  The Mosin is a favorite.   It’s accurate, I reload 7.62x54R ammo, and it is fun to shoot.

My Mosin-Nagant 91/30. The Russians built 17 million of these rifles. They are becoming hard to get and prices have risen substantially.  These rifles are surprisingly accurate.

I’ve owned this Mosin rifle for maybe 10 years now.   It came about almost as an afterthought.  To me, the Mosins appeared to be cheap pieces of junk.  Then one day after a class about engineering creativity, a student asked about the cover photo on a book I wrote.  He told me he and his father owned a Mosin and enjoyed shooting the rifle.  I saw a Mosin on the rack at a sporting goods store a short while later for $139.  It looked crude, but for $139, I thought I’d take a chance.  The guy who sold it to me did not know there was a bayonet in the Mosin’s cardboard box, and when he put the rifle back in its box, the bayonet scratched the stock.   Neither of us knew this until 10 days later (after California’s silly waiting period).  The store offered to sell me a different Mosin, but that meant starting the 10-day waiting period all over again.  I viewed the scratch as an opportunity, and indeed it was.  I refinished the stock (10 coats of TruOil worked nicely).  Then I glass bedded the action, reworked the trigger, polished the bolt, and worked up a load.  It was fun and I learned much about the rifle.  Mine has matching numbers on the receiver, the butt plate, and the bolt.  I know it’s weird: I own some really nice rifles, but the Mosin is one of the ones I love the most.

Serial Number 2339, built in 1940. Production rates ramped up sharply in 1940, but this rifle was built before that occurred. Fit and finish nosedived that year; mine is one of the good ones.
The Mosin’s buttplate.
The serialized (and polished) bolt.

When Duane and I arrived at the range, I set up a target at 50 yards.  Like always, shooting the Mosin felt good.   It had been too long.

Duane is a milsurp rifle enthusiast, too.  He has a beautiful 8mm Mauser K98 that his uncle took home from Germany after World War II.  I keep trying to buy it from him.  He keeps saying no.

A World War II K98 Mauser.
Left view of the K98 Mauser.
Nazi markings on the Mauser’s barrel and receiver.

Like me, Duane is a reloader.  He had reloaded reduced loads for our outing.  A reduced load is one loaded for lower velocity, which means the rifle has significantly less recoil.  One of Duane’s loads had cast bullets.  The other had jacketed 150-grain bullets.  Both were loaded with Trail Boss powder, and both shot well.

8mm Mauser reloaded ammunition. The upper rounds have 150-grain jacketed soft point bullets, the lower rounds have 150-grain cast bullets.

As soon as Duane fired his first shots, I knew he had reduced-load ammo.  Check it out in the video below.

Duane and I both brought handguns, and to my surprise, we both decided to bring our Smith and Wesson 9mm Shields.  I’ve written about the Shield before, as well as the custom work TJ (of TJs Custom Gunworks) did on my Shield.   I shot my Shield at 50 yards.  Using a short-barreled 9mm concealed carry handgun at 50 yards is not a formula for accuracy, but I managed to keep all of my shots on the target.  The group was large, but at least they were on the paper.

My Shield in flat dark earth. I shot my reloaded ammo with Gardner powder-coated bullets.
My Sheild and Duane’s. Duane’s has a Crimson Trace laser just forward of the trigger guard. The laser is actuated by a pushbutton below the trigger.

One of the things I like about my Shield is its bright sights.  Duane’s Shield has white dot sights and a green Crimson Trace laser mounted beneath the slide.  The laser is a cool touch for close in work.  My Shield has high visibility fiber optic sights (they catch light from the side and light up green and red dots).   They’re good if there’s any light at all.   If there’s no light, the sights don’t light, but if there’s no light, it’s not likely you’d be shooting.

A comparison of the sights on both Shields. My pistol’s Hi Viz sights are the best I’ve ever used on a handgun.

Before we called it a day, Duane let me try a couple of shots with his Mauser.  I shot at the same 50-yard target I’d been using with my Shield and the Mosin-Nagant.

The proof is on the paper. The upper red circle surrounds the shots I fired with my Mosin-Nagant (with one exception, all are in the 10 ring…that one exception was the first shot I fired). The circle around the two shots below were mine, fired with Duane’s 8mm Mauser and his reduced-load ammo. All the other shots were with the Smith and Wesson 9mm Shield.

After the West End Gun Club visit, we stopped at our local Mexican restaurant. I had albondigas soup and a chile relleno.  As always, both were outstanding.

A toasted chile relleno. It was excellent.

Help us bring more content to you:  Please click on the popup ads!


Want more guns and ammo stories?   They are right here.


Never miss an ExNotes blog:


Évora!

By Joe Berk

I know, we’re a motorcycle (and other interesting stuff) site, and you might be thinking this blog is going to be about a Lotus Evora (the Evora is a Lotus sports car).   The Evora is probably an incredible automobile, but that’s not why we are here today.

A Lotus Evora.

The word Évora is a feminine word of Portuguese origin; it means “she who lives near yew trees.”  That’s about as irrelevant as the big photo up top.  But hey, we’re a motorcycle site, and who wouldn’t enjoy a photo of a Barbie-themed pink BMW cafe racer carousel ride?  I saw those carousel Beemers as we walked into Évora.  They called out to me.  I had to get a photo.

But I digress: Our focus in this blog is indeed Évora, but it’s not about the Lotus.  It is about a small 2,000-year-old town in Portugal, a World Heritage Site, named Évora.  Before I get to the Évora photos, let me digress a bit more and tell you about our stop as a gas station on the ride from Lisbon to Évora.   That gas station had a magazine rack.  They still do printed motorcycle magazines over there, you know.

Moto mags in Portugal.

On to Évora.  One of our first photo ops was the Capela dos Ossos (the Chapel of Bones).  It was one of many churches we would see on our travels through Spain and Portugal, but this one had a rather bizarre twist:  The walls and columns are covered in bones.

Yep, I said bones.  Human bones.  Weird stuff, this is.

An interior shot of the Capela dos Ossos. The little 18-55 Nikon kit lens was earning its keep.
The thigh bone’s connected to the hip bone…or something like that. Skulls, too. Go figure.

The Capela dos Ossos is a small chapel (it’s located next to the larger Church of St. Francis), and it was built by Franciscan monks in the 16th century.  I guess they wanted it to stand out, and to accomplish that, the guys dug up medieval cemeteries and used the bones from an estimated 5,000 dead folks as interior decor.  It was weird, man.  Bones.  I tried to imagine the conversation hundreds of years ago that led to this decision.  Sue and I have  had interesting discussions about our interior paint and wallpaper choices.  I get it that these decisions are not always easy and everybody has opinions.  But bones?  Those old Portuguesers must have had some spirited interior decor conversations.  Paint?  Nah.  Wallpaper?  Nah.  Tiles?  Maybe a little, but everybody’s done tiles.  Bones?  Yeah, that could work.

All this kind of made me think about cremation as an alternative to burial, but I’m not going with either option.  I’ve already left directions to my heirs.  I’m going to be stuffed when I go.  Stuffed with bullshit, and mounted in front of my laptop.  You know…so I can keep writing the blog.

One thing I love about travel anywhere is that it gives me lots of photo opportunities.  Here’s another picture of a more conventional statue in the bone barn.

High ISOs, the 18-55mm Nikon lens, shooting in RAW, and Photoshop’s noise reduction filter brings it all home.

Gresh asked me about two-stroke motorcycles in Portugal.  The only one I saw was this older Zündapp.  It was very clean, it was plated, and it was obviously still in use.

An old Zündapp still in use in Evora.

I would see a few more two-stroke motos in Spain, but two-strokes have pretty much had their day on the Iberian peninsula.  Bultaco, Ossa, and Montesa (or was it Montessa?) are no more.  Gresh loves his two strokes and he owns several.  I’ve only had one, a BSA Bantam two-stroke.

An excellent resource: The Clymer BSA book.

My Beezer didn’t look anything like the one you see on the Clymer BSA book above (which is an excellent reference, by the way).  Mine was a clapped out, rattle-can black beater bike.   But it was fun and frisky and for a 175 it had power way out of line with its displacement.  Maybe some day I’ll get another two-stroke motorcycle, but the odds are low.  The way the world is going it’s more likely I’ll have an electric motorcycle first, but that’s a topic for a later blog.

I’m digressing again.  Back to the main attraction.  Colors abound in Portugal.  I grabbed this photo of a few plates on display.

Portugal’s photo ops abound.

As we walked through Évora, the door handles and knockers caught my attention.  Here are a few photos.

The macro shots of the door knockers were fun. Take my hand…
Another handy door knocker.
A set of stereo knockers. The one on the right sees the most use.

Many of the doors were cool, too.  I’ll show more of these photos in subsequent blogs.  I took a bunch.

An impressive entry.
And another.

Cork is a big industry in Portugal, and we saw many different cork products (cork bowls, cork pads, cork purses, cork hats, and more).  Did you ever wonder where cork comes from?  Cork is made from tree bark (something I did not know).  The tree is called a cork oak, and the bark can be harvested every 9 years after the tree matures (the bark grows back).  Spain and Portugal are the dominant suppliers.

Our local tour guide with a chunk of cork oak bark stripped from the tree. Who knew?
Cork hats and purses.
Cork bowls and spoons.

Évora is a colorful place.  Walking Évora’s narrow and climbing streets was fun, and the photo ops made it even more so.

Frida Kahlo?

Évora dates to the Roman occupation of the Iberian peninsula.  The remains of the Temple of Diana are on a hill overlooking the city’s center; the temple was built in the first century.  It’s known today as the Temple of Diana, but that’s not what it was when the Romans built it.  A 17th century priest, Father Manuel Fialho, is believed to be the person who tagged it as the Temple of Diana.  It’s too bad we don’t do politics here on ExNotes; this story screams out for a Father Fialho comparison to Fox News or CNN (depending on which way you lean).

Roman ruins in Évora.

Portugal is a well-developed nation with excellent roads.  I’d say it is better-maintained and cleaner than a lot of places I’ve been in the US.  The expressways were every bit as good as ours, and other than the fact that signs were not in English and there was little traffic, the freeways were no different than the ones in southern California.   The climate is about the same, the towns and roads are much cleaner, and we didn’t see any homeless people.  Prices on everything except gasoline were similar to those in the US (gas was around $8 per gallon), but the average wage is substantially lower (their average annual income is about a third of ours).  Somehow they make it all work.

The photo below shows the view from our bus just before we entered Spain.

Espana bound. Spain was a quarter mile in front of us. We didn’t need our passports to enter Spain nor did we need to stop. It was like driving across the state line between California and Arizona.

I’m skipping around a bit.  There’s more to cover from our time in Portugal, and I’ll touch on that in subsequent blogs.  For now, it was on to Spain.

To be continued…


Please help keep ExNotes going.  Visit our sponsors and click on the popup ads!

ZRX RX: An ExNotes Resurrextion, Part 2

By Joe Gresh

This ZRX1100 resurrextion started out kind of leisurely. We don’t like stress at ExhaustNotes.us because we are at peace with our surroundings. ExhaustNotes staff have a firm grasp of our place in the universe and see all matter as insignificant much like we see ourselves. There was no big rush, you know? However, things change in life and the ZRX resurrextion timeline has sped up due to the Mud Chuckers wanting to attend the road races July 7-9 at Laguna Seca in California, now known as Polident Speedway. From my house to Laguna Seca is 1150 miles the fast way and we never take the fast way. We might end up doing 2500 or more miles round trip. Thus, the urgency to get the road burner running as none of my other motorcycles are exactly suited to the job.

The first thing I did to the ZRX was to remove as much bodywork as possible to prevent the odd dropped wrench or spilled brake fluid from damaging Rex’s somewhat pristine original paintwork.

Kawasaki ZRX1100 bits and pieces have been trickling into the shed at Tinfiny Ranch and we will soon see some progress on the abandoned, neglected motorcycle.

Starting with the coolant leak from under the engine, I have determined the water pump or the O-rings on the pipes connecting to the pump were the culprit. Seeing as the pump is 24 years old I sprung for a new pump on eBay. I imagine I could buy just the mechanical seal and rebuild the water pump but I’m getting lazy.

The coolant pipes are slightly rusty so I’ll have to clean them up and give them a shot of paint. The paint on the front down tubes is chipped from road debris so I’ll touch up those areas also.

I also bought some new silicone hoses for the pipes. These hoses live directly behind the exhaust headers and while they seemed flexible and in good condition, they are also 24 years old. A lot of stuff on the Rex is 24 years old, because the bike is 24 years old. Funny, it seems like a new model to me. I can remember buying it only a few years old not a long time ago. Is this how aging works? Does time compress making distant events seem close?

The ZRX1100 comes standard with a ground skimming, low-slung exhaust system. The header pipe collector joins under the engine making my motorcycle lift too tall to fit between the pipe and the ground. Even if the jack fit under the bike you’d have to make some spacer blocks to prevent the pipe from hitting the lift. I went with jack stands on both front frame rails and one stand on a cross pipe behind the engine. With this tripod set up the bike feels pretty stable.

Once jacked up I could remove both wheels for new tires. I also removed the clutch slave cylinder that is leaking and then could access the leaking water pump.

The calipers on the front brakes are stuck.  My caliper rebuild kits came in the mail so I’ll have plenty of piston swapping to keep me busy. This is one of the chores I dread.

The chain is pretty much worn out. The rollers are loose on the pins and the thing has 25,000 miles on it.  Kawasaki used an endless type chain so I cut it off with a 4-inch abrasive cutting wheel. The rear sprocket looks unworn, which I find amazing, and the front sprocket has just the slightest bit of hooking. Most aftermarket junk won’t last as long as an old, used Kawasaki sprocket. I’ll get a new front sprocket and chain for the bike.

My initial goal with the Kawasaki is to fix the brakes, fork seals and tires. That will upgrade the ZRX to roller status, then I’ll be able to push it outside the shed for a much-needed bath. There is a long way to go to undo the damage 9 years of storage has done to this motorcycle so don’t get ants in your pants. Part 3 to follow, unless I skip to Part 5.


Help us keep the content coming:  Please click on the popup ads!


Here’s Part 1 of the ZRX Resurrection!


Never miss an ExNotes blog:


More Resurrections here!

A Tangerine WRX

There are needs and there are wants.  I don’t need a Subaru WRX, but I sure  want one.  I had my Outback in for service the other day, and the Subie dealer had a bright tangerine WRX on the showroom floor (Subie calls the color Solar Orange Pearl).  Those cars are fast and appealing and I was all over it.  I don’t need another car.  But I sure want the WRX you see above.  I’d name it Il Tangerino.

My 2006 WRX in Rally Blue. The fun factor was off the charts in this car.

Susie and I bought a new WRX in 2006 and it was one of the best and most fun cars we ever owned.  We did a lot of great trips in that car.  It had an automatic transmission (unusual for the WRX) and it was just a hoot to drive.  It felt like a supercharged go kart, which in a way it sort of was.  Turbocharged, anyway.  It would go like a bat out of hell and one time when passing a long string of cars heading north on the 395, I looked down and saw I was doing a cool 140 mph.  It was effortless. Like I said, these cars are fast.

The 2023 WRX. Nice.

I like the orange color.  I had an orange Subie CrossTrek and my friends teased me about its bright orange paint.  Laugh all you want.  The CrossTrek was a good looking car and it was easy to find in a parking lot.

I first drove a WRX when good buddy Tom tossed me the keys to his WRX when we were hanging around Bob Brown’s BMW dealership.  Marty and I took it out for a spin, it was fast, and that ride was all it took.  I bought the blue one you see above a short while later.

The WRX you see here has an automatic transmission. Slick. I want one.

Most WRX Subies have manual transmissions.   Those are okay, but I’m a bit more mature now and I prefer an automatic.  Sit in California traffic a while and you will, too.

The WRX seats are hard but surprisingly comfortable.

I asked the sales guy at the Subie dealership what this one would go for and after the standard line of dealer crap (including the when are you going to buy, how much are you willing to offer, etc….I do love dealers and their sales people), he finally showed me their invoice.  The bottom line is that this Subie would go for something slightly north of $32,000, not counting taxes and other fees.

I love that scoop. It’s for the turbo’s cooler.

My first thought was that $32K is not a bad price for a car like this (I recently read in the Wall Street Journal that the average price for a new GM car is right at $50K today).  The Subie you see here has a 2.4-liter engine and a turbocharger.  You’re supposed to run premium fuel and here in the Peoples Republik premium is running north of $5 per gallon. so that’s probably a deal killer.  But like I said at the start of this blog, there’s needs and there’s wants.  I don’t need a new WRX, but I sure want this one.  If enough of our readers click on the popup ads…who knows?


Never miss an ExNotes blog:


Help us bring more content to you…please click on the popup ads!

Thoughts on the 9mm Double Charge Issue

By Joe Berk

A few days ago I blew up my 9mm Springfield Armory 1911.  It was hellaciously frightening. I wrote a blog about it and I’ll provide a link at the end of this post.  My initial conclusion was that I had committed the cardinal reloading sin:  I double charged a case.  Instead of the intended 5.4 grains of Accurate No. 5 propellant, I cycled the round twice at the charging station and I inadvertently loaded 10.8 grains.  I know what you are thinking and that’s okay.  If I read about somebody doing this, I’d think they were a dumbass, too.  I’ll get back to that later.

5.4 grains of Accurate No. 5 behind a 125-grain powder coated bullet is good. 10,8 grains is not.

Thinking about the double charge issue more, several additional thoughts emerged.   Were there other possibilities?

One other possibility is that instead of the failure being due to a double charge, it might have been a squib charge (which would lodge a bullet in the bore) followed by another round.  This was dismissed for several reasons:

      • I knew it wasn’t preceded by a squib charge because the prior round felt normal.
      • If it was a squib charge, the following round probably would not have chambered.  Squib charges resulting from no powder and pressure being provided by the primer only (in a handgun) tend to push the bullet into the barrel a very short distance (the bullet doesn’t go into the barrel far enough to allow another round to chamber).
      • The were 5 holes on the target, which is the number of rounds I had fired.
      • The barrel was not bulged (TJ inspected it and pronounced it good).
Count them: 5 holes on the target. The fifth hole is the one at the bottom. This bullet was tumbling due to its low velocity. When the case blew out, the pressure vented elsewhere.

A friend asked if I could have seated two bullets in the case.  I set bullets (one on top of the other) next to a cartridge case.  I think you can see that seating two bullet in the case is not possible.  The bottom bullet would set higher in the case than you see in the photo below (the web near the case base and the thickness of the case “floor” would cause it to seat much higher in the case).  I would not have been able to seat the second bullet even if there was no powder in the case.

A photo showing that two bullets in a single case is not possible.

I pulled the bullets in the photo above from two cartridges using an inertia bullet puller.  Both had exactly 5.4 grains of Accurate No. 5 propellant, which is what I intended.  These are the pulled bullets on top of their cartridge cases:

125-grain powder coated bullets pulled from their cases and then placed back on top of their cases.

After I pulled the bullets and put the powder back in each case, you can see the level at which the right amount of propellent (5.4 grains) sets in the case.

5.4 grains of Accurate No. 5 in 9mm cartridge cases.

I wondered:  Would a double charge (i.e., 10.8 grains of Accurate No. 5) fit in a cartridge case without it spilling out of the case?  The answer is yes.  I took the powder from one case and poured it in the other.  The case can easily hold 10.8 grains of Accurate No. 5.  Take a look:

10.8 grains of Accurate No. 5 in a 9mm cartridge case.

It would be better if the powder was bulky enough that it would spill over the case rim if I double charged it.  I know that my 9mm Unique load sits higher in the case (my Unique load for the 125-grain bullet is 5.0 grains).

Trickling 5.0 grains of Unique onto the powder scale.

Here’s what 5.0 grains of Unique looks like in a 9mm case:

5.0 grains of Unique in a 9mm cartridge case.

The question then was how much Unique can a cartridge case hold?  I was specifically interested in determining  if a double charge of Unique would overflow the case.  To answer this, I completely filled a 9mm case with Unique and weighed that amount of propellant:

A 9mm cartridge case completely filled with Unique.

I weighed the amount of Unique held by a completely-filled 9mm cartridge case.  The filled 9mm case held 7.9 grains of Unique.

Weighing the Unique held by a completely-filled 9mm case.
A completely-filled 9mm cartridge case can hold a hair over 7.9 grains of Unique propellant.

A double charge of Unique would be 10.0 grains.  I concluded that a double charge of Unique would overflow the 9mm case, and this would provide an additional safeguard against an inadvertent double charge.  I was careless enough to not notice a case double-charged with Accurate No. 5.  I’d like to think I wouldn’t be careless enough to miss powder spilling out of the case, as would occur with Unique.  The next time I load 9mm ammo, it will be with Unique.

You might be wondering about the numbers here.  Bear in mind that Unique is a less dense propellant than Accurate No. 5.   10.0 grains of Unique occupies more volume than does 10.8 grains of Accurate No. 5.

The challenge now is what to do about the approximately 1400 rounds of 9mm and .45 ACP I already have loaded on the Lee Turret press.  I thought I might be able to quickly screen the rounds by weight, but that’s not going to work.  The weights of the powder, the brass case, and the bullet all vary, with the bullet (as the heaviest item) having the greatest variation.  On the 9mm cartridges, I found that the weight variation of the completed 9mm cartridges varies from 192 grains up to 198 grains.  The powder charge is 5.4 grains.  If a cartridge weighs 198 grains, would it just be at the upper edge of the weight distribution with the correct single charge, or would it be a 192-grain cartridge with a double charge?   It’s even worse on the .45 ACP rounds, because the weight variability of the completed cartridge is more than the 9mm, and those powder charges are in the range of 5.0 grains or 5.4 grains (they are lost in the case compared to 9mm ammo).  I can’t take the chance that there’s another double charge in there.  I’m breaking down and checking every cartridge.  It’s a lot of work, but it’s better than blowing up a gun.

This is the .45 ammo I loaded on the Lee turret press.   It’s 700 rounds. I have another 700 rounds of 9mm ammo similarly loaded.

You might be wondering what it’s like to get back on the range after blowing up a gun.  I was afraid I might return with a very serious flinch (you know, when you jerk the gun in anticipation of it firing).  I’m happy to report (and maybe brag a little bit) that I’m just fine.  I had my 9mm S&W Shield out with ammo that I tore down, checked, and reloaded, and I also had my Colt Python (in which I shot .38 Special wadcutters).

An S&W 9mm Shield target shooting the 5.4 grain Accurate No. 5, 125-grain powder coated bullet load described in this blog.
A Colt Python target shot with 148-grain powder-coated wadcutters.  I’ve done better and I’ve done worse.

At this point, I’m convinced that I screwed up and double-charged the 9mm round I wrote about last week.  TJ (of TJ’s Custom Gunworks) disassembled the gun and pulled out the case you see in the photo at the top of this blog.  There was a lot of pressure in there (about 10.8 grains of Accurate No. 5’s worth, actually).   Like I said in the earlier blog, it’s an opportunity.  More good news is the barrel wasn’t damaged.  Even more good news is that TJ is doing an action and reliability job on my 1911.  TJ is replacing the two piece guide rod (two-piece guide rods are a solution to a problem that doesn’t exist) and doing a few more good things to this pistol.  I’ve already purchased and received replacement grips and a new 9mm magazine.  I’ll provide an update in a couple of weeks after I get the 1911 back, and I’ll do another blog on what it’s like disassembling and reassembling 1400 rounds of reloaded ammo.

Stay tuned!


Please click on the popup ads!


Never miss an ExNotes blog:


More reloading and firearms stories are here!

ZRX RX: An ExNotes Resurrection

By Joe Gresh

The Carrizozo Mudchuckers have too much disposable income. Just in the last few months they’ve bought a Husaberg 400, a gas-in-frame Buell, a KTM 890, and a Kawasaki Vulcan 750. The boys want to do some high speed touring, like going to the Sacramento mile in California, and they are talking 500-mile days in the saddle. As I look over my operational motorcycles I don’t see anything I’d like to sit on for 500 miles.  But if I include the non-ops there is one that is capable of reeling off 500 miles without breaking a sweat.

I’m talking about the long dormant Kawasaki ZRX1100. The bike is a road burner of the highest order and looks cool as hell to boot. The only problem is the ZRX has sat for 9 years as CT and I wandered the world. Nothing on the thing works.  The last time I rode the bike was on the Christmas toy run in the Florida Keys in 2014. It’s time I changed that.

The ZRX front brake caliper kit, available on Amazon.

This resurrection might take a while because I’m knee deep in concrete projects but at least I can start ordering parts as my Social Security checks roll in.  I’m starting with the brake systems and forks. The front brakes on the Rex are 6-piston jobs and there are two calipers which means I have to deal with 12 pistons. The brakes are great on the Kawasaki but 12 pistons are a bit much.

The rear brake caliper kit, also available on Amazon.

Both master cylinders are frozen, probably full of crystalized brake fluid. I’m going to try and get away with cleaning up the master cylinders as I have not been impressed with the quality of aftermarket junk and I don’t feel like looking up a bunch of part numbers on the Kawasaki sites. I mostly stop with the front brake anyway; hopefully that master will be in good shape. A failure of the rear brake won’t slow me down…that doesn’t sound right.

The ZRX fork seal kit.

I will rebuild the rear caliper using new seals. Don’t try to follow the logic. In addition, the fork seals need replacing and new fork oil dumped in. I might take a stab at greasing the steering head bearings while the front end is apart.

Maxima fork oil. It’s good stuff.

Due to its long slumber there are many, many issues with the ZRX, like:

      • Cooling system leaks, probably from the water pump
      • Broken throttle cable at twist grip housing
      • Chain is worn out
      • Carbs are gummed up
      • Gas tank is full of smelly, gooey gasoline
      • Clutch lever is frozen
      • Clutch slave cylinder is leaking
      • Battery is not there
      • Valves need adjusting

And I’m sure other things will crop up as I get into the project.

Barely broken in, my ZRX is.

I’ve really let this bike down. Believe me, I feel bad about it. Nine years of neglect have taken a huge toll on anything rubber. The good thing is the Rex has relatively low miles (25,000) and has never gone under water so I’ve got good bones to work with. The paintwork is mostly perfect and there are no dents. The bike will clean up and be a stunner. I rode the ZRX from Florida to New Mexico years ago and it will be bookoo-maximus karma if New Mexico is the place where the ZRX1100 rises up to snarl across the rust-red landscape again. Watch this space for updates.

Never miss an ExNotes blog:


Help us help you:  Please click on the popup ads!


Click here for more ExNotes Resurrections!


More Gresh?  You bet!